(210-2229) Faulty camshaft sprocket 9-5
Symptom: The faulty camshaft sprockets can cause serious engine damage.
|
MODIFICATION INSTRUCTION
|
|
Bulletin Nbr:
|
210-2229
|
|
Date:
...........
|
Mars 2000
|
|
Market:
|
all
|
|
|
Faulty camshaft sprocket 9-5
|
|
Customer satisfaction campaign 107 21
|
Cars in stock must be remedied before delivery.
A personal communication must be sent to the owners of cars already delivered requesting them to get in touch with the nearest Saab garage as soon as possible to have the fault rectified.
Saab 9-5 M00 4-cyl with VIN
Y2030053 - Y2034207
Y7010845 - Y7012022
Y3055761 - Y3060850
A material fault has arisen in a limited number of camshaft sprockets. These have been fitted in the cars within the above VIN interval. The service life of these camshaft sprockets is significantly reduced and thus they must be replaced.
Symptoms
The faulty camshaft sprockets can cause serious engine damage.
91 15 205 Camshaft sprocket (x2)
Check box C2 on the modification identity plate before preceding. Continue as follows if the box is not marked.
|
1.
|
Protect the wings and disconnect the negative battery cable.
|
|
2.
|
Remove the upper engine cover.
|
|
3.
|
Remove the crankcase ventilation pipe. Keep the O-rings.
|
|
4.
|
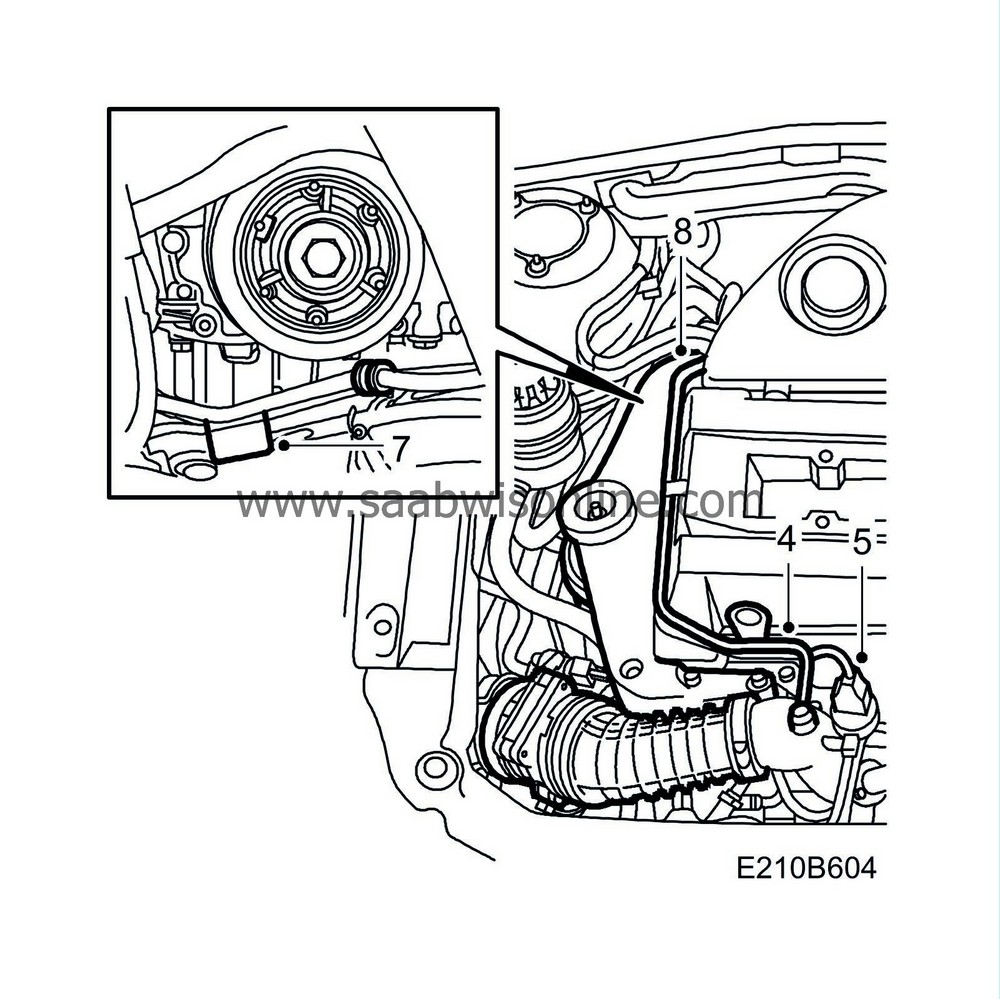
Undo the crankcase ventilation nipple from the camshaft cover and the check valve cable ties.
|
|
5.
|
Undo the connector and remove the ignition discharge module. Undo the connector to the solenoid valve.
|
|
6.
|
Raise the car and remove the drive belt cover.
|
|
7.
|
Aut:
Take up the weight of the engine by placing two wedges between the subframe and oil filter adapter.
|
|
8.
|
Aut:
Lower the car and remove the upper engine mounting.
|
|
9.
|
Remove the camshaft cover.
|
|
10.
|
Detension the belt tensioner and remove the multigroove V-belt.
|
|
11.
|
Turn the crankshaft so that the markings on the camshaft sprockets point straight up.
|
|
12.
|
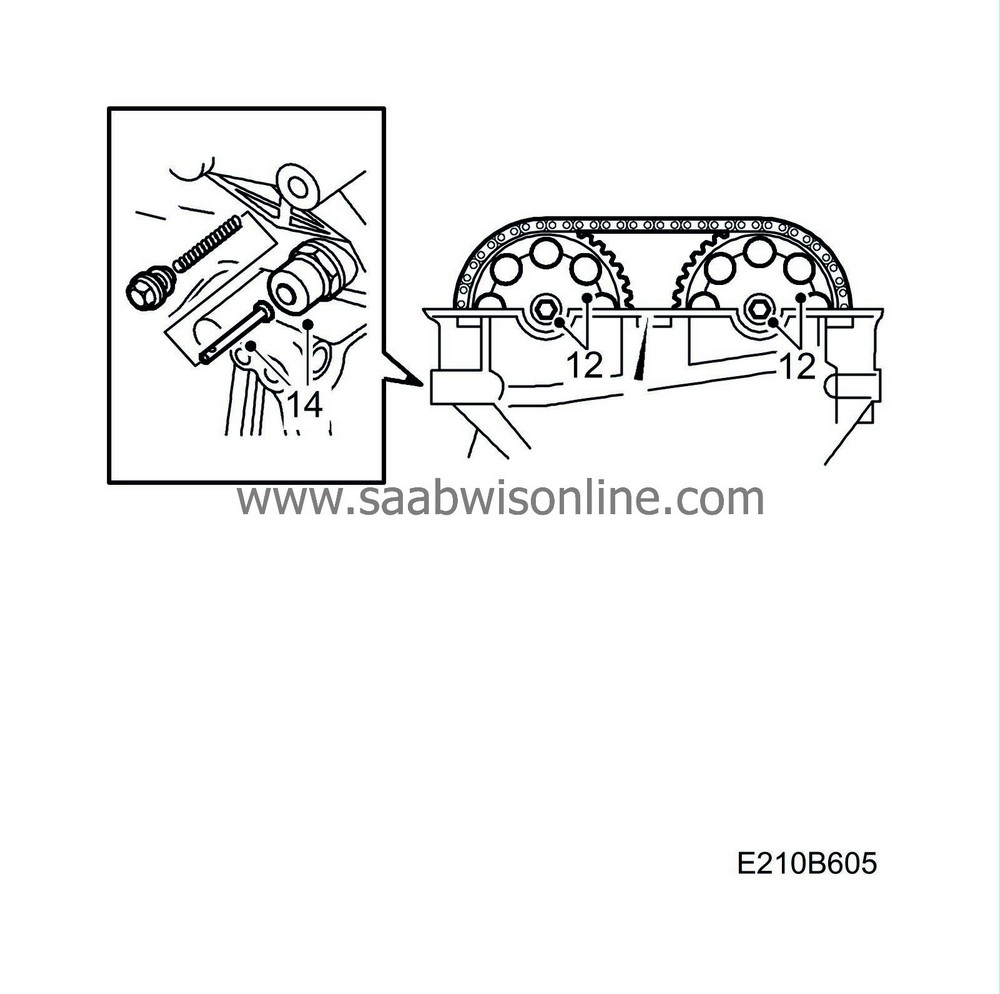
Undo the bolts on the camshaft sprockets. Take up the strain on the rear end of the camshaft with a spanner.
|
|
13.
|
Remove the idler sprocket.
|
|
14.
|
Remove the chain tensioner plug, spring and pushrod. Remove the chain tensioner using a 27 mm socket.
|
|
15.
|
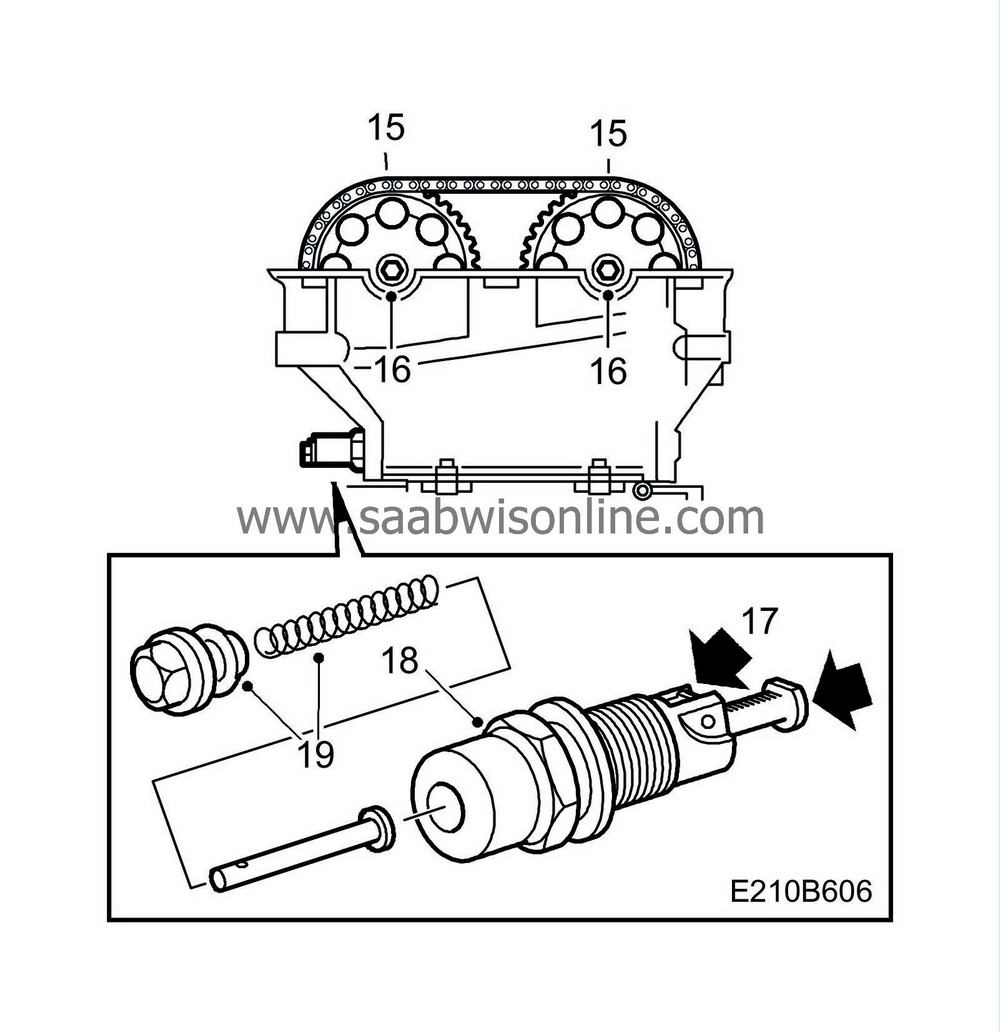
Mark the chain to correspond with the markings on the sprockets. Use a marker or the like.
|
|
16.
|
Change the camshaft sprocket on the exhaust side. Change the camshaft sprocket on the inlet side. Take up the strain on the rear end of the camshaft with a spanner.
Tightening torque 63 Nm (47 lbf ft)
|
|
17.
|
Prepare the chain tensioner for fitting by pressing down the catch and sliding in the chain adjuster.
|
|
18.
|
Fit the chain tensioner with a 27 mm socket.
Tightening torque 63 Nm (47 lbf ft).
|
|
19.
|
Fit the plug to the chain tensioner with pushrod and spring.
Tightening torque 22 Nm (16 lbf ft).
|
|
20.
|
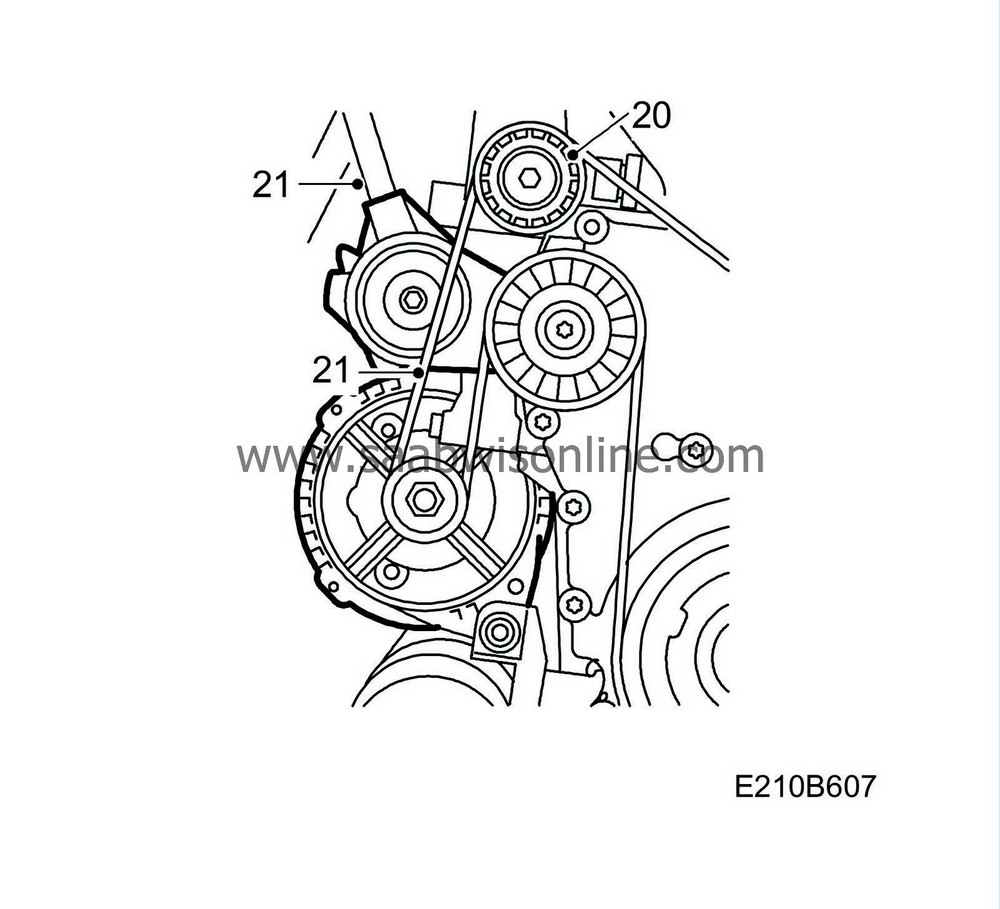
Check that the markings on the chain match with those on the camshaft sprockets. Fit the idler sprocket.
Tightening torque 20 Nm (15 lbf ft)
|
|
21.
|
Detension the belt tensioner and fit the multigroove V-belt.
|
|
22.
|
Clean the camshaft cover sealing surface with benzene.
|
|
23.
|
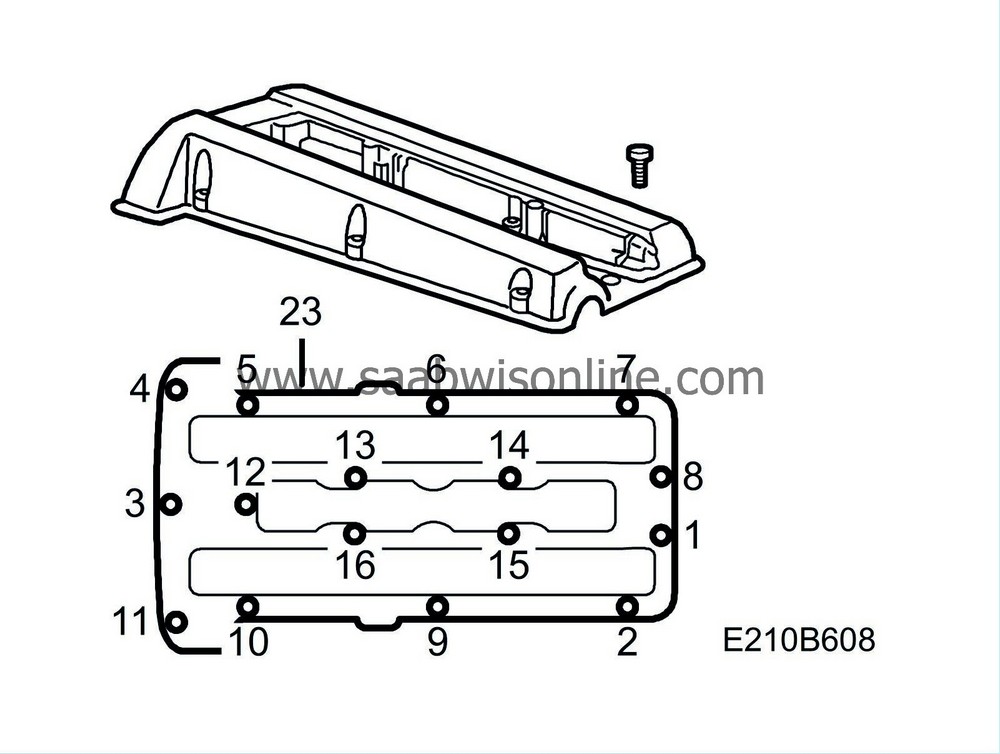
Fit the camshaft cover starting by the recess. Check that the cables in the edge of the cover, towards the intake manifold, do not get caught between the camshaft cover and the cylinder head. Then tighten the bolt furthest out at the timing chain end. Proceed by tightening the bolts in the order illustrated.
Tightening torque 15 Nm (11 lbf ft).
|
|
24.
|
Fit the upper engine cover.
Tightening torque, bolts: 47 Nm (35 lbf ft)
Nuts: 105 Nm (78 lbf ft)
|
|
25.
|
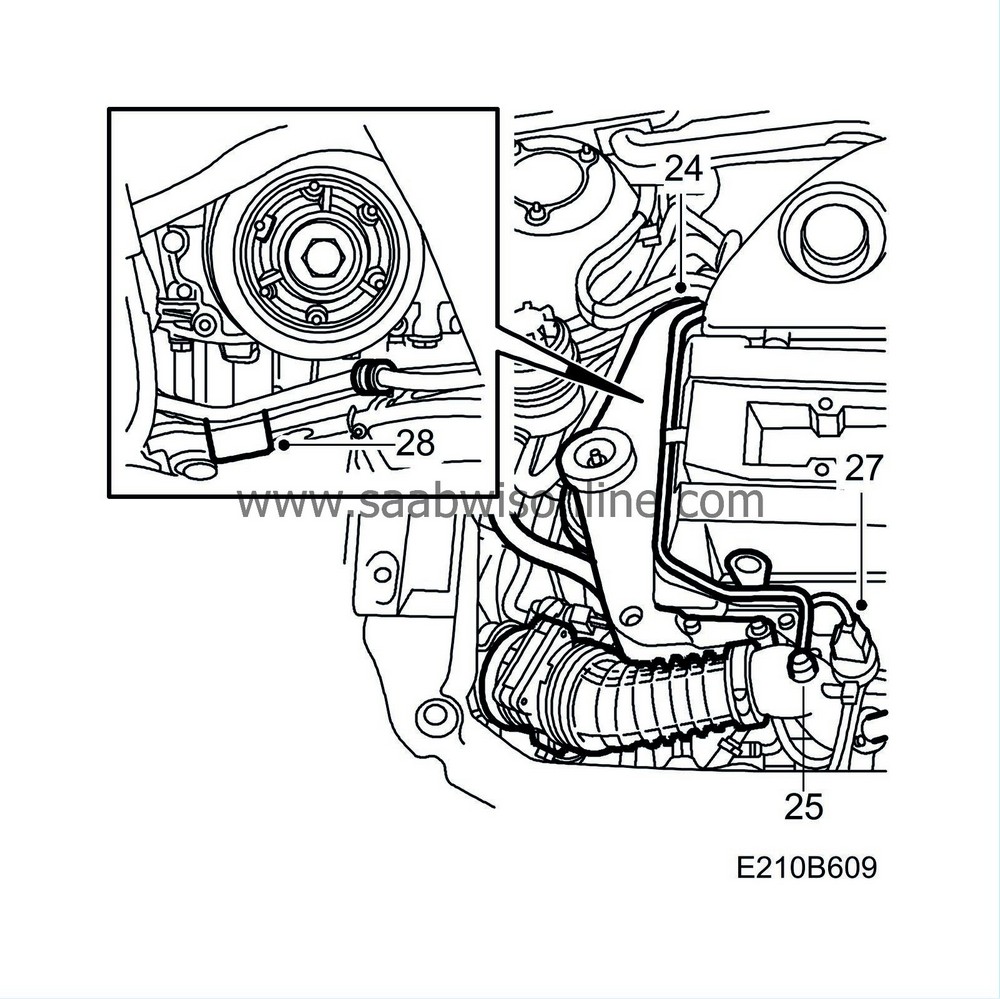
Fit the crankcase ventilation bolt and connectors, and the check valve cable ties.
Tightening torque, banjo connection: 24 Nm (18 lbf ft)
Mounting to camshaft cover: 11 Nm (8 lbf ft)
|
|
26.
|
Apply Krytox, part no. 30 19 312, to the rubber seal of the ignition discharge module. Fit the ignition discharge module and plug in the connector.
Tightening torque 11 Nm (8 lbf ft).
|
|
27.
|
Plug in the connector to the solenoid valve.
|
|
28.
|
Raise the car, remove the wedges by the oil filter adapter and fit the drive belt cover.
|
|
29.
|
Lower the car and fit the upper engine cover.
|
|
30.
|
Reconnect the negative battery cable.
|
|
31.
|
Remove the wing covers. Check the cleanliness of the engine bay.
|
|
32.
|
Start the engine. Switch off the engine, check and rectify any oil leaks.
|
|
33.
|
Check all functions. Reset the clock and radio code, if required. Calibrate the ACC.
|
|
Marking the modification identity plate
|
On completion of the necessary work, box C2 on the modification identity plate must be marked. If the work was carried out by the importer, mark the box with a "7". If done by the dealer, mark with an "8".
|
Warranty/Time information
|
See separate information.


