Steering gear, V6 engine
| Steering gear, V6 engine |
| To remove |
| Important | ||
|
The power steering system is extremely sensitive to contamination. Therefore, observe a high degree of cleanliness when working on the power steering system. |
||
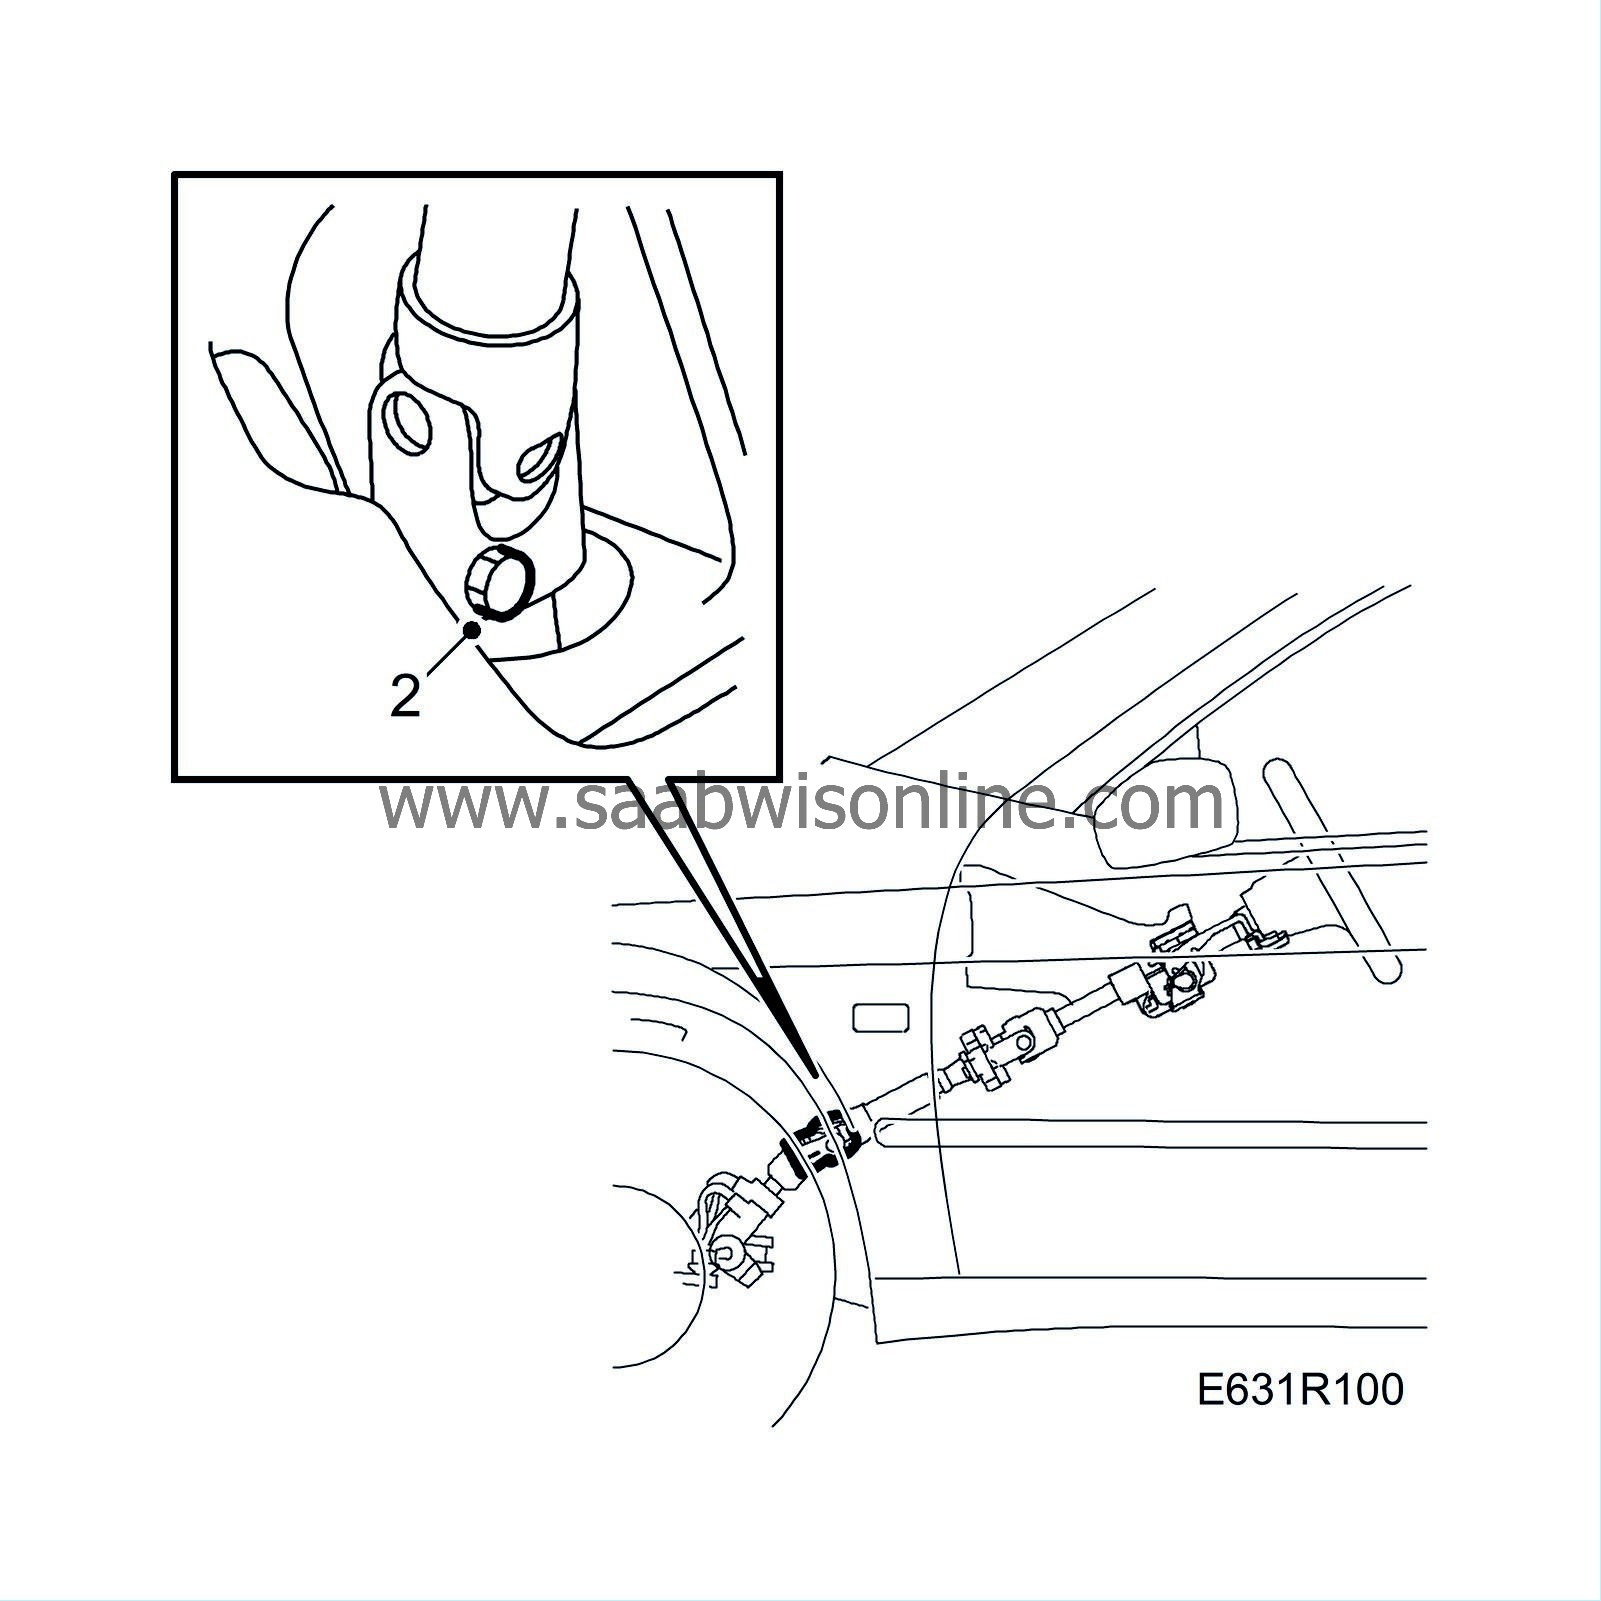
| 2. |
Remove the bolt securing the steering column shaft to the steering gear (accessible under the dashboard) and push the steering column shaft upwards, withdrawing it from the steering gear.
|
|||||||||
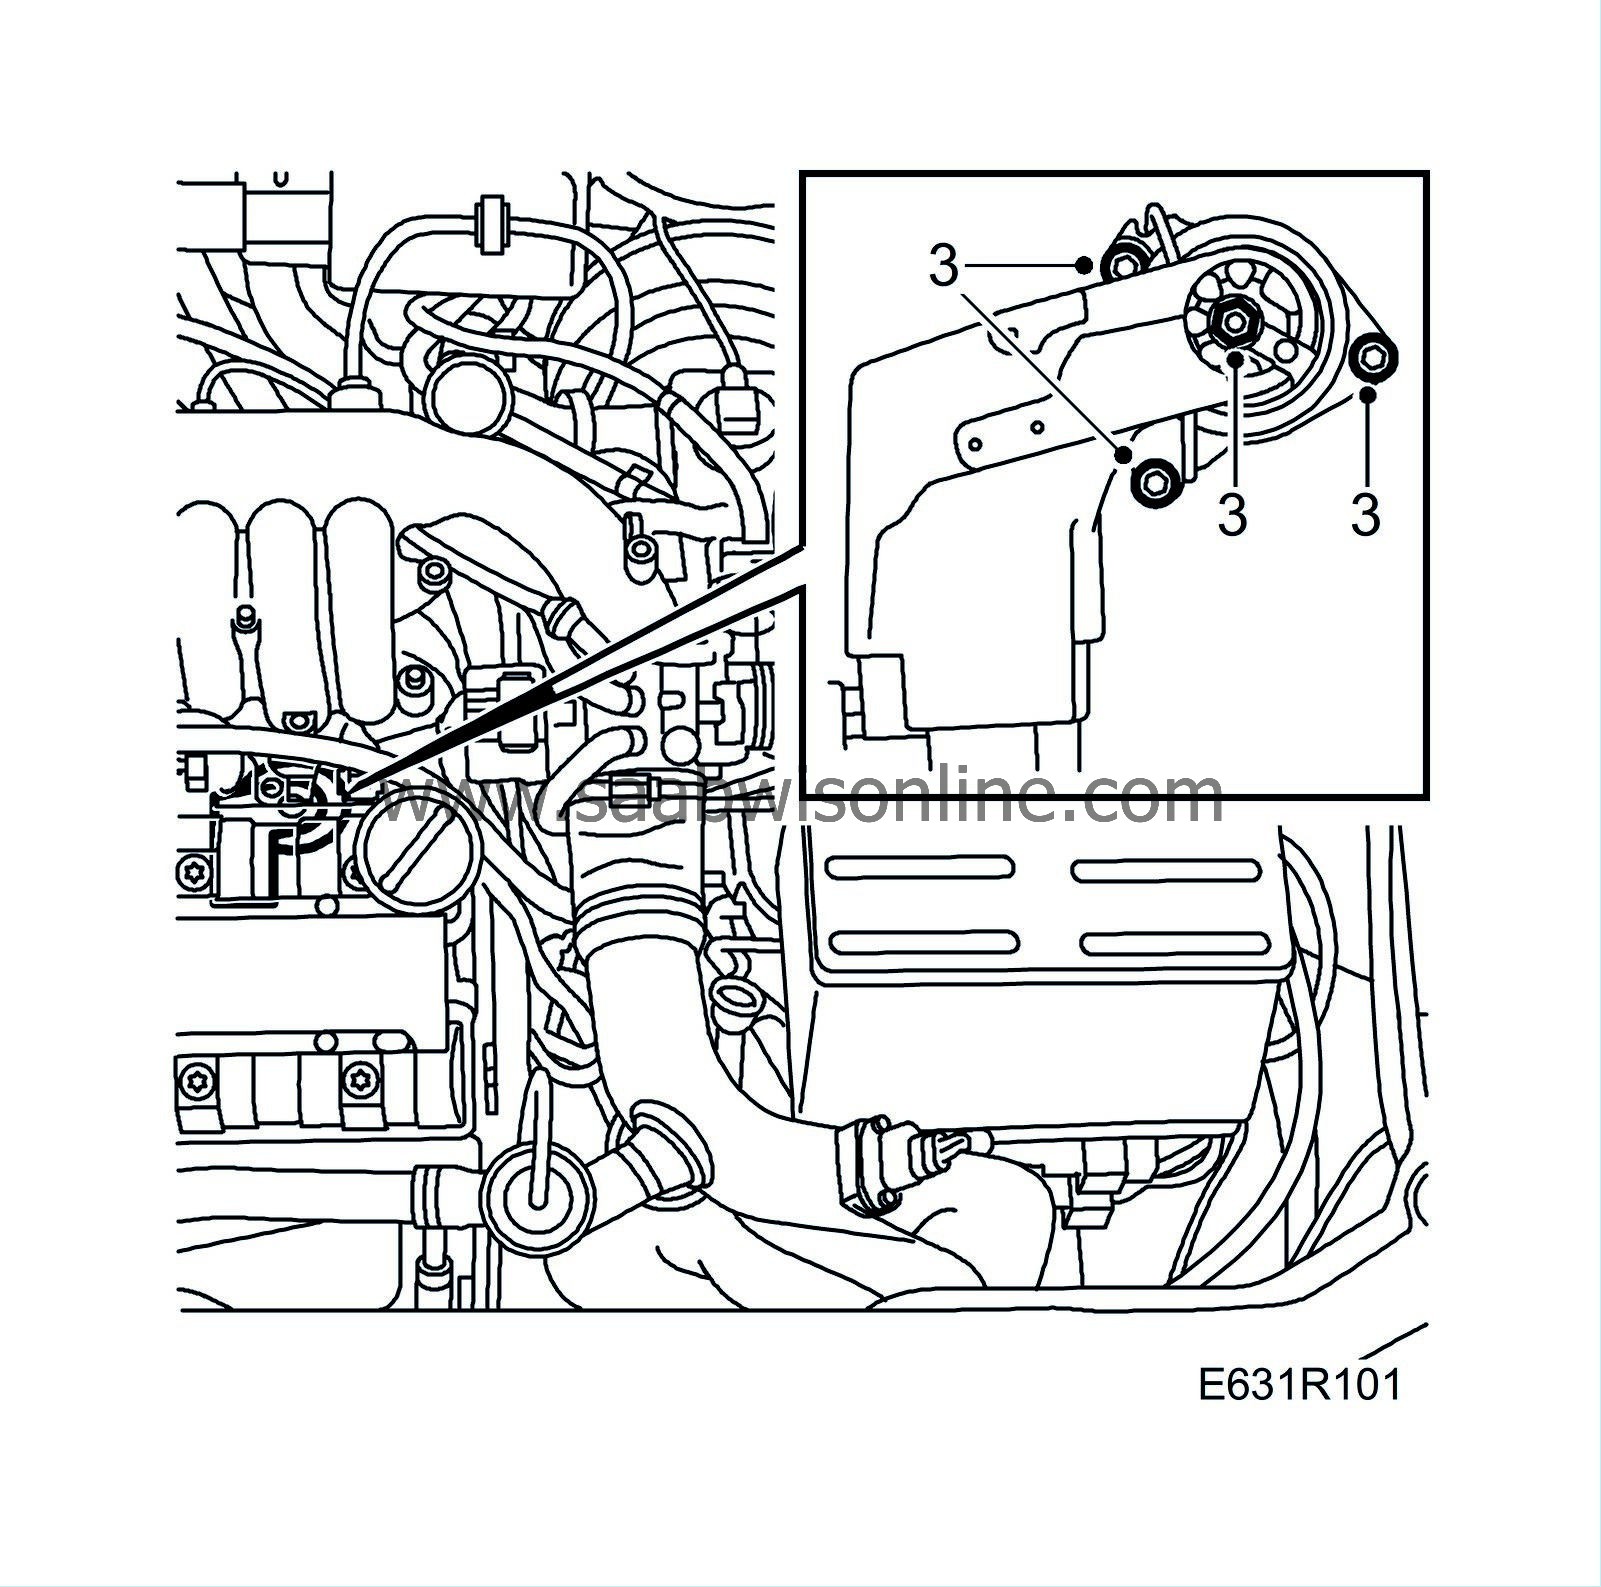
| 3. |
Undo the bolts securing the rear engine cushion to the subframe and the nut securing the engine cushion to the engine mounting.
|
|
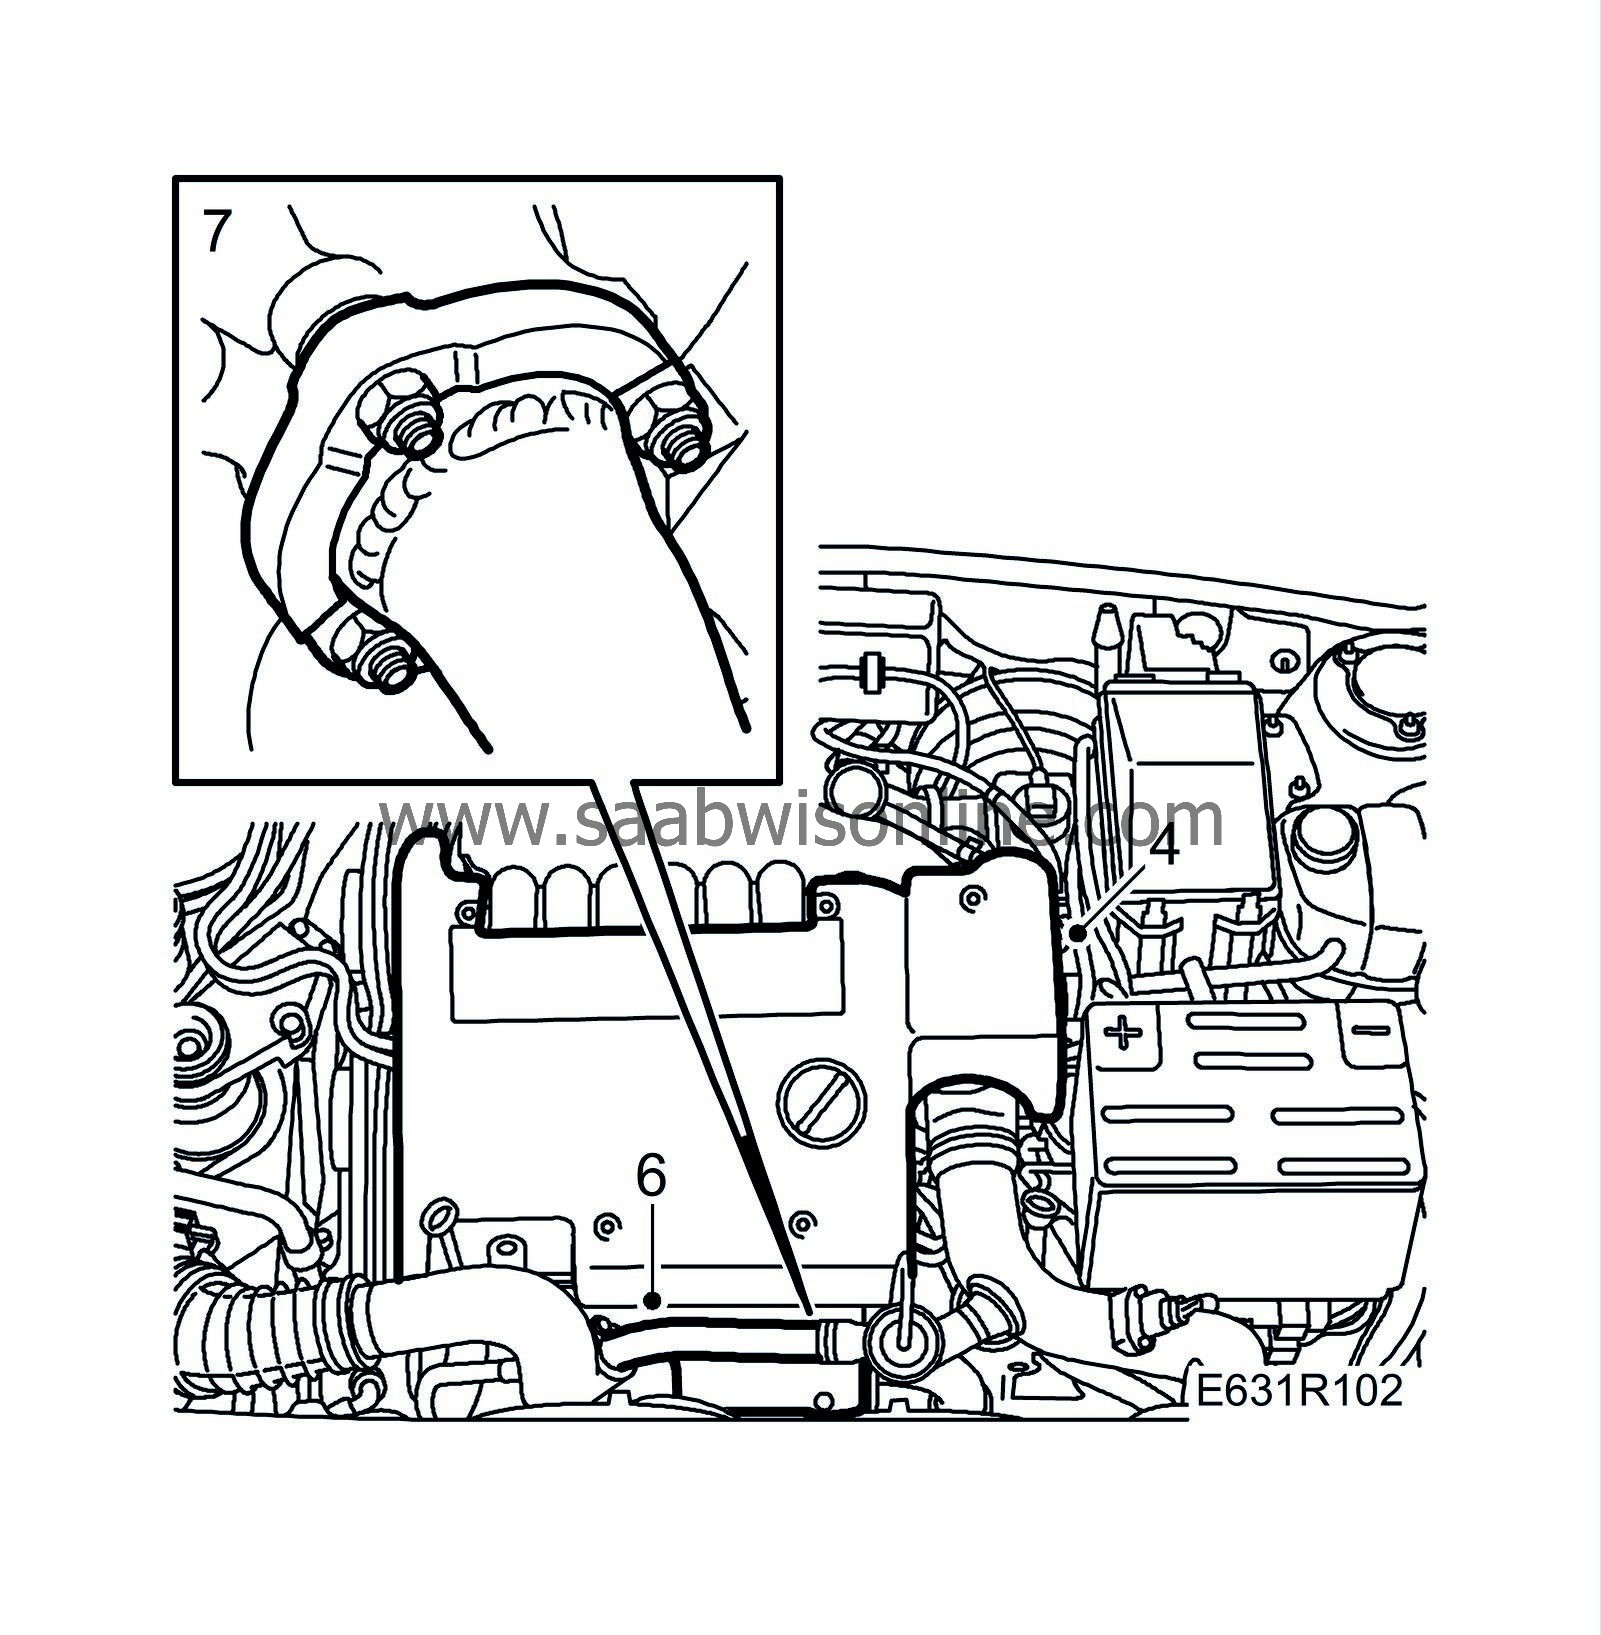
| 4. |
Remove the engine cover.
|
|
| 5. |
Blow clean around the bypass pipe connection.
|
|
| 6. |
Remove the screw and bend aside the turbocharger bypass pipe. Plug the hole.
|
|
| 7. |
Slacken the two bolts in the top of the exhaust pipe flange a couple of turns. The exhaust pipe should remain suspended from the flange but be moveable.
|
|
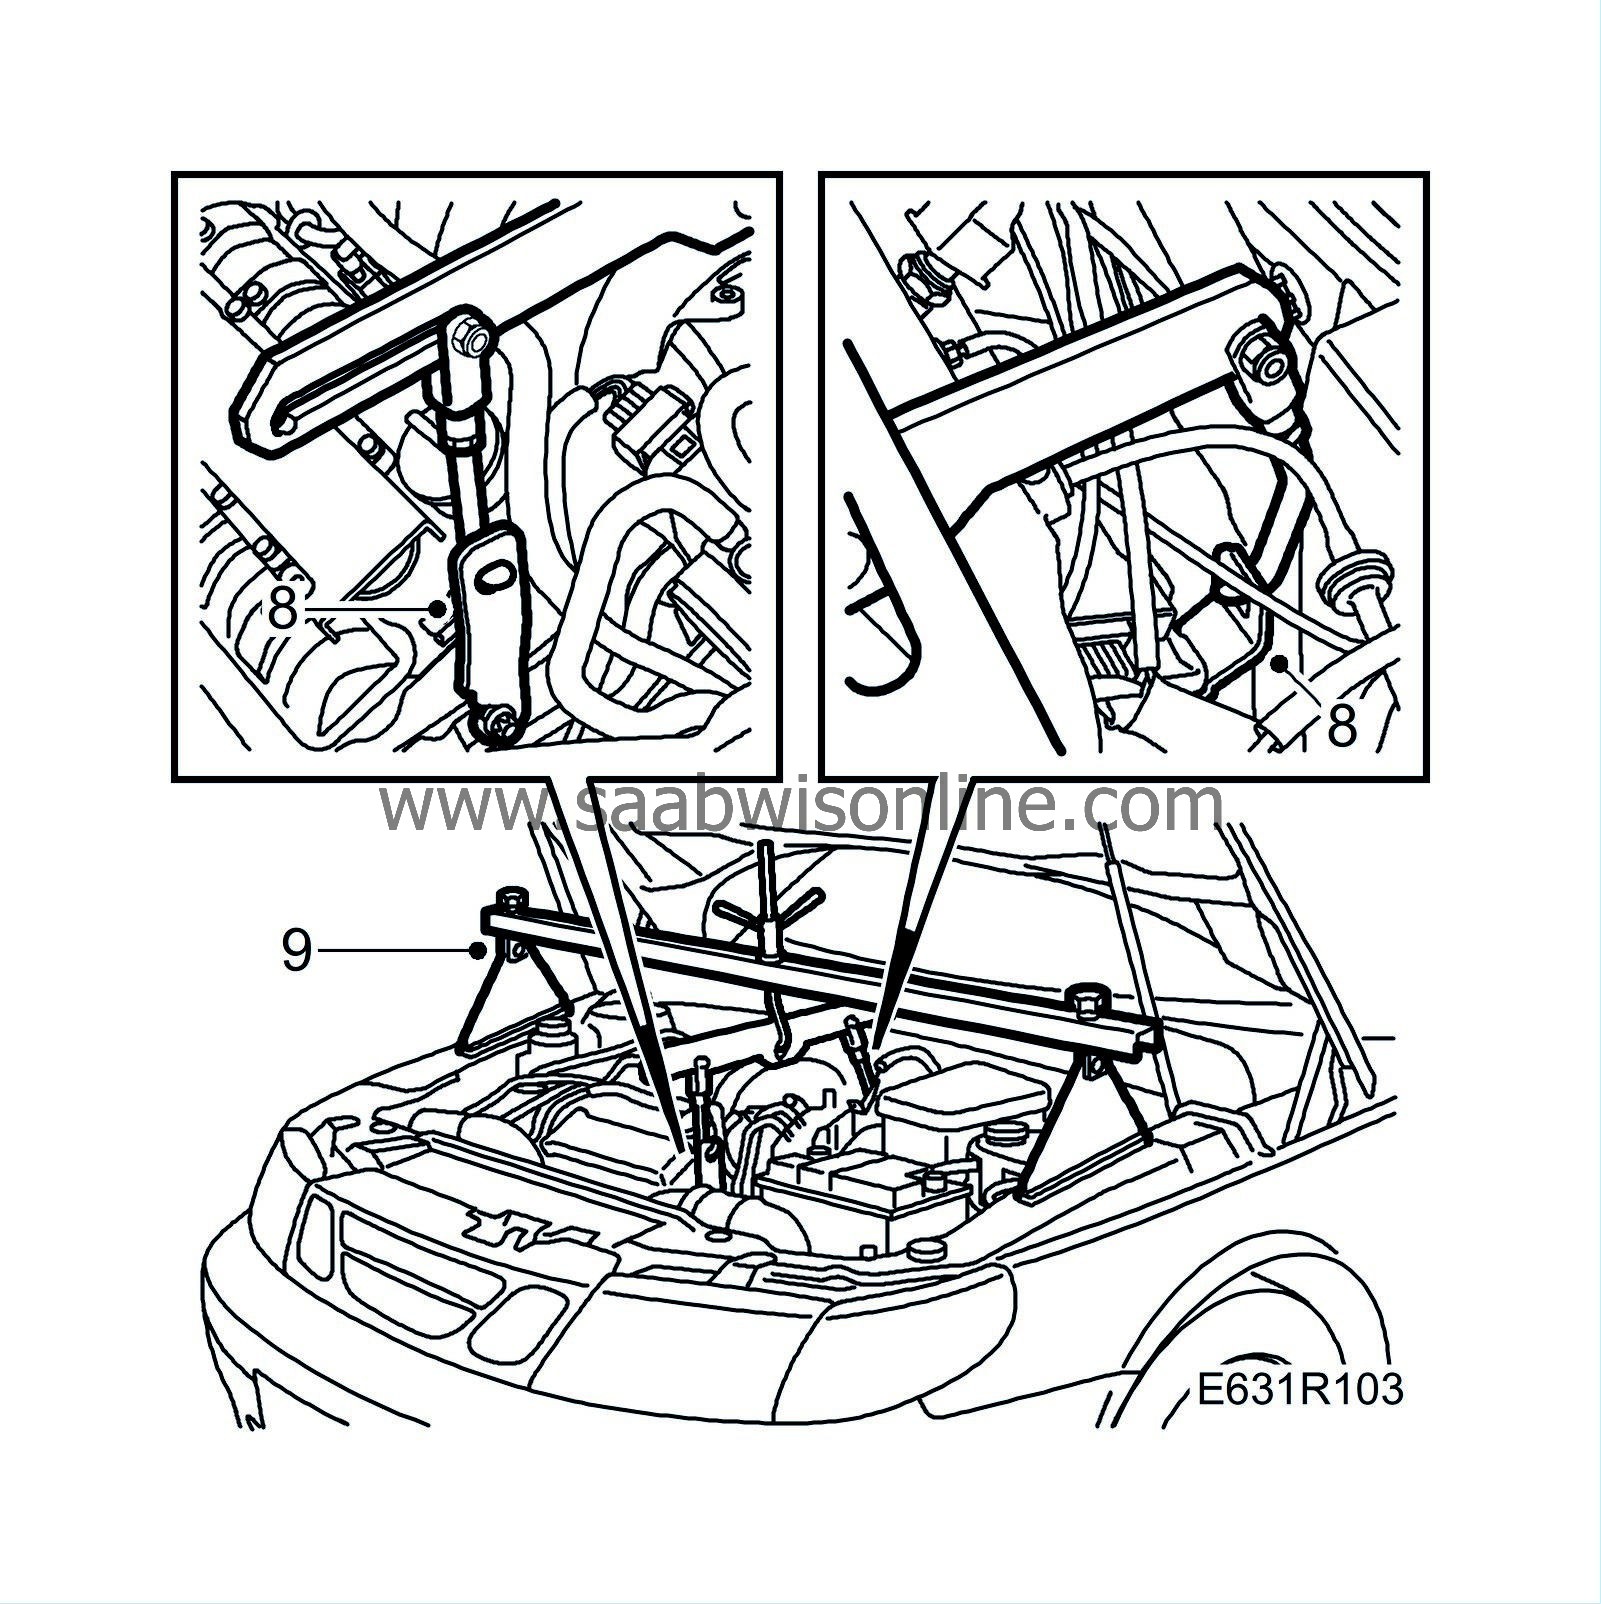
| 8. |
Fit the lifting eyes, one on the rear of the cylinder head and one on the front cylinder head (remove one bolt first).
|
|
| 9. |
Place protective pads on the wings and place
83 94 850 Lifting beam
on the pads
Hook up the rear lifting eye and take up the weight of the engine. |
|
| 10. |
Lift the car and remove the front wheels.
|
|
| 11. |
Undo the locknut on the track rod.
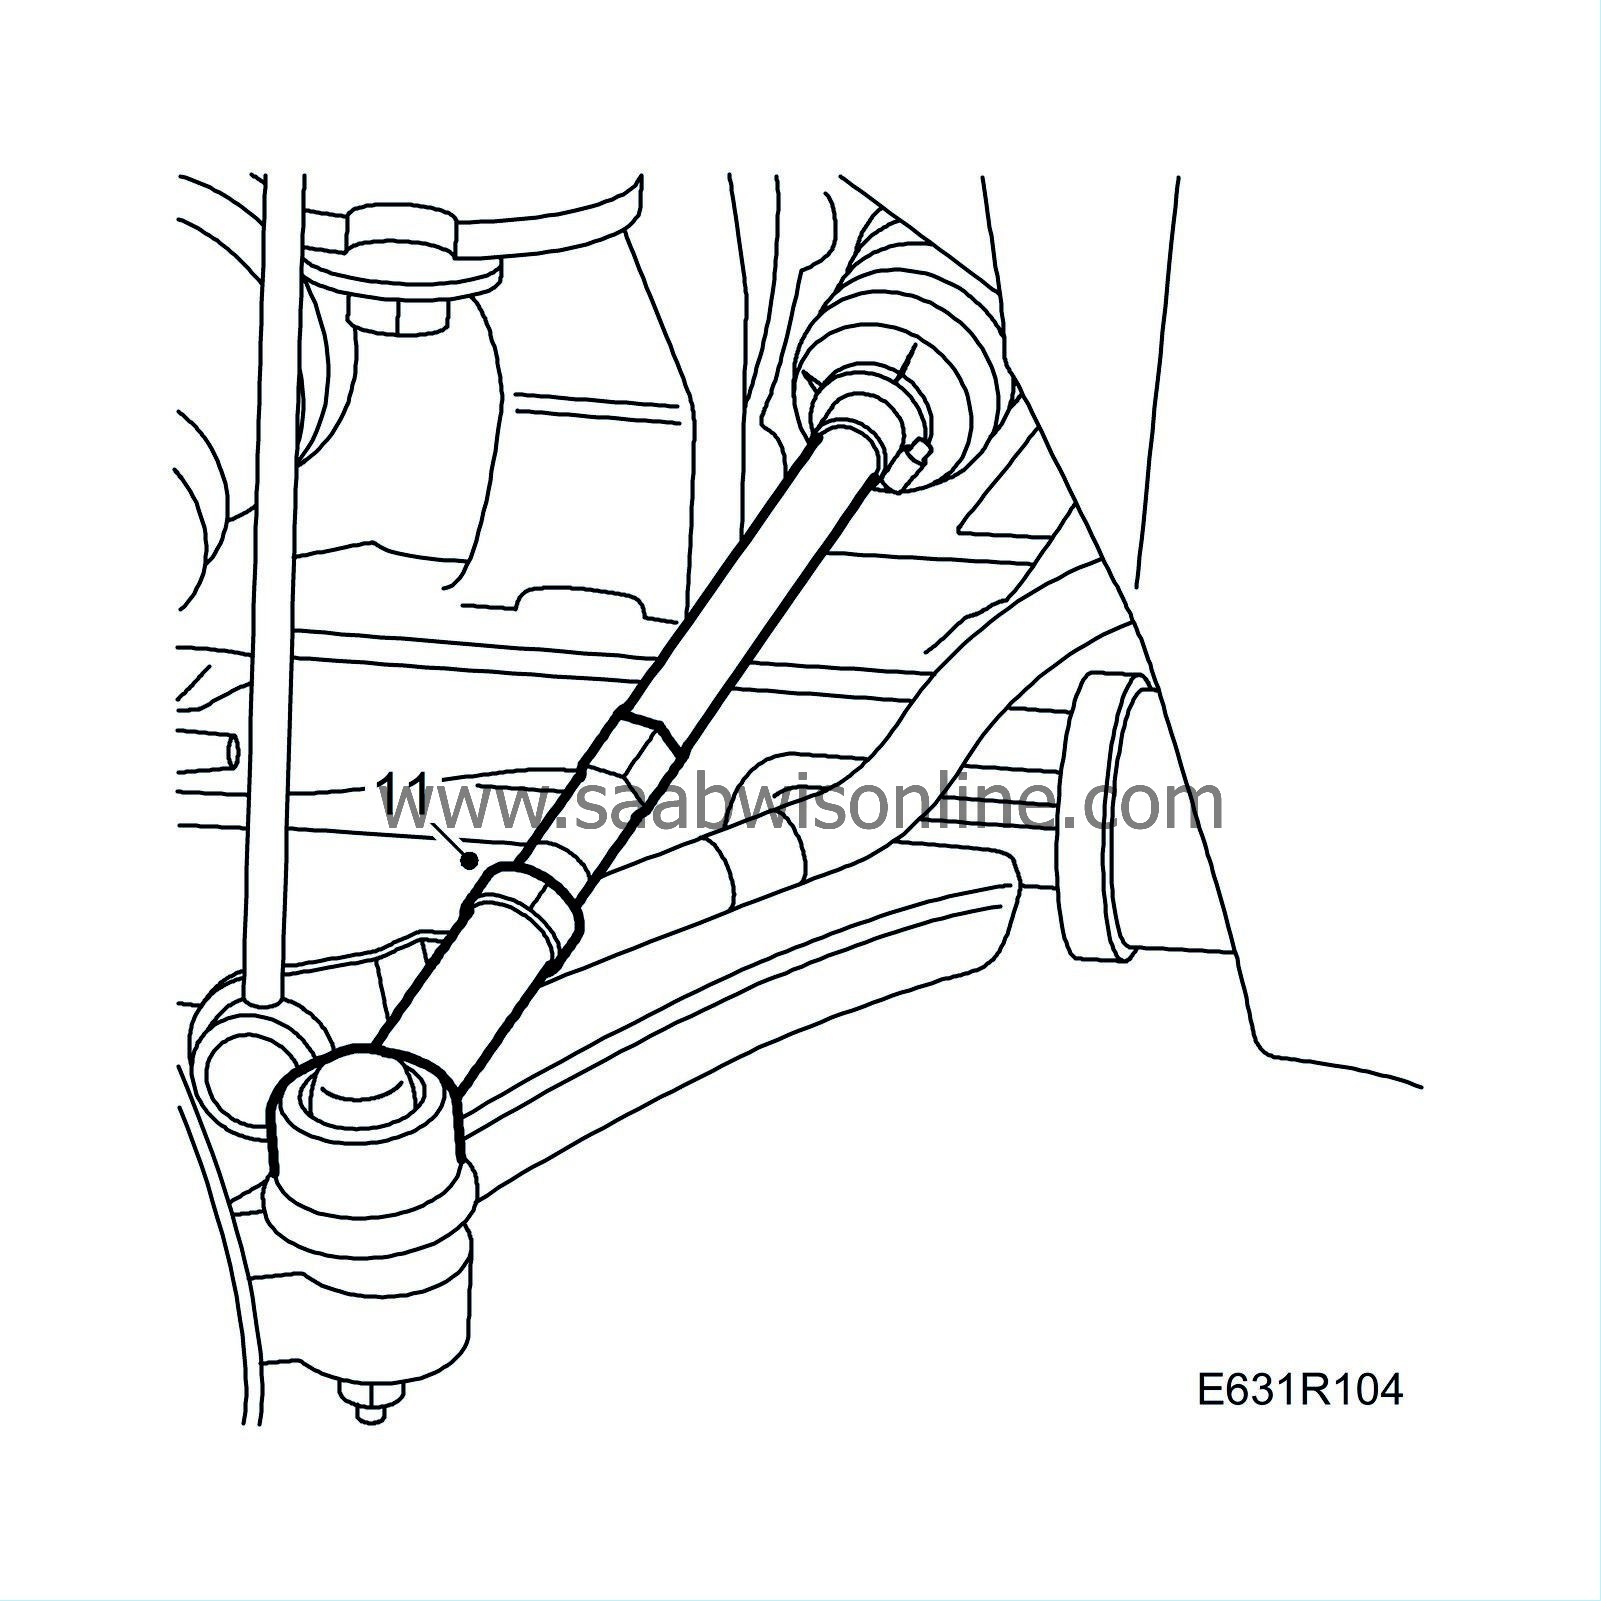
|
|
| 12. |
Undo the nut securing the track-rod end to the steering swivel member.
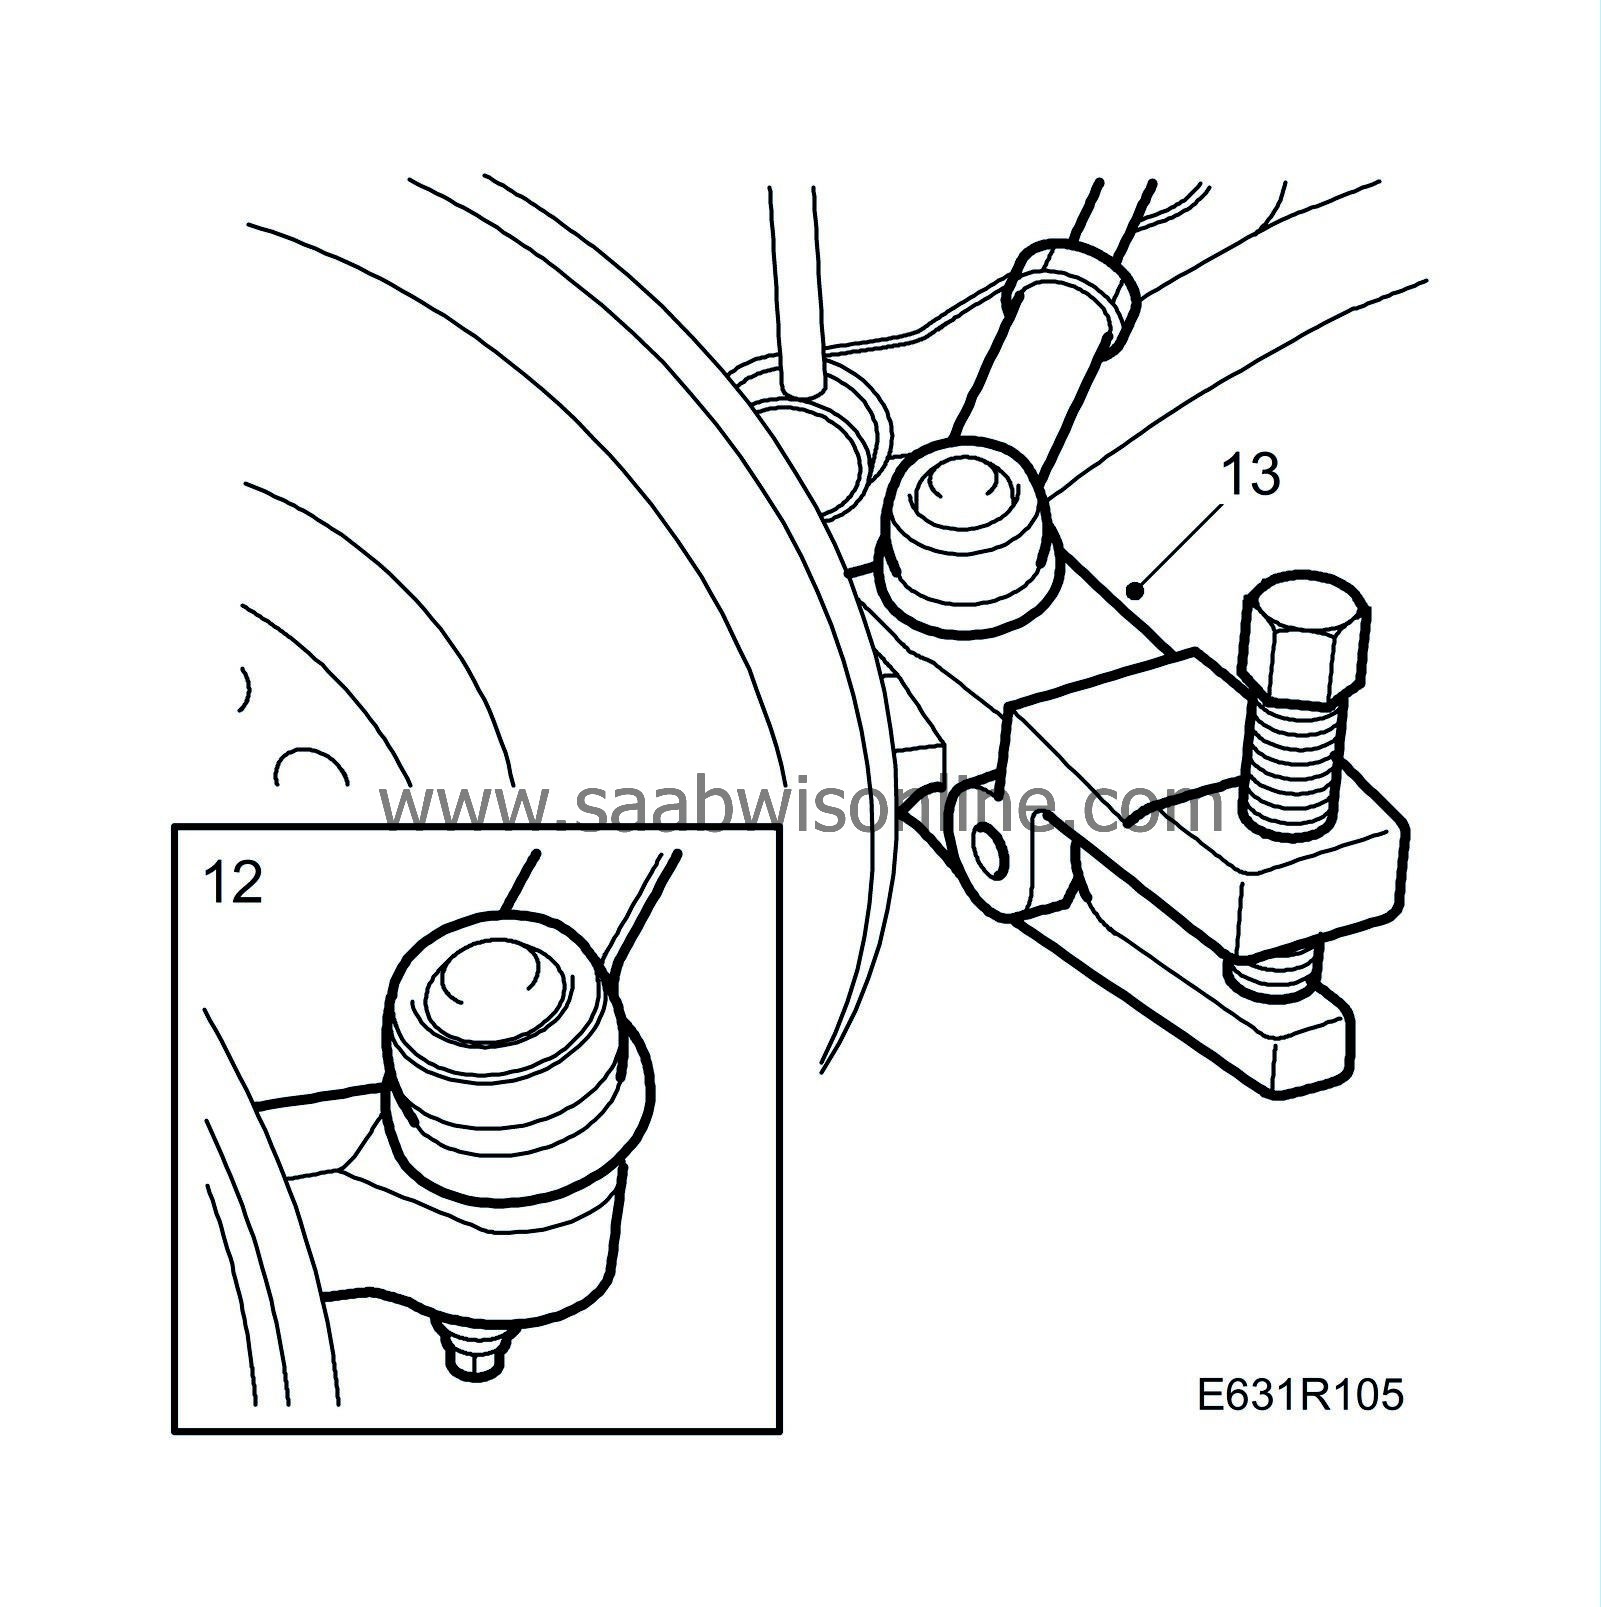
|
|
| 13. |
Remove the track-rod end from the steering swivel member using
89 96 696 Puller
.
|
|
| 14. |
Unscrew the track-rod end from the track rod, counting the number of turns.
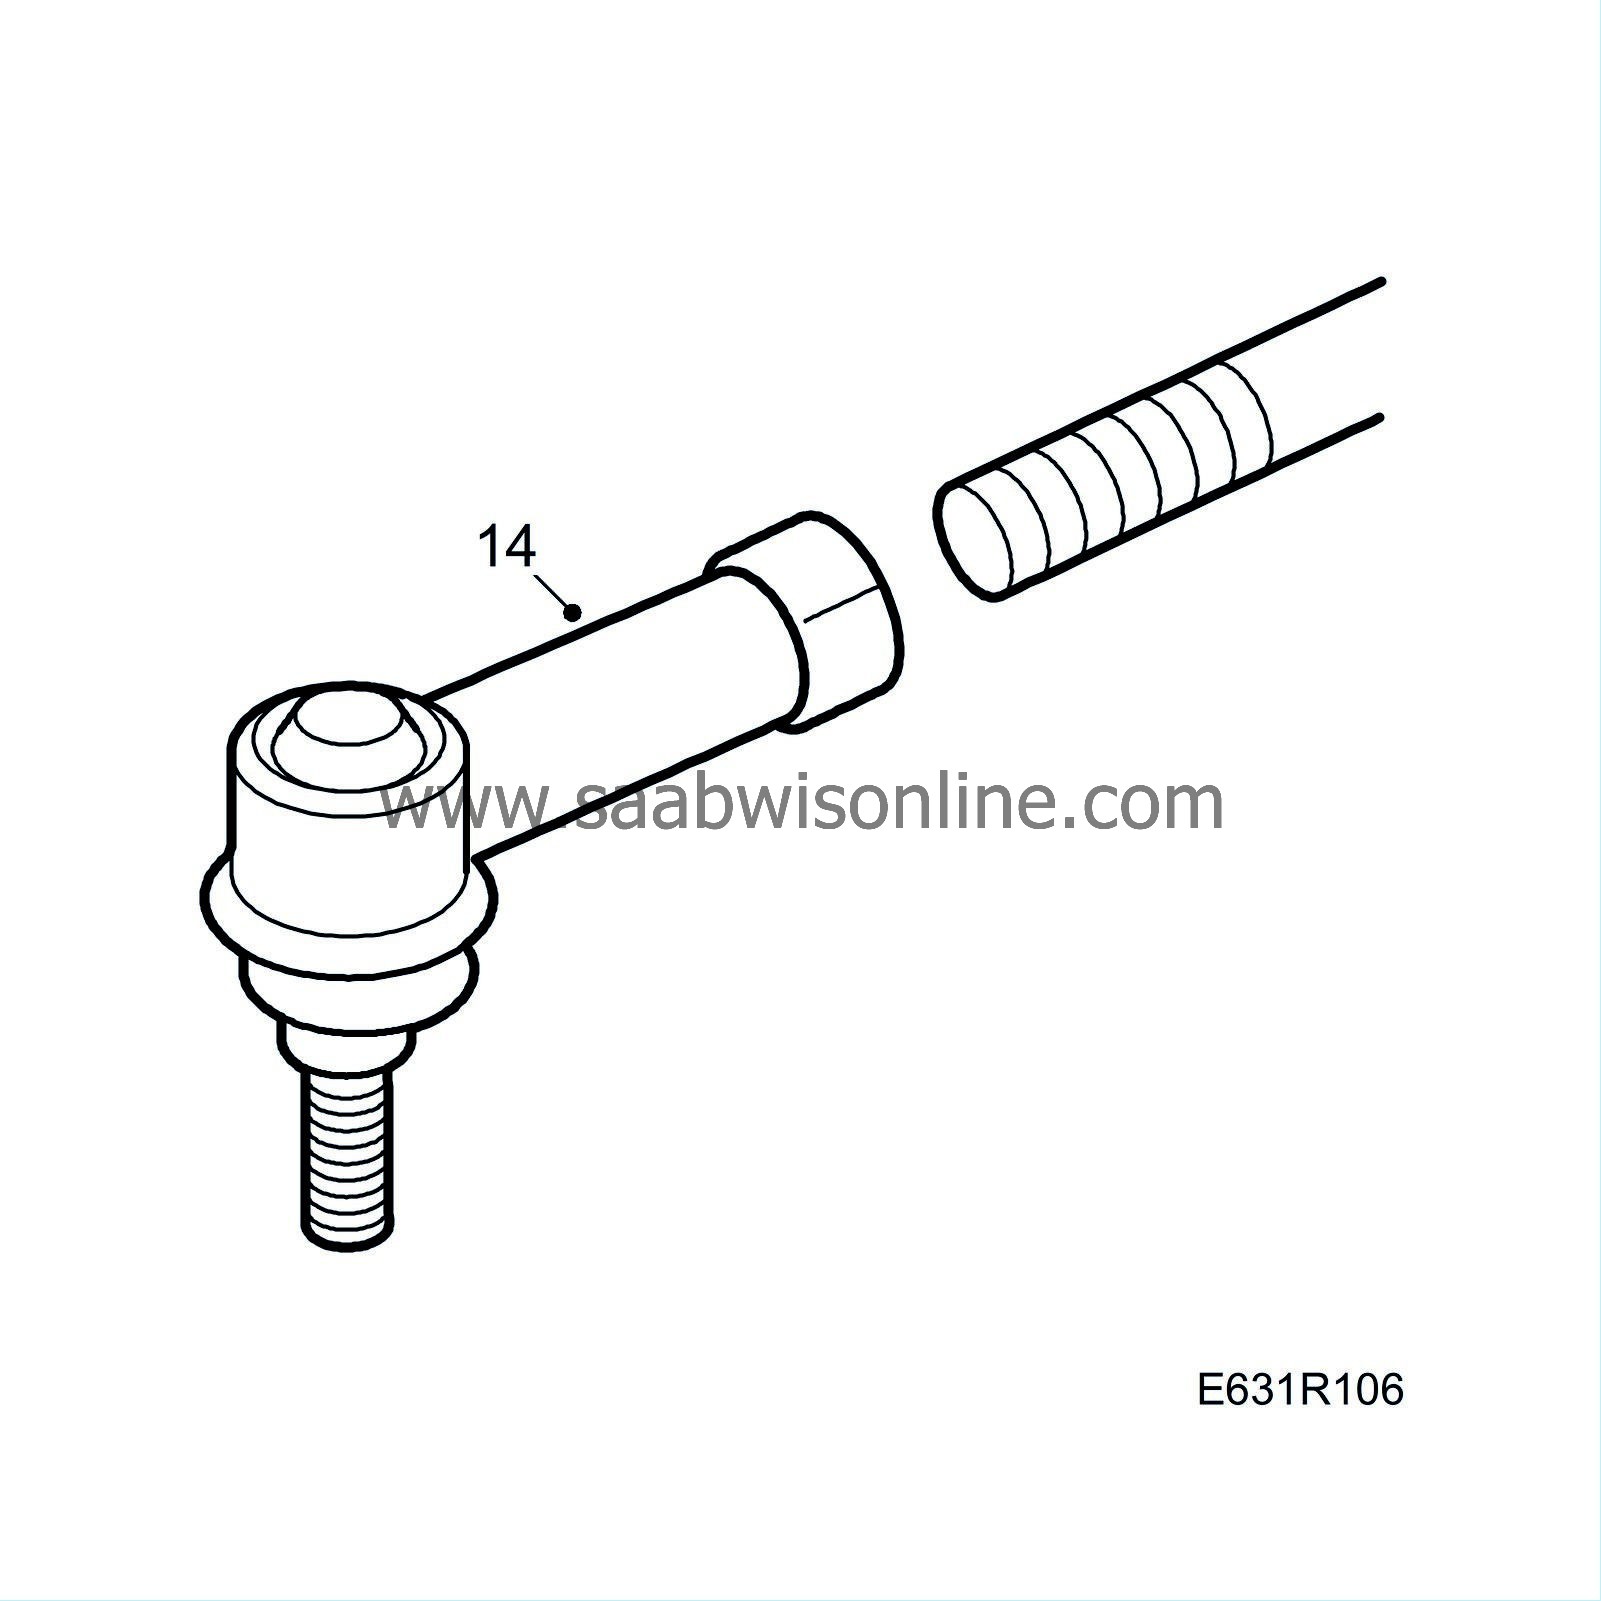
|
|
| 15. |
Carry out steps 9-12 on the other side of the car.
|
|
| 16. |
Remove the reinforcements by the rear subframe mounting.

|
|
| 17. |
Split the exhaust pipe between the catalytic converter and silencer and lower it approximately 100 mm. Suspend the pipe with a strap to prevent damaging the flexible sections.
|
|||||||
| 18. |
Split the exhaust pipe at the rear exhaust manifold.
|
|
| 19. |
Remove the bolts from the centre subframe mounting and lower the rear edge of the subframe.
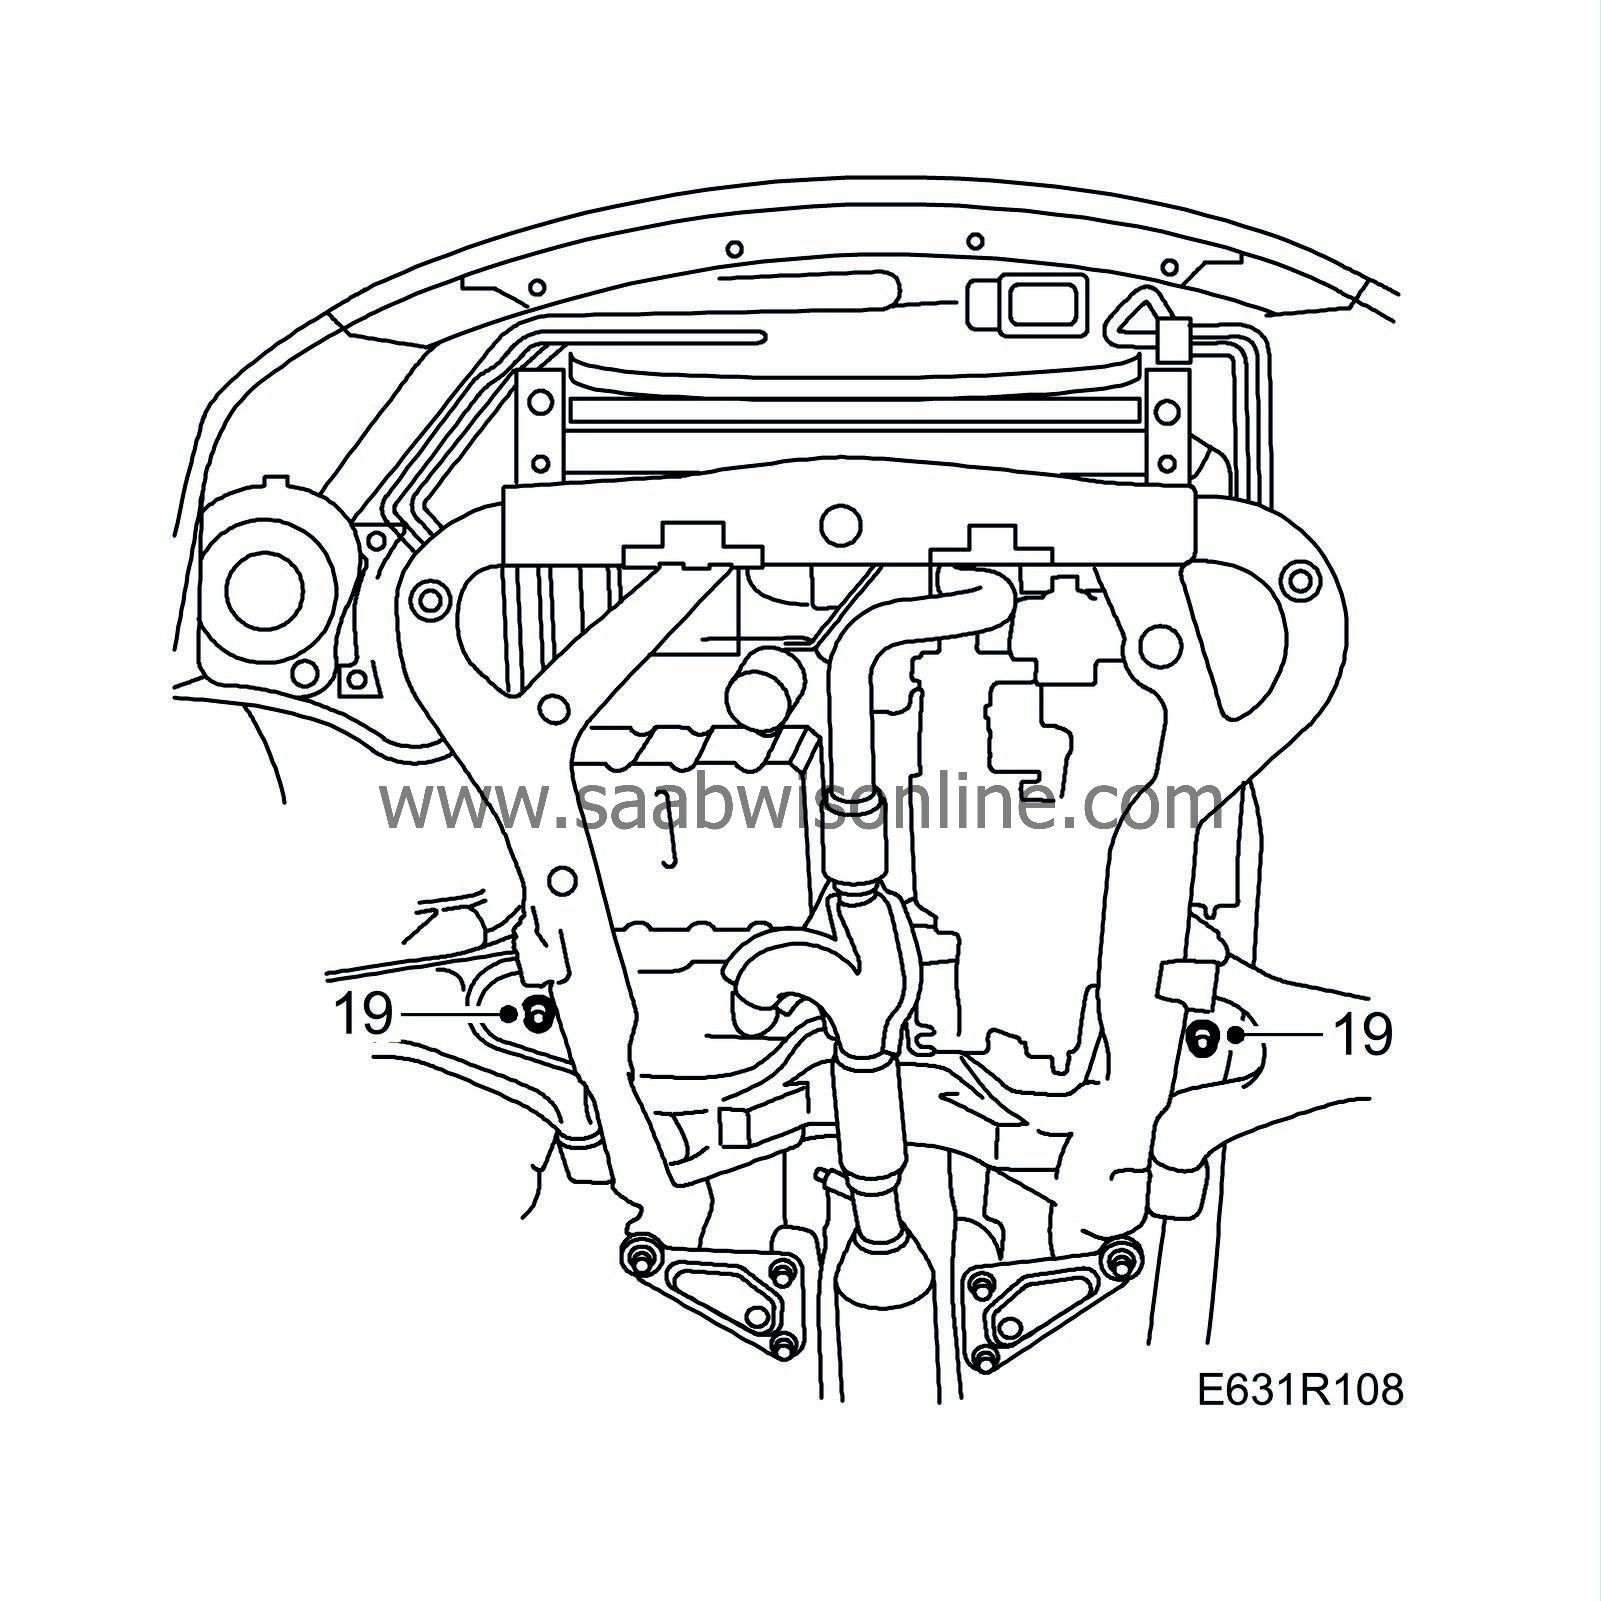
|
|
| 20. |
Blow thoroughly clean around the valve body connections.
|
|
| 21. |
Disconnect the delivery and return pipes from the valve body.
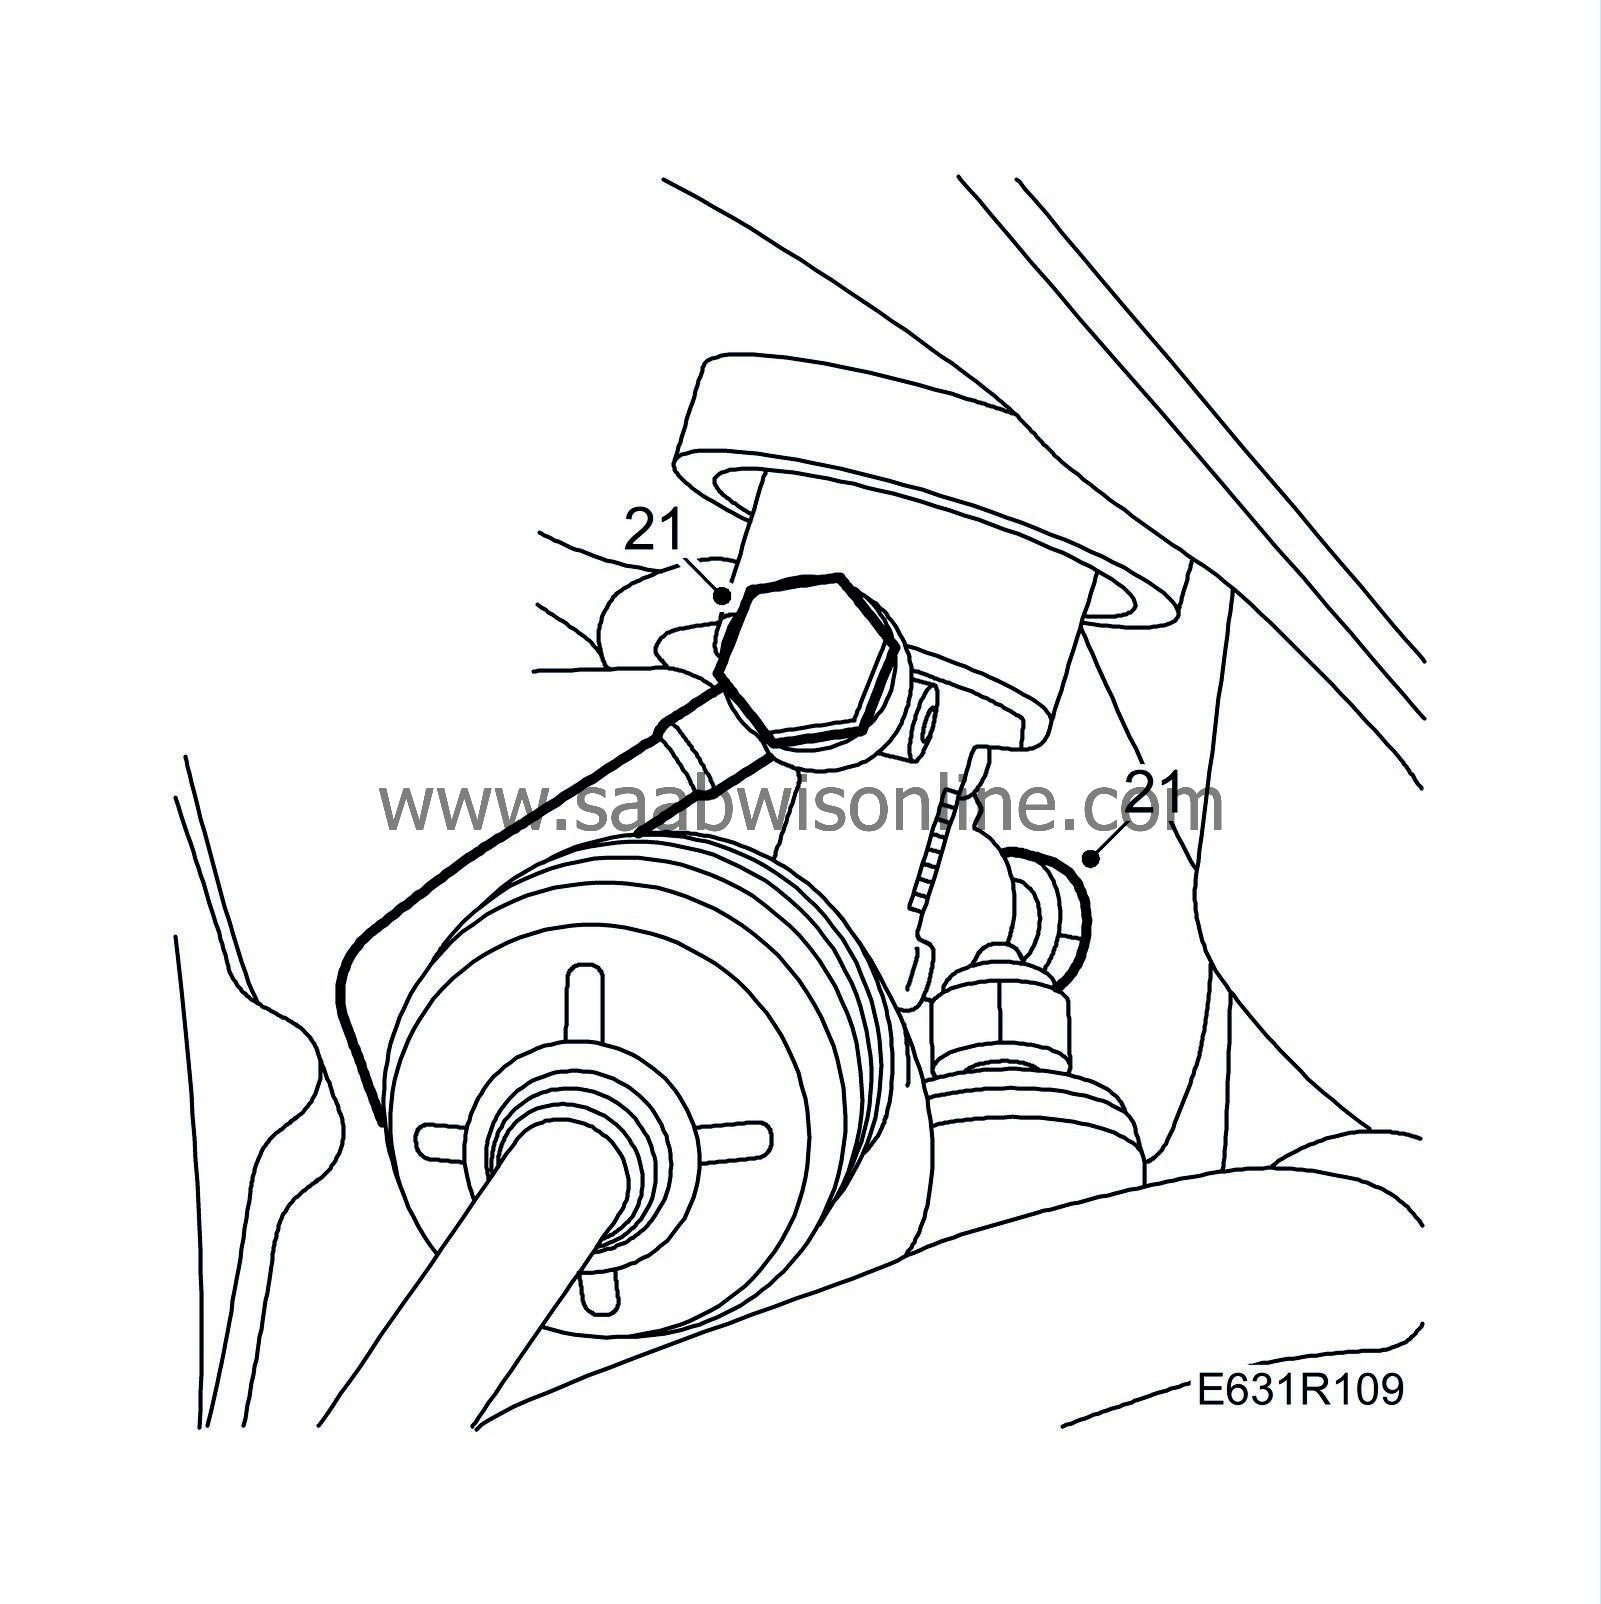
|
|
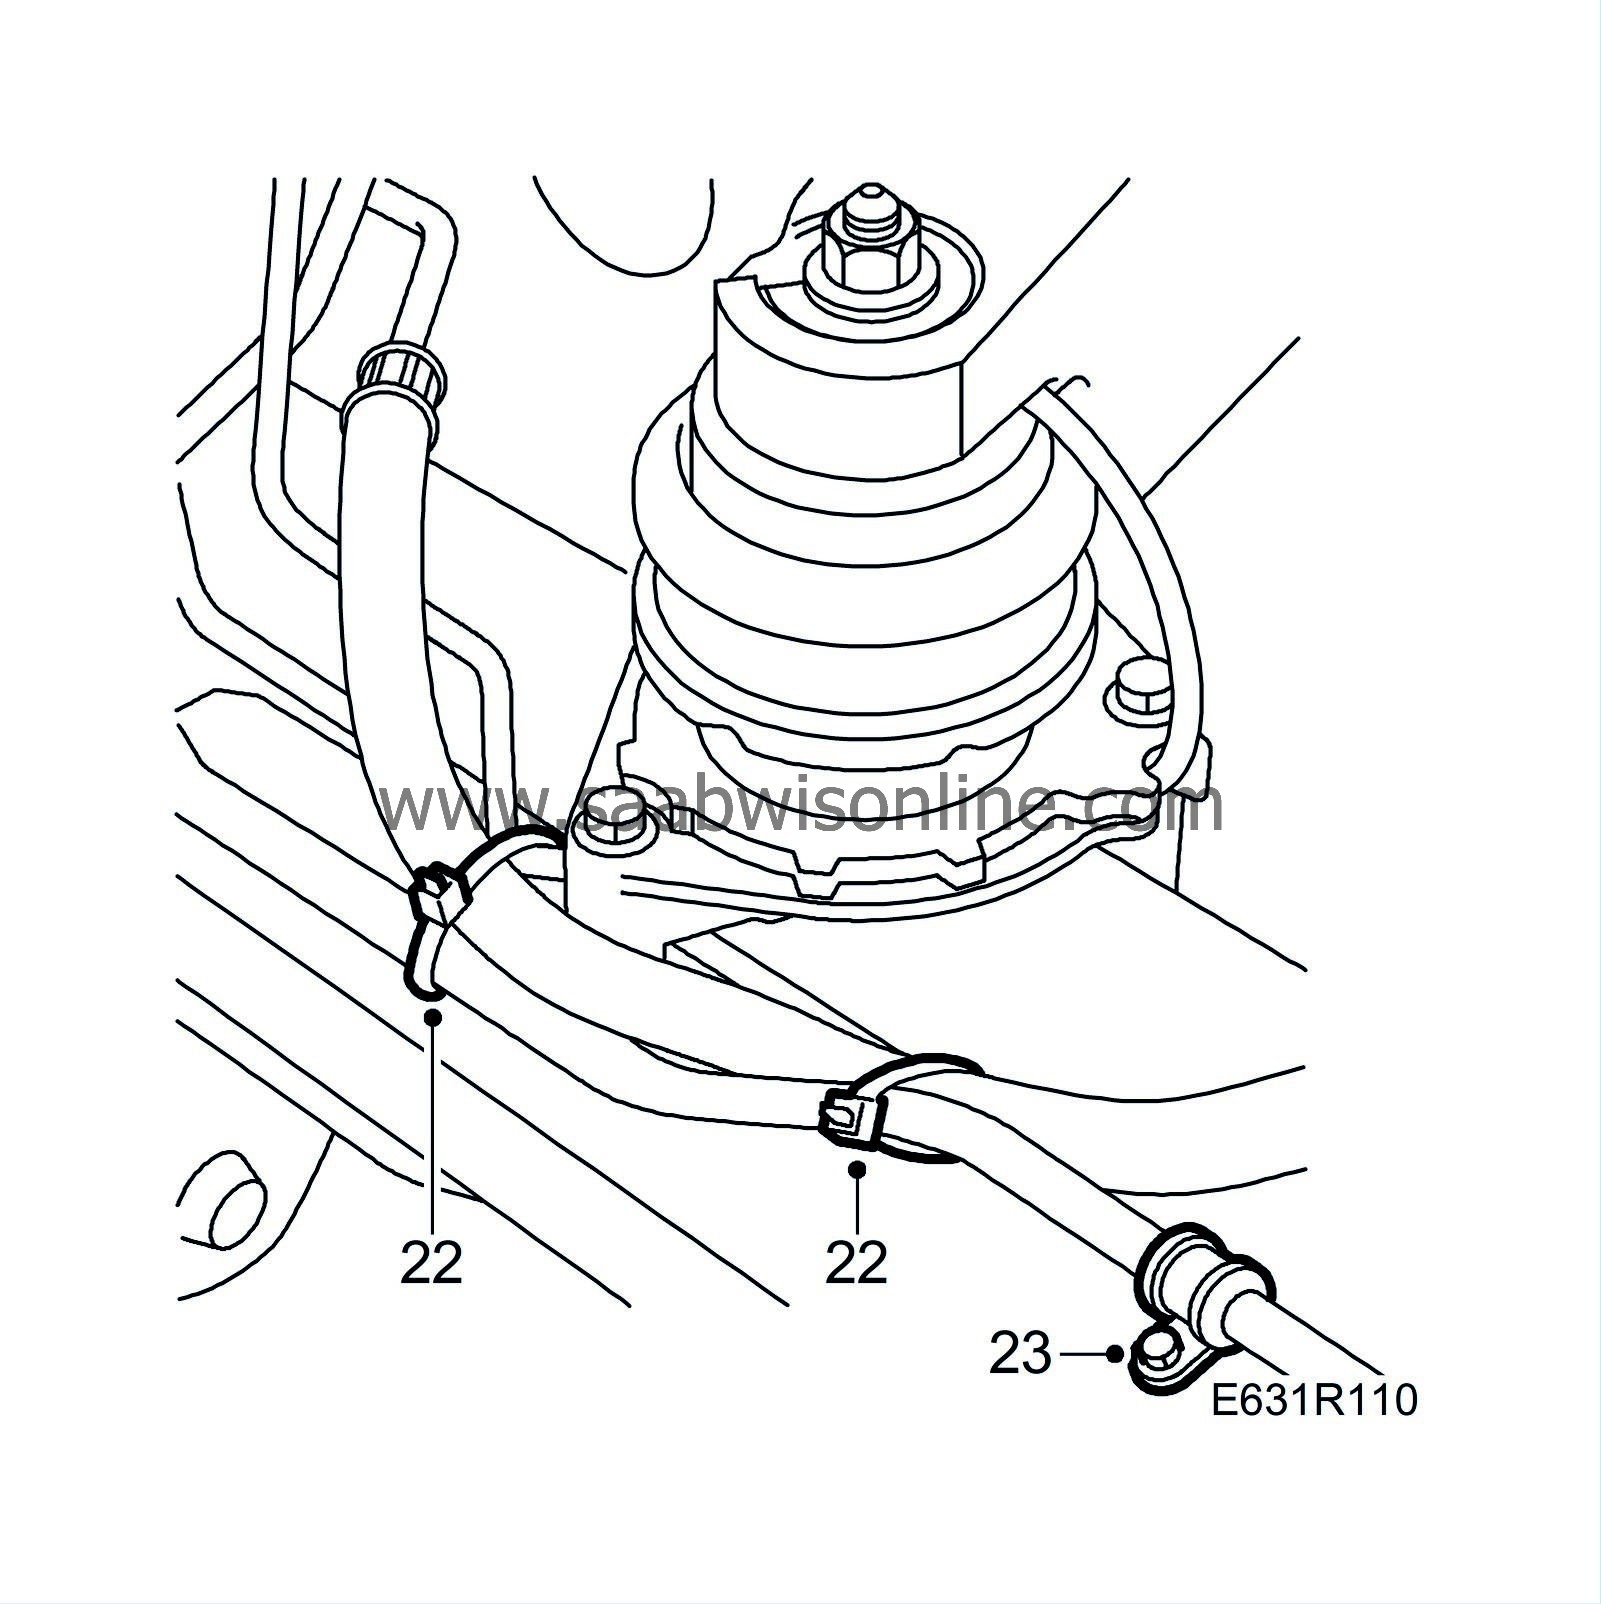
| 22. |
Cut the three cable ties.
|
|
| 23. |
Remove the clamp securing the securing the delivery pipe to the steering gear.
|
|
| 24. |
Remove two retaining bolts securing the steering gear.
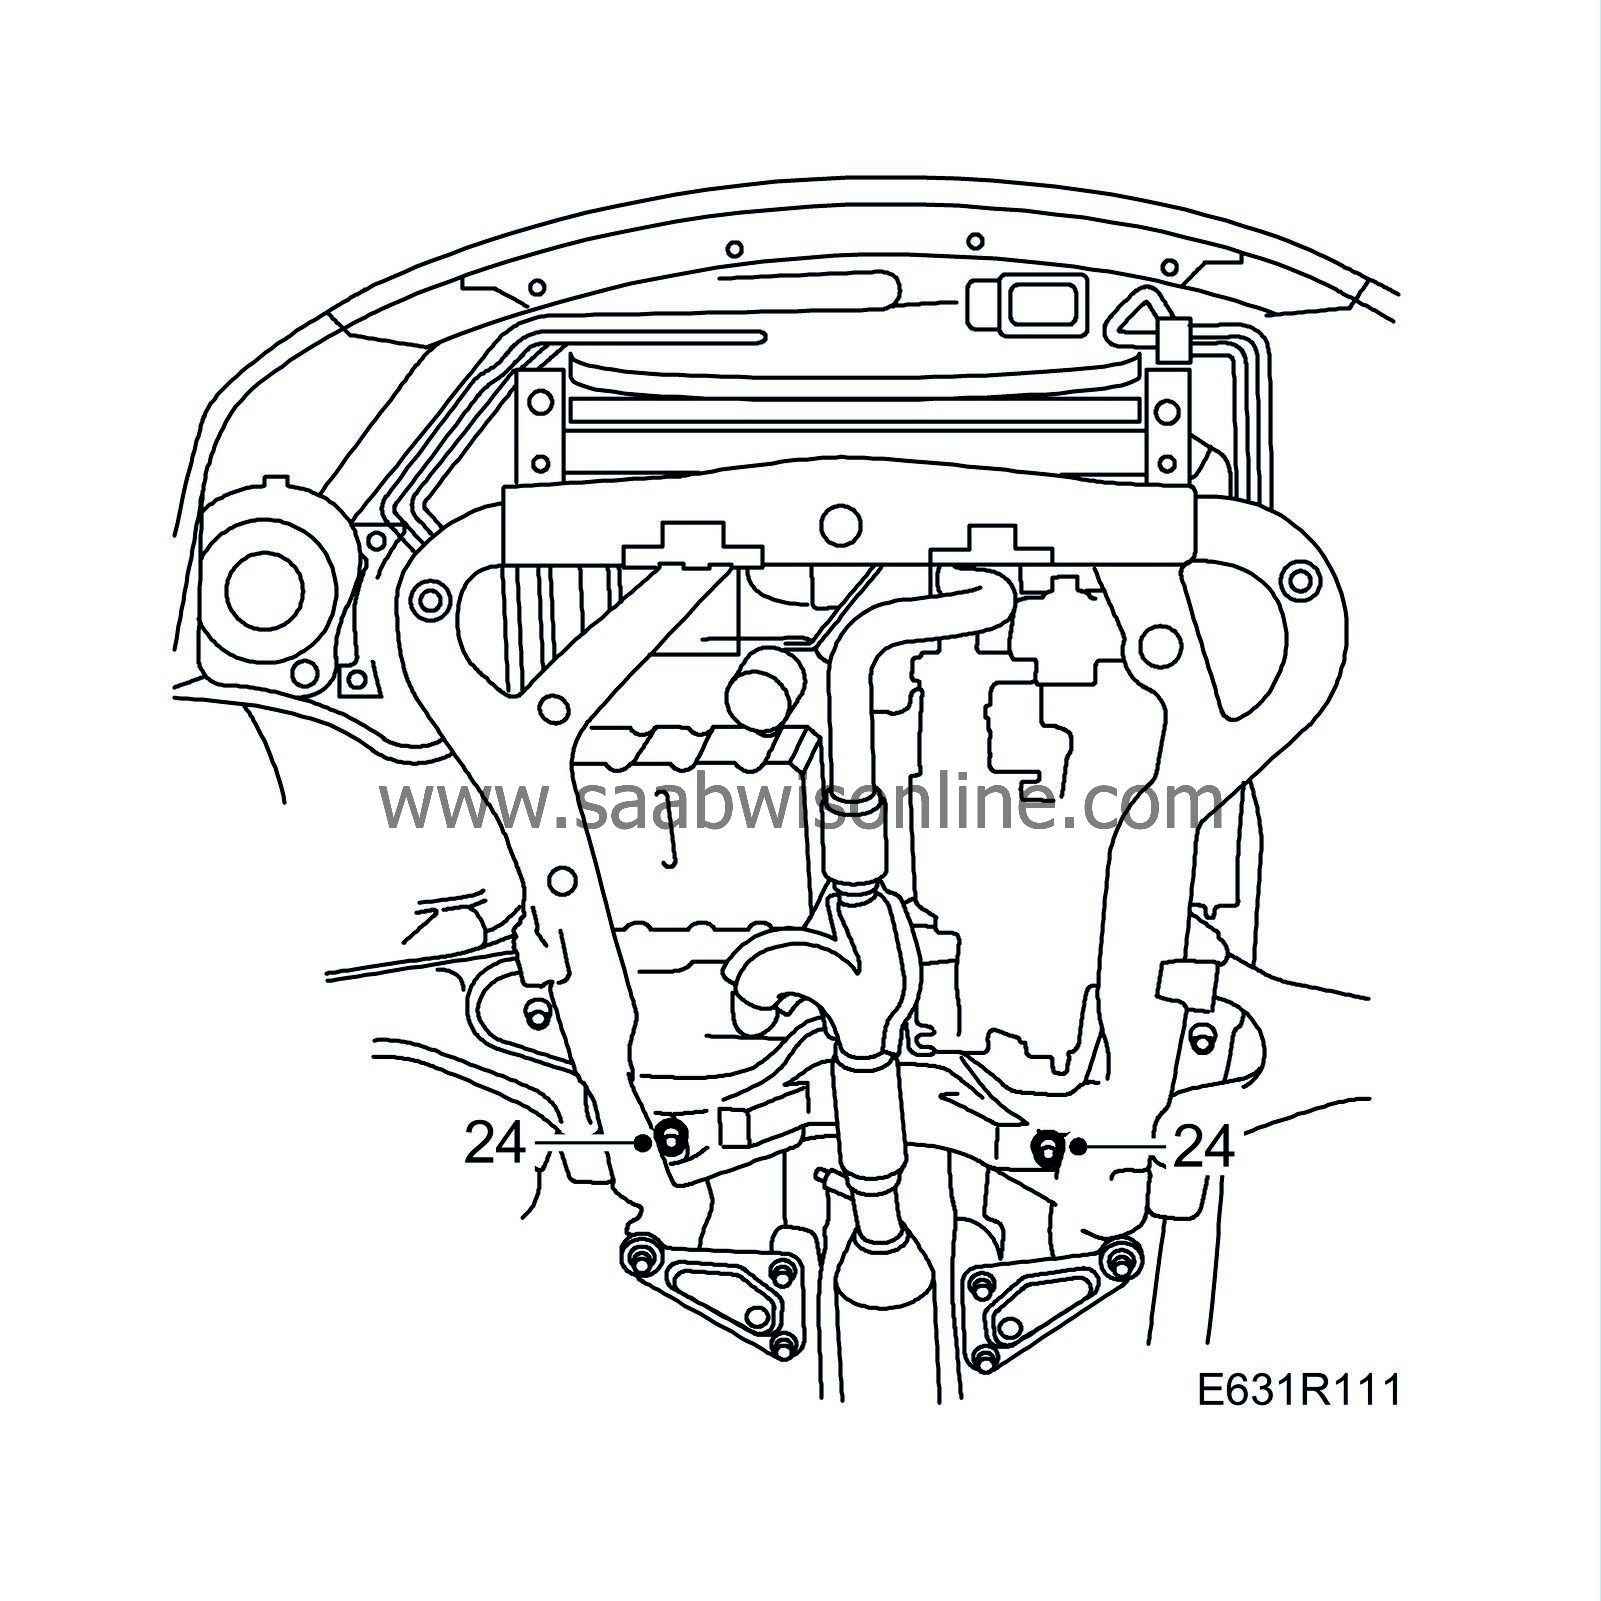
|
|
| 25. |
Lift out the steering gear through the passenger-side wheel housing. The rear engine cushion must be removed at the same time as the steering gear. Angle the steering gear forward so that it does not foul adjacent components. Keep the bulkhead seal.
|
||||||||||
| To fit |
| Important | ||
|
The power steering system is extremely sensitive to contamination. Therefore, observe a high degree of cleanliness when working on the power steering system. |
||
| 1. |
Turn the steering gear's pinion shaft so that the rack is centred and lift in the steering gear through the passenger-side wheel housing. Make sure that the steering gear does not foul any hoses or cables in the engine bay. The rear engine cushion must be lifted in at the same time as the steering gear.
|
||||||||||
| 2. |
Fit the valve body seal. Grease the upper edge with petroleum jelly.
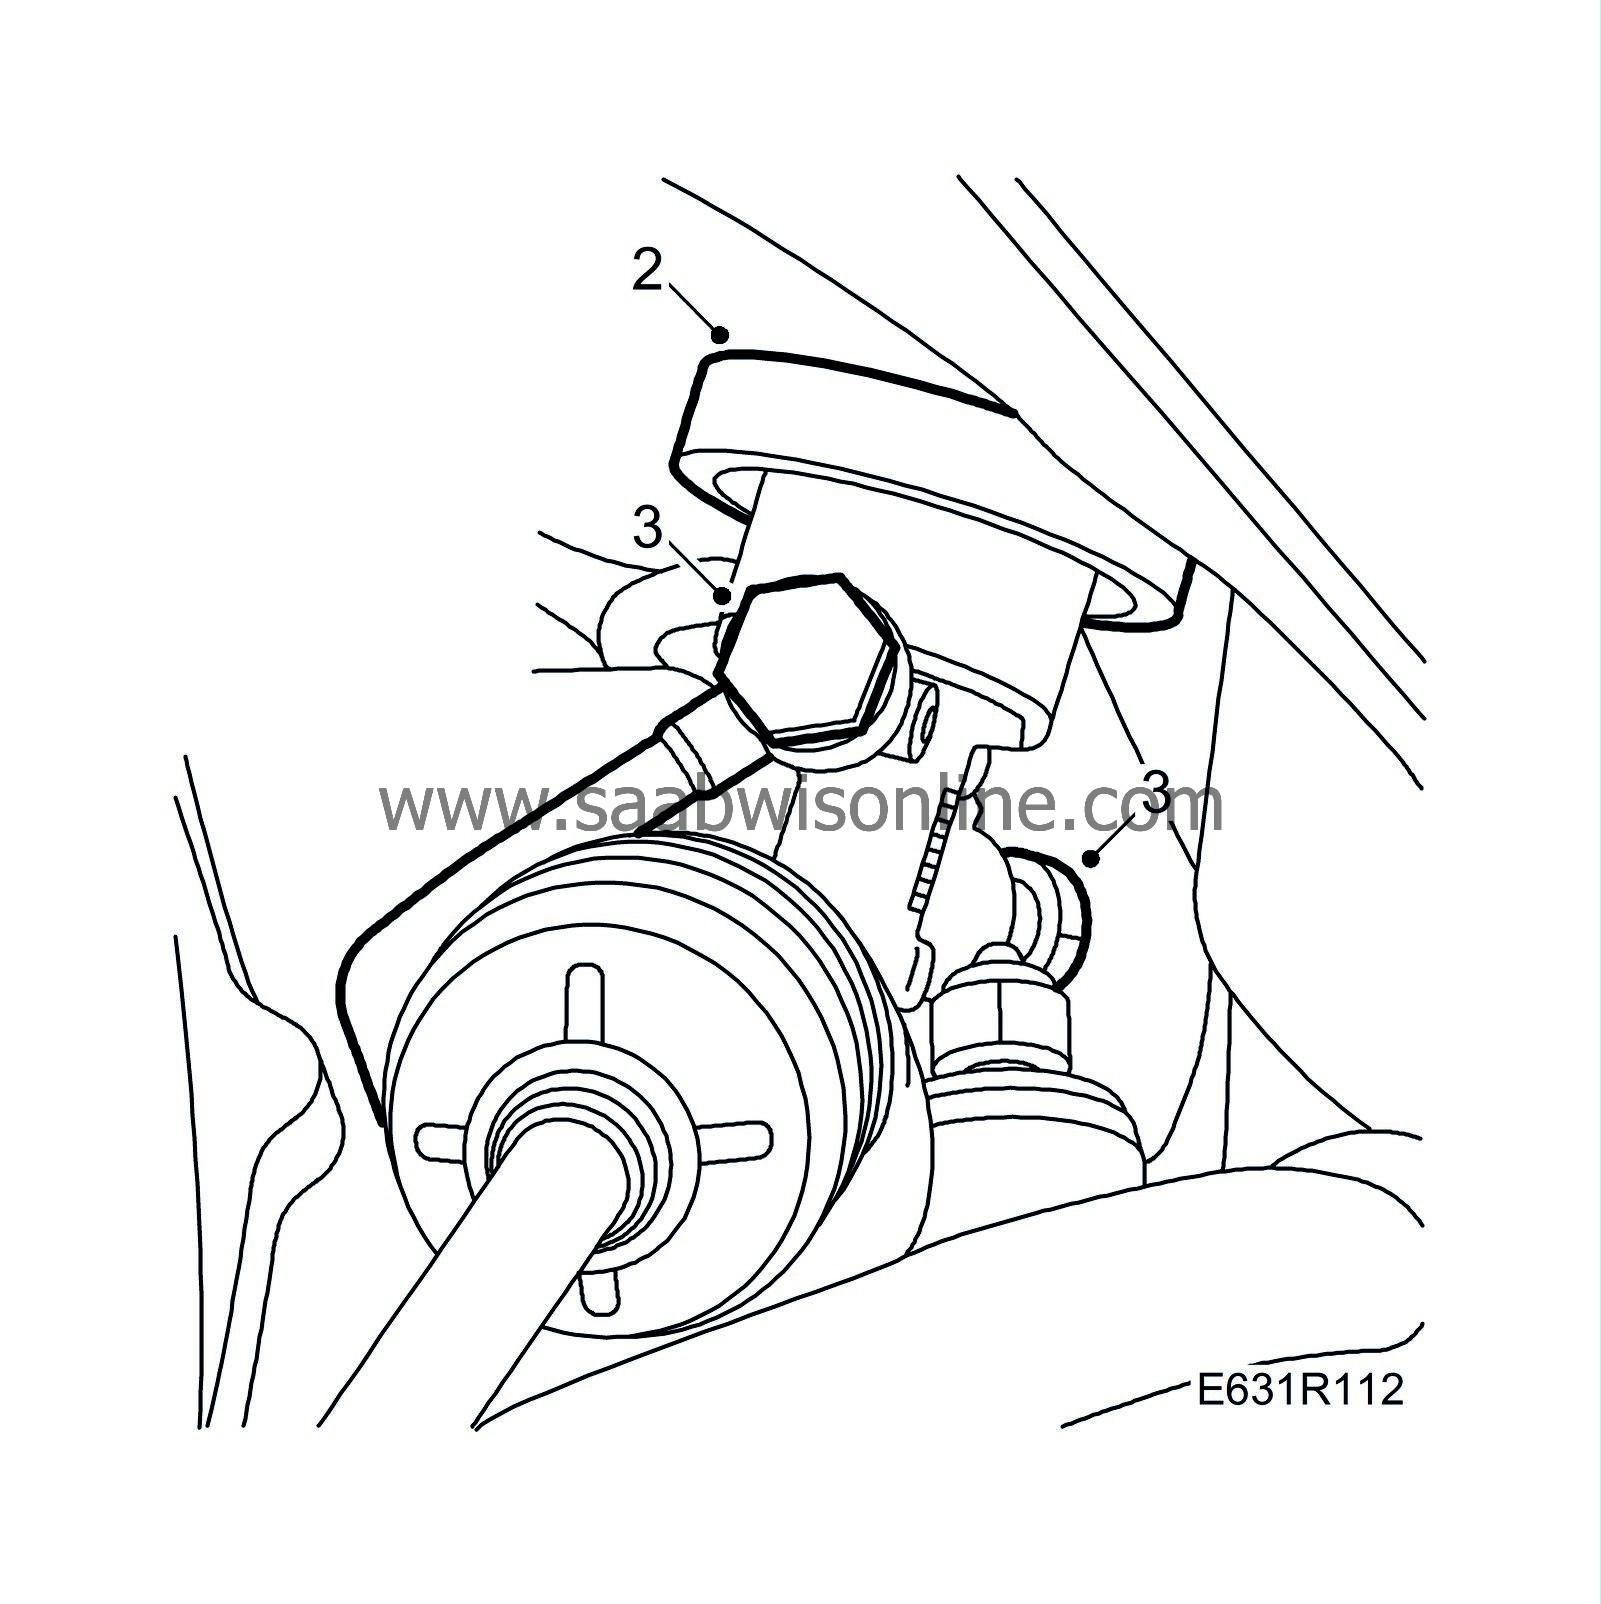
|
|
| 3. |
Connect the delivery and return pipes to the valve body using new seals.
Do not
tighten the banjo nipples fully.
|
|
| 4. |
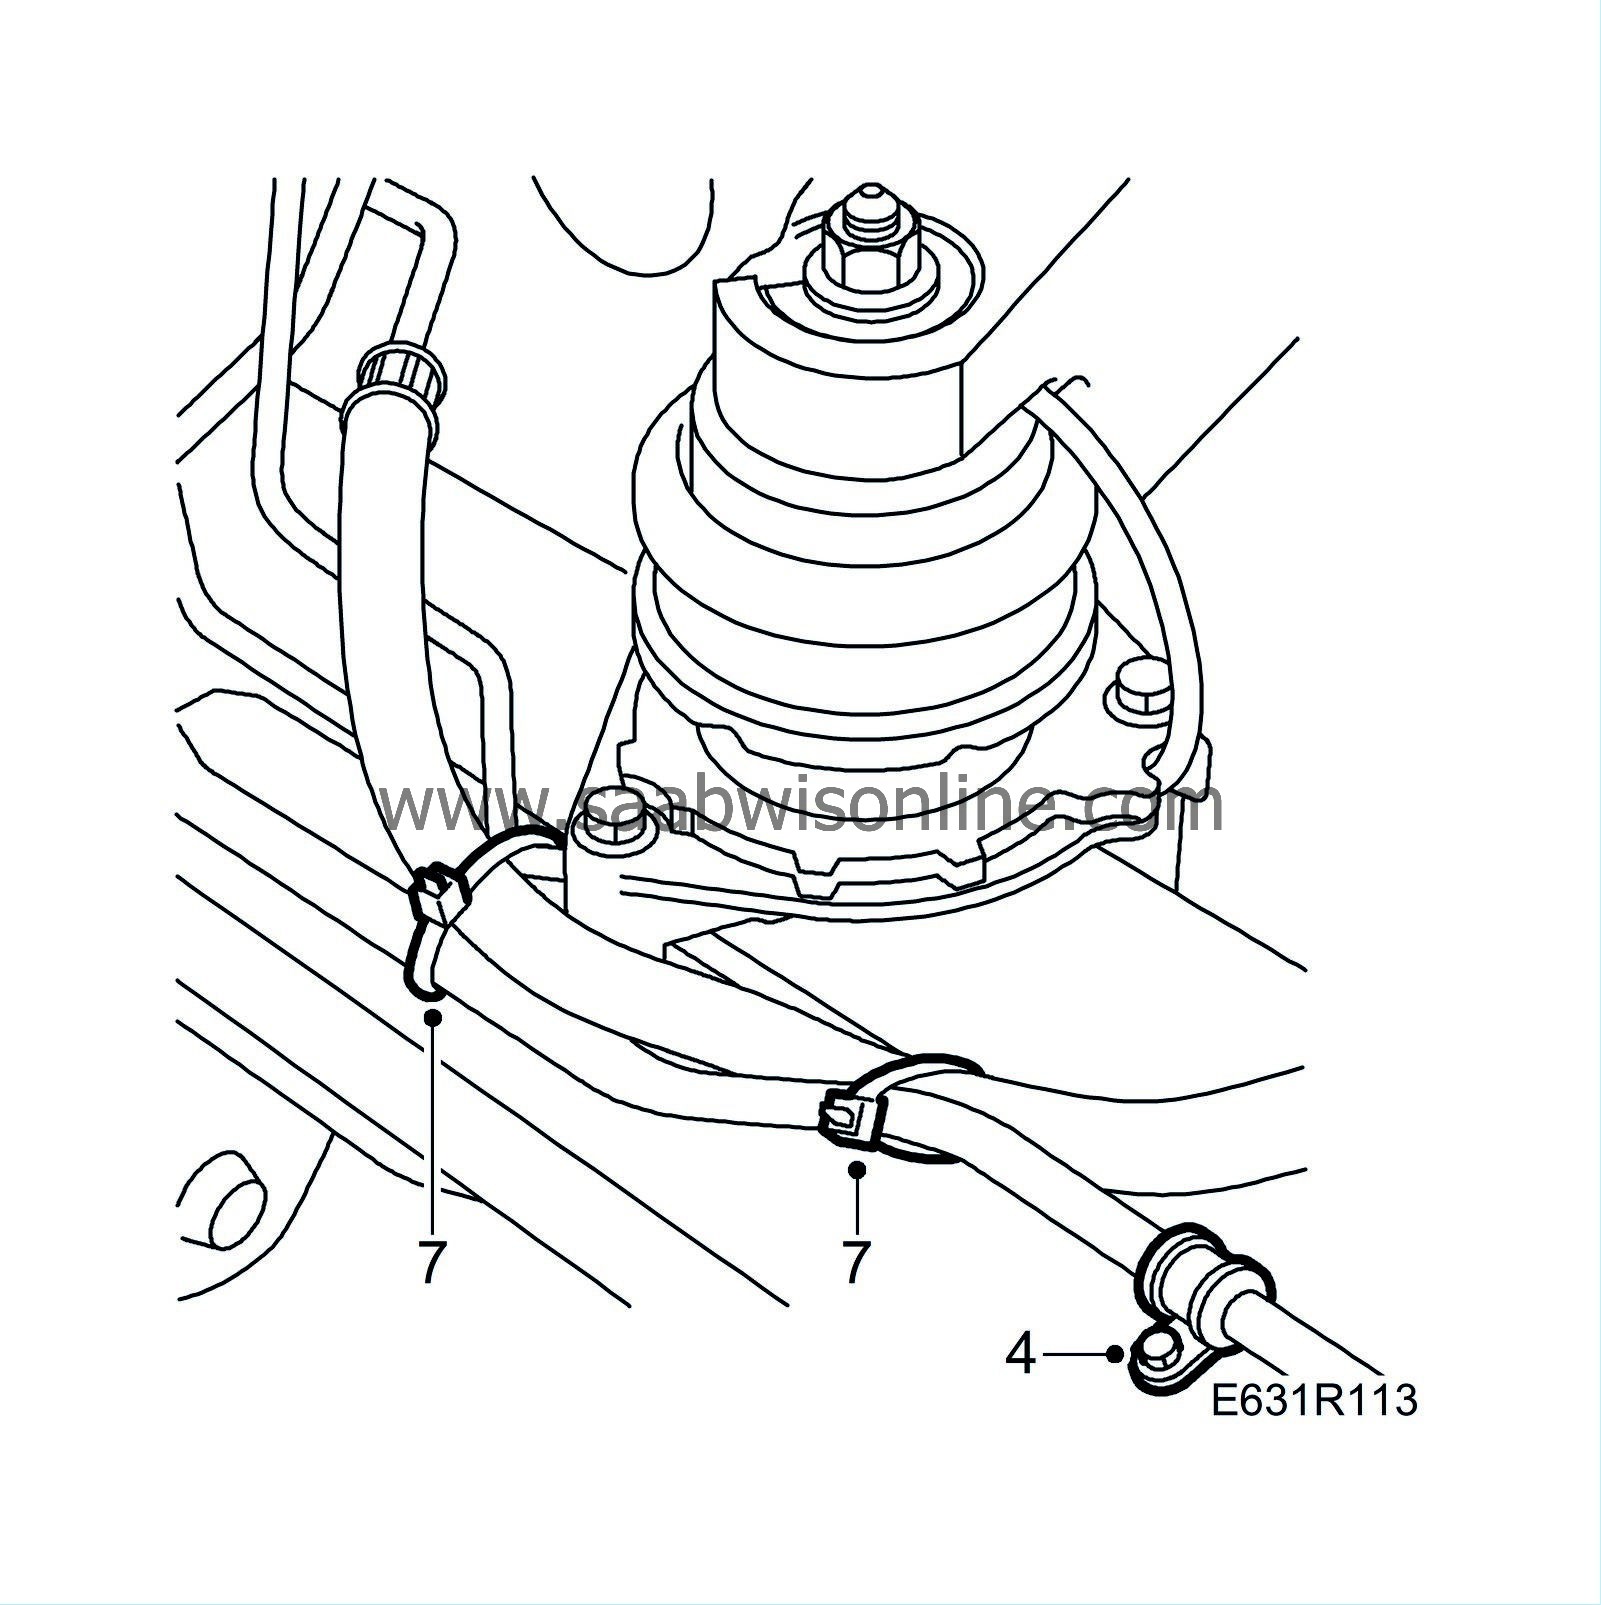
Fit the clamp securing the delivery pipe to the steering gear.
|
|
| 5. |
Thread the nuts and bolts (with washers) securing the steering gear but do not tighten them.
|
|
| 6. |
Tighten the delivery and return pipes connected to the valve body, holding them against turning. Secure them to the steering gear.
Tightening torque 30 Nm (25 lbf ft) |
|
| 7. |
Secure the return hose and oxygen sensor cables to the delivery pipe.
|
|||||||
| 8. |
Tighten the steering gear retaining bolts.
Tightening torque 95 Nm (70 lbf ft) |
|
| 9. |
Position the engine cushion and thread the bolts.
|
|
| 10. |
Raise the subframe and thread the bolts in the centre mountings.
|
|
| 11. |
Thread the bolts for the rear subframe mountings and the reinforcements.
|
|
| 12. |
Thread the bolts for the reinforcements by the rear subframe mounting.
|
|
| 13. |
Tighten the centre mountings.
Tightening torque 100 Nm +45° (75 lbf ft +45°) 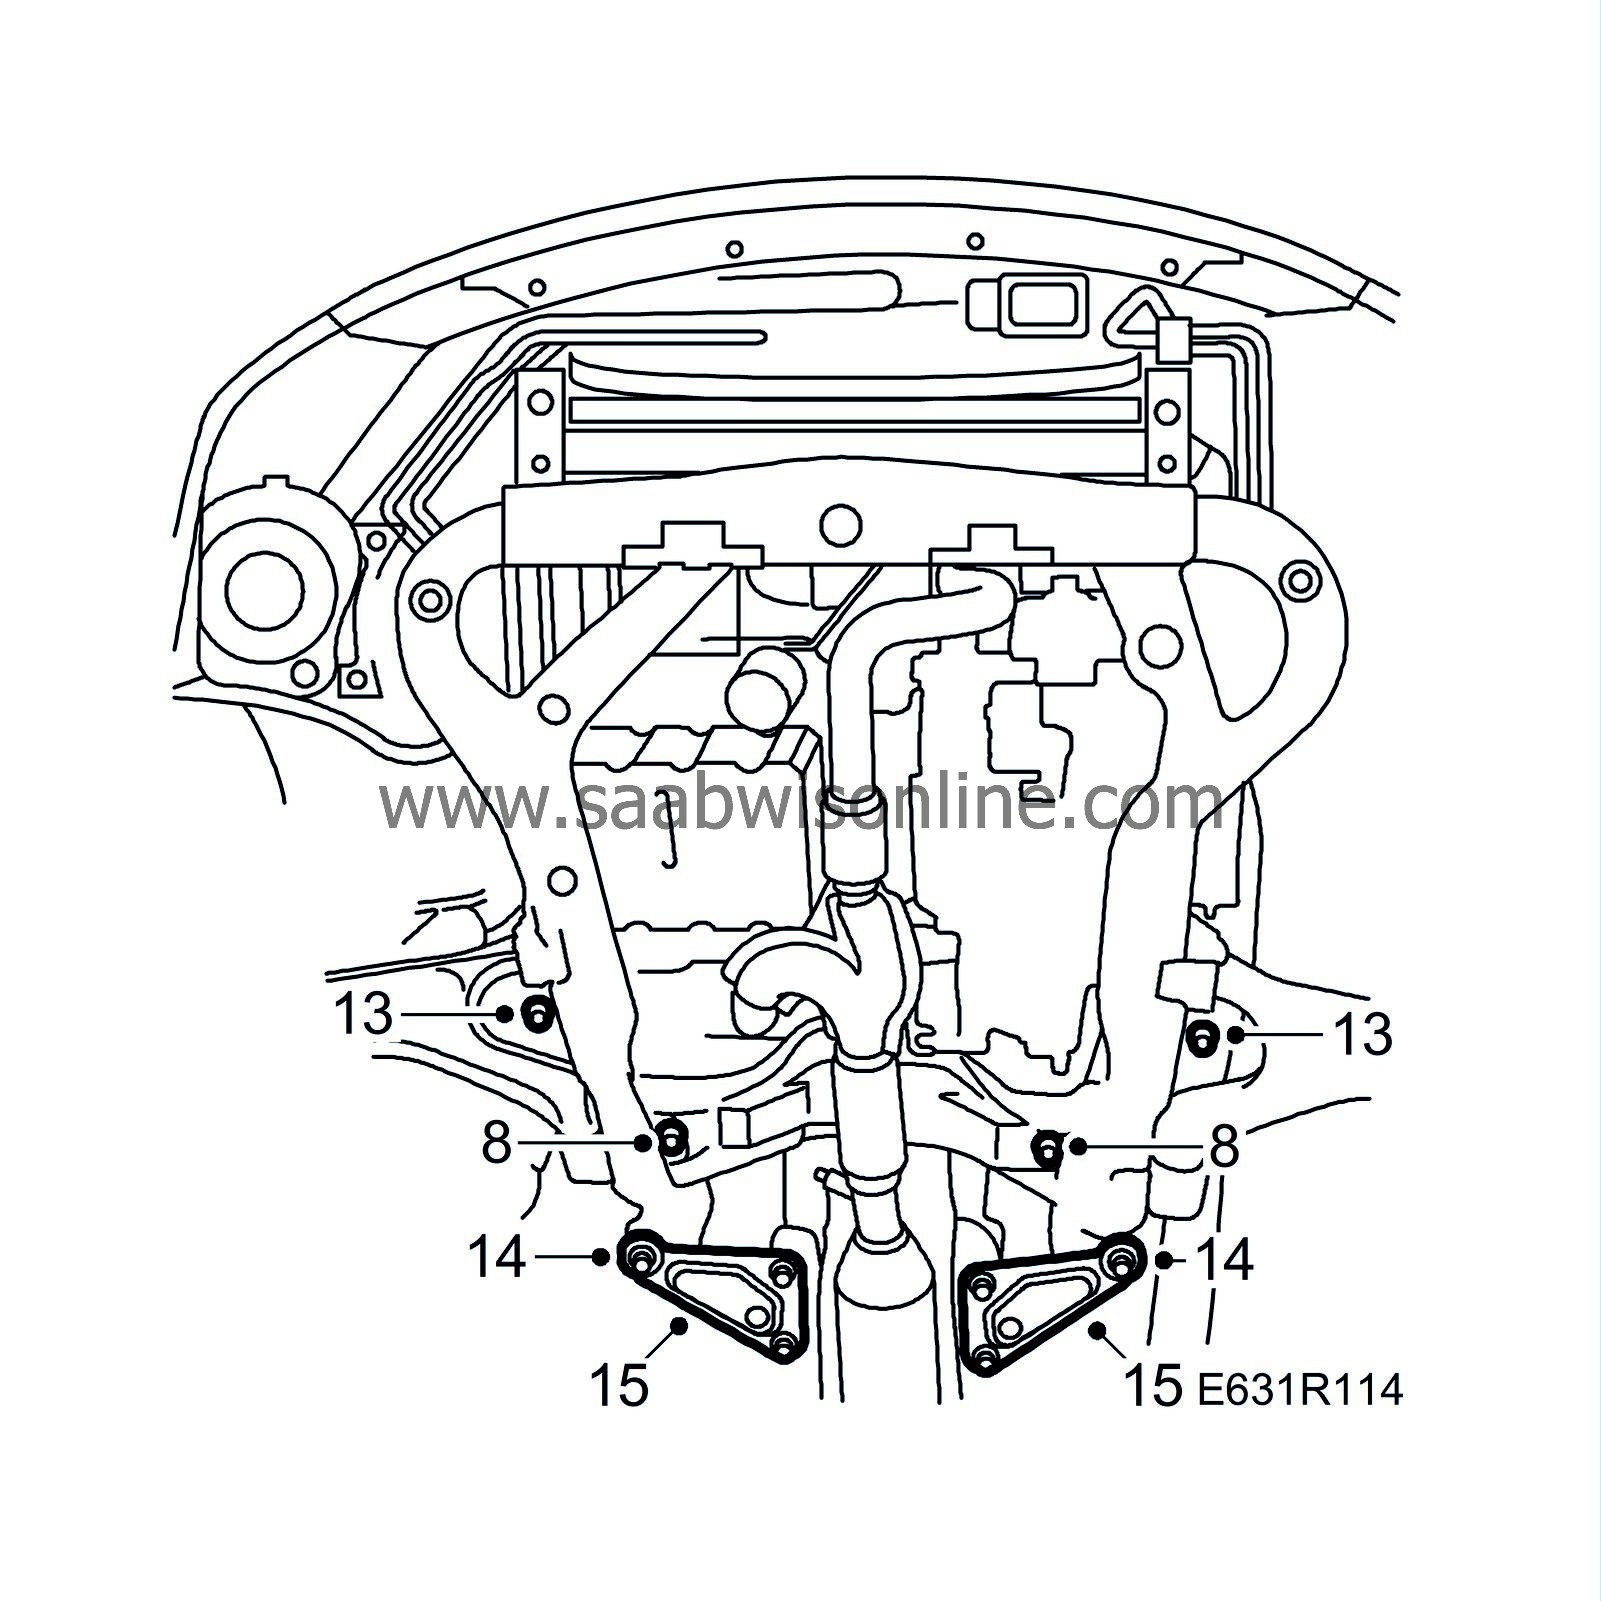
|
|
| 14. |
Tighten the rear subframe mountings and the reinforcements.
Tightening torque 100 Nm +45° (75 lbf ft +45°) |
|
| 15. |
Tighten the reinforcement at the subframe's rear attachment point.
Tightening torque 65 Nm (50 lbf ft) |
|
| 16. |
Connect the exhaust pipe to the rear exhaust manifold.
Tightening torque 40 Nm (30 lbf ft) 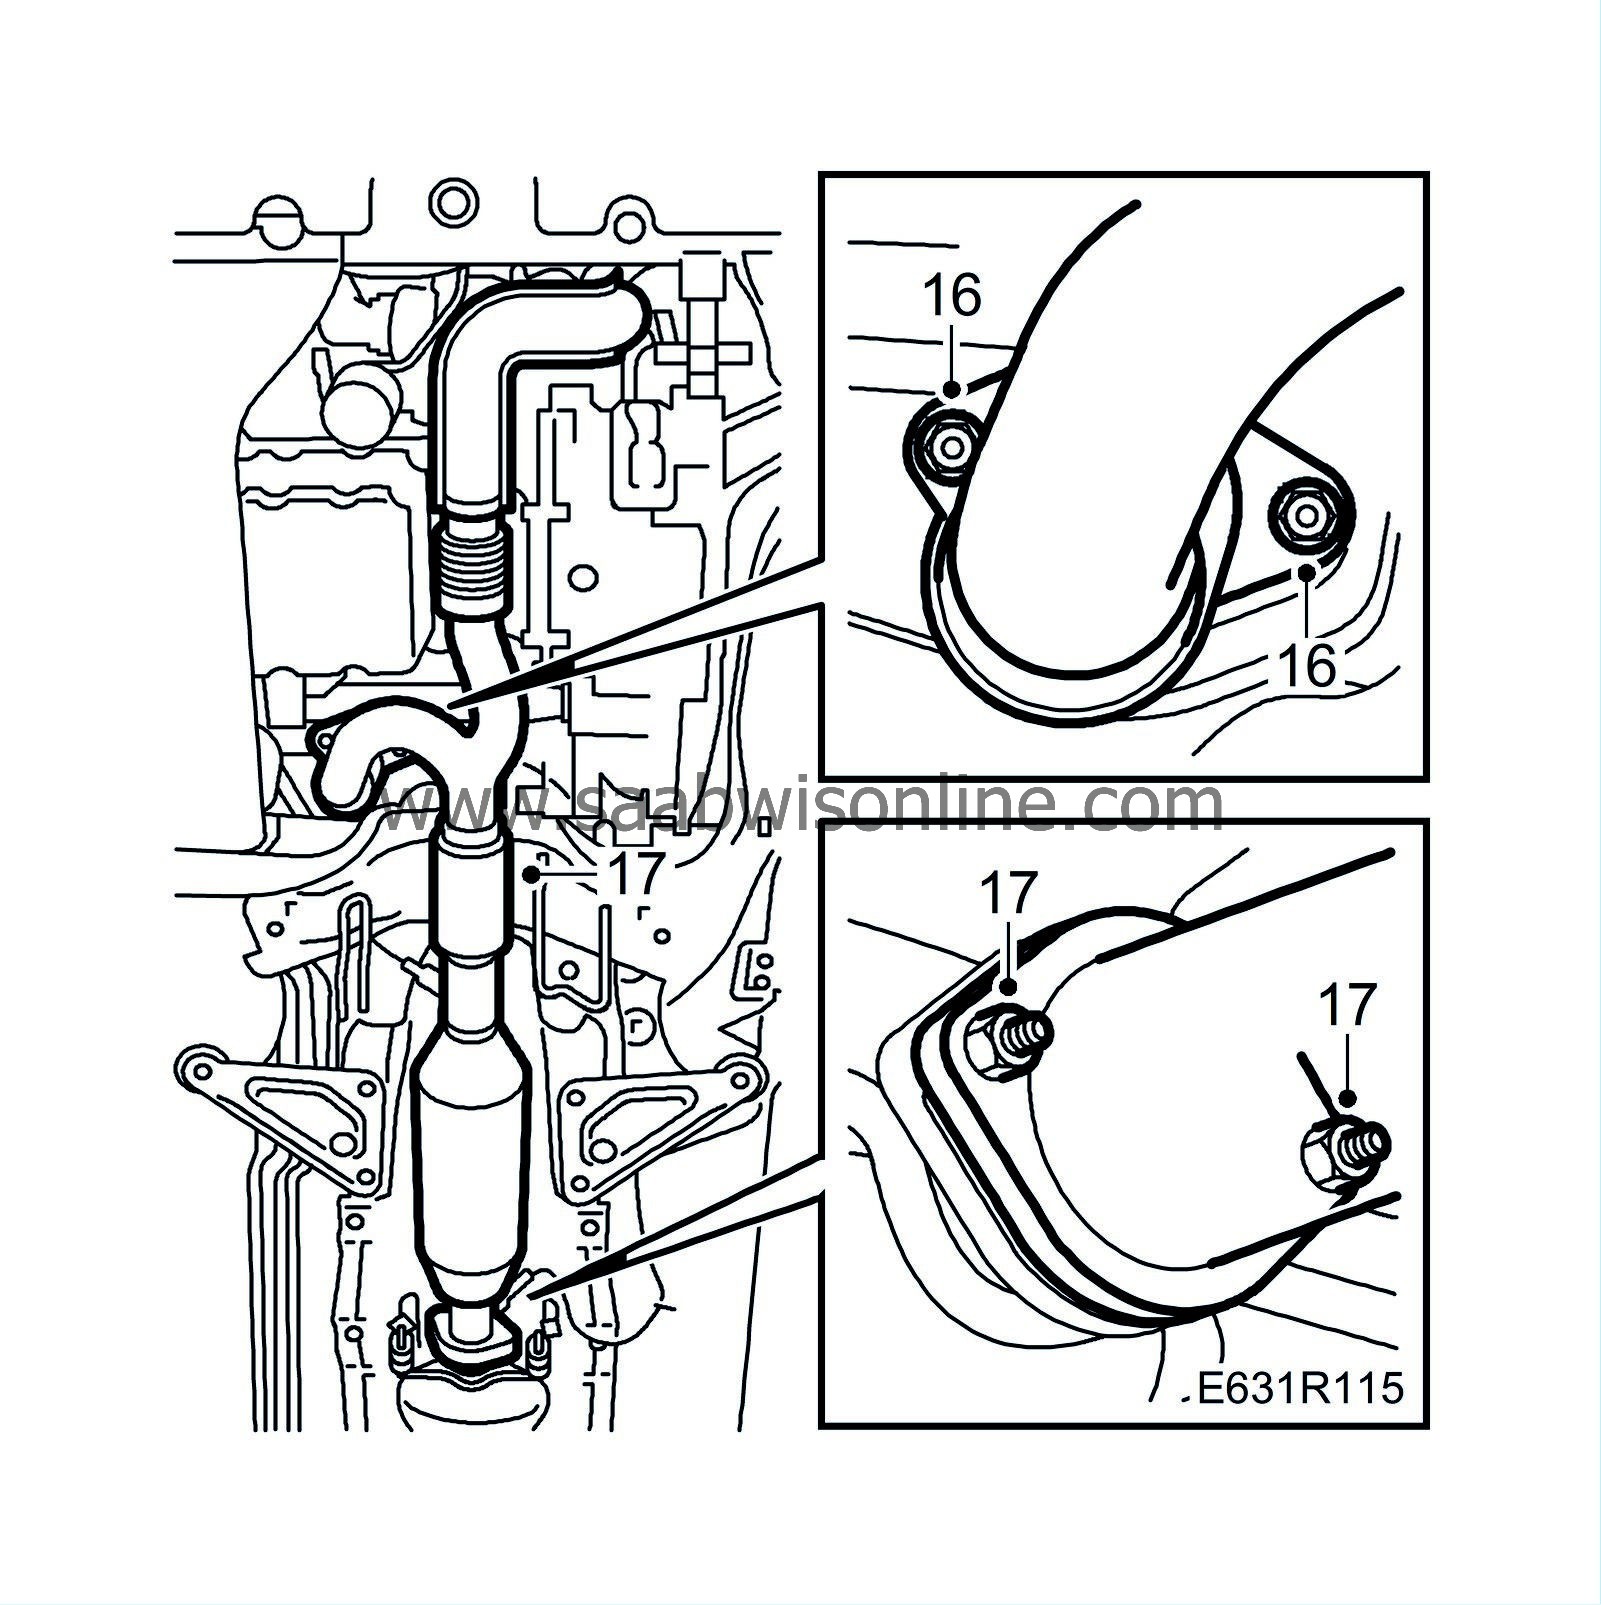
|
|
| 17. |
Fit the exhaust pipe to the catalytic converter and silencer.
|
|
| 18. |
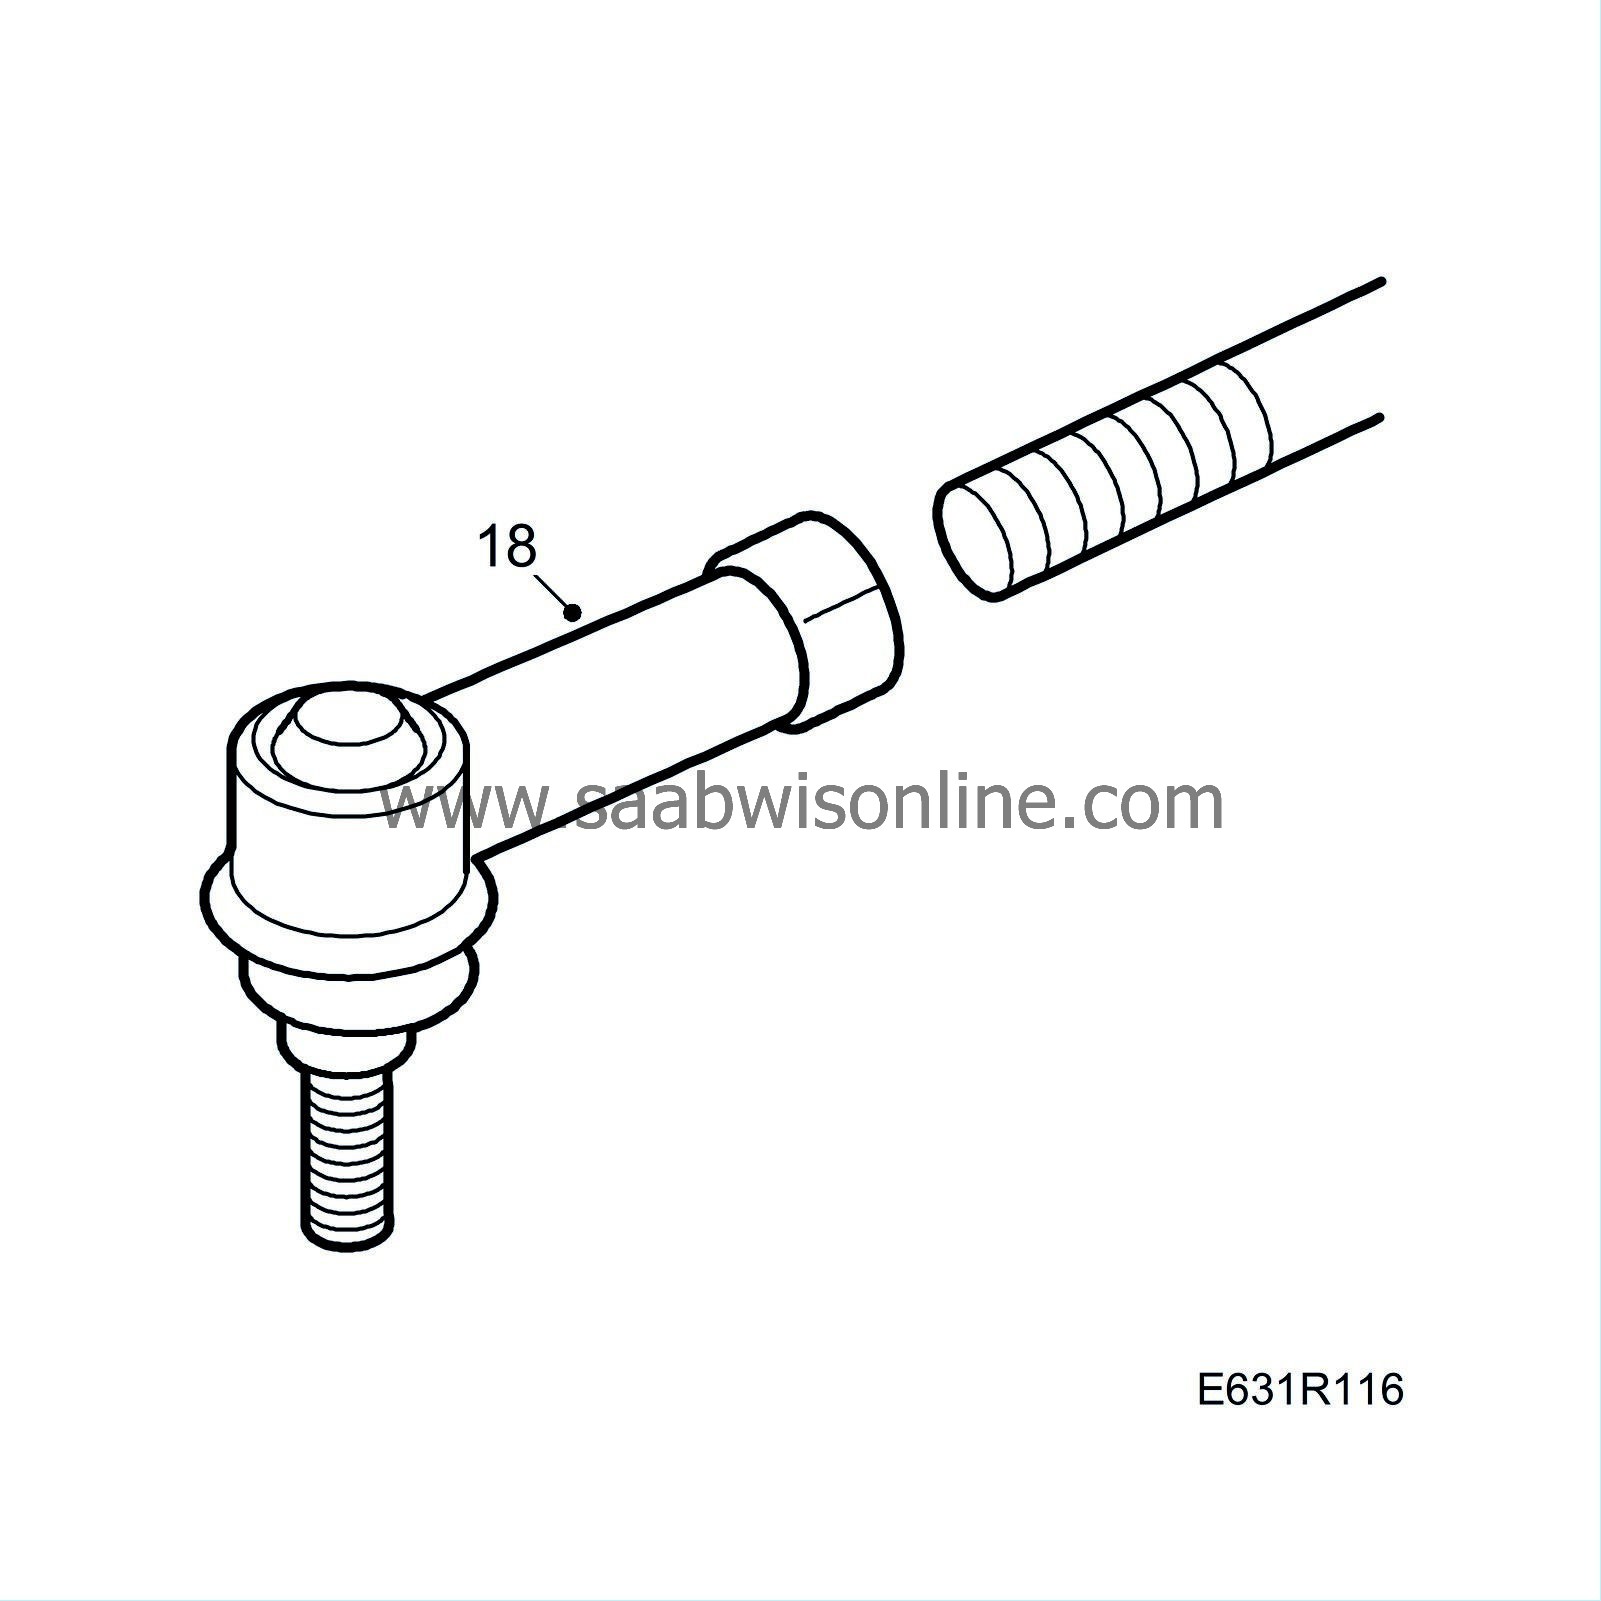
Screw the track-rod ends on the track rods the same number of turns as when they were removed, but do not tighten the locknuts.
|
|
| 19. |
Fit the track-rod ends to the steering swivel members using new nuts.
Tightening torque 60 Nm (45 lbf ft) 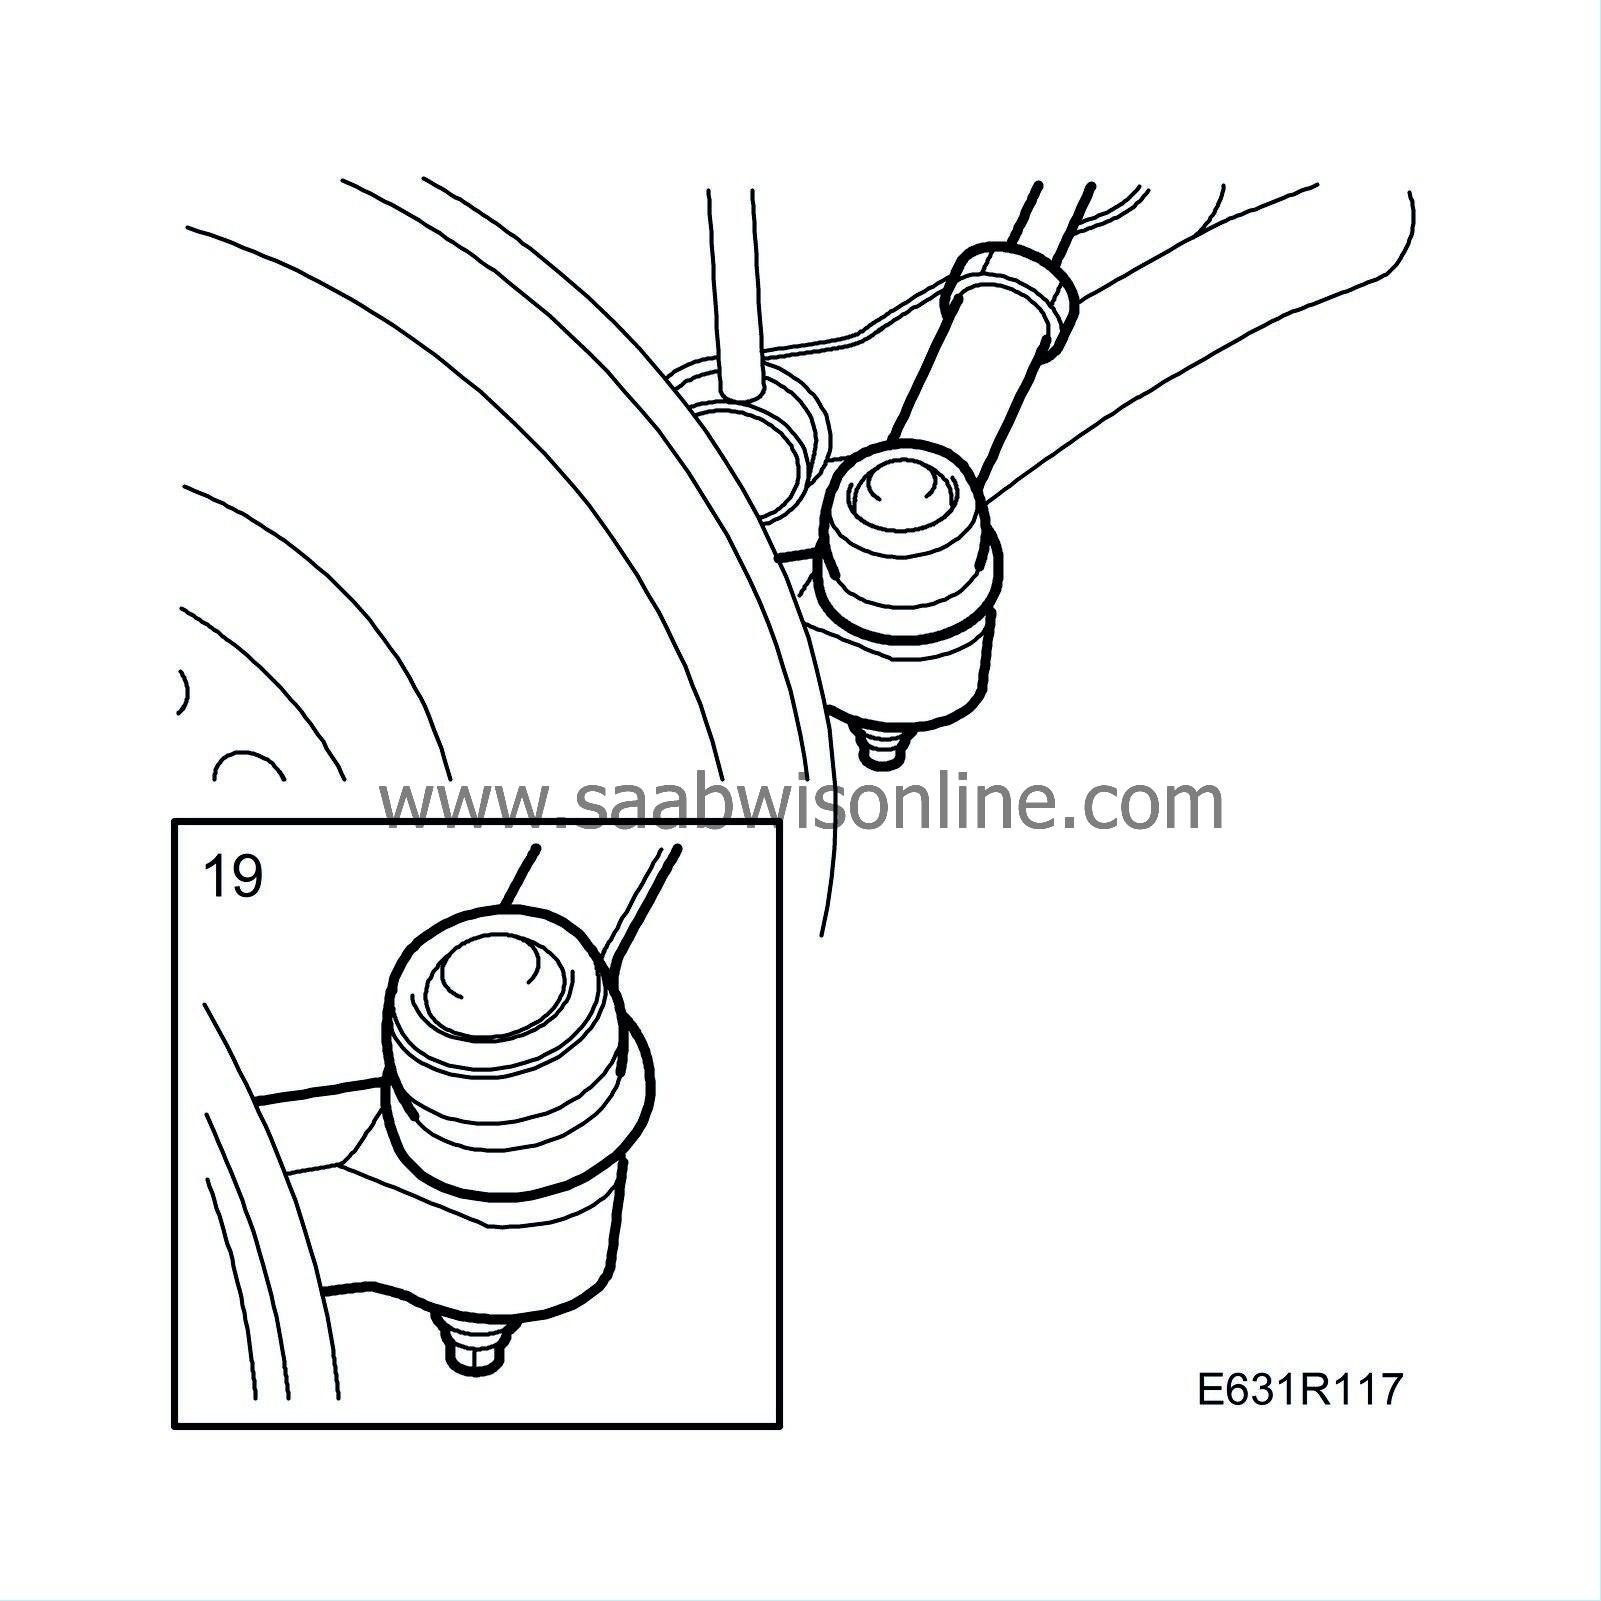
|
|
| 20. |
Fit the wheel. See
Wheels
.
Tightening torques aluminium wheel 110 Nm (81 lbf ft) steel wheel 50 Nm + 2x90°, max. 110 Nm (37 lbf ft + 2x90°, max. 81 lbf ft) Lower the car to the floor. |
|
| 21. |
Lower the engine onto the rear engine cushion and remove the lifting beam.
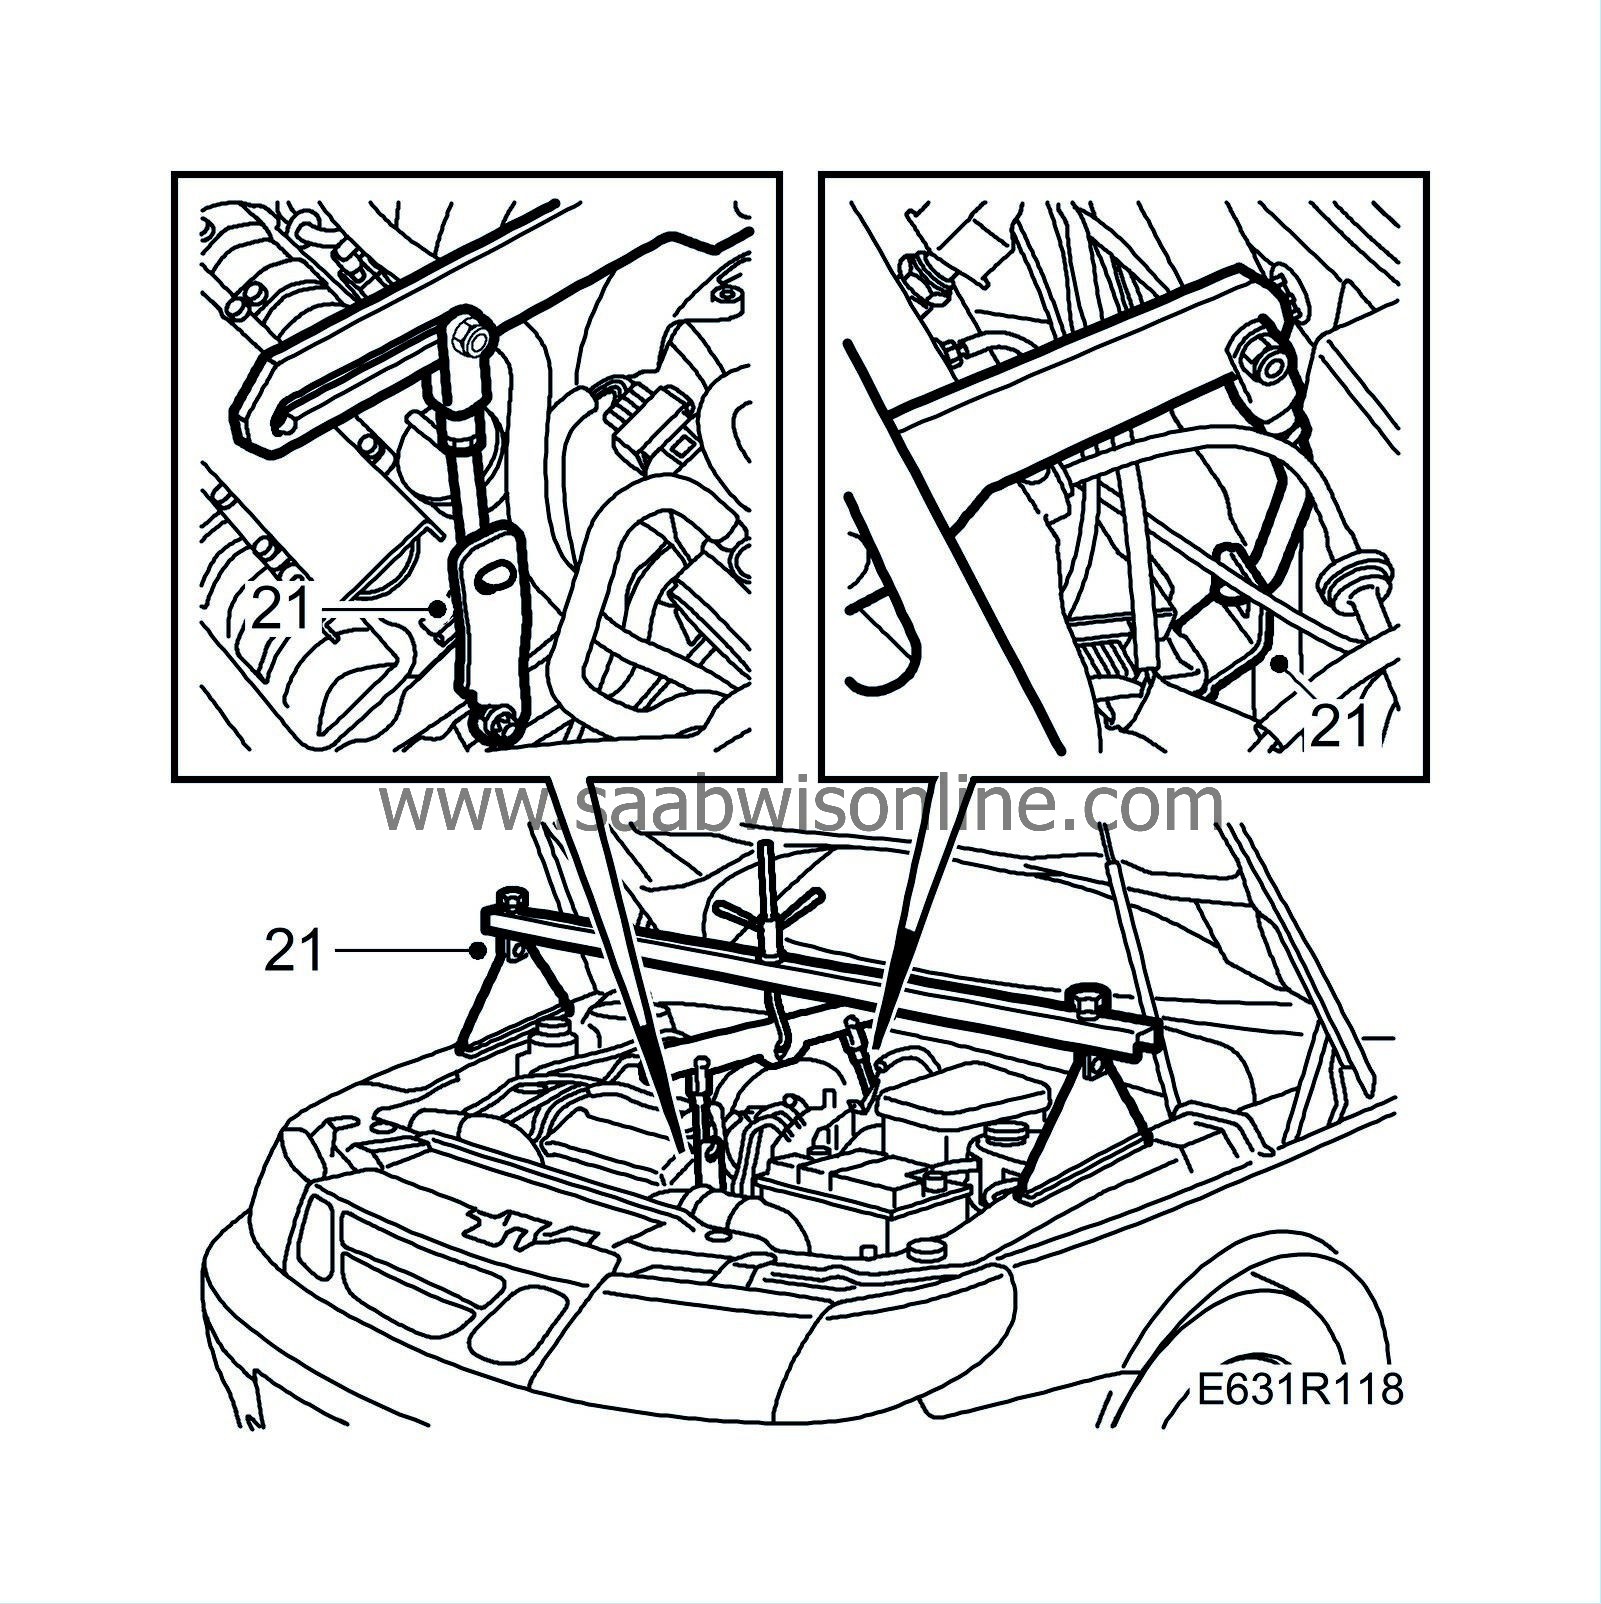
|
|
| 22. |
Tighten the bolts securing the rear engine cushion to the subframe.
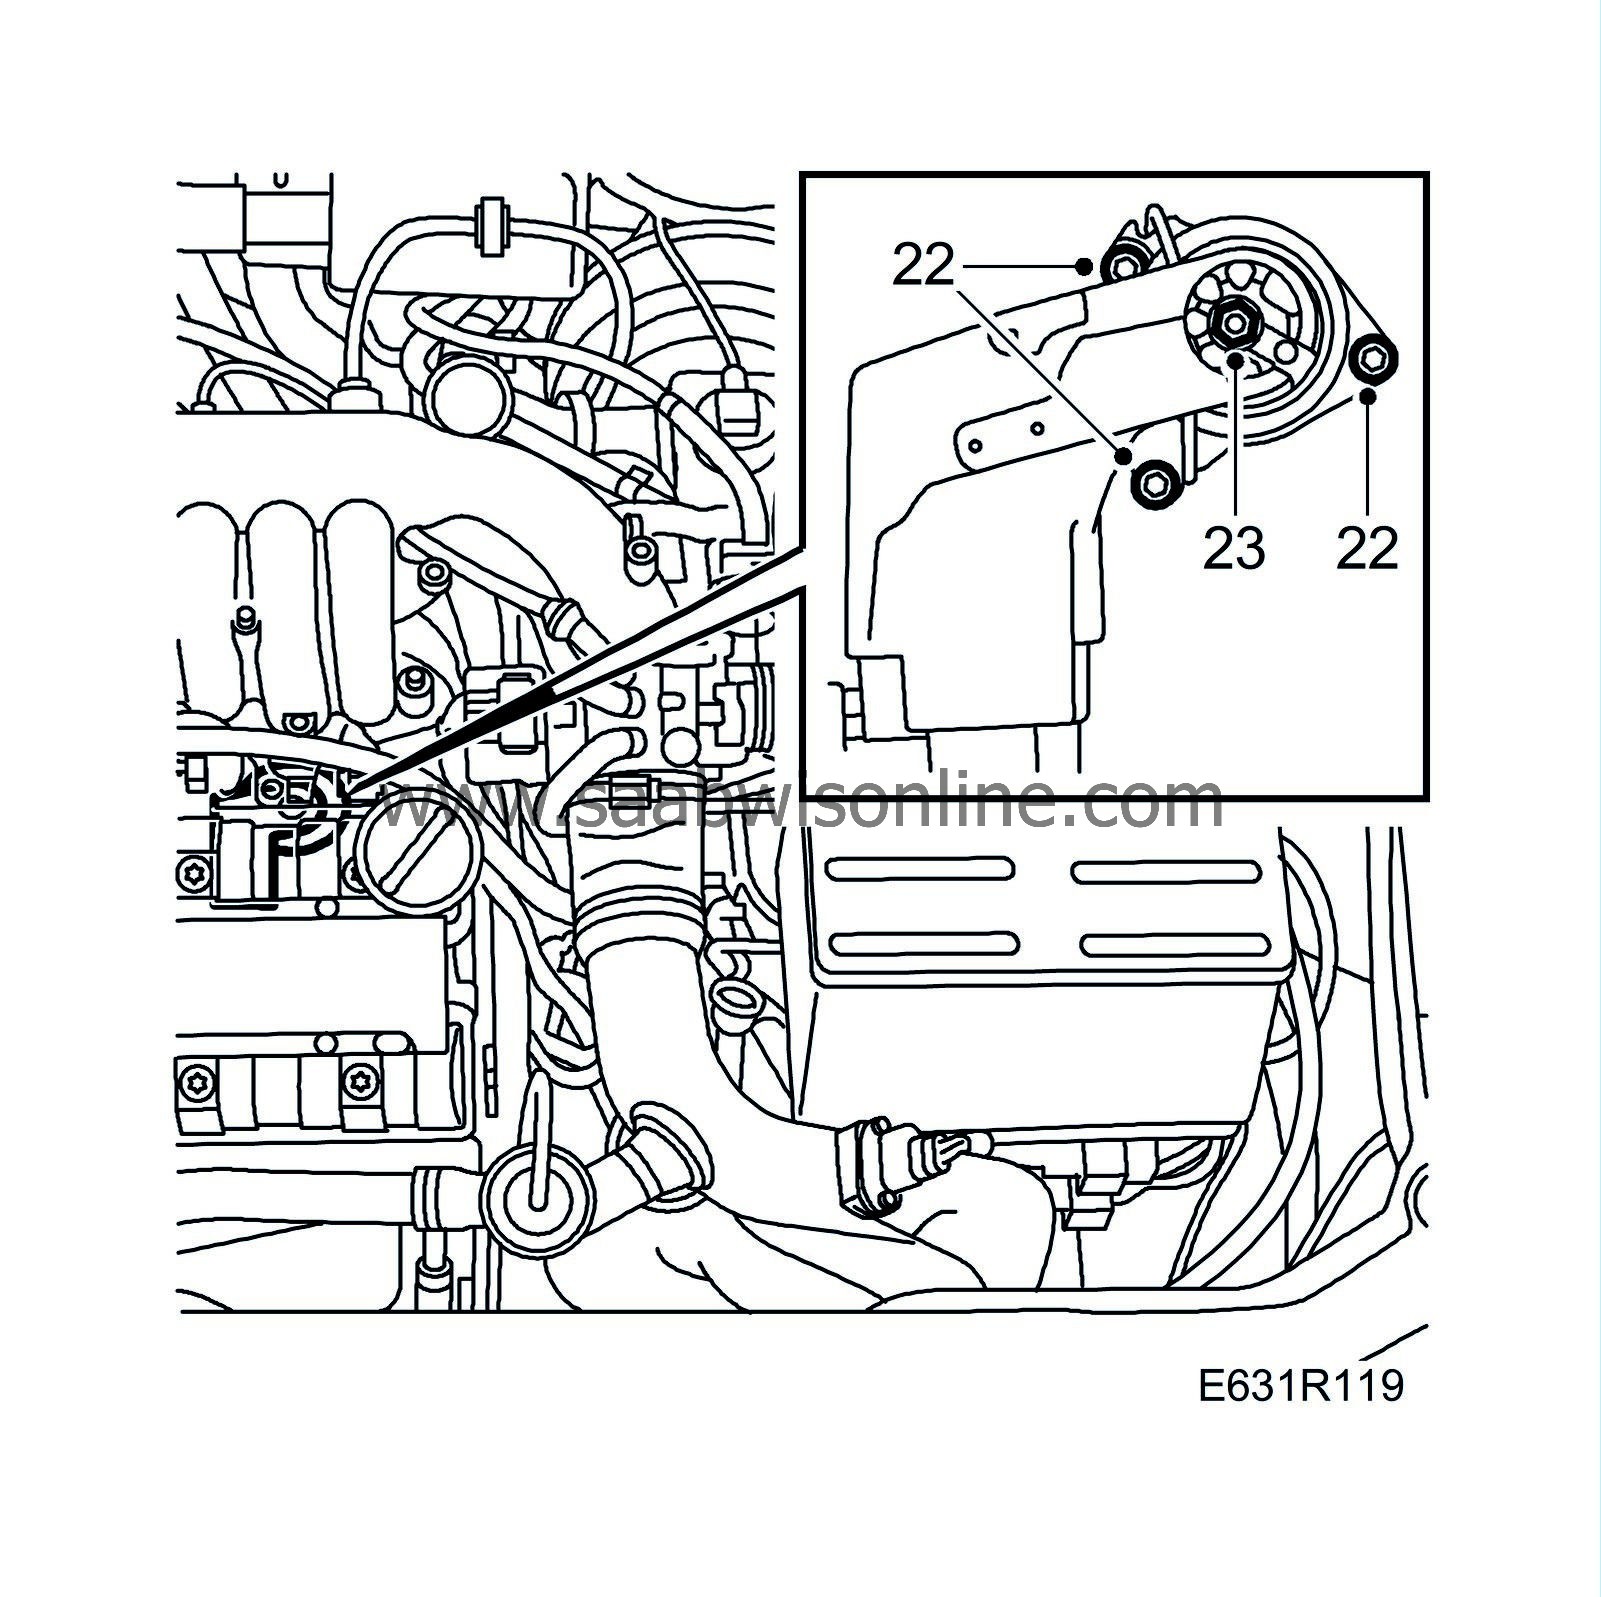
Tightening torque 25 Nm (20 lbf ft) |
|
| 23. |
Tighten the bolt securing the rear engine cushion to the engine mounting.
Tightening torque 50 Nm (35 lbf ft) |
|
| 24. |
Tighten the two bolts at the top of the exhaust pipe flange.
Tightening torque 25Nm (18 lbf ft) 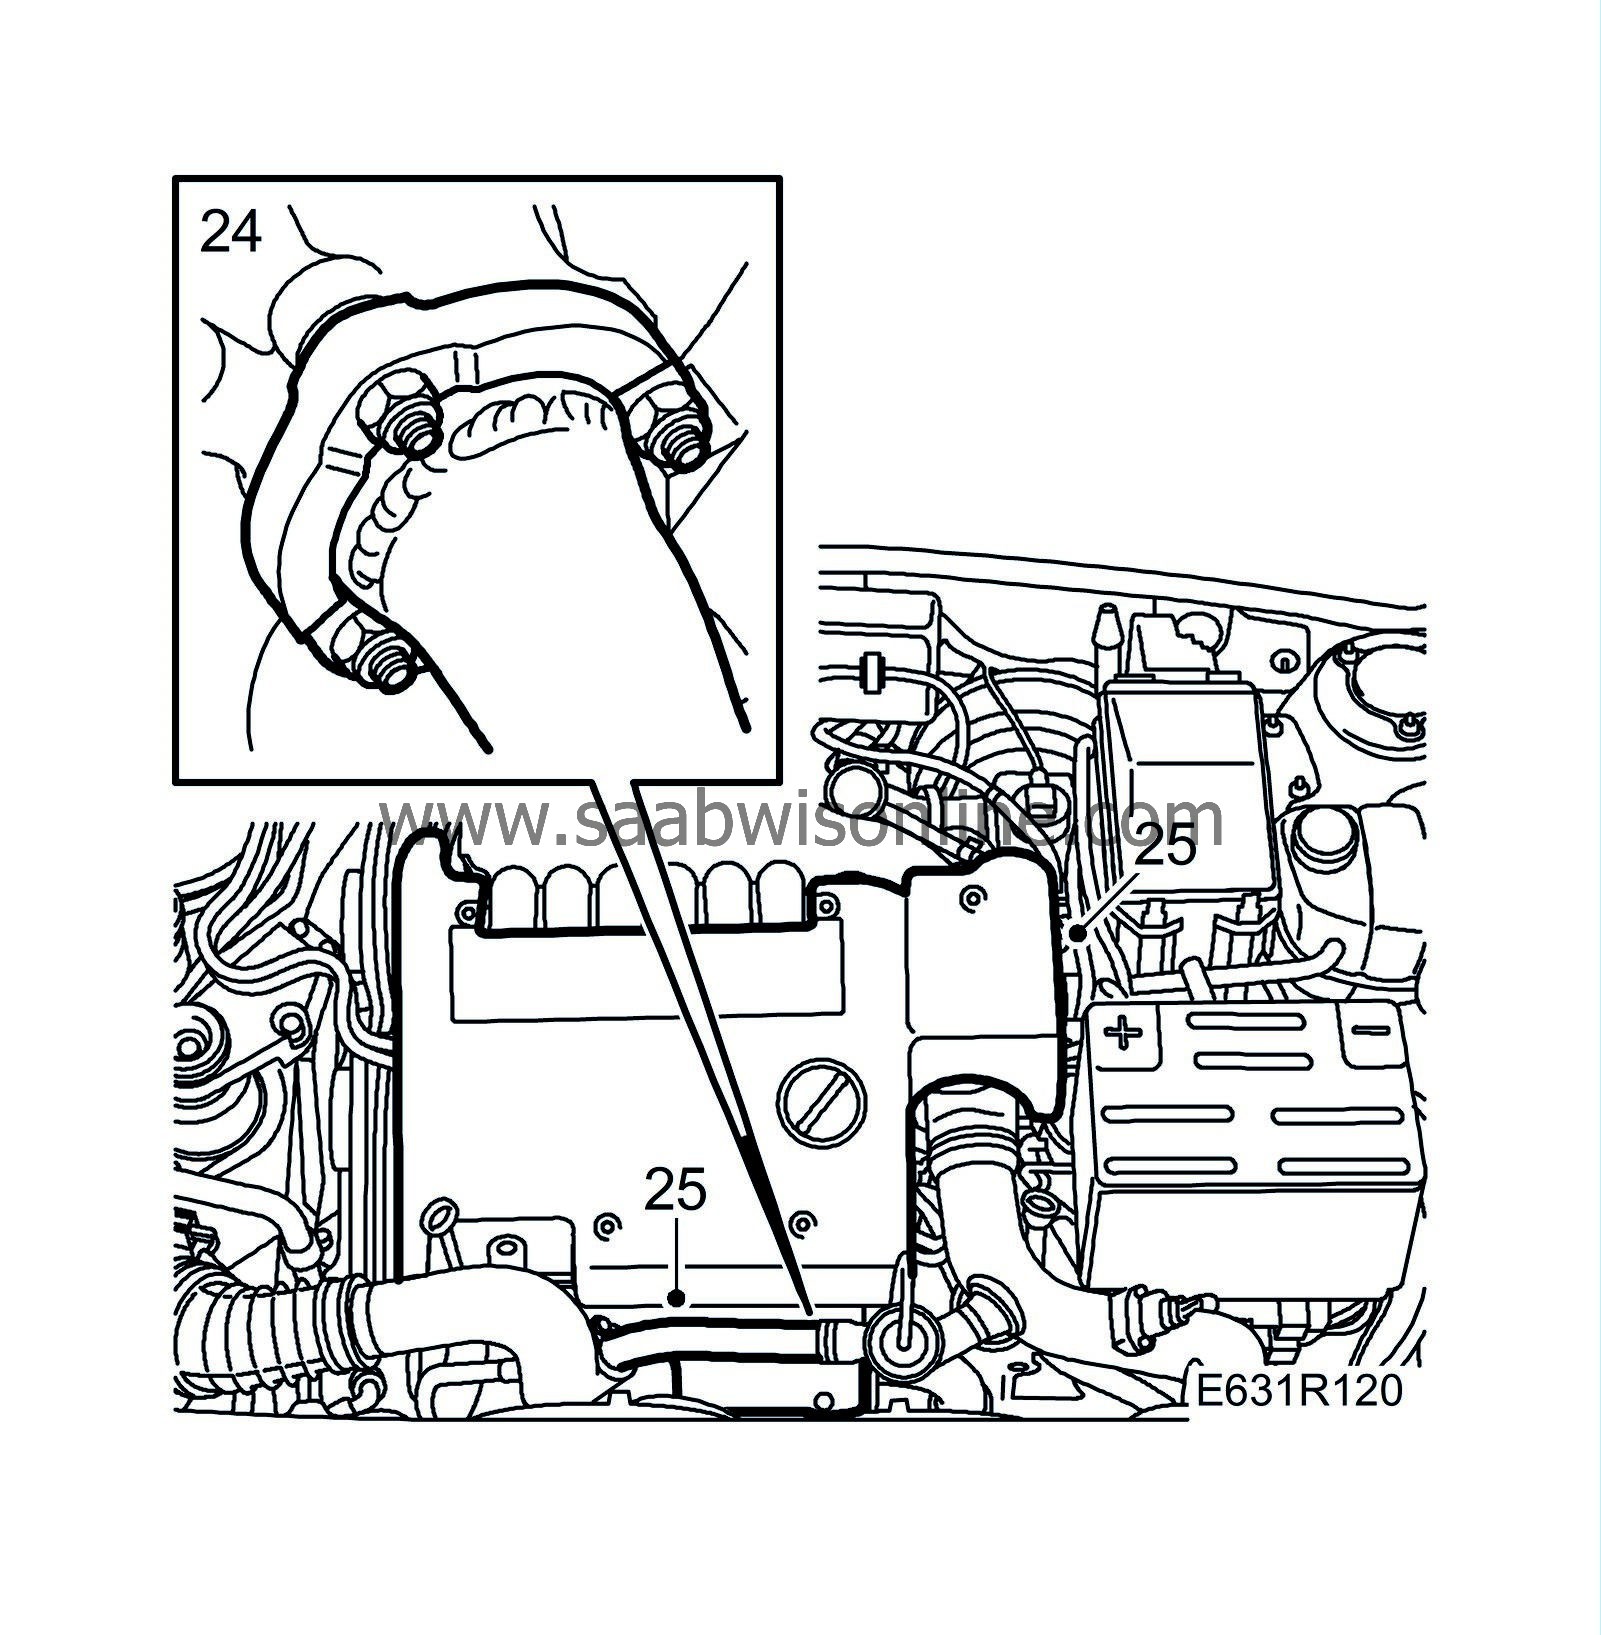
|
|
| 25. |
Fit the engine cover.
|
|
| 26. |
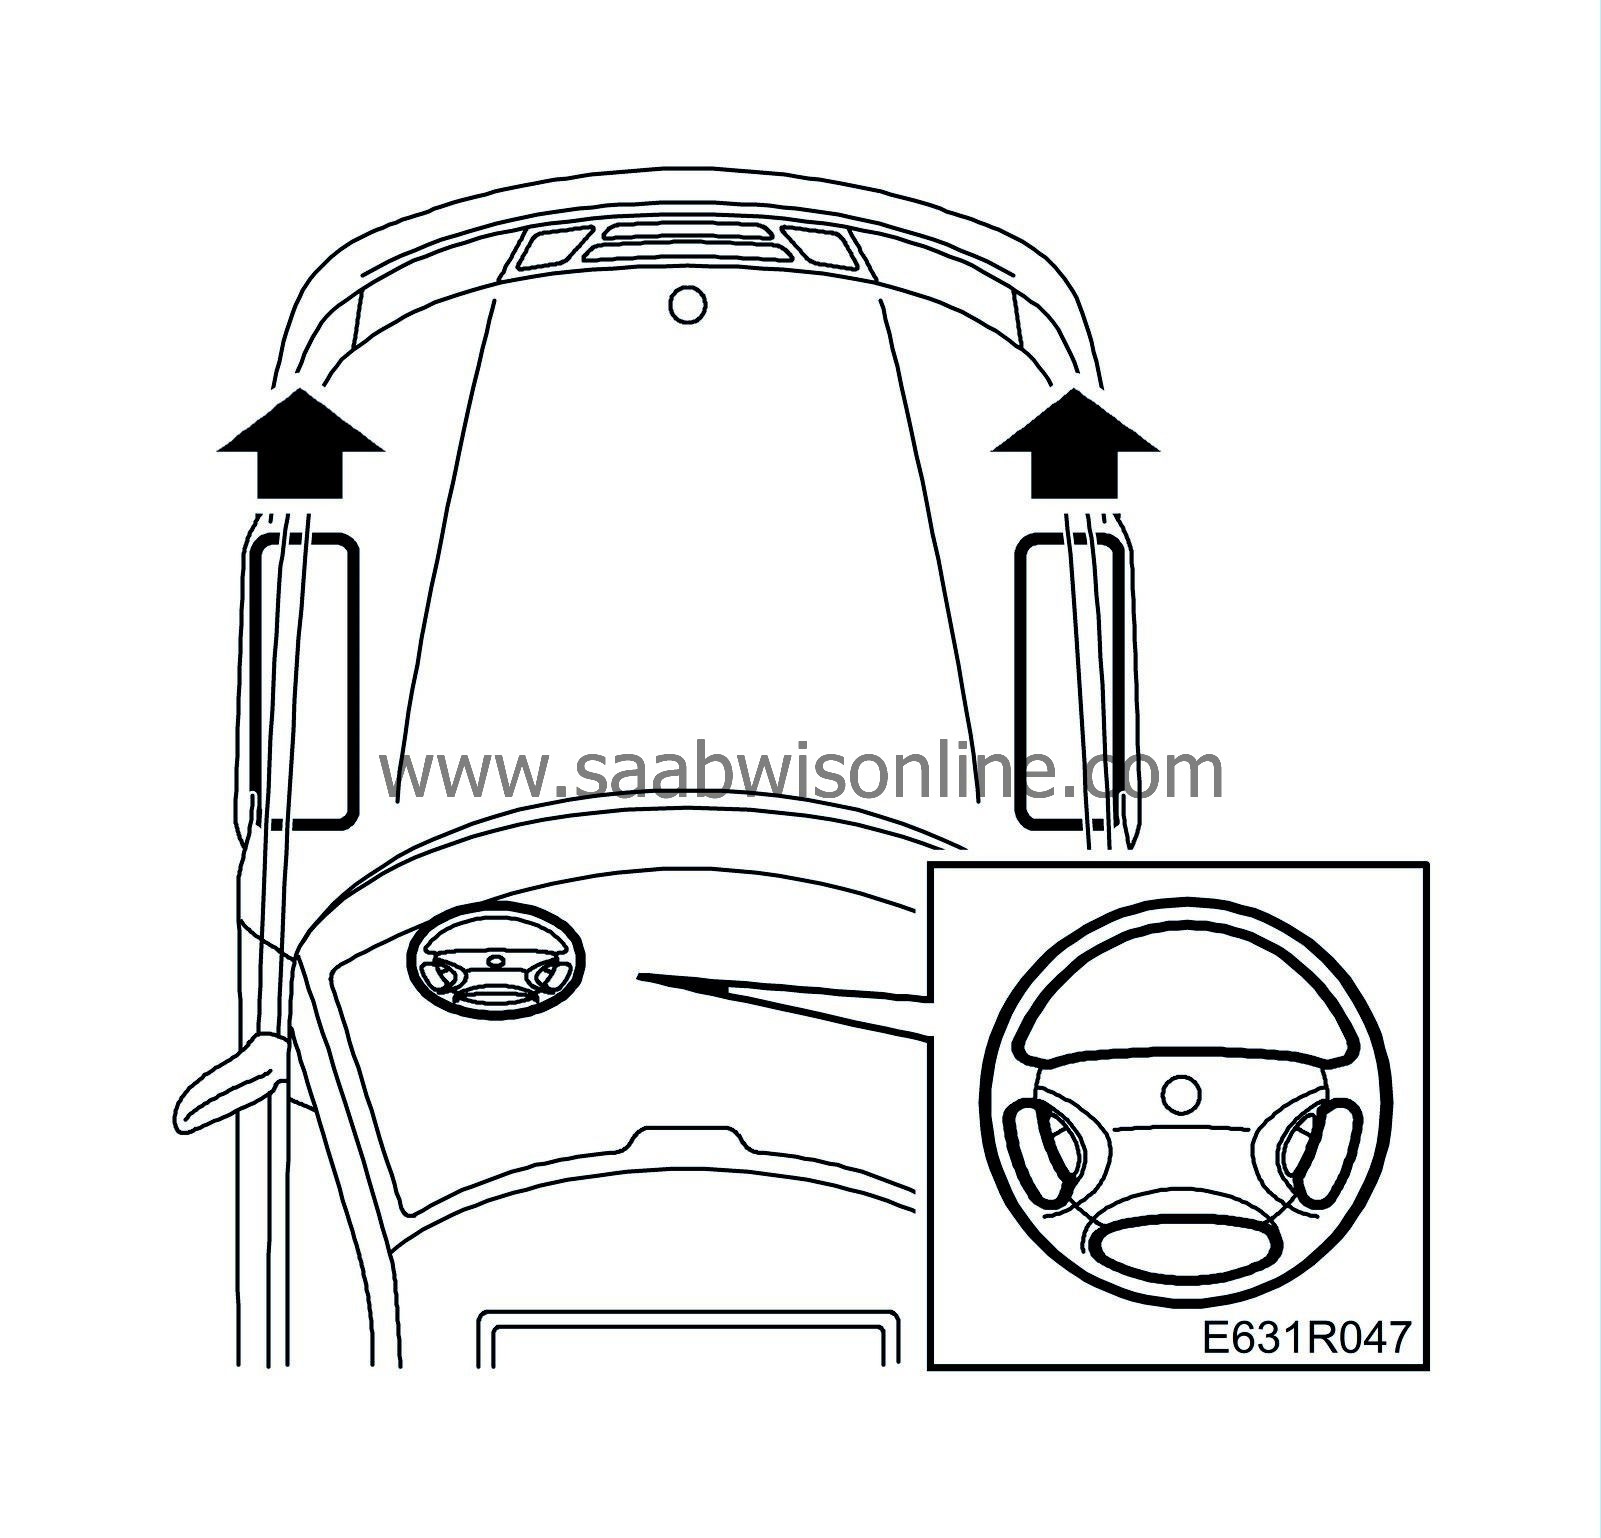
Make sure the front wheels are in the straight-ahead position.
|
|
| 27. |
Align the steering column shaft with the steering gear and tighten the bolt securing them to each other.
Tightening torque 30 Nm (25 lbf ft) 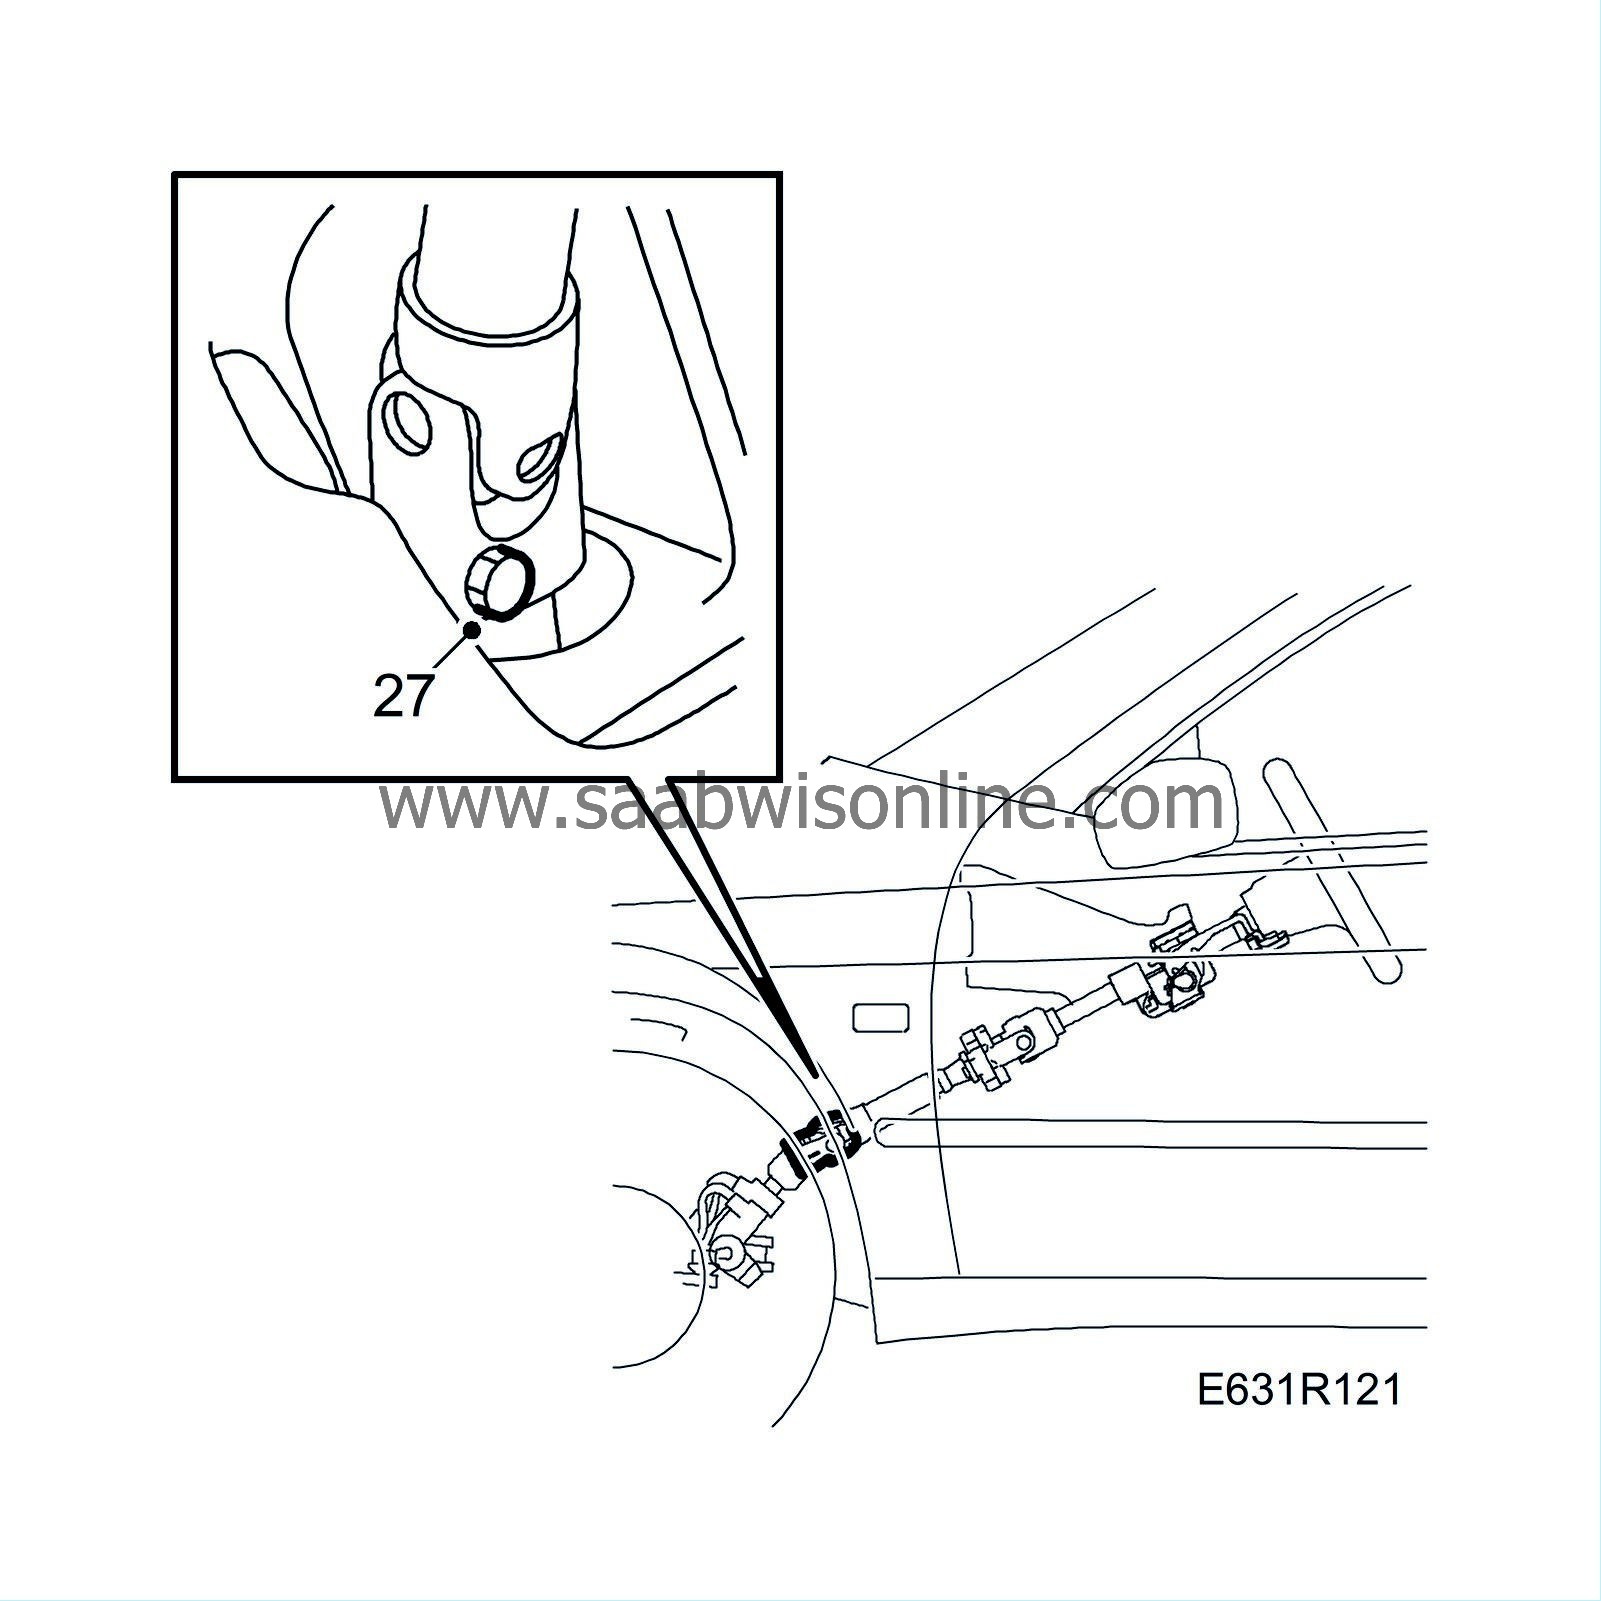
|
|||||||||||||||
| 28. |
Remove the tape or other means used to prevent the steering wheel from moving.
|
|
| 29. |
Fill the power steering fluid reservoir with fluid and lift the front assembly so that the wheels are clear of the floor.
Use a power steering fluid specified in Lubricants. |
|
| 30. |
Start the engine and allow it to run for
max. 5 seconds
.
|
|||||||||
| 31. |
Top up the power steering fluid.
|
|
| 32. |
Start the engine, turn the steering wheel full lock right and left 2-3 times. Turn off the engine and top up with fluid.
|
|
| 33. |
Start the engine and turn the steering wheel full lock right and left 2-3 times. Turn off the engine and top up with fluid.
|
|
| 34. |
Check the toe angle and adjust as necessary, see Adjusting front toe angle.
|
|
| 35. |
Tighten the track rod locknuts.
Tightening torque 70 Nm (55 lbf ft) 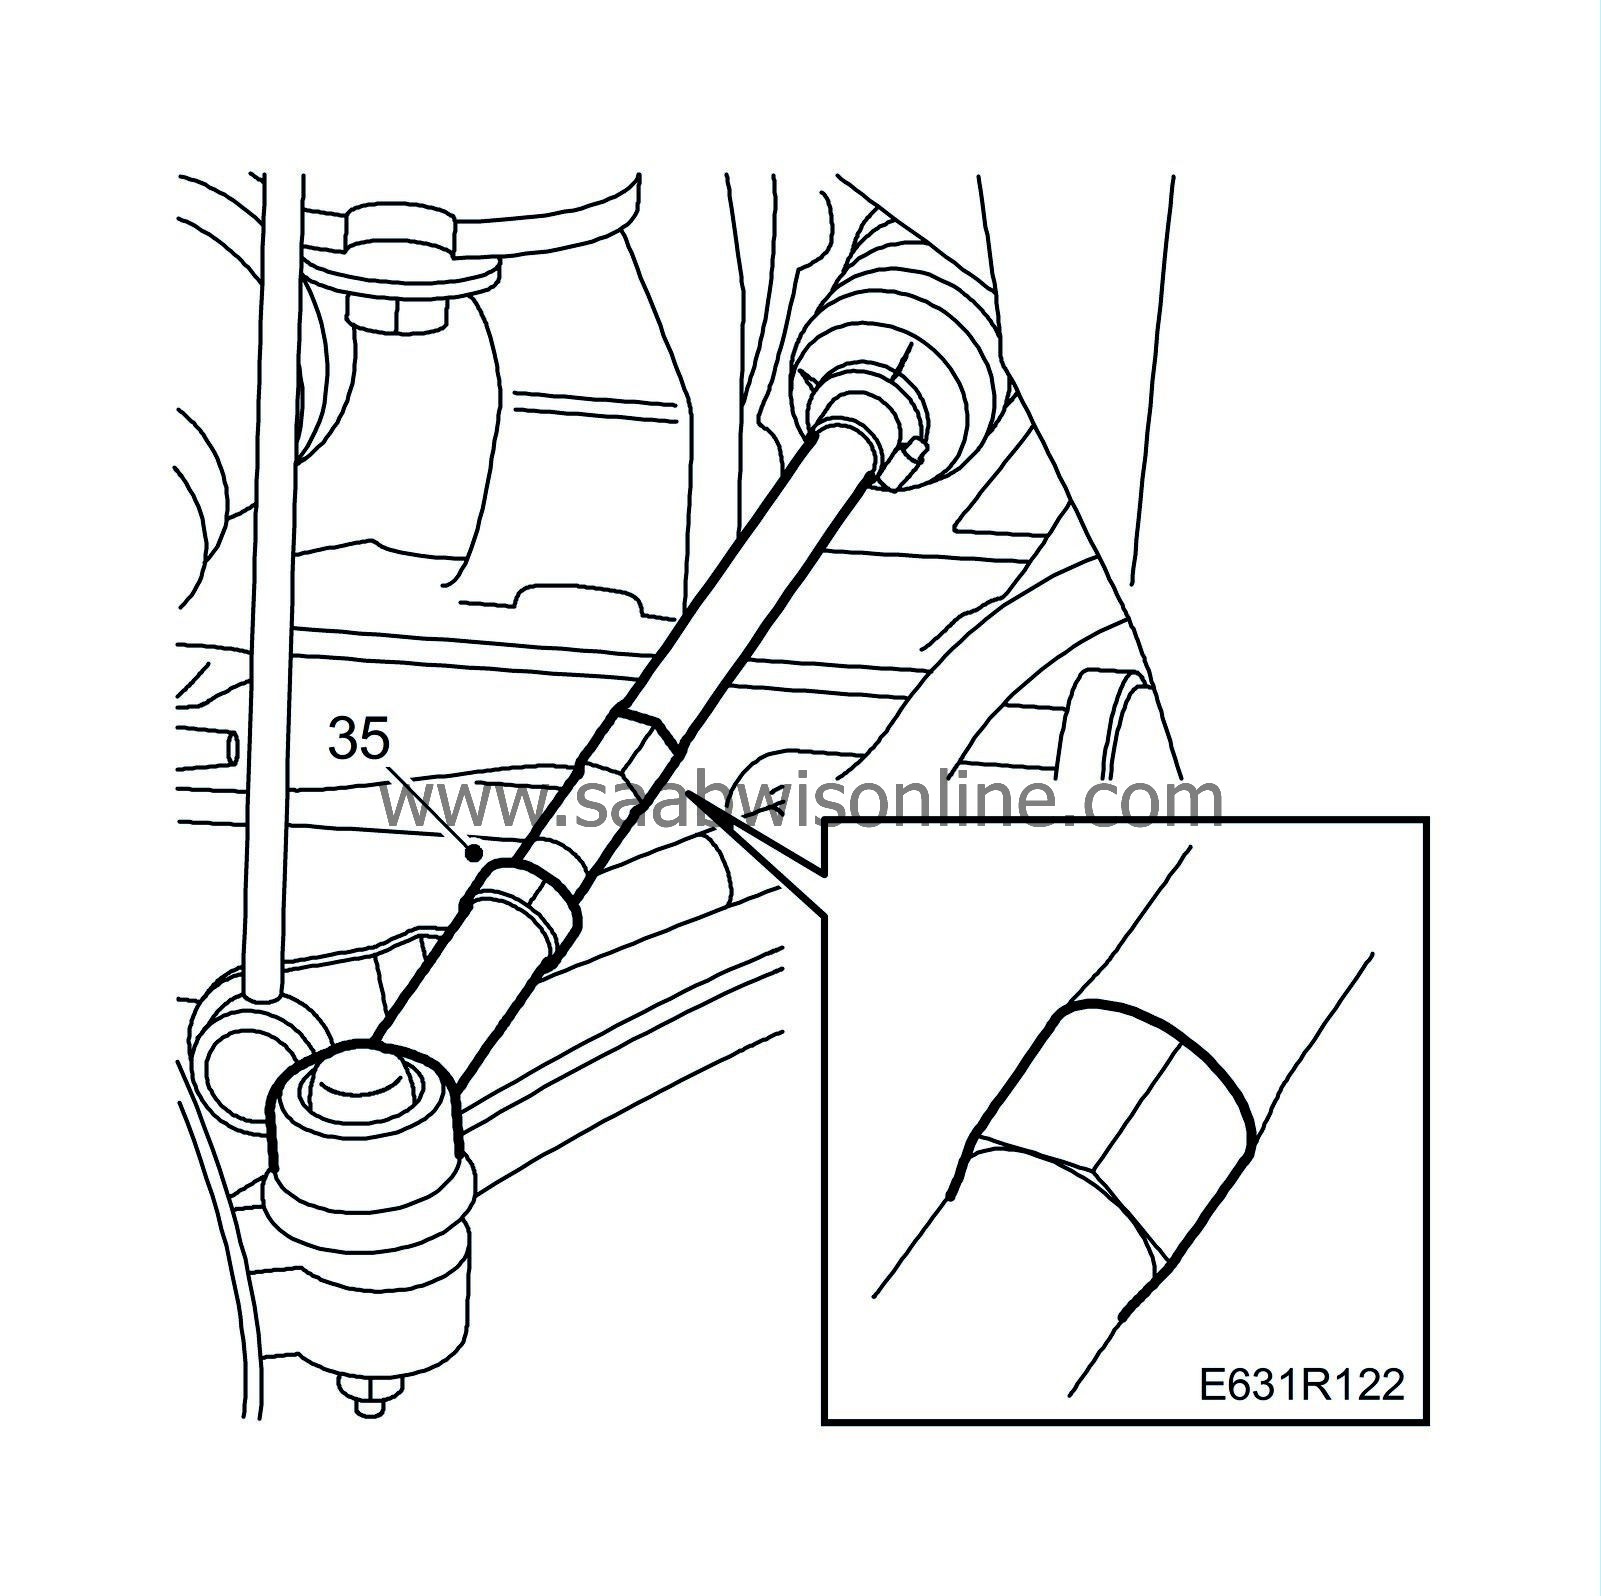
|
|
| 36. |
Road test the car to check the steering.
|
|
| 37. |
Check for any leaks and check the oil level.
|
|

 Warning

