To dismantle the engine
| To dismantle the engine |
| 1. |
Remove the bracket for the engine wiring harness.

|
|
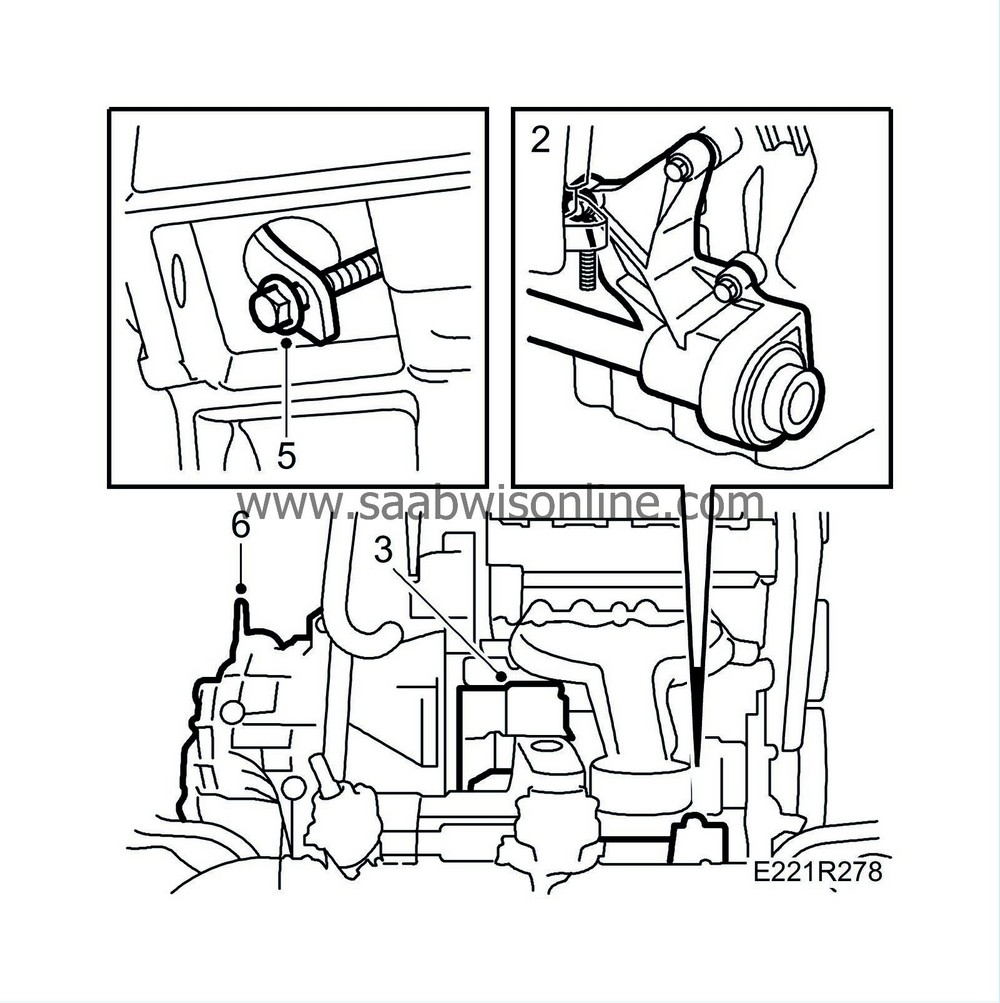
| 2. |
Remove the support bearing bracket with pipe and inboard drive shaft universal joint.
|
|
| 3. |
Disconnect the starter motor and remove same.
|
|
| 4. |
Remove the plastic plug under the starter motor and remove the torque converter bolts.
Advance the torque converter gradually by turning the crankshaft with the pulley. |
|
| 5. |
Prevent the torque converter from moving by means of
87 92 574 Holder
.
|
|
| 6. |
Remove the gearbox.
|
|
| 7. |
Remove the front exhaust pipe with heated oxygen sensor, power steering pump and power unit from the subframe.
|
|
| 8. |
Fit
Holder
part no. 83 94 751 to the power train and lift over the power train to
78 74 878 Floor stand
.
|
|
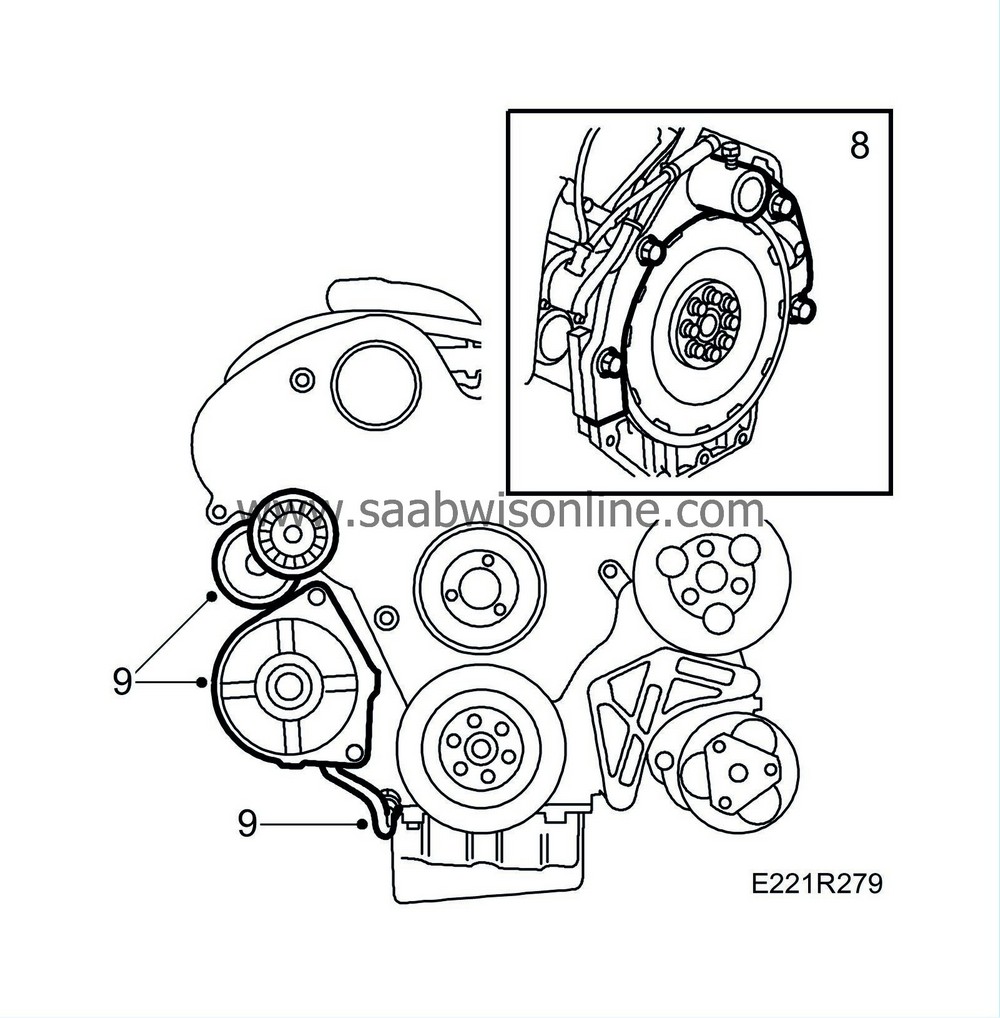
| 9. |
Remove the belt tensioner and disconnect and remove the generator.
Do not forget to remove the lead to the oil pressure sensor from the generator. |
|
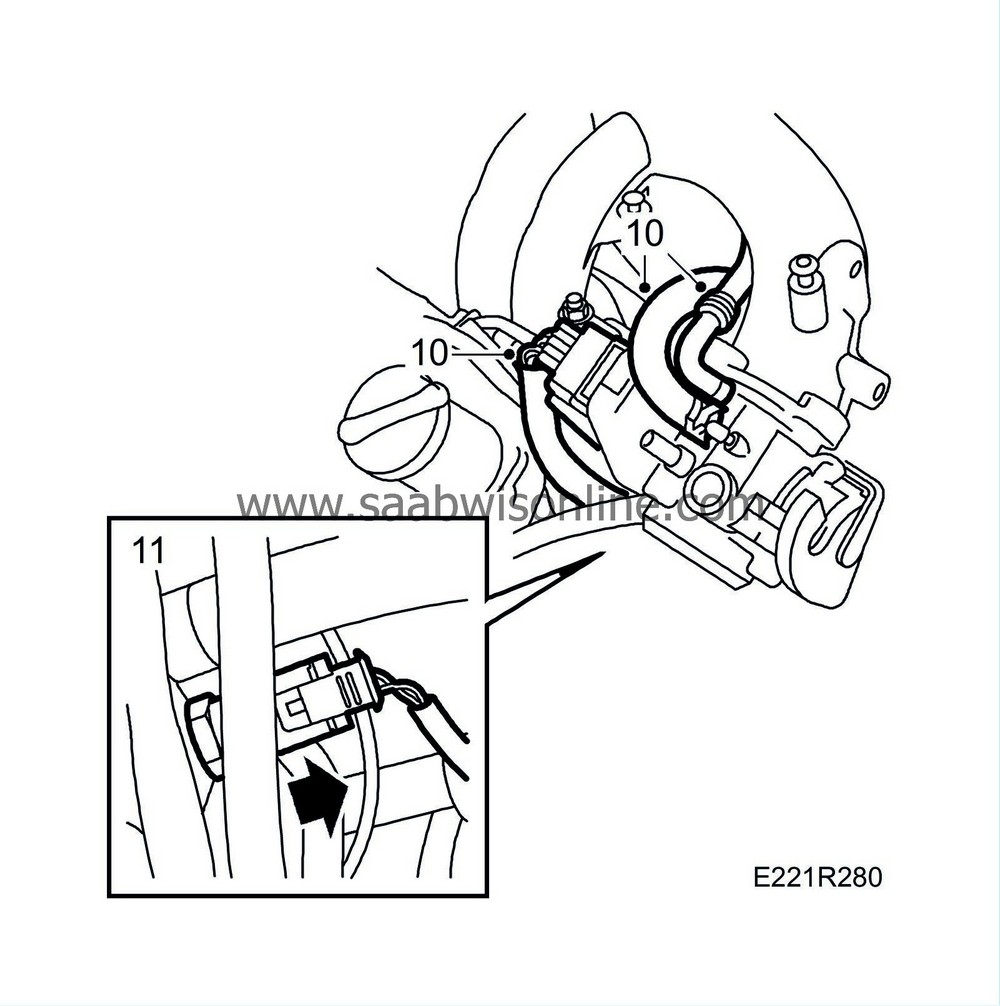
| 10. |
Detach the vacuum hose and water hoses from the throttle. Also unplug the throttle's connector.
|
|
| 11. |
Detach the temperature sensor on the coolant bridge.
|
|
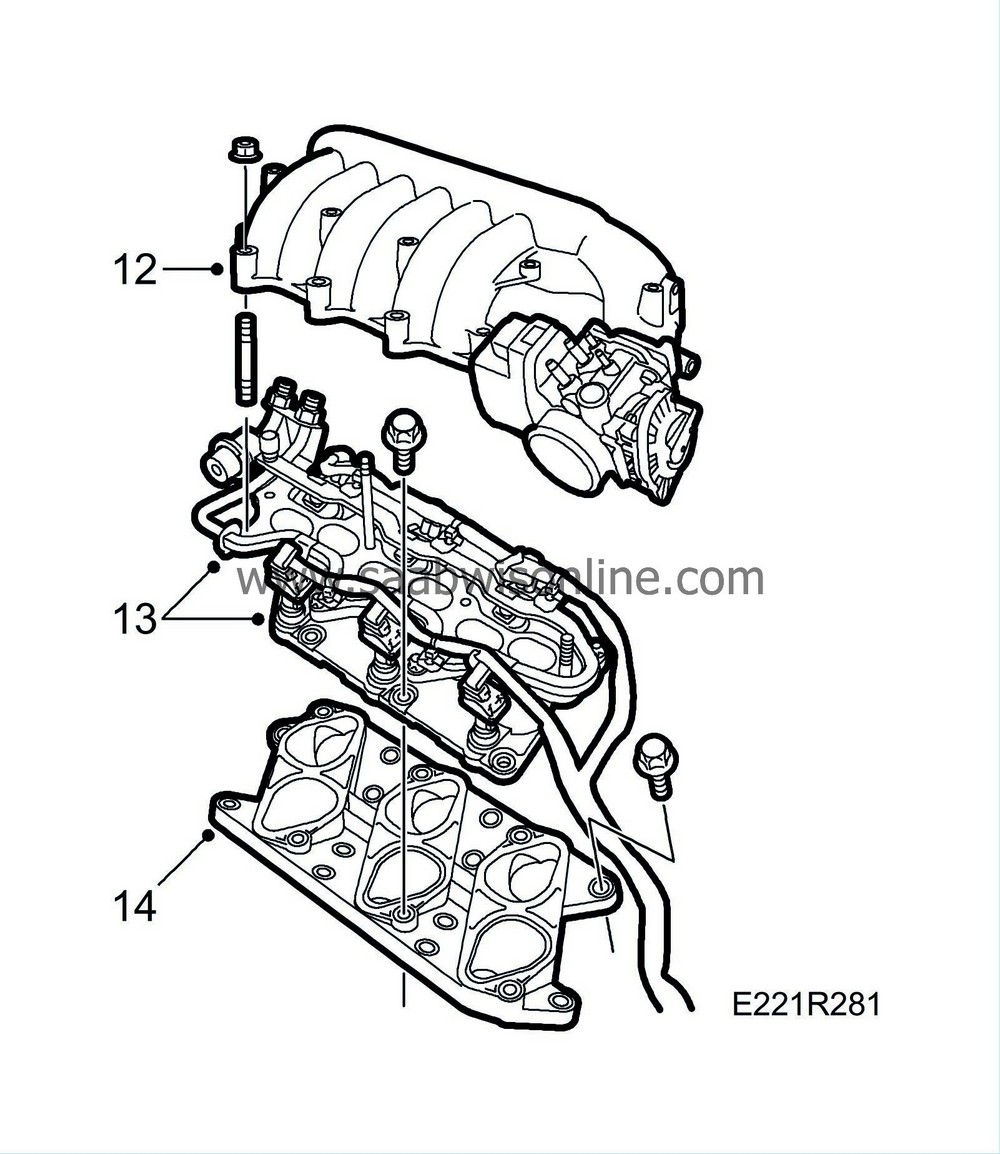
| 12. |
Remove the upper intake manifold.
|
|
| 13. |
Disconnect the leads to the injectors. Remove the middle intake manifold.
|
|
| 14. |
Remove the lower intake manifold. Plug the induction orifices.
|
|
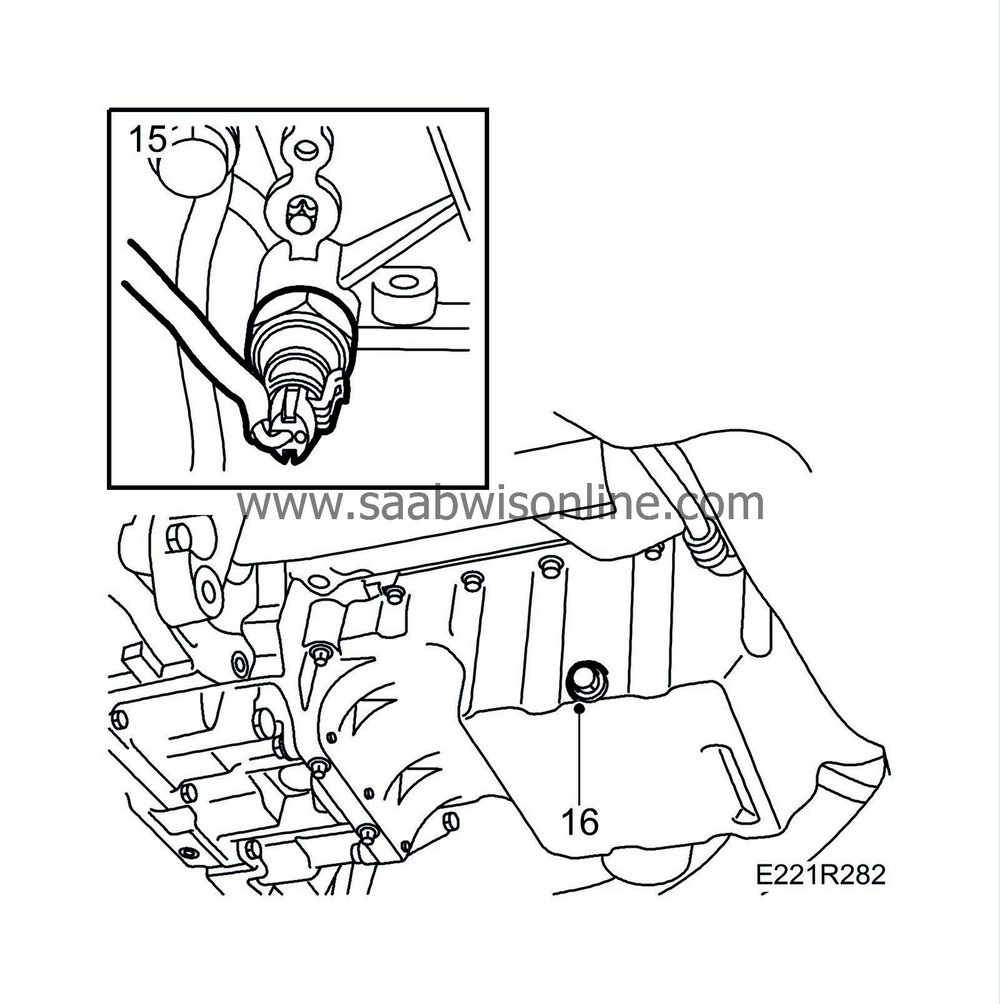
| 15. |
Disconnect the lead to the oil pressure sensor.
|
|
| 16. |
Drain the oil and tighten the drain plug.
Tightening torque: 25 Nm (18.5 lbf ft). |
|
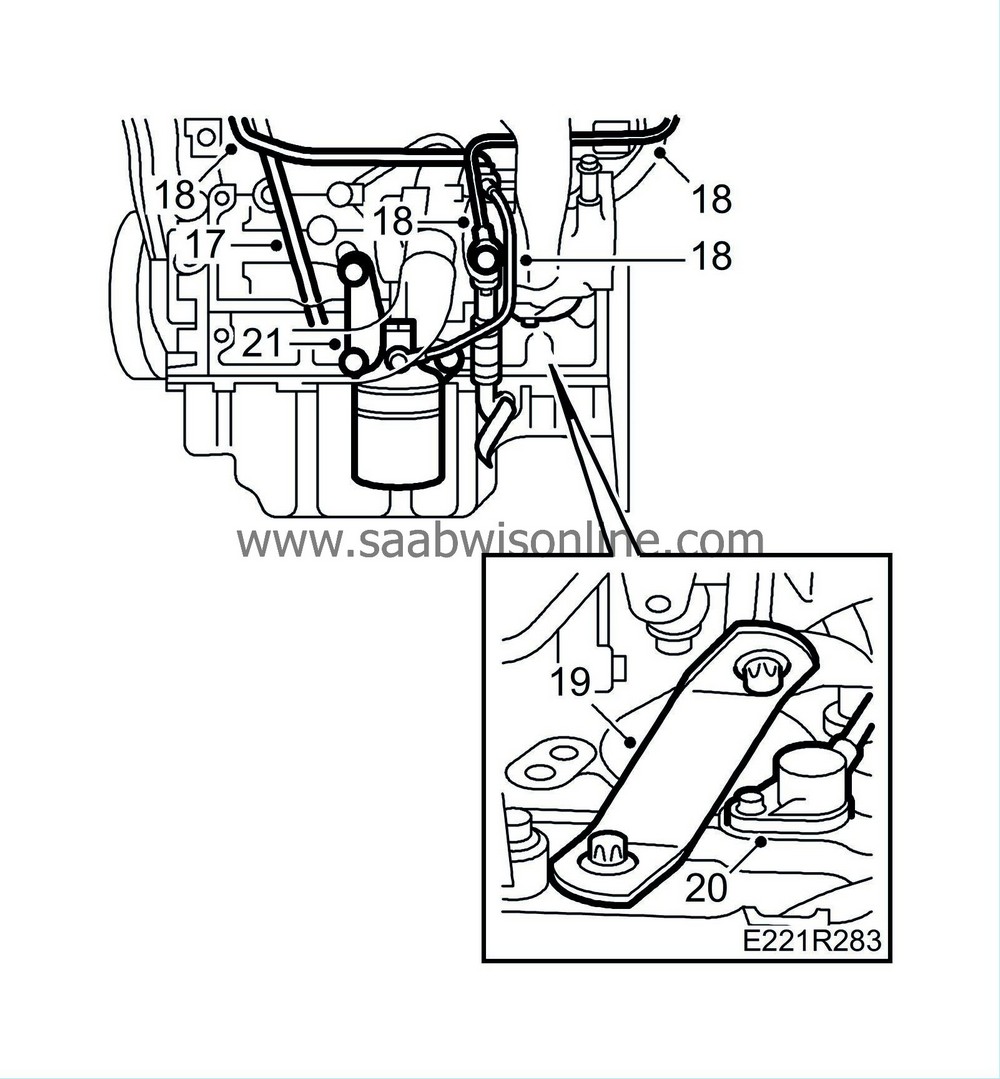
| 17. |
Remove the dipstick.
|
|
| 18. |
Remove the turbo's water and oil pipes.
|
|
| 19. |
Remove the turbo's bracket.
|
|
| 20. |
Remove the crankshaft position sensor.
|
|
| 21. |
Remove the oil filter and the oil pipes from the oil filter adapter.
|
|
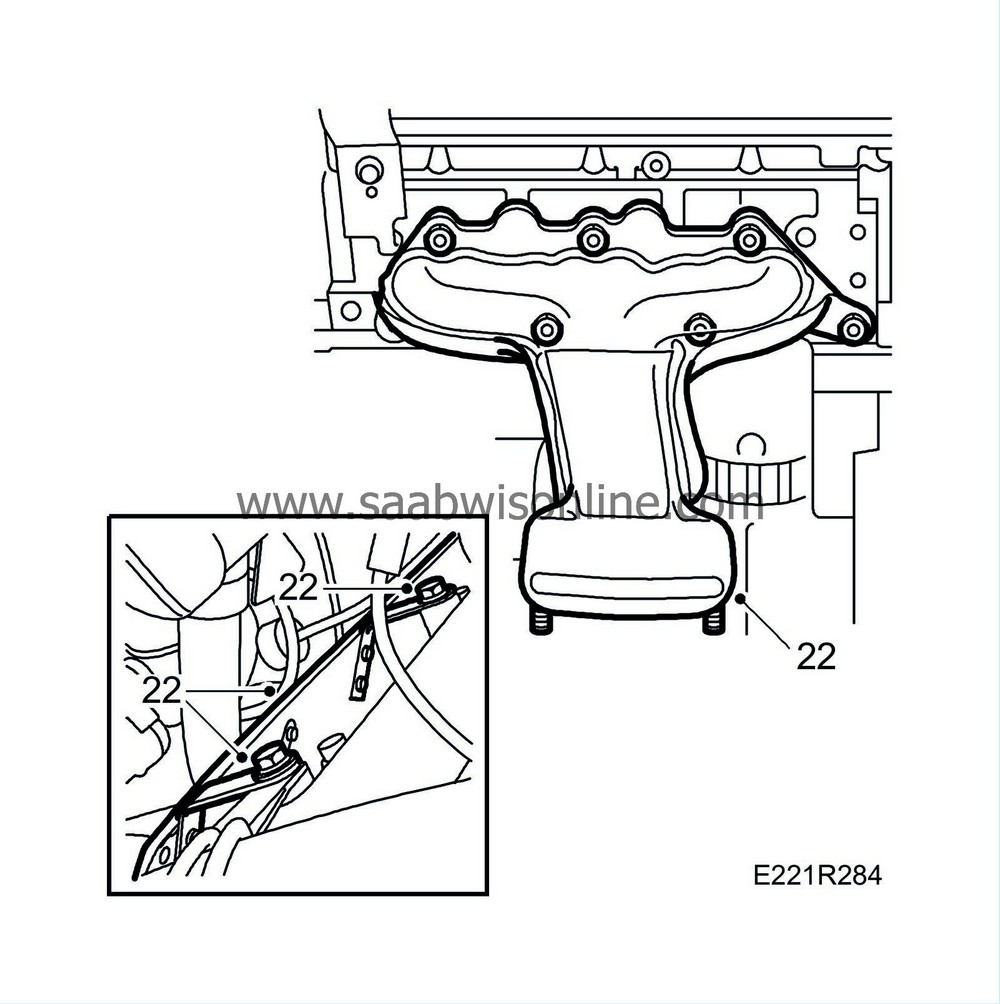
| 22. |
Remove the rear exhaust manifold's heat shield. Remove the rear exhaust manifold.
|
|
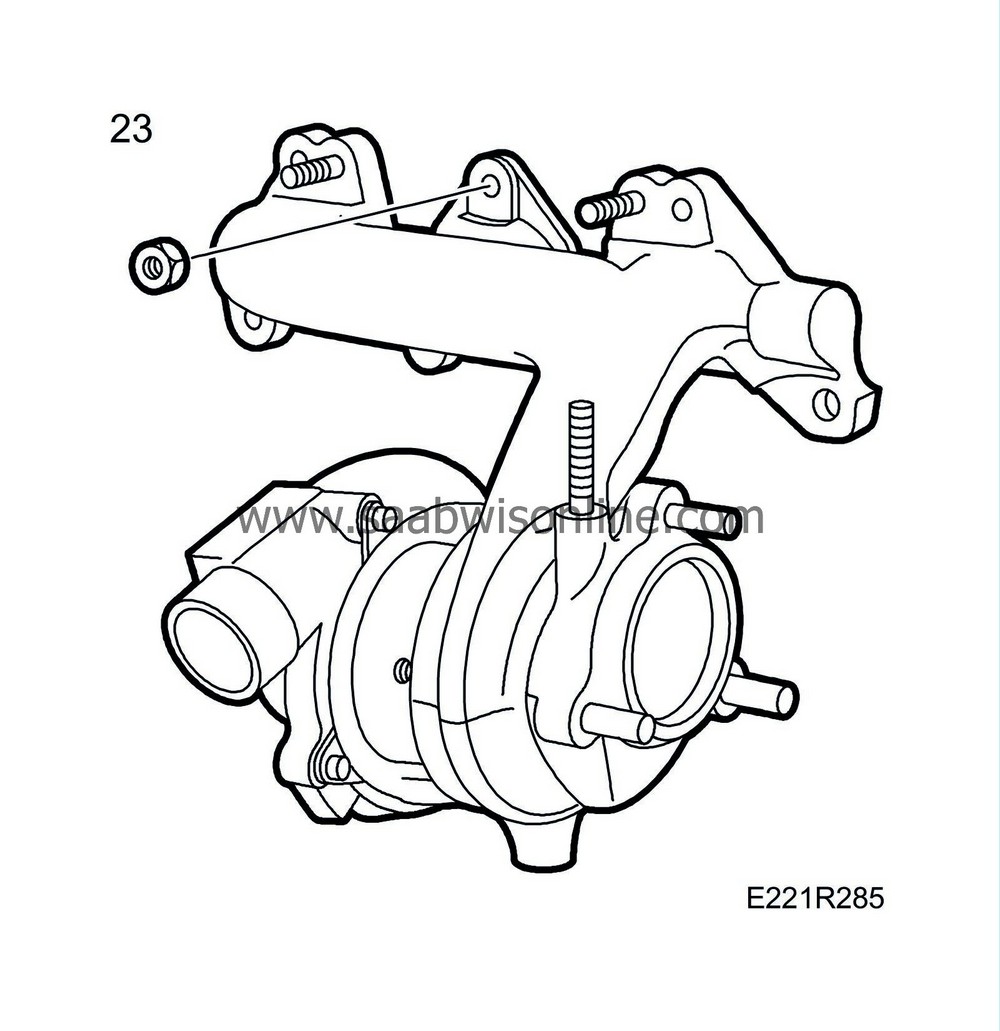
| 23. |
Remove the front exhaust manifold.
|
|
| 24. |
Detach the coolant pipe and remove the thermostat housing with thermostat.

|
|
| 25. |
Remove the coolant bridge, being careful not to damage the gaskets.
|
|
| 26. |
Remove the crankcase breather housing.
|
|
| 27. |
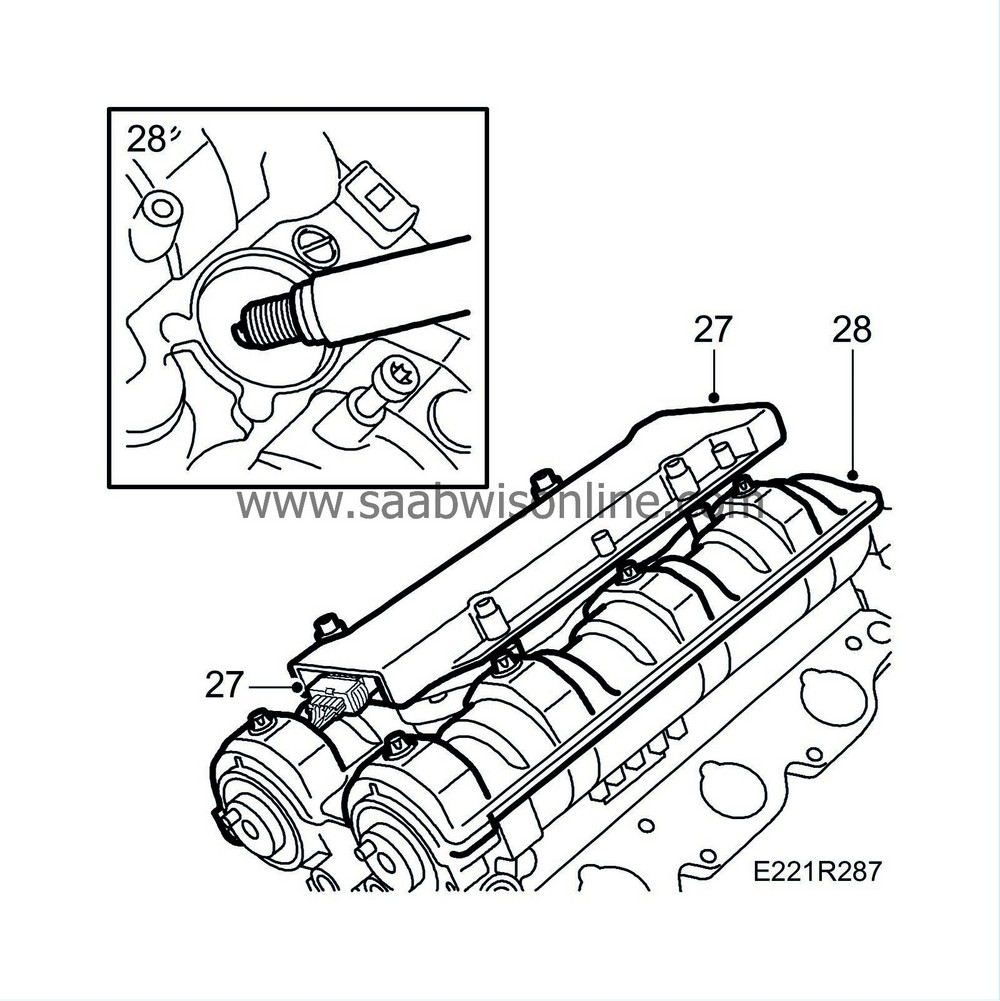
Disconnect the leads to the ignition discharge modules and remove the engine wiring harness. Remove the ignition discharge modules.
|
|
| 28. |
Remove the spark plugs using
Spark plug socket
part no. 83 95 485, and also remove the camshaft covers with gaskets.
|
|
| 29. |
Remove the coolant pump pulley and crankshaft pulley.

|
|
| 30. |
Remove the timing cover.
|
|
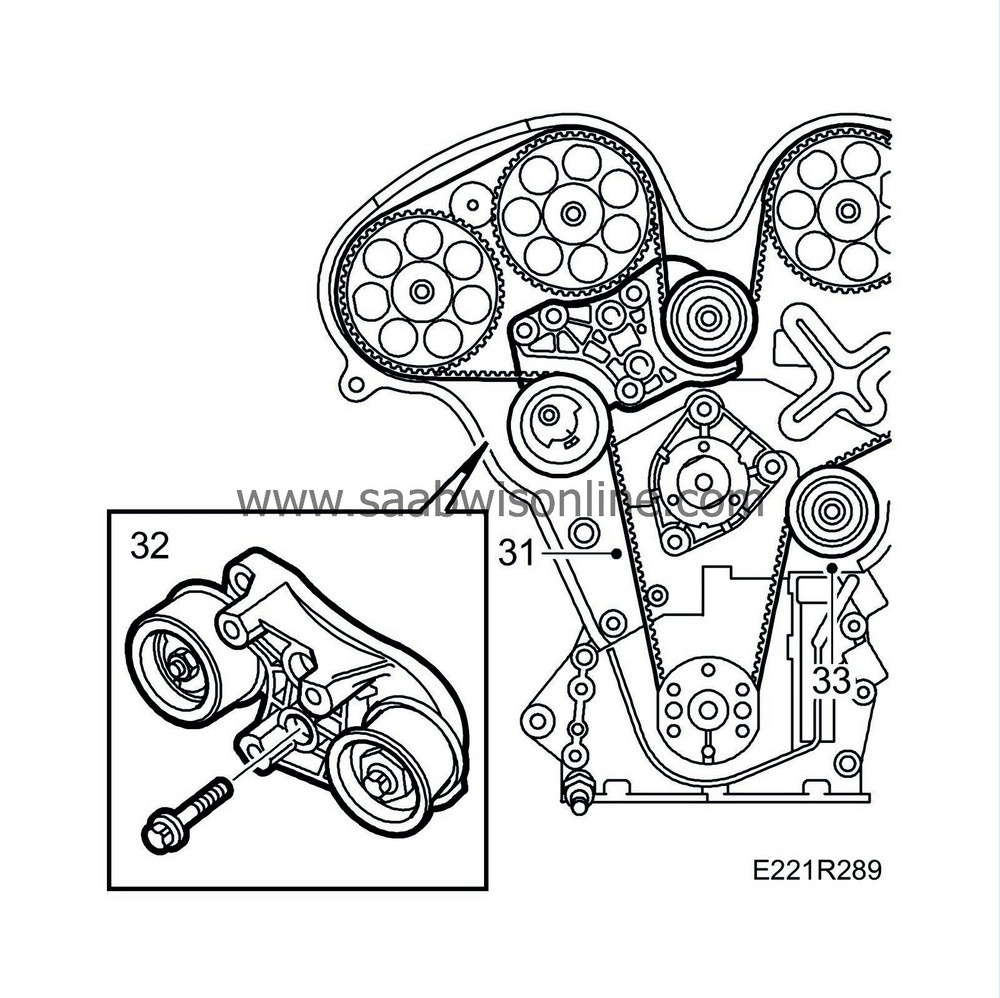
| 32. |
Remove the bracket with tensioning roller and the upper adjuster roller.
|
|
| 33. |
Remove the lower adjuster roller.
|
|
| 34. |
Hold the camshafts with a spanner and remove the camshaft sprockets.

|
|||||||||
| 35. |
Remove the coolant pump, taking care not to damage the O-ring.
|
|||||||
| 36. |
Remove the inner timing cover.
|
|
| 37. |
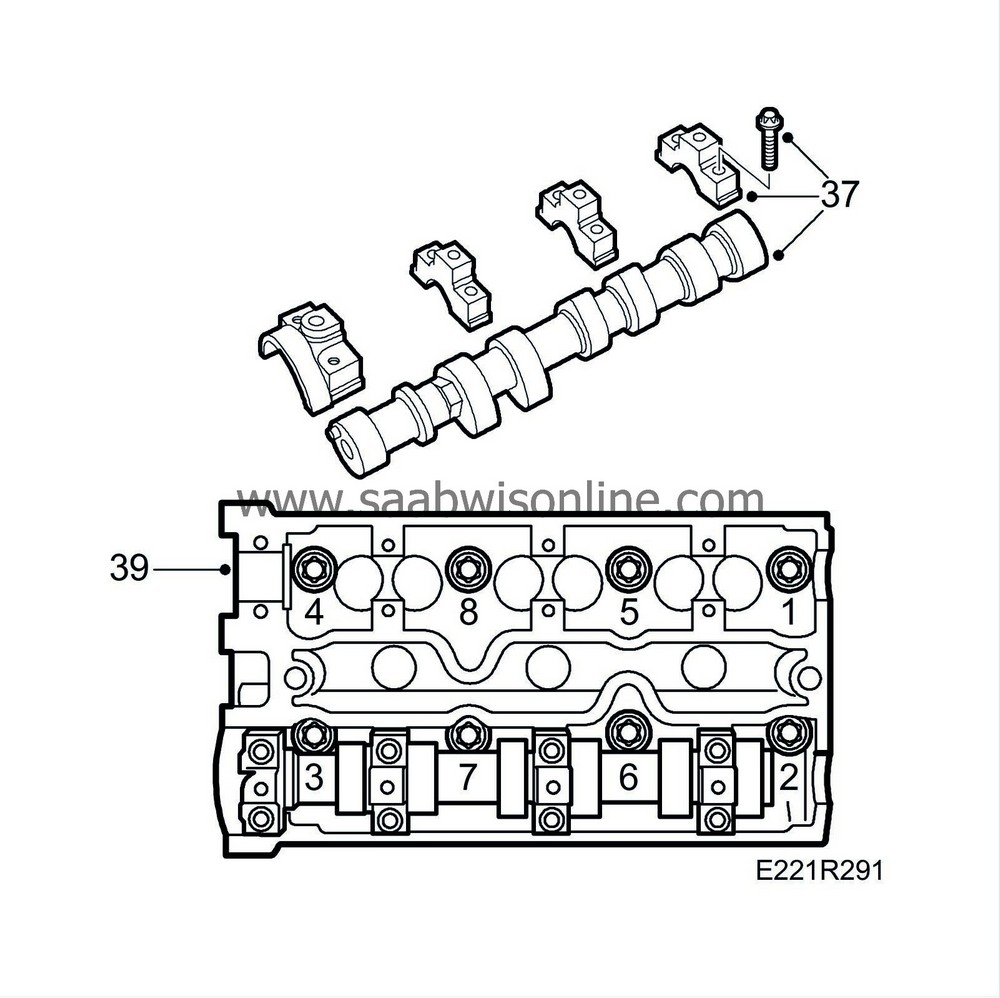
Remove the exhaust camshaft bearing caps by undoing the bolts in steps of 1/2 to 1 turn. It is important to conclude removal at the bearing cap where the tappets are under load. Lift out the camshafts and remove the stuffing boxes. Note the marking on the camshaft bearing caps.
|
||||||||||||||||
| 38. |
Remove the tappets and keep them in
83 93 787 Valve stand
so that they are kept in order. Fit
Protective collars
part no. 83 95 022.
|
|
| 39. |
Undo the cylinder head bolts in the order shown in steps of 1/4 - 1/2 a turn. Remove the cylinder heads. Exercise care when putting them down as the intake camshafts are still in place and the valves could easily be bent through carelessness.
|
|
| 40. |
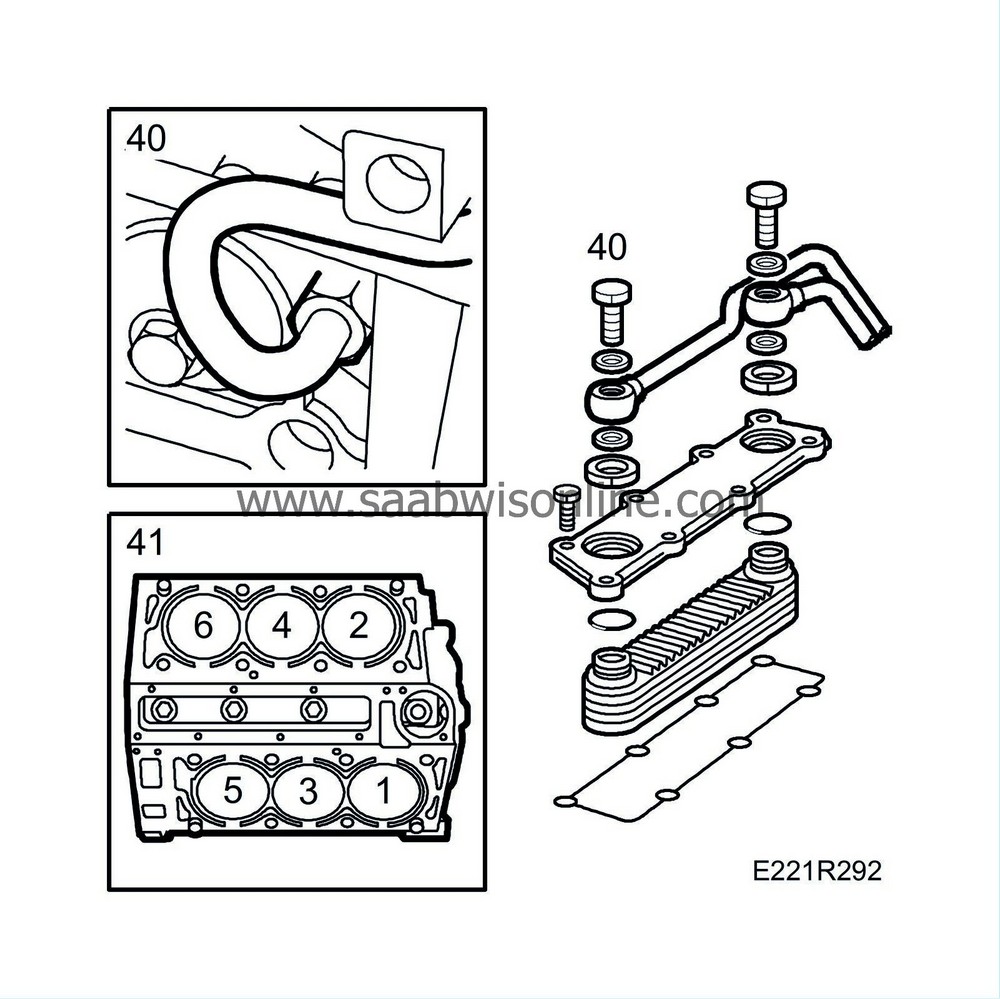
Detach the pipes from the heat exchanger, being careful with the gaskets. Remove the heat exchanger cover complete with the heat exchanger.
|
||||||||||
| 41. |
Mark the pistons with the cylinder number.
|
|
| 42. |
Turn the engine. Remove the oil sump, oil suction pipe and antislosh baffle.

|
|
| 43. |
Fit
Counterstay
83 95 063 and remove the camshaft belt sprocket from the crankshaft. Remove the oil pressure sensor.

|
|
| 44. |
Remove the oil pump and gasket.
|
|
| 45. |
Remove the front crankshaft seal.
|
|
| 46. |
Remove the drive plate. Carefully prise out the rear crankshaft seal.

|
||||||||||
| 47. |
Undo all big-end bearing caps and press or carefully tap the pistons out of the cylinders in pairs. Start with 1 and 2.

|
|
| 48. |
Remove the main bearing member by first undoing the middle bolts on the long sides and unscrewing the adjusting sleeves about 1/2 a turn.
|
|||||||
| 49. |
Remove the rest of the bolts. Note the position of the main bearing member for subsequent reassembly.
|
|
| 50. |
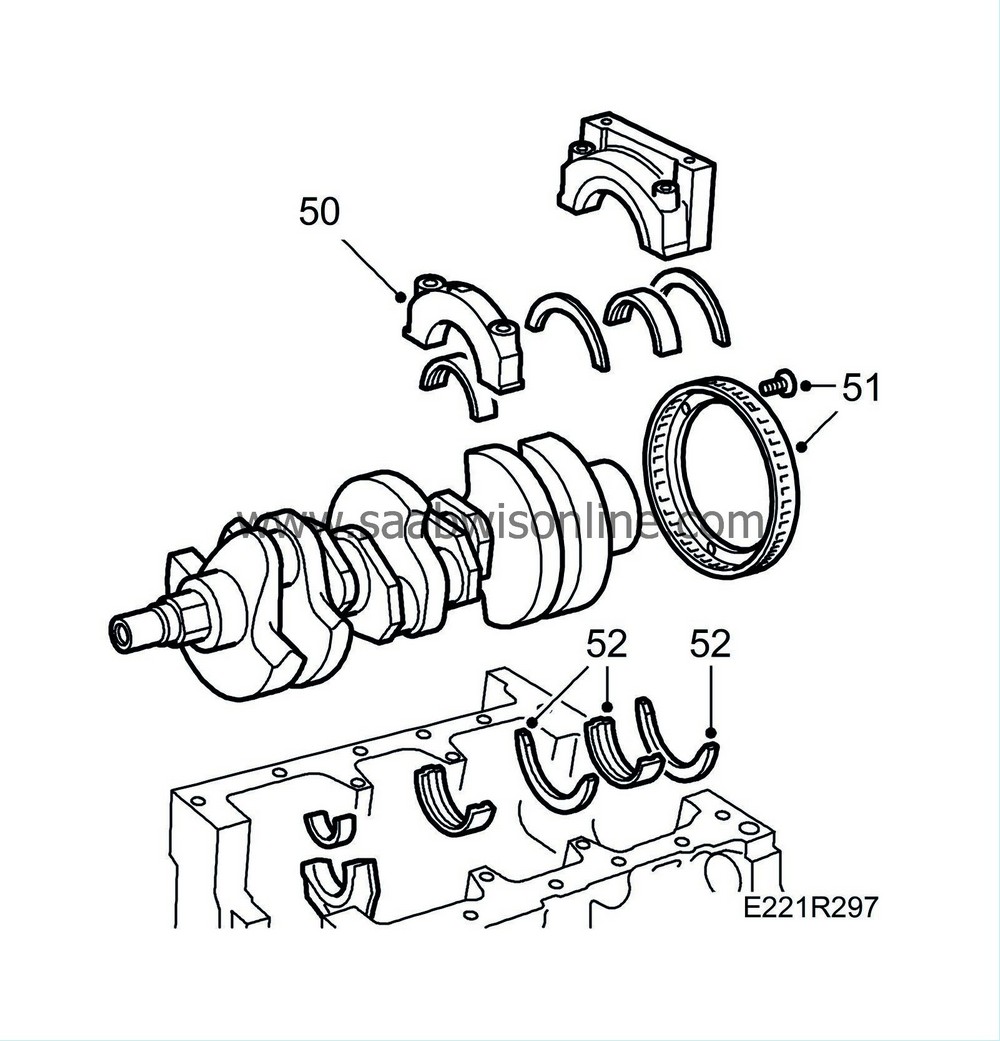
Remove all main bearing caps and lift out the crankshaft.
|
|
| 51. |
Remove the slotted ring.
|
||||||||||
| 52. |
Remove all bearing shells for both the main bearings and big-end bearings.
|
|

 Warning

