Ignition switch
| Ignition switch |
| 2. |
Dismantle the selector lever casing, see
 .
.
|
|
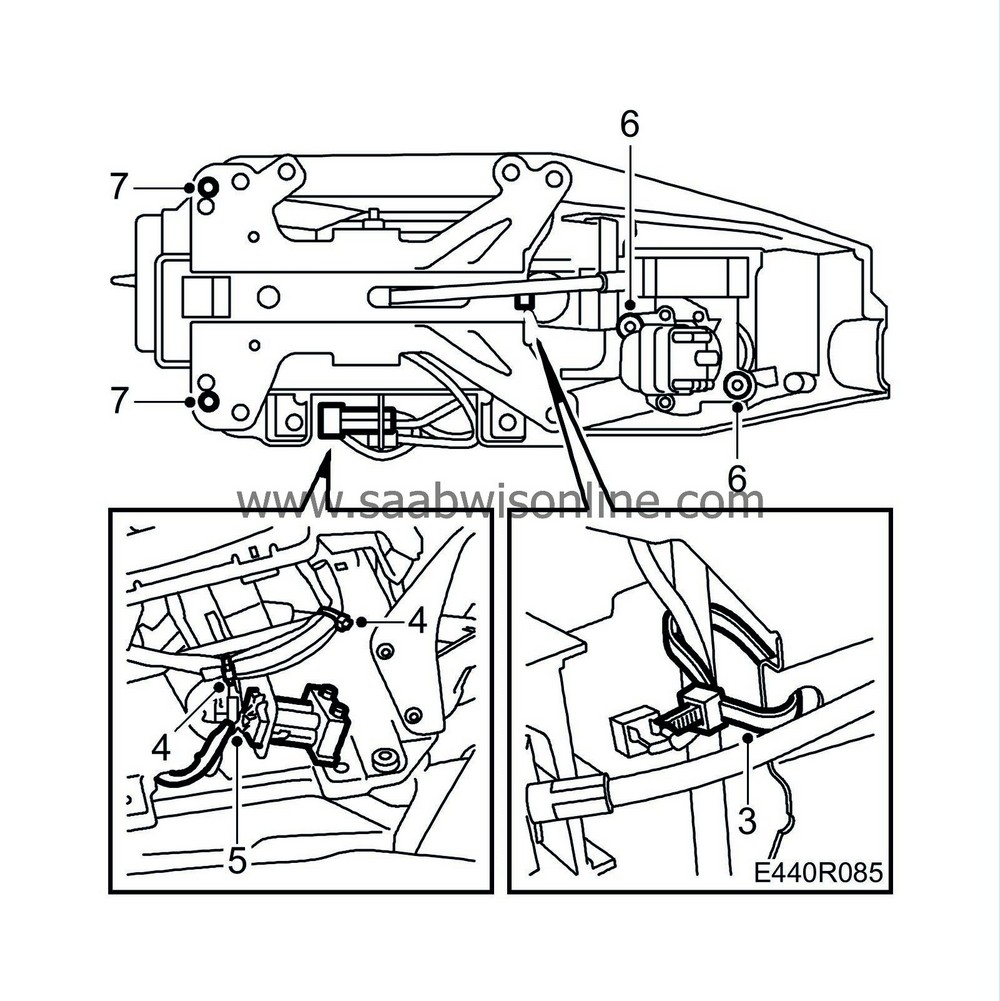
| 3. |
Snip the cable tie holding the lead for the lighting button in place.
|
|
| 4. |
Snip the cable tie securing the lead for the electromagnet.
|
|
| 5. |
Extract electromagnet pins 5 and 6 from the connector.
|
|
| 6. |
Remove the shift indication display. Remove the screws securing the ignition switch.
|
|
| 7. |
Drill out the rivets.
|
|
| 8. |
Dismantle the selector lever housing.
|
|
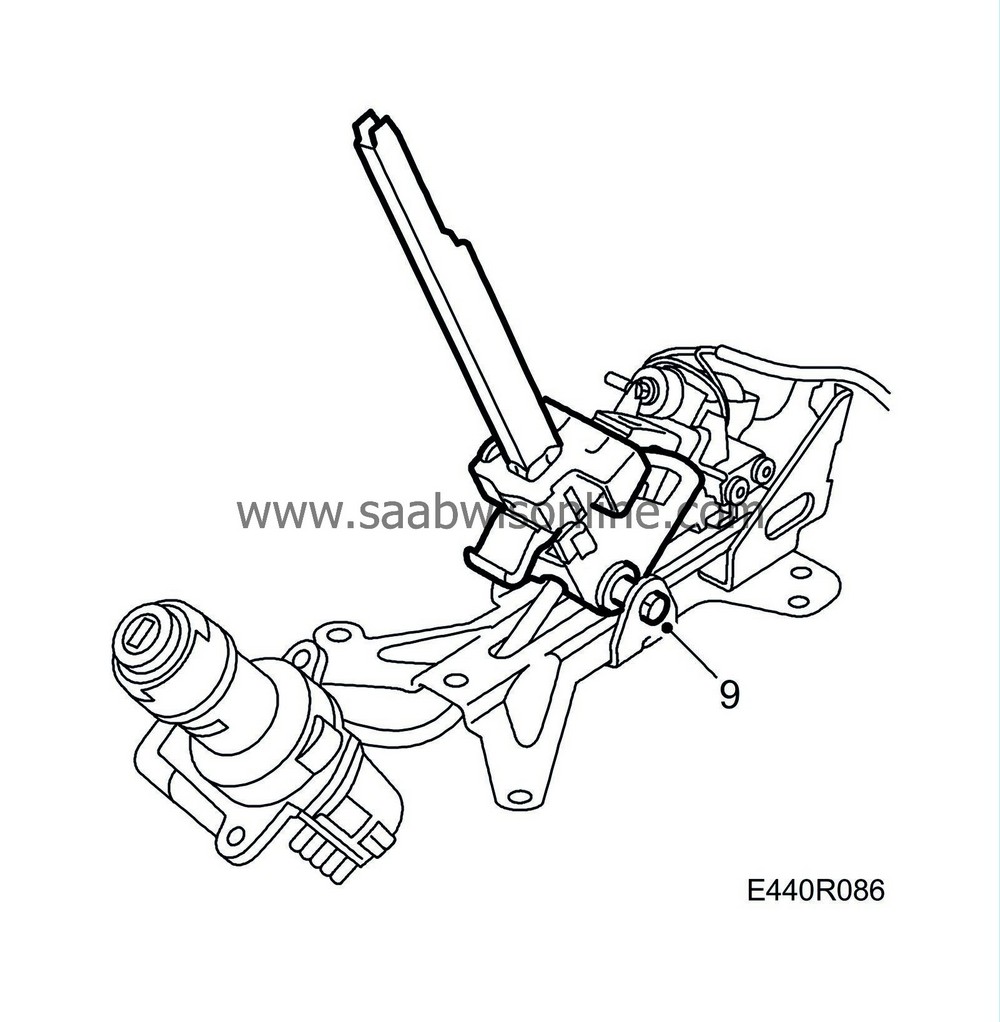
| 9. |
Remove the selector lever retaining bolt.

|
|
| 10. |
Remove the selector lever with holder from the base plate.
|
|
| 11. |
Remove the lock washer and tap out the spacer sleeve.
|
|
| 12. |
Detach the selector lever from the holder.
|
|
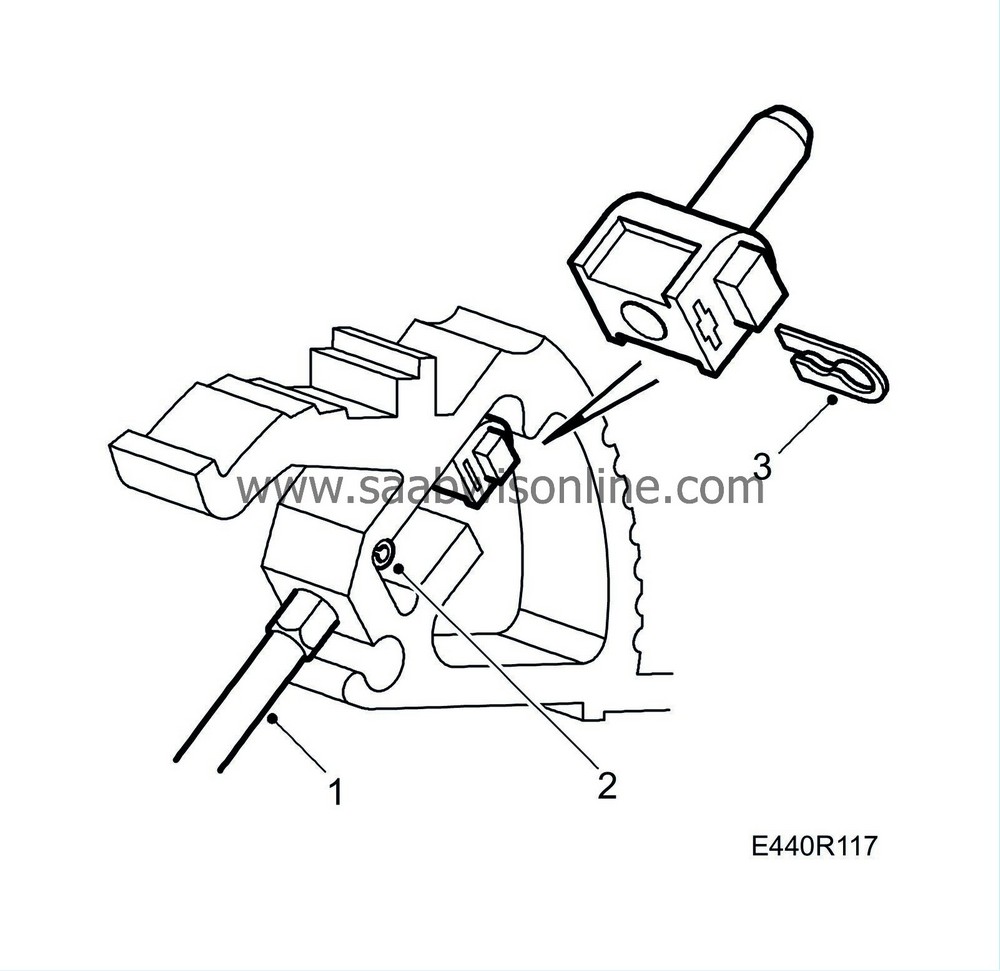
| 13. |
Remove the expanding pin securing the cable ferrule.

|
|
| 14. |
Remove the clip from the locking pin.
|
|
| 15. |
Withdraw the cable from the holder.
|
|
| Fitting |

| 1. |
Connect the cable to the holder and locking pin.
|
|
| 2. |
Fit the expanding pin securing the cable ferrule.
|
|
| 3. |
Fit the clip in the locking pin.
|
|
| 4. |
Fit the selector in the holder.

|
|
| 5. |
Insert the spacer sleeve through the selector lever, ignition switch retaining catch, shift-lock retaining catch and holder. Fit the lock washer.
|
|
| 6. |
Fit the selector lever with holder into the groove at the front of the base plate.
|
|
| 7. |
Fit the bolt and tighten it.
|
|
| 8. |
Fit the selector lever and ignition switch in the selector lever housing. Place the sport button's lead in the clip.
|
|
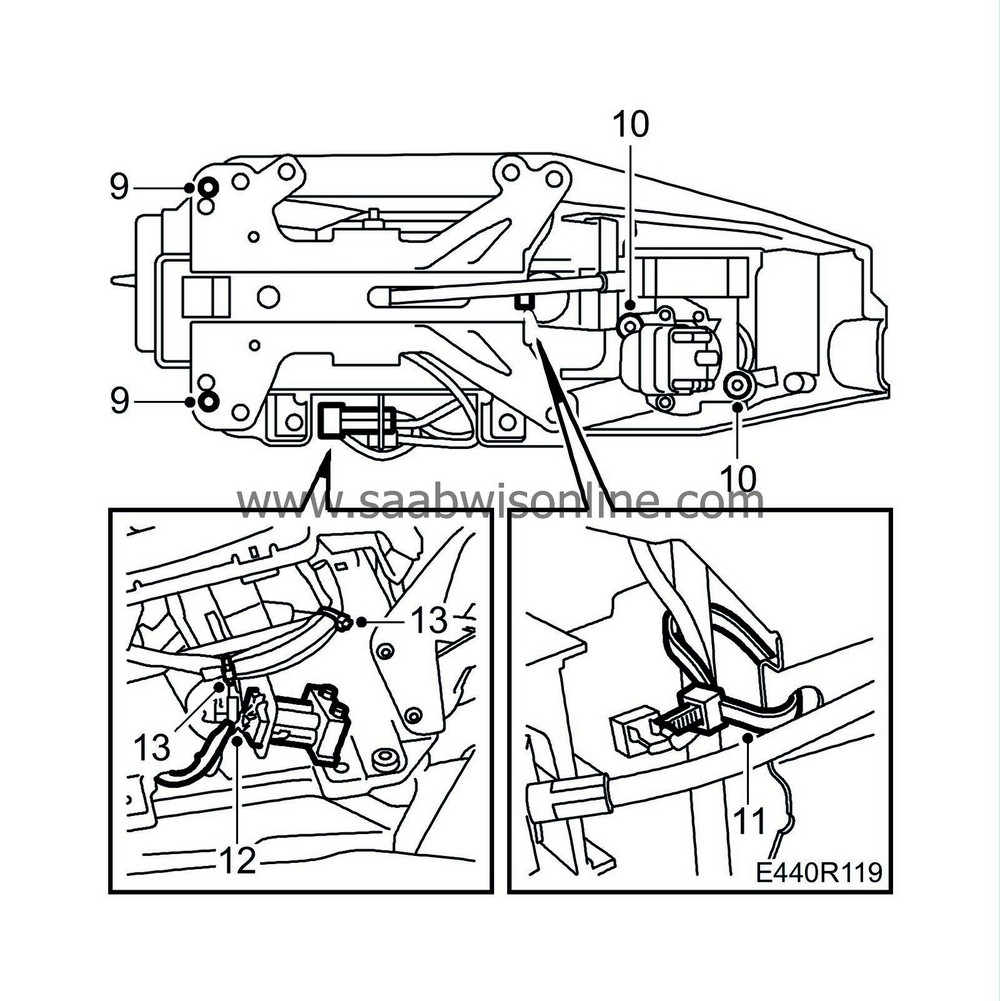
| 9. |
Rivet the parts of the selector lever housing together.

|
|
| 10. |
Screw the ignition switch in place. Fit the shift indication display.
|
|
| 11. |
Fit a cable tie to hold the lead for the lighting in place.
|
|
| 12. |
Plug in the electromagnet's connector.
|
|
| 13. |
Insert a cable tie through the hole in the selector lever and round the electromagnet's and WINTER button's leads.
|
|
| 14. |
Fit the ignition switch lock cylinder, see
 .
.
|
|
| 15. |
Assemble the selector lever casing, see
 .
.
|
|
| 16. |
Fit the selector lever housing, see
 .
.
|
|


