(731-2341 utg. 2) Vibrations and noise when idling with selector lever in position D
Symptom: Vibrations and infrasonic noise when idling with selector lever in position D.
|
TECHNICAL SERVICE BULLETIN
|
|
Bulletin Nbr:
|
731-2341 utg. 2
|
|
Date:
...........
|
Maj 2005
|
|
Market:
|
ej US, CA
|
|
|
Vibrations and noise when idling with selector lever in position D
|
Saab 9-5 M02 with 4-cylinder petrol engine, automatic transmission and VIN within the interval 23000132-23021442.
On certain cars, considerable vibration has been detected in the steering wheel and seat when idling with the selector level in position D. On some cars, there is also infrasonic noise.
The problem is most apparent when driving in stop-and-go traffic.
The following action is to be taken upon customer complaint.
Symptom description
Vibrations and infrasonic noise when idling with selector lever in position D.
As needed
|
•
|
52 33 382 Bush (x1 - x4)
|
|
•
|
52 31 808 Bush (x1 - x2)
|
|
1.
|
Start the engine and connect Tech 2.
|
|
2.
|
Shift the selector lever to D.
|
|
3.
|
Select
Trionic -
Adjustment -
Idle RPM Offset in Drive in Tech 2 and increase idling speed by 10-50 rpm.
|
|
4.
|
Have the vibrations and noise stopped?
YES:
Shift out of D, switch off the engine and disconnect Tech 2. The problem has been remedied and the remaining steps in these instructions do not need to be carried out.
|
Note
|
|
If idling speed has been increased, inform the customer that the car will pull with more force when it is stationary and the selector lever is in position D.
|
NO:
Continue following step 5 of these instructions.
|
|
6.
|
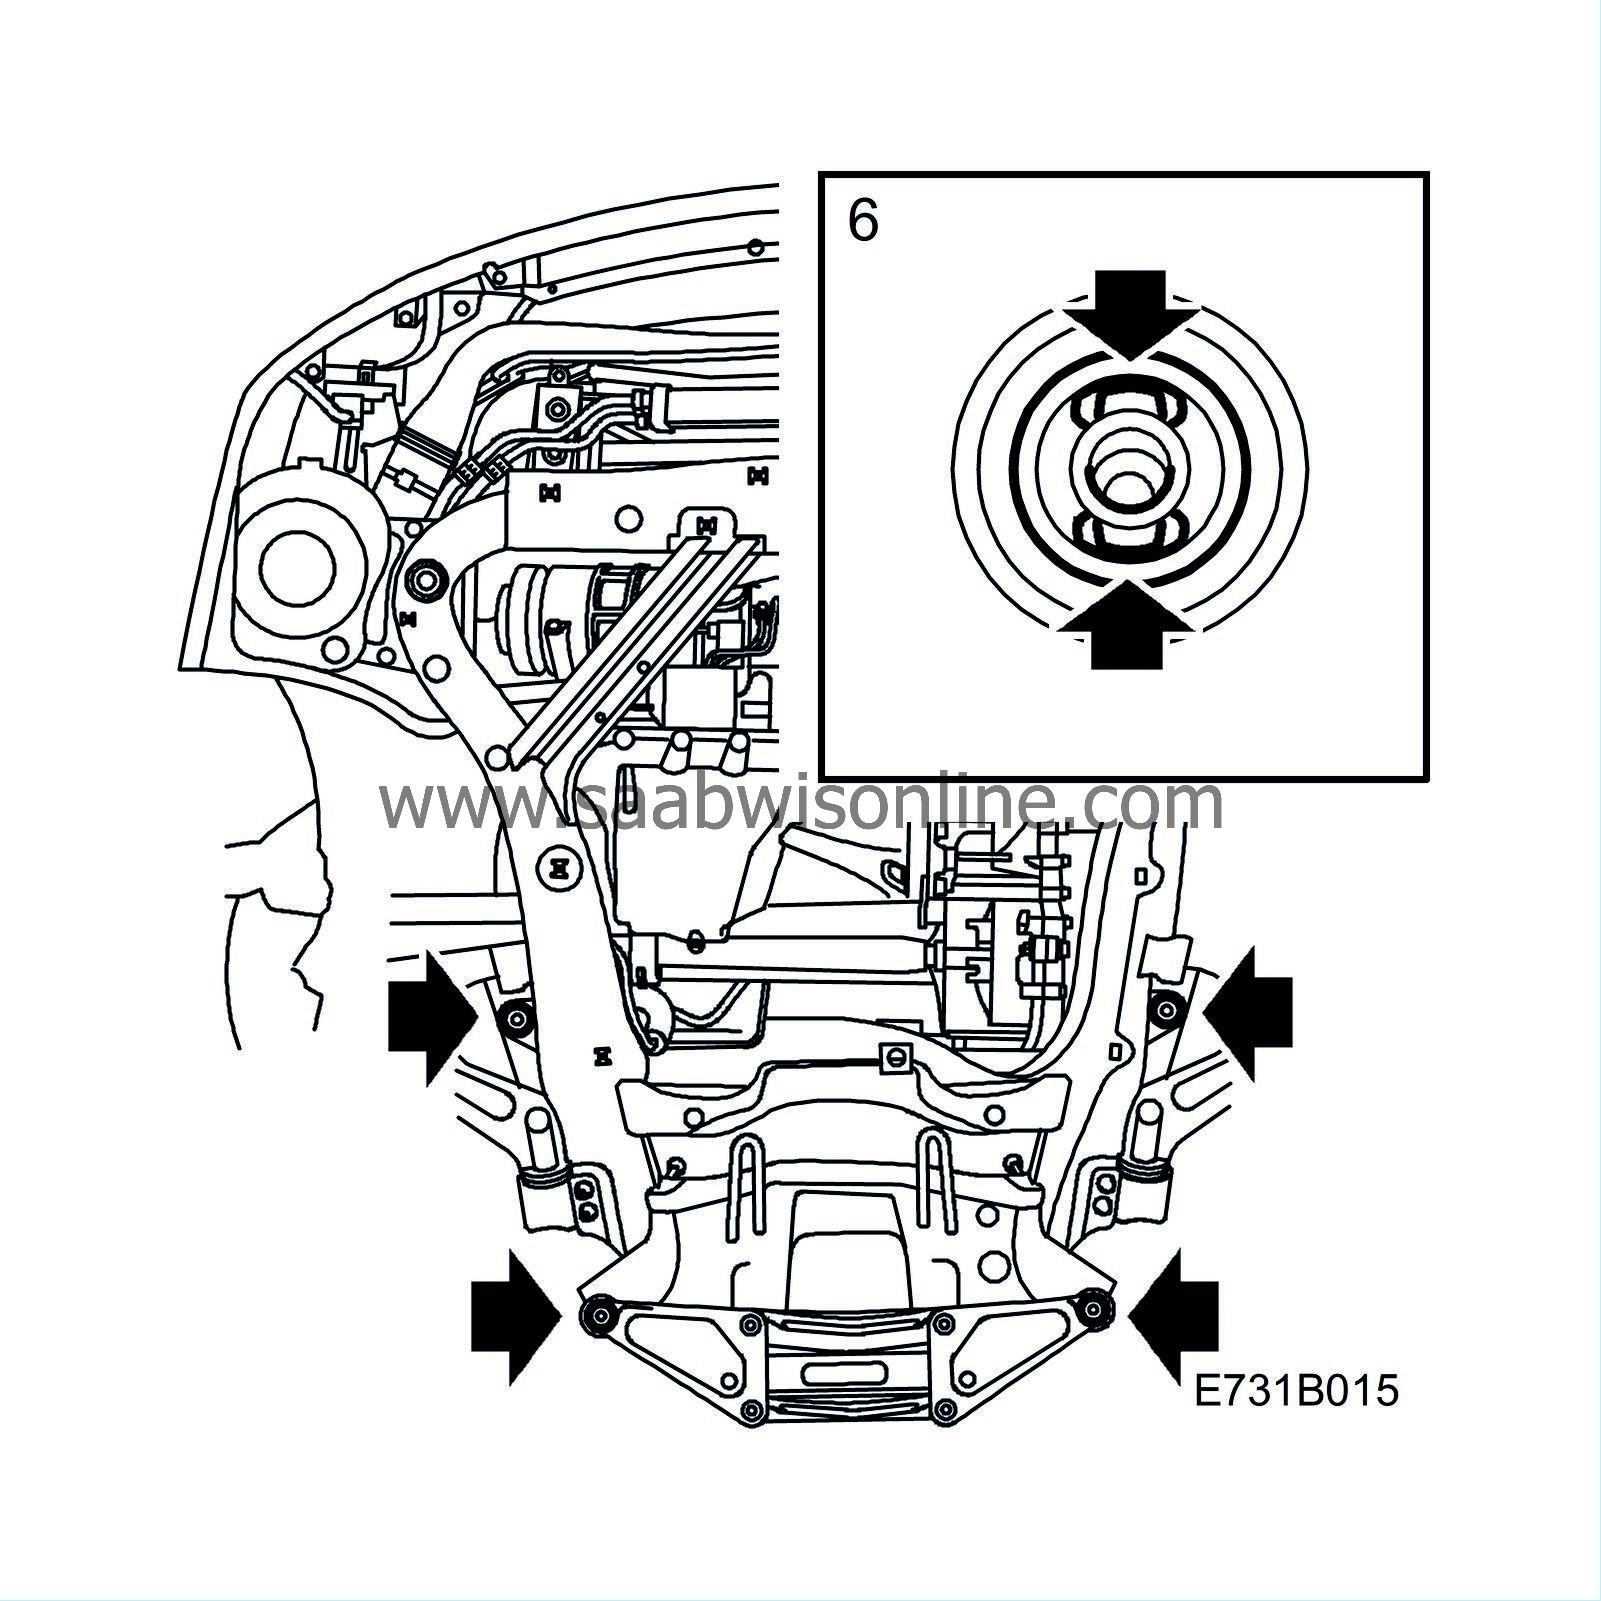
Check that the rear and centre bushes are correctly fitted. They must be fitted with one opening to the front and one opening to the rear.
|
|
7.
|
Are the bushes correctly fitted in the subframe?
NO:
Replace the bush following "WIS - 7. Suspension, wheels - Suspension, front - Adjust, replace - Bush, subframe". At the same time, check and if necessary replace the two front bushes. Then continue following step 8 of these instructions.
YES:
Continue following step 8 of these instructions.
|
|
8.
|
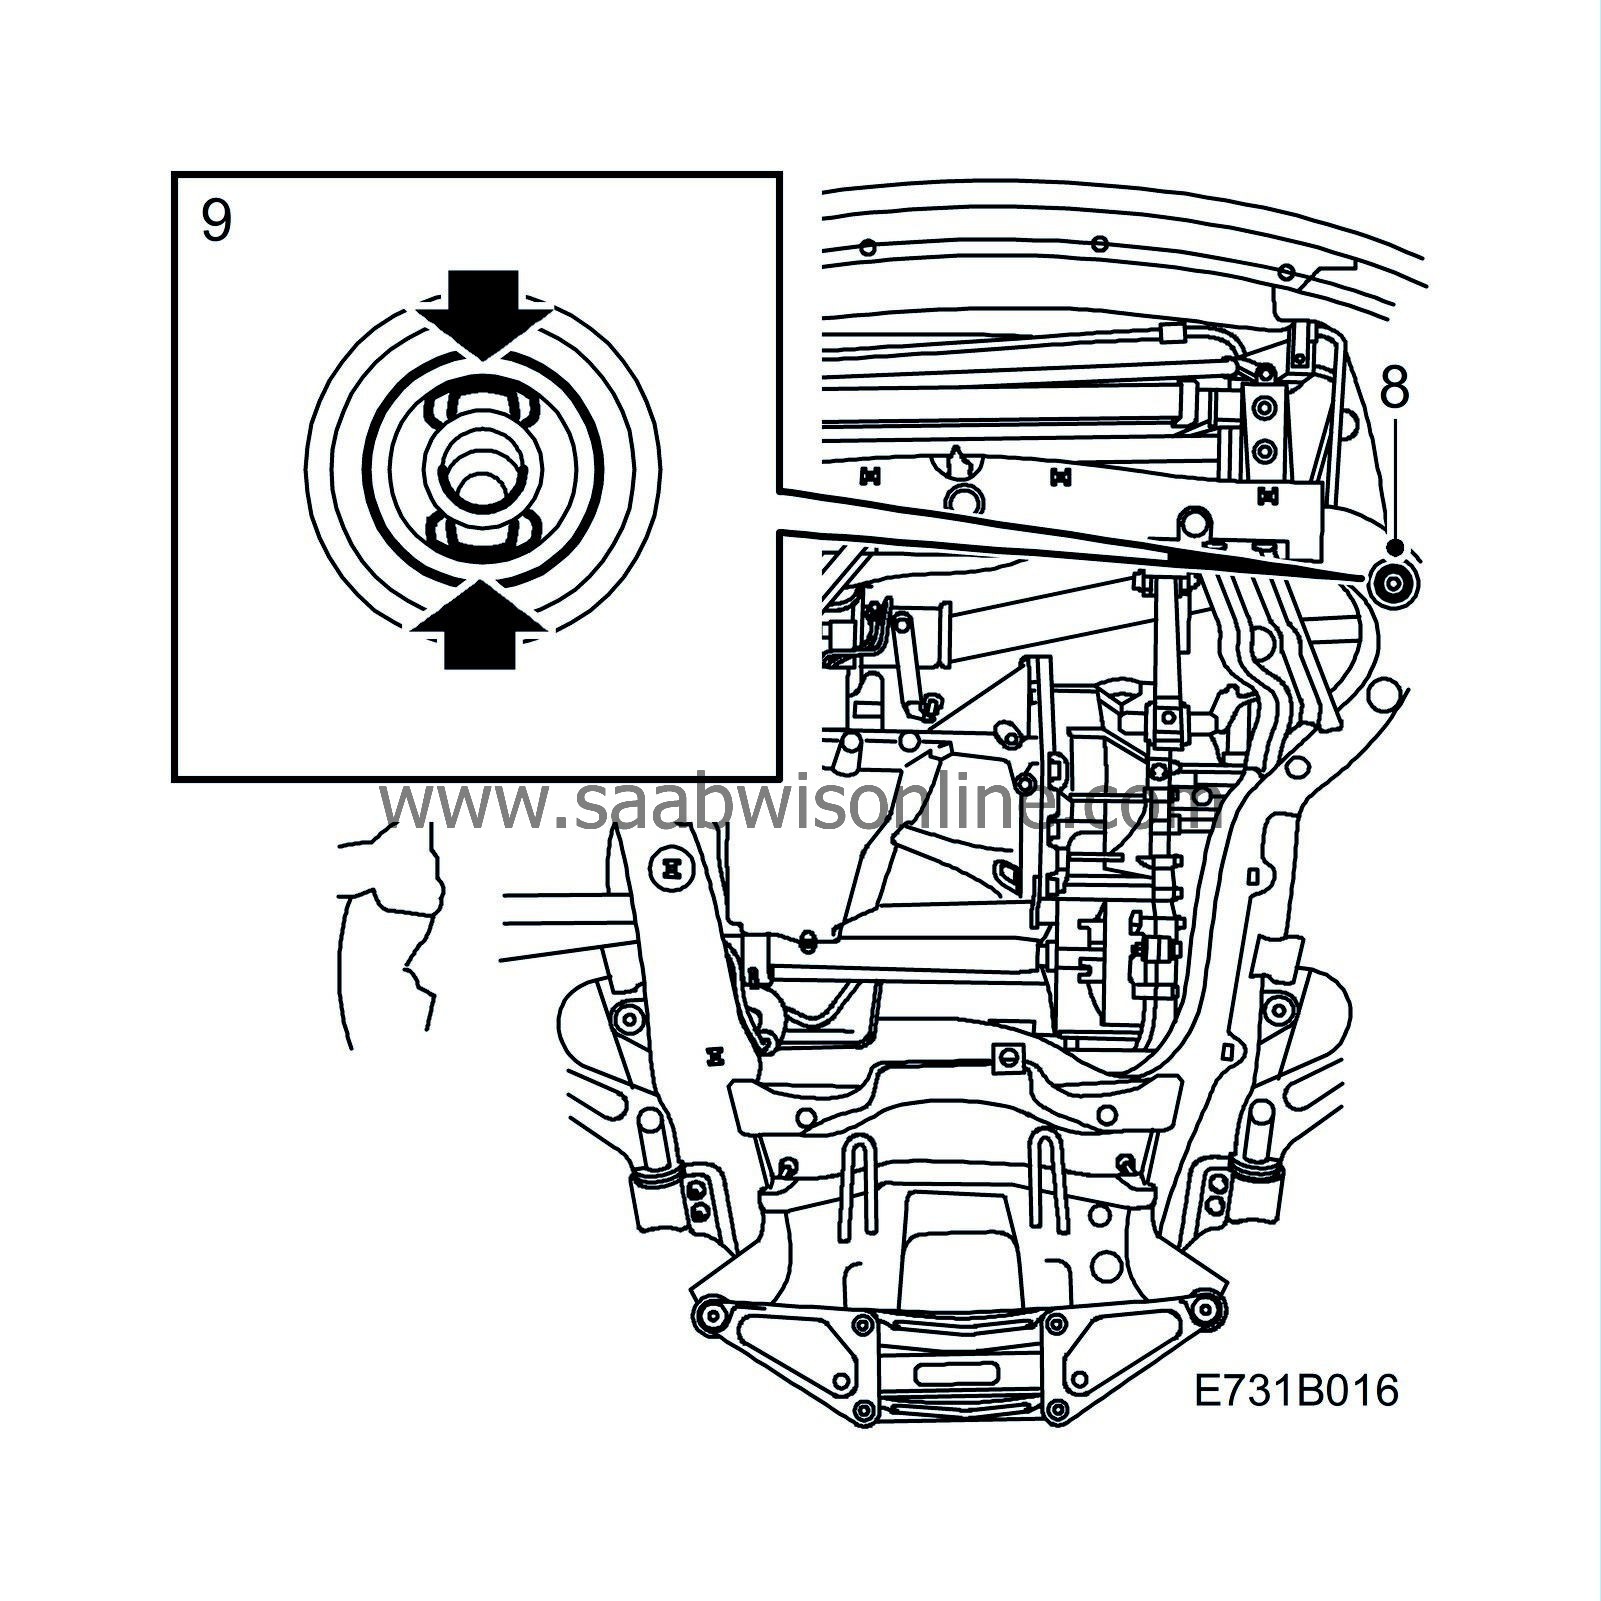
Remove the screw from the front bush on the left-hand side of the subframe.
|
|
9.
|
Check that the bush is correctly fitted. The bushes must be fitted with one opening to the front and one to the rear.
|
|
10.
|
Is the bush correctly fitted in the subframe?
NO:
Replace the bush following "WIS - 7. Suspension, wheels - Suspension, front - Adjust, replace - Bush, subframe". At the same time, check and if necessary replace the front bush on the right-hand side. Then continue following step 11 of these instructions.
YES:
Continue following step 11 of these instructions.
|
|
11.
|
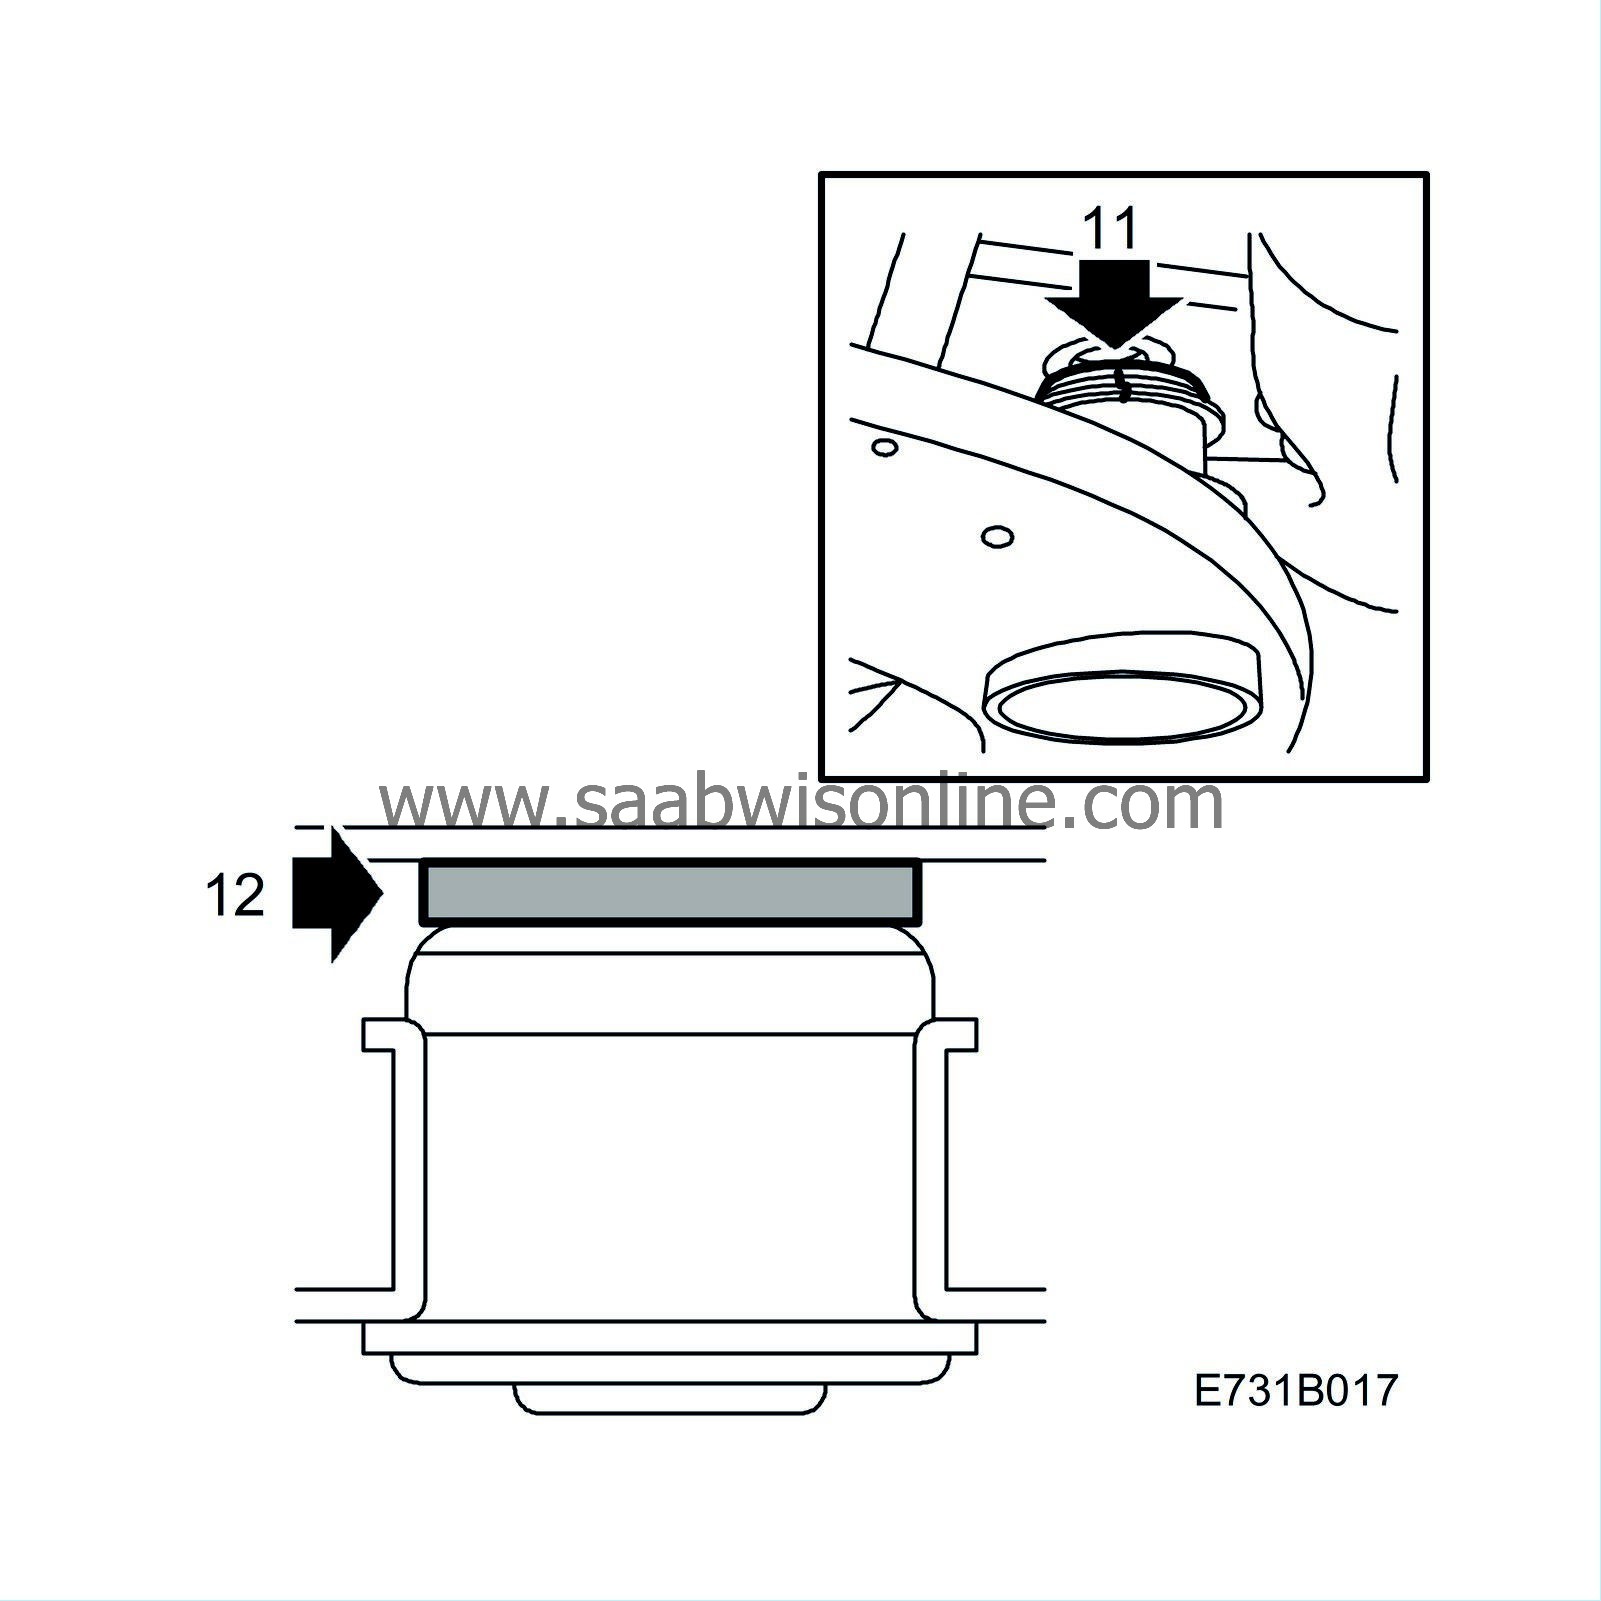
Mark the position of the bush with a dash to check that it is not rotated when the screw is fitted.
|
|
12.
|
Place a 4 mm or 2 mm thick washer between the bush and the body if it can be done without forcing it in.
|
Note
|
|
The washer must not be forced into place. The space between the bush and the body should be at least 0.5 mm bigger than the thickness of the washer. If the space is less than 2.5 mm, do not fit a washer.
|
|
|
13.
|
Lift the subframe enough that the bush is pressed against the body. Fit the screw.
|
Note
|
|
Make sure the bush is not rotated out of its position when tightening.
|
Tightening torque 100 Nm +45° (75 lbf ft +45°)
|
|
14.
|
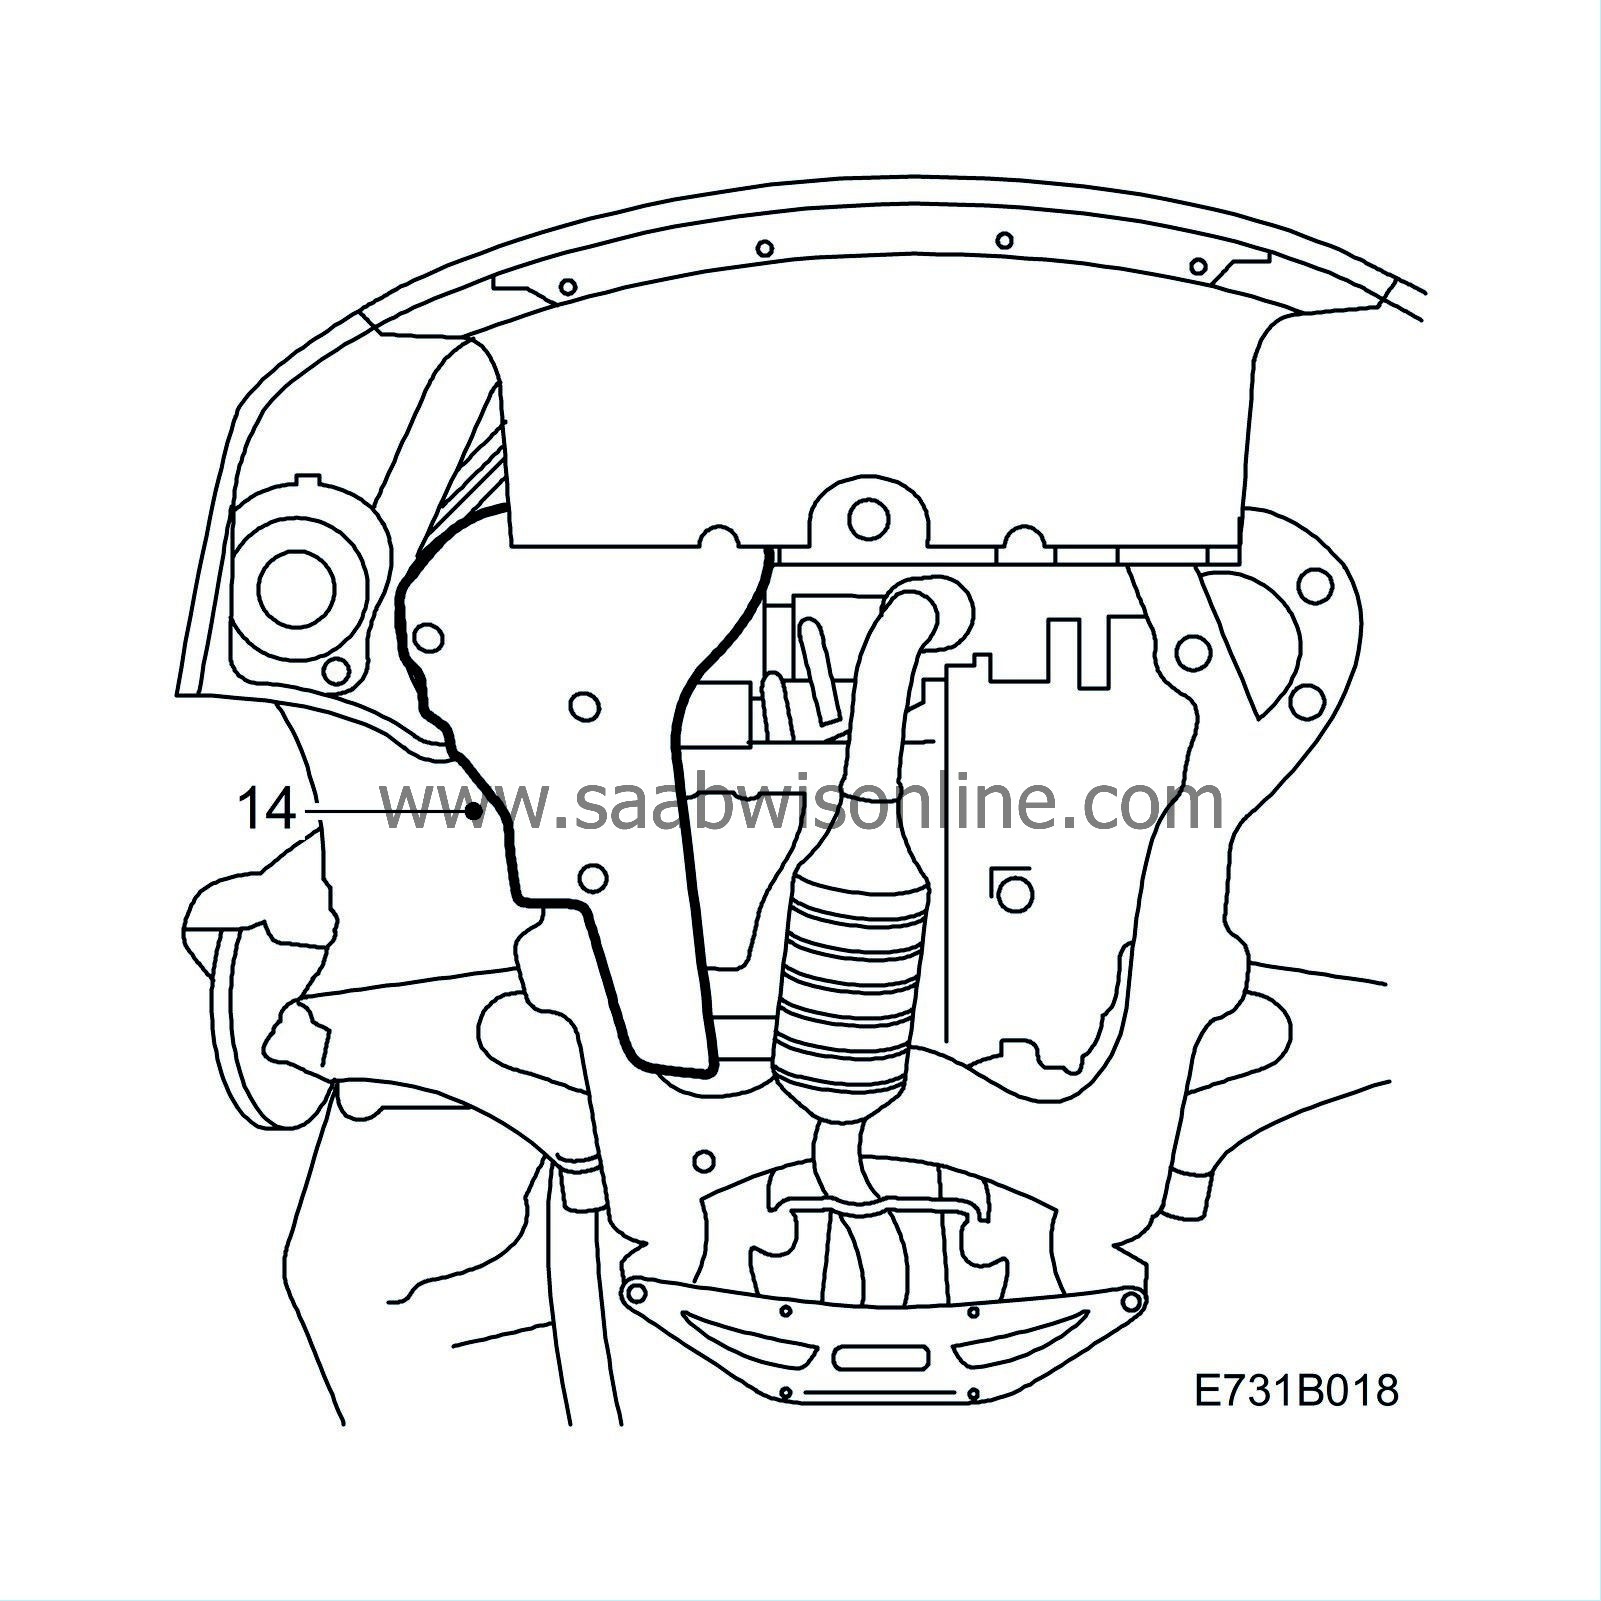
Remove the lower cover of the belt circuit.
|
|
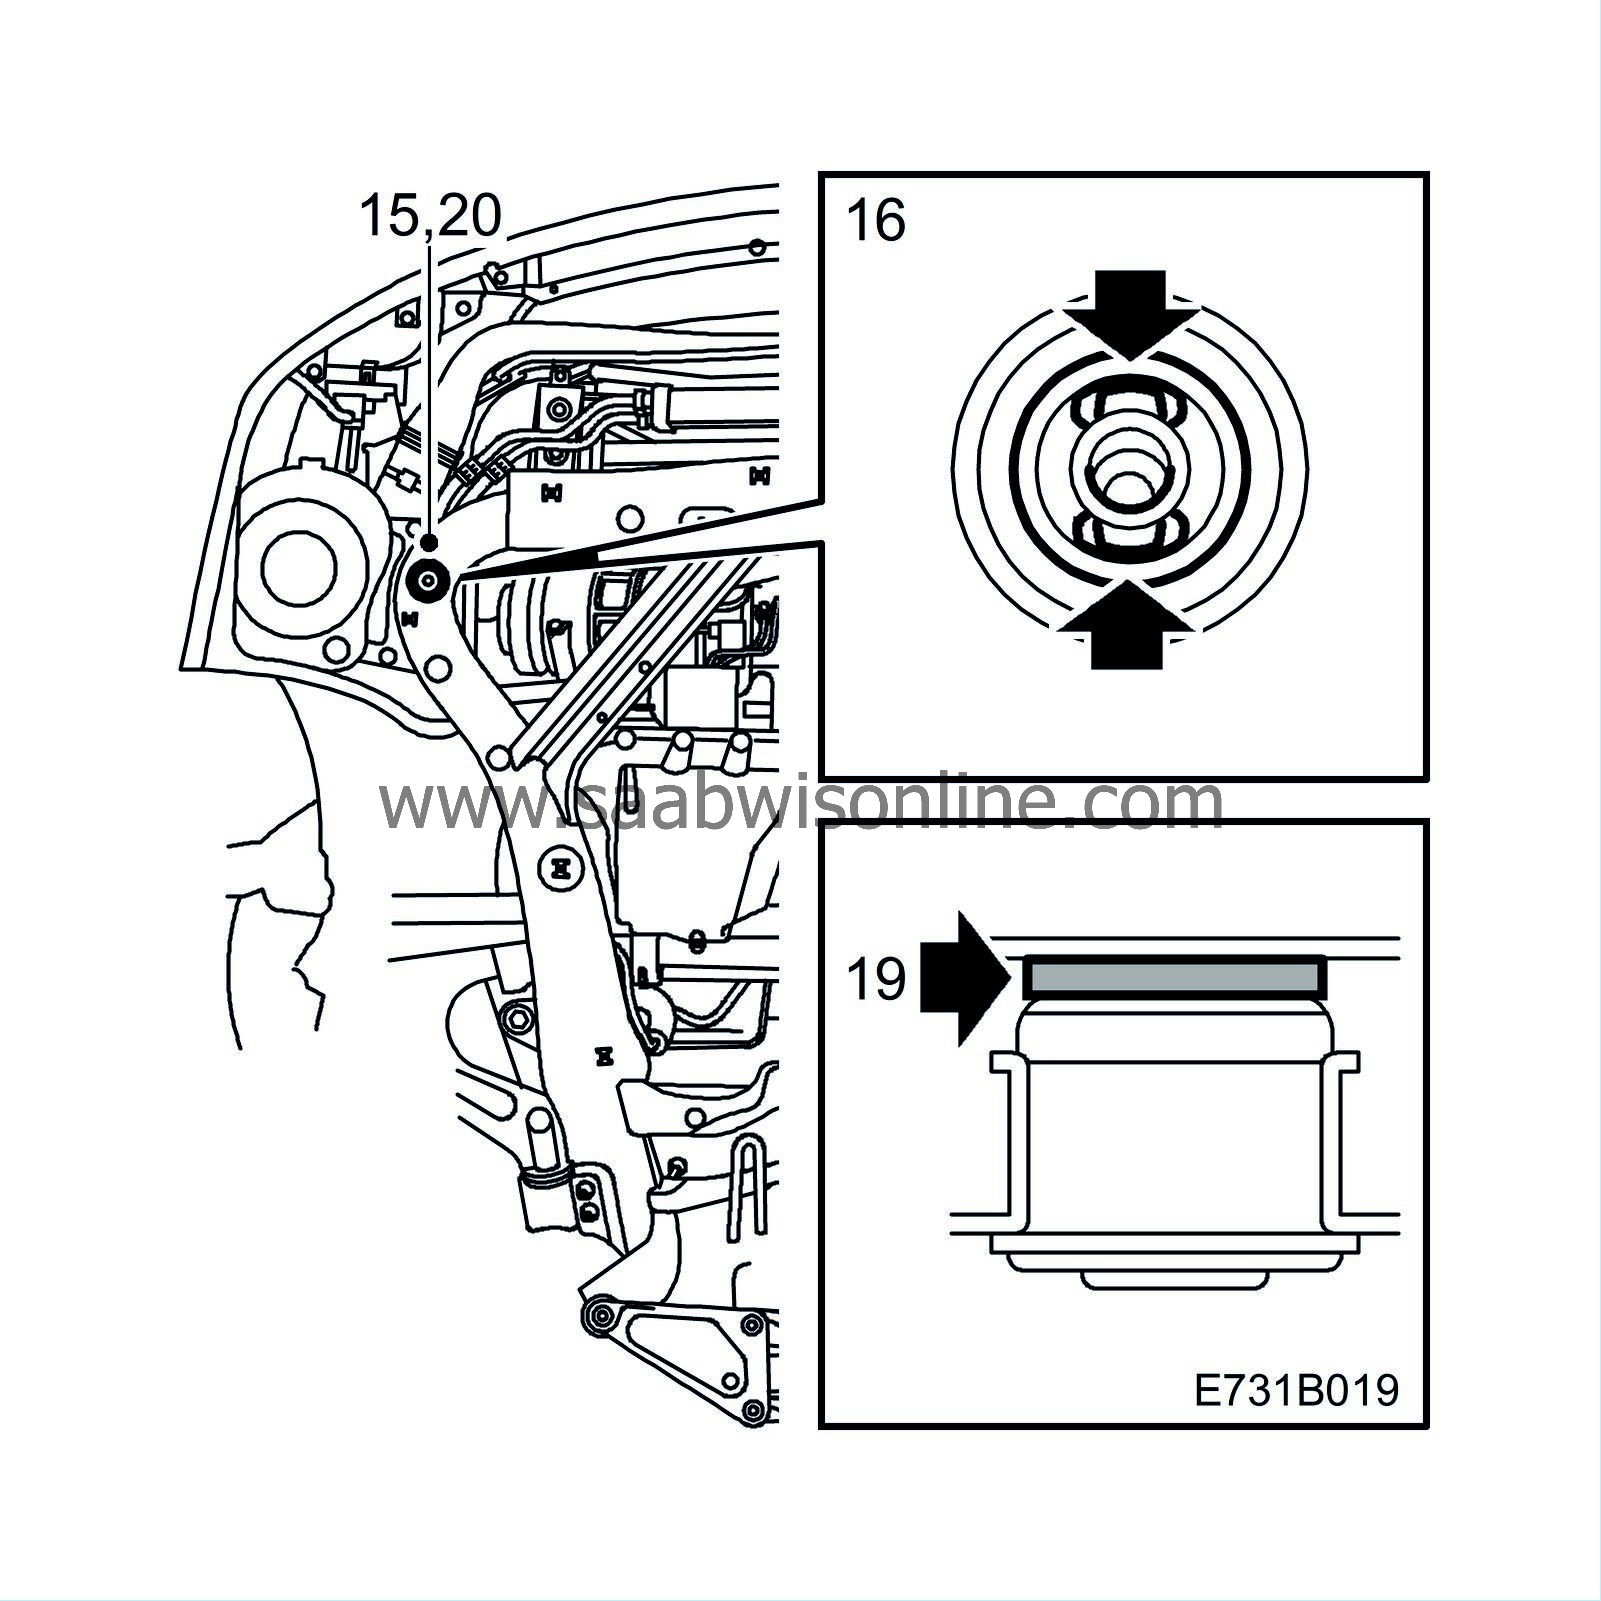
15.
|
Remove the screw from the front bush on the right-hand side of the subframe.
|
|
16.
|
Check that the bush is correctly fitted. The bushes must be fitted with one opening to the front and one to the rear.
|
|
17.
|
Is the bush correctly fitted in the subframe?
NO:
Replace the bush following "WIS - 7. Suspension, wheels - Suspension, front - Adjust, replace - Bush, subframe". Then continue following step 18 of these instructions.
YES:
Continue following step 18 of these instructions.
|
|
18.
|
Mark the position of the bush with a dash to check that it is not rotated when the screw is fitted.
|
|
19.
|
Place a 2 mm thick washer between the bush and the body if it can be done without forcing it in.
|
Note
|
|
The washer must not be forced into place. The space between the bush and the body should be at least 0.5 mm bigger than the thickness of the washer. If the space is less than 2.5 mm, do not fit a washer.
|
|
|
20.
|
Lift the subframe enough that the bush is pressed against the body. Fit the screw.
|
Note
|
|
Make sure the bush is not rotated out of its position when tightening.
|
Tightening torque 100 Nm +45° (75 lbf ft +45°)
|
|
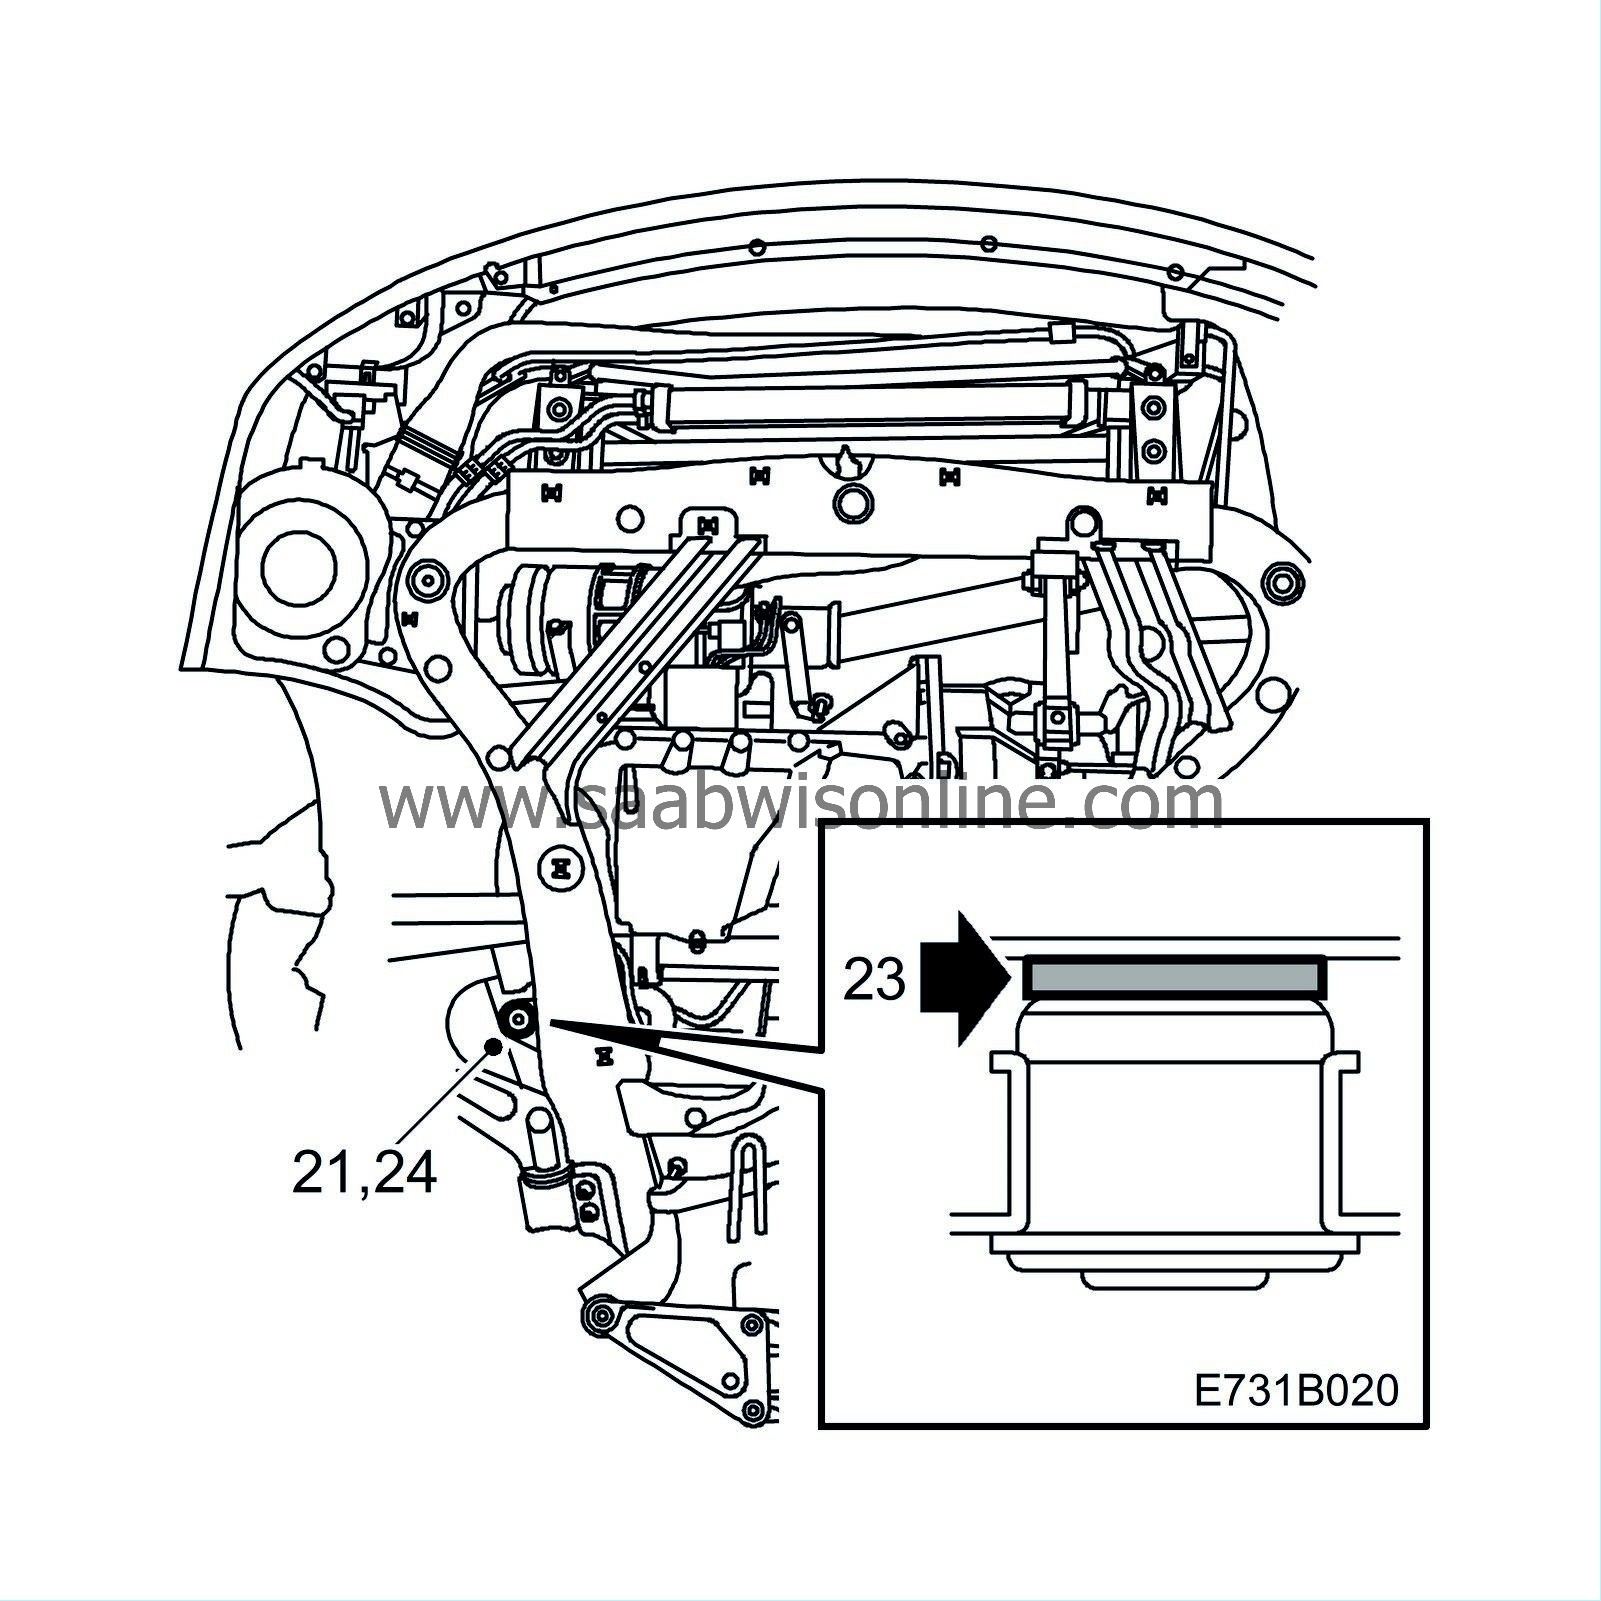
21.
|
Remove the screw from the centre bush on the right-hand side of the subframe.
|
|
22.
|
Mark the position of the bush with a dash to check that it is not rotated when the screw is fitted.
|
|
23.
|
Place a 2 mm thick washer between the bush and the body if it can be done without forcing it in.
|
Note
|
|
The washer must not be forced into place. The space between the bush and the body should be at least 0.5 mm bigger than the thickness of the washer. If the space is less than 2.5 mm, do not fit a washer.
|
|
|
24.
|
Lift the subframe enough that the bush is pressed against the body. Fit the screw.
|
Note
|
|
Make sure the bush is not rotated out of its position when tightening.
|
Tightening torque 100 Nm +45° (75 lbf ft +45°)
|
|
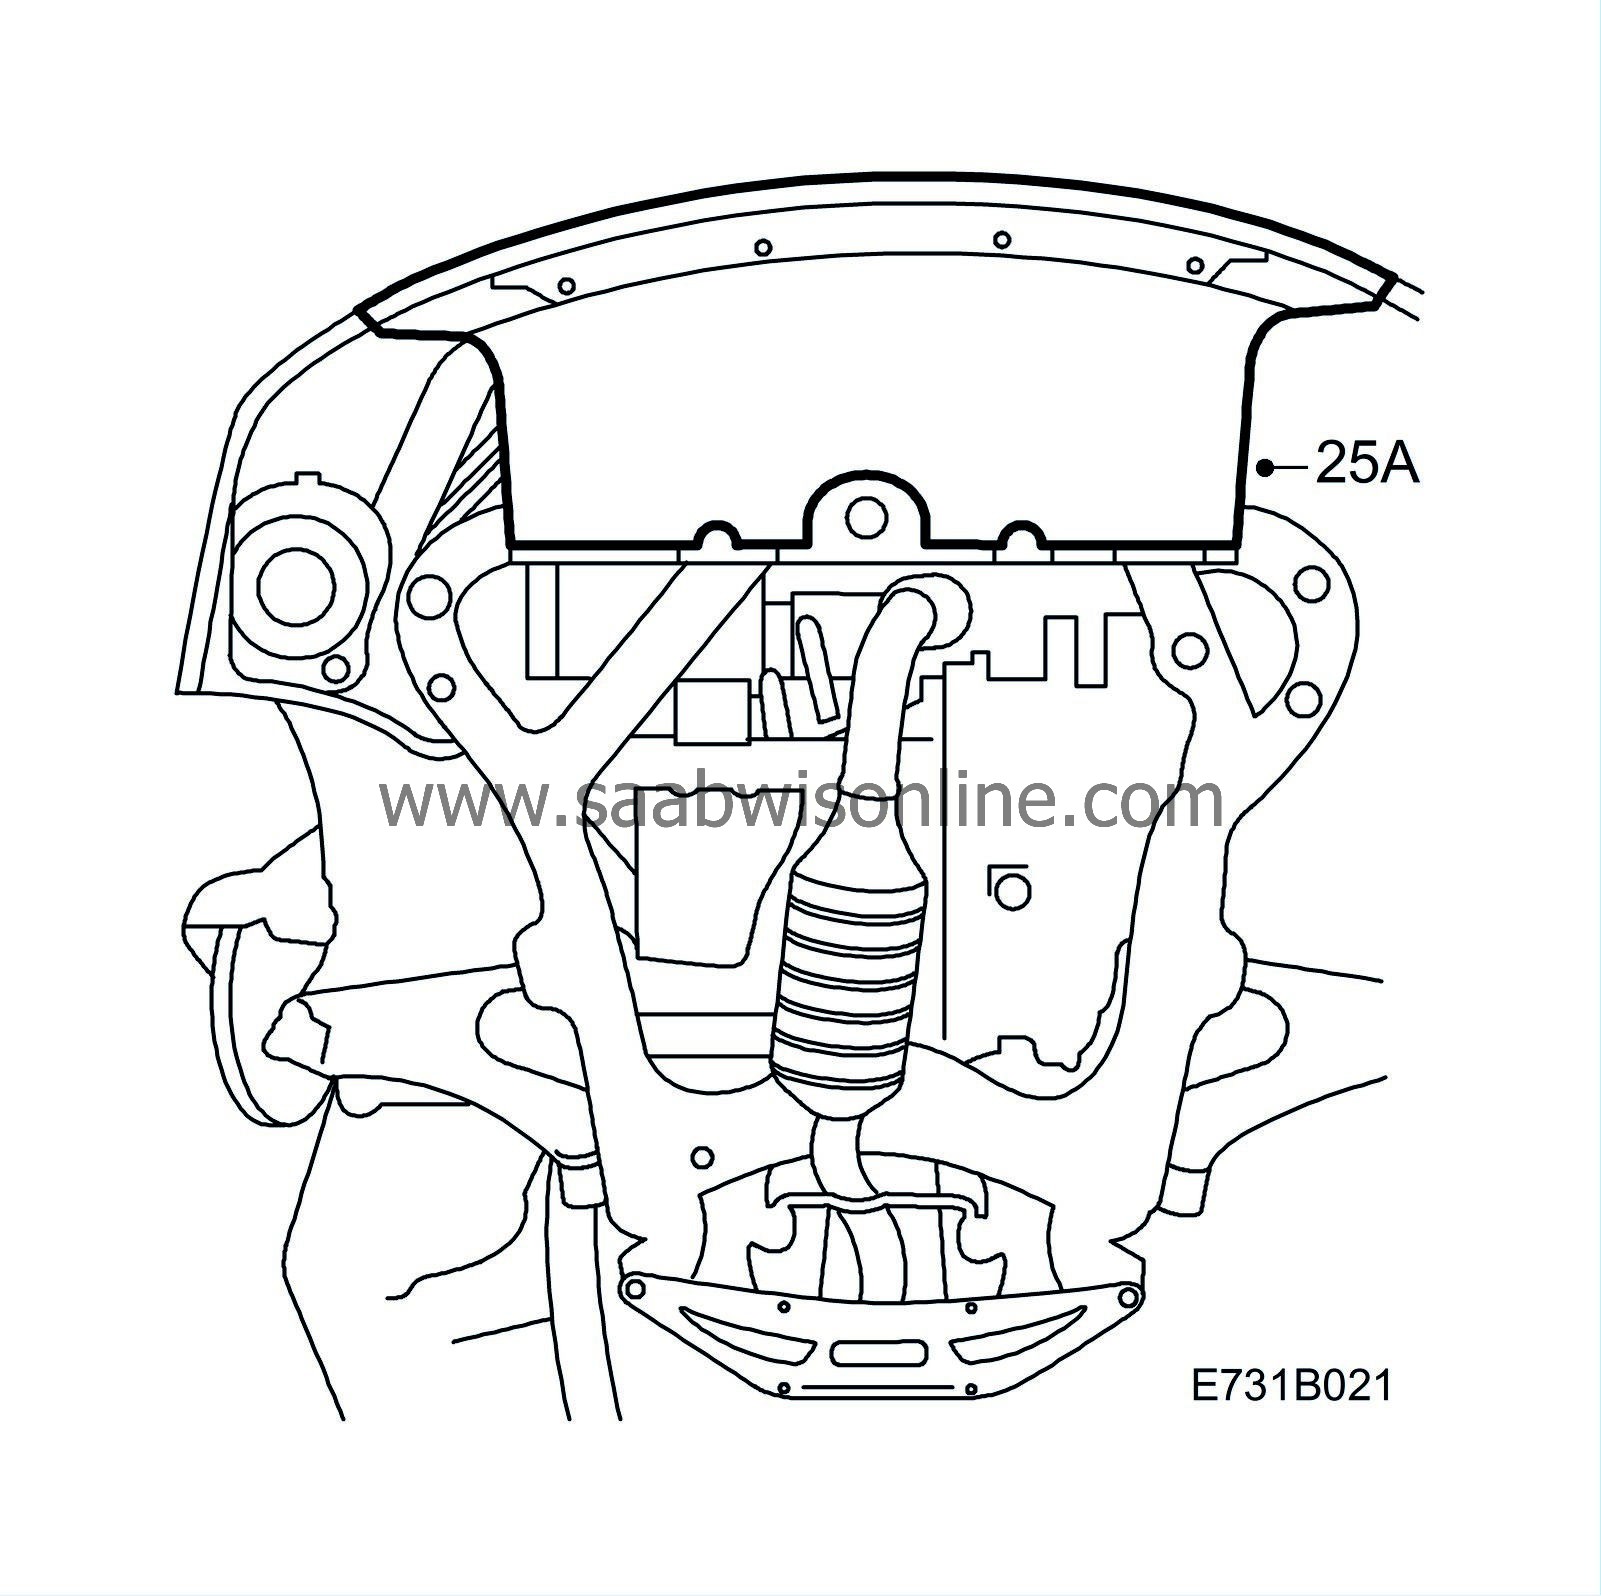
25.
|
If a 4 mm washer was used to shim the front bush on the left-hand side of the subframe, the radiator and charge air cooler must be shimmed with four 2 mm washers.
|
|
|
25.a.
|
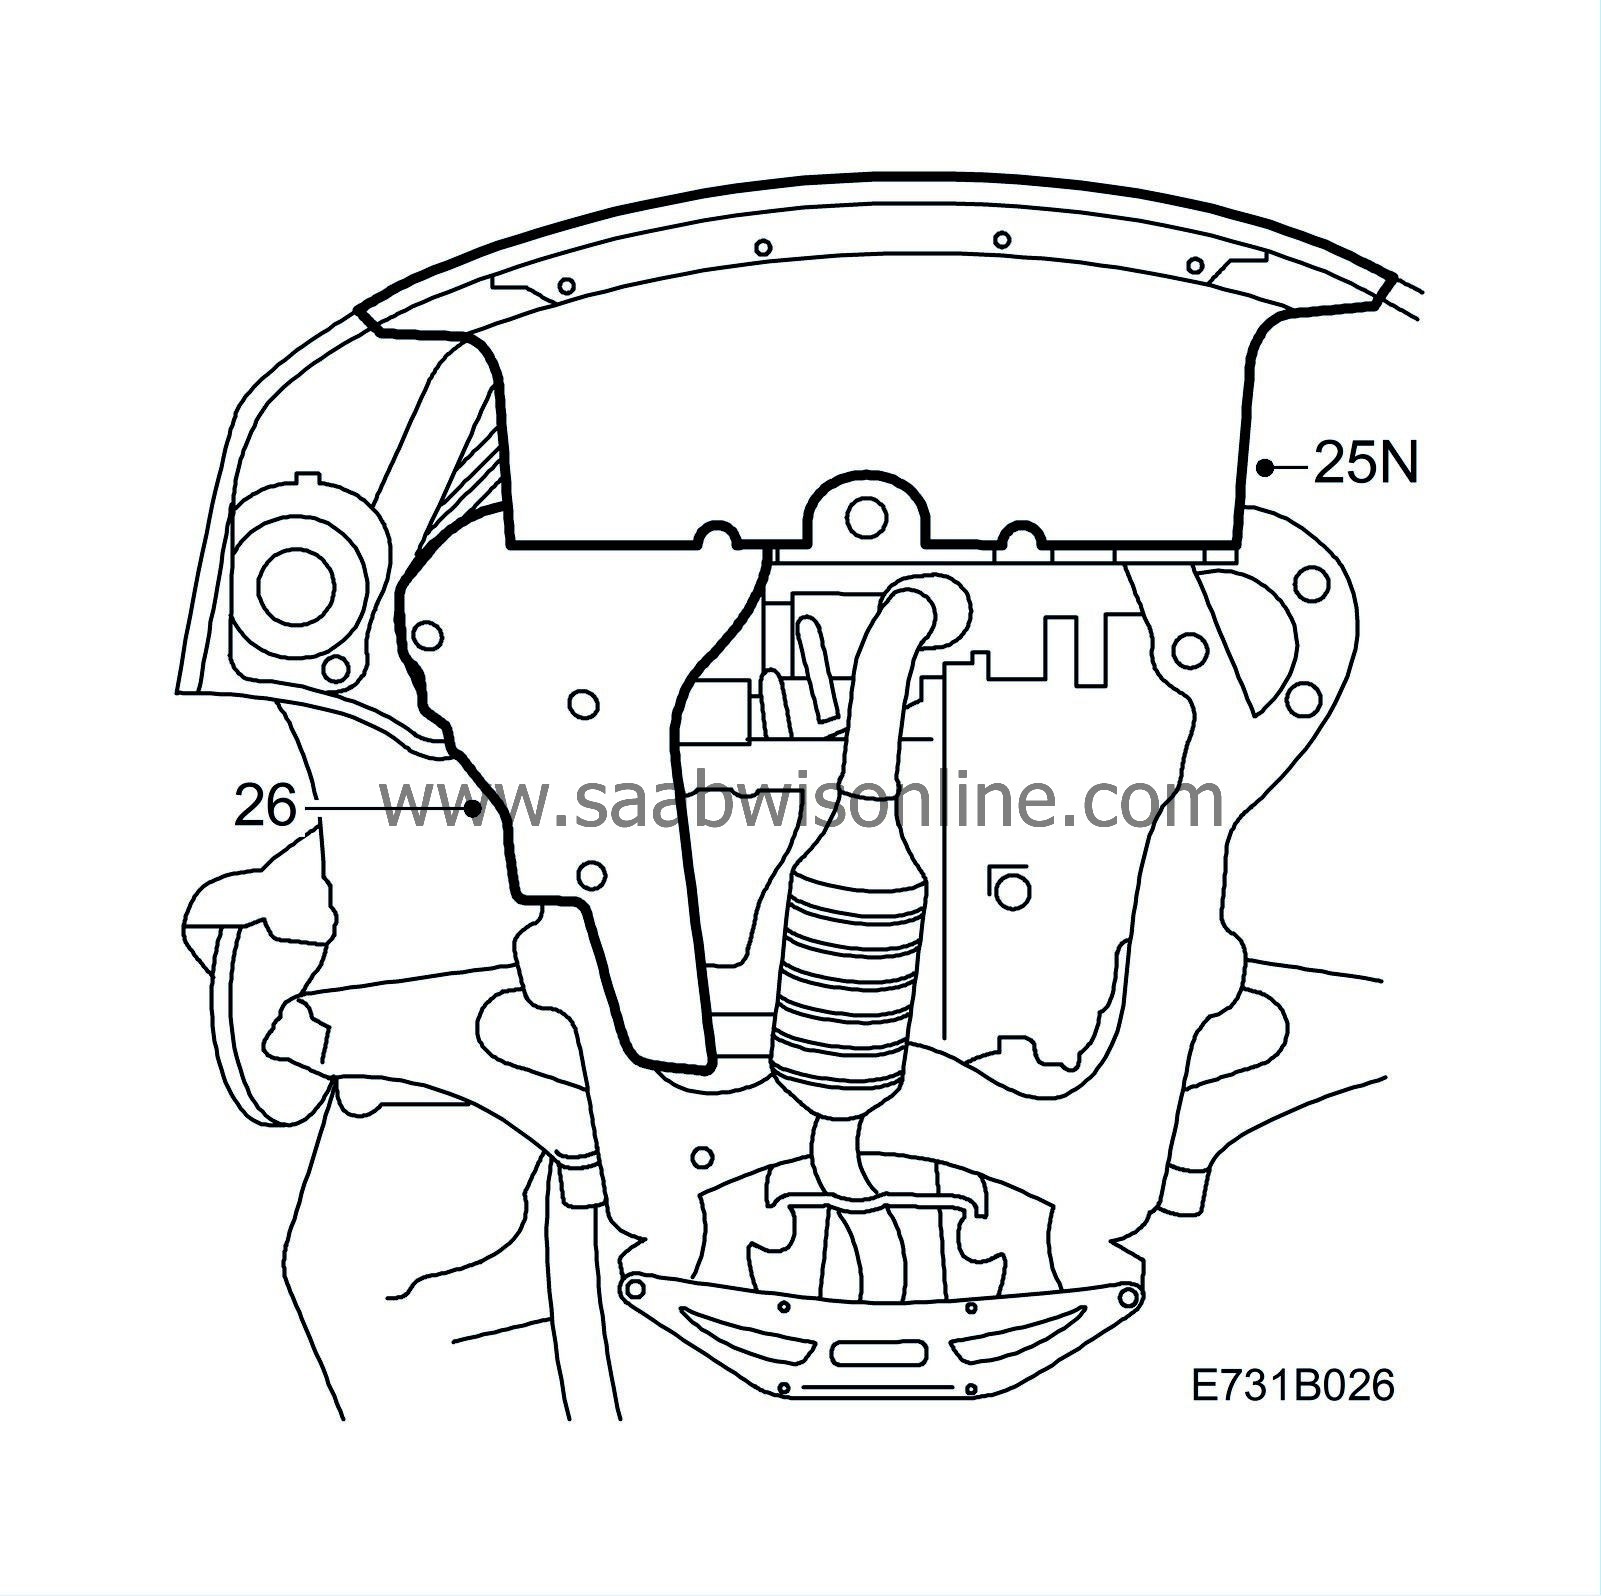
Remove the lower front cover.
|
|
|
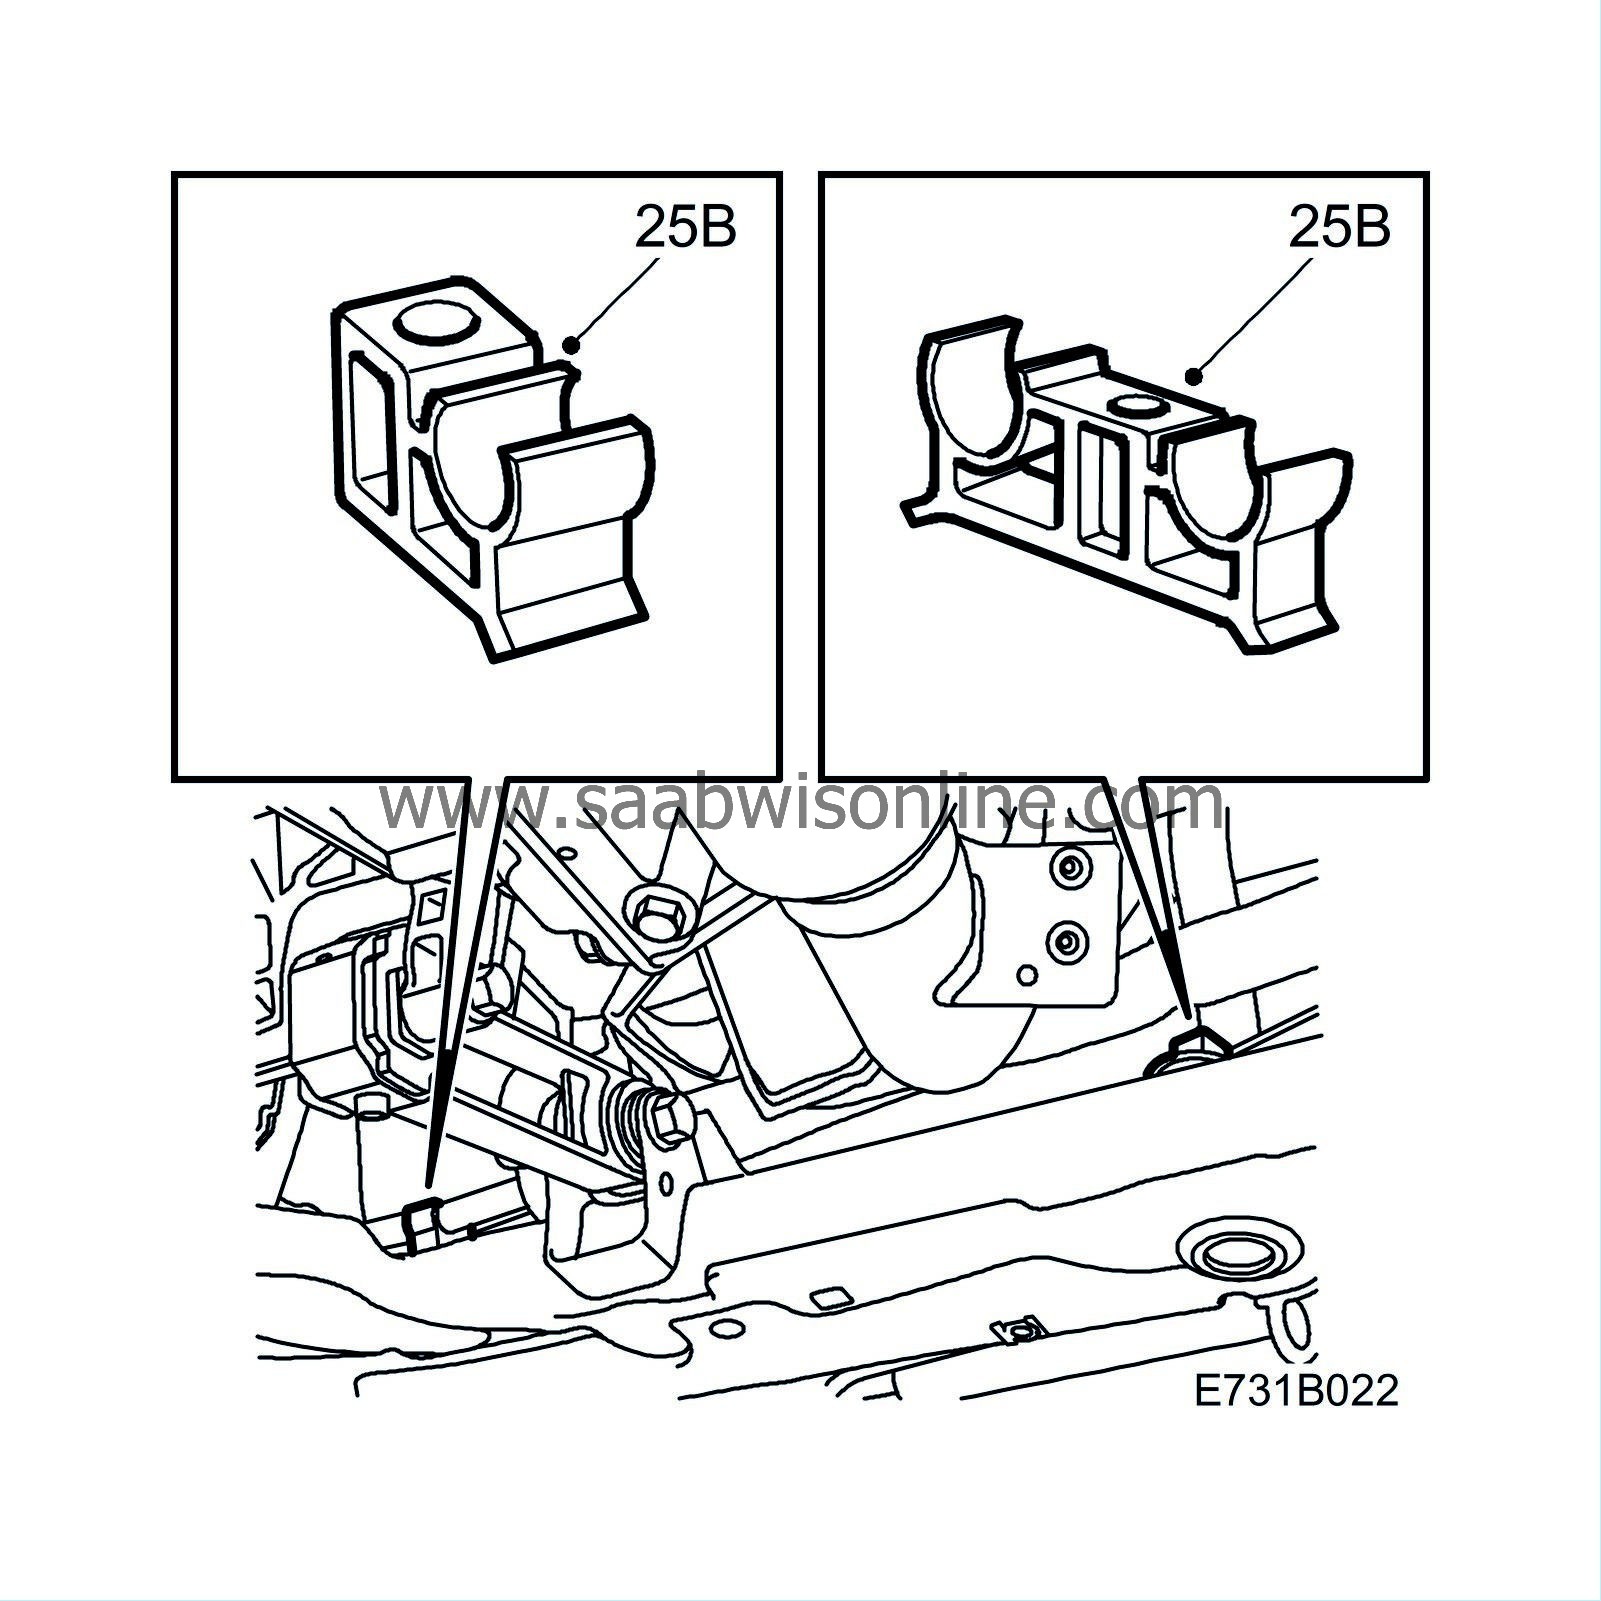
25.b.
|
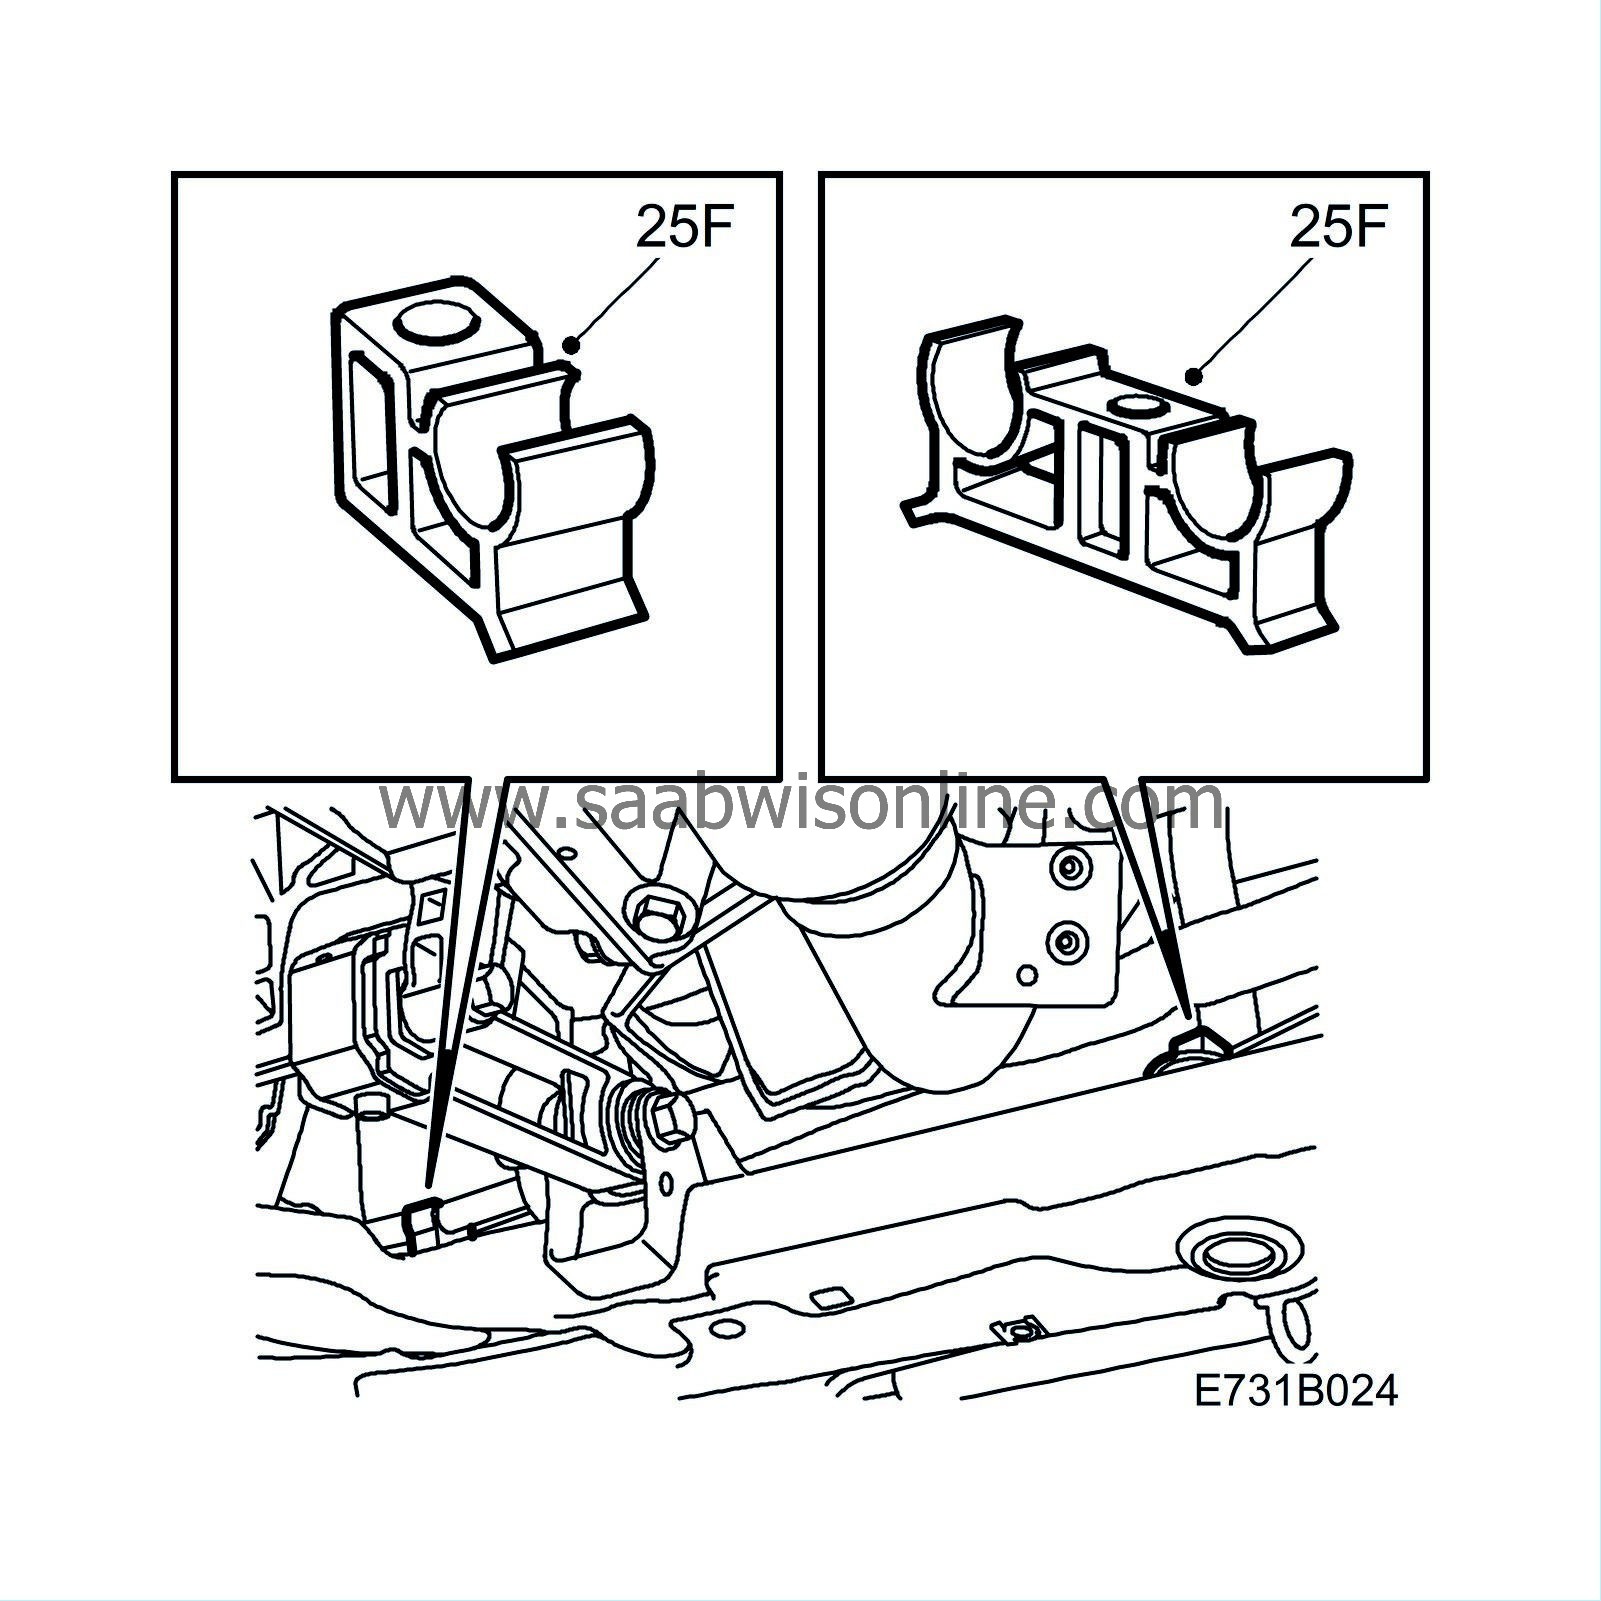
Detach the A/C pipes from the plastic clip on the subframe.
|
|
|
25.c.
|
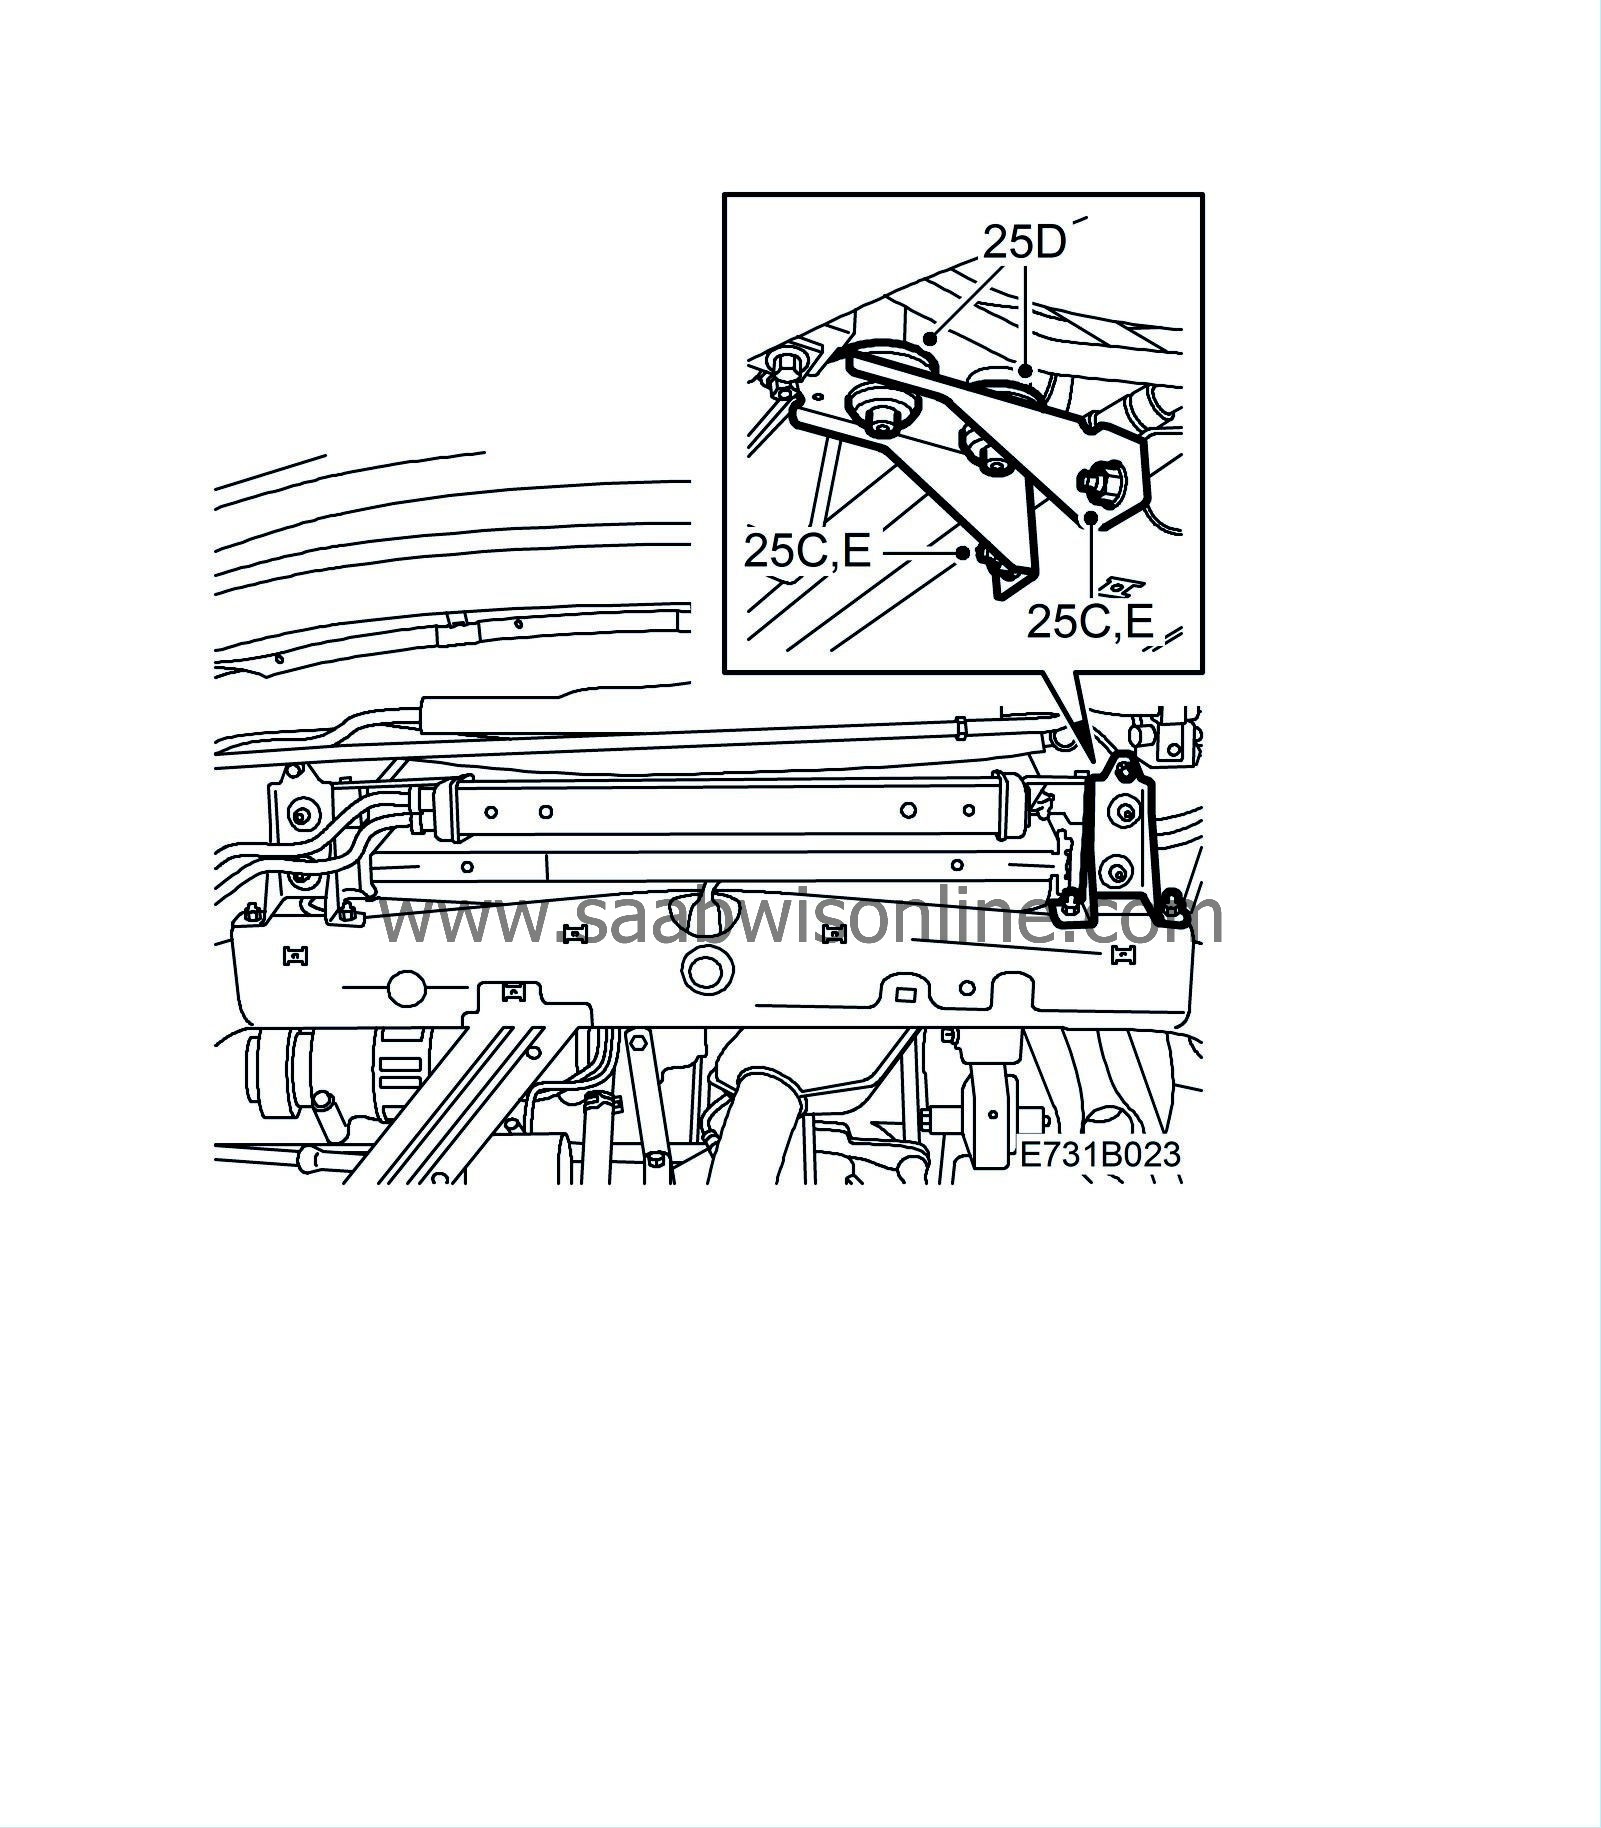
Detach the left-hand radiator bracket from the subframe.
|
|
|
25.d.
|
Fit a washer under the radiator and a washer under the charge air cooler.
|
|
|
25.e.
|
Fit the radiator bracket to the subframe.
|
|
|
25.f.
|
Fit the A/C pipes into the plastic clip.
|
|
|
25.g.
|
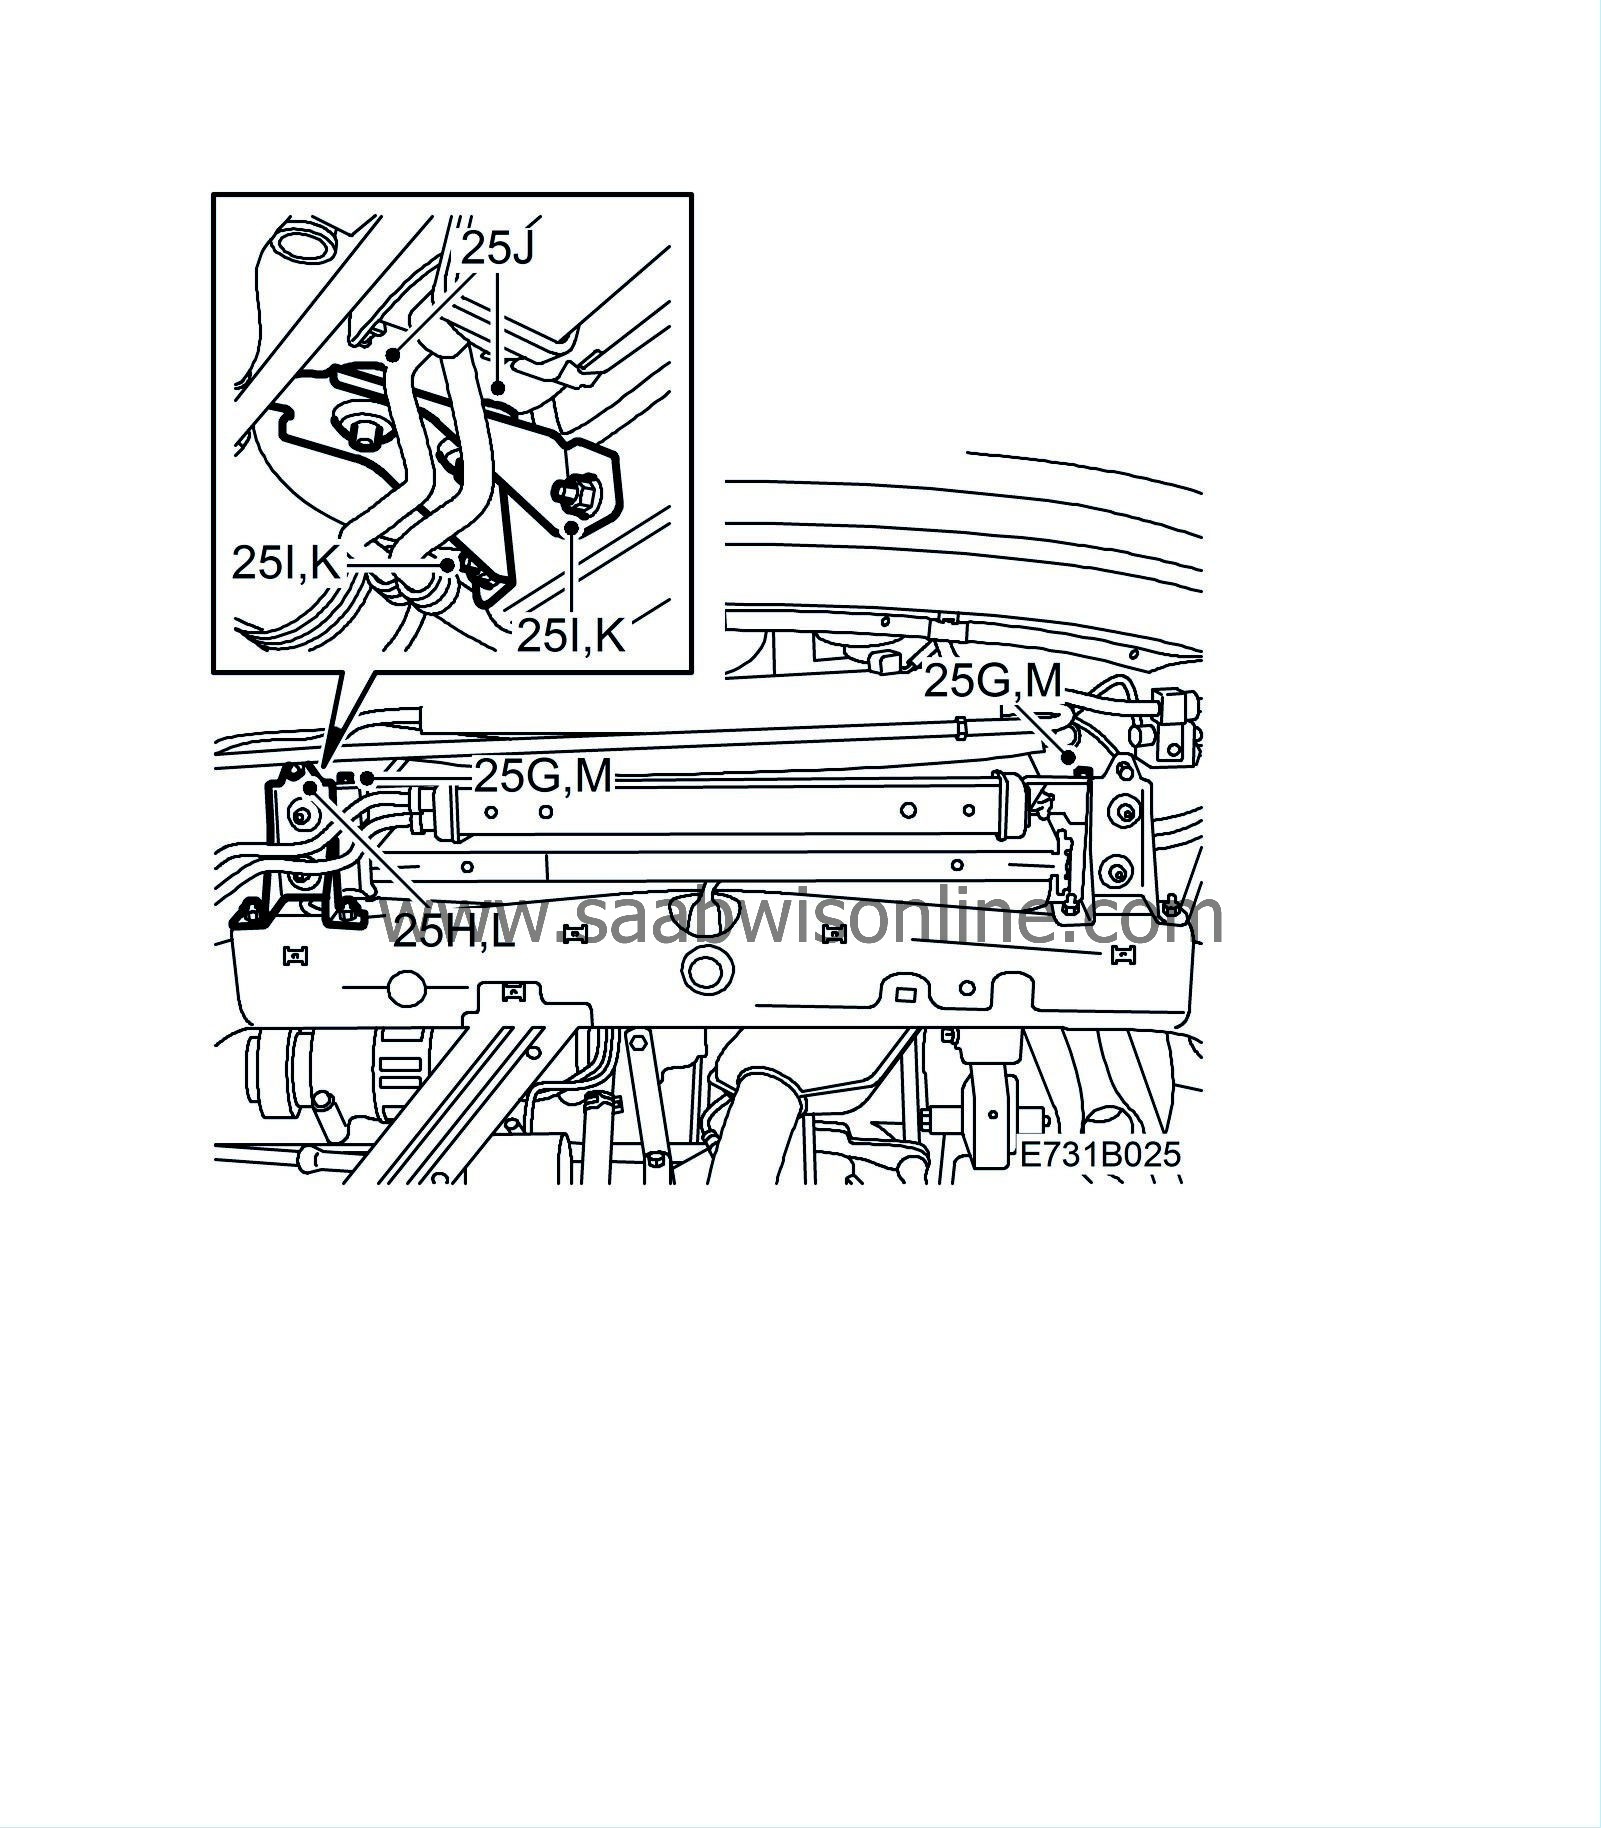
Remove the engine oil cooler from the charge air cooler.
|
|
|
25.h.
|
Detach the PS hose from the right-hand radiator bracket.
|
|
|
25.i.
|
Remove the right-hand radiator bracket from the subframe.
|
|
|
25.j.
|
Fit a washer under the radiator and a washer under the charge air cooler.
|
|
|
25.k.
|
Fit the radiator bracket to the subframe.
|
|
|
25.l.
|
Fit the PS hose to the radiator bracket.
|
|
|
25.m.
|
Fit the engine oil cooler to the charge air cooler.
Tightening torque 6 Nm (4.5 lbf ft)
|
|
|
25.n.
|
Fit the lower front cover.
|
|
26.
|
Fit the lower cover of the belt circuit.
|
|
28.
|
Test-run the car, accelerating and braking to condition the bushes.
|
|
30.
|
Shift the selector lever to D.
|
|
31.
|
Select
Trionic -
Adjustment -
Idle RPM Offset in Drive in Tech 2 and increase idling speed by 10-50 rpm so that the vibrations and infrasonic noise disappear.
|
Note
|
|
If idling speed has been increased, inform the customer that the car will pull with more force when it is stationary and the selector lever is in position D.
|
|
|
Time/Warranty information
|
To resolve a customer complaint for a vehicle
under warranty
, submit a claim using the following information:
Object code: 19047 and 73191
Fault/Reason code: 47
Location code: 09
Action code: 01, 05 and 08
Labour operation
Time:
19047 Idling speed adjustment: 0.1 hour
73191 Checking and fitting washers: 0.7 hours
73191 Replacing 1 bush: 2.8 hours
73191 Replacing 2 bushes: 2.9 hours
73191 Replacing 6 bushes: 3.3 hours


