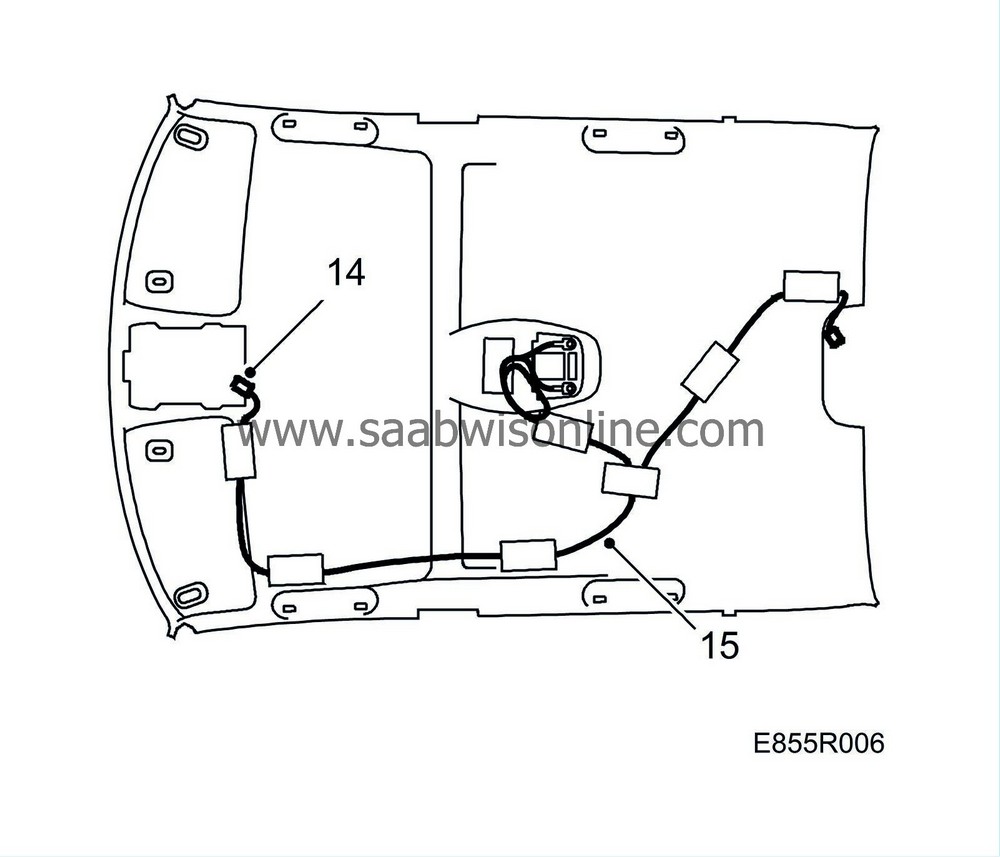
Headlining, 4D
| Headlining, 4D |
| To remove |
|
|||||||
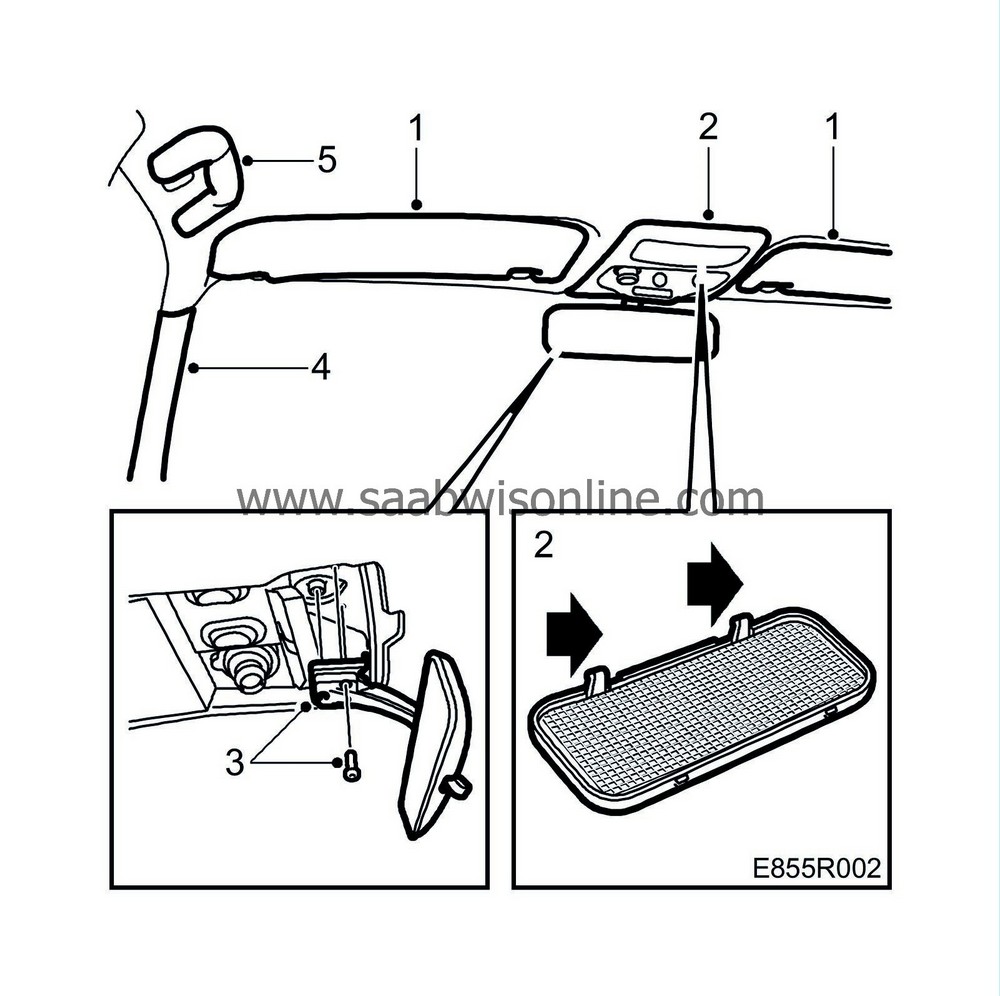
| 1. |
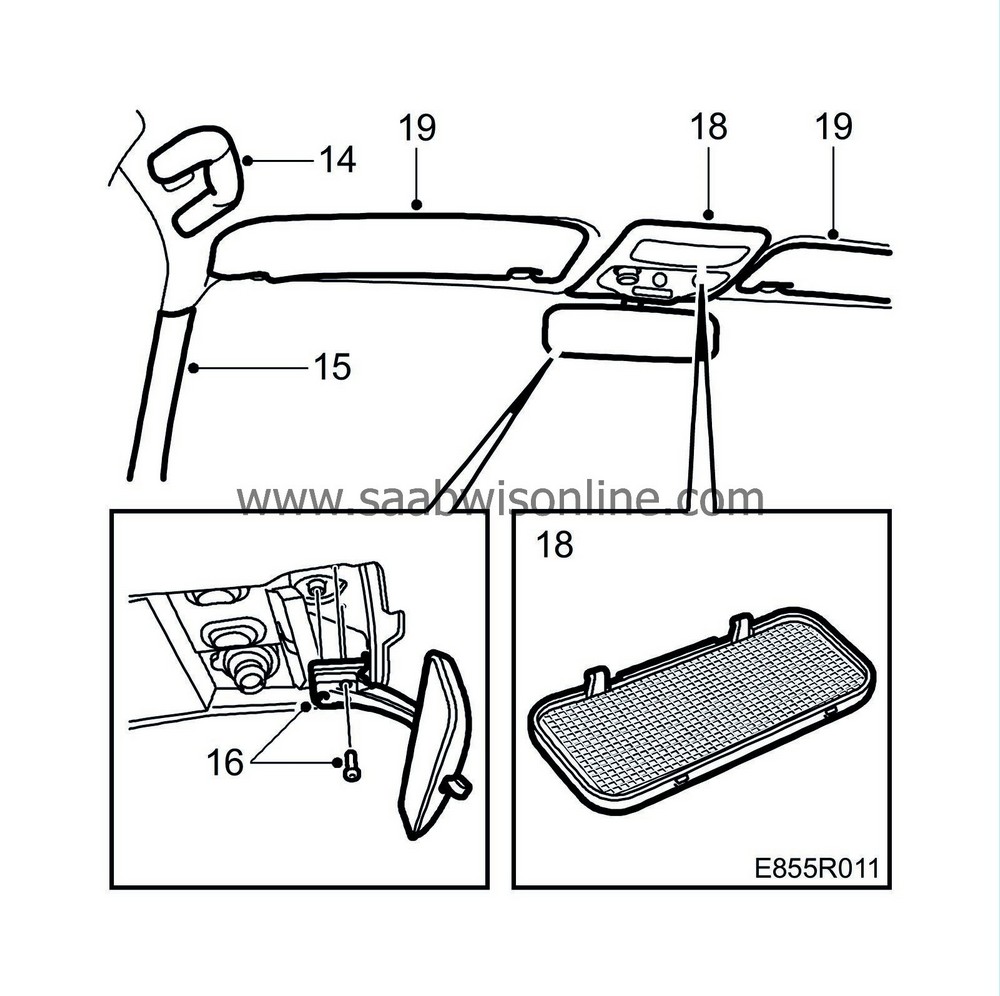
Remove the sun visor and its mounting, 3 screws per visor.
Mirror light: Unplug the connector for the light. |
|
| 2. |
Remove the roof console by carefully prising up the front edge of the light lens with a screwdriver inserted in the clip recesses.
Unscrew the roof console. Unplug the interior temperature sensor's connector, if fitted, and lift the roof console away. |
||||||||||
| 3. |
Remove the rear view mirror, 3 screws.
|
|
| 4. |
Remove the A-pillar trim (fastened with clips).
|
|
| 5. |
Remove all courtesy handles above the doors.
|
|
| 6. |
Cars with sunroof:
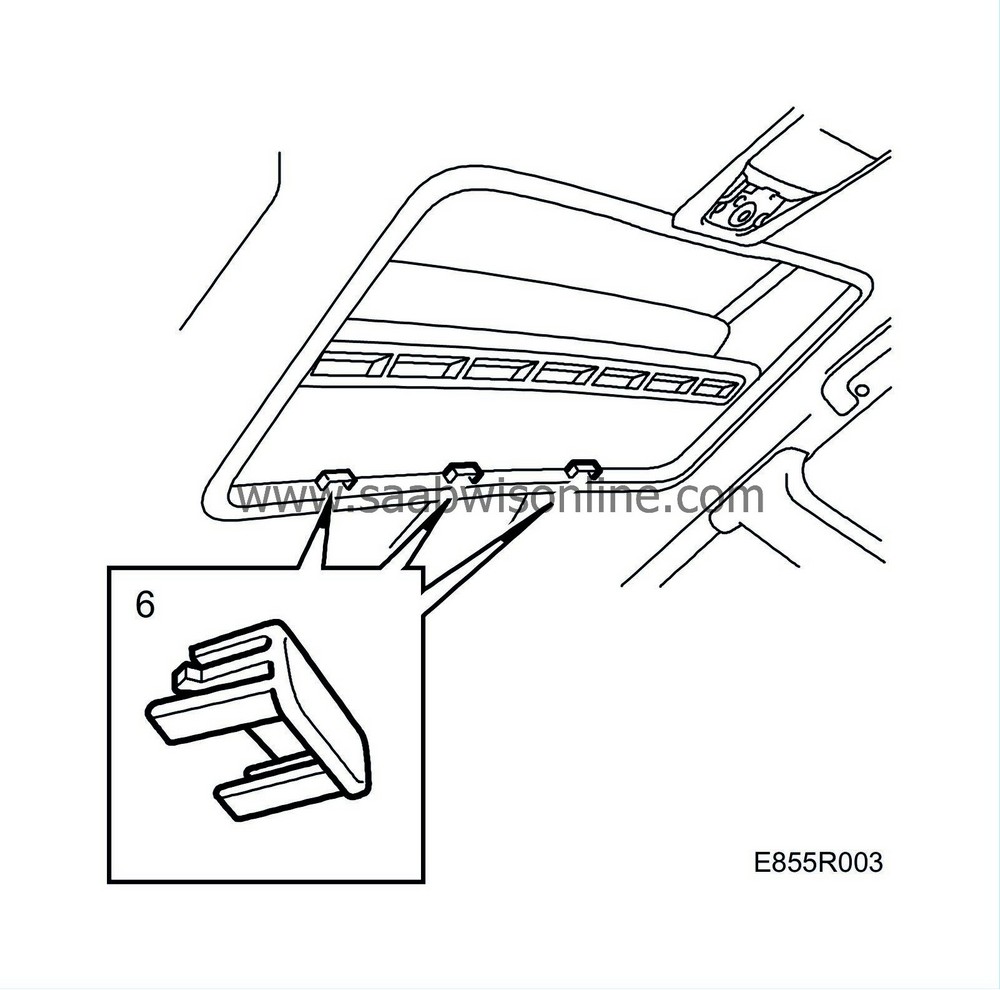
Remove the clips at the rear of the sunroof (3 pcs.) by carefully pressing from the rear with one finger. |
|
| 7. |
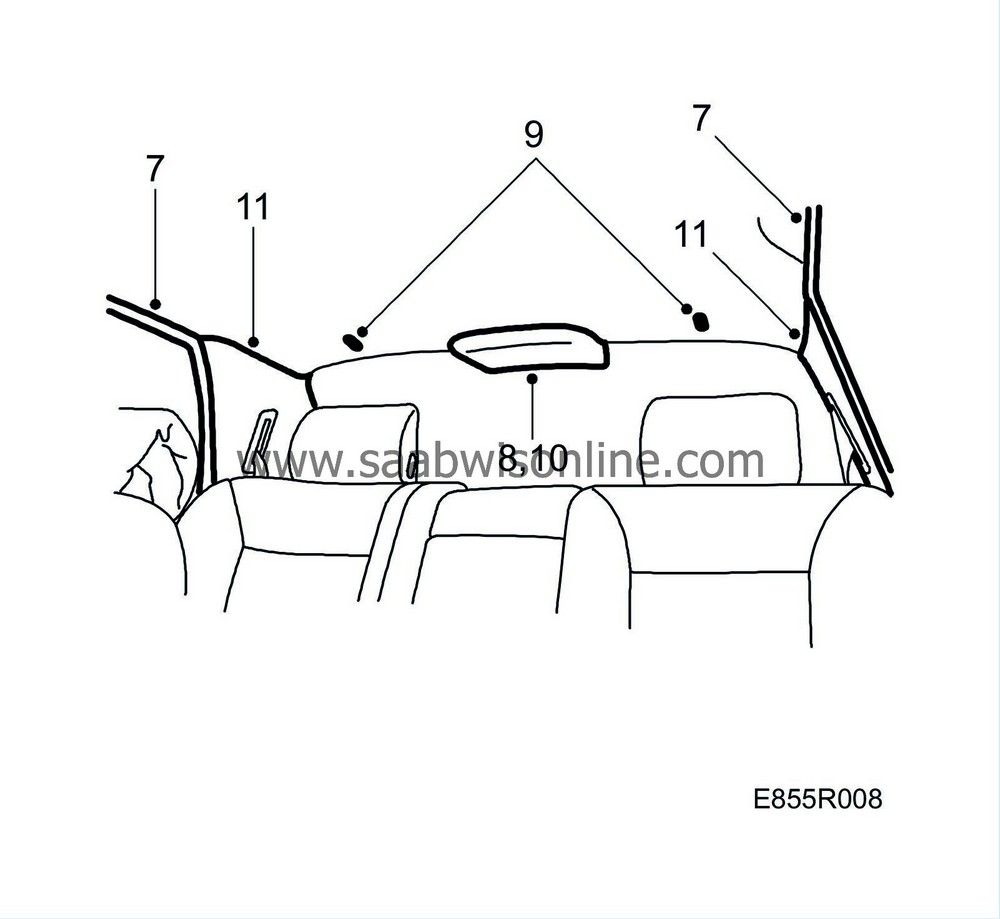
Remove the B-pillar trim on the passenger side (fastened with clips).

Lift the trim out of the air duct and place to one side. |
|
| 8. |
Detach the top of the C-pillar trim (fastened with clips).

|
|
| 9. |
Remove the cover for the high level brake light (fastened with clips) and unplug the connector.
Pull the brake light lead clear of the console. |
|
| 10. |
Undo the 2 clips securing the back of the headlining by turning them 90°.
|
|
| 11. |
Lower and slide back the front seats and fold down the backrests as far as possible.
|
|
| 12. |
Carefully pull the headlining out of the door sealing moulding on the passenger side. Then pull the headlining out of the door sealing moulding on the driver's side.
|
|
| 13. |
Cars with sunroof:
Detach the headlining from the hooks by the sunroof. |
|
| 15. |
Lift the headlining out through the front door on the passenger side.
When replacing the headlining, the rear roof light and wiring harness should be removed. |
|
| To fit |
|
|||||||

| Important | ||
|
Be careful not to crack the headlining. |
||
| 1. |
When replacing the headlining, the rear roof light and wiring harness should be fitted.
Lift the headlining in through the front door on the passenger side. |
|
| 2. |
Reconnect the connector on the top of the headlining.
Where applicable, reconnect the connector for the alarm system. |
|
| 3. |
Raise the headlining at the rear and place it on the C-pillar trims.
|
|
| 4. |
Fit the headlining to the B-pillar trim and door sealing mouldings on the driver's side.
|
|
| 5. |
Pull the headlining forward so it is hanging from the roof console by the rear-view mirror.
|
|
| 6. |
Cars with sunroof:
Reattach the hooks at the sunroof. |
|
| 7. |
Fit the headlining under the door sealing mouldings on the passenger side.
Check that the door sealing mouldings fit correctly.
|
|||||||
| 8. |
Thread in the lead and reconnect the connector for the high level brake light.
|
|
| 9. |
Fit the 2 clips at the rear of the headlining.
|
|
| 10. |
Fit the brake light cover.
|
|
| 11. |
Refit the C-pillar trim.
|
|
| 12. |
Refit the B-pillar trim.

Check that the seat belt runs correctly. |
|
| 13. |
Cars with sunroof:

Fit the clips at the rear of the sunroof. |
|
| 14. |
Refit the courtesy handles.
|
|
| 15. |
Refit the A-pillar trim.
|
|
| 16. |
Refit the rear-view mirror, 3 screws.
|
|
| 17. |
Replace the diode in its holder in the roof console.
|
|
| 18. |
Refit the roof console, 1 screw and light glass.
First reconnect the connector where applicable. |
|
| 19. |
If necessary, reconnect the connector for the mirror light.
Refit the sun visor and its mounting. |
|

 Warning
