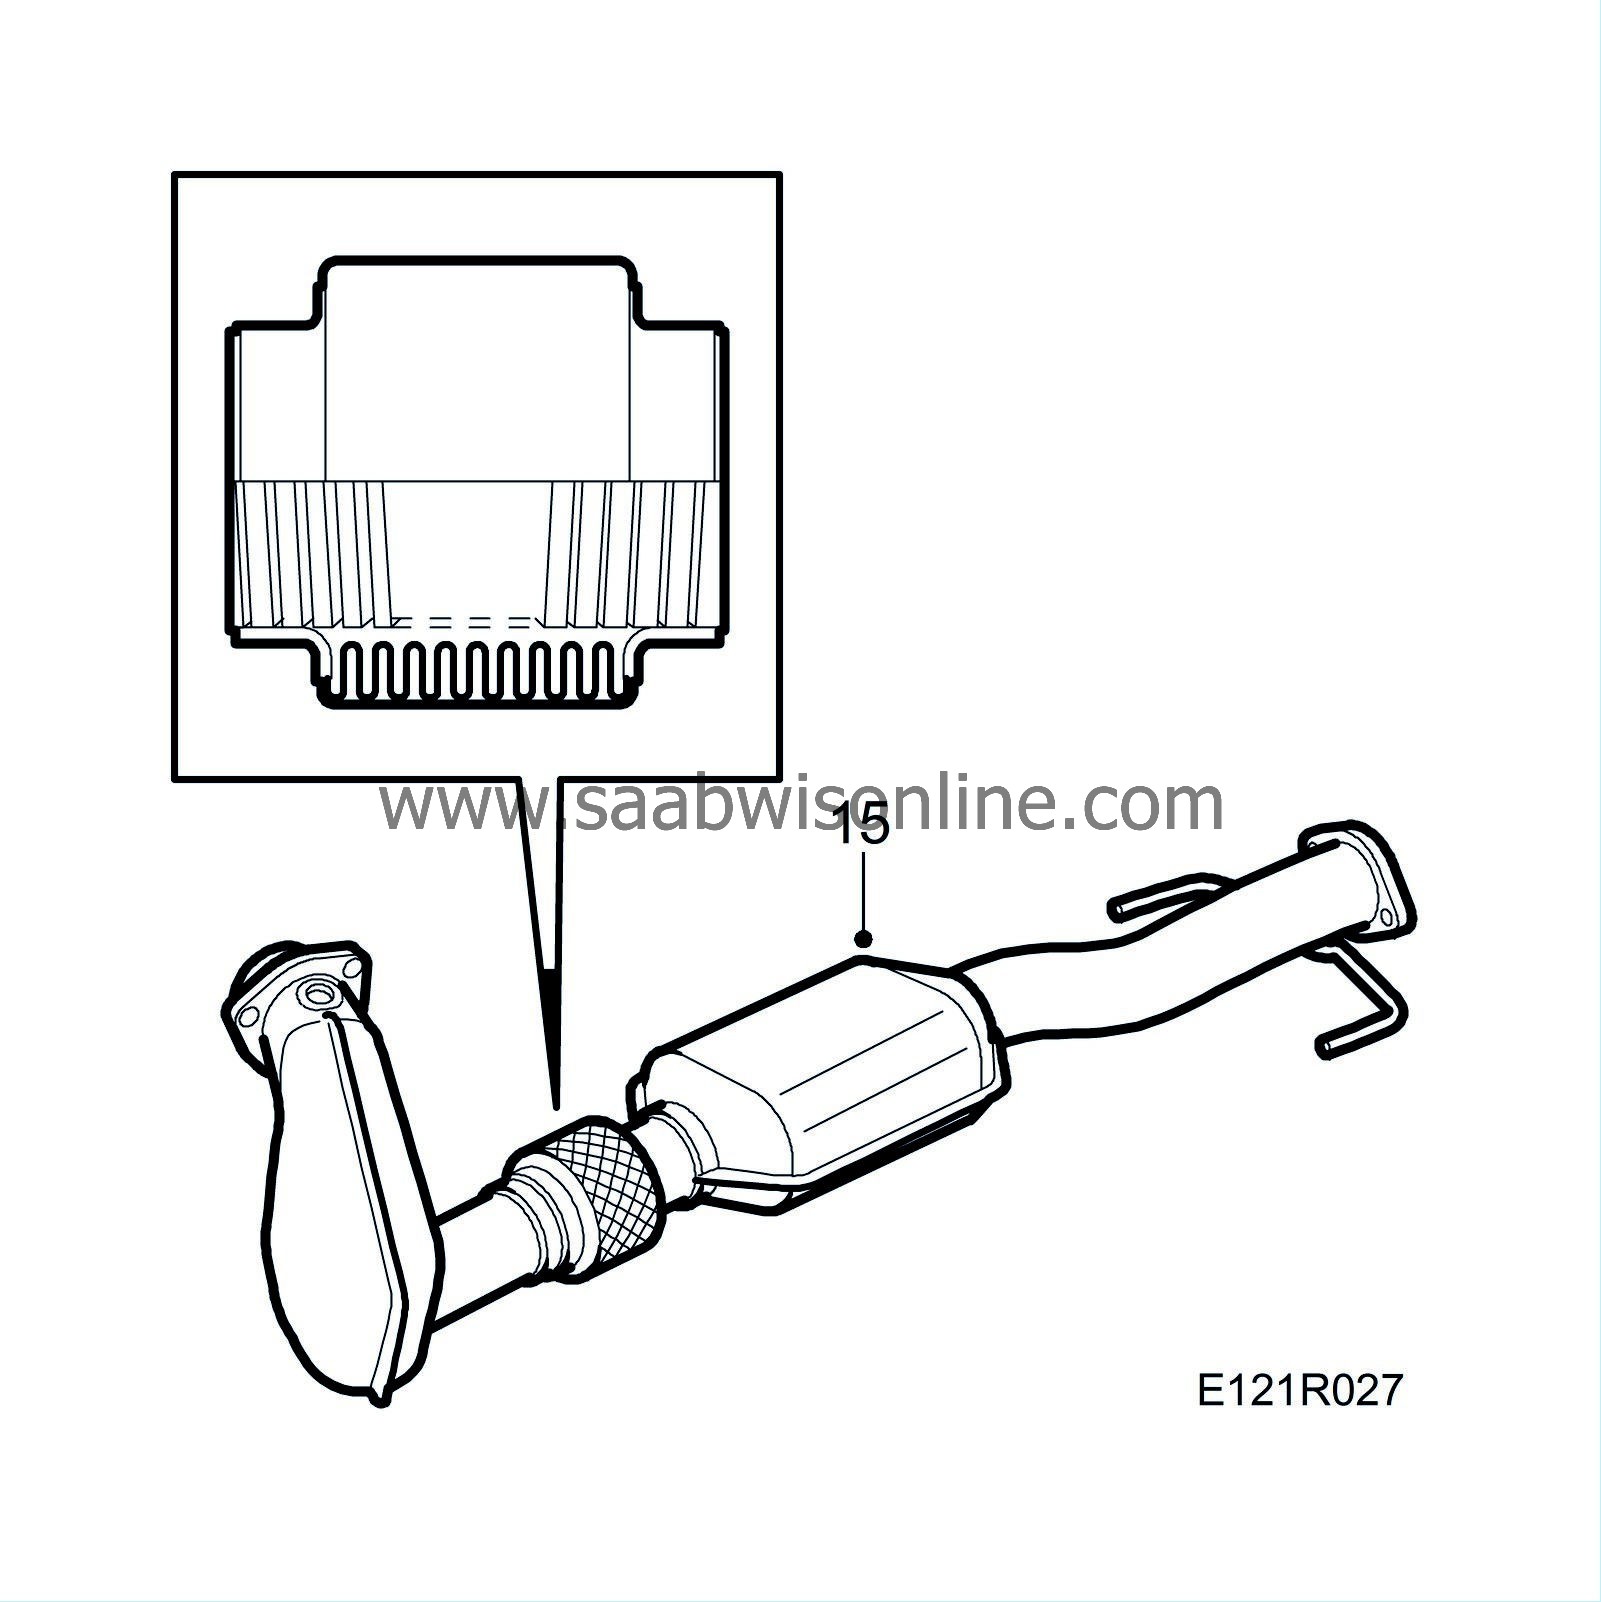
Engine mounting rear
| Engine mounting rear |
To remove
| 1. |
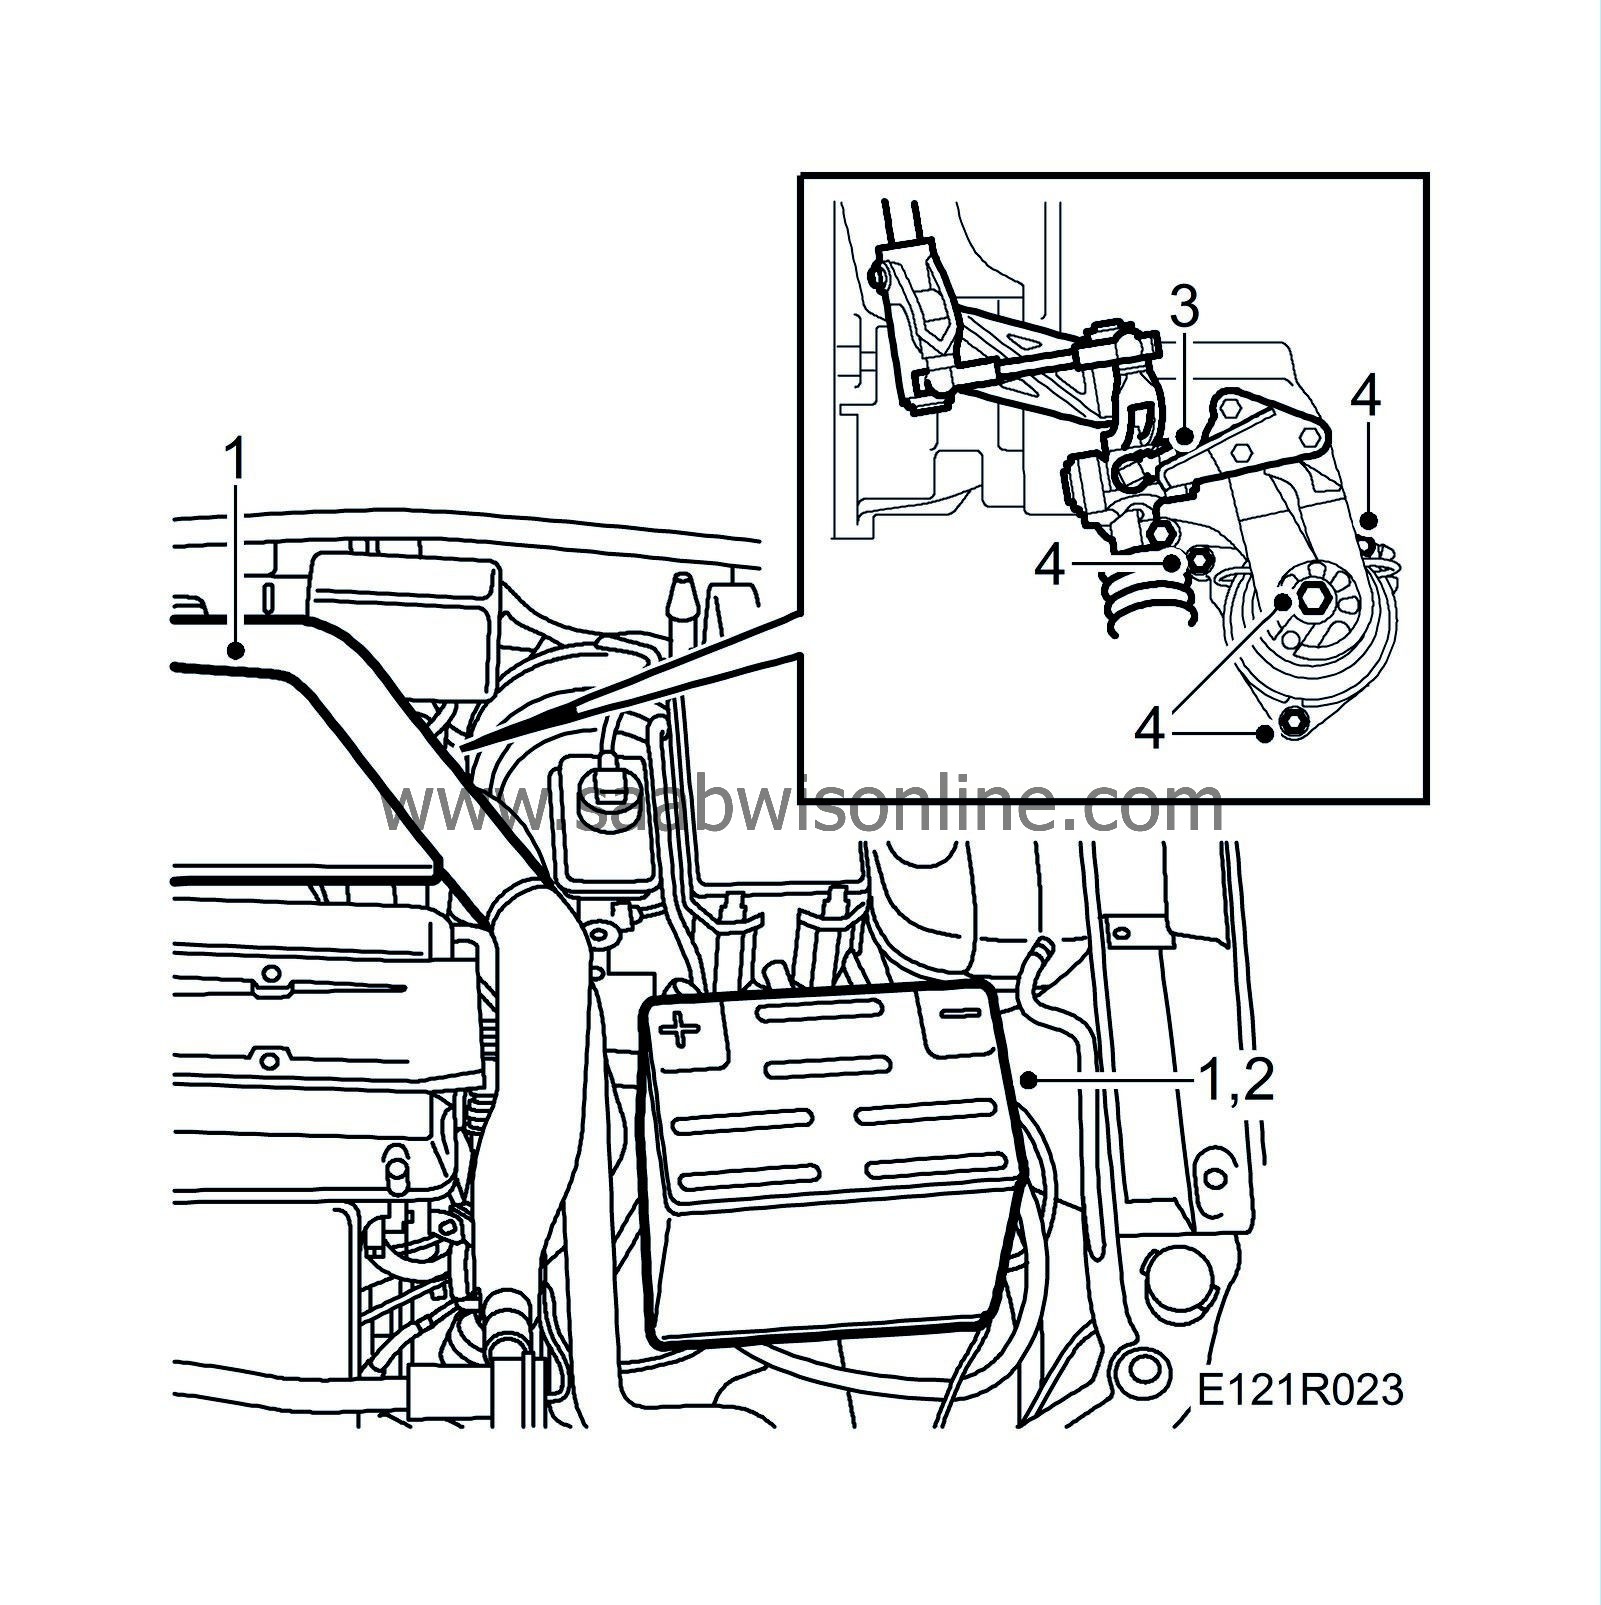
Cover the wings and remove the top engine cover and the battery cover. Note the radio code, where applicable.
|
|
| 2. |
Disconnect the negative battery cable.
|
|
| 3. |
(man) Remove the stay for the gear-changing linkage from the rear engine mounting's bracket.
|
|
| 4. |
Remove the engine mounting's upper retaining nut and the bolts securing it to the subframe.
|
|
| 5. |
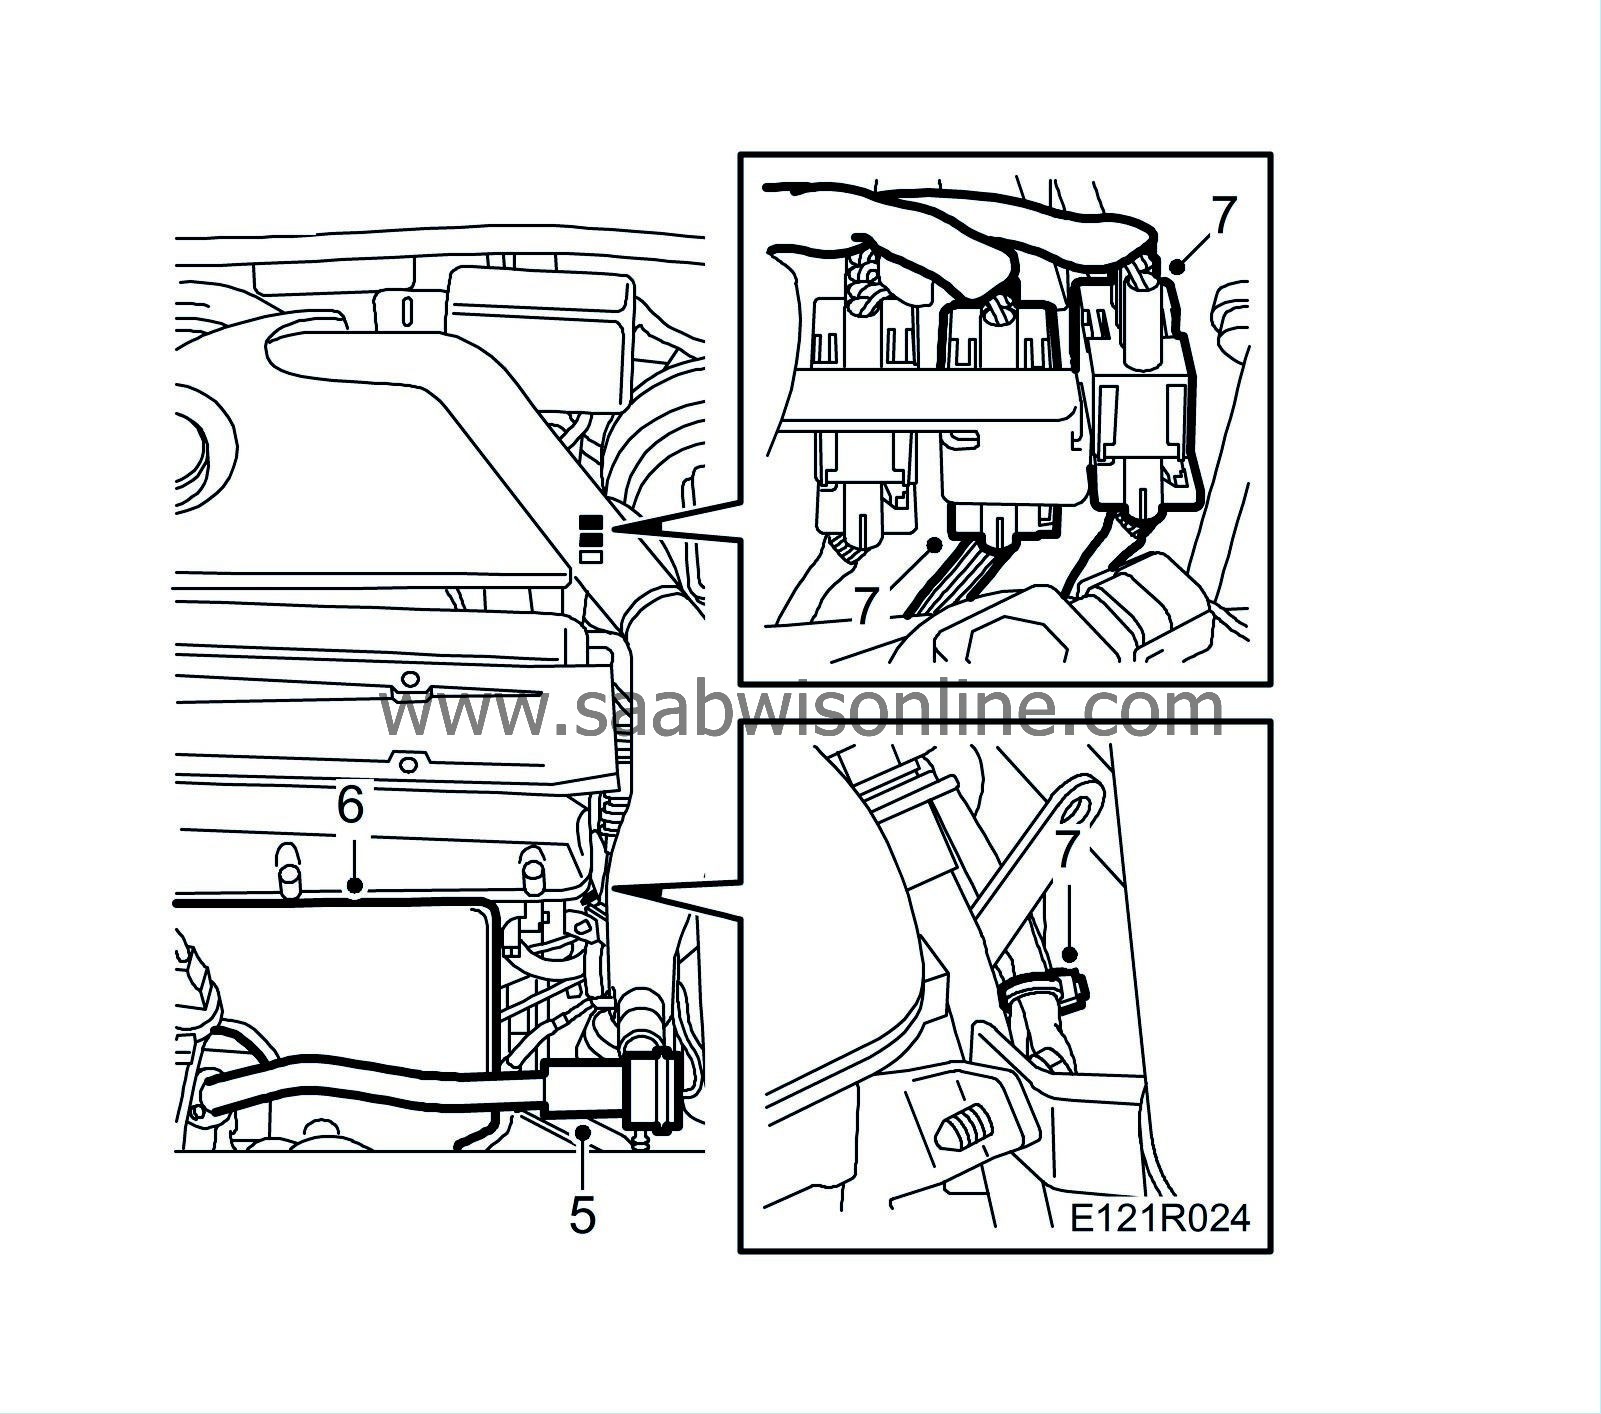
Remove the bypass pipe and valve.
|
|||||||
| 6. |
Remove the exhaust manifold heat shield.
|
|
| 7. |
Unplug the oxygen sensor connectors. Cut the cable tie and pull out the cables.
|
|
| 8. |
Fit
83 94 850 Lifting beam
.

|
|
| 9. |
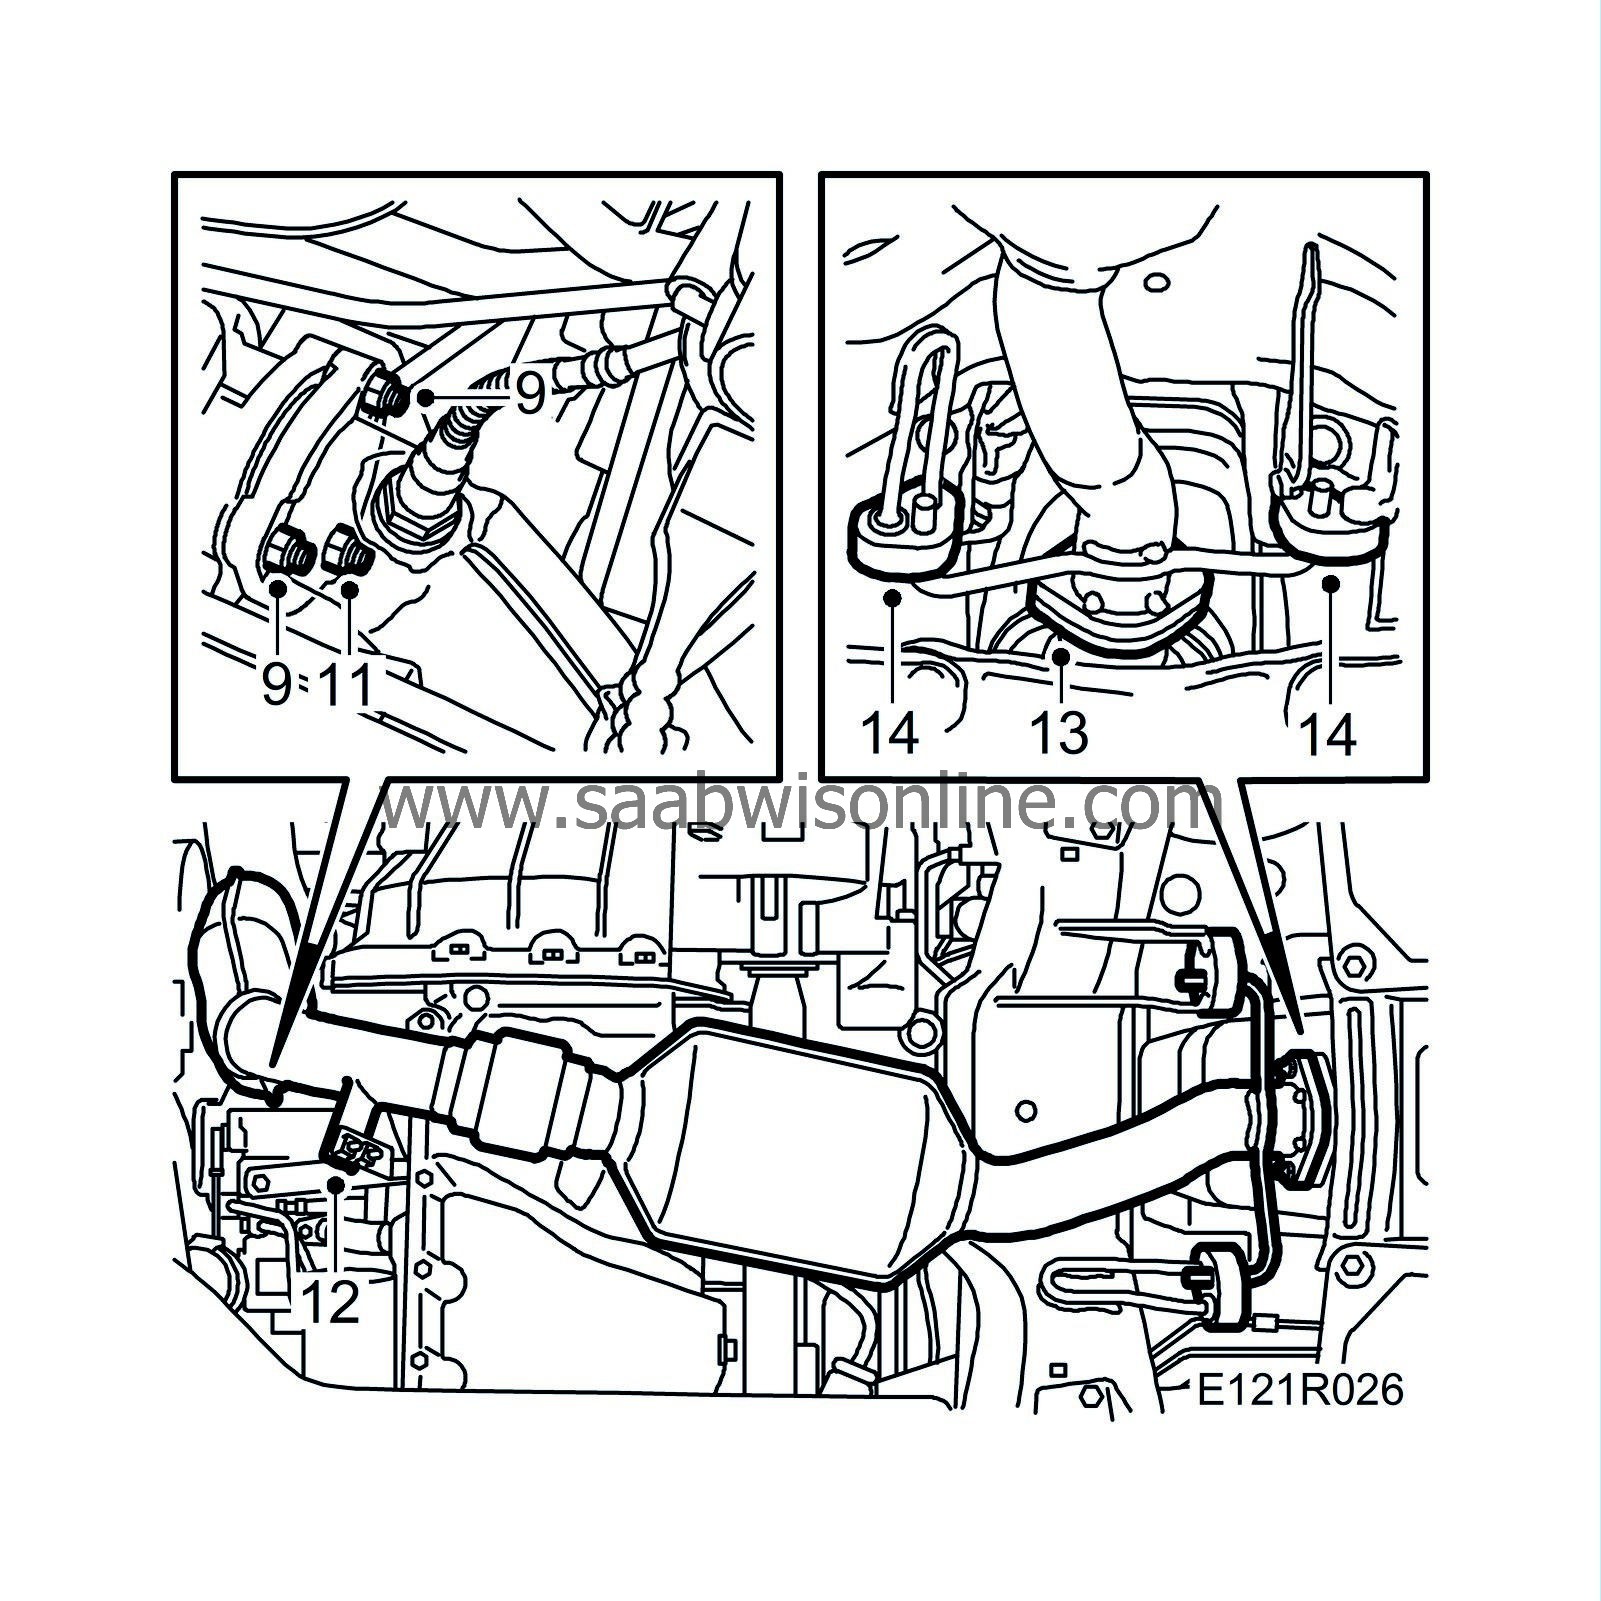
Undo the two upper nuts on the turbo/front exhaust system joint.
|
|
| 10. |
Raise the car.
|
|
| 11. |
Undo the third nut on the turbo/front exhaust system joint.
|
|
| 12. |
Undo the upper bolt on the stay securing the catalytic converter to the engine.
|
|
| 13. |
Undo the pipe joint between the front and rear exhaust systems.
|
|
| 14. |
Remove the clips and carefully pull off the rubber mountings.
|
|
| 16. |
Remove the engine mounting from the gearbox.

|
|
| 17. |
Remove the engine pad.
|
|
To fit
| 1. |
Position the engine pad and insert the retaining bolts for the engine mounting.
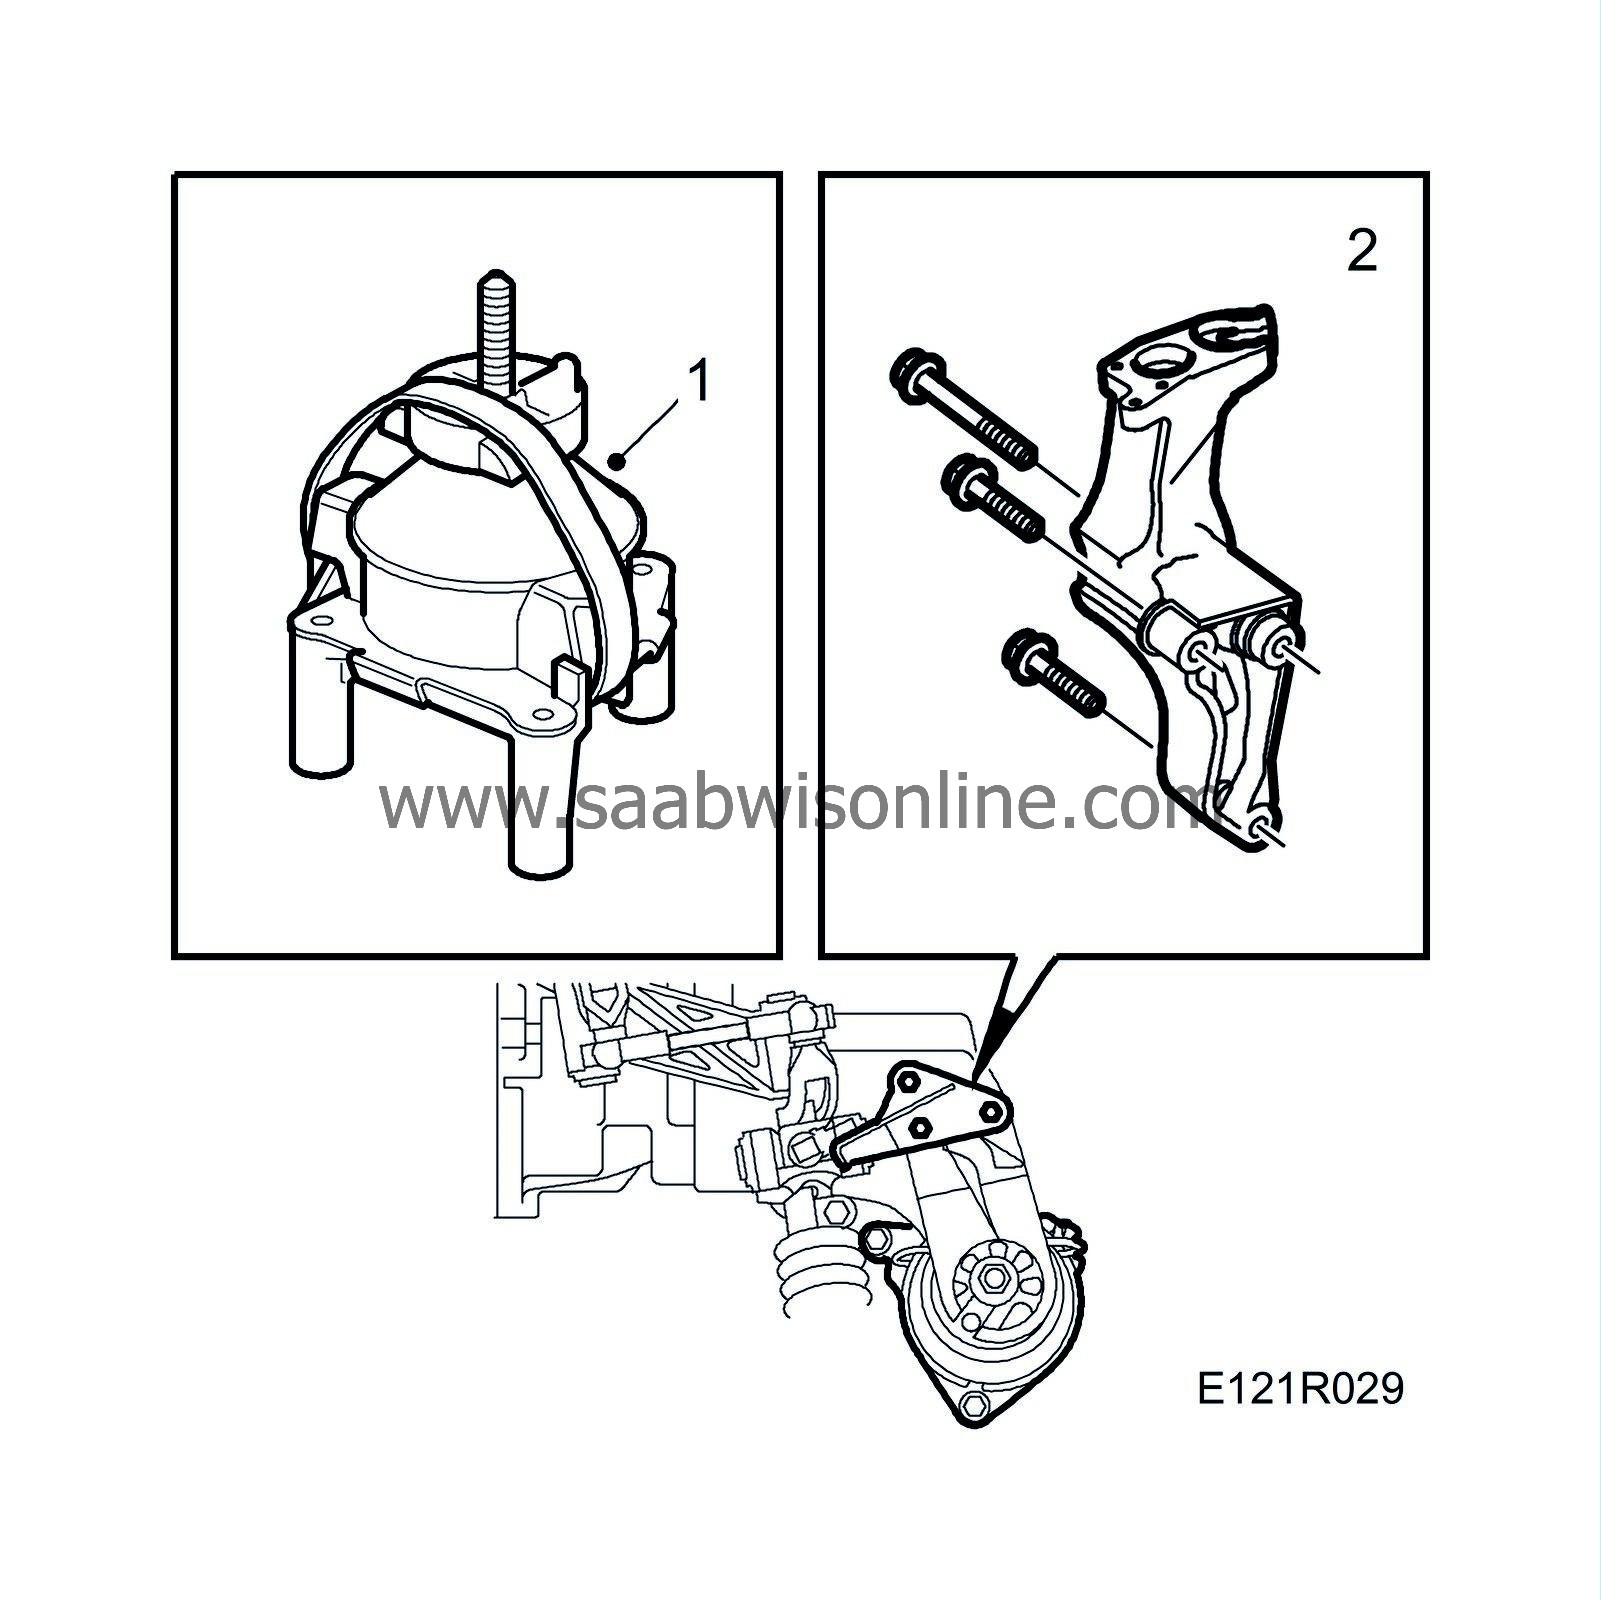
|
|
| 2. |
Fit the engine mounting to the gearbox.
Tightening torque 84 Nm (62 lbf ft) |
|
| 3. |
Fit the front pipe with rubber mountings and clips.
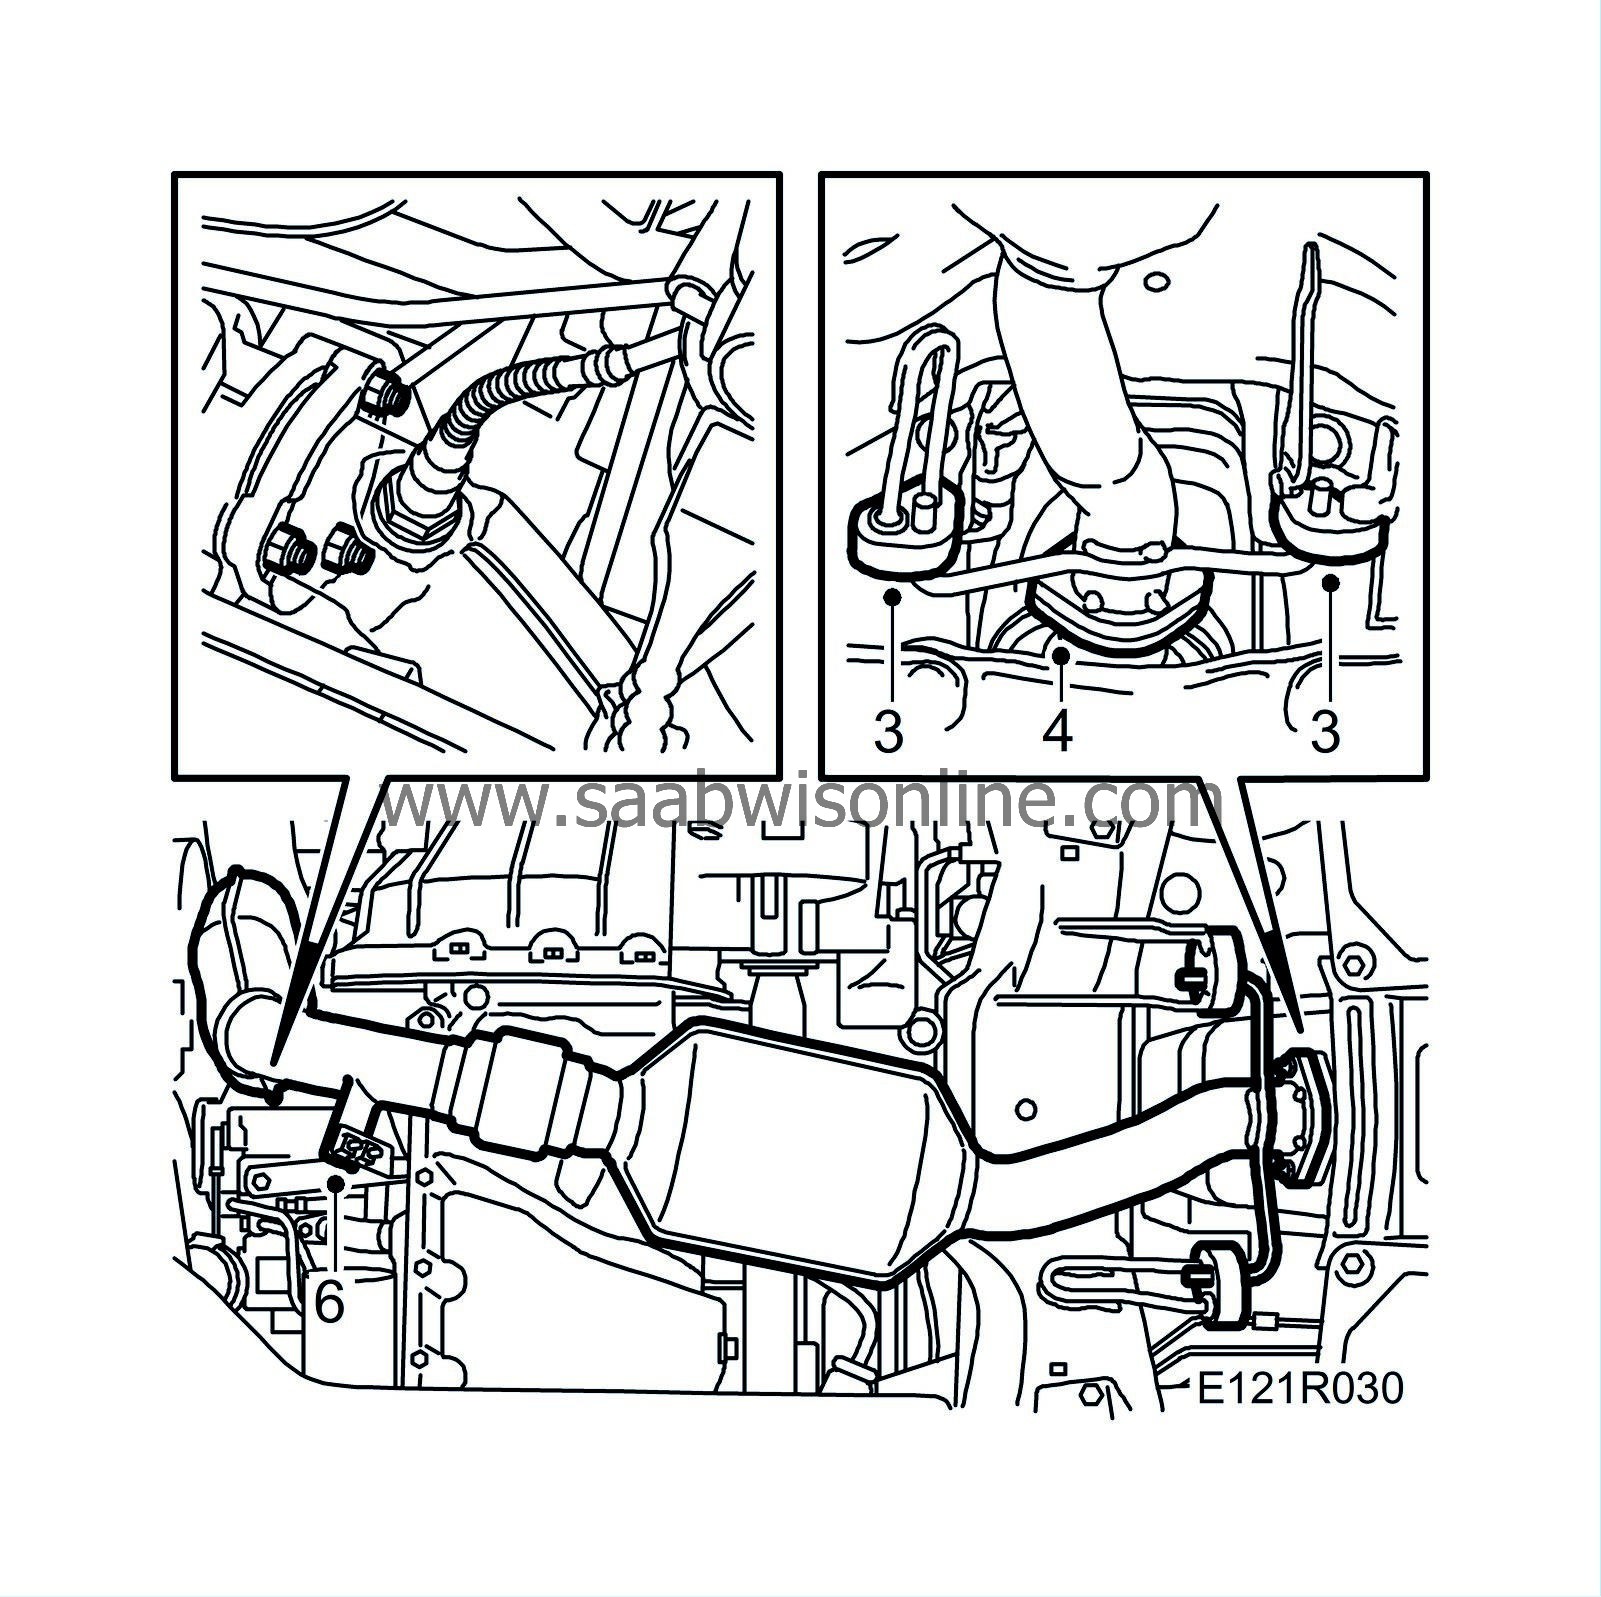
|
|
| 4. |
Fit the nuts on the rear pipe joints.
Tightening torque 22 Nm (16 lbf ft) |
|
| 5. |
Fit the lower nut on the turbo unit.
|
|
| 6. |
Fit the stay securing the front pipe to the engine.
Tightening torque 25 Nm (19 lbf ft) |
|
| 7. |
Feed up the oxygen sensor cables and lower the car.
|
|
| 8. |
Release the strain on the lifting beam and remove it.
|
|
| 9. |
Tighten the engine mounting's retaining bolts, using a torque wrench.
Tightening torque 26 Nm (19 lbf ft). 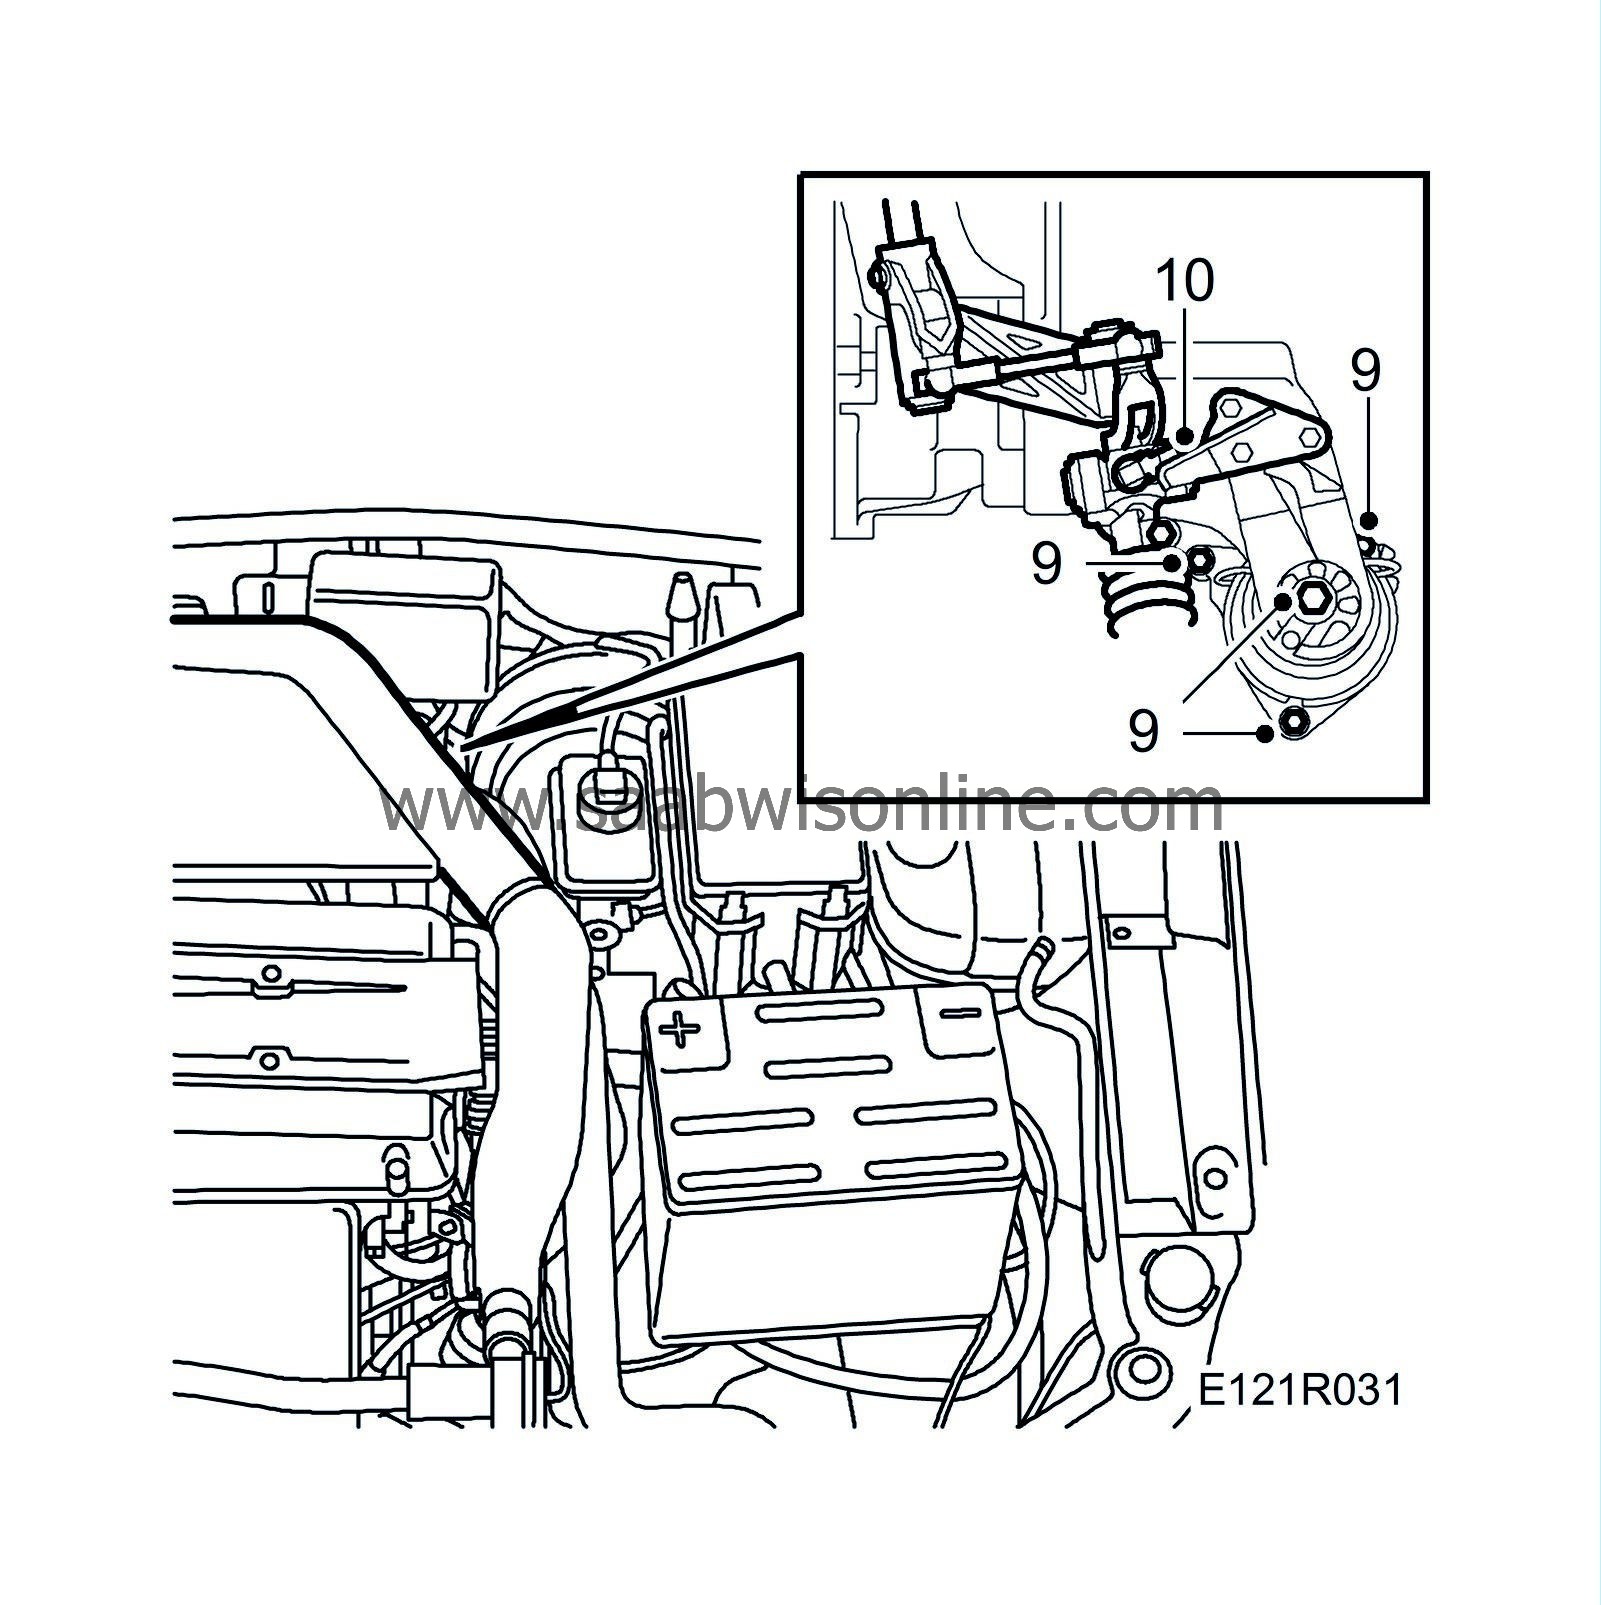
|
|
| 10. |
Fit the gear linkage to the engine mounting.
|
|
| 11. |
Fit the engine mounting's upper retaining nut.
Tightening torque: 47 Nm (35 lbf ft). |
|
| 12. |
Fit the two upper nuts on the exhaust system.
Tightening torque 24 Nm (18 lbf ft) 
|
|
| 13. |
Take hold of the oxygen sensor cables and plug in the connectors.
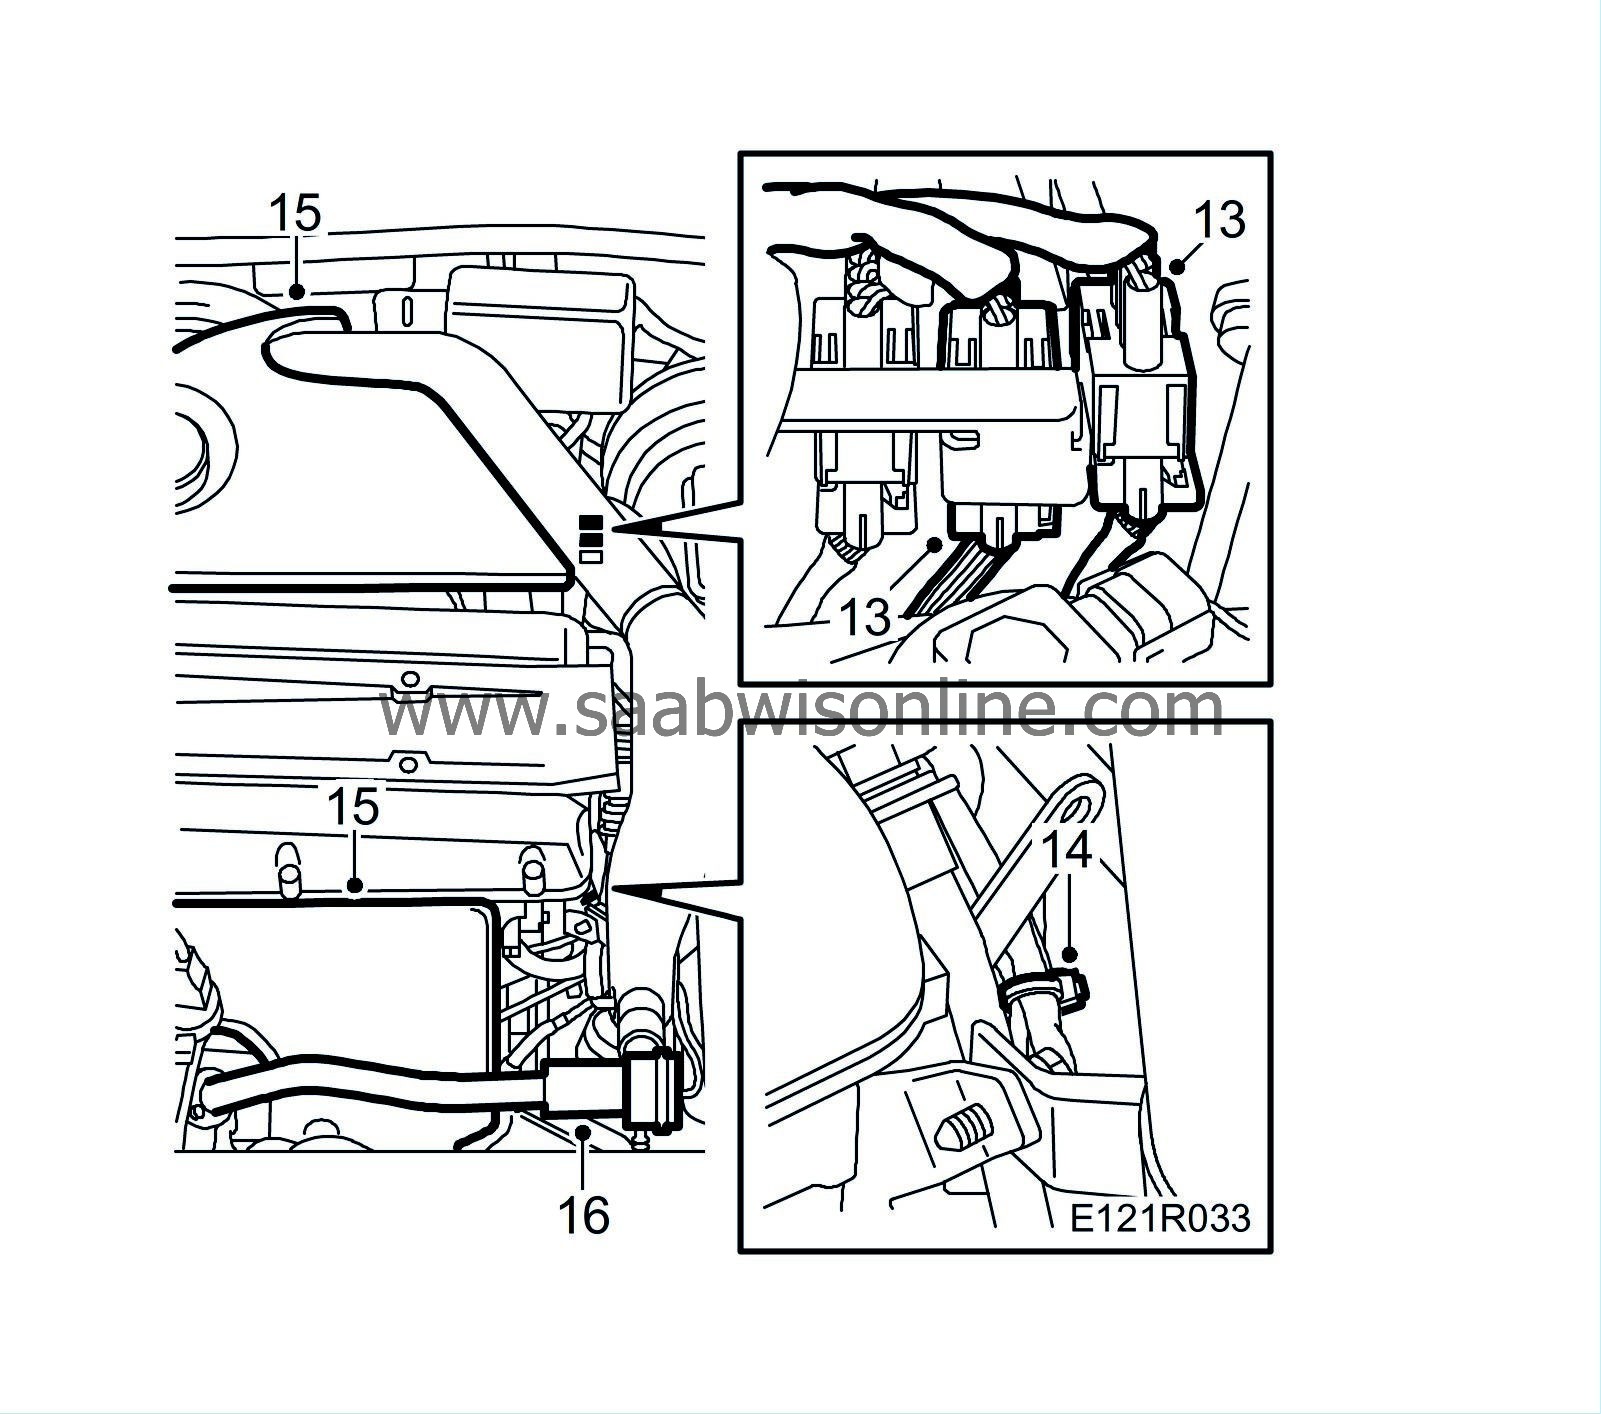
|
|
| 14. |
Secure the cables with a cable tie.
|
|
| 15. |
Fit the top engine cover and the heat shield over the exhaust manifold.
|
|
| 16. |
Lubricate the O-ring on the bypass pipe with acid-free petroleum jelly and fit the pipe with the valve and vacuum hose.
Tightening torque 8 Nm (6 lbf ft) |
|
| 17. |
Connect the negative battery cable and fit the cover over the battery.
Calibrate the ACC. Set the clock and radio code where applicable. |
|

