(351-2379) Securing the direction indicators
Symptom: The indicator may become detached from the headlamp and hang on the wiring harness.
| MODIFICATION INSTRUCTION | |
| Bulletin Nbr: | 351-2379 |
| Date: ........... | November 2002 |
| Market: | JP |
| Securing the direction indicators |
| Customer Satisfaction Campaign 154 12 |
Cars in stock must be rectified before delivery.
A personal communication must be sent to the owners of cars already delivered requesting them to get in touch with the nearest Saab garage as soon as possible to have the fault rectified.
| Cars affected |
Saab 9-5 M02-03 within VIN range 23000132 - 33002223
| Background |
The clip locking the indicator to the headlamp is too weak and must be reinforced.
Symptom description
The indicator may become detached from the headlamp and hang on the wiring harness.| Parts required |
53 37 167 Clip (2 per car)
If new modification identity plate required
49 00 007 Modification identity plate16-30 15 815 Cleaning agent FL T875, sufficient for 50-100 cars.
| Procedure |
Check box D2 (M02) or A2 (M03) on the modification identity plate before proceeding. If necessary a new modification identity plate must be fitted (applies only to M02), see the section "Fitting a new modification identity plate". Continue as follows if the box is not marked.
| 1. |
LH:
Remove the battery cover's top section.
|
|
| 2. |
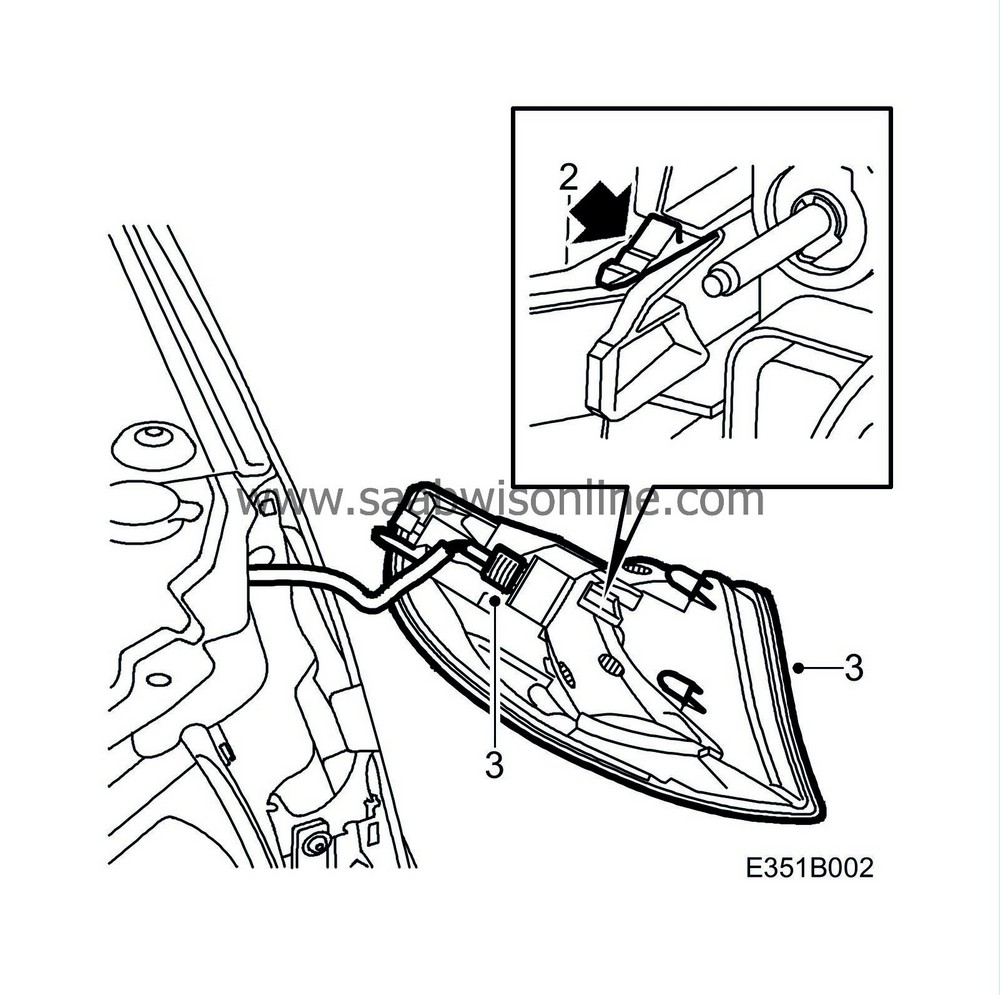
Press down on the snap fastener and undo the indicator.

|
|
| 3. |
Remove the indicator connector and remove the indicator.
|
|
| 4. |
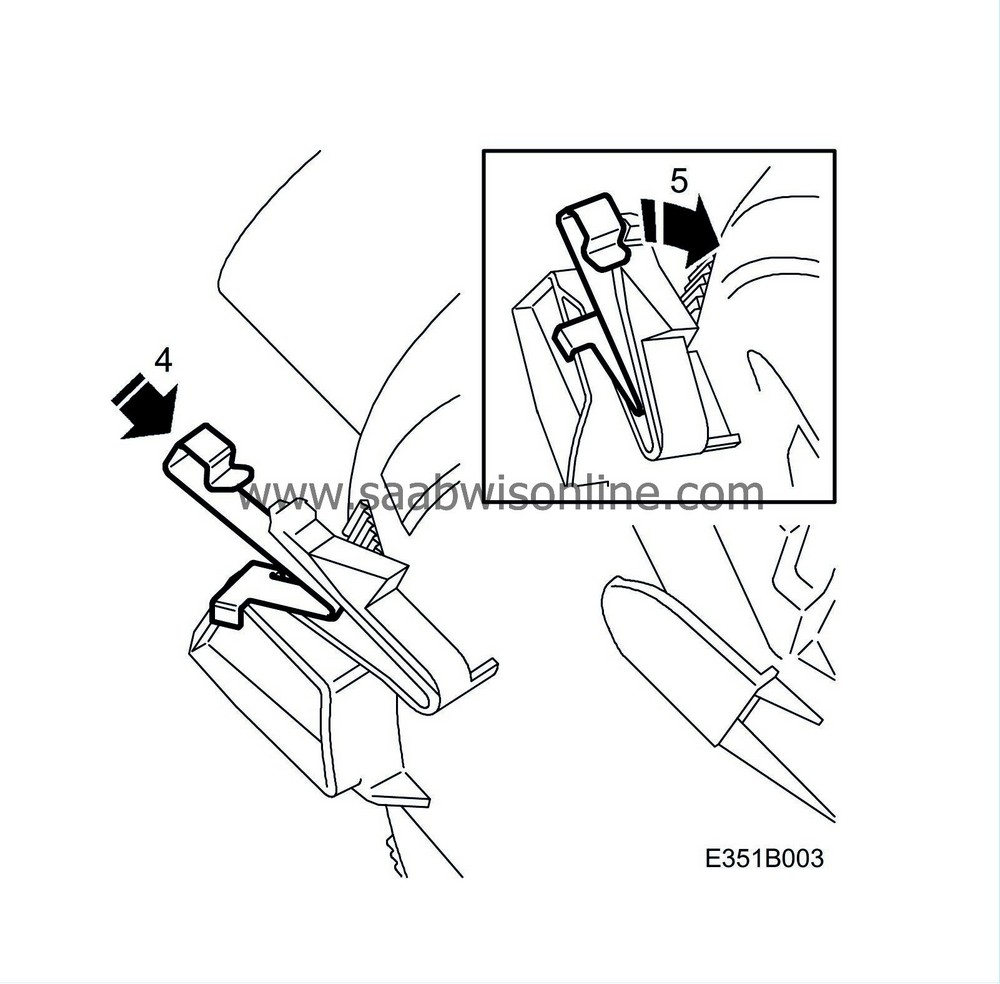
Press in the metal clip at a slight angle from the side of the existing indicator clip.

|
|
| 5. |
Press the new clip into place.
|
|
| 6. |
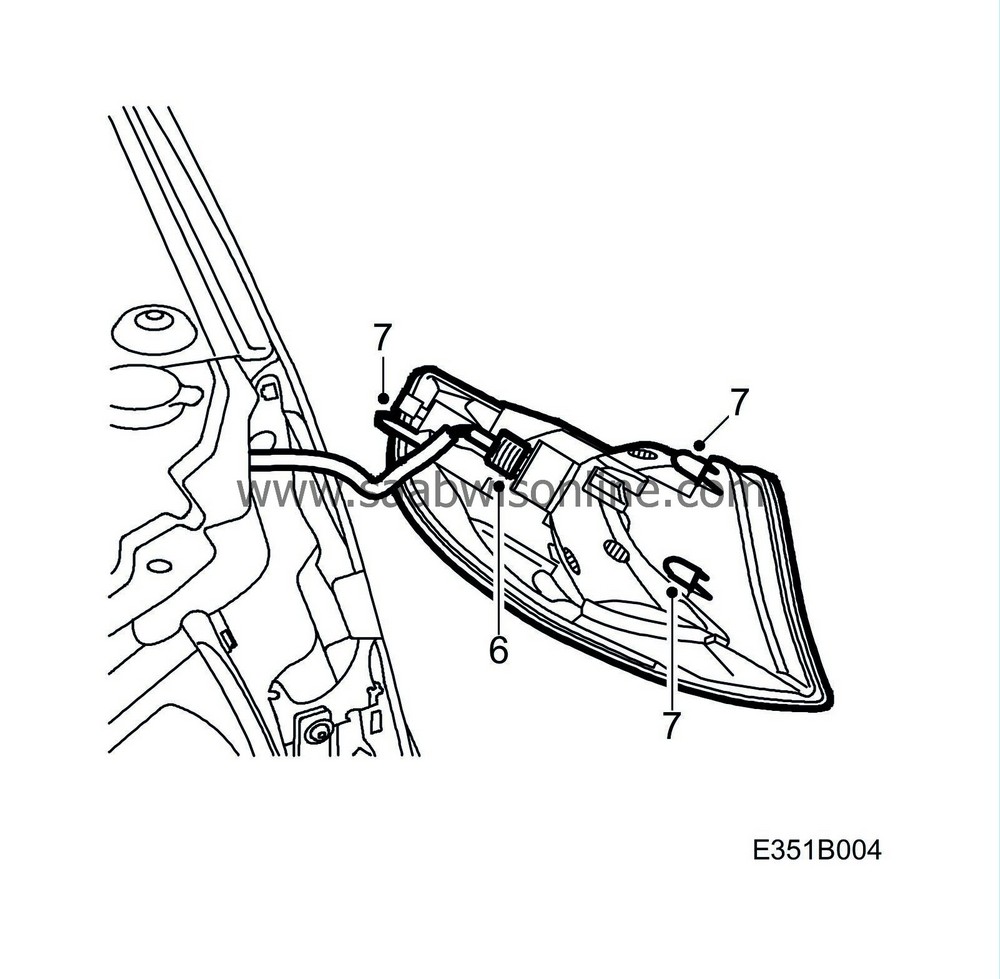
Fit the indicator connector.

|
|
| 7. |
Position the indicator so that the guide pins reach the correct position. Press the indicator firmly. Check that the locking clip is firmly secured.
|
|
| 8. |
LH:
Fit the battery cover's top section.
|
|
| 9. |
Carry out the procedure on the other side of the car.
|
|
| Marking the modification identity plate |
After carrying out the procedure, box D2 (M02) or box A2 (M03) on the modification identity plate must be marked. Mark the box with the number "7" if the procedure was carried out by the importer or with the number "8" if carried out by the dealer.
Fitting a new modification identity plate (M02)
| 1. |
Open the tailgate and hang up the floor panel.
5D: Lift the trim up over the spare wheel and hook it securely on the tailgate. |
|
| 2. |
4D:
To obtain a curved shape, bend the modification identity plate by pressing the plate slightly against the scuff plate.

|
|
| 3. |
Clean the body surface using Teroson FL T875. Remove the plastic cover from the rear of the plate.
|
|
| 4. |
4D:
Firmly press and secure the modification identity plate as per the illustration.

|
|
| 5. |
5D:
Firmly press and secure the modification identity plate as per the illustration. Put back the trim over the spare wheel.

|
|
| 6. |
Close the floor panel and the tailgate.
|
|
| Time/Warranty information |
See separate information.


