Valve-stem seals
| Valve-stem seals |
(in car)
| To remove |
(This method can also be used when changing valve springs, valve disc or valve cones.)
|
||||||||||||||||||||||
| 1. |
Remove the
Tappets
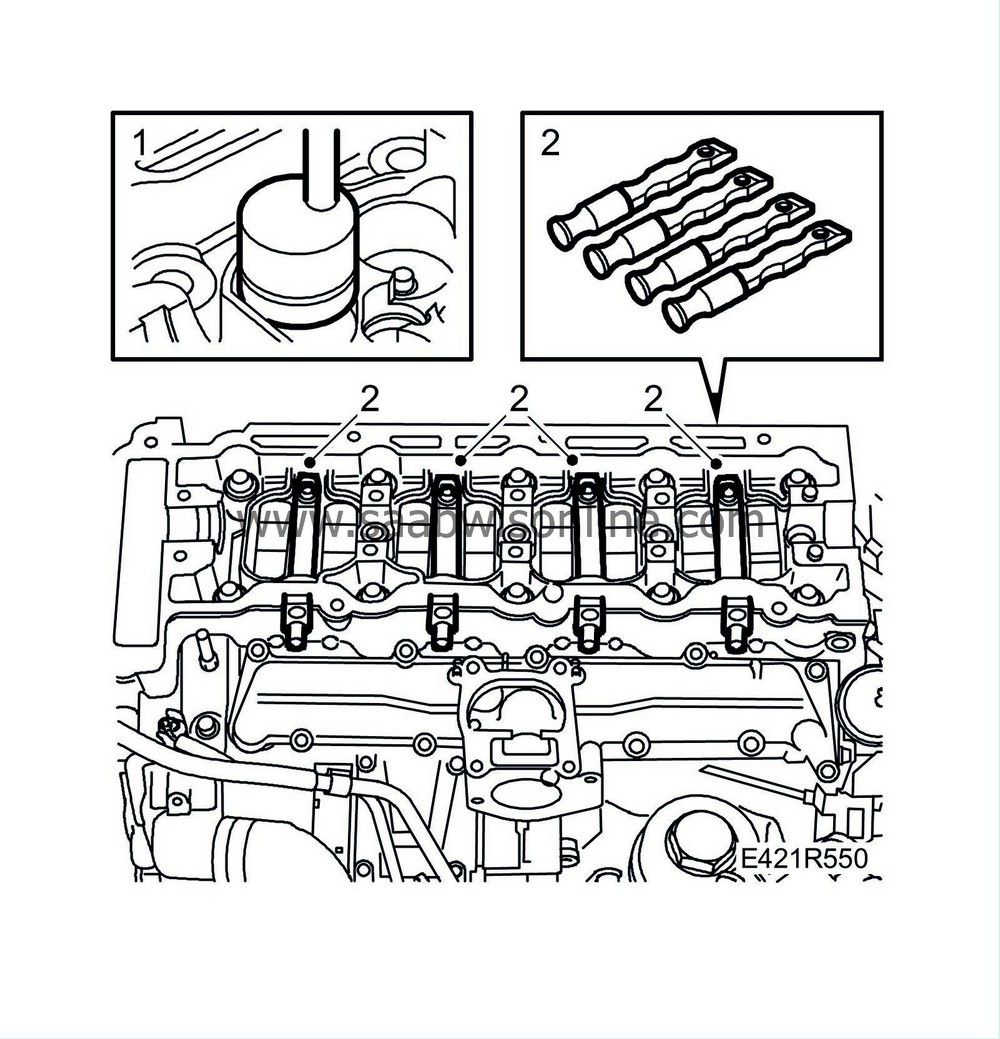
|
|
| 2. |
Fit
83 95 444 Protective cap
over the injectors.
|
|
| 3. |
Fit
83 95 022 Protective cap
around the valve springs to protect the tappet sealing surfaces. Pay attention to the position of the cap.
|
|
| 4. |
Make sure that
83 95 352 Setting tool, crankshaft
securing the crankshaft is located in the hole for the crankshaft position sensor.
|
|
| 5. |
Engage 1st gear and apply the handbrake.
|
|
| 6. |
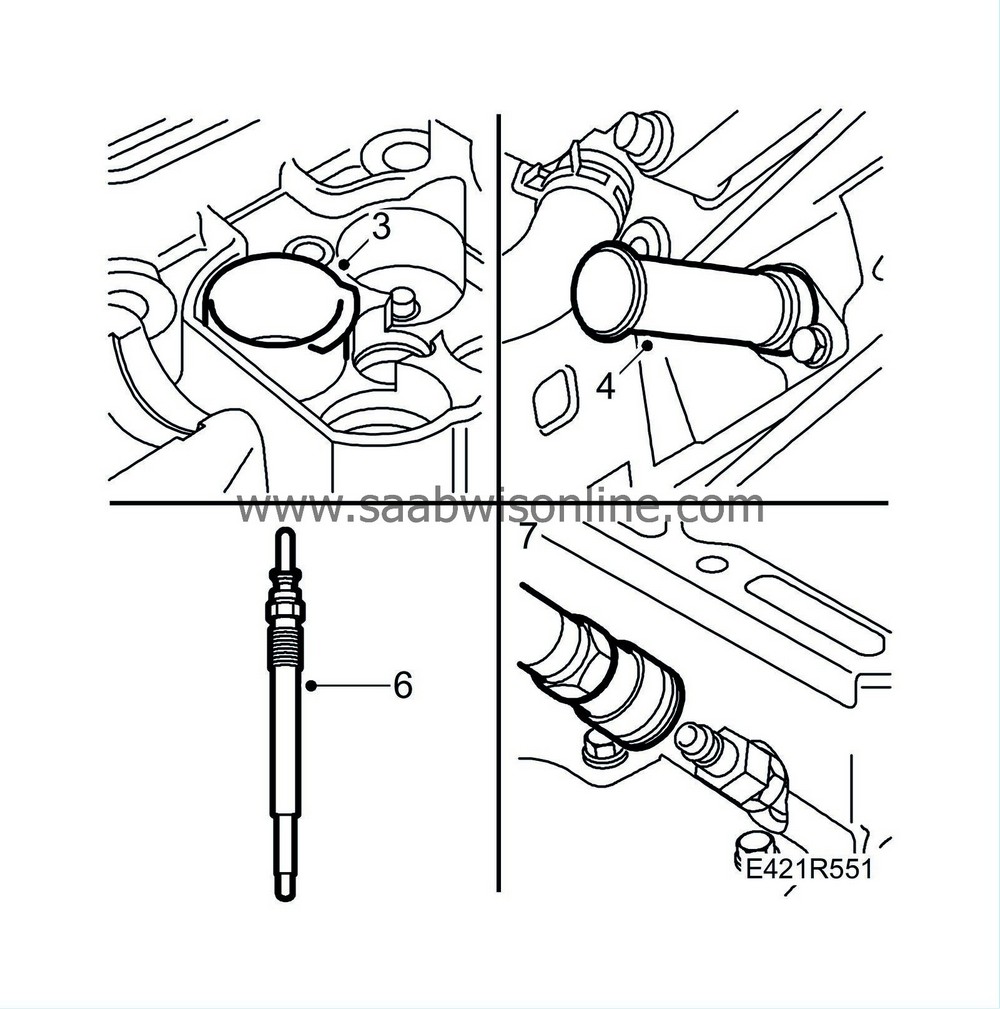
Unscrew the glow plug for the relevant cylinder and fit
83 95 345 Adapter, compression sensor
and
83 95 501 Air nipple
.
|
|||||||||
| 7. |
Connect compressed air and carefully apply pressure to the piston and valves.
|
|
| 8. |
Fit
83 95 246 Valve spring compressor
onto the cylinder head. Press down the lever and remove the valve cones.
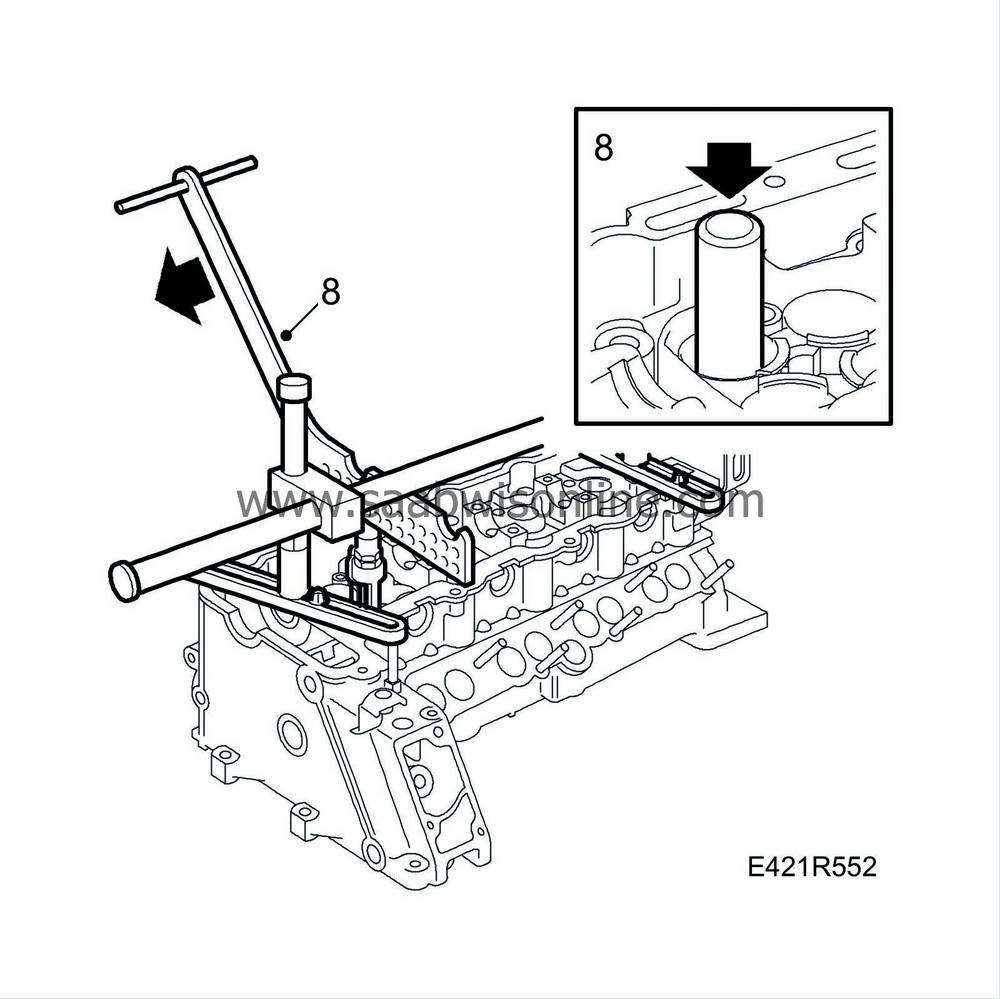
|
|
| 9. |
Lift out the spring disc and the valve spring. Remove the valve guide seal with
83 94 157 Pliers, valve guide seal
.
|
|
| To fit |
(This method can also be used when changing valve springs, valve disc or valve cones.)
| 1. |
Remove the handle from
83 95 071 Assembly tool, valve guide seal
and place the valve guide seal into the tool with the rubber flange facing inward (up on the valve stem). Fit the seal on the valve. Use a plastic mallet to carefully tap the seal in place.
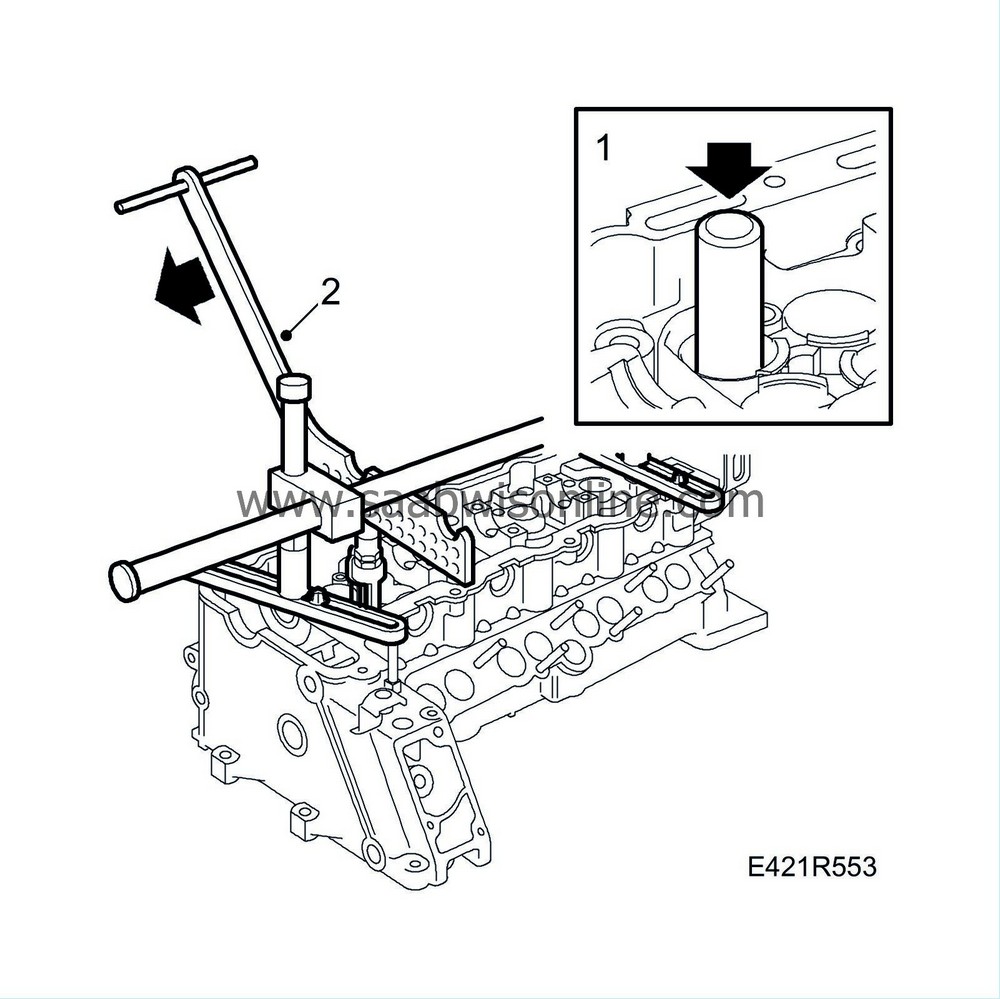
|
|
| 2. |
Fit the spring and spring disc and place the valve cones into the groove in the valve disc. Press down the lever on the spring compressor and position the valve cones. Remove the spring compressor.
|
|
| 3. |
Disconnect the compressed air and remove the air nipple.
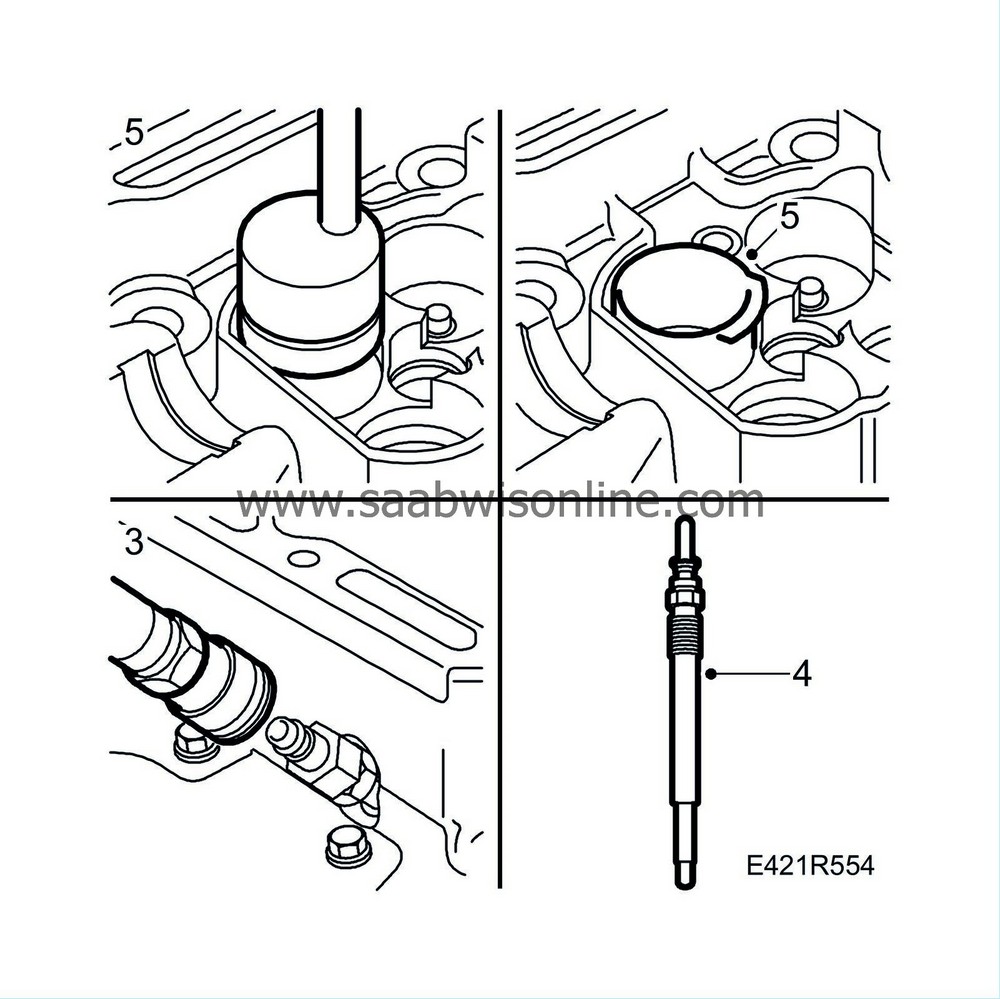
|
|
| 4. |
Fit the glow plugs.
Tightening torque: 10 Nm (8 lbf ft). |
|
| 5. |
Remove the protective collars and fit the tappets.
|
|
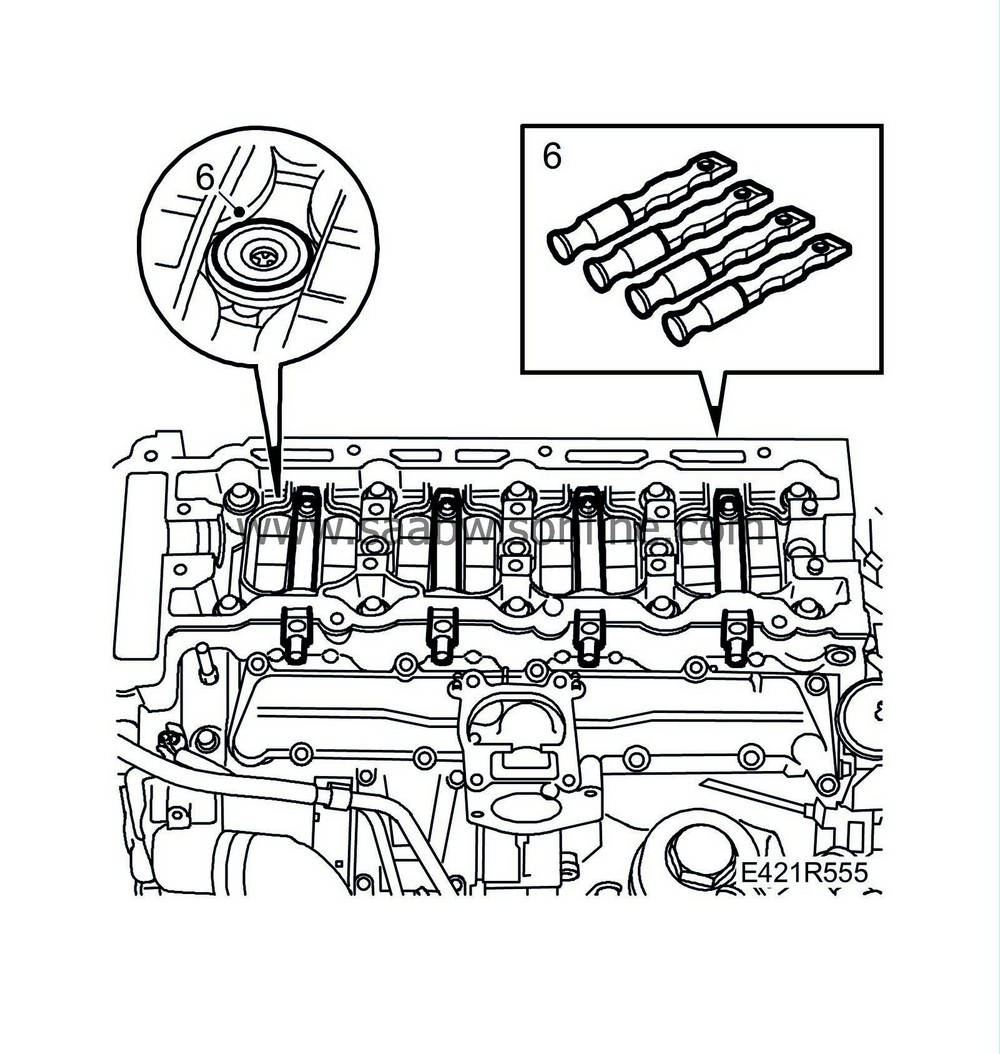
| 6. |
Remove the fixing tools, clean and fit the new seals onto the injector connections to the fuel bridges. Remove and remnants from old seals.
|
|
| 7. |
See To fit
Tappets
.
|
|

 Warning

