CD changer, accessory (5D)
| CD changer, accessory (5D) |
| Note | ||
|
The following method applies if the car is equipped with a navigation system: CD changer (5D) . |
| To remove |

| 1. |
Connect Tech 2.
|
|
| 2. |
Establish communication with the CD changer (CDC).
|
|
| 3. |
Select “
Programming ” from the system menu.
|
|
| 4. |
Press “
ENTER
”.
|
|
| 5. |
Select “DIVORCED” with the change button and press “
OK ”.
|
|
| • |
“
DIVORCED ” must be selected when removing the CD changer (to be installed in another car or to be returned for warranty repair).
|
| 6. |
The sound should disappear and “CDC CODE” is displayed on the SID.
|
|
| 7. |
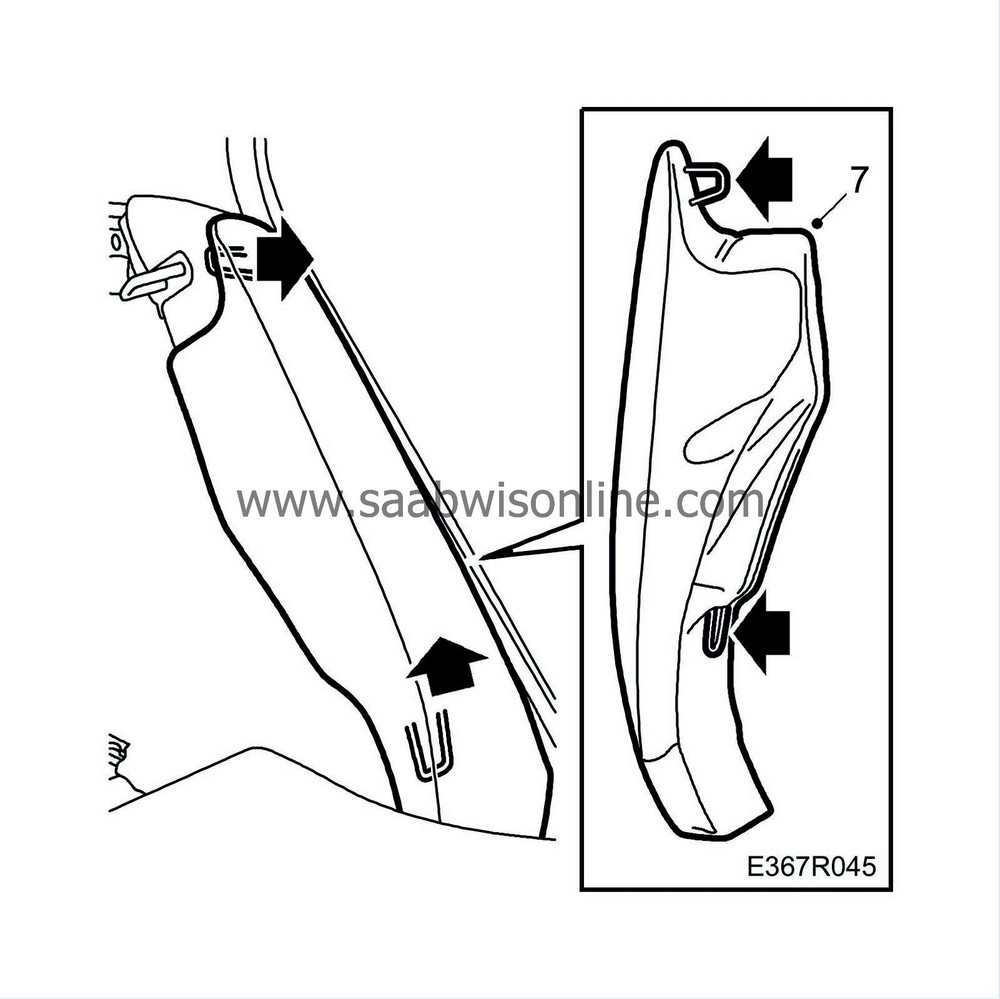
Fold down the LH rear seat backrest and remove the side bolster.
|
|
| 8. |
Lift out the concealing panel.
|
|
| 9. |
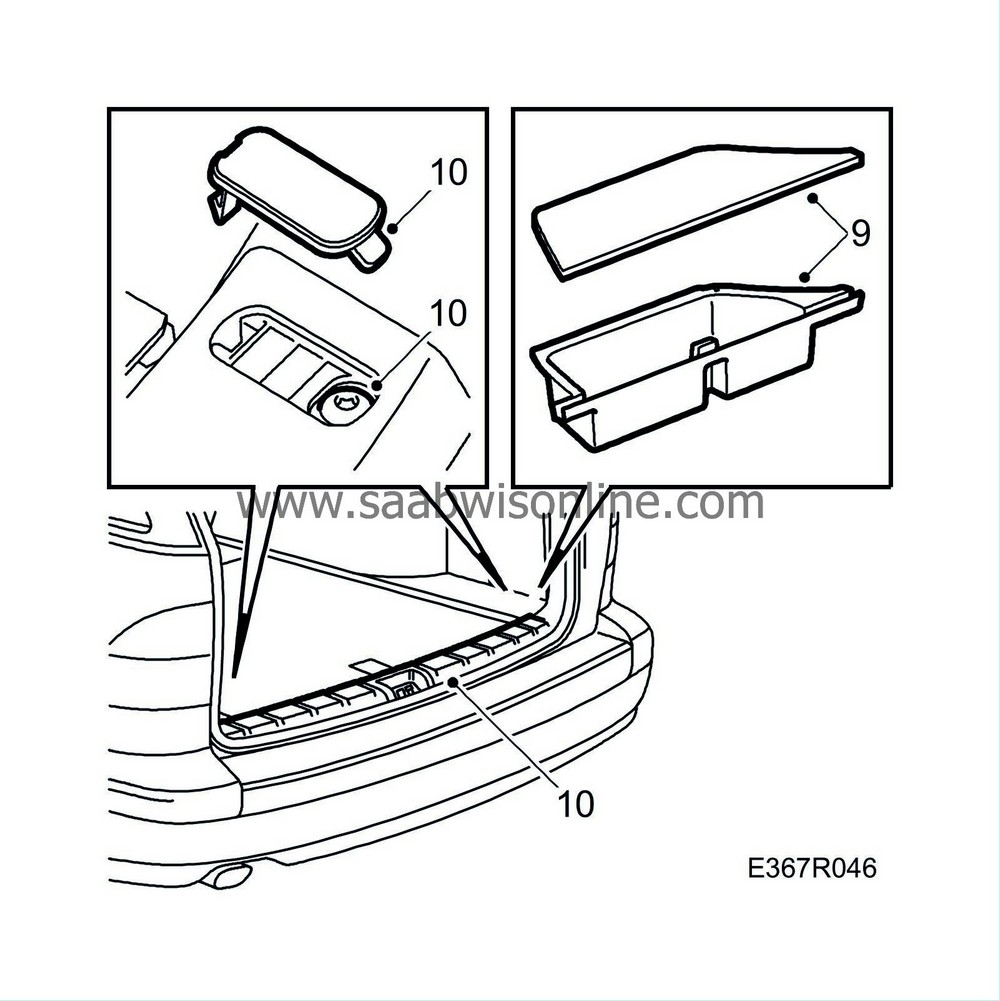
Remove the LH storage compartment in the floor.

|
|
| 10. |
Remove the scuff plate by first removing the covers on the RH and LH sides. Undo the screws securing the scuff plate to the sill. Pull off the scuff plate, it is fastened with clips.
|
|
| 11. |
Remove the rear roof cover and unplug the lighting connections.

|
|
| 12. |
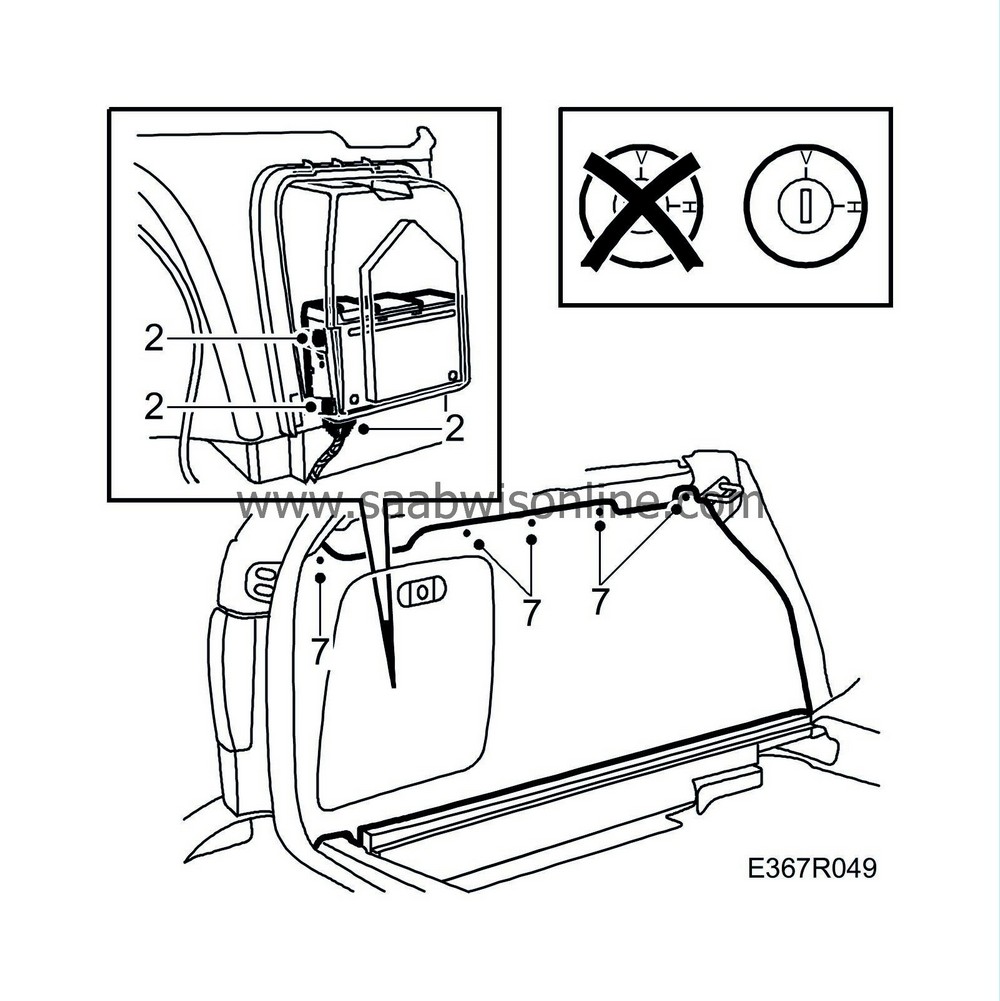
Remove the LH D-pillar trim and the LH concealing panel support (3 screws).
|
|
| 13. |
Remove the five screws in the top of the LH side trim and lift out the trim.

|
|
| 14. |
Remove the four screws with washers that hold the CD changer and CD magazine.
|
|
| 15. |
Unplug the connector.
|
|
| To fit |

| 1. |
Remove
4x transit screws
(2 marked red on each side) from the new CD changer.
|
|
| 2. |
Fit the CD changer with the four screws and washers, plug in the connector. Fit the CD magazine.
|
||||||||||
| 3. |
Connect Tech 2. Establish communication and then select “
PROGRAMMING ” from the system menu.
|
|
| 4. |
Press “
ENTER
”.
|
|
| 5. |
Select “MARRIED” with the change button and press “
OK ”.
|
|
| 6. |
“CDC CODE” disappears from SID and the sound returns.
|
|
| 7. |
Position the side trim and tighten the four screws.
|
|
| 8. |
Refit the concealing panel support (3 screws) and the D-pillar trim.

|
|
| 9. |
Plug in the lighting and press on the rear roof cover.
|
|
| 10. |
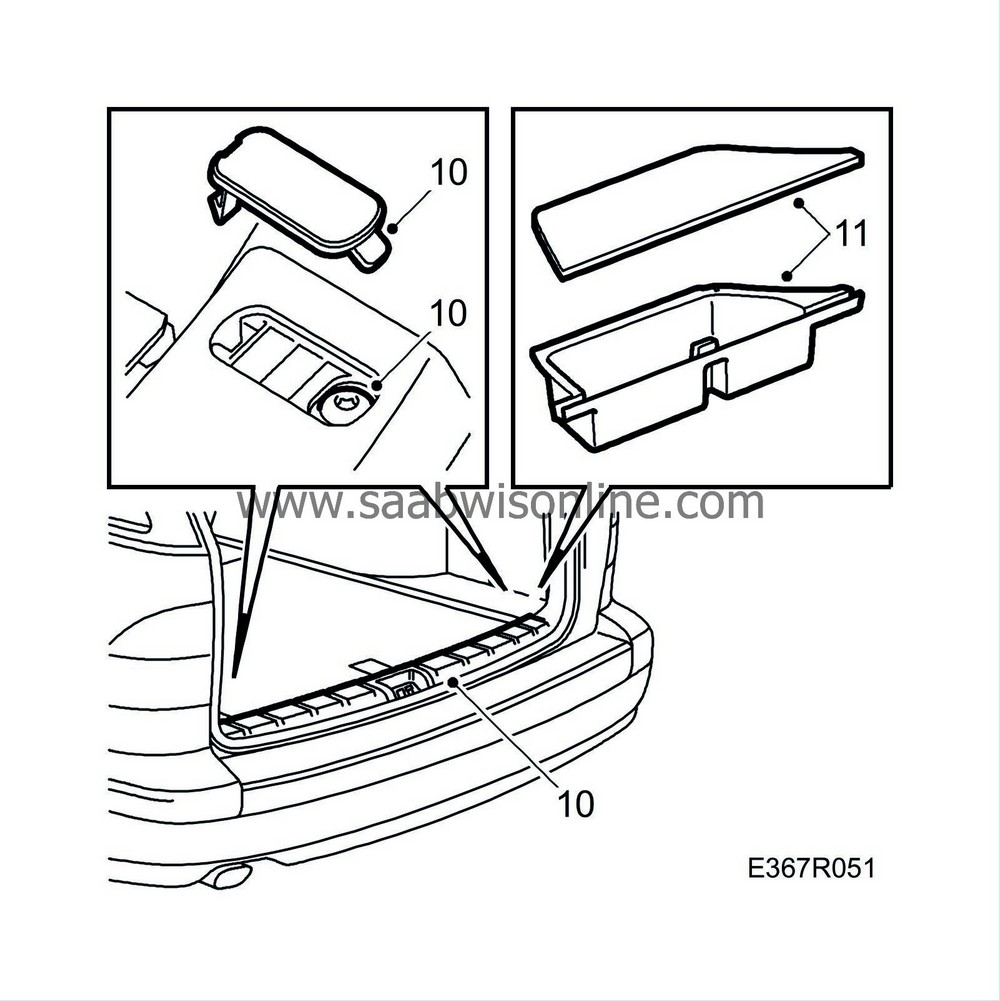
Press in the scuff plate clips and screw on the scuff plate. Fit the covers over the screws and position the sealing strip over the scuff plate.

|
|
| 11. |
Fit the storage compartment in the floor.
|
|
| 12. |
Lift in the concealing panel.
|
|
| 13. |
Fit the side bolster between the rear left door and the backrest and fold up the rear seat backrest.

|
|
|
|||||||||||||

 Warning

