Changing generator, 4-cyl. LHD
| Changing generator, 4-cyl. LHD |
| Note | ||
|
If the car is equipped with a radio other than a genuine Saab radio, check that the customer has the radio code before commencing work. |
| 1. |
Drape protective covers over the front wings.
|
|
| 2. |
Lift off the battery cap and disconnect the negative cable.
|
|
| 3. |
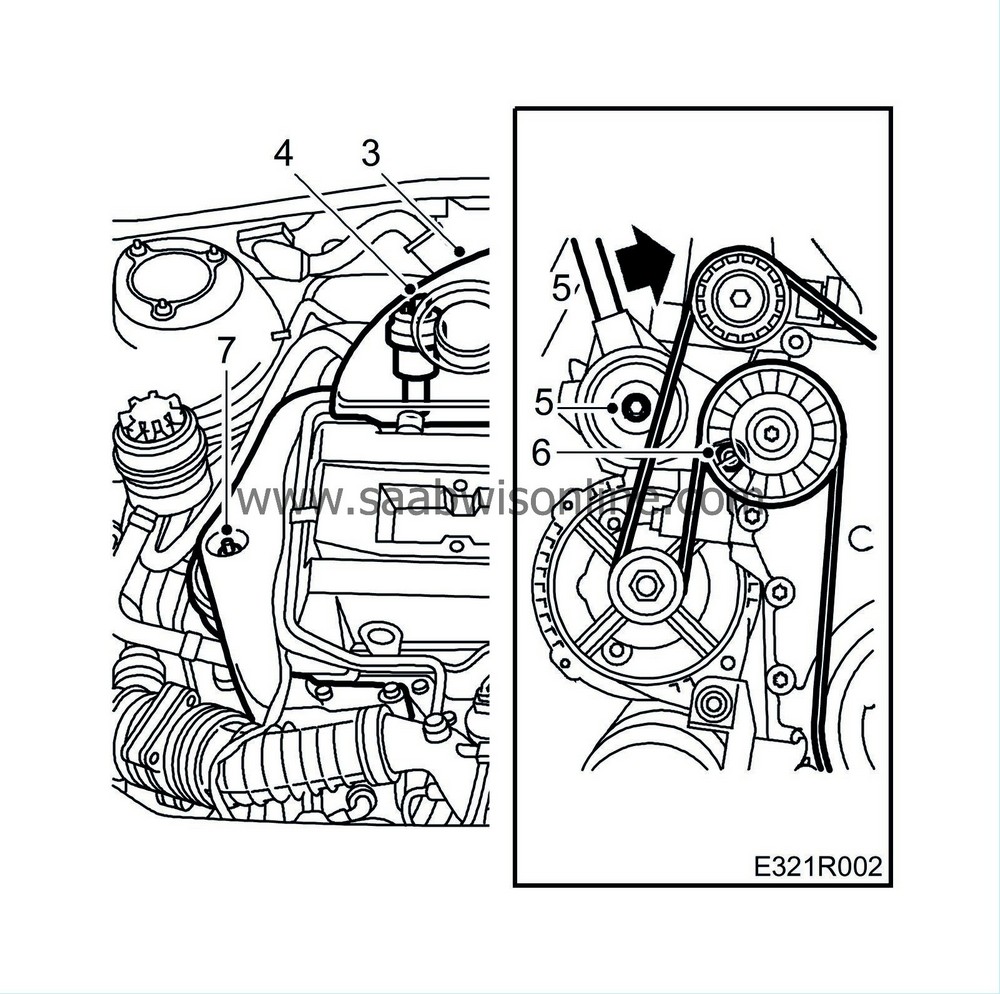
Remove the shield over the intake manifold.
|
|
| 4. |
Remove the crankcase ventilation solenoid and constant-pressure valves.
|
|
| 5. |
Relieve the tension on the belt tensioner and remove it. Use special tool 83 95 254.
|
|
| 6. |
Remove the generator's upper retaining bolt.
|
|
| 7. |
Mark and detach the retaining nut on the right-hand engine mounting and lubricate it to give it some mobility.
|
|
| 8. |
Detach the retaining nut on the rear engine mounting.

|
|
| 9. |
Remove the front exhaust pipe, see
Front exhaust system with three-way catalytic converter, 4 cyl.
.

|
|
| 10. |
Remove the hose between the oil trap and the oil sump.
|
|
| 11. |
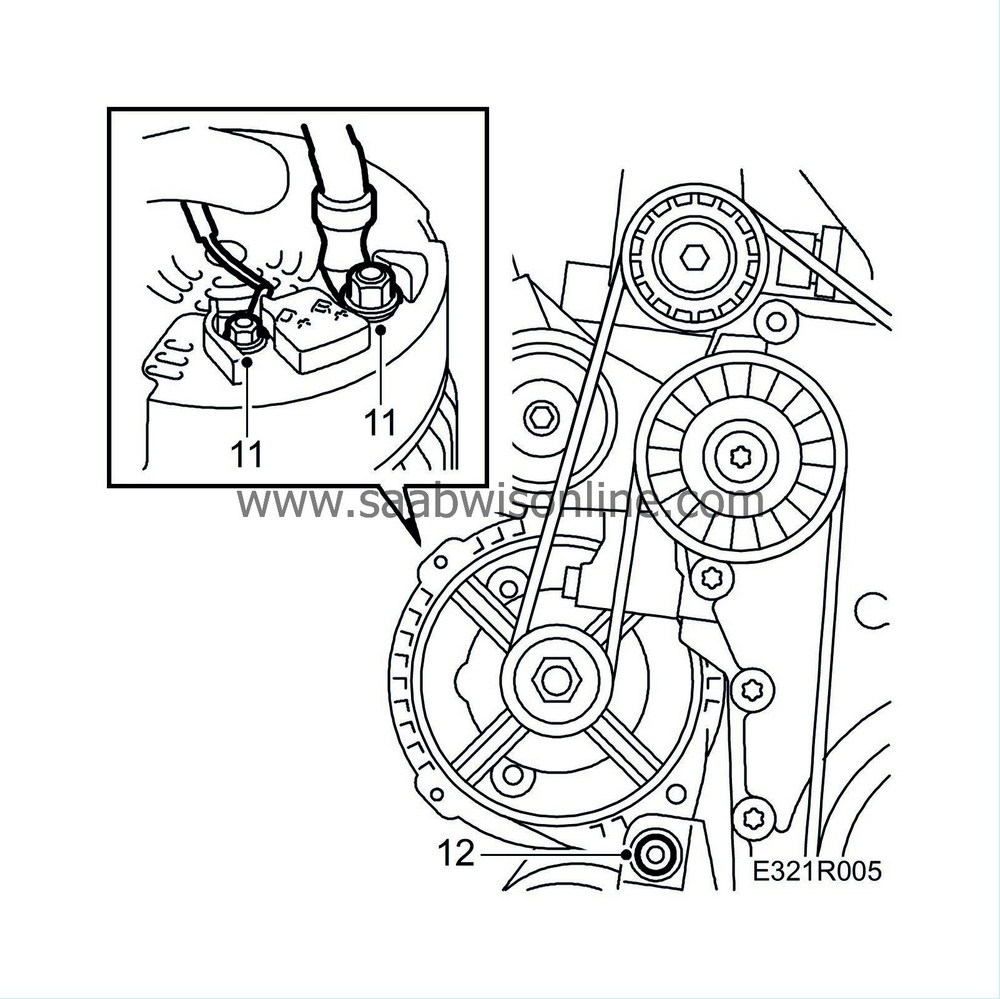
Disconnect the terminals B+ and D+ on the generator.

|
|
| 12. |
Remove the generator's lower retaining bolt.
|
|
| 13. |
Face the generator and belt pulley downwards between the steering gear and the intermediate shaft.
|
|
| 14. |
Insert a bar carefully between the gearbox and the subframe.
|
|
| 15. |
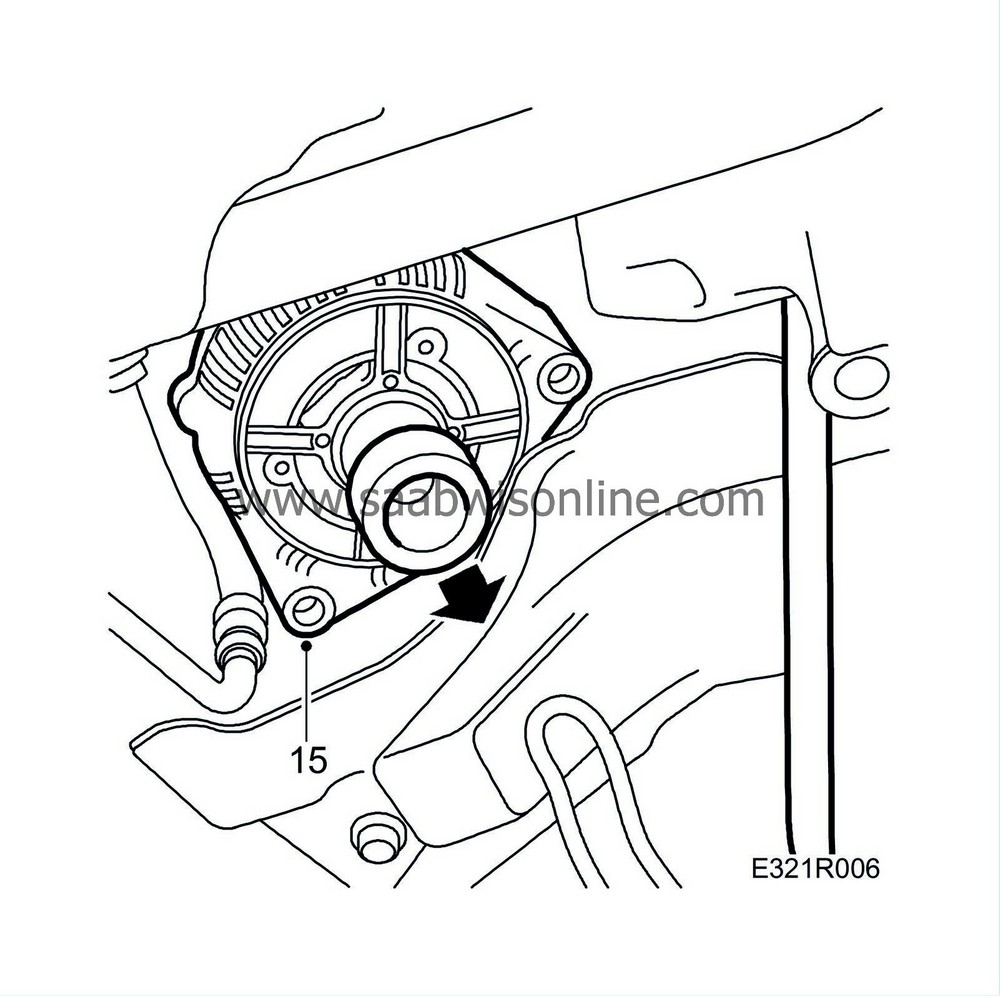
Lower the generator.

|
|
| To fit |

| 1. |
To make is easier to refit the generator, tap the bushings until they are level with the mountings.
|
|
| 2. |
Clean the generator mountings and apply Vaseline to prevent oxidization.
|
|
| 3. |
Insert a bar carefully between the gearbox and the subframe.
|
|
| 4. |
Lower the generator.
|
|
| 5. |
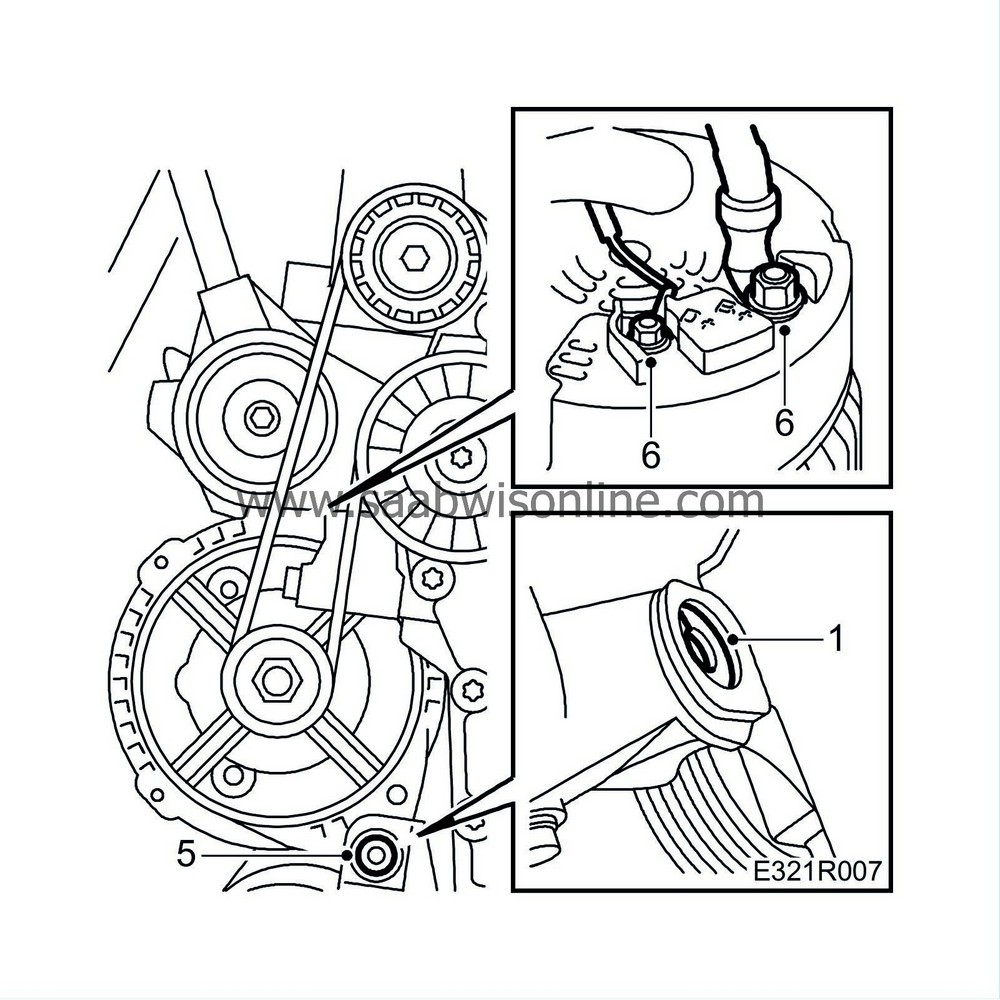
Refit the generator retaining bolts loosely.
|
|
| 6. |
Clean terminals B+ and D+ and apply Vaseline before connecting them.
|
|
| 7. |
Refit the hose between the oil trap and the oil sump.

|
|
| 8. |
Fit the front exhaust pipe, see
Front exhaust system with three-way catalytic converter, 4 cyl.
.
|
|
| 9. |
Refit the generator's upper retaining bolt.
|
|
| 10. |
Refit the belt tensioner.

Tightening torque: 45 Nm (33 lbf ft) |
|
| 11. |
Mount the drive belt. Check the position of the belt on all the pulleys and reapply the tension. Remove the tension reliever.
|
|
| 12. |
Fit the crankcase ventilation vacuum valve.
|
|
| 13. |
Adjust the right-hand engine mounting as per the marking. Check that the engine has a neutral position and tighten the retaining nut to the correct torque.
Tightening torque: 50 Nm (37 lbf ft). |
|
| 14. |
Tighten the retaining nut on the rear engine mounting to the correct torque.

Tightening torque: 25 Nm (19 lbf ft). |
|
| 15. |
Refit the shield on to the intake manifold.
|
|
| 16. |
Reconnect the battery's negative cable and refit the cap.
|
|
| 17. |
During replacement, check the battery; refer to
Battery check
and charge the battery if necessary, see "Charging the battery".
|
|
| 18. |
Set the clock and reprogram the radio code.
|
|
| 19. |
Start the engine and let it run at idle speed for a moment. Switch off the engine and check that the belt is correctly positioned.
|
|


