coil spring (contact roller)
|
|
coil spring (contact roller)
|
 Warning
|
|
Read
 carefully before starting work.
|
|
|
|
|
|
|
1.
|
Ignition switch in the OFF position.
|
|
2.
|
Turn the steering wheel to the straight ahead position.
|
|
3.
|
Remove the airbag from the steering wheel, 2 screws and plugs.

|
|
4.
|
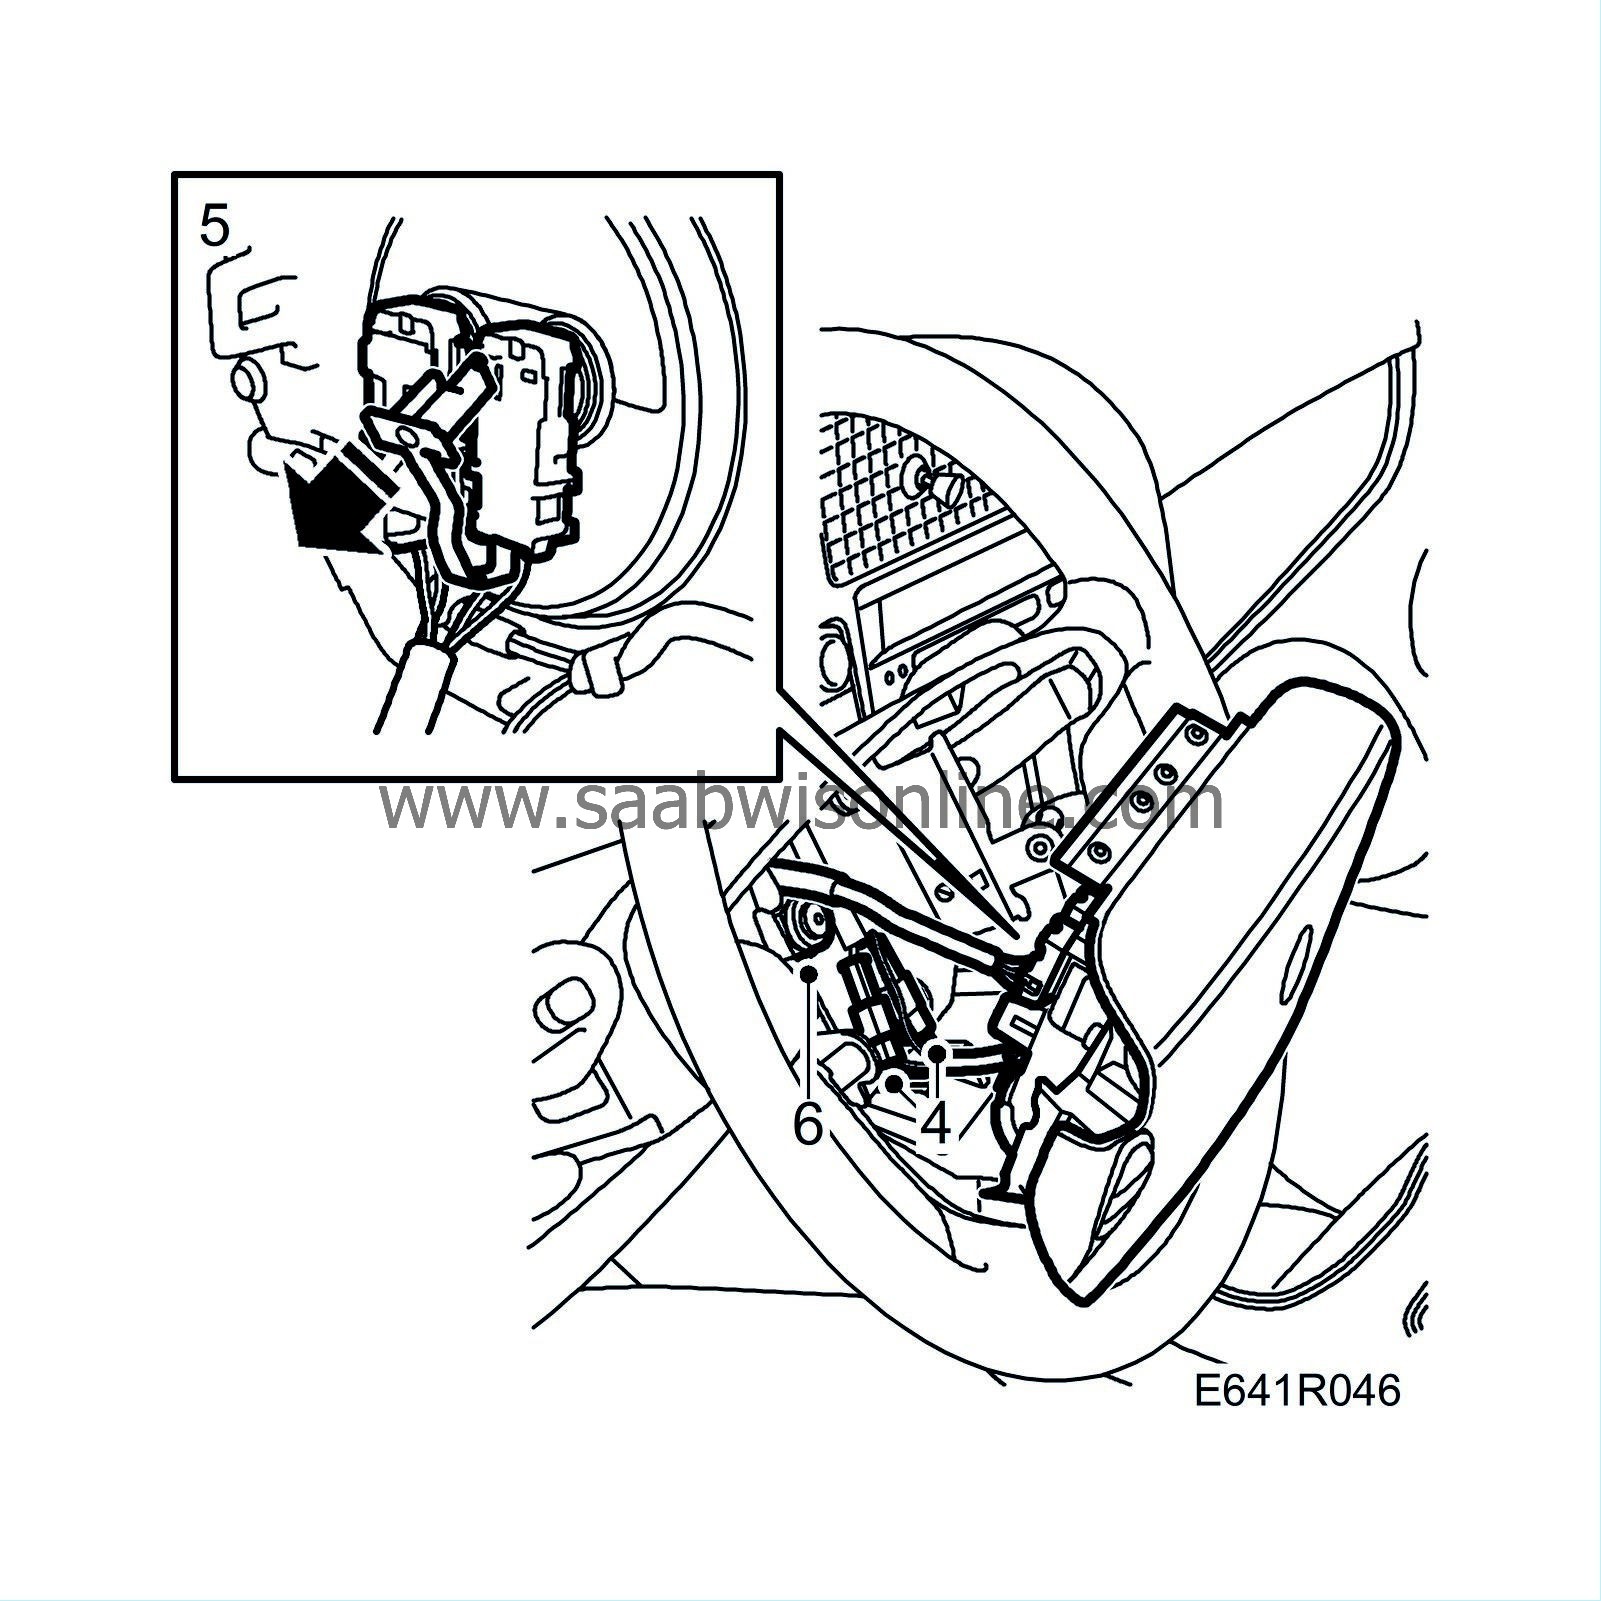
Lift out the airbag slightly from the steering wheel and detach the connectors from the Velcro tape.
|
|
5.
|
Disconnect the wires on the back of the airbag.
|
|
6.
|
Undo the steering wheel nut a few turns and pull up the steering wheel so it comes loose from the steering column.
|
|
7.
|
Remove the steering wheel nut and washer.
|
|
8.
|
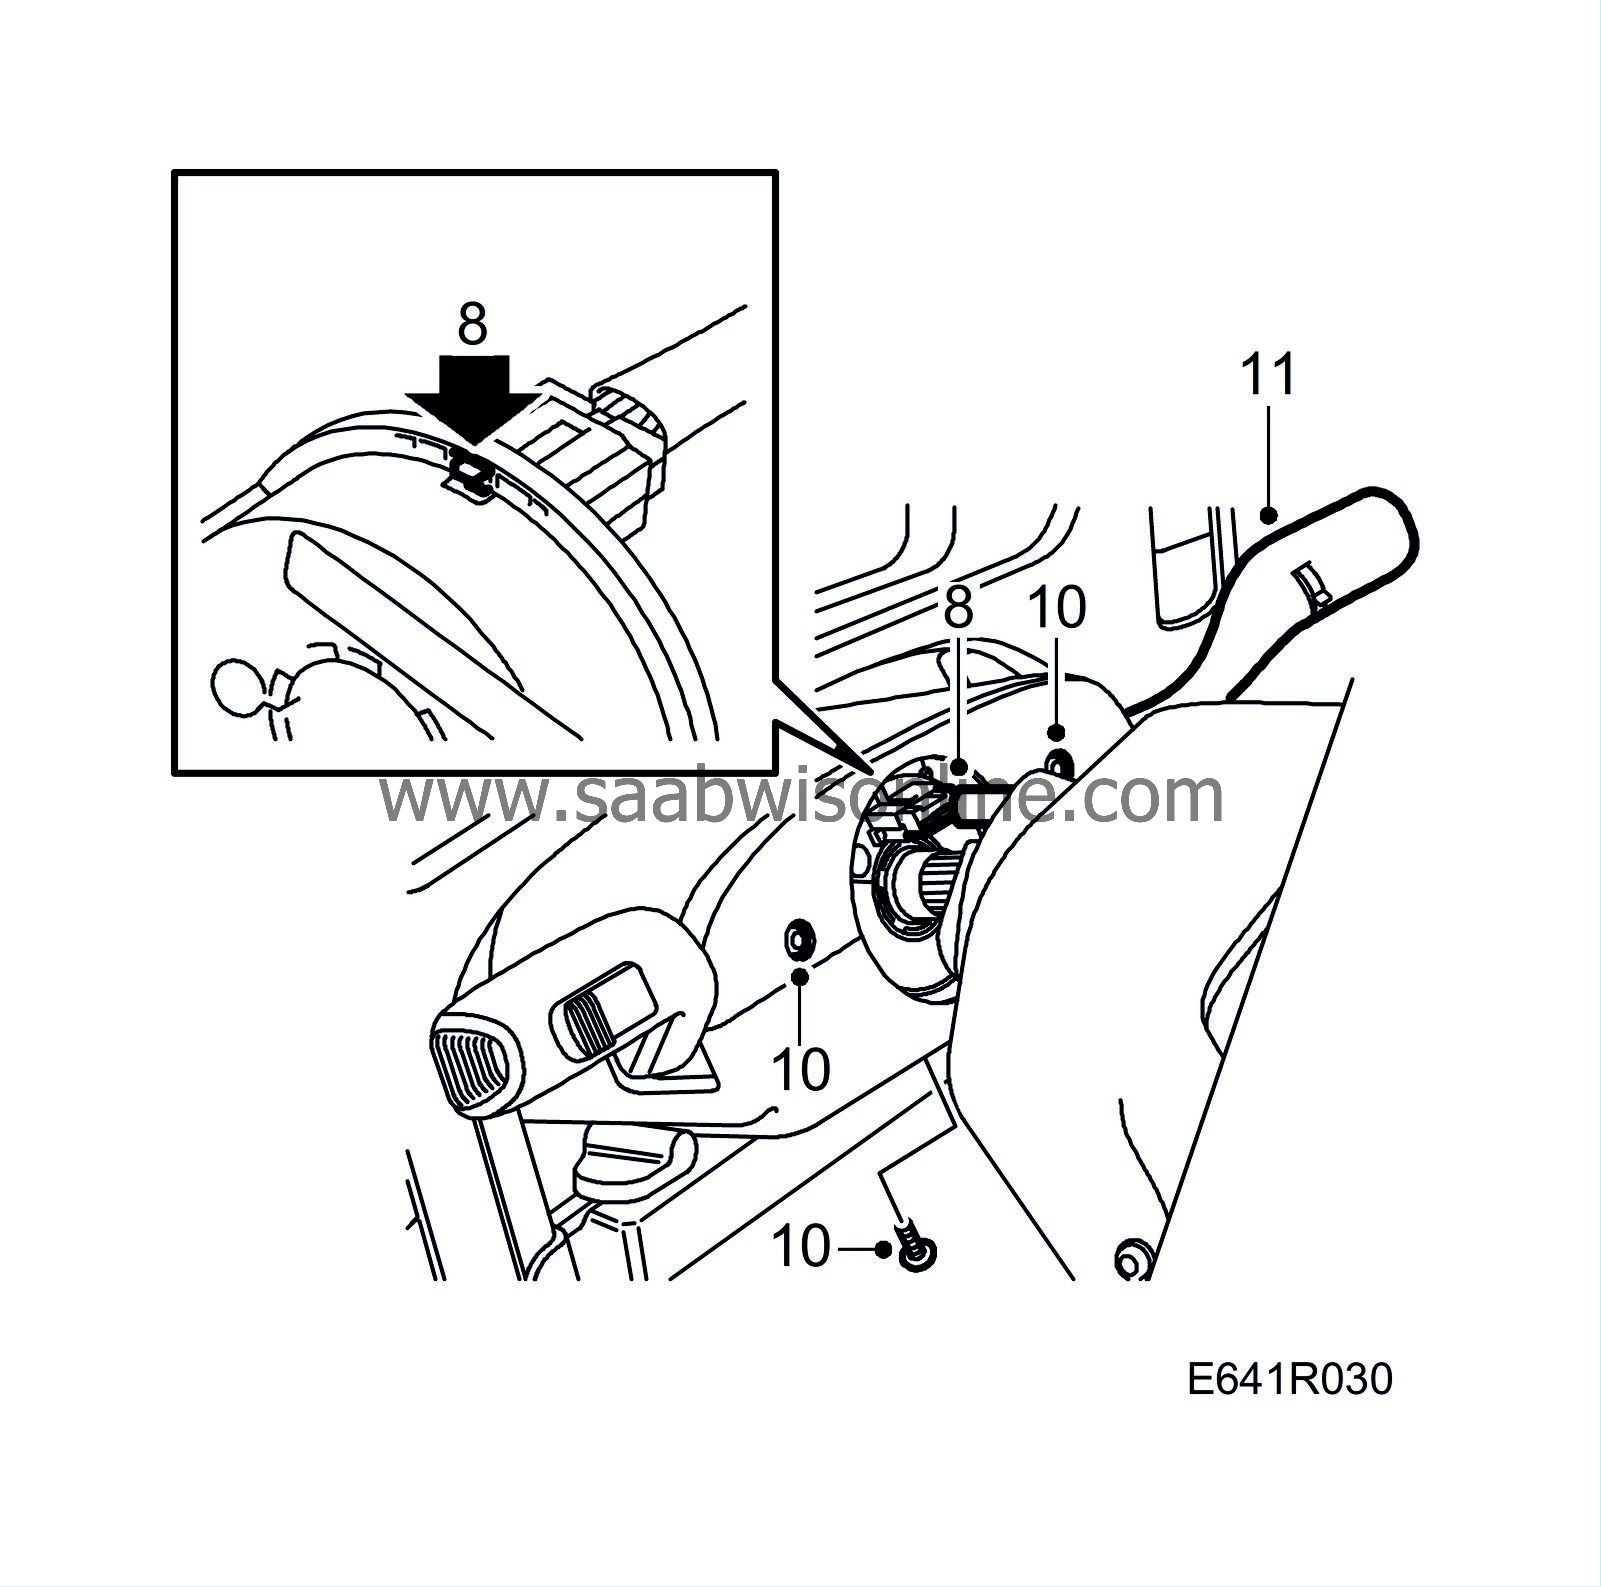
Pull up the steering wheel far enough to access the connector on the contact roller.
Unplug the steering wheel harness connector from the contact roller. Make sure the contact roller mechanism is secure.
|
|
9.
|
Lift off the steering wheel.
|
|
10.
|
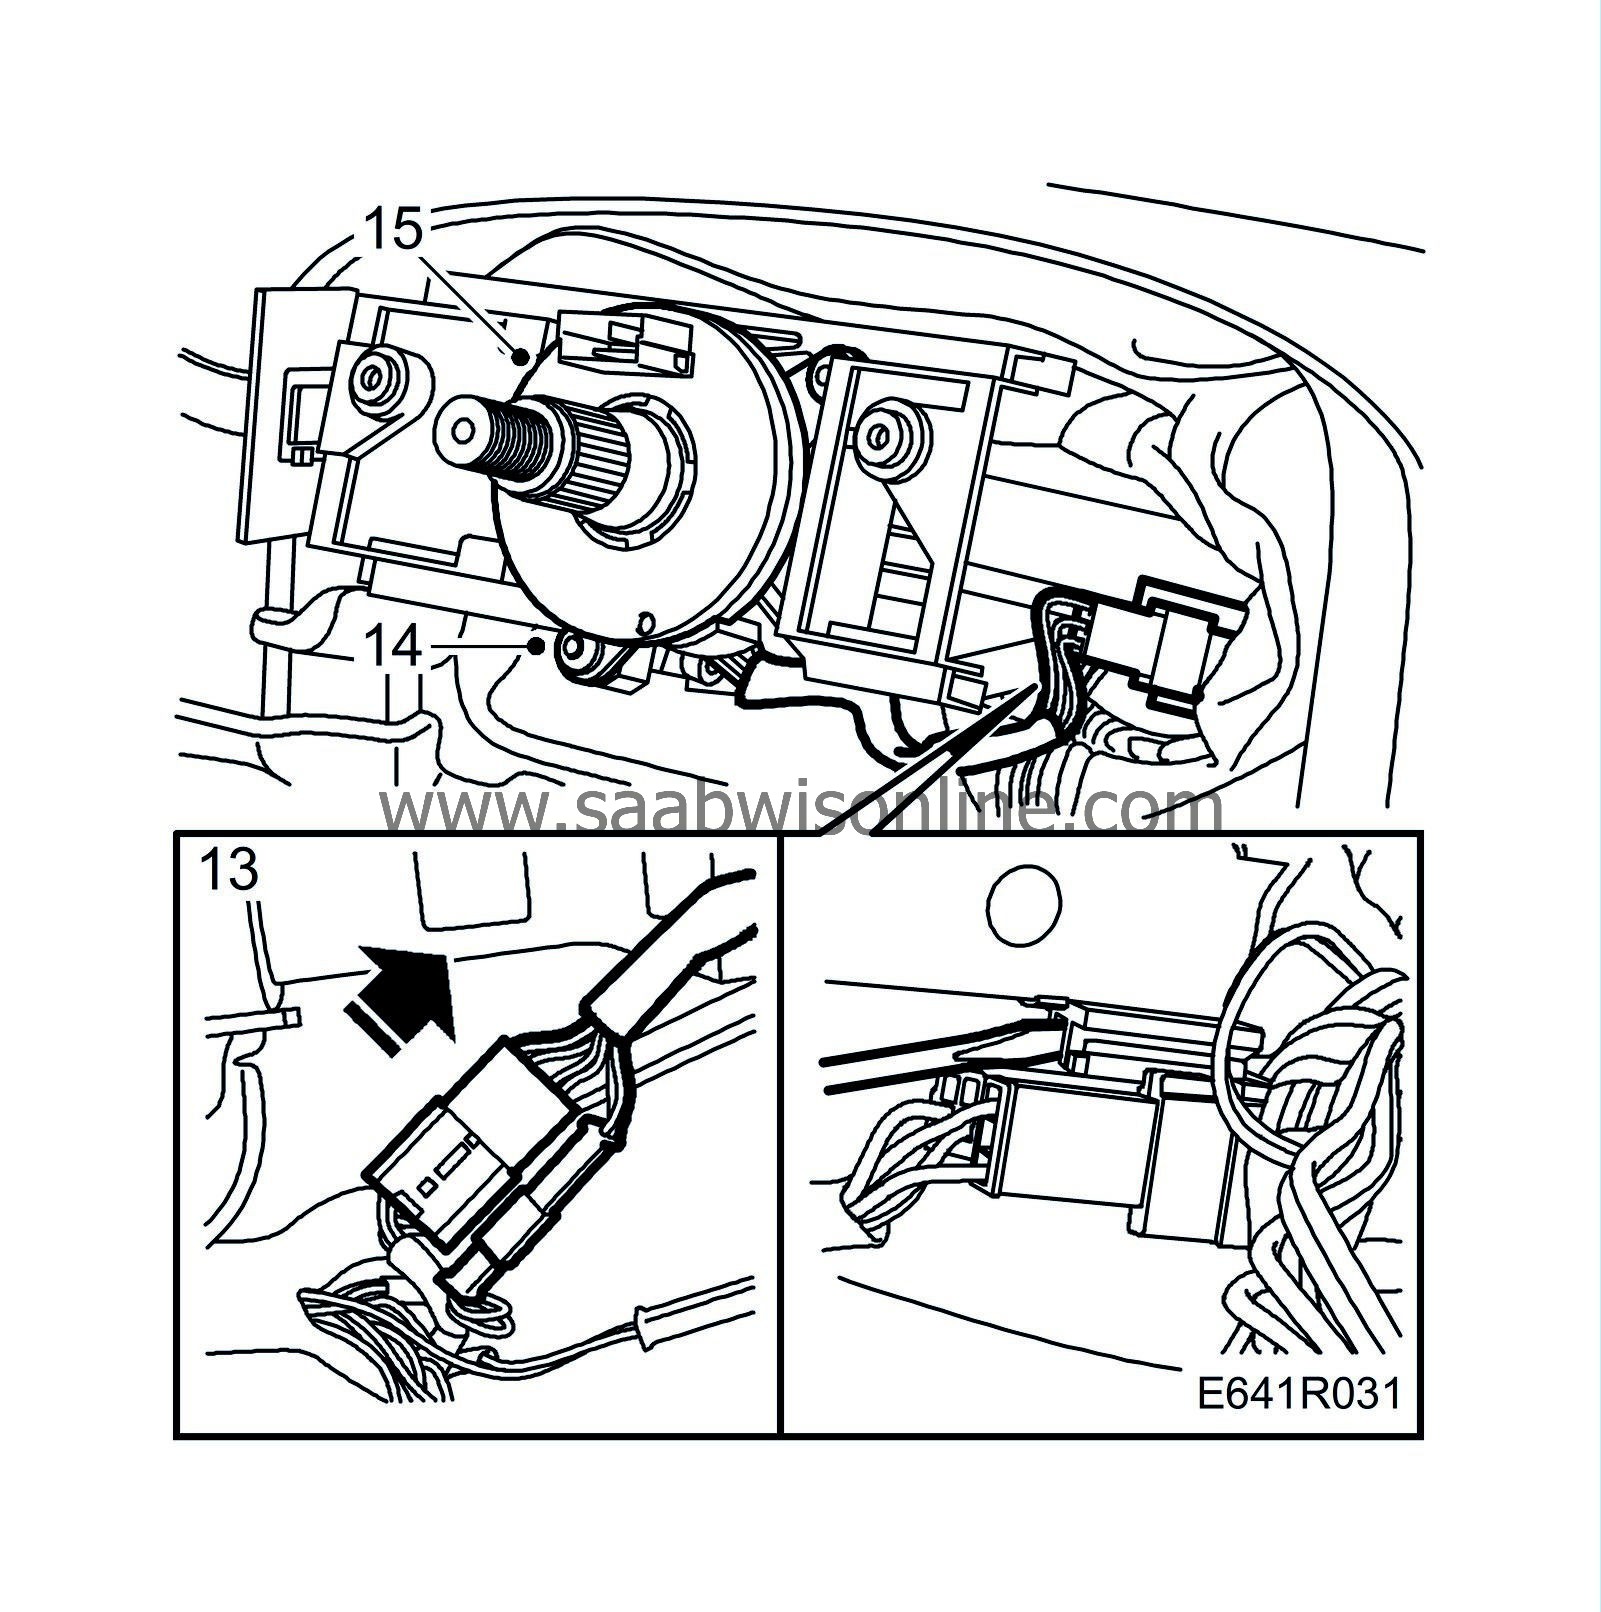
Remove the upper and lower steering column covers, 3 screws.
|
|
11.
|
Remove the windscreen wiper stalk switch.
|
|
13.
|
Unplug the contact roller connector.
|
|
14.
|
Remove the screws securing the contact roller, 2 pcs.
|
|
15.
|
Lift out the coil spring.
|
|
1.
|
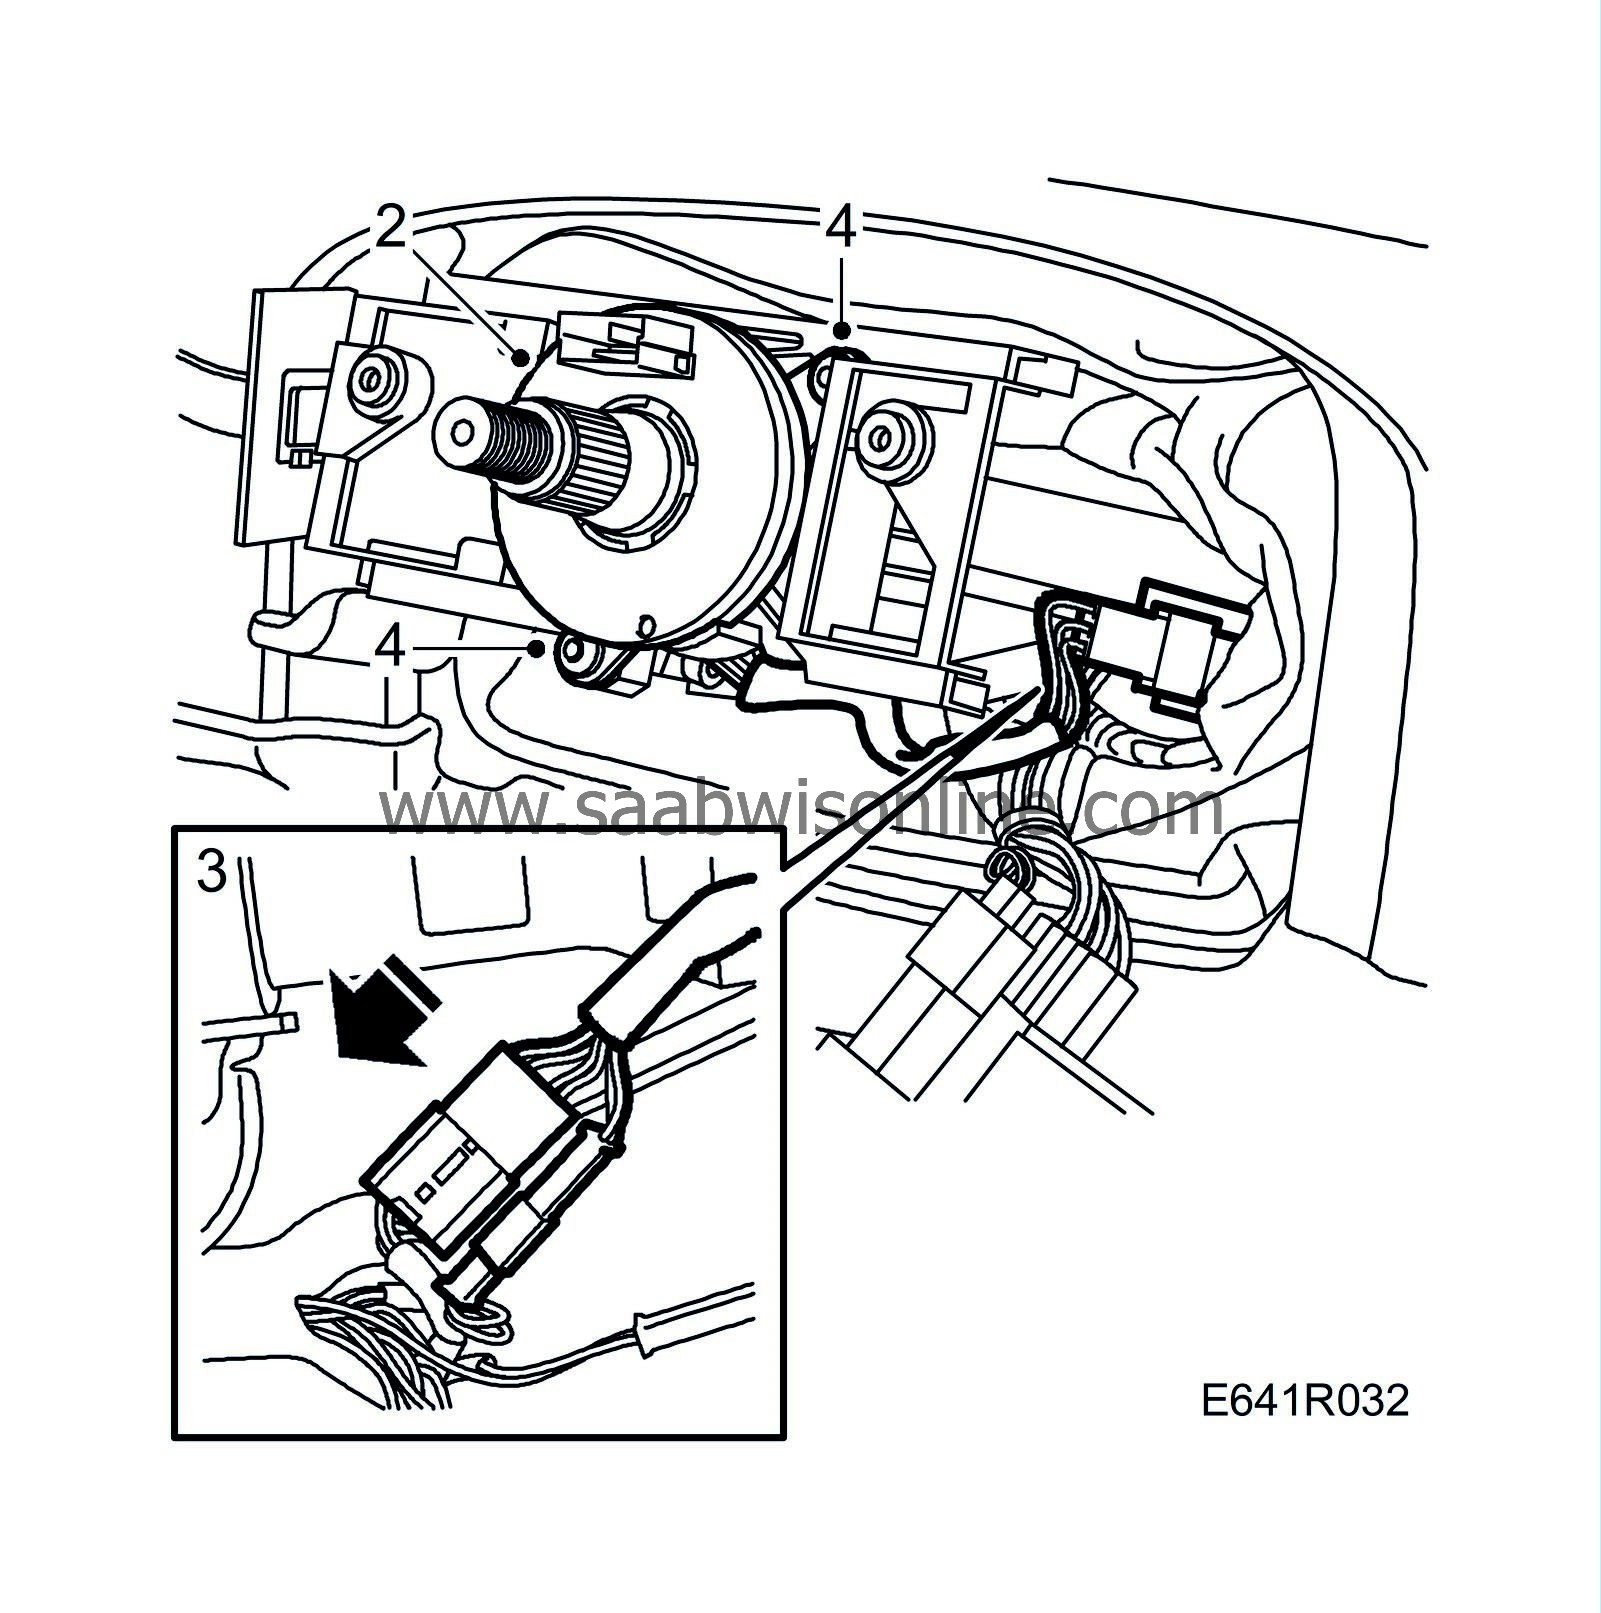
Check that the contact roller is locked in the centre position.
|
|
2.
|
Put in place the contact roller and cable harness. Fit the cable tie.
|
|
3.
|
Plug in the connector.
|
|
4.
|
Fit the screws securing the contact roller, 2 pcs.
|
|
5.
|
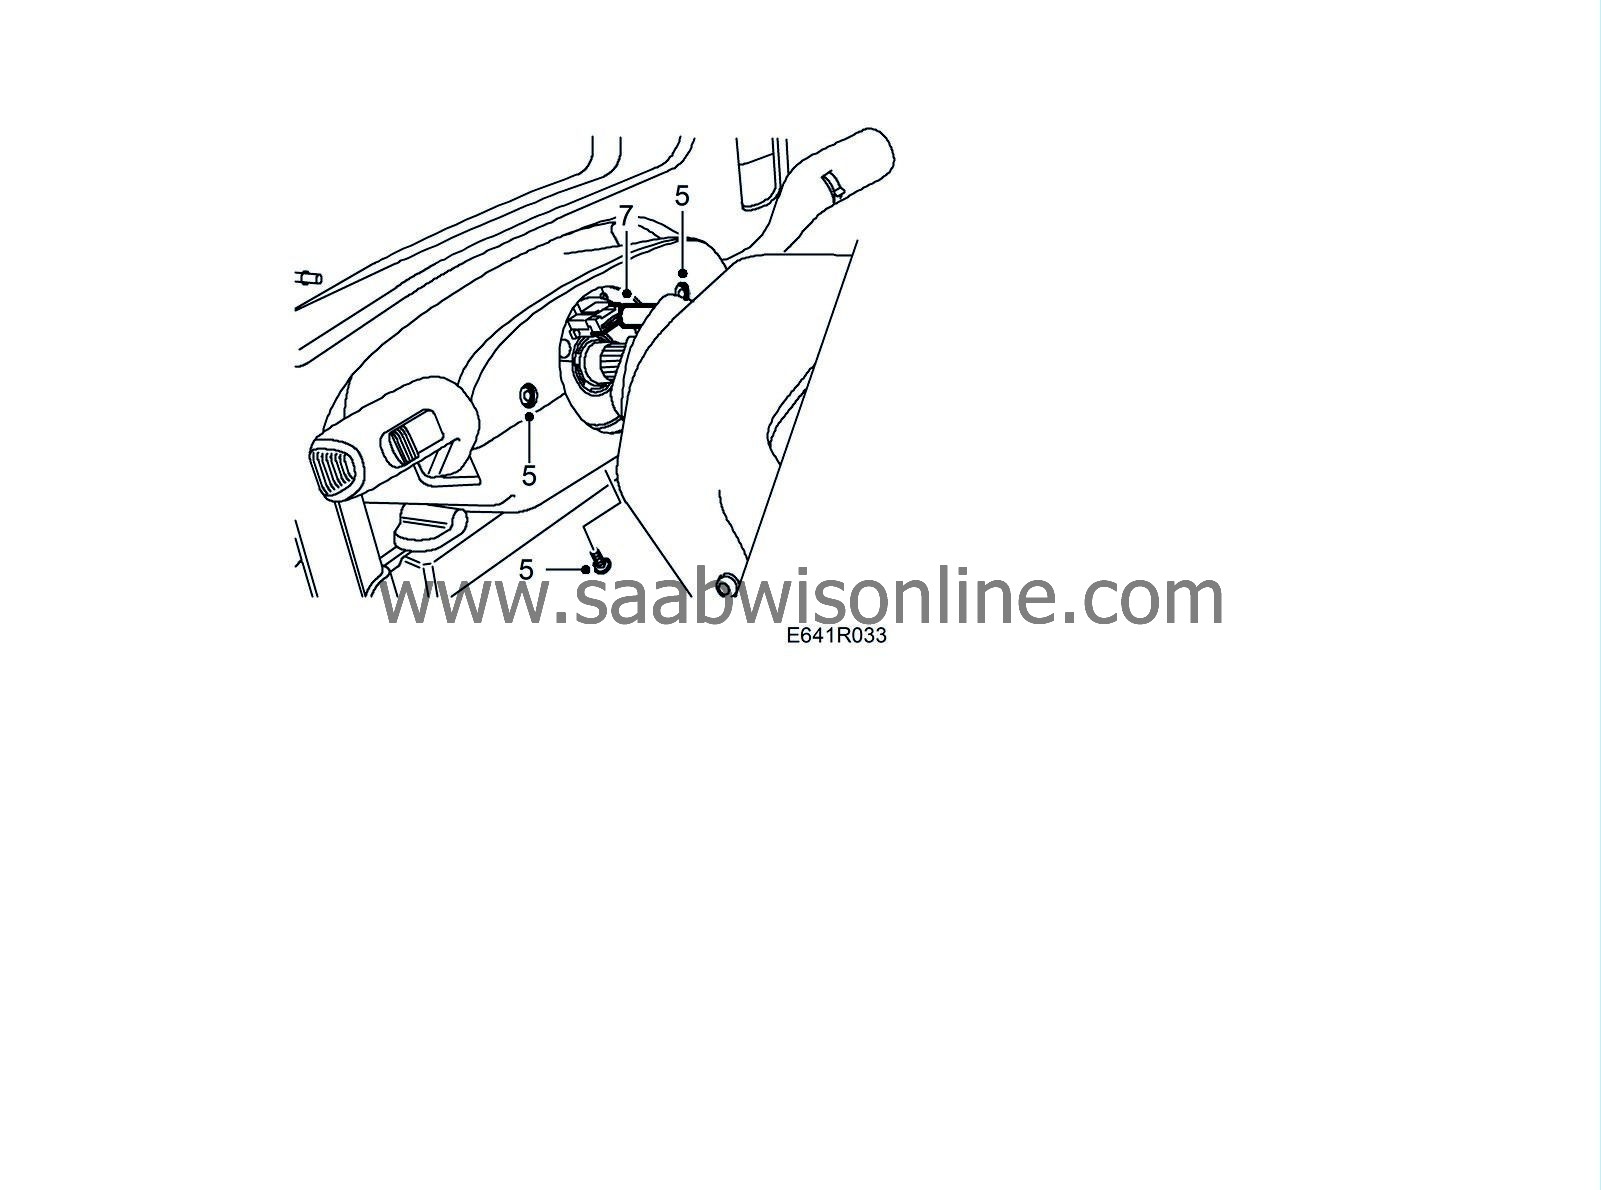
Refit the upper and lower steering column covers, 3 screws.
|
|
6.
|
Check that the leads connected to the coil spring are not twisted.
|
|
7.
|
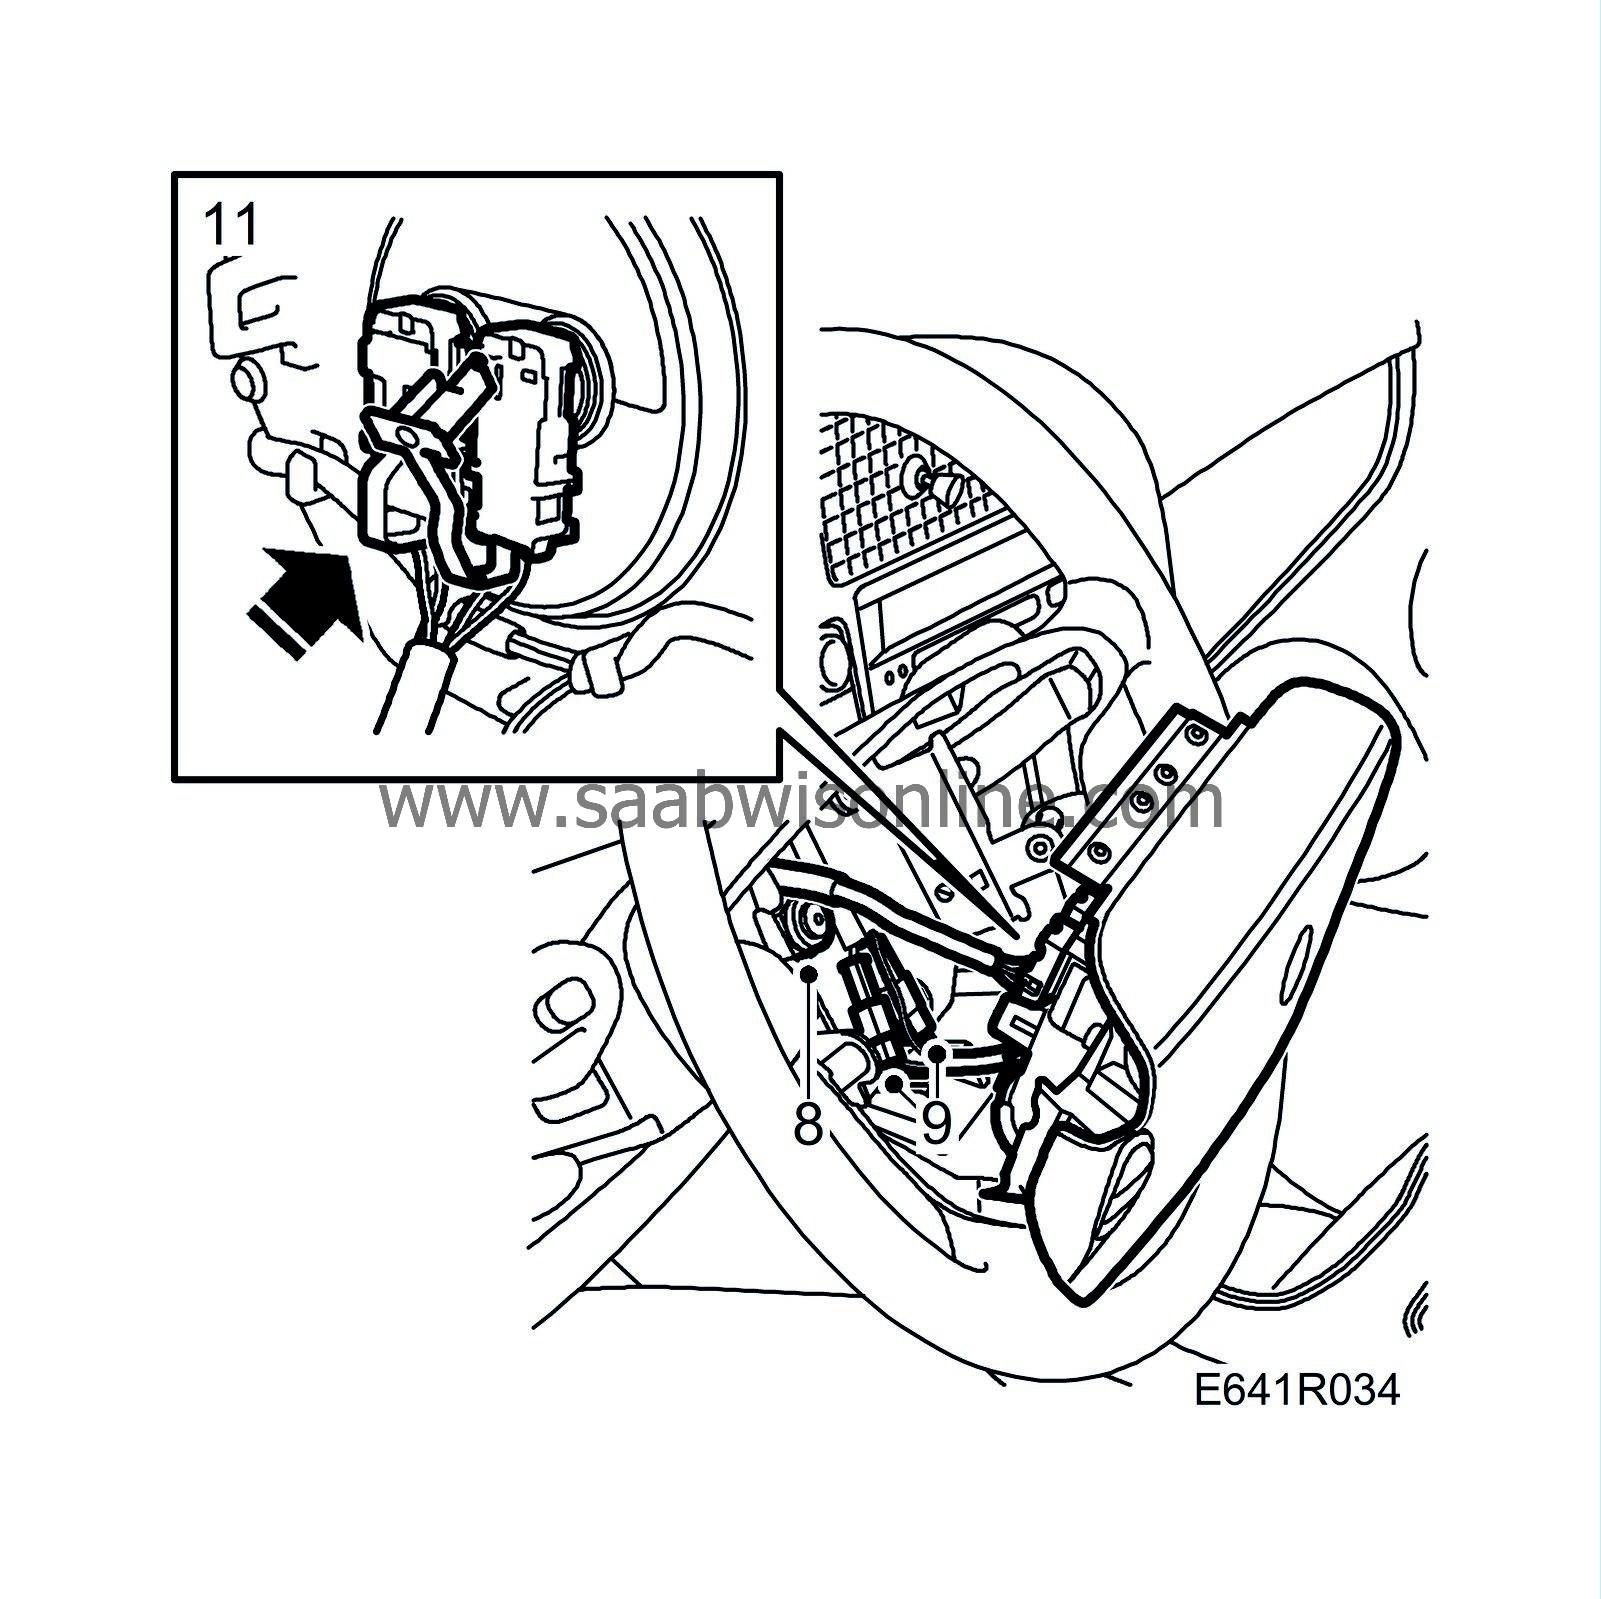
Hang the steering wheel on the steering shaft.
|
Note
|
|
Make sure the hole in the steering wheel fits over the contact roller connector.
|
Plug in the contact roller before pushing home the steering wheel.
|
|
8.
|
Push home the steering wheel.
Fit the washer and steering wheel nut.
Tightening torque: 39 Nm (28.8 lbf ft)
|
|
9.
|
Plug in the horn and, if fitted, the audio system.
|
|
10.
|
Attach the connectors to the Velcro tape.
|
|
11.
|
Plug in the electrical connections on the back of the airbag.
|
|
12.
|
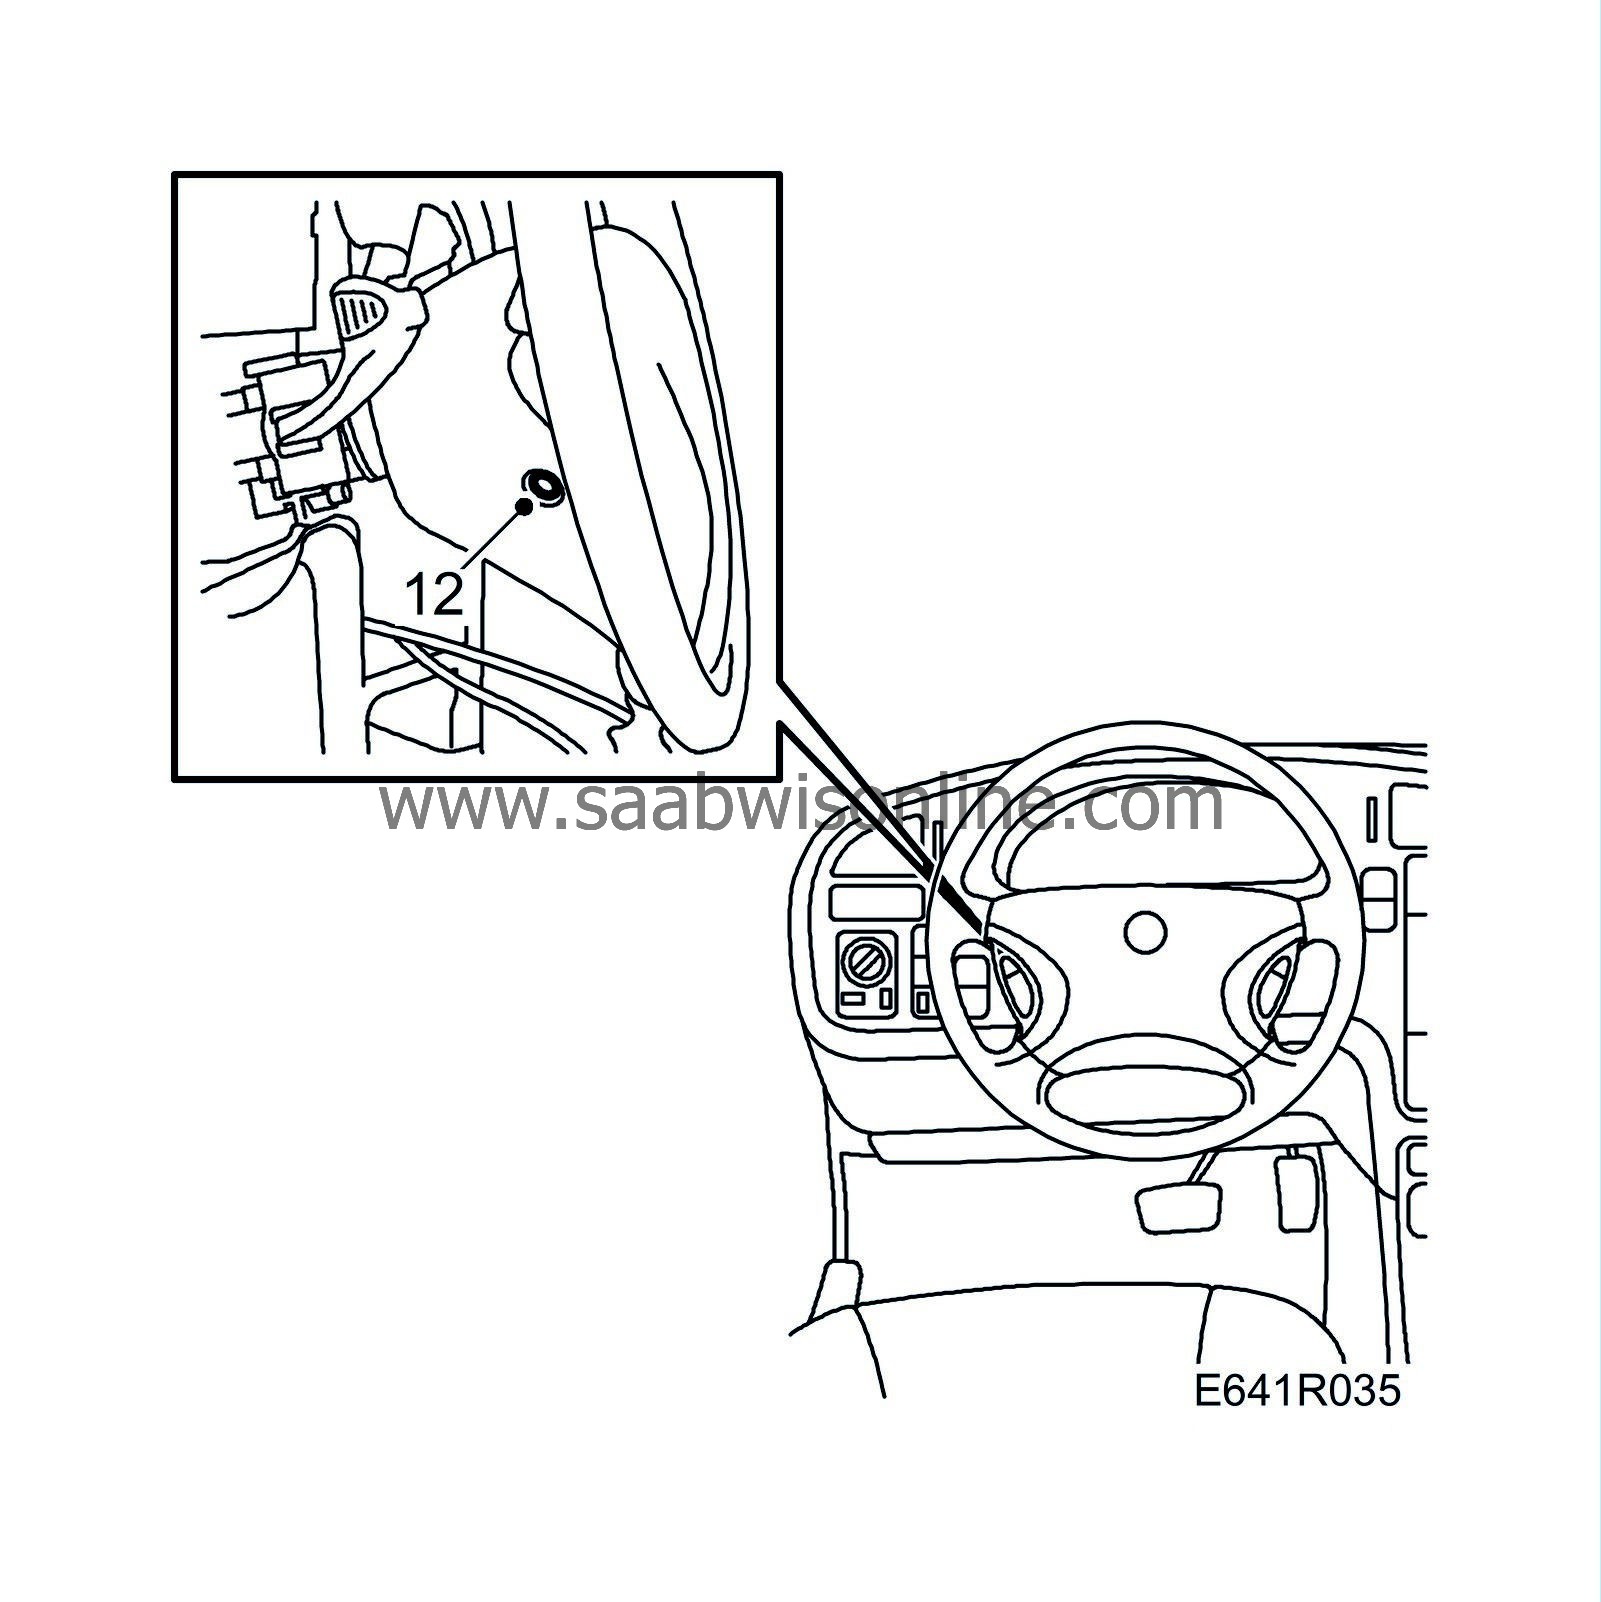
Fit the airbag in the steering wheel, 2 screws and plugs.
|
|
13.
|
Turn on the ignition and check the SRS system and control module with the diagnostic tool as follows:
Connect the diagnostic tool to the diagnostic socket under the dashboard. Clear any diagnostic trouble codes that are present.
Turn the ignition off and on again. Wait at least 10 seconds with the ignition on.
Check whether a diagnostic trouble code is shown:
If a diagnostic trouble code is shown:
Carry out fault diagnosis in accordance with the directions given for each DTC.
If no diagnostic trouble code is shown:
The installation is successful. Disconnect the diagnostic tool.
|


 Warning


