Tappets
| Tappets |
| To remove |
|
||||||||||||||||||||||
| 1. |
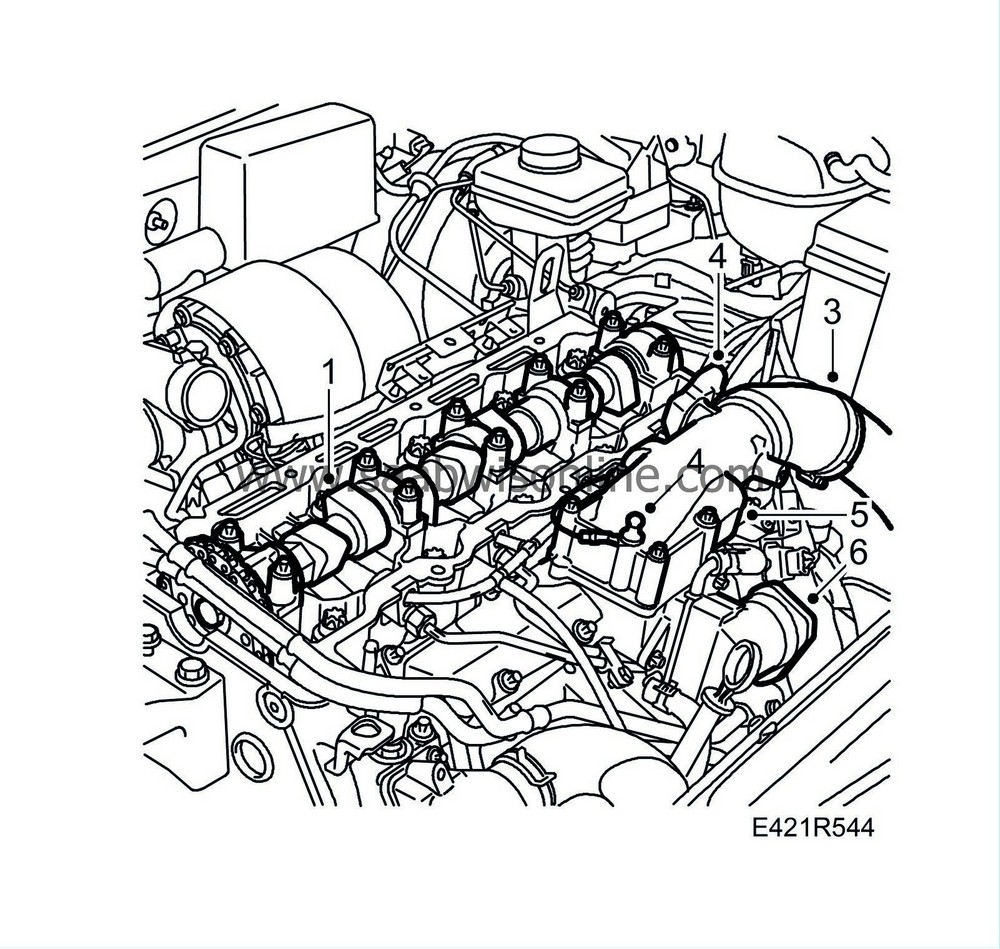
Remove the camshaft, see
Camshaft.
|
|
| 2. |
Remove any oil found on top of the cylinder head.
|
|
| 3. |
Remove the turbocharger delivery pipe with hose from the throttle body and move it out of the way.
|
|
| 4. |
Unplug the pressure/temperature sensor and disconnect the ground cable.
|
|
| 5. |
Remove the throttle body.
|
|
| 6. |
Unplug the EGR valve connector and remove the EGR valve from the intake manifold.
|
|
| 7. |
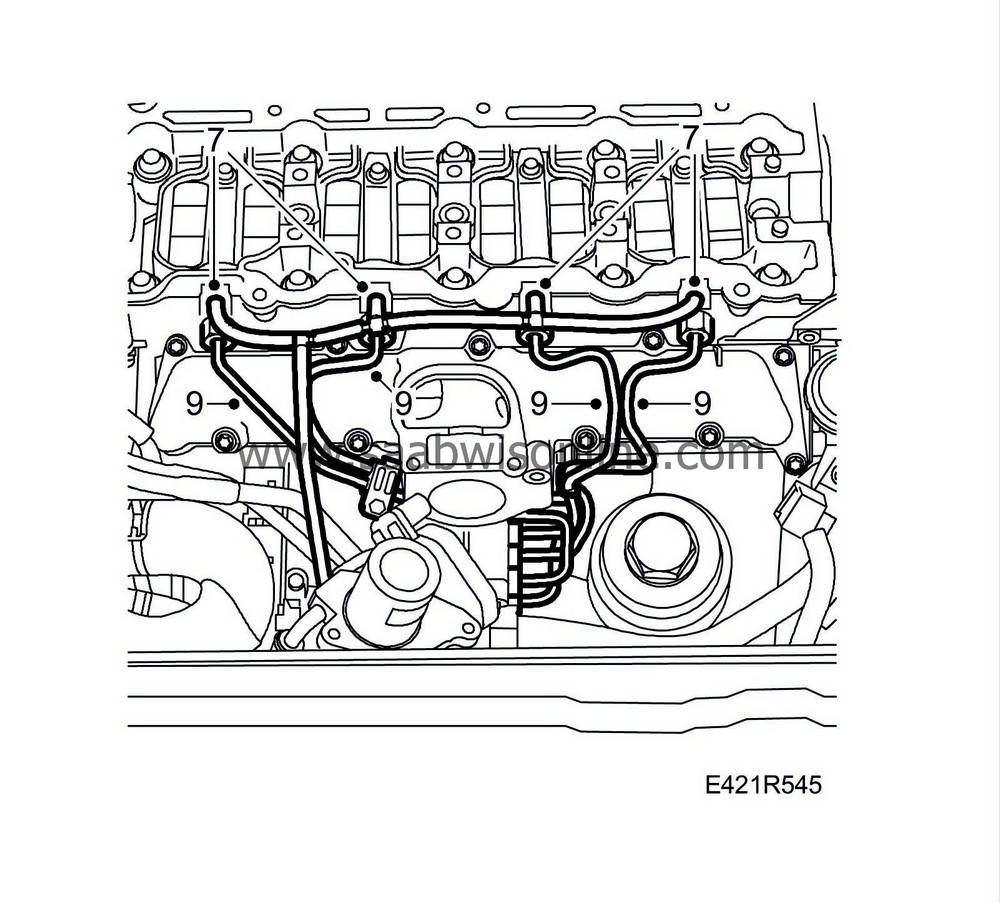
Place a receptacle under the car to collect any spilled fuel. Remove the fuel return hoses.
|
|
| 8. |
Make a note of the position of the fuel distribution pipes and their clips, mark the pipes.
|
|
| 9. |
Remove the fuel rail (remove the rail clips if necessary).
|
|
| 10. |
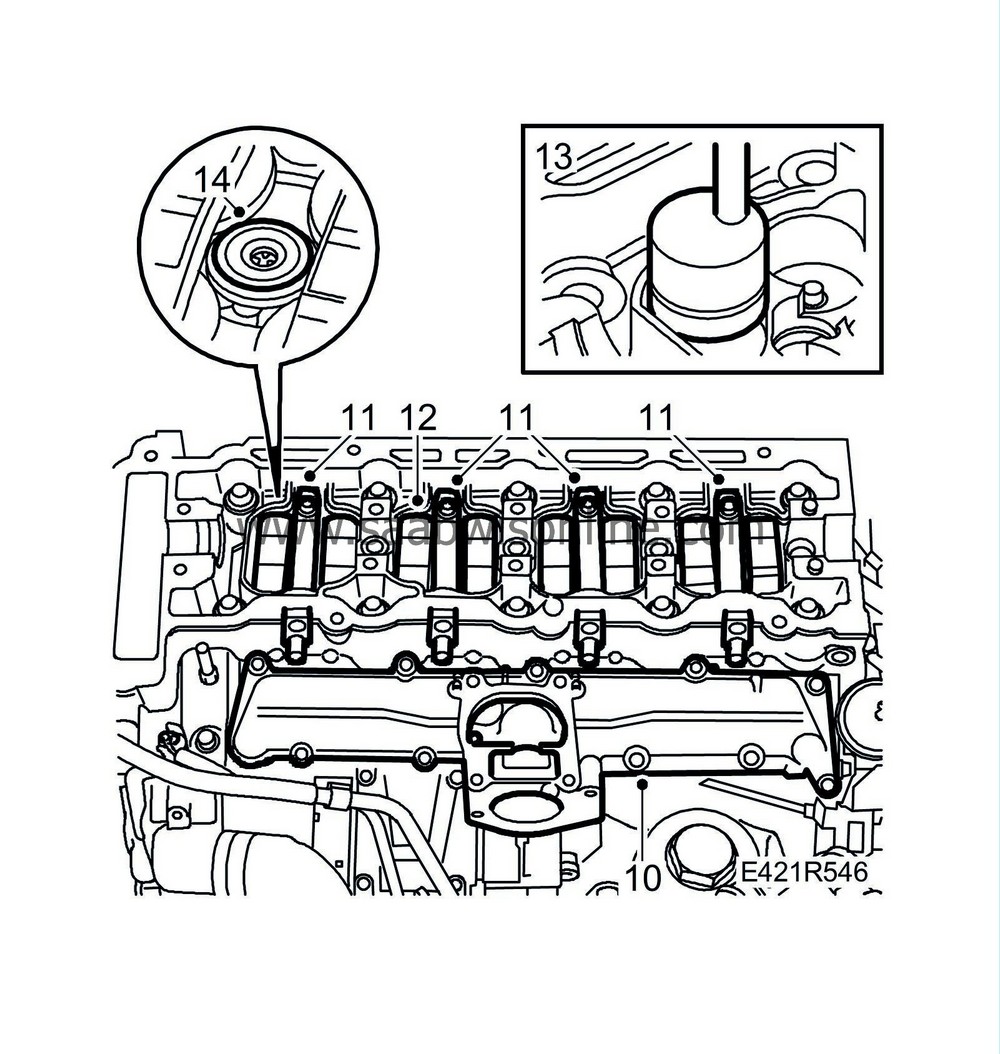
Remove the upper part of the intake manifold and plug the passageways.
|
|
| 11. |
Remove the retaining bolts for the fuel bridges, lift and pull out the fuel bridges from the cylinder head.
|
|
| 12. |
Remove the valve bridges.
|
||||||||||
| 13. |
Lift up the tappets with
83 91 401 Magnetic tool
.
|
|
| 14. |
Remove the seals from the injector connections in the fuel bridges.
|
|
| To fit |
| 1. |
Clean all dismantled parts and inspect for wear. Change as necessary.
|
|
| 2. |
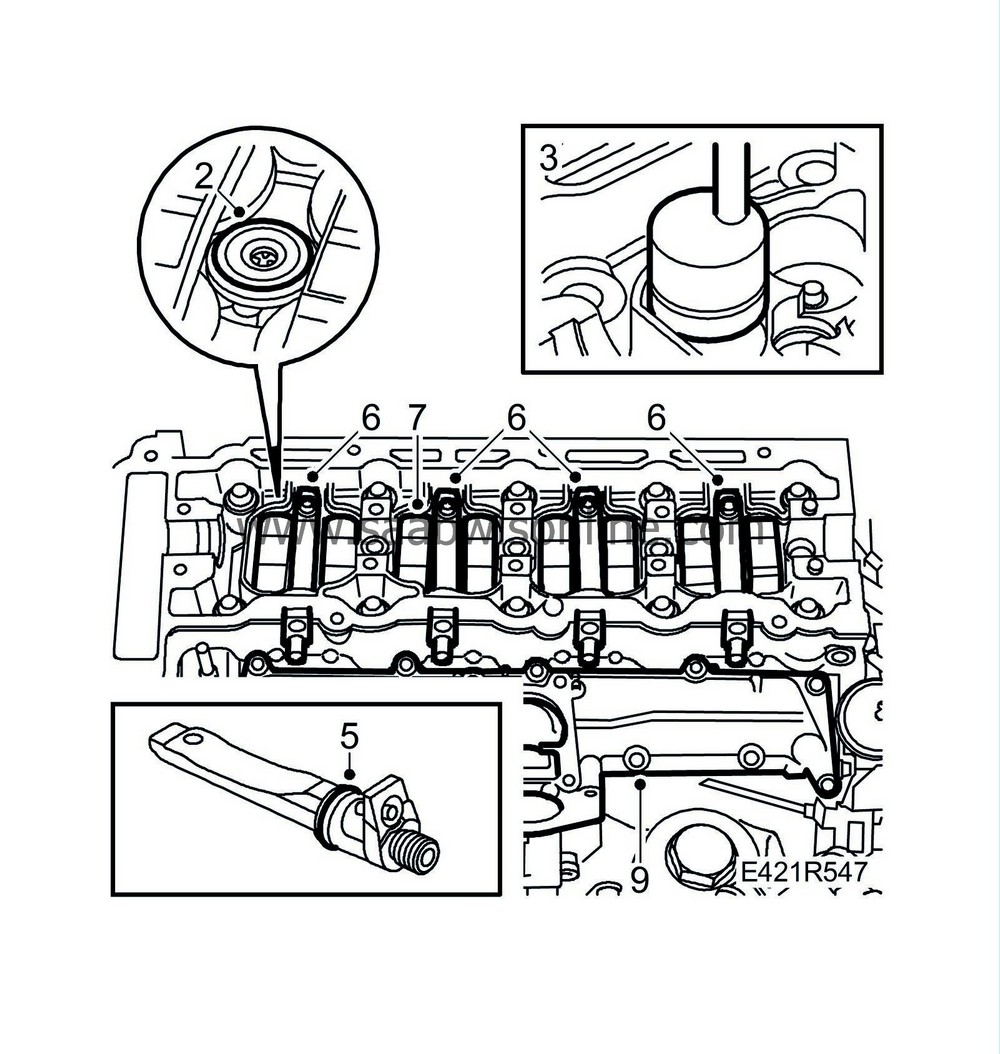
Fit the seals from the injector connections in the fuel bridges.
|
|
| 3. |
Lubricate the tappets with engine oil and position them in the cylinder head.
|
|
| 4. |
Blow clean the holes for the fuel bridge retaining bolts.
|
|
| 5. |
Fit the new O-rings onto the fuel bridges, lubricate the O-rings with non-acidic Vaseline and carefully push them into the cylinder head.
|
|
| 6. |
Tighten the fuel bridge bolts.
Tightening torque: 5 Nm + 360°(4 lbf ft + 360°) |
|
| 7. |
Fit the valve bridges.
|
||||||||||
| 8. |
Clean the sealing surfaces.
|
|
| 9. |
Place a new gasket on the lower part of the intake manifold and fit the upper part.
Tightening torque: 10 Nm (7 lbf ft). |
|
| 10. |
Inspect the tapered fuel rail connections and replace as necessary.
|
|
| 11. |
Connect the fuel rail with clips in their original positions.
Tightening torque: 25 Nm (19 lbf ft). 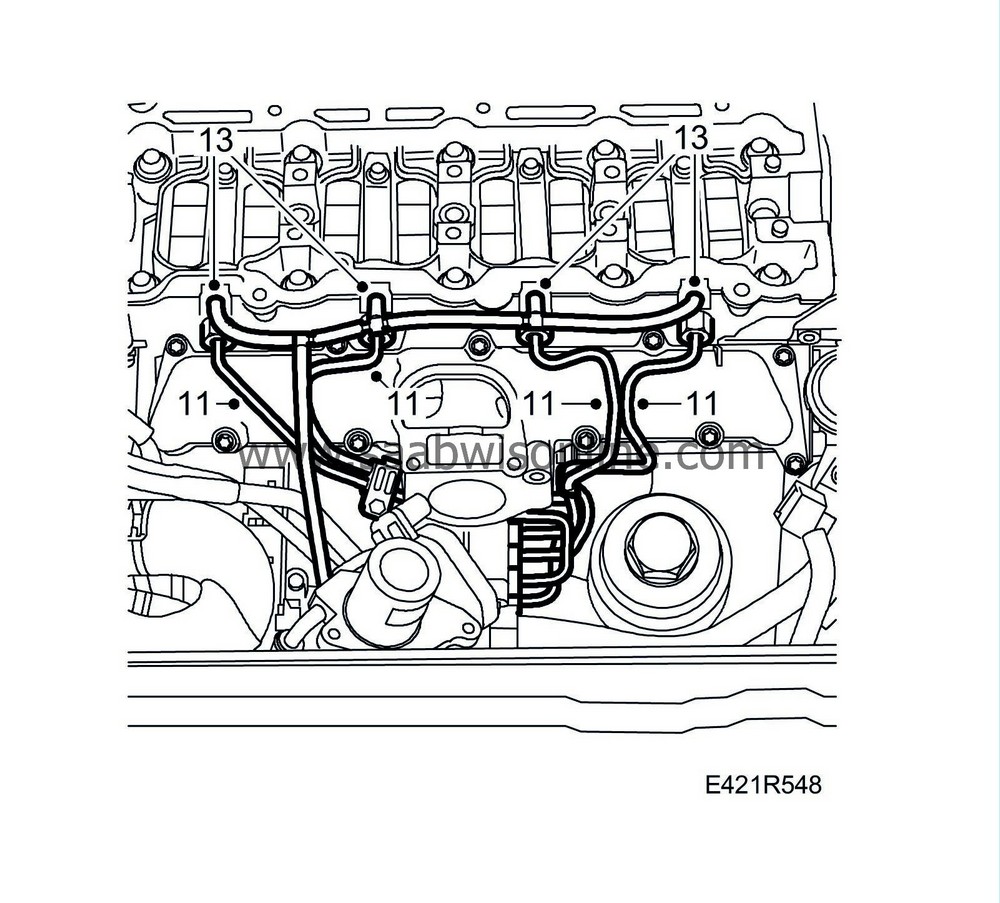
|
|
| 12. |
Check the condition of the fuel return hoses and joints and change as necessary.
|
|
| 13. |
Connect the fuel return hoses to the fuel bridges. Loosen the fuel return connection from the fuel pump and connect
30 14 883 Pressure/vacuum pump
. Pump up a vacuum of 750 mbar and wait for 1 minute. Check that the indicator on the tool has not moved.
If there is a leak, the fuel bridges must be inspected individually. Connect a pressure/vacuum pump to each fuel bridge return fuel line, do not use the existing return hose. If the fuel bridges are free from faults, inspect the return fuel hoses with T-pieces. The hoses must be supple and not be cracked or damaged in any other way. If there are signs of leaks, change all the fuel return hoses with T-pieces. If the fuel bridge is leaking, remove it, change the seal and fit the fuel bridge. Check for leaks again. |
|
| 14. |
Fit the EGR valve with a new O-ring.
Tightening torque: 10 Nm (7 lbf ft) 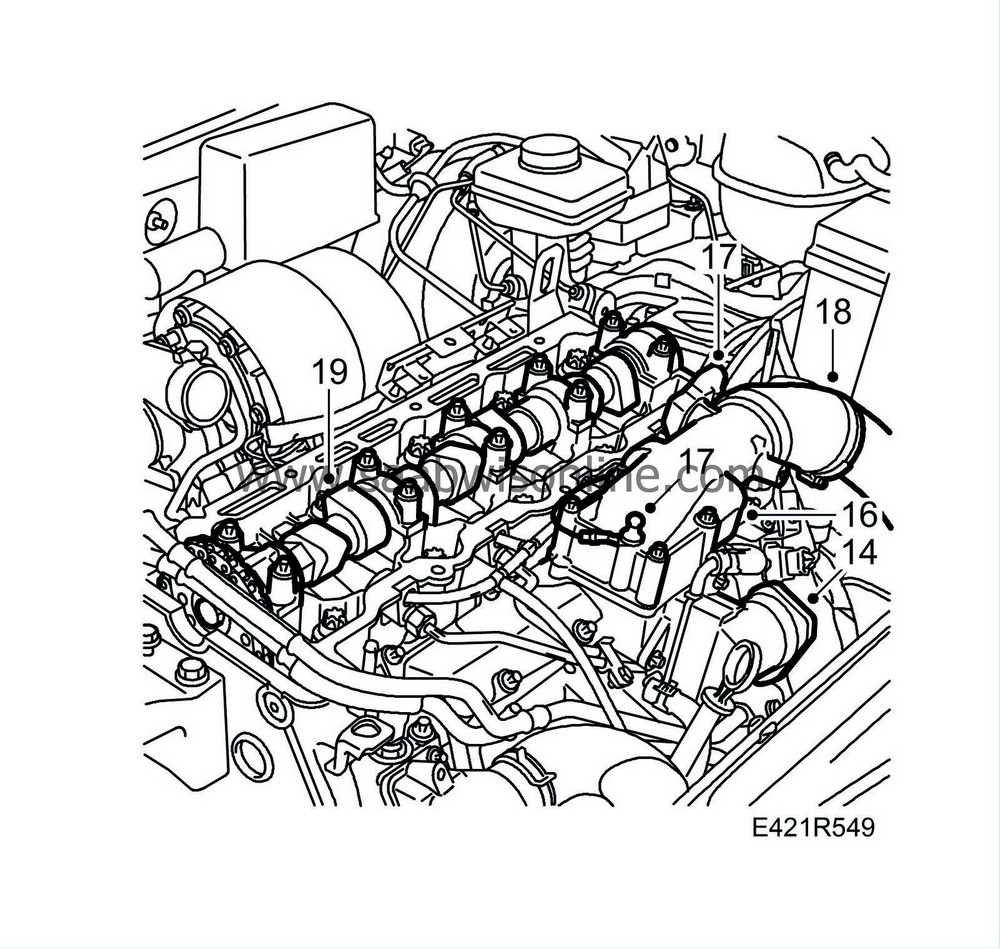
|
|
| 15. |
Plug in the EGR valve connector.
|
|
| 16. |
Fit the throttle body with a new gasket.
Tightening torque: 10 Nm (7 lbf ft) |
|
| 17. |
Fit the ground cable and the pressure/temperature sensor connector on the throttle body.
|
|
| 18. |
Connect the turbocharger delivery pipe with hose to the throttle body.
|
|
| 19. |
Fit the
Camshaft.
|
|

 Warning

