Timing cover plate
| Timing cover plate |
| To remove |
| 1. |
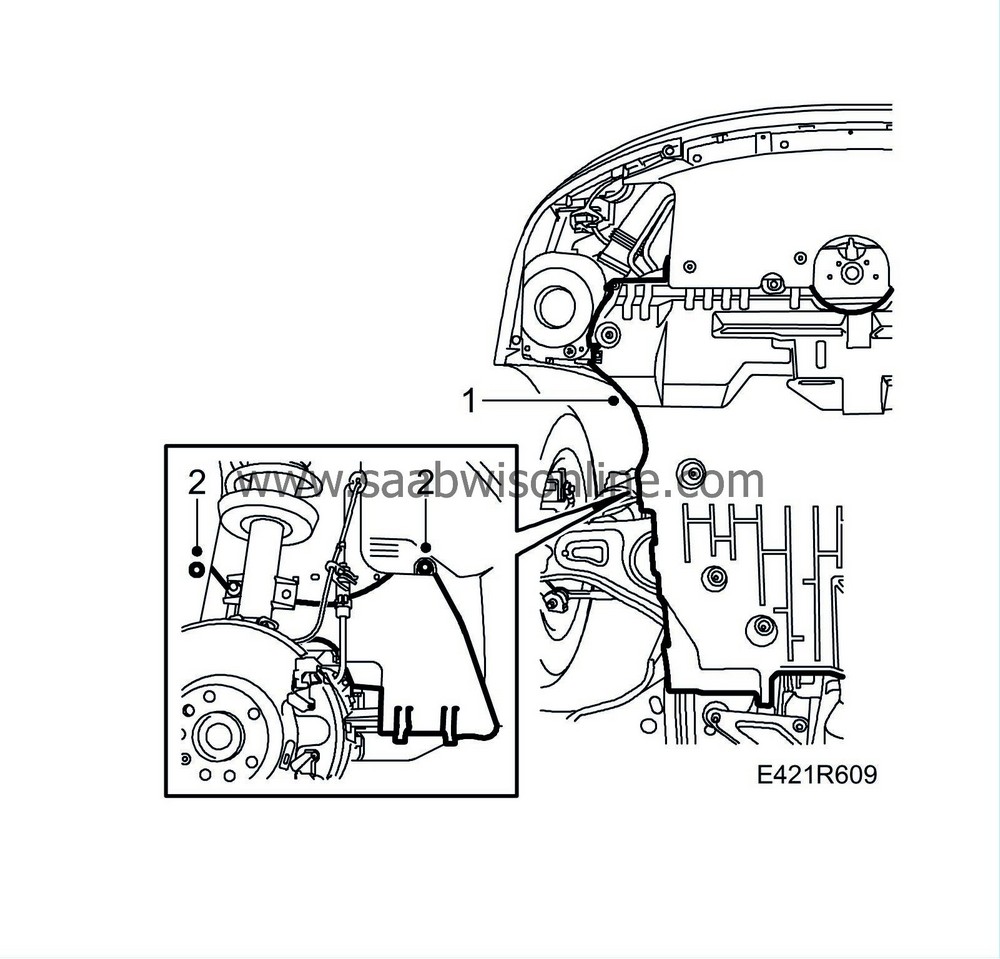
Raise the car and remove the lower engine cover.
|
|
| 2. |
Remove the drive belt cover.
|
|
| 3. |
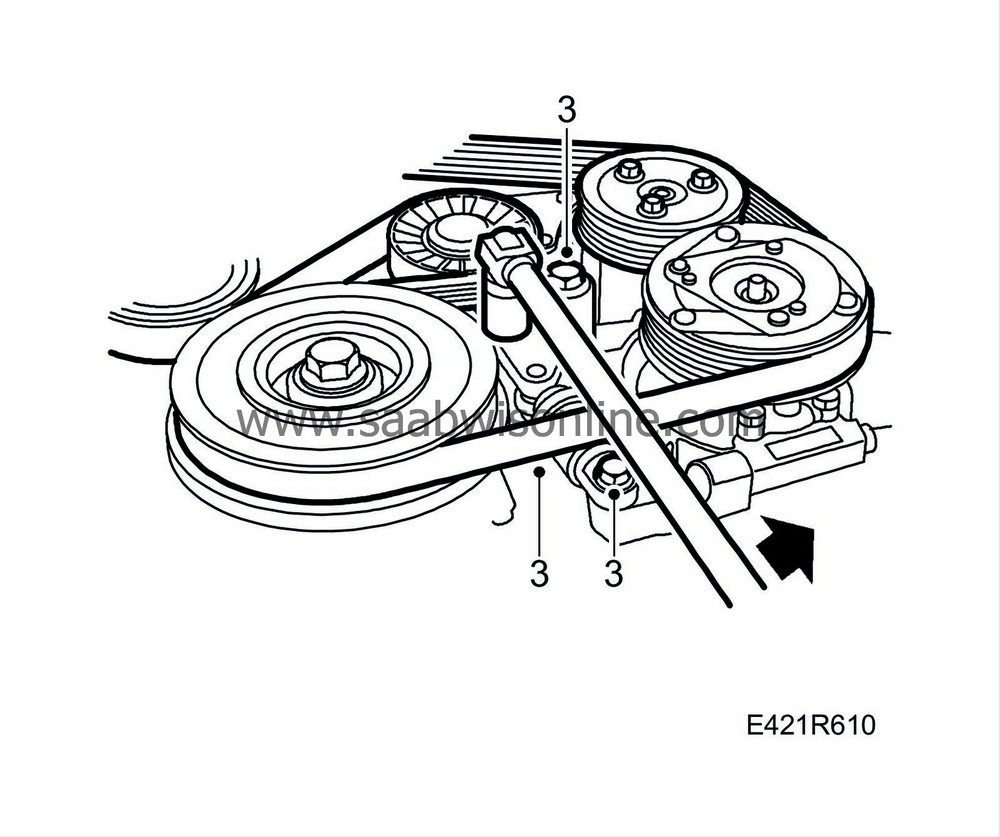
Mark up the multigroove belt rotation, relieve and remove the belt and belt tensioner.
|
|
| 4. |
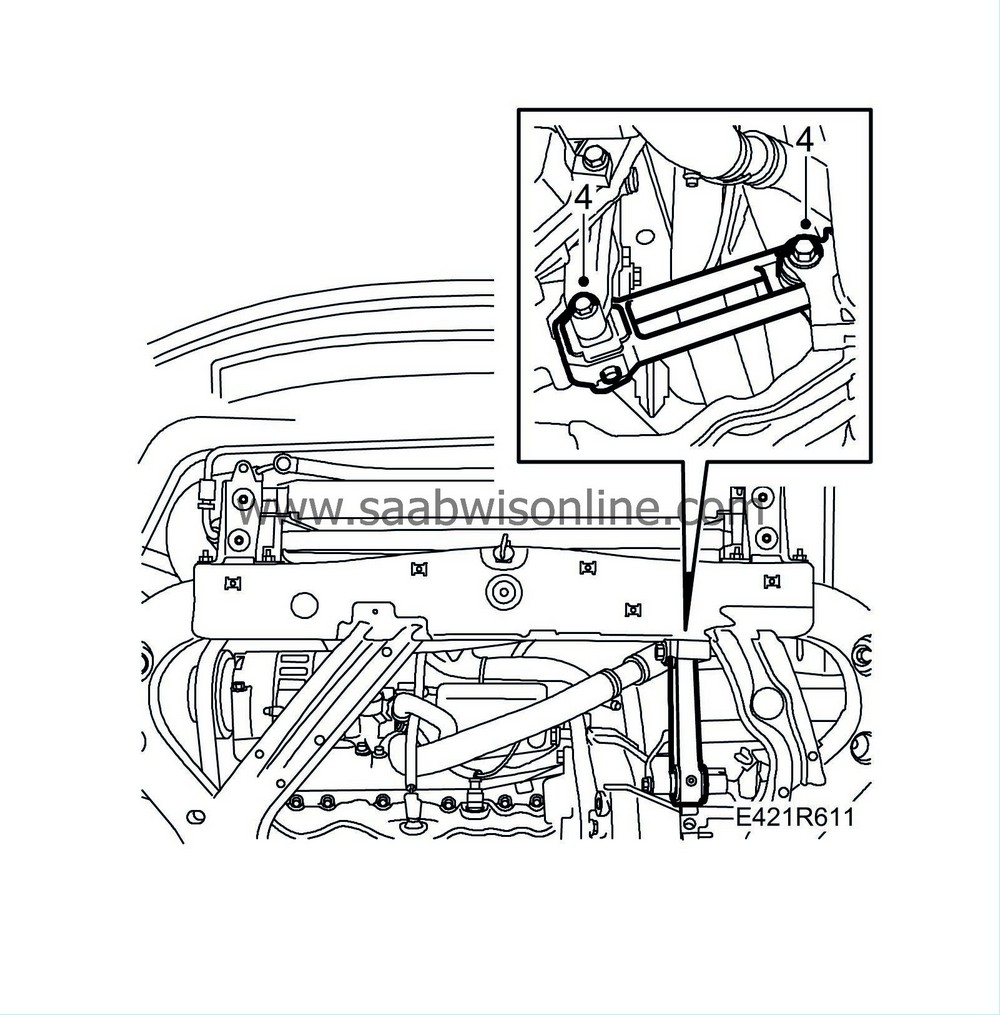
Remove the front bolt on the torque arm and undo the rear one.
|
|
| 5. |
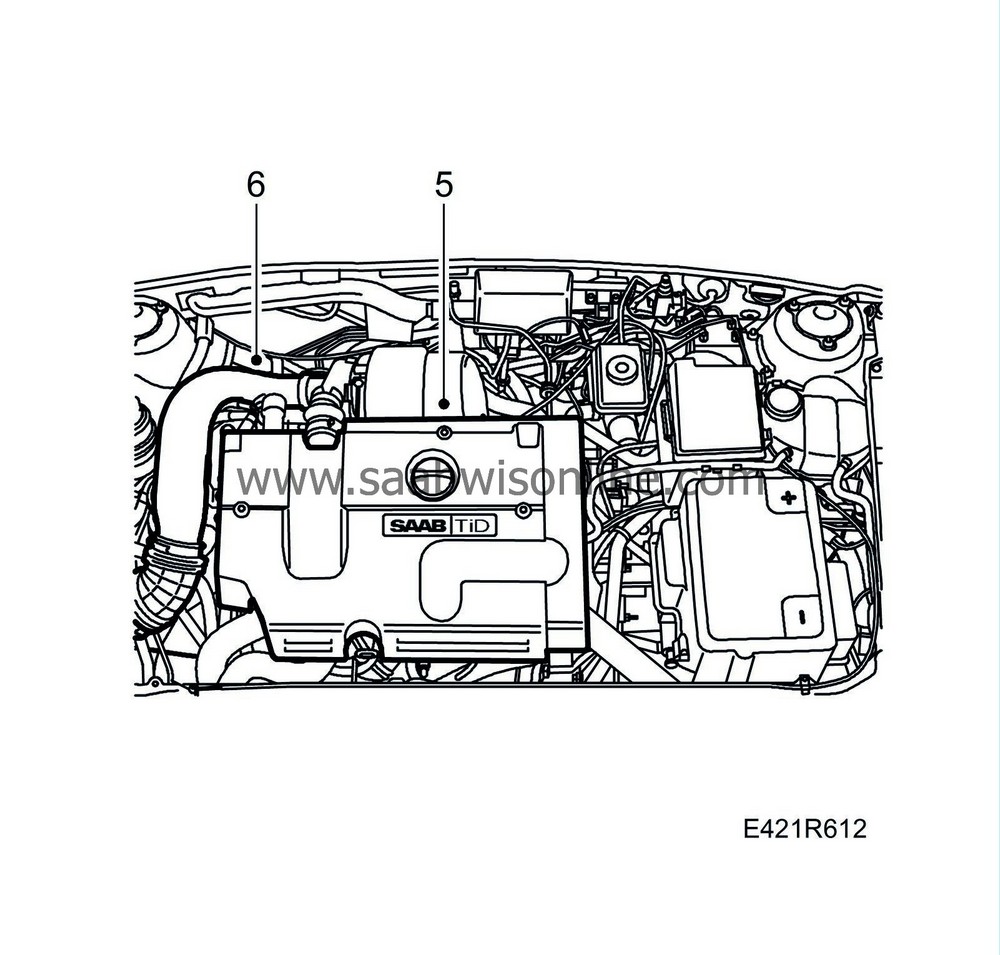
Lower the car and remove the upper engine cover.
|
|
| 6. |
Remove the intake manifold from the mass air flow sensor to the turbocharger and camshaft cover.
|
|
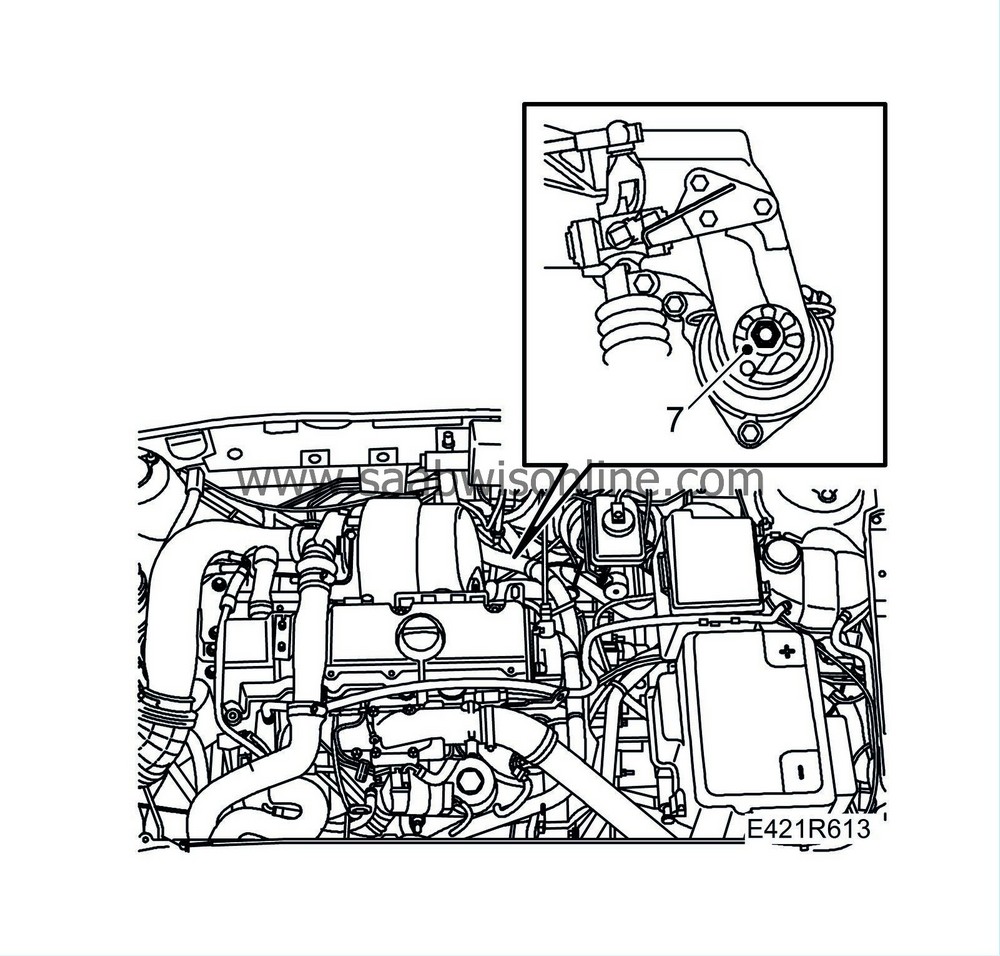
| 7. |
Remove the nut on the rear engine mounting.
|
|
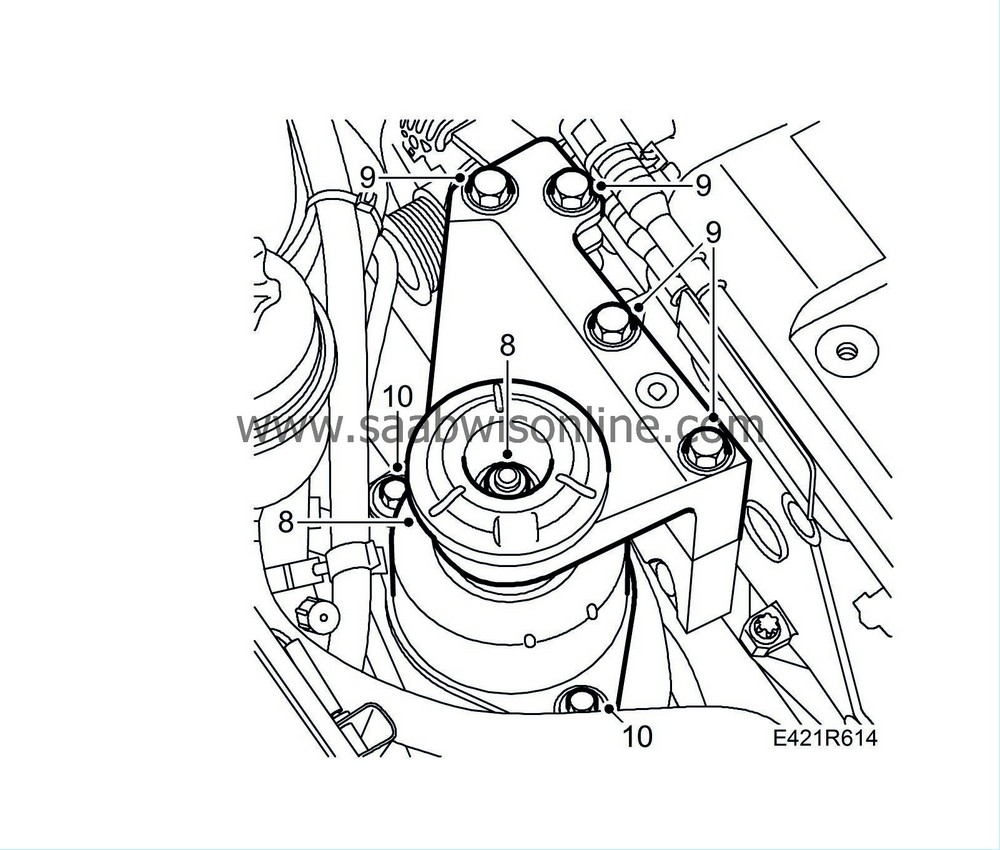
| 8. |
Remove the nut and the vibration damper on the right-hand engine mounting.
|
|
| 9. |
Take the weight of the engine carefully with a jack and remove the upper right engine bracket.
|
|
| 10. |
Dismantle the right-hand engine mounting.
|
|
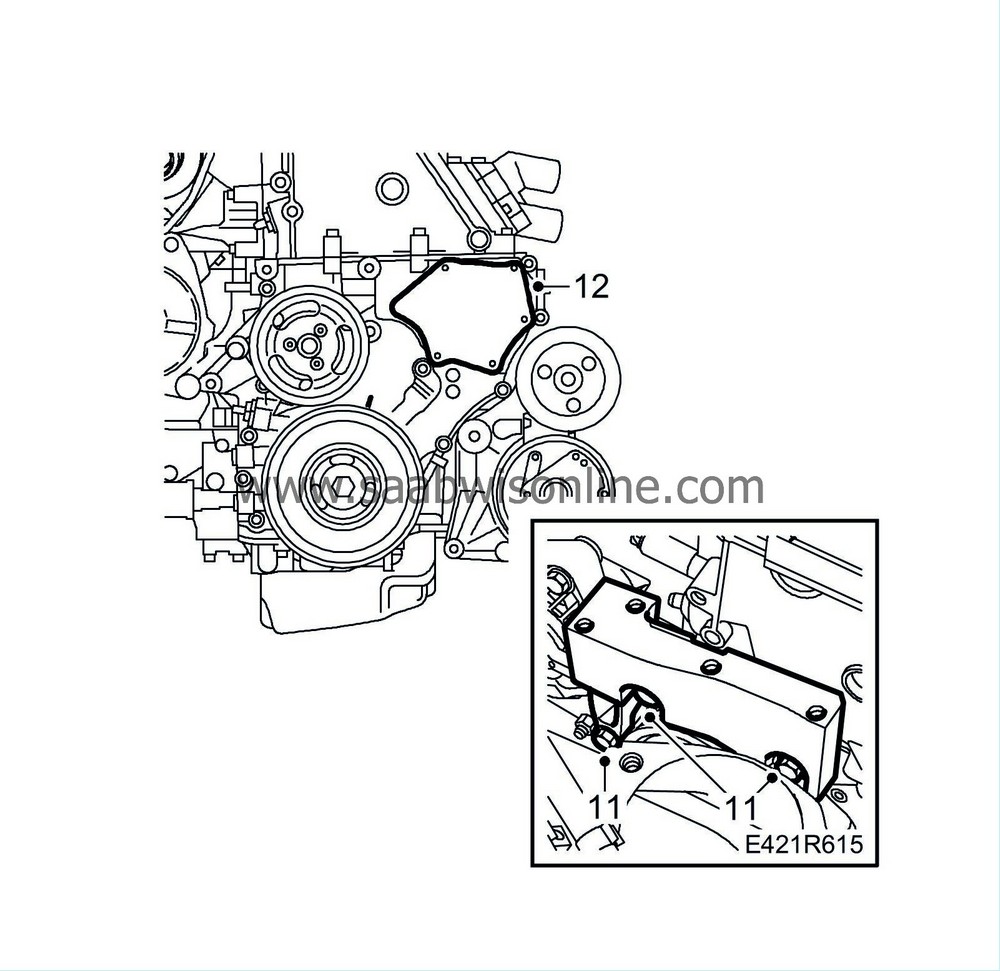
| 11. |
Raise the engine with the jack and remove the lower bracket.
|
|
| 12. |
Lower the engine slightly and remove the bolts on the timing cover plate. Carefully insert a spatula behind the plate and prise it loose.
|
||||||||||
| To fit |
| 1. |
Cover the opening in the timing cover with a lint-free rag clean the sealing surface from any remnants of gasket. Clean the sealing surface on the cover plate as well.
|
|
| 2. |
Apply a bead of
87 81 841 Silicon flange sealant
about 2mm thick on the cover plate, remove the rag from the timing cover and fit the cover plate.
Tightening torque: 6 Nm (5 lbf ft). 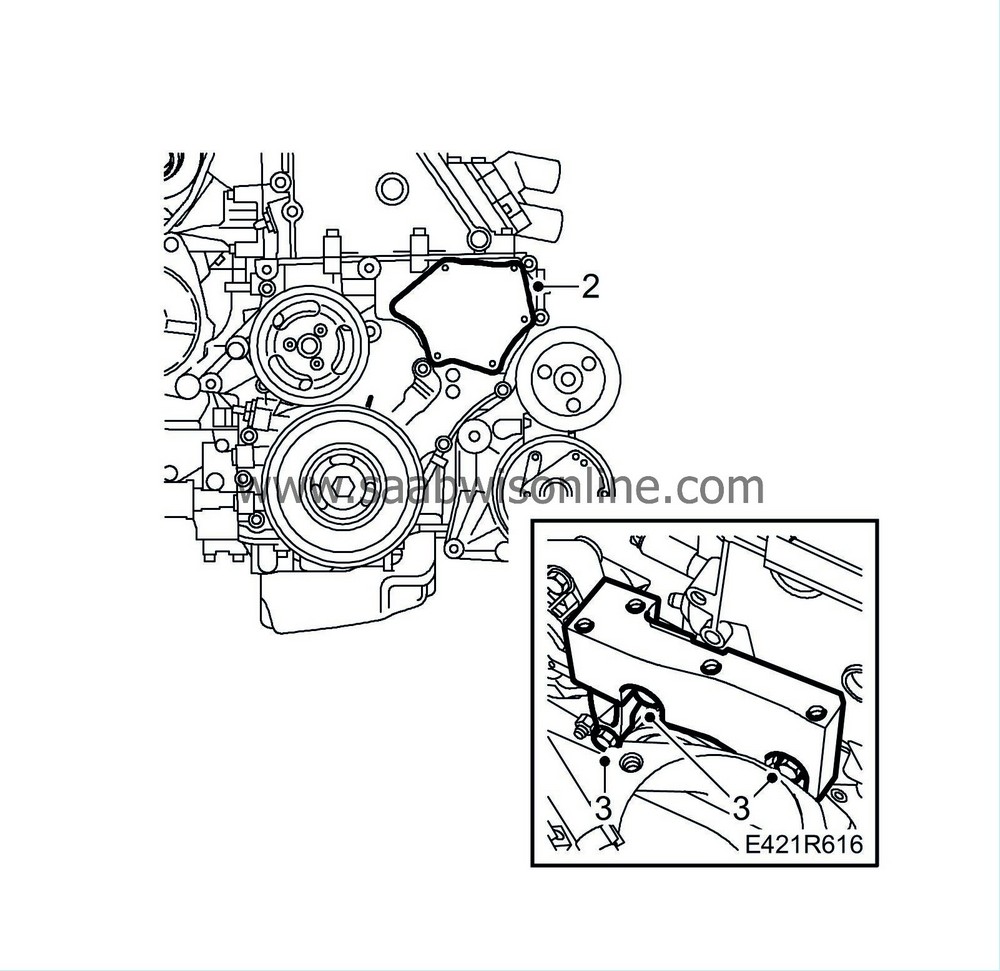
|
|
| 3. |
Fit the lower right engine bracket.
Tightening torque: 40 Nm + 90° (30 lbf ft + 90°) |
|
| 4. |
Fit the right-hand engine mounting.
Tightening torque: 40 Nm + 30°(30 lbf ft + 30°) 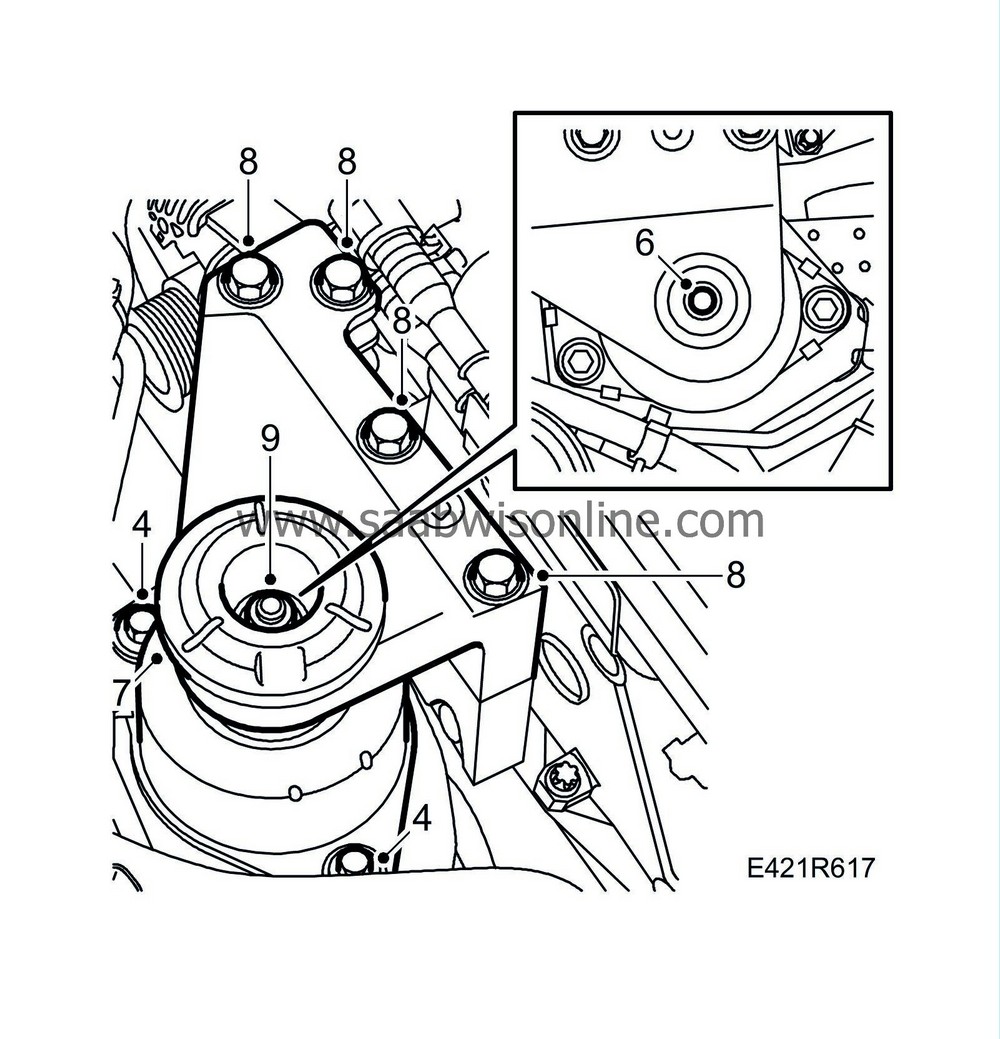
|
|
| 5. |
Fit the upper engine bracket without tightening the bolts.
|
|
| 6. |
Lower the jack until the upper bracket comes in contact with the engine mounting. Adjust the position of the upper bracket so that the engine mounting stud is situated as close as possible to the middle of the upper bracket hole.
|
|
| 7. |
Fit the engine mounting vibration damper and nut and tighten the upper bracket retaining bolts.
Tightening torque: 40 Nm + 60° (30 lbf ft + 60°) |
|
| 8. |
Lower the engine completely and remove the jack.
|
|
| 9. |
Tighten the nut on the right-hand engine mounting.
Tightening torque: 105 Nm (77 lbf ft) |
|
| 10. |
Fit the nut on the rear engine mounting.
Tightening torque: 47 Nm (35 lbf ft) 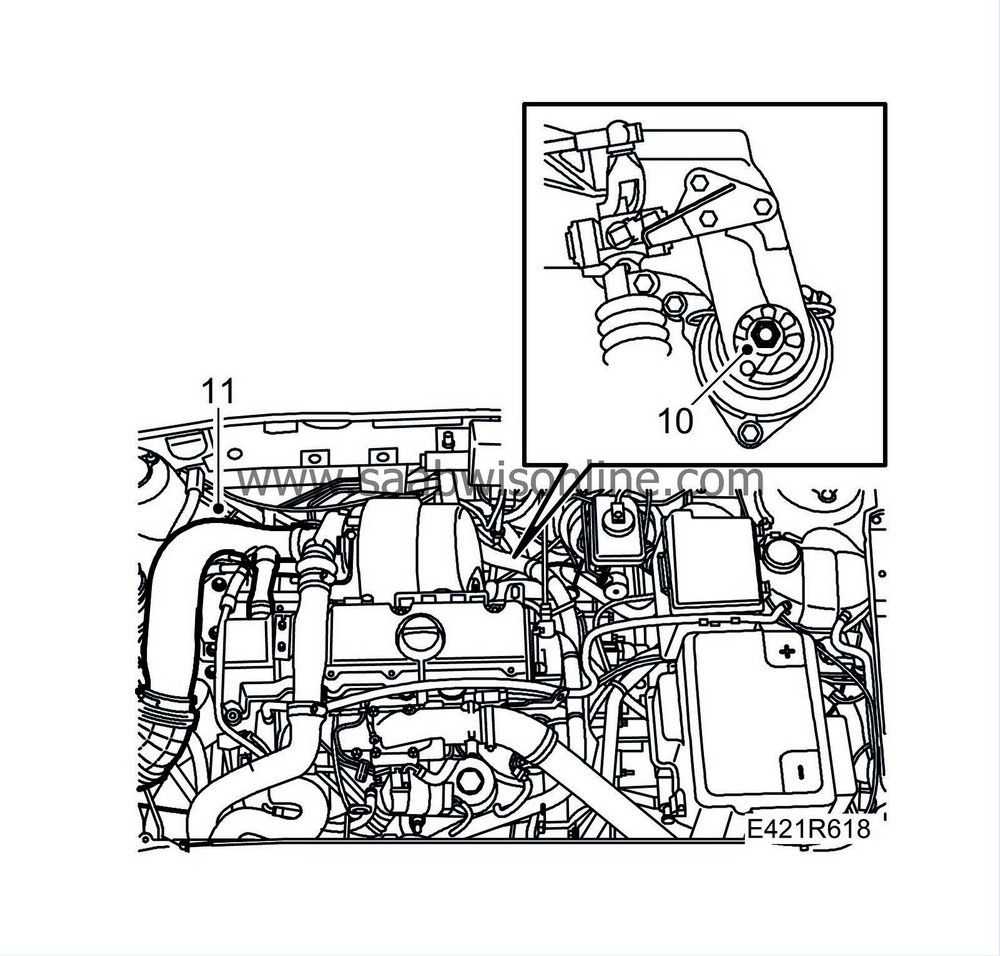
|
|
| 11. |
Fit the intake manifold from the mass air flow sensor to the turbo and the hose for the crankcase ventilation.
Tightening torque, mass air flow sensor: 3.5 Nm (2.5 lbf ft) |
|
| 12. |
Raise the car, fit the front torque arm bolt and tighten the rear one.
Tightening torque, front bolt 90 Nm + 90° (66 lbf ft + 90°) Tightening torque, rear bolt 50 Nm + 120° (37 lbf ft + 120°) 
|
|
| 13. |
Fit the belt tensioner and tighten the upper bolt first.
Tightening torque: 42 Nm (31 lbf ft). 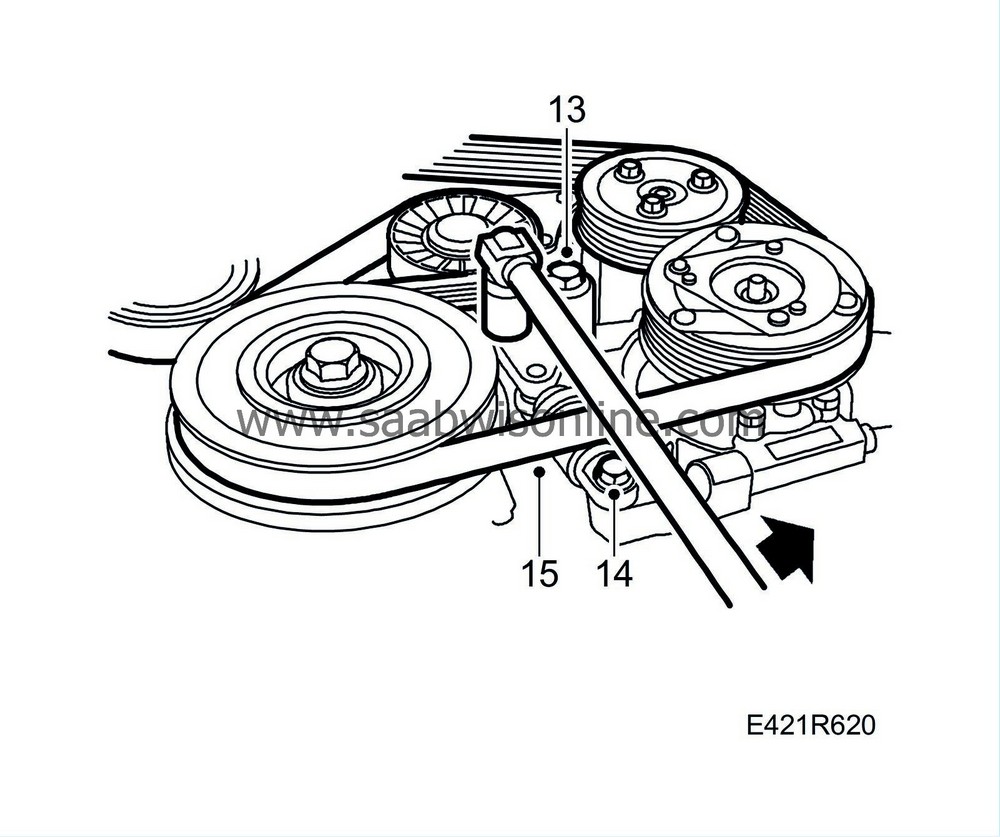
|
|
| 14. |
Tighten the lower bolt.
Tightening torque: 23 Nm (17 lbf ft). |
|
| 15. |
Fit the multigroove belt so that it corresponds with the previously marked direction of rotation.
|
|
| 16. |
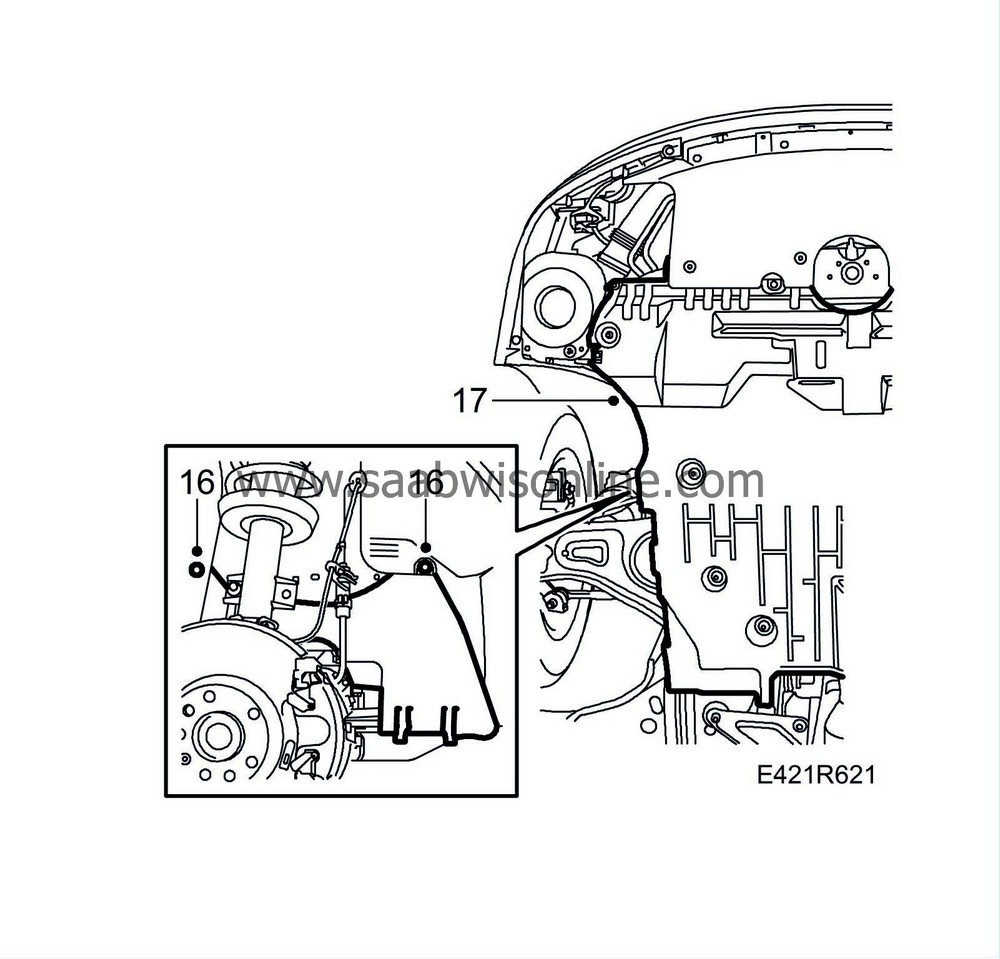
Fit the drive belt cover.
|
|
| 17. |
Fit the lower engine cover.
|
|
| 18. |
Lower the car and make sure the multigroove belt is positioned correctly on the pulleys.
|
|
| 19. |
Fit the upper engine cover.
|
|


