Removing the power unit
| Removing the power unit |
| To remove |
| 1. |
Position the car on a lift and put protection on the wings.
|
|
| 2. |
Raise the car somewhat so that the wheels are free from the floor.
|
|||||||||
| 3. |
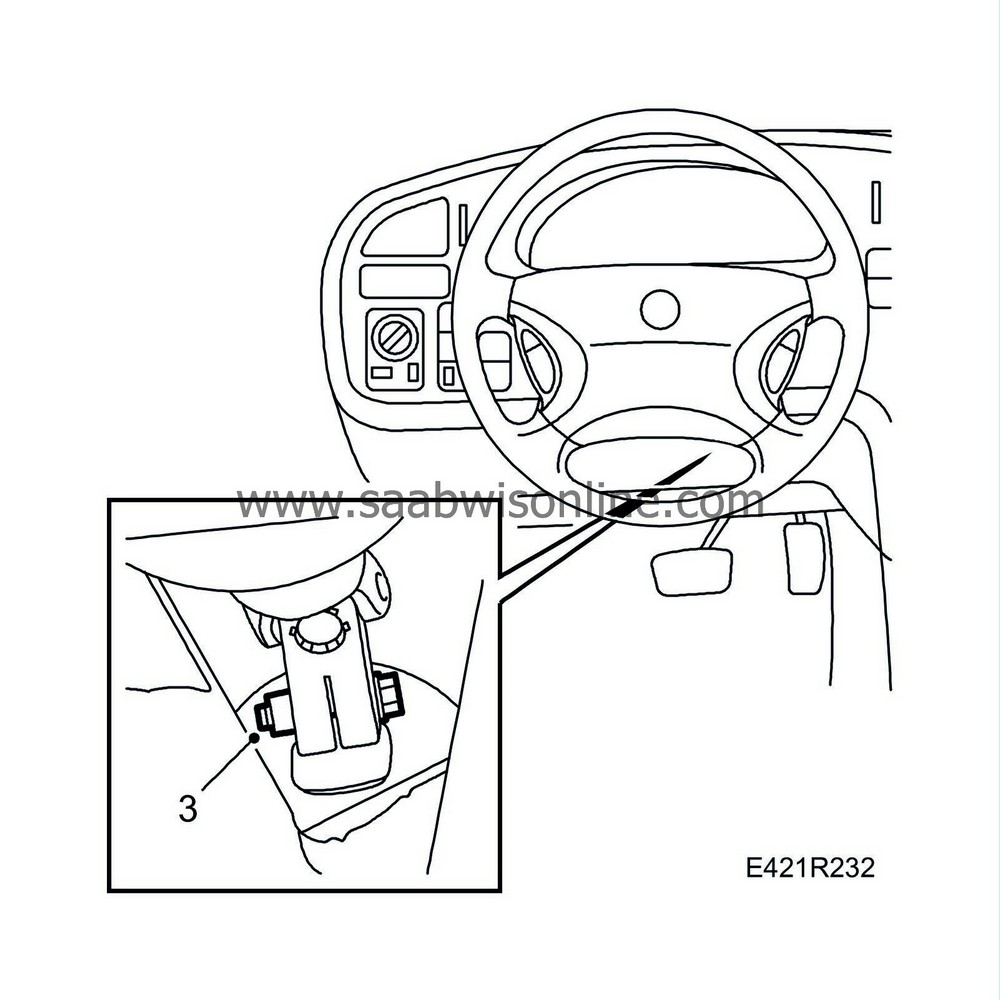
Place the wheels in the straight-ahead position, secure the steering wheel and unbolt the steering column from the steering gear inside the cabin.
|
|
| 4. |
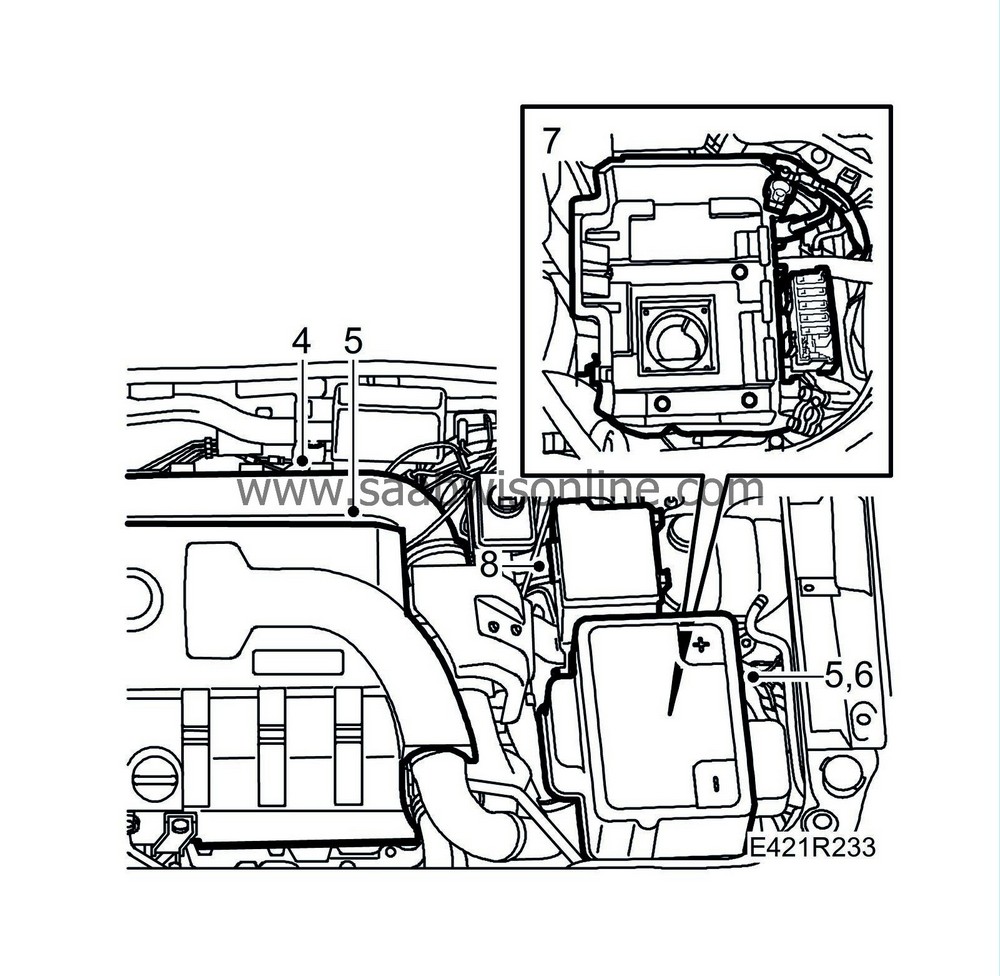
Remove the upper intake manifold between the mass air flow sensor and the turbo.
|
|
| 5. |
Remove the upper engine cover and the battery cover.
|
|
| 6. |
Disconnect the battery cables and remove the battery.
|
|
| 7. |
Undo the maxifuse holder and remove the battery shelf.
|
|
| 8. |
Detach and move aside the electrical distribution box.
|
|
| 9. |
Prevent brake fluid from running out of the reservoir by using
30 07 739 Hose pinch-off pliers
to block off the brake fluid hose to the slave cylinder.
|
|
| 10. |
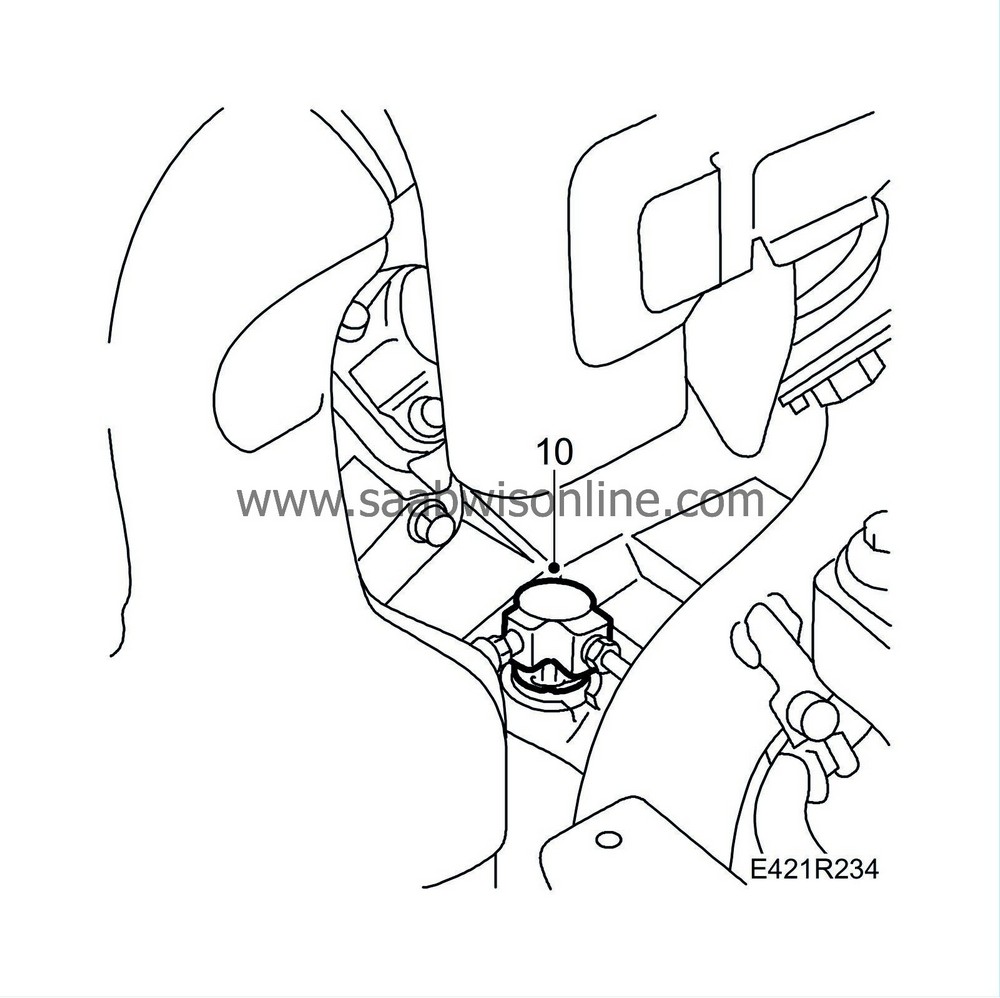
Remove the clip at the slave cylinder and detach the connection to the delivery pipe. Refit the clip.
|
|
| 11. |
Open the cap on the expansion tank.
|
|
| 12. |
Remove the front wheels and hub centre nuts.
|
|||||||||||||||||||||||||||||||||
| 13. |
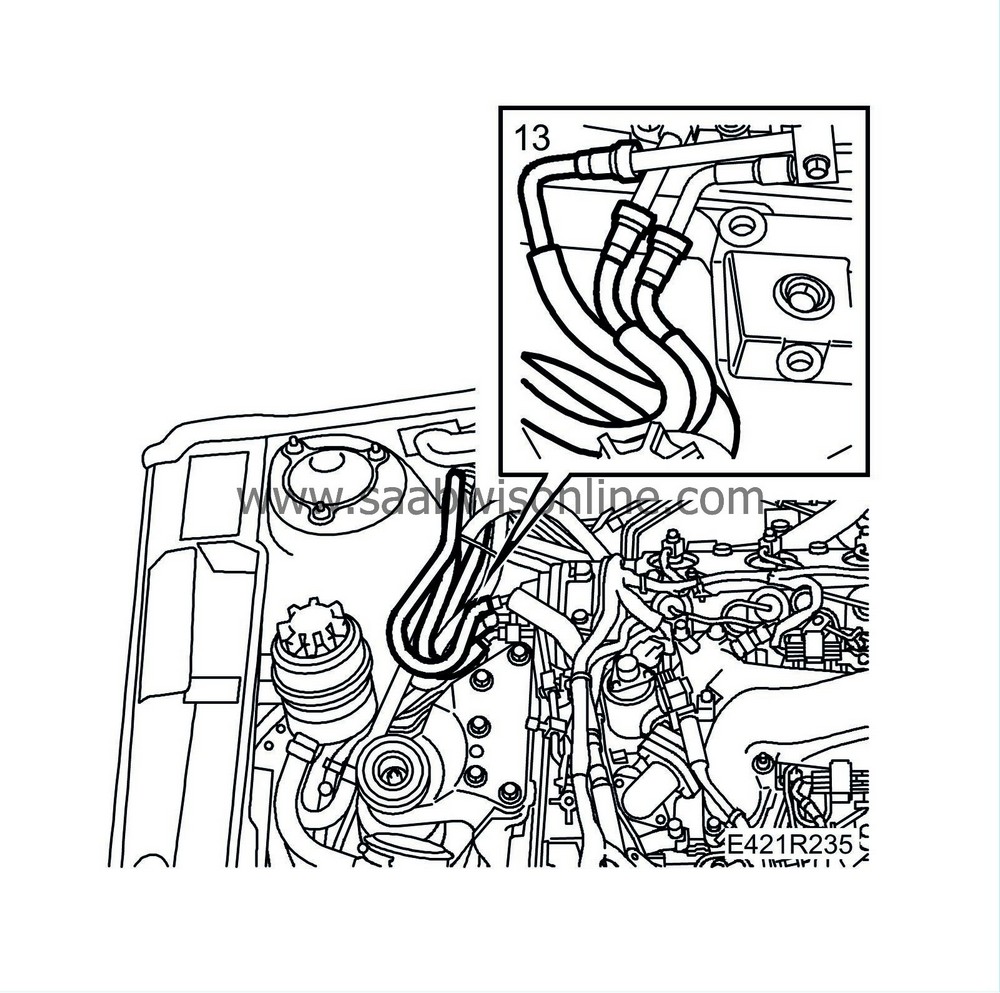
Undo the quick-release couplings on the fuel lines. Use a cloth to catch any fuel spill.
|
|
| 14. |
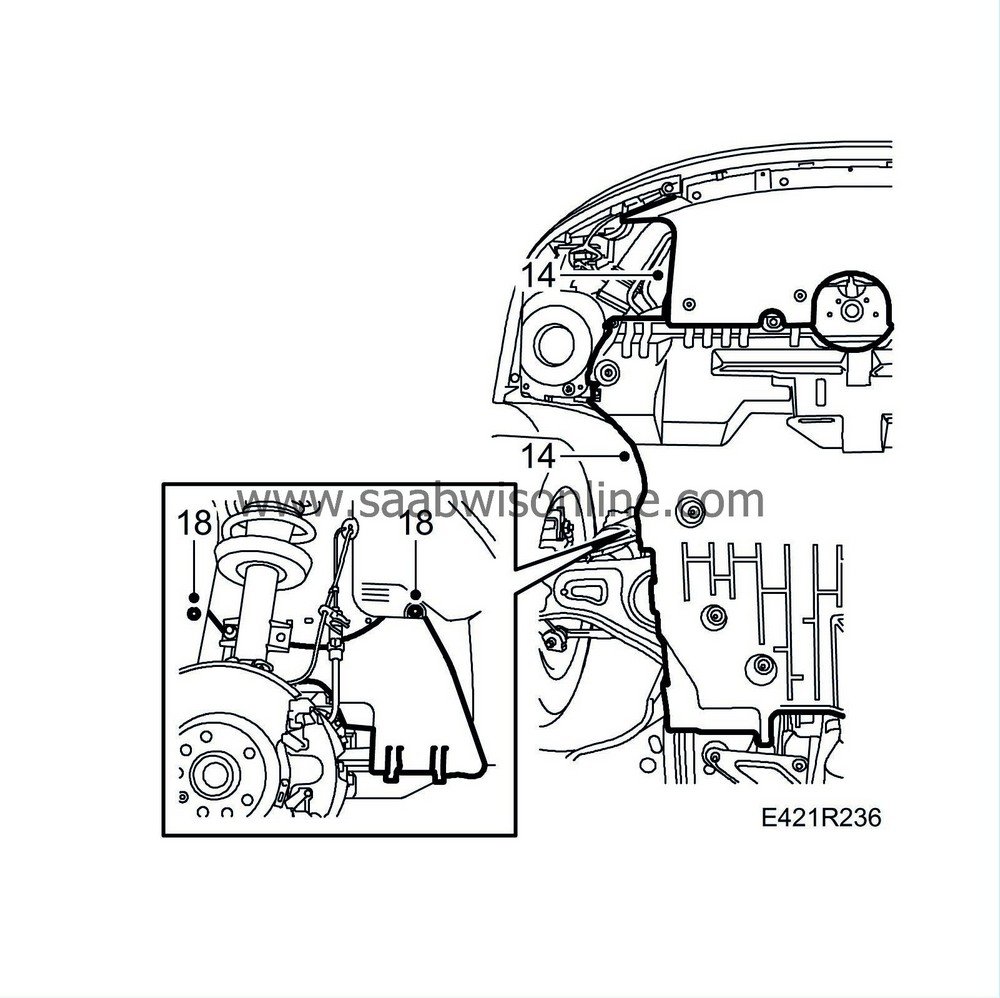
Raise the car and remove the lower engine covers.
|
|
| 15. |
Place a suitable receptacle under the car and drain the cooling system.
|
|
| 16. |
When replacing the engine (longblock)
: Drain the engine oil and replace the oil filter.
|
|
| 17. |
When replacing the gearbox
: Drain the gearbox oil.
|
|
| 18. |
Remove the side cover from the right and left-hand wheel housings.
|
|
| 19. |
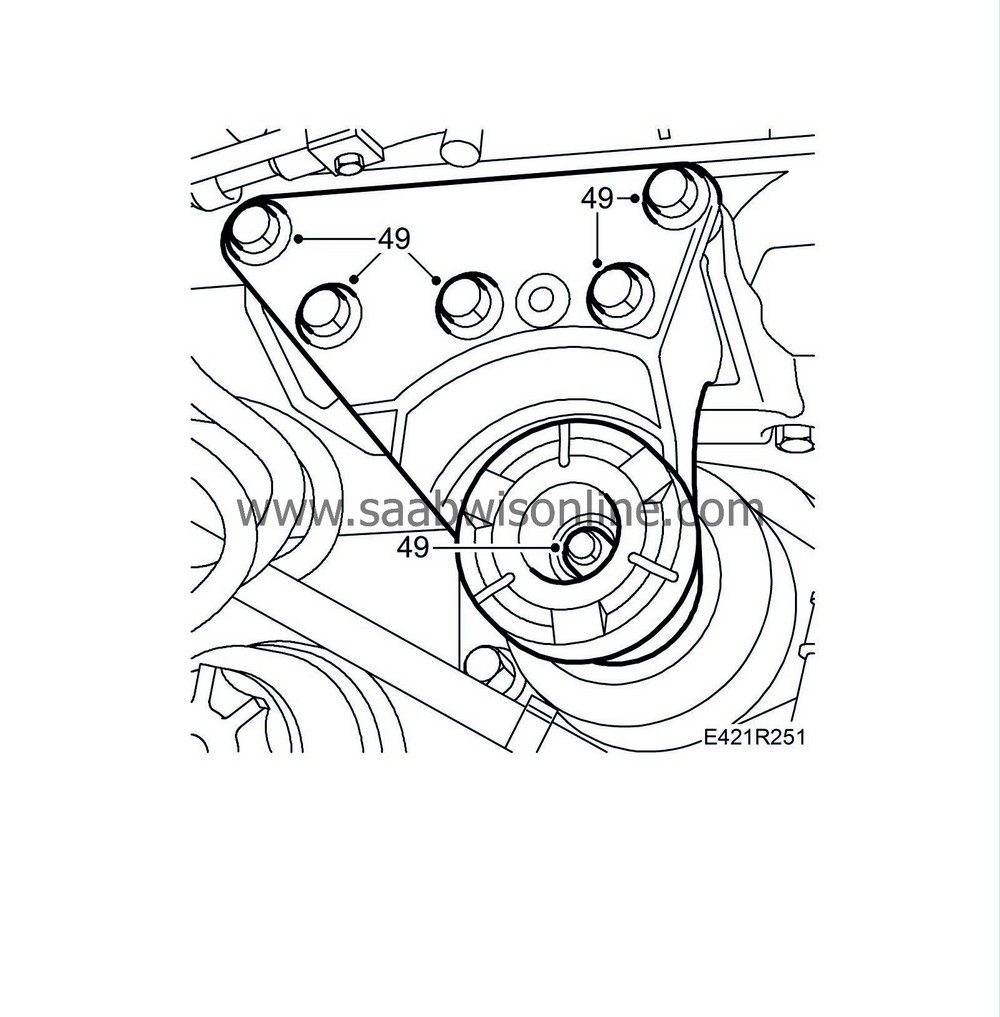
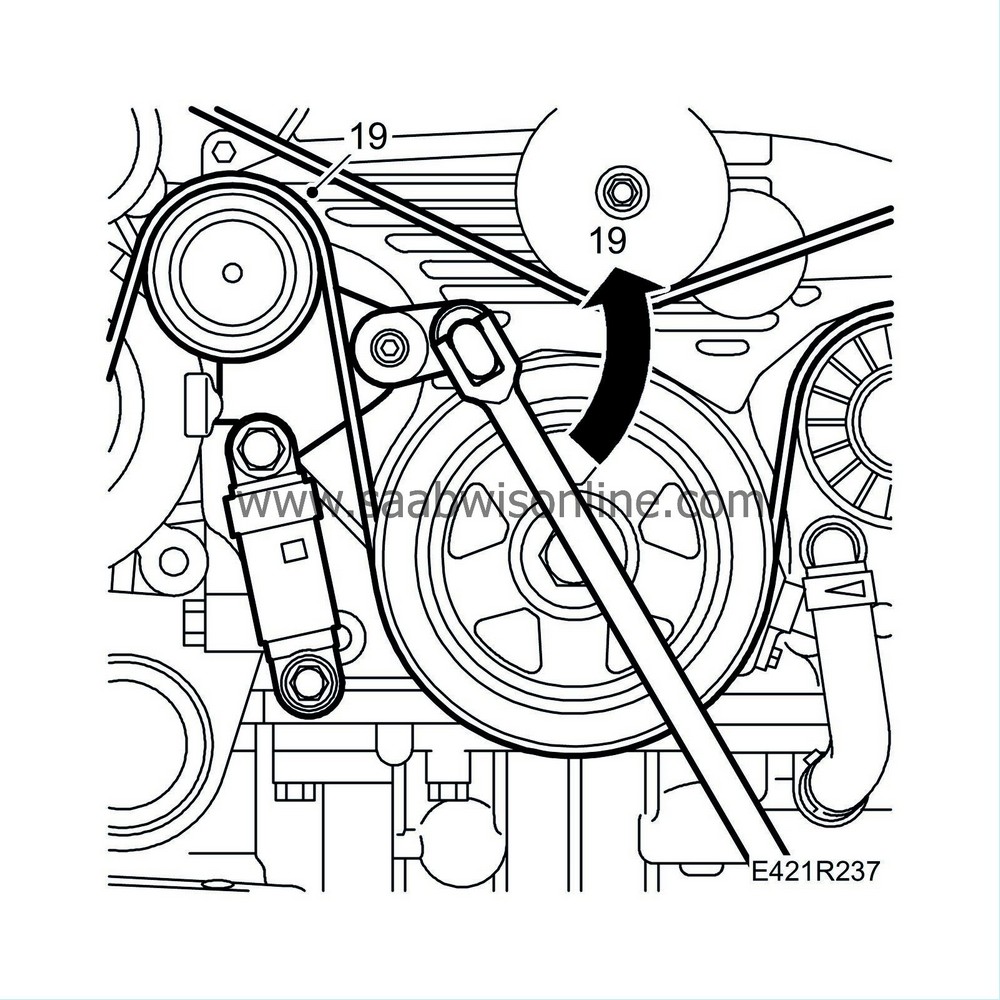
Carefully and slowly release the tension of the belt tensioner. Remove the multigroove V-belt.
|
|
| 20. |
Close the coolant drain cock.
|
|
| 21. |
Fit the oil plug when draining the engine and gearbox oil.
|
|
| 22. |
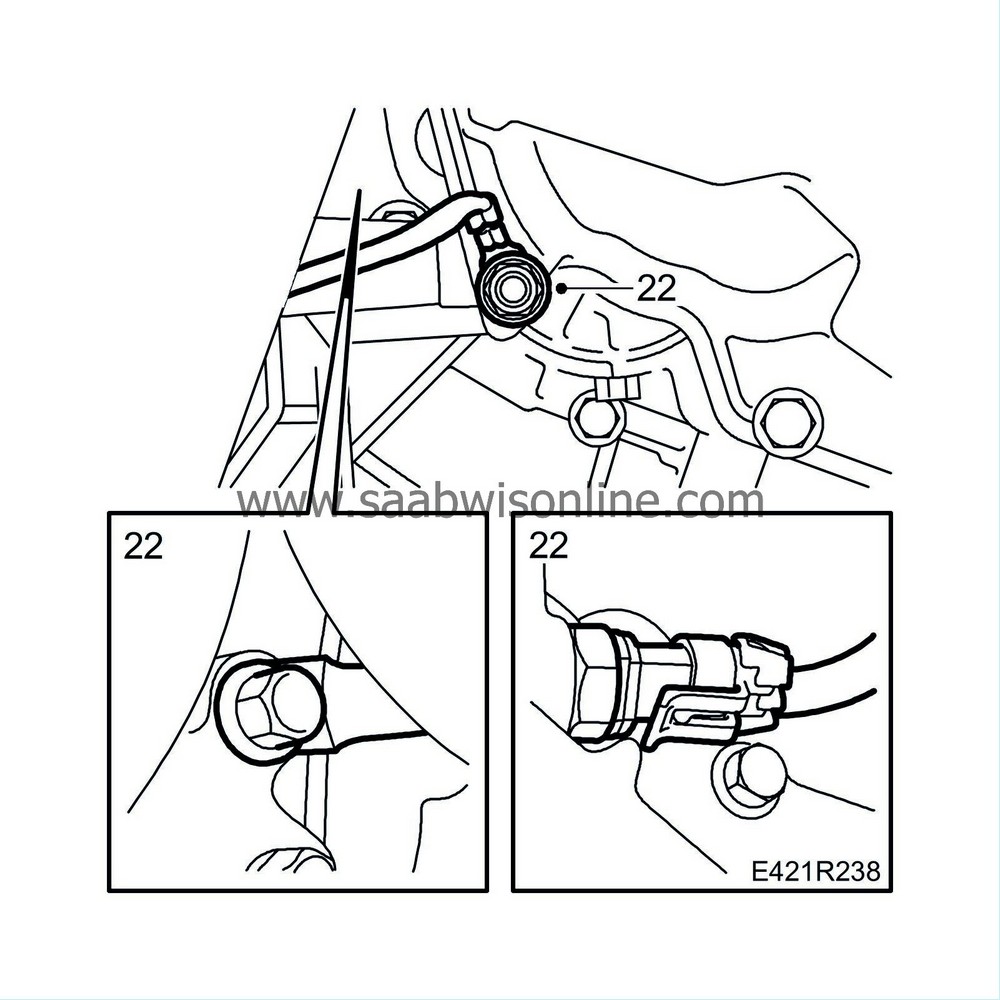
Detach both ground cables and unplug the connector of the reversing light switch from the gearbox.
|
|
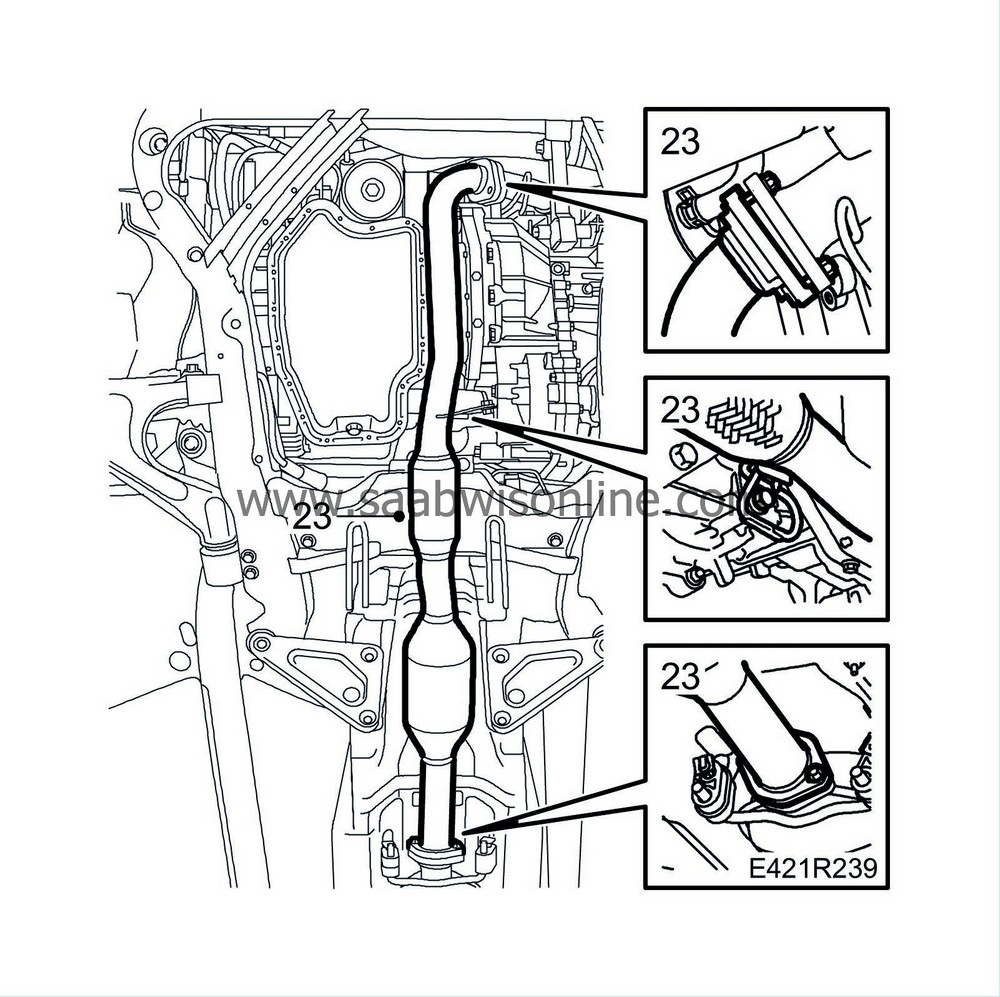
| 23. |
Remove the front exhaust pipe.
|
|
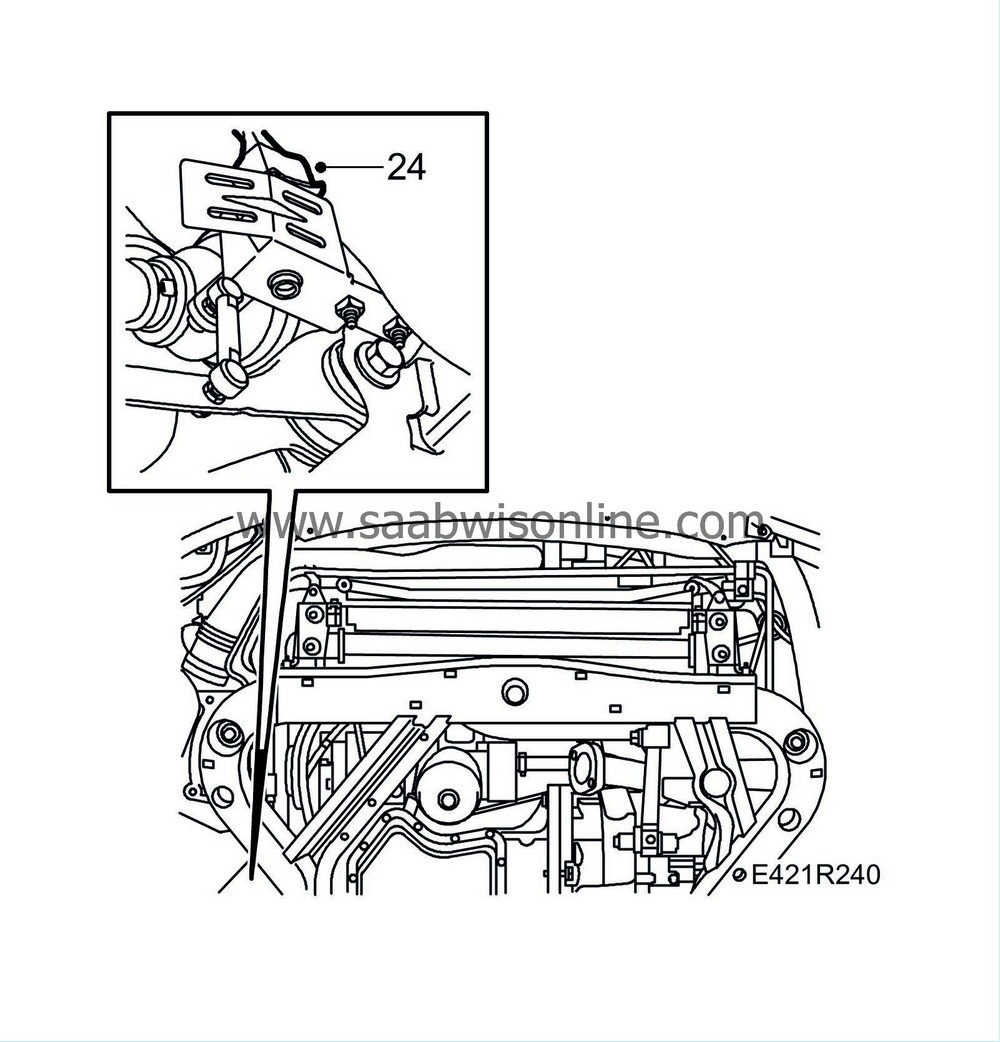
| 24. |
Unplug the connector to the headlamp control module on the link arm (xenon headlamps only).
|
|
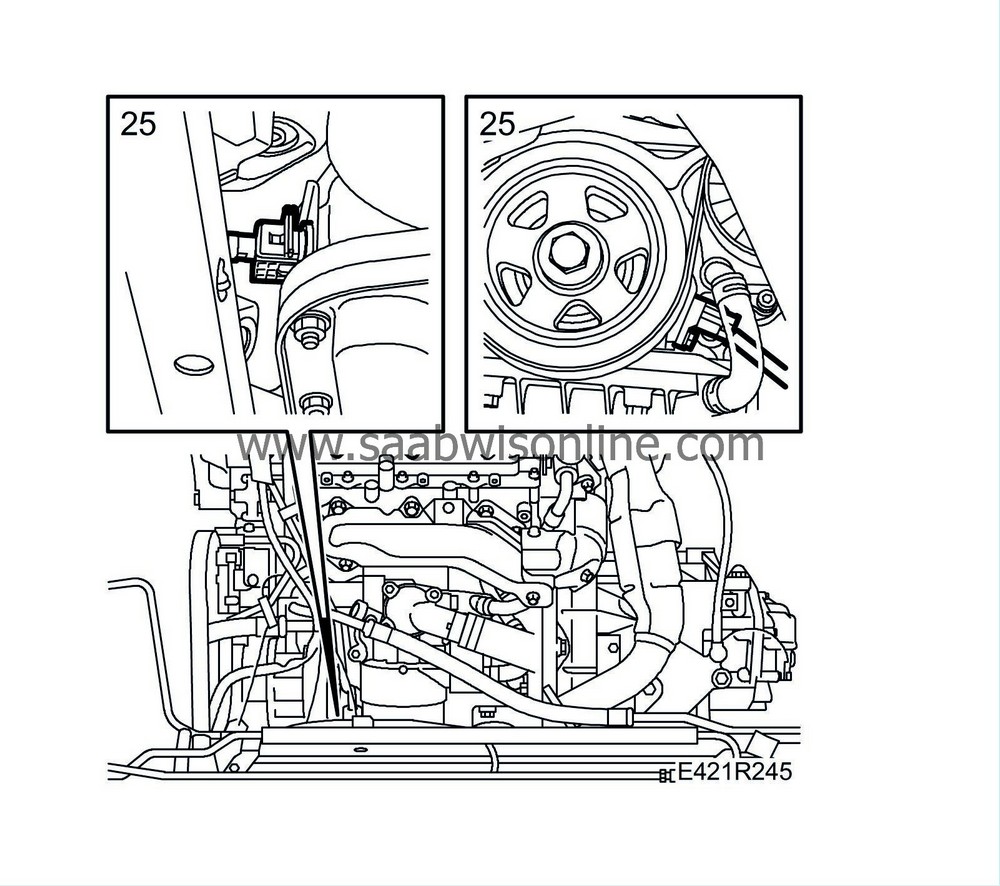
| 25. |
Unplug the connectors to the crankshaft sensor and the oil level sensor.
|
|
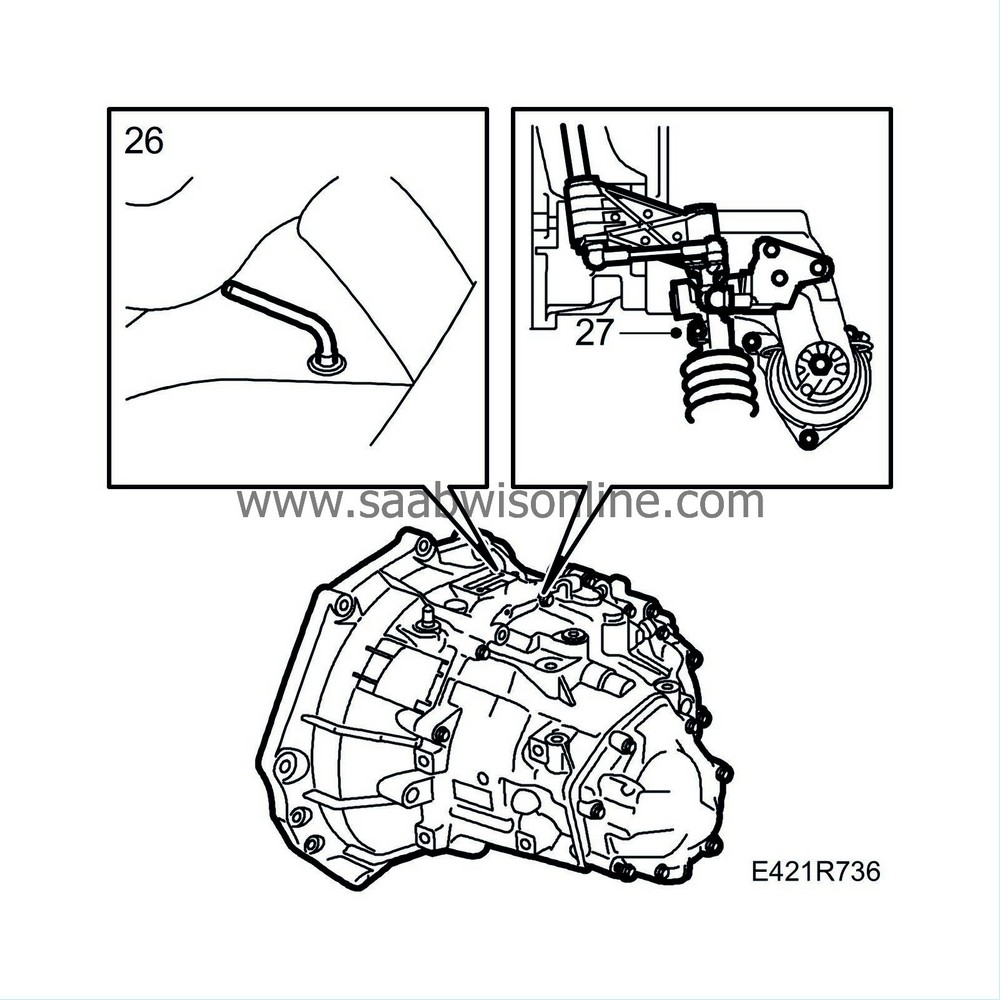
| 26. |
Lower the car, engage 4th gear and remove the plastic plug from the gearbox. Lock 4th gear in the gearbox by inserting
87 92 335 Lock pin.
|
|
| 27. |
From above, undo the clamp holding the selector rod in the linkage on the gearbox.
|
|
| 28. |
Lift up the gear lever gaiter. Engage 3rd gear so that the selector rod leaves the linkage and insert
87 92 335 Lock pin
into the gear lever housing.
|
|
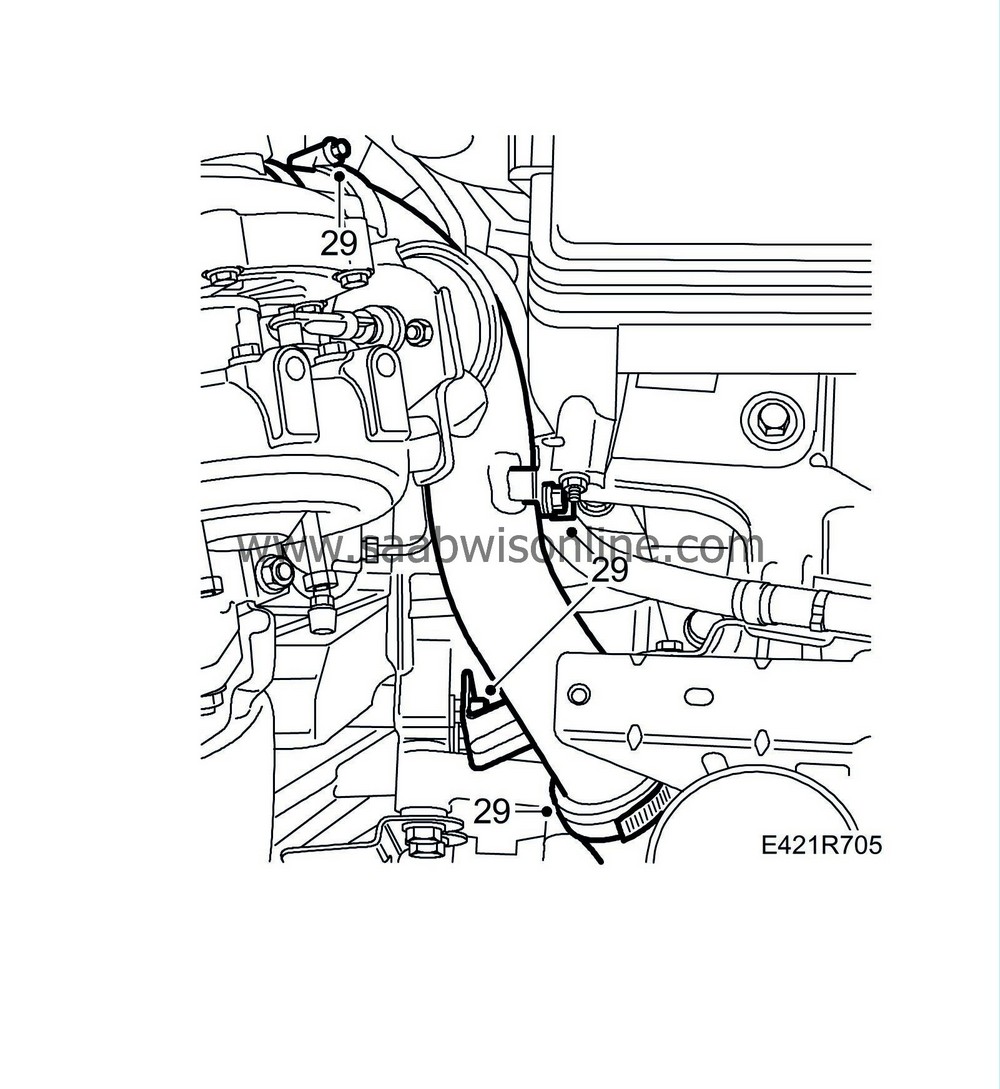
| 29. |
Remove the charge air pipe from the turbocharger.
|
|
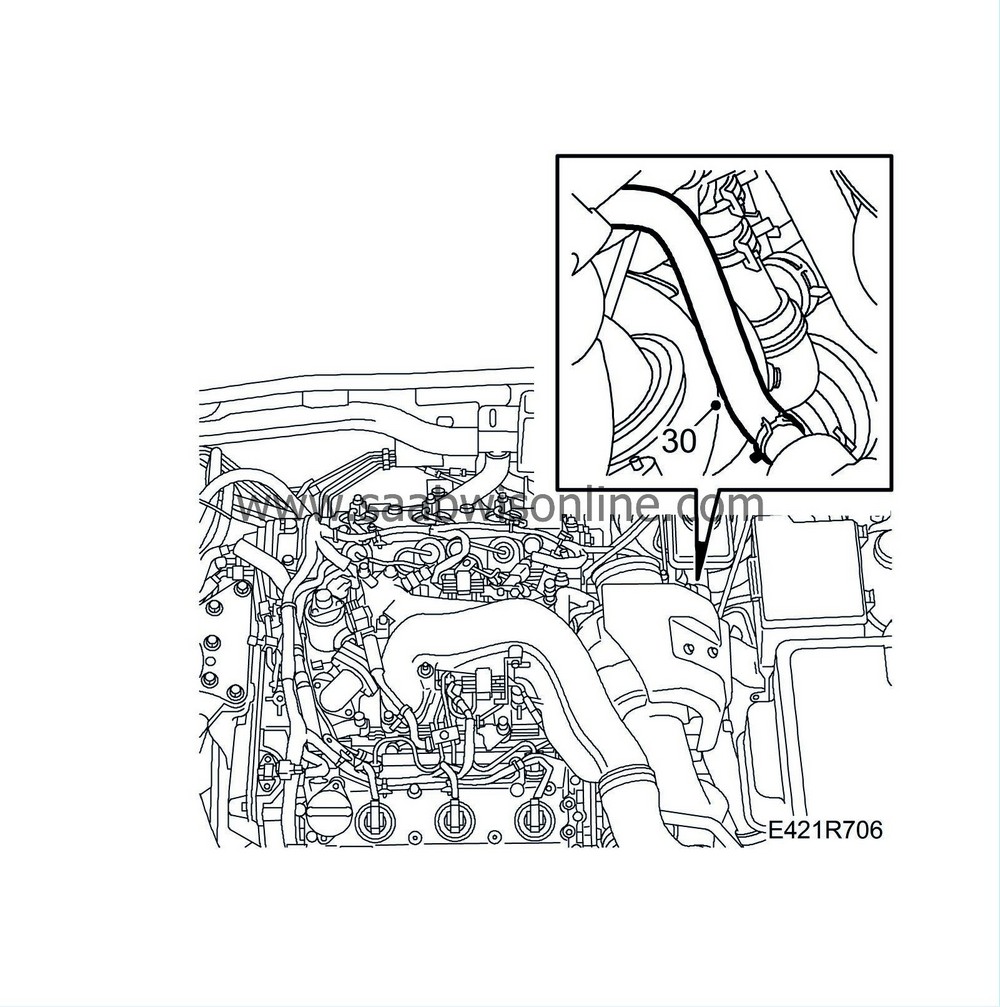
| 30. |
Remove the turbo unit cooler hose.
|
|
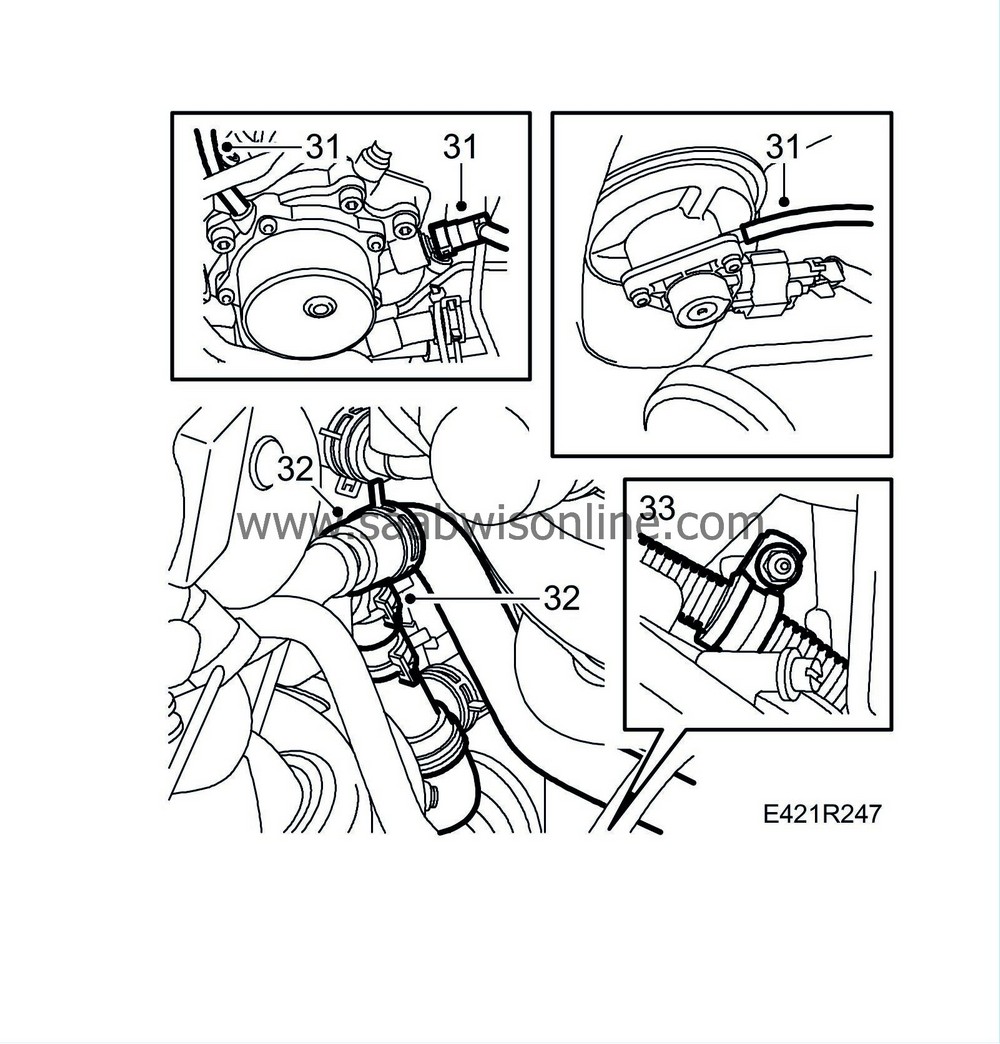
| 31. |
Detach the vacuum hoses from the vacuum pump and the hose of the turbo's vacuum box.
|
|
| 32. |
Detach the hoses to the heater assembly.
|
|
| 33. |
Remove the nuts on the holders of the starter motor wiring harness
|
|
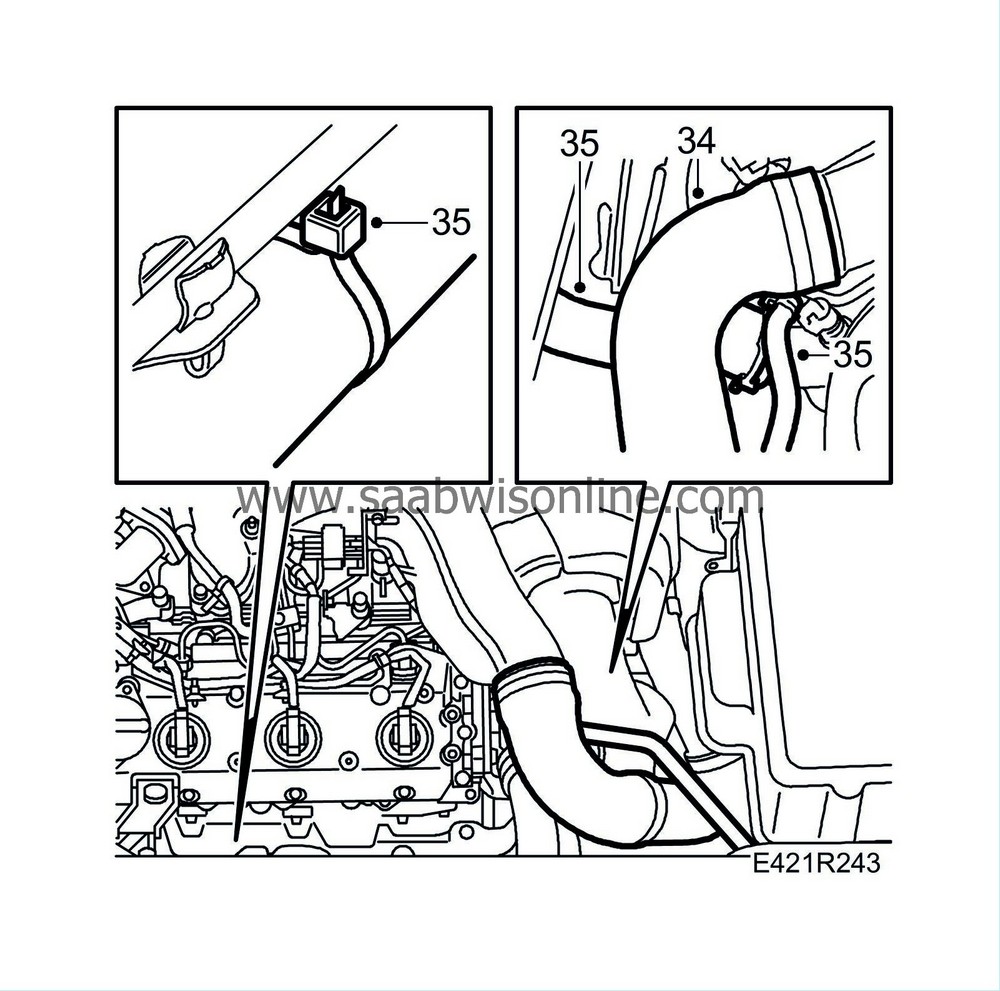
| 34. |
Detach the charge air hose from the upper charge air pipe and plug the pipe.
|
|
| 35. |
Remove the cable tie and remove the upper radiator hose and the breather hose from the engine and the radiator
|
|
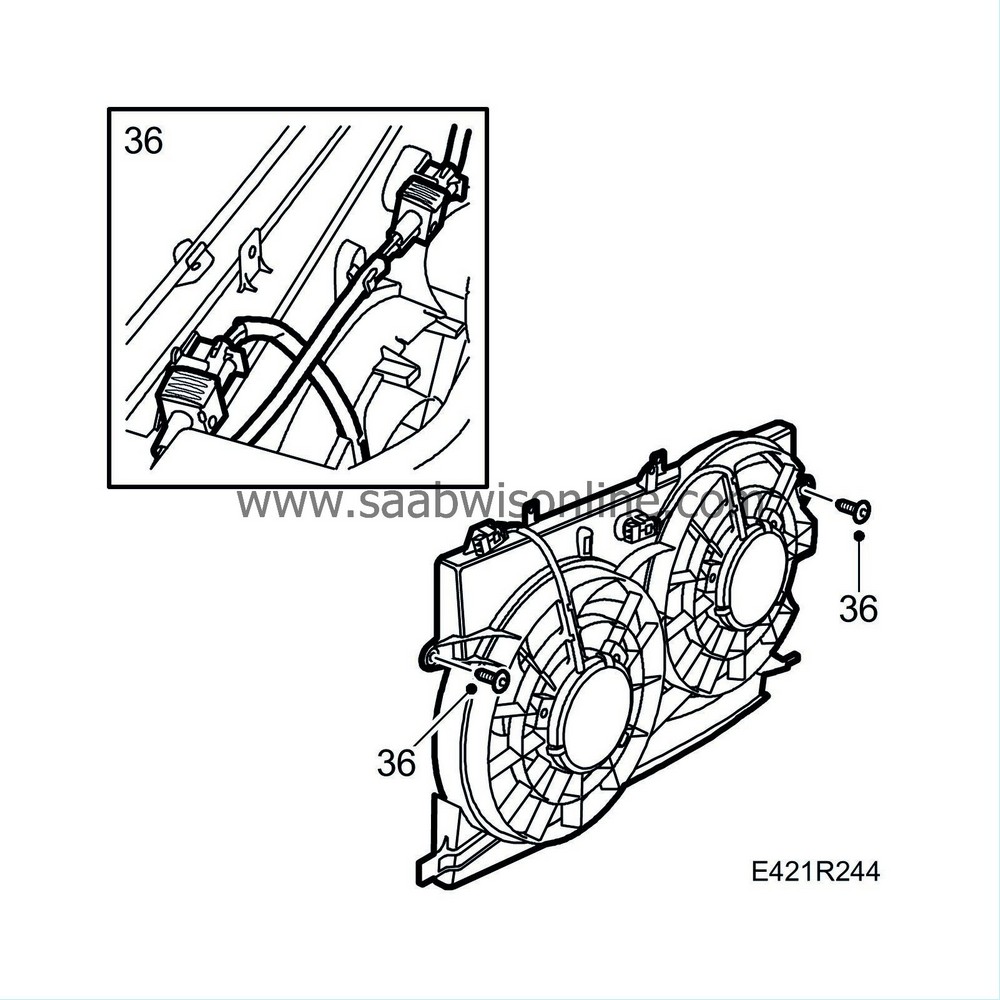
| 36. |
Unplug the fan connectors and carefully remove the fan cowling.
|
|
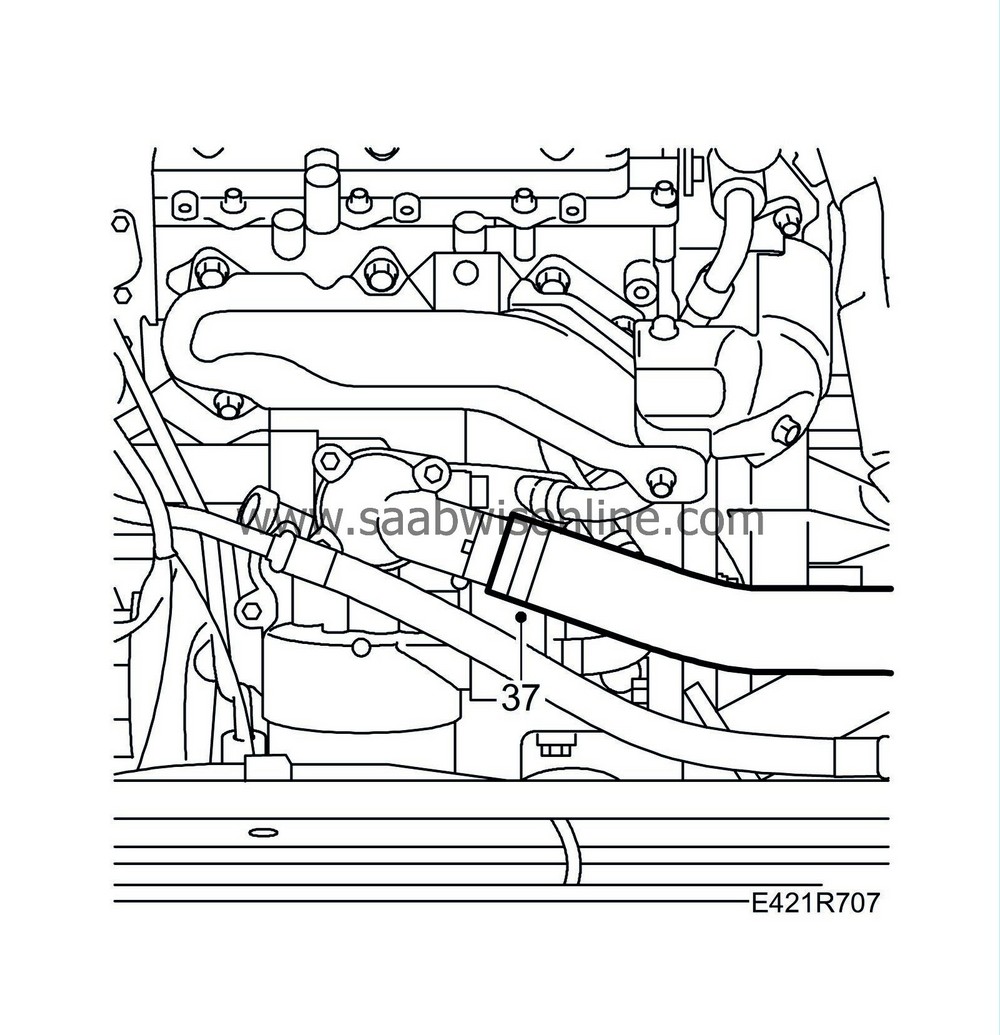
| 37. |
Detach the lower radiator hose from the thermostat housing.
|
|
| 38. |
Suspend the radiator in the body using a
83 95 212 Strap
. Do not suspend the steering servo cooler that comes down with the subframe.
|
|
| 39. |
Move the 83 95 212 Strap down towards the AC compressor.
|
|
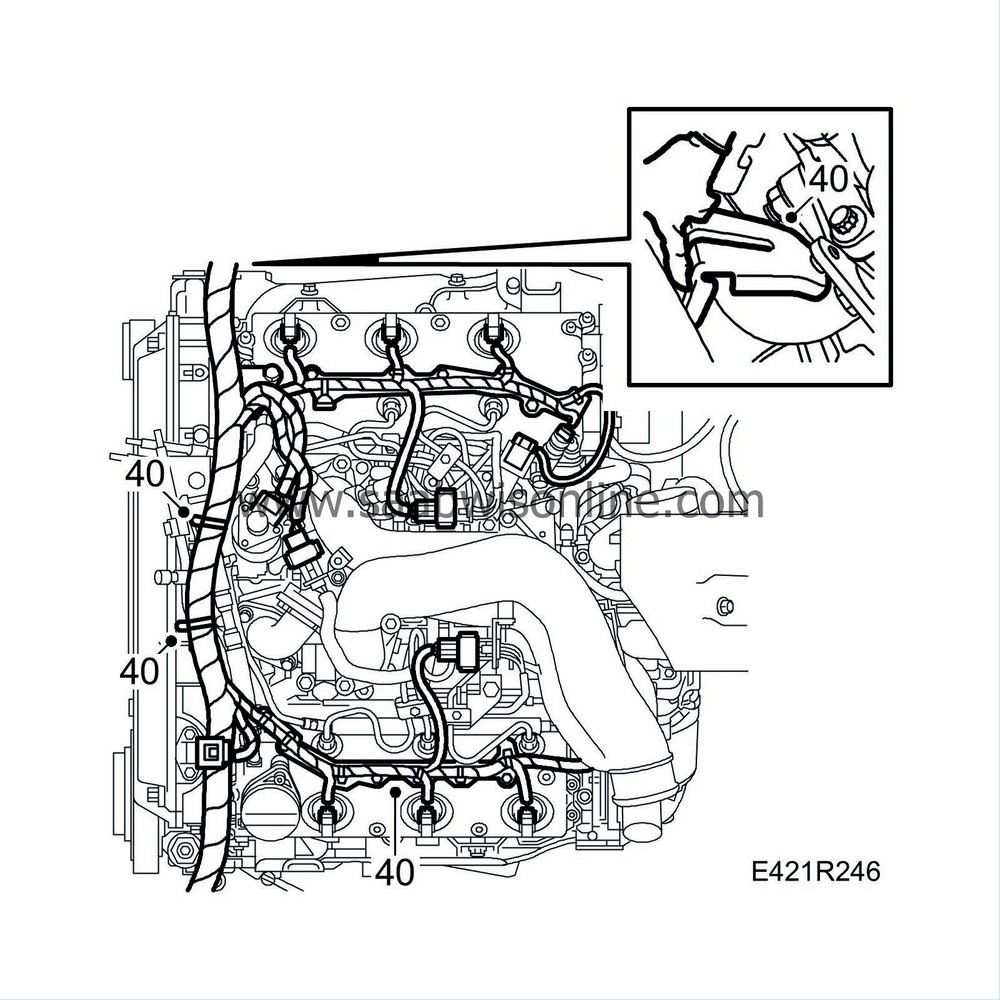
| 40. |
Unplug the engine wiring harness connector with the cable ducts.
|
|
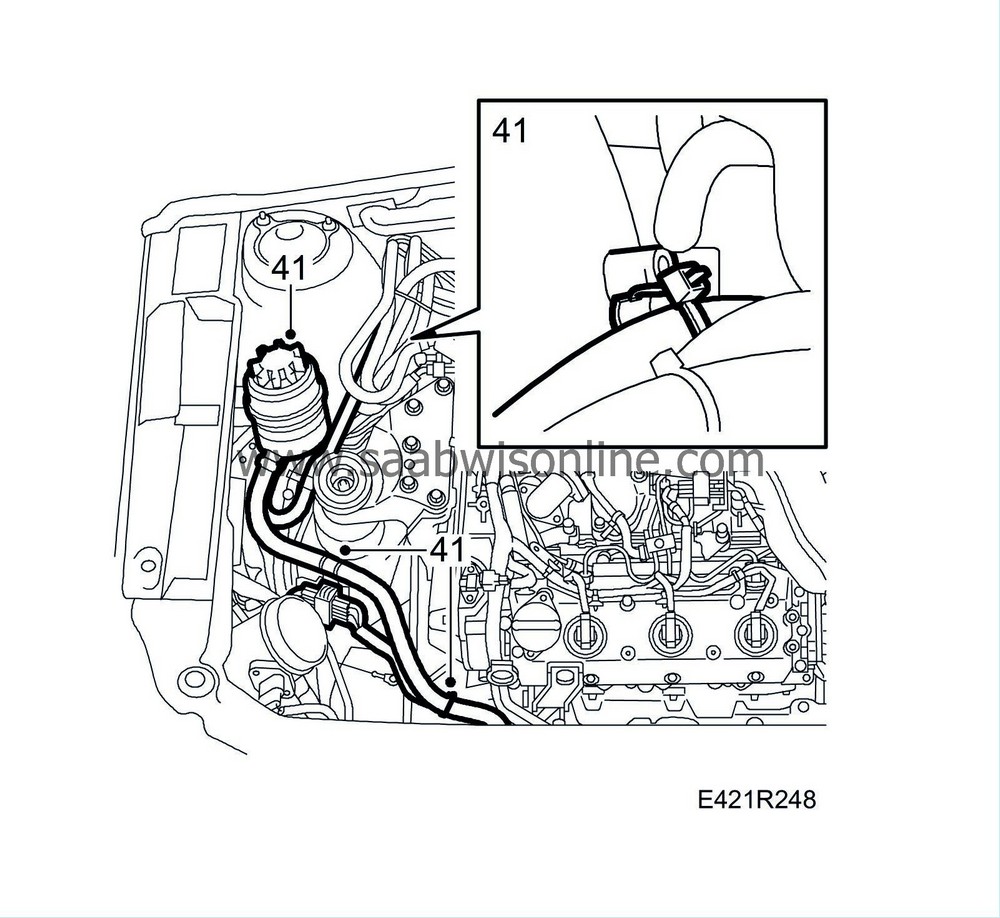
| 41. |
Fit pinch-off pliers to the hoses of the power steering fluid reservoir and remove the reservoir mounting.
|
|
| 42. |
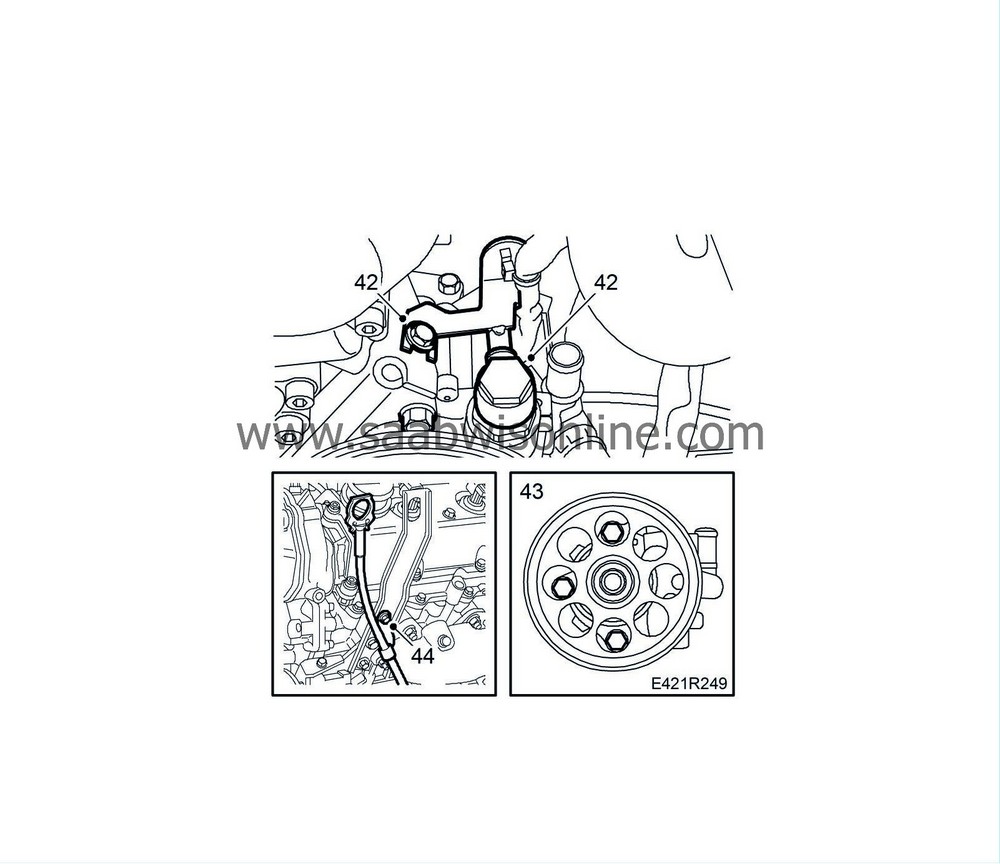
Detach the banjo pipe from the power steering pump.
|
|
| 43. |
Undo the bolts of the power steering pump and move the pump aside.
|
|
| 44. |
Remove the dipstick pipe bolt from the front lifting eye.
|
|
| 45. |
Unplug the connectors of the oil pressure sensor and the A/C compressor.

|
|
| 46. |
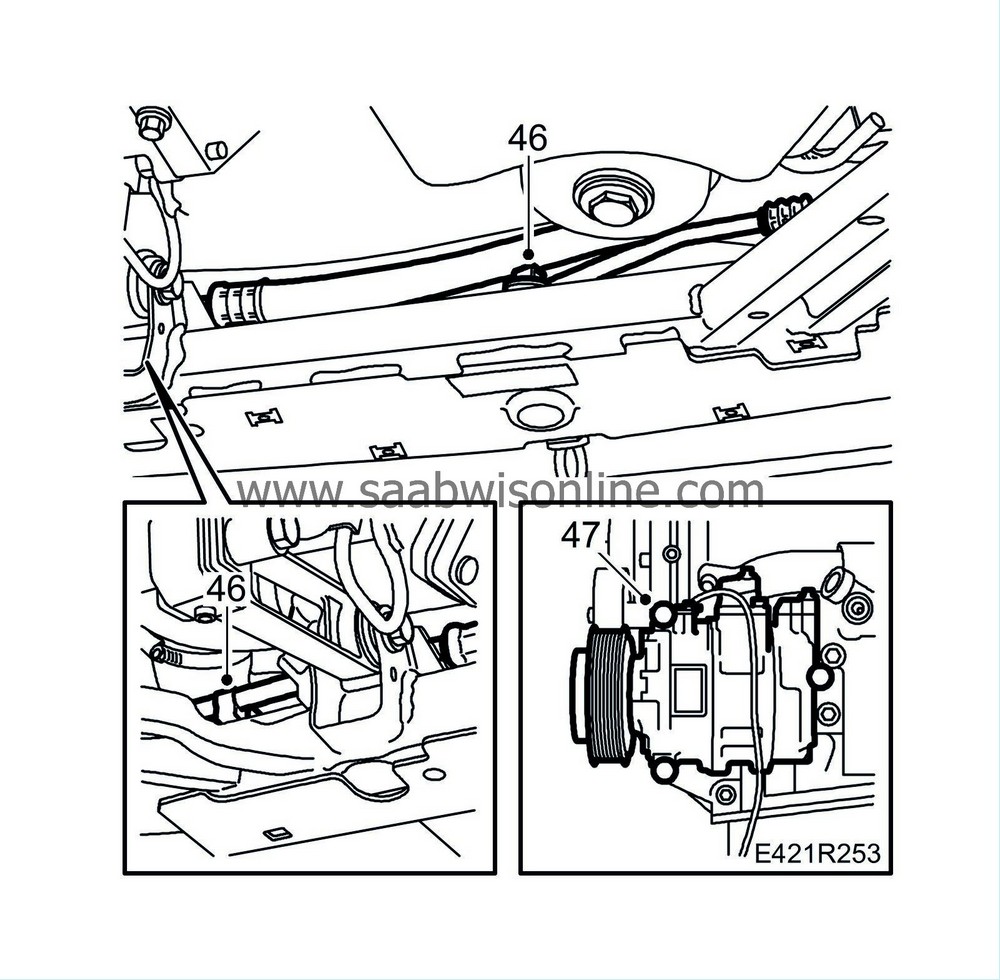
Detach the A/C pipes from the attachment points on the subframe.
|
|
| 47. |
Undo the upper of the A/C compressor screws
|
|
| 48. |
Relieve the weight on the right-hand side of the engine carefully using a jack.
|
|
| 50. |
Relieve the weight of the gearbox carefully using a jack.
|
|
| 51. |
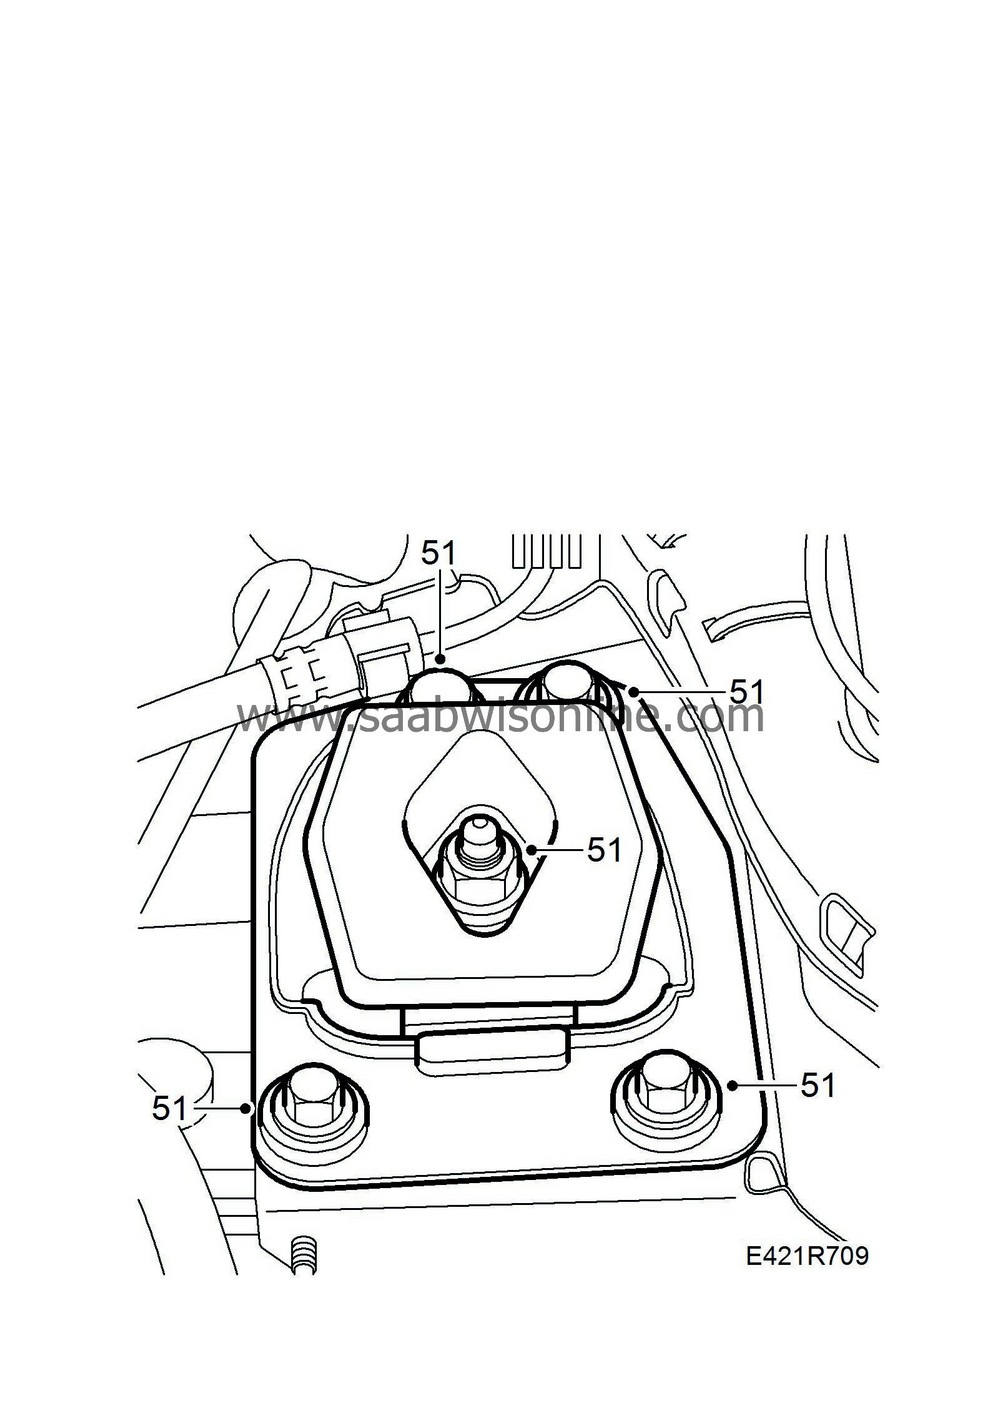
Remove the nut and the four bolts to the gearbox bracket, position wedges between the gearbox and the subframe. Lower the gearbox to the subframe and remove the gearbox bracket.
|
|
| 52. |
Set the power steering pump and reservoir on the engine so that they can follow when the power unit is lowered.
|
|
| 53. |
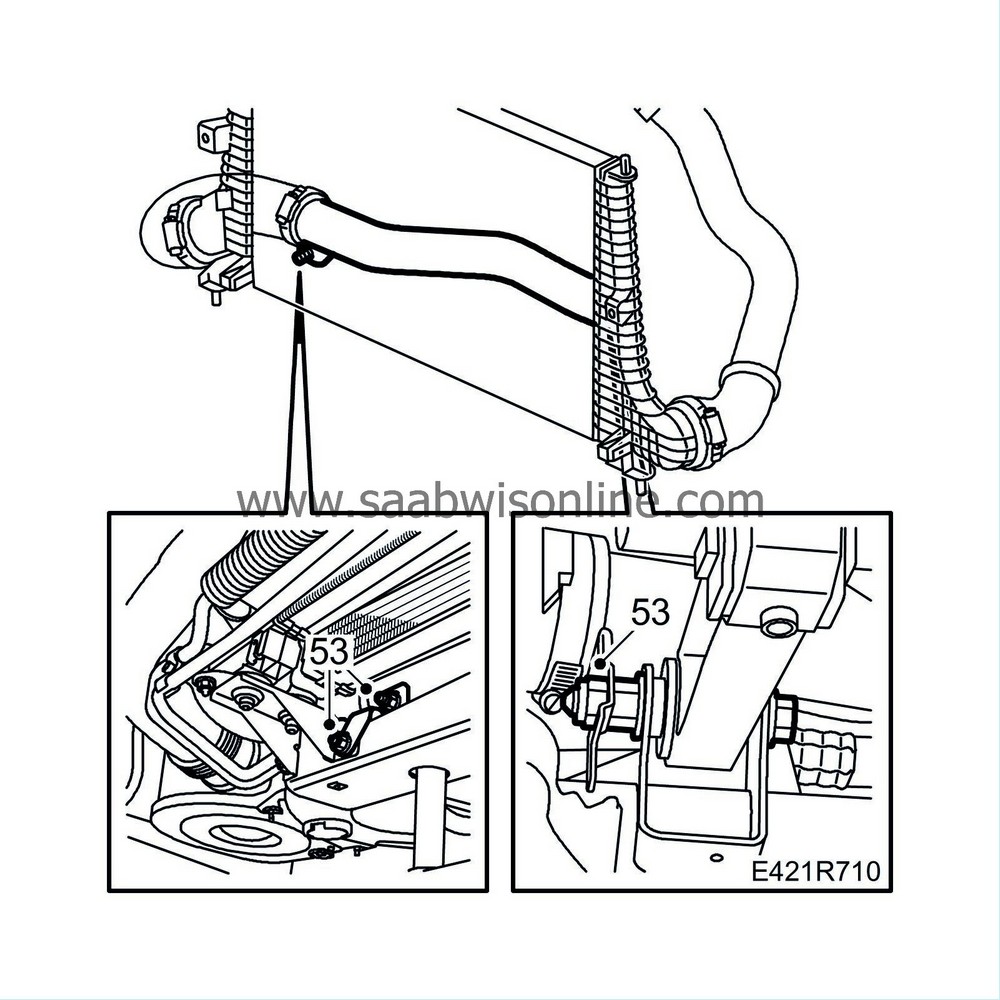
Raise the car and remove the charge air pipe brackets from the subframe.
|
|
| 54. |
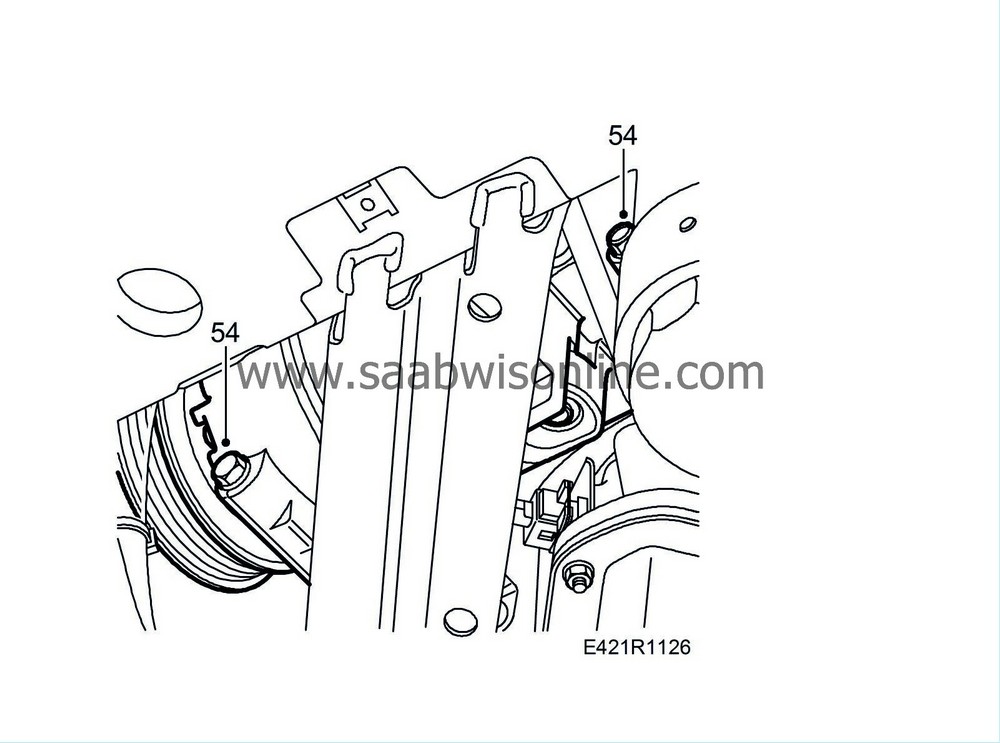
Remove the AC compressor's screws and lift it from the bracket.
|
|
| 55. |
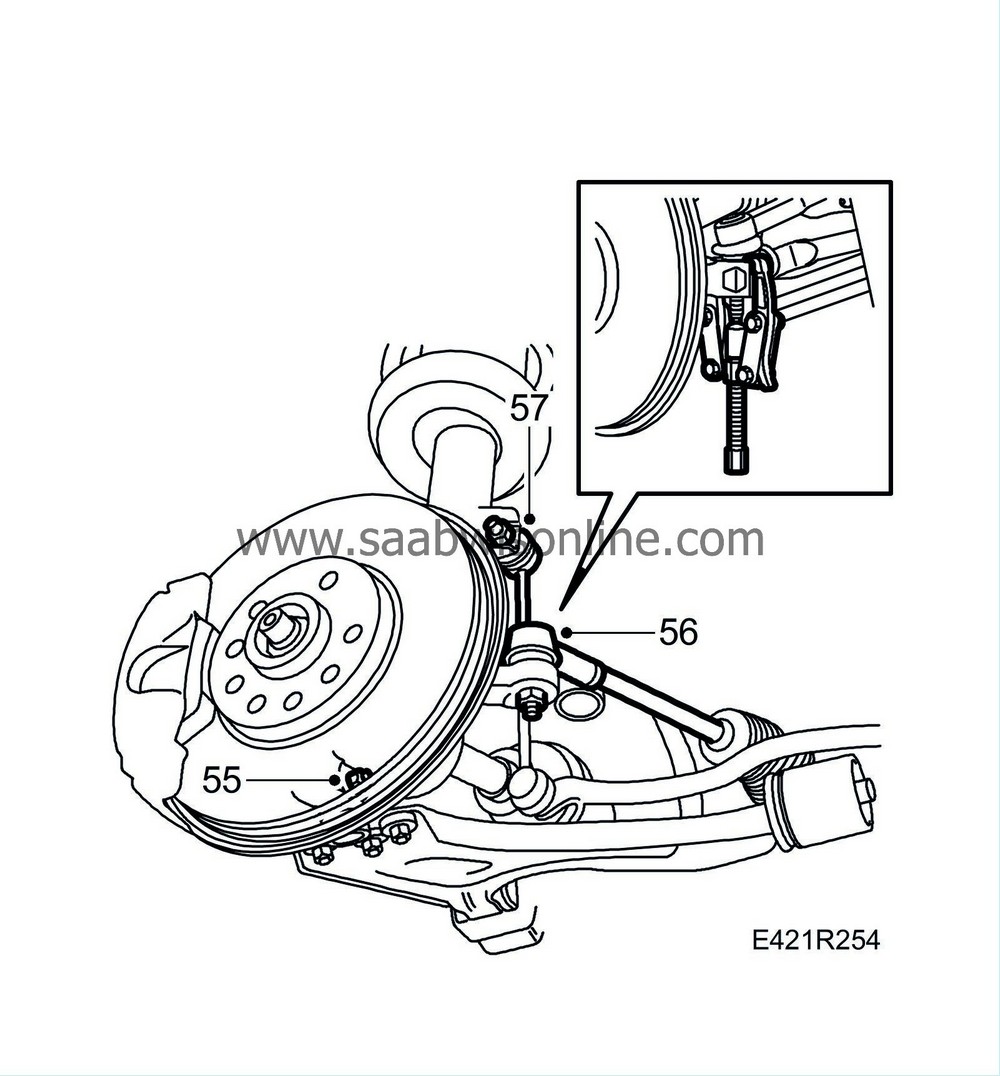
Remove the lead-through bolt and detach the lower spindle joint from the steering swivel member on the right and left-hand sides.
|
|
| 56. |
Remove the nuts securing the track rods and press these out using
87 92 343 Puller.
|
|
| 57. |
Unscrew the anti-roll bars' upper nuts.
|
|
| 58. |
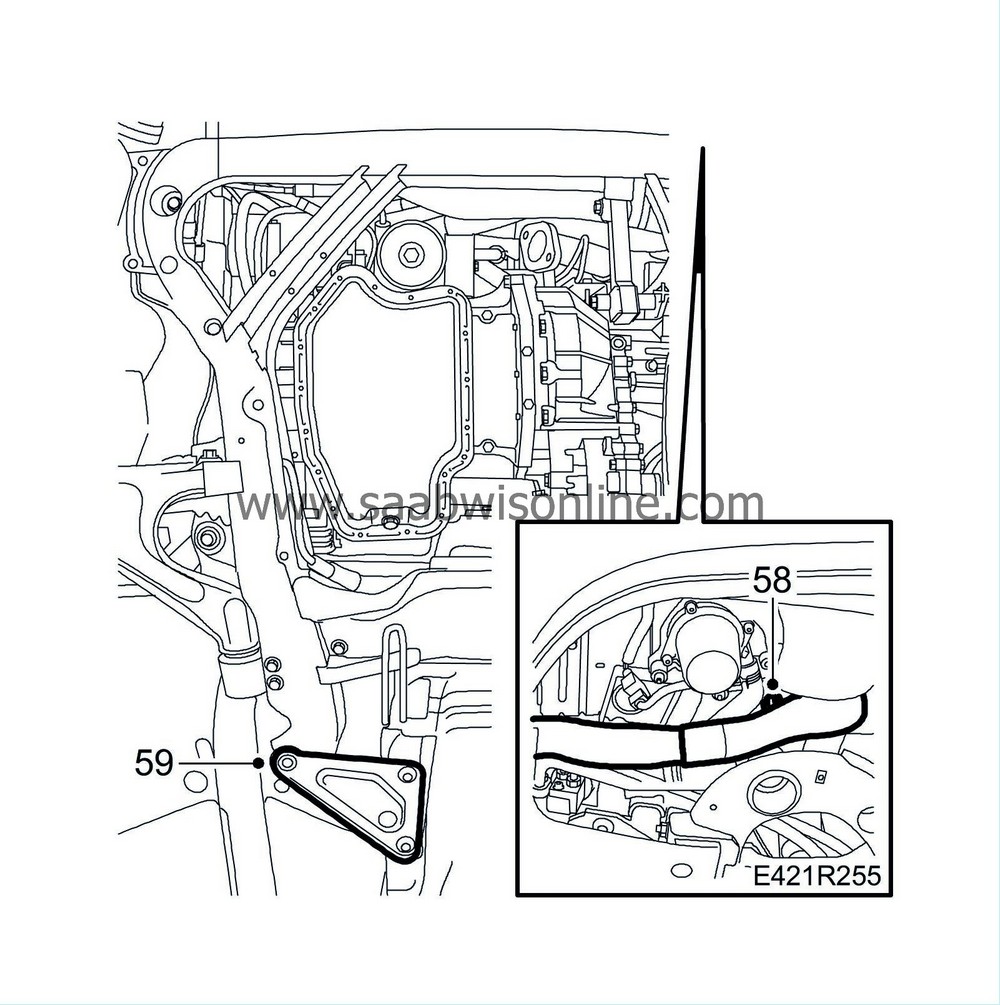
Remove the nut to the battery box coolant pipe bracket.
|
|
| 59. |
Remove the triangular stiffeners.
|
|
| 60. |
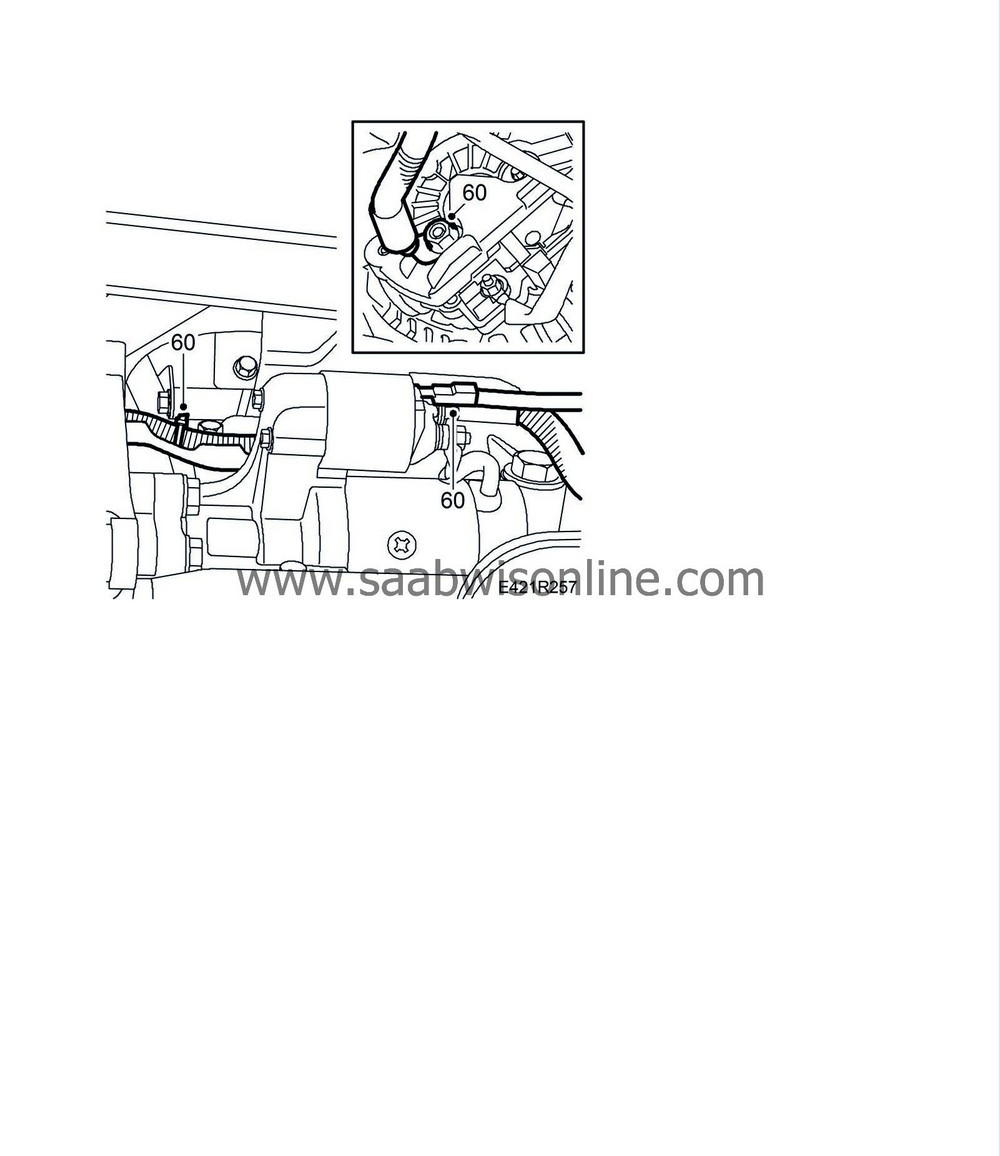
Remove the cables to the starter motor and the generator as well as the cable clip.
|
|
| 61. |
Check to make sure that everything has been detached and moved aside so that no damage will occur when the power unit is removed.
|
|
| 62. |
Position
83 95 311 Trolley lift
, with
83 94 801 Parent fixture
,
83 95 170 Adapter
,
83 95 188 Basic fixture
and
83 95 196 Holder, front
under the power unit. The height adjusters of the fixture must be in their lowest position.
|
|
| 63. |
Raise the lifting table and adjust it according to the locating points on the car body and fixture. Continue raising the lifting table until it touches the subframe. Raise it a little more and then adjust its height until it abuts evenly against the subframe.
|
|
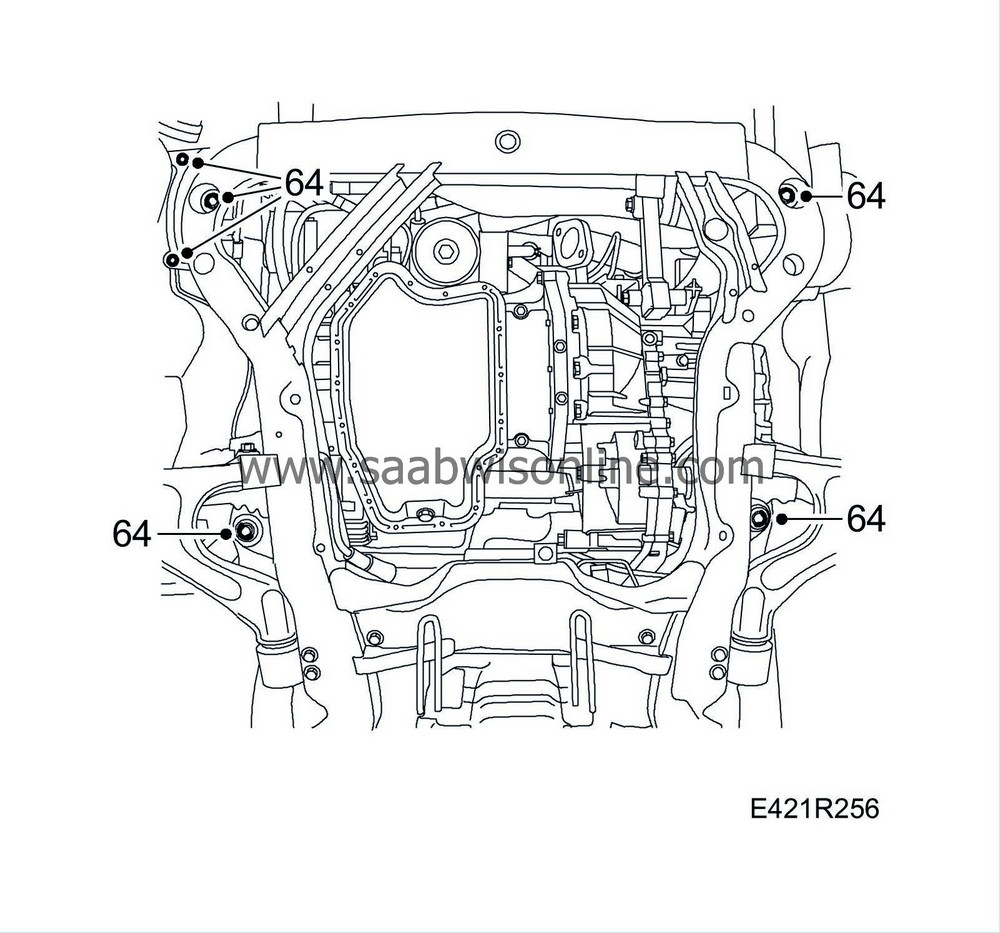
| 64. |
Undo the subframe retaining bolts and the two nuts at the air cleaner.
|
|
| 65. |
Carefully lower the power unit slightly and detach the drive shafts from the hubs using
89 96 951 Puller, drive shaft
.
|
|
| 66. |
Lower slightly further and make sure that the A/C compressor comes out between the subframe and the body so that the engine can move down unhindered. Suspend the A/C compressor using a
83 95 212 Strap.
|
|
| 67. |
Cut off the cable clips to the battery cable and detach it from the cable duct under the rear exhaust manifold.
|
|
| 68. |
Lower the power unit more. Be careful to ensure that nothing gets jammed or overlooked during removal and gets damaged.
|
|

 Warning
