Control module
| Control module |
| To remove |
| 1. |
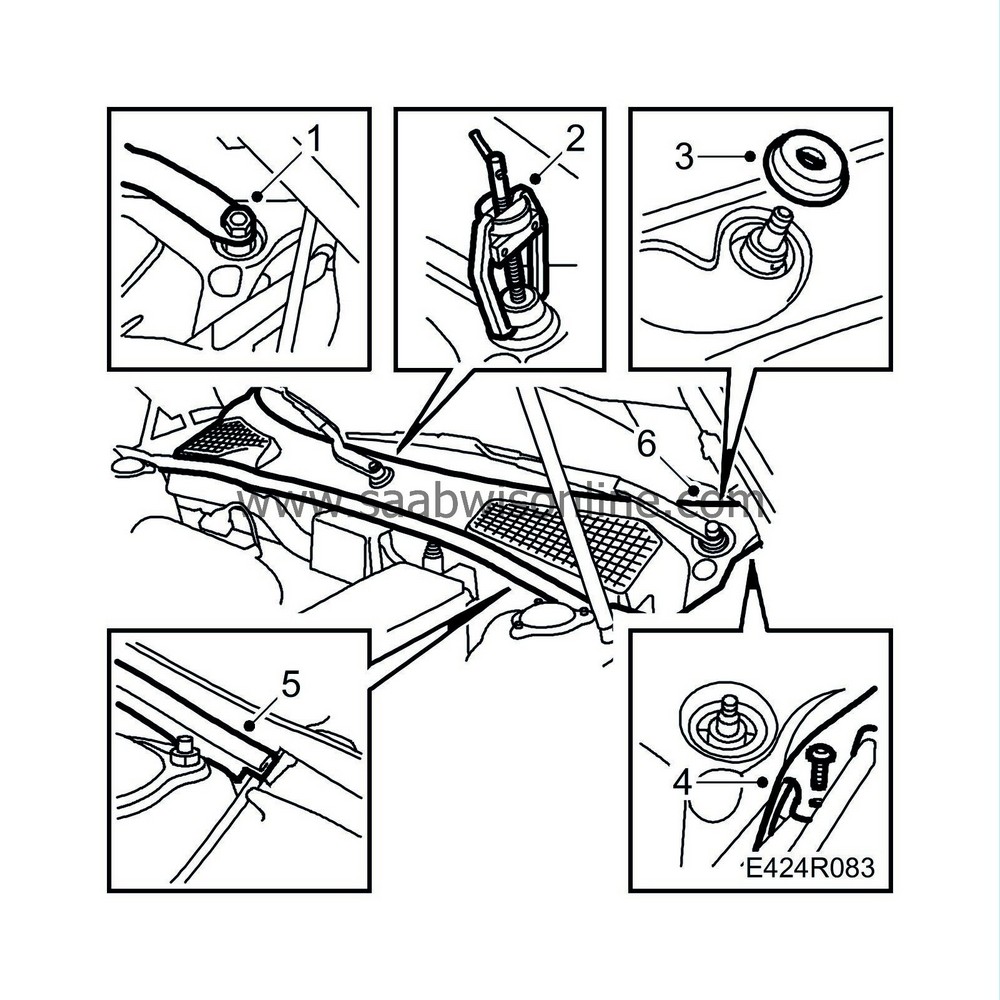
Slightly loosen the nuts of the wiper arms.

|
|
| 2. |
Use a puller, special tool No. 85 80 144 to remove the wiper arms. Remove the nuts and wiper arms.
|
|
| 3. |
Remove the rubber seals from the wiper arms.
|
|
| 4. |
Remove the two screws in the short sides of the windscreen cover panel.
|
|
| 5. |
Remove the rubber seal.
|
|
| 6. |
Remove the windscreen cover panel by grasping its front edge and lifting it up and forwards. Mind the bonnet release cable's lead-through on the left-hand side.
|
|
| 7. |
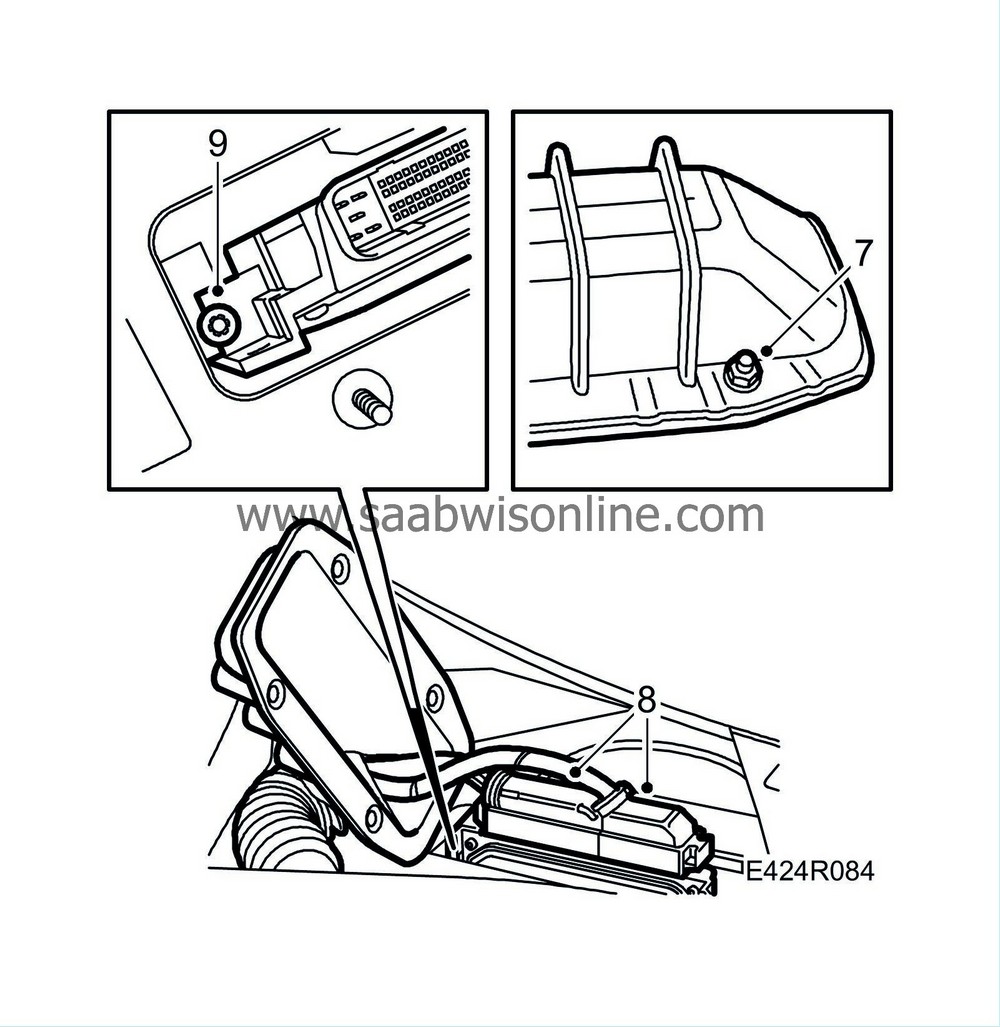
Undo the 4 nuts securing the control module's protective cover.

|
|
| 8. |
Bend up the cover and detach the control module connectors.
|
|
| 9. |
Undo the control module's retaining nuts and remove them. A 10 mm magnetic socket will be useful for this.
|
|
| 10. |
Lift the control module straight up.
|
|||||||||||||
| To fit |
| 1. |
Position the control module from above.

|
|
| 2. |
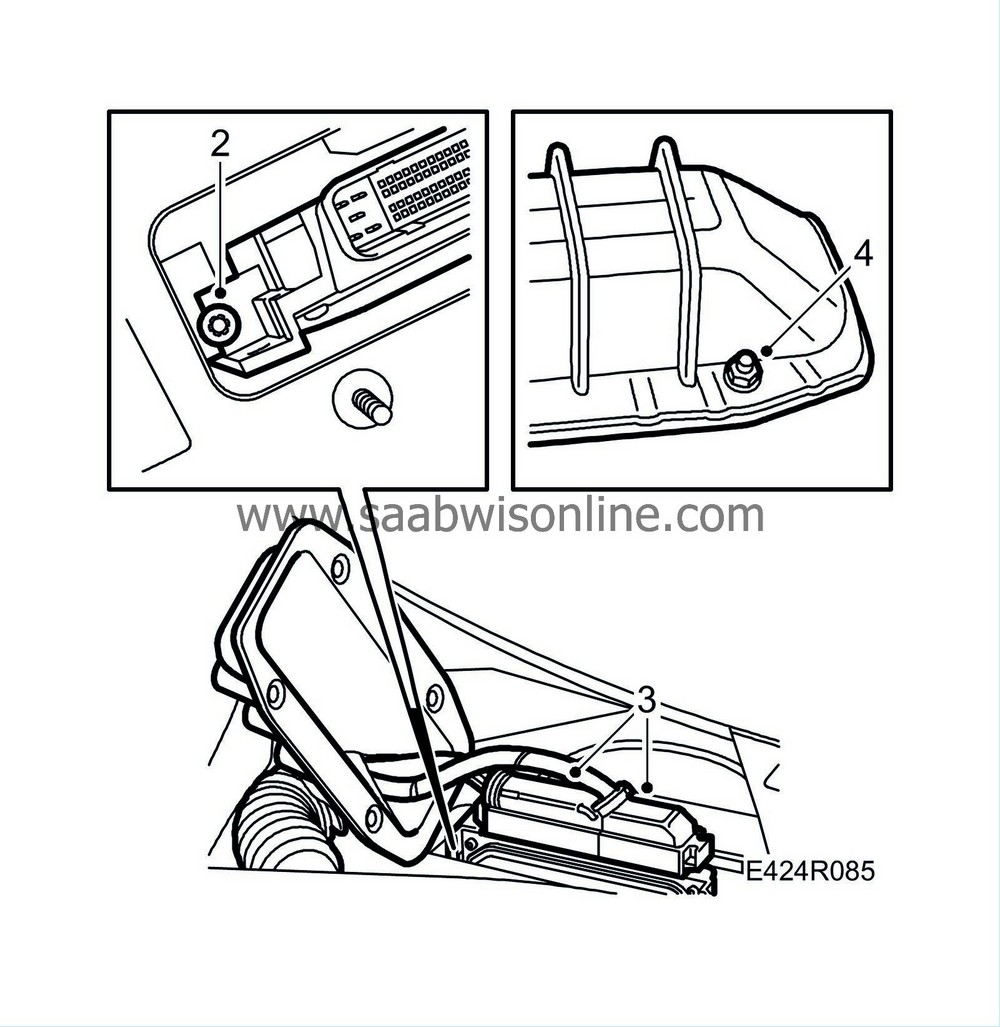
Fit the 2 control module retaining nuts.
|
|
| 3. |
Attach the connectors carefully so as not to damage the connections.
|
|
| 4. |
Fit the 4 nuts to the control module cover.
|
|
| 5. |
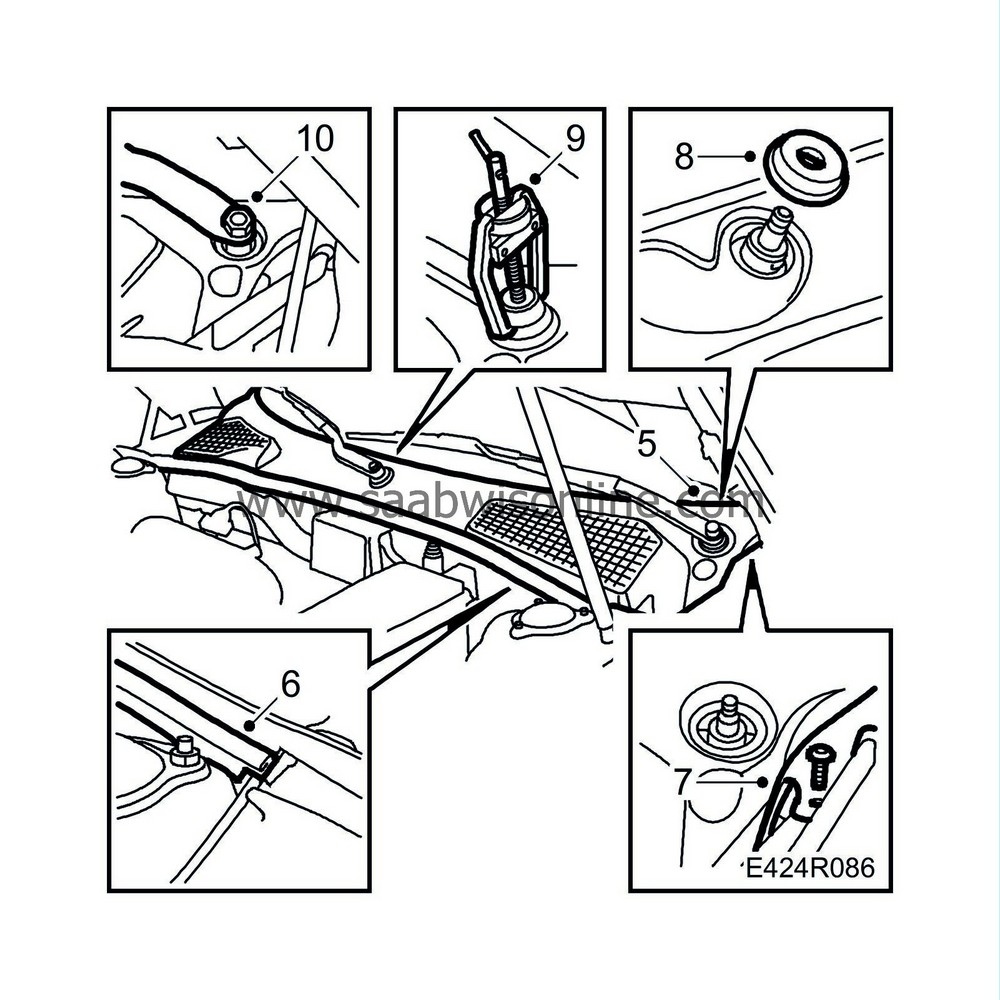
Fit the windscreen cover. Be careful with the bonnet release wire on the left-hand side.
|
|
| 6. |
Fit the rubber seal.

|
|
| 7. |
Fit the two screws in the short sides of the windscreen cover panel.
|
|
| 8. |
Fit the rubber wiper arm seals.
|
|
| 9. |
Fit the wiper arms and nuts.
Adjust the wipers to the correct resting position using the two marks on the windscreen. |
|
| 10. |
Fit the nuts on the wiper arms with the blanking-off washers on the nuts.
|
|
| 11. |
Perform
Measures after changing a control module
.
|
|
| 12. |
Reset immobilization as follows:
|
|
| • |
Connect Tech 2 and turn the ignition key to ON.
|
| • |
Select Body and TWICE
|
| • |
Select Immobilization. After approx. 10 sec. immobilization is programmed.
|


