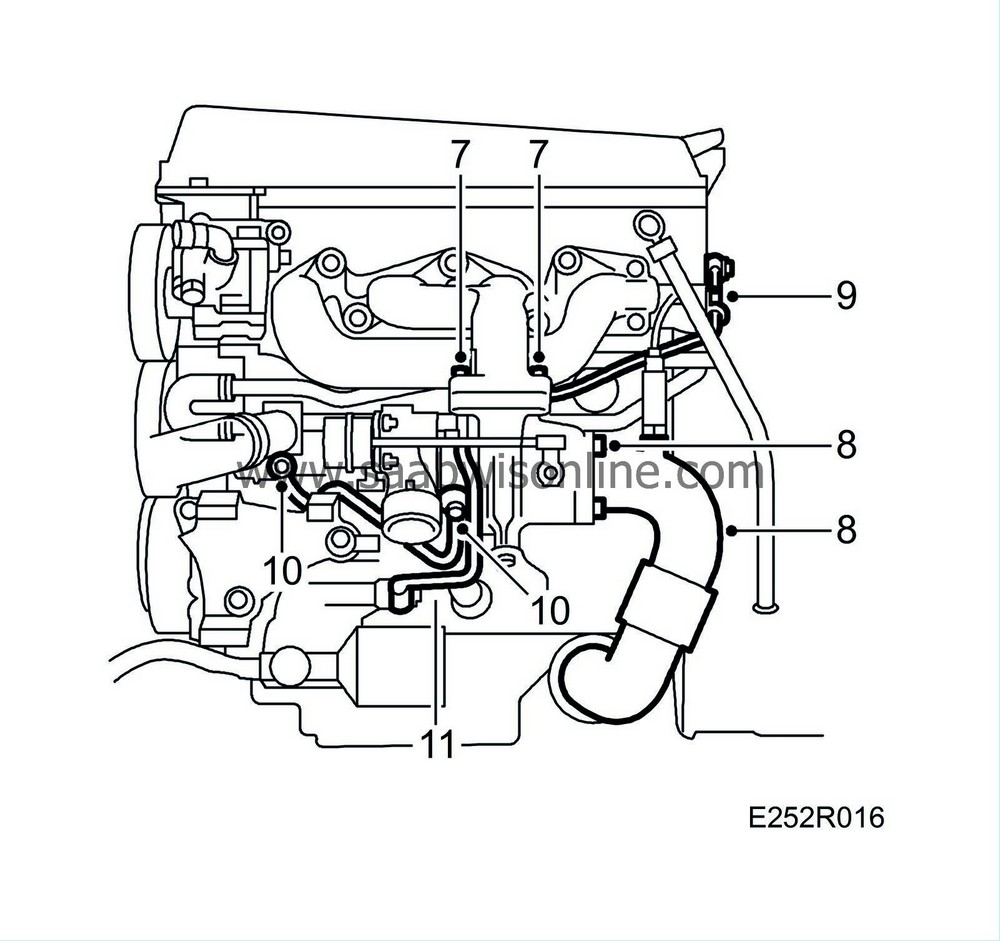
Exhaust manifold, 4-cyl.
| Exhaust manifold, 4-cyl. |
| To remove |
|
|||||||
| 1. |
Open the expansion tank cap to release the system pressure.

|
|
| 2. |
Raise the car.
|
|
| 3. |
Remove the lower front cover.
|
|
| 4. |
Drain off the coolant.
|
|
| 5. |
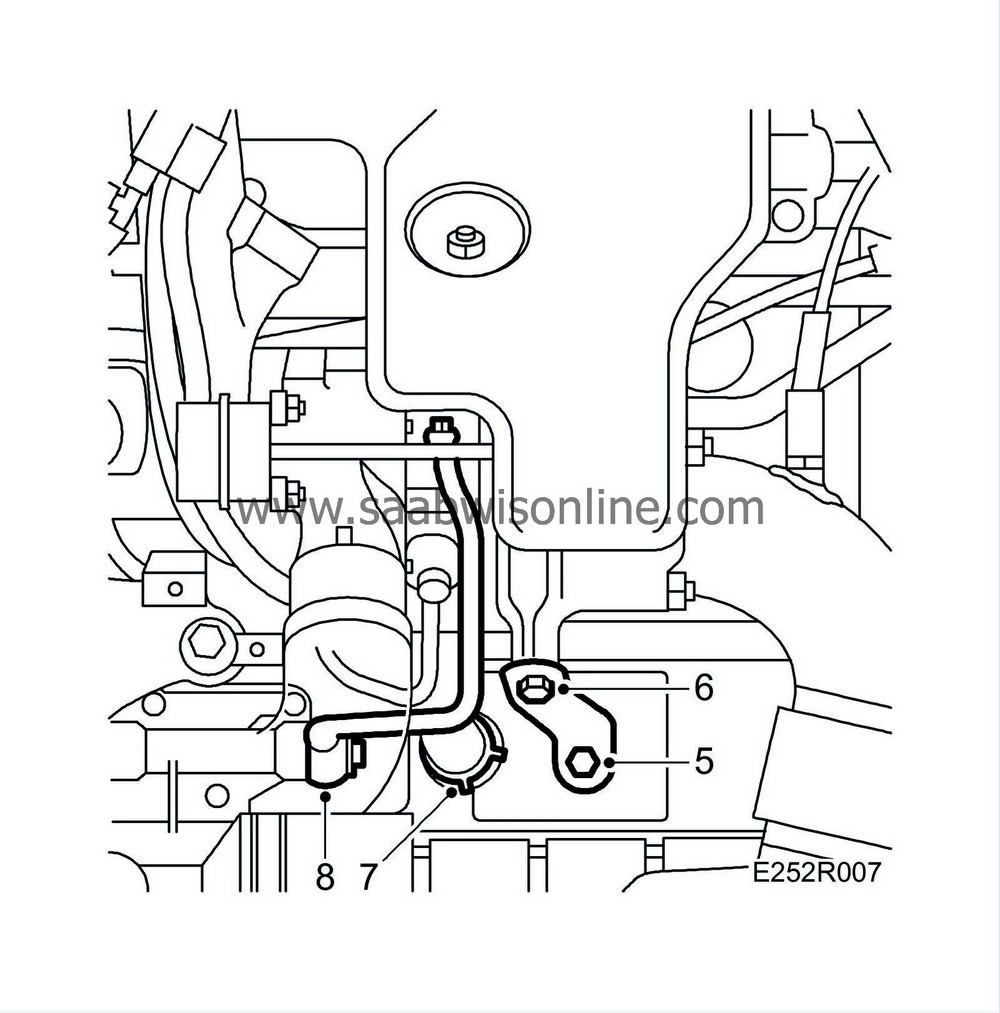
Undo the bolt at the turbo mounting on the engine block.
|
|
| 6. |
Loosen the upper screw on the turbo mounting.
|
|
| 7. |
Detach the turbo return hose to the sump.
|
|
| 8. |
Loosen the oil pipe to the turbo at the oil filter adapter.
|
|
| 9. |
Lower the car to the floor.
|
|
| 10. |
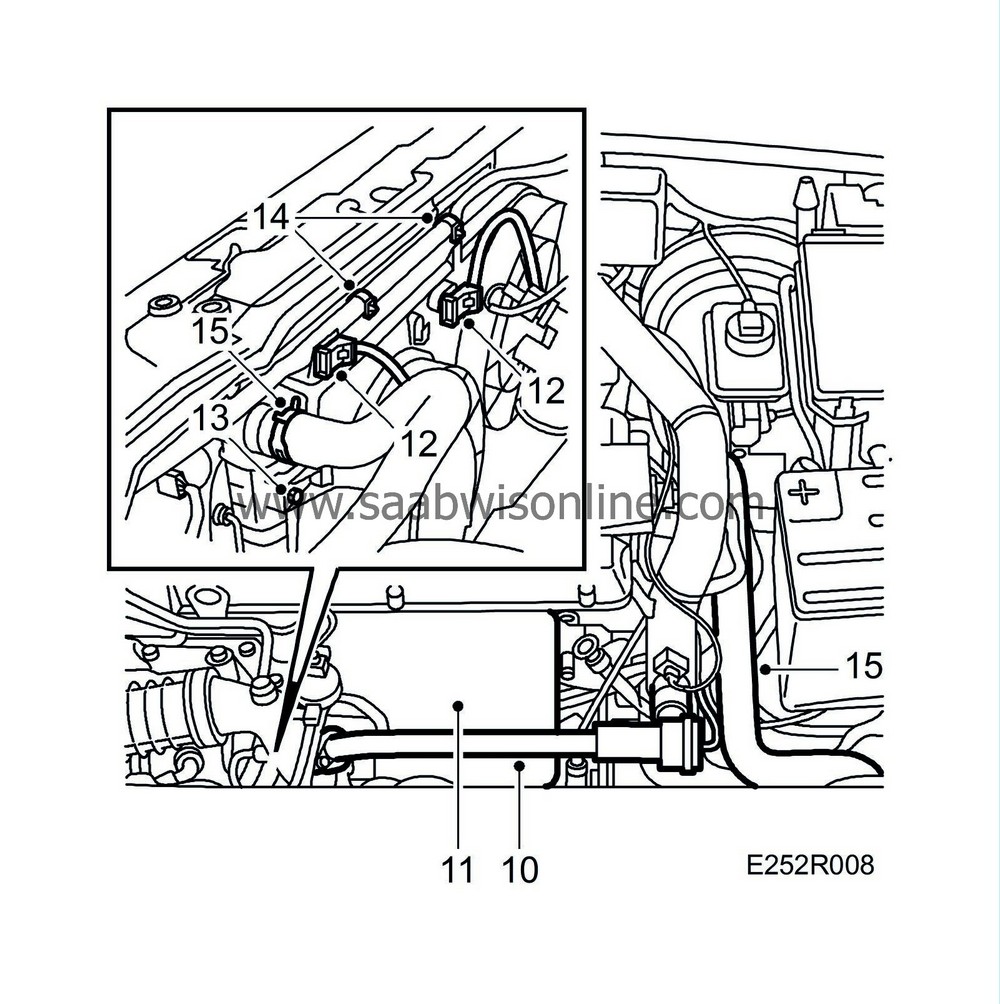
Remove the bypass pipe and valve.
|
|||||||
| 11. |
Remove the exhaust manifold's heat shield.
|
|
| 12. |
Unplug the radiator fan's connectors and move them aside.
|
|
| 13. |
Remove the bolts on each side of the fan assembly.
|
|
| 14. |
Loosen the clip holding the cooling system vent hose.
On cars with automatic transmission, also remove the pipe mounting on the fan cowling. |
|
| 15. |
Detach the upper radiator hose by undoing the hose clip and bending the hose aside.
|
|
| 16. |
Unhook and twist the fan assembly, then lift it out.
|
|
| 17. |
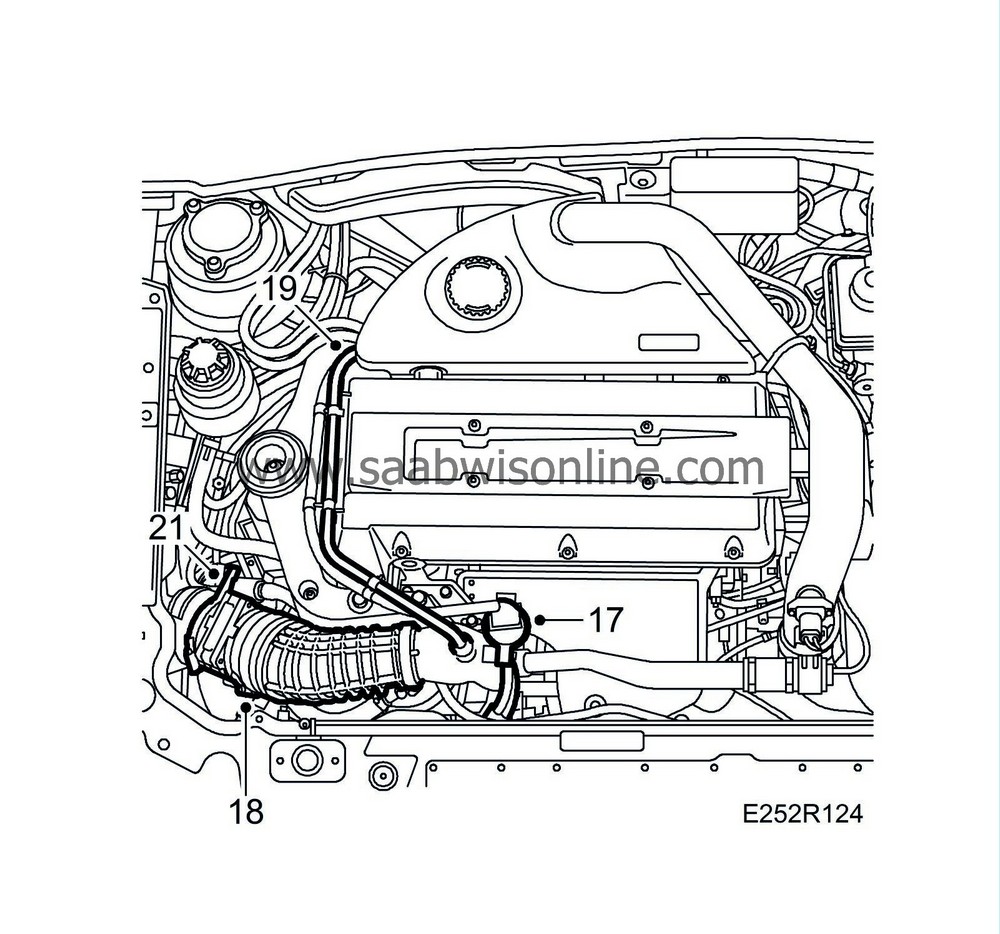
Unplug the connector from the control valve.
|
|
| 18. |
Unplug the mass air flow sensor connector.
|
|
| 19. |
Detach the crankcase breather pipe fastened to the turbo intake pipe and detach the camshaft cover.
|
|
| 20. |
Bend the pipe and wiring aside.
|
|
| 21. |
Remove the mass air flow sensor and air hose.
|
|
| 22. |
Loosen the hoses to the turbo and diaphragm housing.

|
|
| 23. |
Undo the quick coupling on the bleeder hose using
83 95 261 Tool, fuel line
.
|
|
| 24. |
Undo the intake manifold's V-clamp at the turbo.
|
|
| 25. |
Unbolt the intake pipe from the power steering pump mounting.
|
|
| 26. |
Lift out the intake manifold.
|
|
| 27. |
Undo the hose clip on the hose between the charge air cooler and the turbo. Plug the hose to prevent dirt entering the hose, use plug
83 94 595 Plug, turbo hose
or similar.
|
|
| 28. |
Undo the retaining nuts and remove the front part of the exhaust system from the turbo.
|
|
| 29. |
Carefully lower the front exhaust system away from the turbo.
|
|||||||||||||
| 30. |
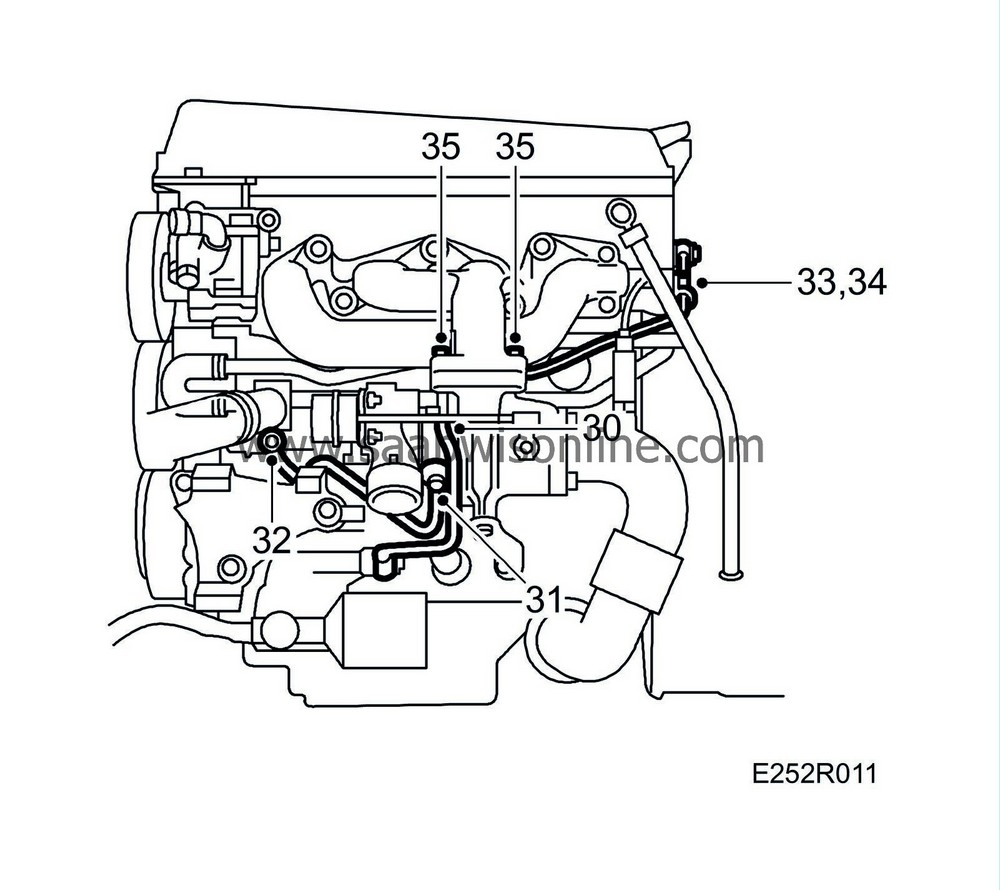
Remove the oil pipe to the turbo. Save the copper washers.
|
|
| 31. |
Loosen the water pipe at the turbo. Save the copper washers.
|
|
| 32. |
Release the water pipe screw at the coolant pump.
|
|
| 33. |
Loosen the water return pipe from the turbo at the cylinder head and the pressure sensor mounting. Save the copper washers.
|
|
| 34. |
Undo the water return pipe's bolt at the turbo.
|
|
| 35. |
Remove the bolts securing the turbo to the exhaust manifold.
|
|
| 36. |
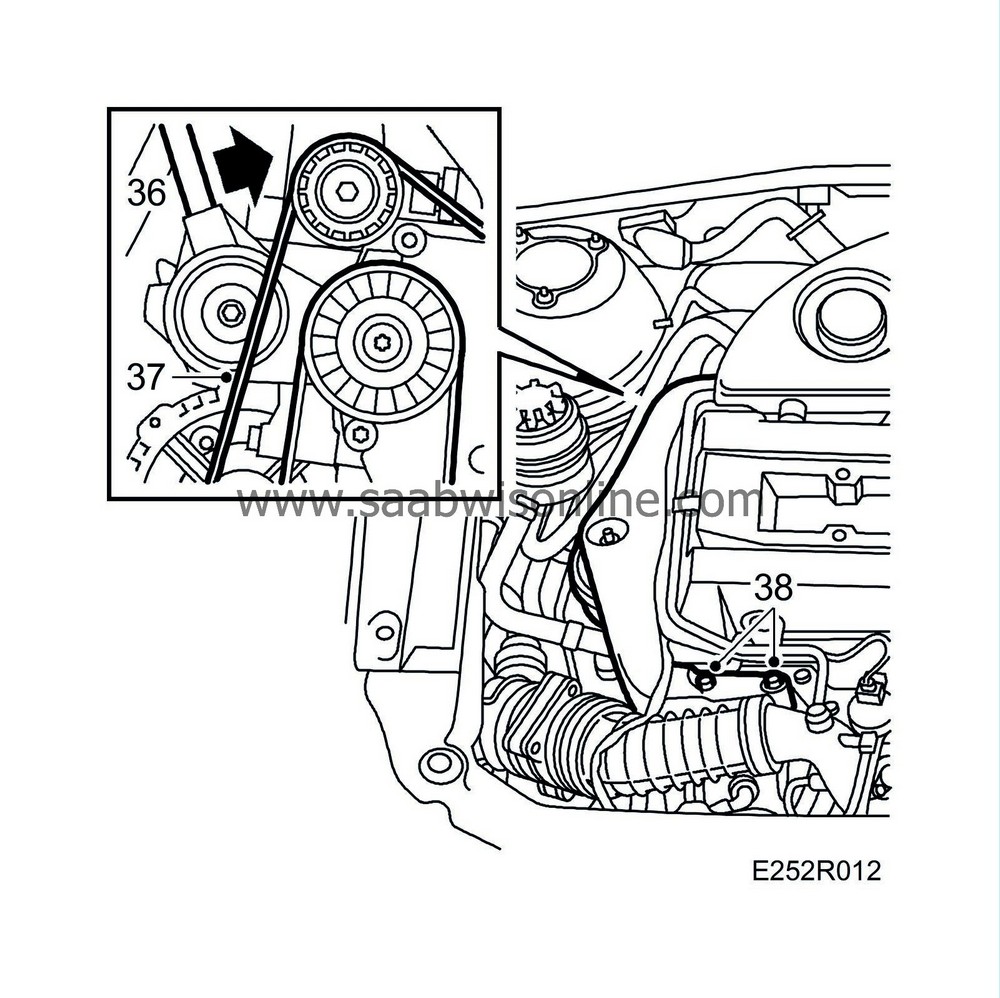
Release the tension of the poly-V-belt using
254 Drawbar handle, hydraulic belt tensioner
.
|
|
| 37. |
Move the belt away from the power steering pump.
|
|
| 38. |
Remove the power steering pump bracket from the engine mount.
|
|
| 39. |
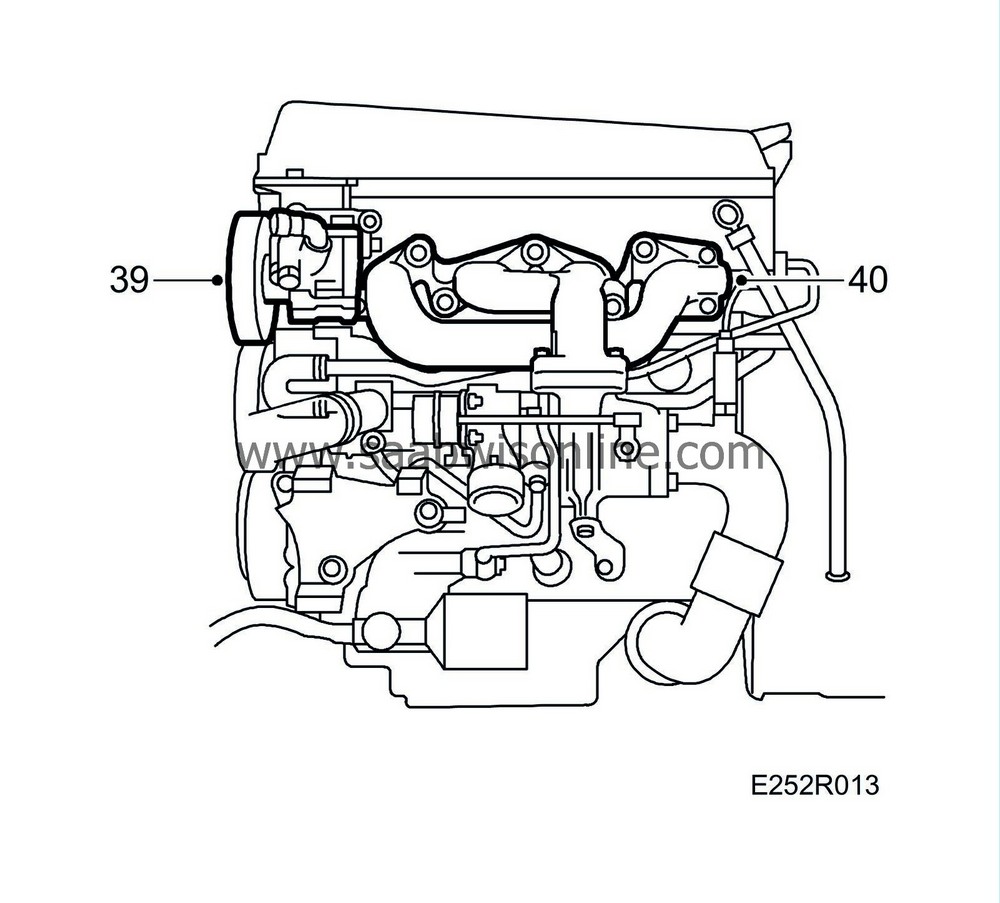
Undo the power steering pump bracket bolts and move the pump aside.
|
|
| 40. |
Push the turbo aside and remove the exhaust manifold. Save the spacer sleeves and washers.
|
|
| To fit |

| Note | ||
|
Lubricate studs and gasket with a thin layer of 90 513 210 Universal paste or the equivalent to stop them burning together. |
||
|
Spray the connector with Anti-corrosion agent, Contact Protect . |
| 1. |
Fit a new gasket to the exhaust manifold.
|
|
| 2. |
Fit the exhaust manifold.
|
|
| 3. |
Fit the washers, spacers and nuts.
Tightening torque: 25 Nm (18 lbf ft) |
|
| 4. |
First fit the top left bolt in the power steering pump bracket. Then fit the other two bolts.
Tightening torque: 24 Nm (18 lbf ft) |
|
| 5. |
Bolt the power steering pump bracket to the engine mount and tighten the bolts.

Tightening torque: 24 Nm (17.7 lbf ft). |
|
| 6. |
Fit the poly-V-belt and adjust the belt tensioner. Use a
83 95 254 Drawbar handle, hydraulic belt tensioner
.
|
|
| 8. |
Fit the front part of the exhaust system to the turbo and tighten the nuts.
Tightening torque: 24 Nm (18 lbf ft)
|
||||||||||
| 9. |
Fit the turbo water return pipe. Use new copper washers.
Tightening torques Water return pipe/cylinder head 25 Nm (18 lbf ft) Water return pipe, turbo 25 Nm (18 lbf ft) |
|
| 10. |
Fit the turbo water pipe. Tighten the pipe also at the coolant pump end. Use new copper washers.
Tightening torques Water pipe/turbo 25 Nm (18 lbf ft) Water pipe/coolant pump 20 Nm (15 lbf ft) |
|
| 11. |
Fit and tighten the turbo oil pipe at the turbo. Use new copper washers.
Tightening torques Oil pipe to turbo/turbo 20 Nm (15 lbf ft) |
|
| 12. |
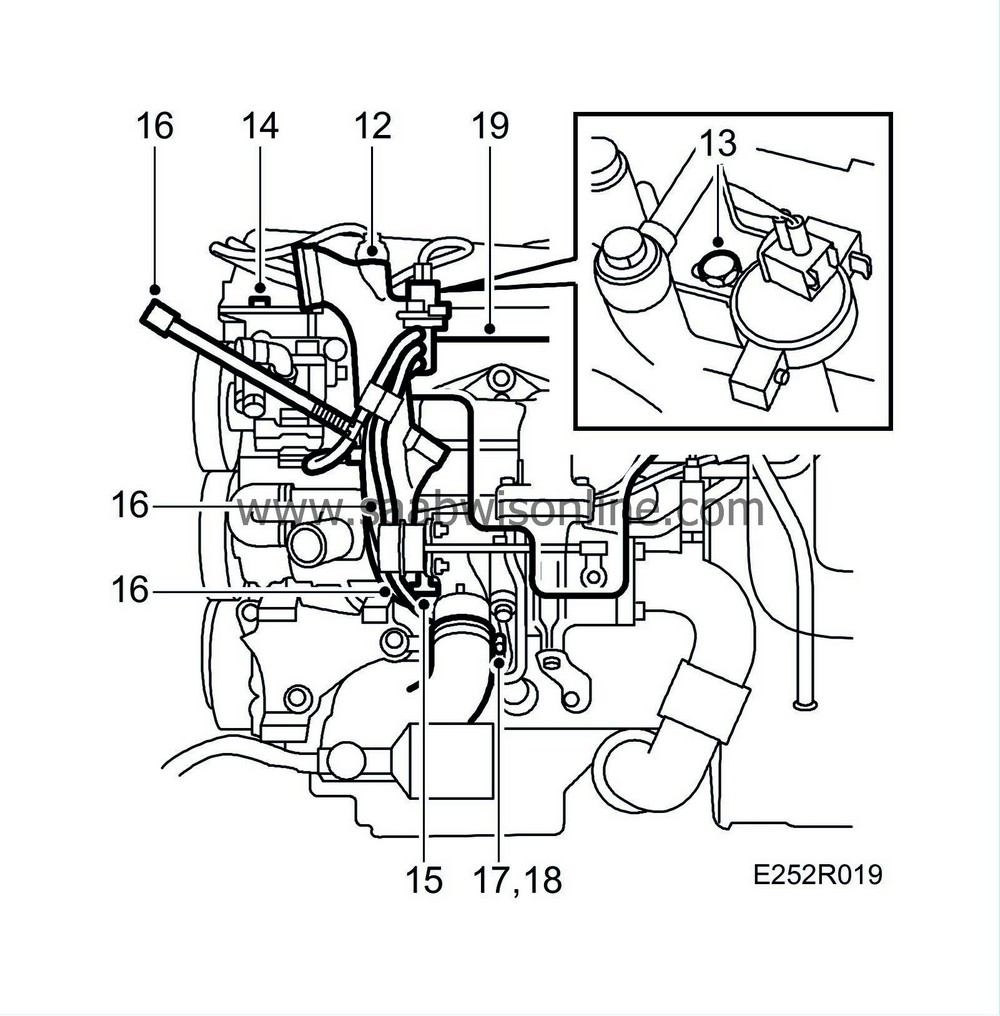
Fit a new O-ring greased with non-acidic vaseline to the turbo intake pipe. Slide the V-clamp on the pipe and position same. Bolt the pipe to the power steering pump bracket to facilitate tightening/fitting the V-clamp.
|
|
| 13. |
Slacken the adjusting screw on the intake pipe to adjust the pipe.
|
|
| 14. |
Tighten the intake manifold bolt in the power steering pump mounting. Also tighten the adjusting screw.
Tightening torque: 24 Nm (18 lbf ft) |
|
| 15. |
Tighten the V-clamp between the turbo and the turbo intake pipe.
Tightening torque 3 Nm (2 lbf ft) |
|
| 16. |
Connect the hoses to the diaphragm box and turbo, and the vent hose.
|
|
| 17. |
Remove the plug from the charge air cooler intake pipe.
|
|
| 18. |
Connect the charge air cooler intake pipe to the turbo.
Tightening torque: 8 Nm (6 lbf ft) |
|
| 19. |
Fit the heat shield. Press on the left clamp first. Apply
90 513 210 Universal paste
to the nut.
Tightening torque: 20 Nm (15 lbf ft) |
|
| 20. |
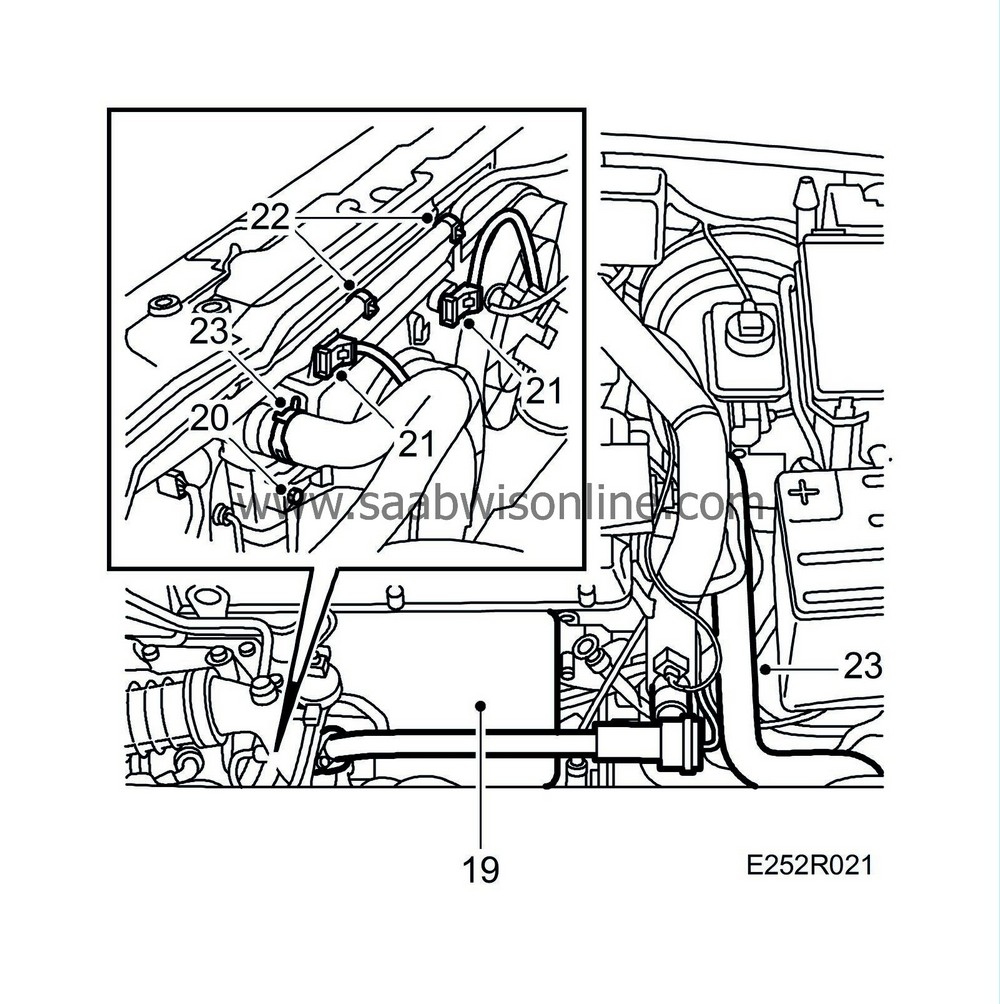
Fit the fan assembly. Ensure that it is positioned on the lower hooks. Tighten the two bolts on the sides of the fan assembly.
Tightening torque: 8 Nm (6 lbf ft) |
|
| 21. |
Plug in the fan assembly's connectors.
|
|
| 22. |
Fit the clip that holds the cooling system vent hose.
On cars with automatic transmission, also attach the pipe mounting on the fan cowling. |
|
| 23. |
Fit the upper radiator hose.
|
|
| 24. |
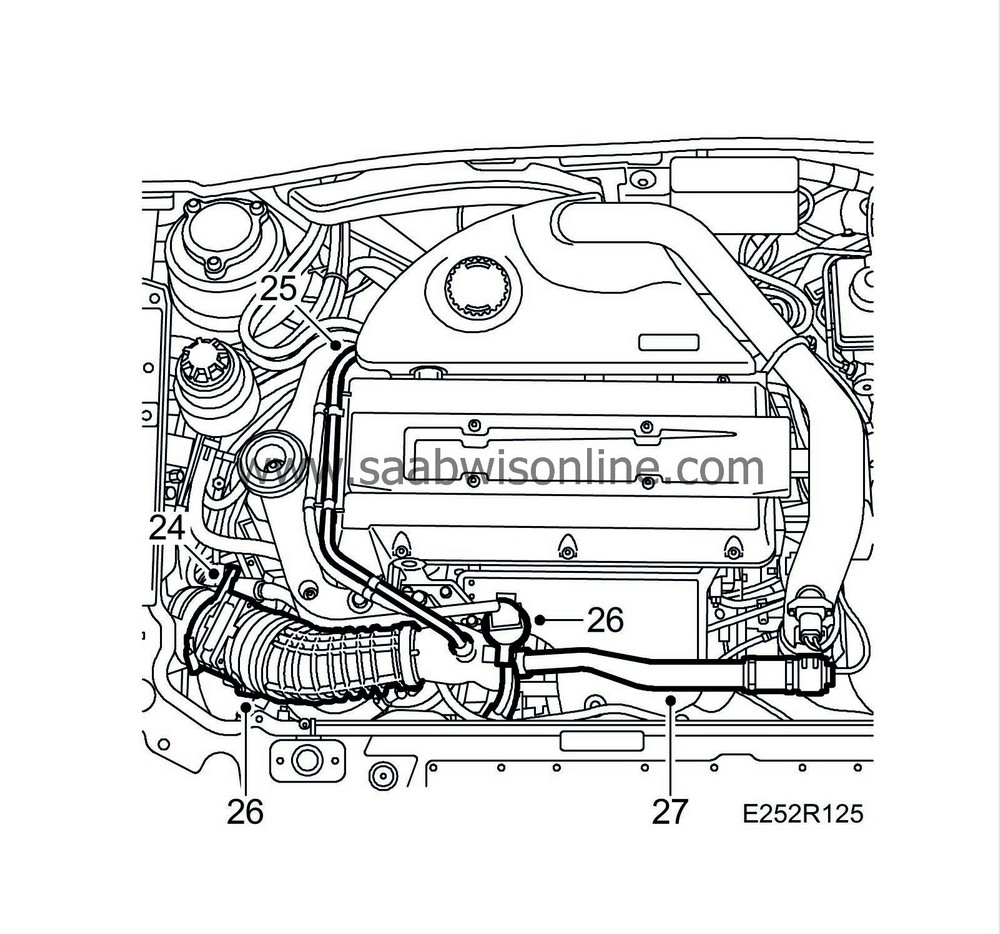
Fit the mass air flow sensor and air hose.
|
|
| 25. |
Fit the crankcase breather pipe to the camshaft cover and turbo intake pipe.
Tightening torque: 24 Nm (18 lbf ft)
|
||||||||||
| 26. |
Plug in the mass air flow sensor and boost pressure control valve connectors.
|
|
| 27. |
Connect the bypass pipe and valve. Use a new O-ring lubricated with acid-free petroleum jelly (vaseline).
|
|
| 28. |
Tighten the bypass pipe screw and hose clamp.
Tightening torque: 8 Nm (6 lbf ft) |
|
| 29. |
Raise the car.
|
|
| 30. |
Connect the turbo oil return hose to the sump.

|
|
| 31. |
Fit and tighten the turbo oil pipe at the oil filter adapter.
Tightening torque: 25 Nm (18 lbf ft) |
|
| 32. |
Fit the turbo's bracket.
Tightening torque: 24 Nm (18 lbf ft) |
|
| 33. |
Lower the car to the floor.
|
|
| 34. |
Check that the radiator drain cock is closed. Fill with coolant. For the correct mixture, refer to
Coolant
. Close the cap.

|
|
| 35. |
Start the car.
|
|
| 36. |
Set the heater control at full heat.
|
|
| 37. |
Warm up the engine to expel any air from the cooling system.
|
|
| 38. |
Raise the car and check for oil and water leaks.
|
|
| 39. |
Fit the lower front cover.
|
|
| 40. |
Lower the car to the floor.
|
|
| 41. |
Top up with coolant/oil as necessary.
|
|

 Warning
