Fuel filler pipe
| Fuel filler pipe |
|
||||||||||||||||||||||
| Important | ||
|
Be particulary observant regardning cleanliness when working on the fuel system. Loss of function may occur due to very small particles. Prevent dirt and grime from entering the fuel system by cleaning the connections and plugging pipes and lines during disassembly. Use 82 92 948 Plugs, A/C system assembly. Keep components free from contaminants during storage. |
||
| To remove |
| 1. |
Make sure the tank is not more the 3/4 full. Refer to
Draining the fuel tank
if necessary.
|
|
| 2. |
Raise the car and remove the rear right wheel. See
Wheels
.
|
|
| 3. |
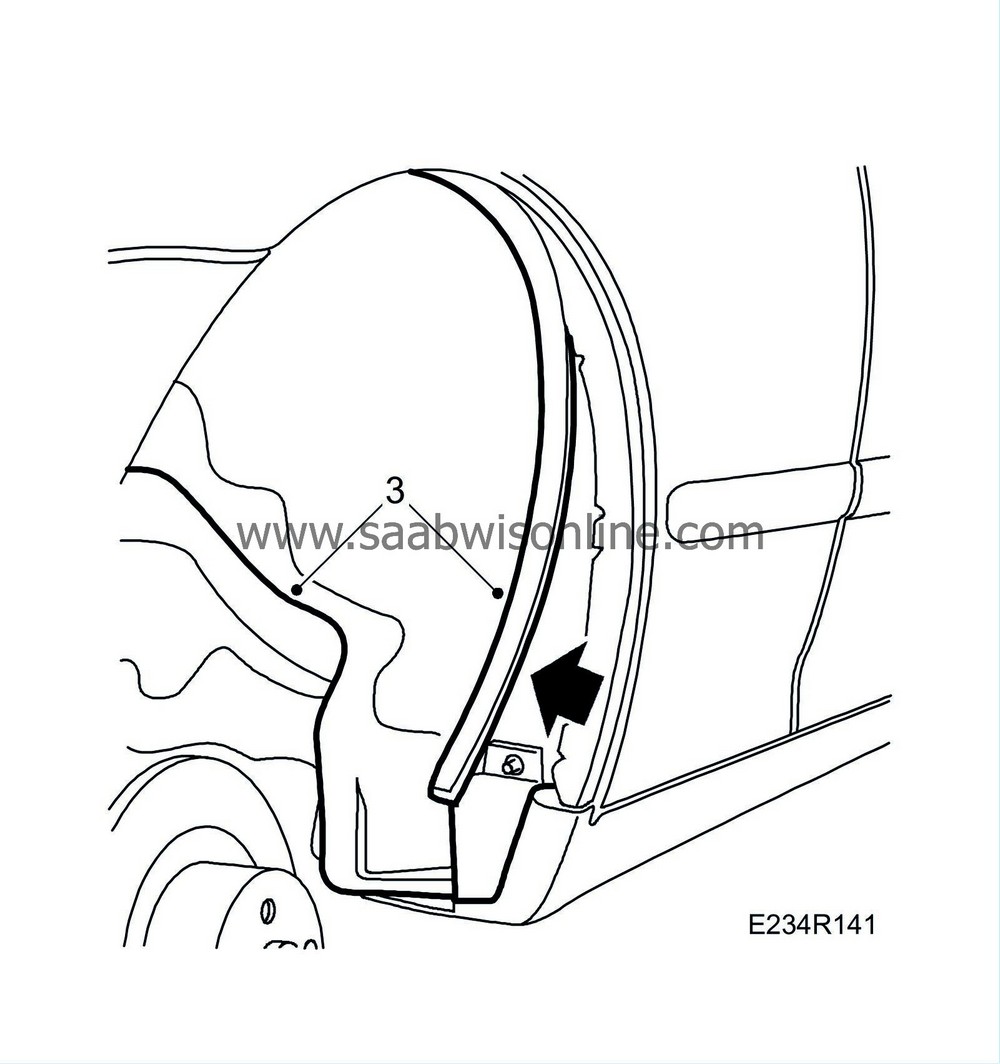
Remove the wing edging strip and the wing liner. The wing edging strip must be removed first.

|
|
| 4. |
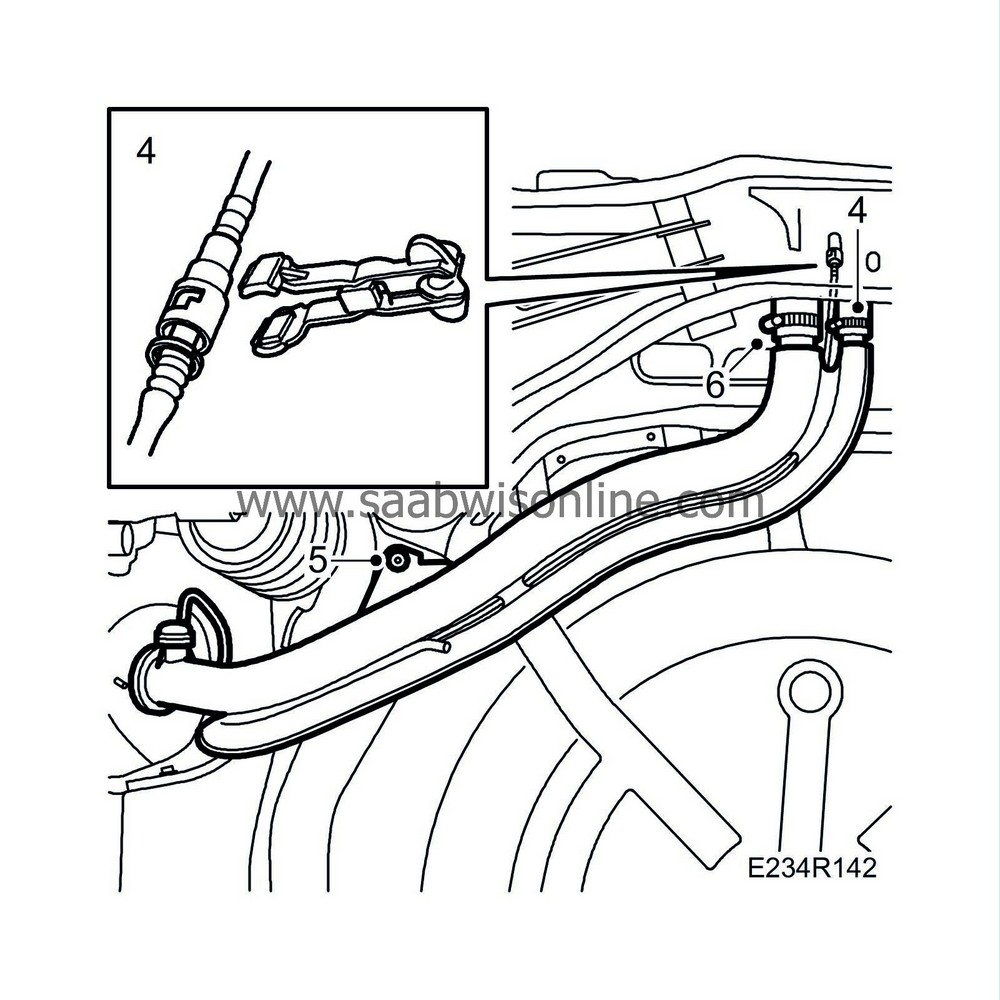
Undo the filler pipe hose clips and separate the purge pipe using tool
83 95 261 Tool, fuel line
.
|
|
| 5. |
Undo the bolt securing the pipe.

|
|
| 6. |
Open the filler flap and remove the filler cap.
|
|
| 7. |
Remove the filler pipe.
|
||||||||||
| To fit |
| Important | ||
|
When fitting the filler pipe it is important to replace the rubber hoses between the filler pipe and the fuel tank. There is a risk of cracks forming on the hoses after repeated tightening of the hose clips and this can lead to fuel leakage. |
||
|
It is also important to replace the old plastic bolt by a new bolt of plastic. In the event of a collision, the plastic bolt will break thus avoiding any damage to the filler pipe which is also made of plastic. |
||
| 1. |
Fasten the filler pipe to the connecting hoses leading to the fuel tank.
|
|
| 2. |
Insert the filler pipe into the filler hole.

|
|
| 3. |
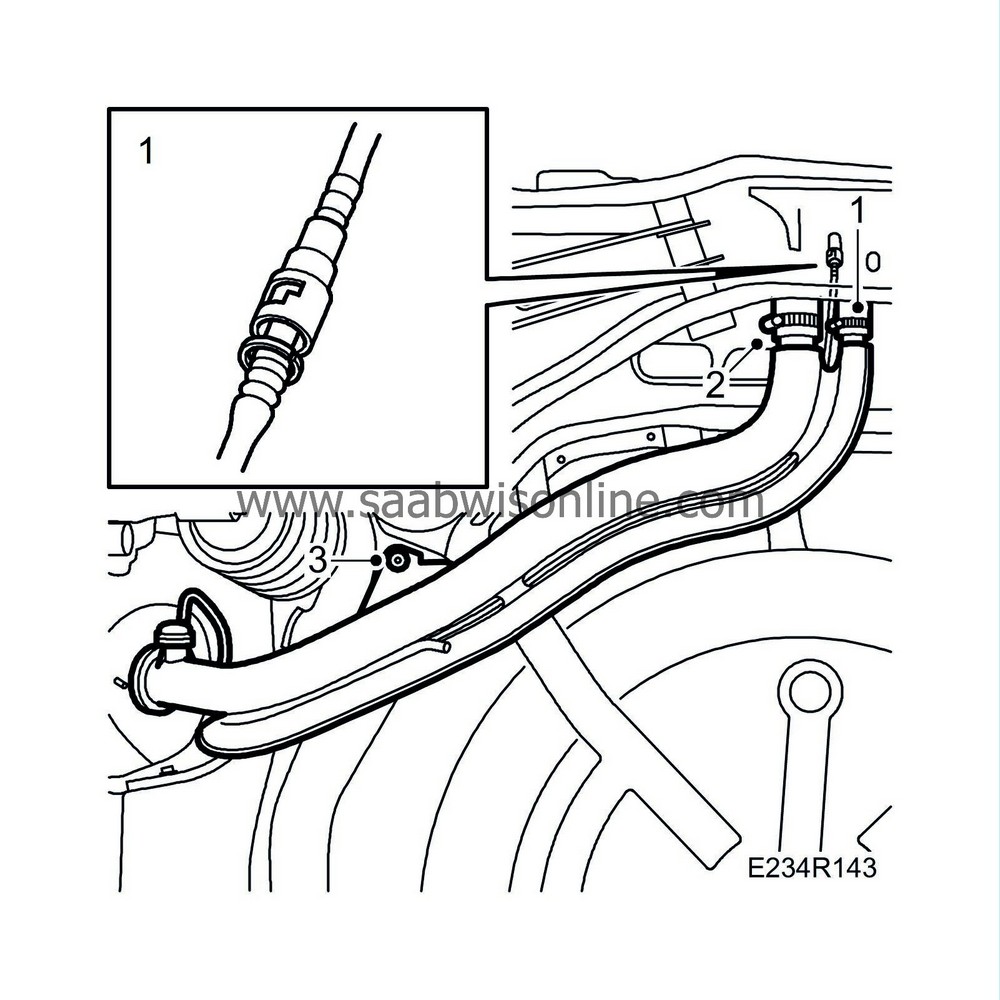
Fit a new plastic screw to secure the pipe.
Tightening torque, plastic screw 1.5 Nm (1 lbf ft) |
|
| 4. |
Fit and tighten the hose clips on the connecting hoses. Spray the hose clips with Tectyl ML part no. 30 21 763 or similar.
Tightening torque for hose clips 4 Nm (3 lbf ft) |
|
| 5. |
Fit the wing liner and wing edging strip.
|
|
| 6. |
Fit the rear right wheel.
|
|
| 7. |
Lower the car to the floor.
|
|
| 8. |
Refit the filler cap.
|
|

 Warning

