Fuel pump
| Fuel pump |
|
||||||||||||||||||||||
| Dismantling |
| Important | ||
|
The car should be parked on a level surface. If the tank is full and the car is jacked up at the rear when the pump is removed, it is very likely that fuel will run out. |
||
|
Place protective paper over the carpeting when the pump is removed as there is a risk of fuel spilling out. |
||
| 1. |
Raise the rear seat cushions and fold the carpeting out of the way.

|
|
| 2. |
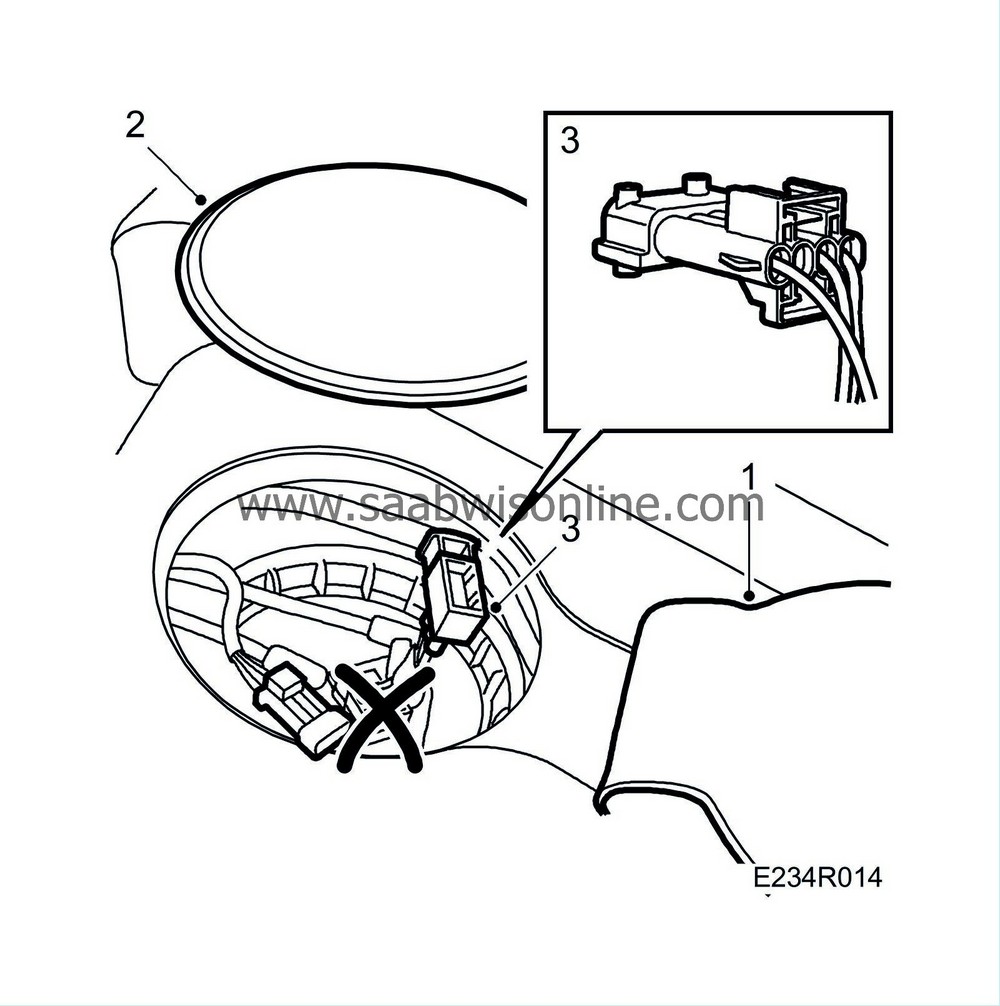
Remove the fuel pump cover.
|
|
| 3. |
Unplug the upper connector.
|
||||||||||
| 4. |
Certain cars:
Remove the retaining clip.

|
|
| 6. |
Remove the screw ring using the
83 94 462 Fuel pump tool
.

|
|
| 8. |
Transfer the pump to a suitable receptacle and pour off the fuel.
|
|
| To fit |

| Note | ||
|
Spray the connectors with Kontakt 61, part no. 30 04 520, before connecting them. |
| 1. |
Clean sealing surfaces.
|
|
| 2. |
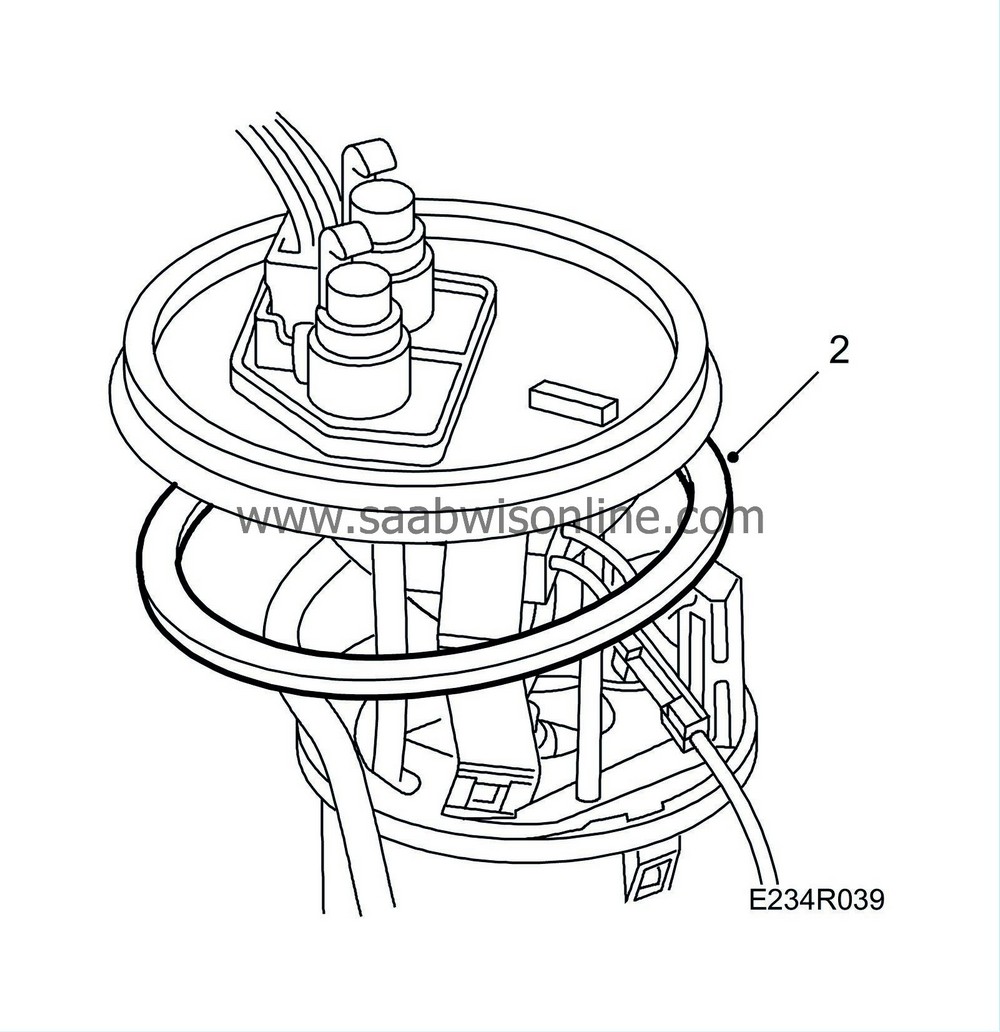
Fit a new O-ring in the tank groove.
|
|
| 4. |
Lubricate the screw threads on the pump cover and the upper edge of the pump with acid-free vaseline to prevent the pump from turning when the screw ring is tightened.
|
|
| 5. |
Attach the screw ring with the
83 94 462 Fuel pump tool
.
Tightening torque: 75 Nm (55 lbf ft) |
|
| 6. |
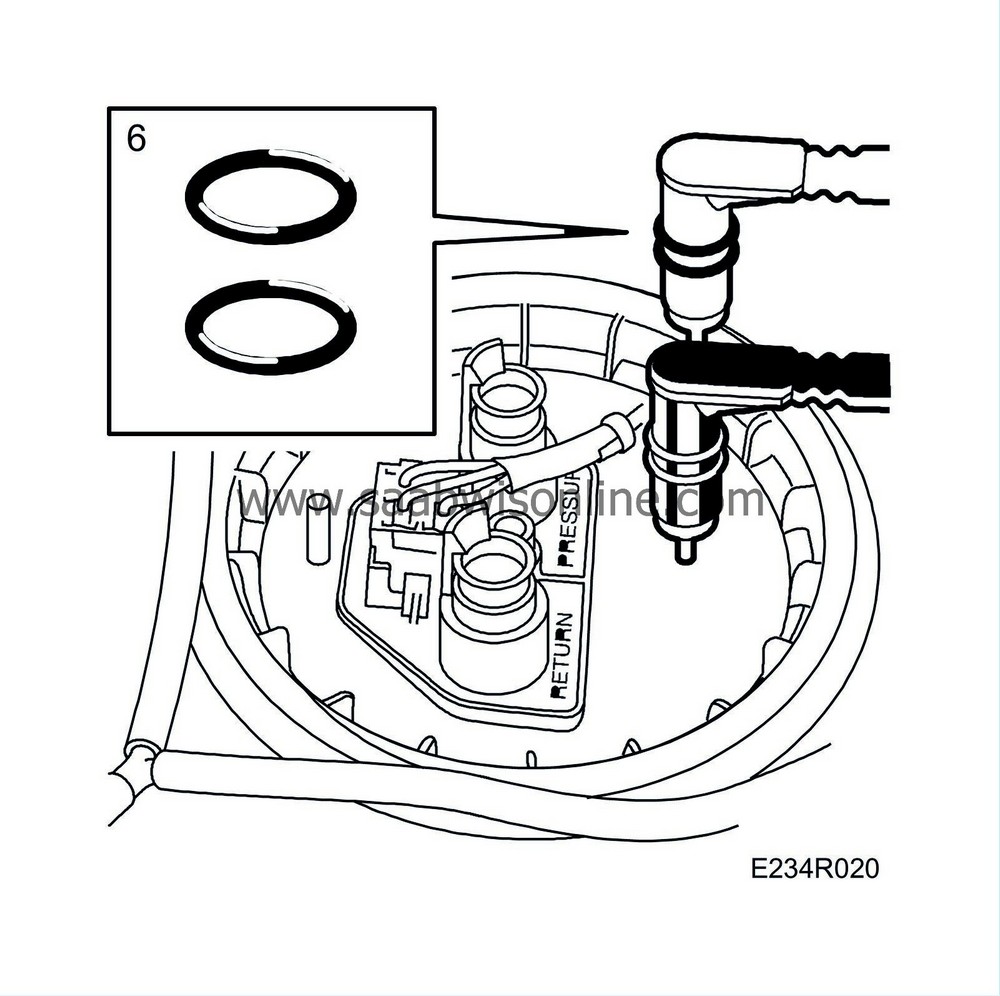
Inspect and lubricate the O-rings on the fuel line connections with acid-free vaseline. Connect the fuel line connections to the pump.

|
|
| 7. |
Make sure that the yellow hooks have snapped in place over the connections.
|
|
| 8. |
Certain cars:
Fit the retaining clip. Fit the screw manually to avoid damaging the thread. Check that the retaining clip does not press against the yellow catches.
Tightening torque: 2 Nm (1.5 lbf ft). 
|
||||||||||
| 9. |
Plug in the connector.
|
|
| 10. |
Check that the pump functions properly and that it does not leak.
|
|
| 11. |
Fit the fuel pump cover, replace the rear seat cushions and fold back the carpeting.
|
|

 Warning


