Intake manifold, upper and lower parts, 4-cyl
|
|
Intake manifold, upper and lower parts, 4-cyl
|
 Warning
|
|
The work involved in removing the fuel pipe requires working with the vehicle's fuel system. The following points should therefore be heeded in conjunction with these measures:
|
|
• Have a class BE fire extinguisher on hand! Be aware of the risk of sparks, i.e. in connection with electric circuits, short-circuiting, etc.
|
|
• Absolutely No Smoking!
|
|
• Ensure good ventilation! If there is approved ventilation for evacuating fuel fumes then this must be used.
|
|
• Wear protective gloves! Prolonged exposure of the hands to fuel can cause irritation to the skin.
|
|
• Wear protective goggles.
|
|
|
|
|
|
|
Important
|
|
Be particulary observant regardning cleanliness when working on the fuel system. Loss of function may occur due to very small particles. Prevent dirt and grime from entering the fuel system by cleaning the connections and plugging pipes and lines during disassembly. Use 82 92 948 Plugs, A/C system assembly. Keep components free from contaminants during storage.
|
|
|
|
1.
|
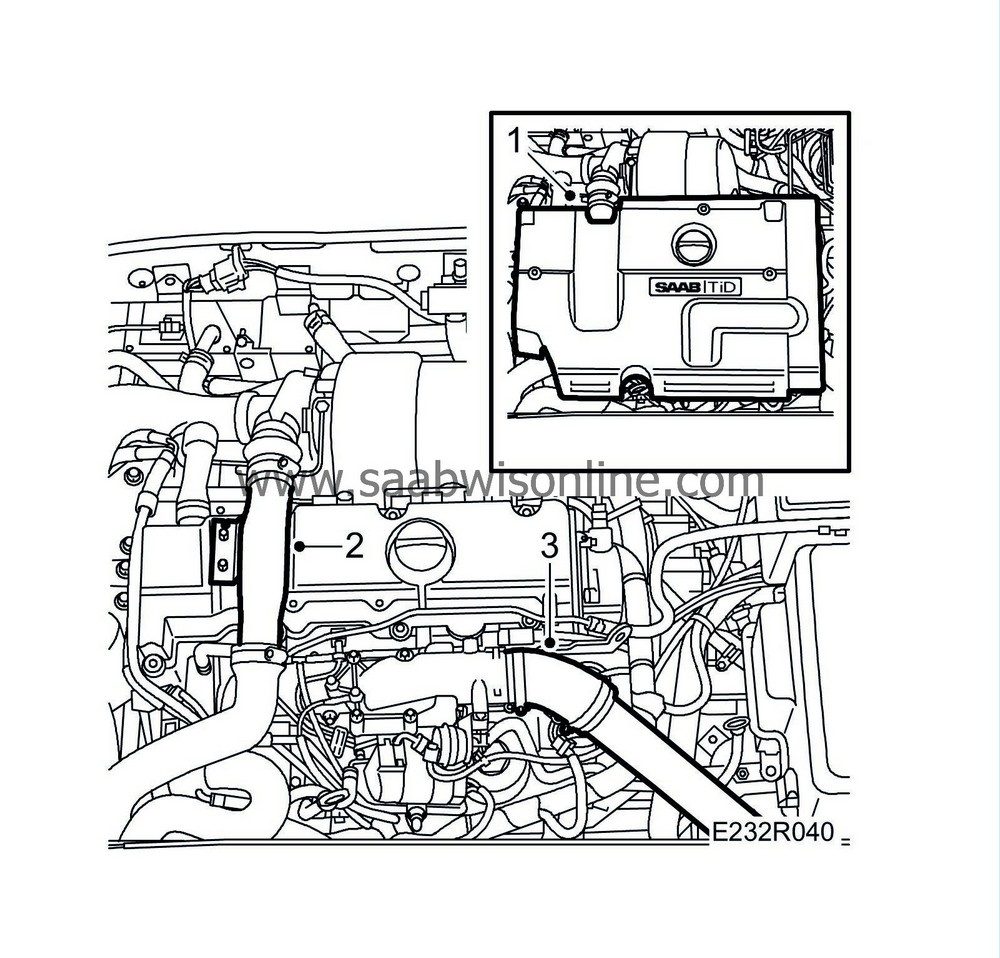
Remove the upper engine cover.
|
|
2.
|
Remove the charge air pipe connection from the turbocharger and the camshaft cover, move it aside and plug the pipe and turbocharger inlet.
|
|
3.
|
Remove the charge air hose from the throttle body, plug it and move it aside.
|
|
4.
|
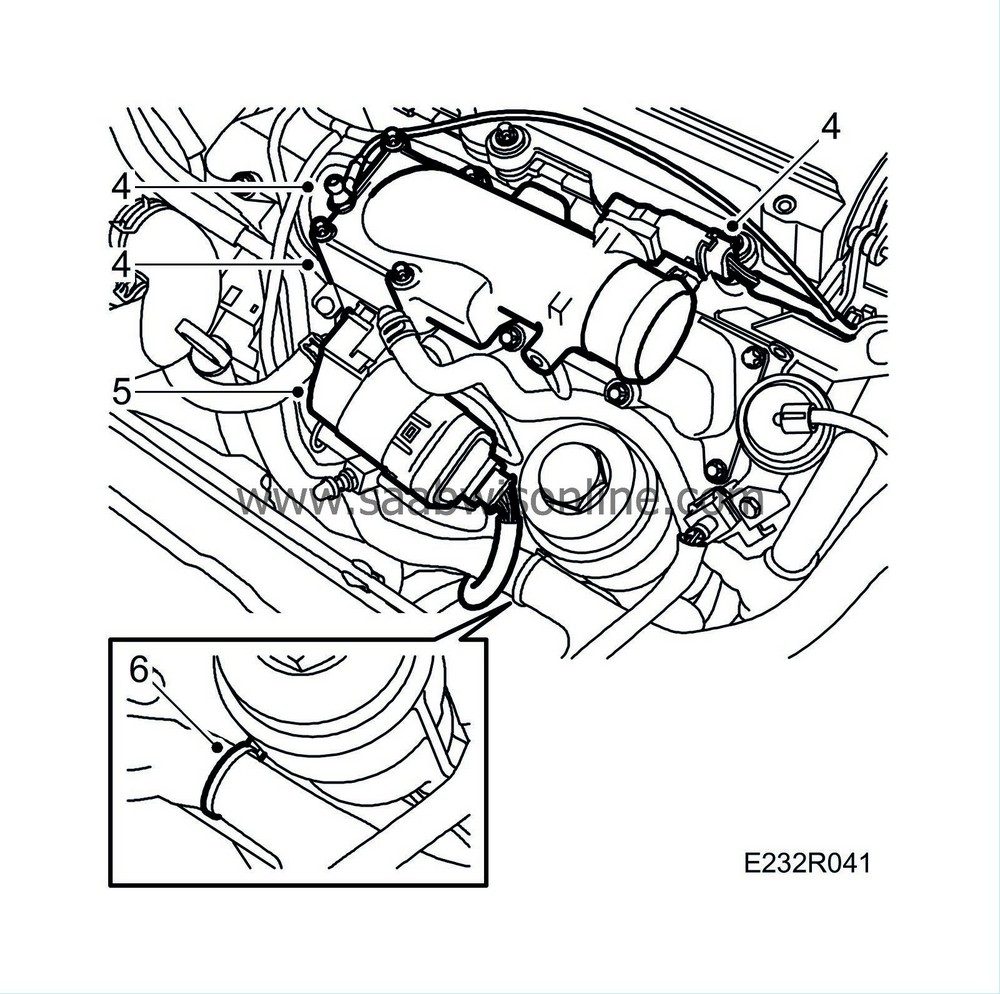
Remove the temperature/pressure sensor connector, ground cable and throttle body. Plug the intake manifold.
|
|
5.
|
Detach the EGR valve connector and EGR valve. Move the valve aside.
|
|
6.
|
Detach the engine harness from the oil filter housing.
|
|
7.
|
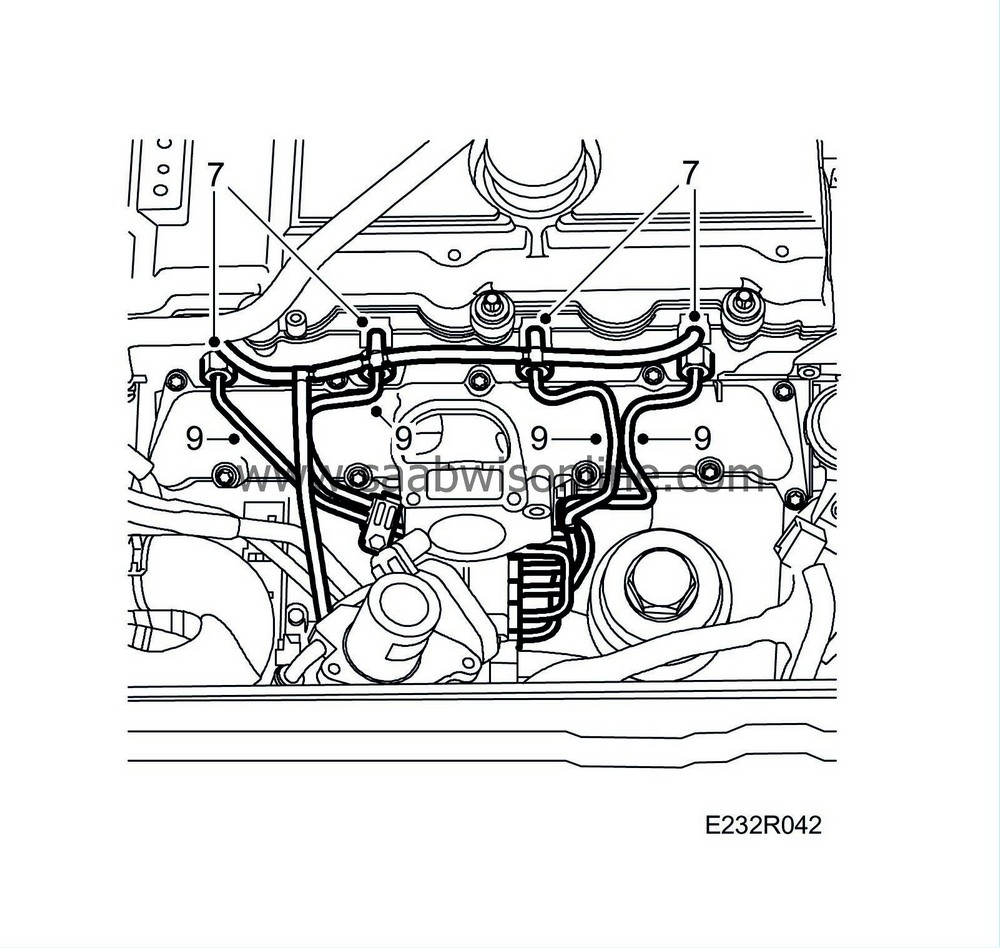
Detach the fuel return hoses from the fuel bridges.
|
|
8.
|
Note the position of the fuel rails and their clips and mark them.
|
|
9.
|
Remove the fuel rails with clips. Remove following the order of the cylinders.
|
|
10.
|
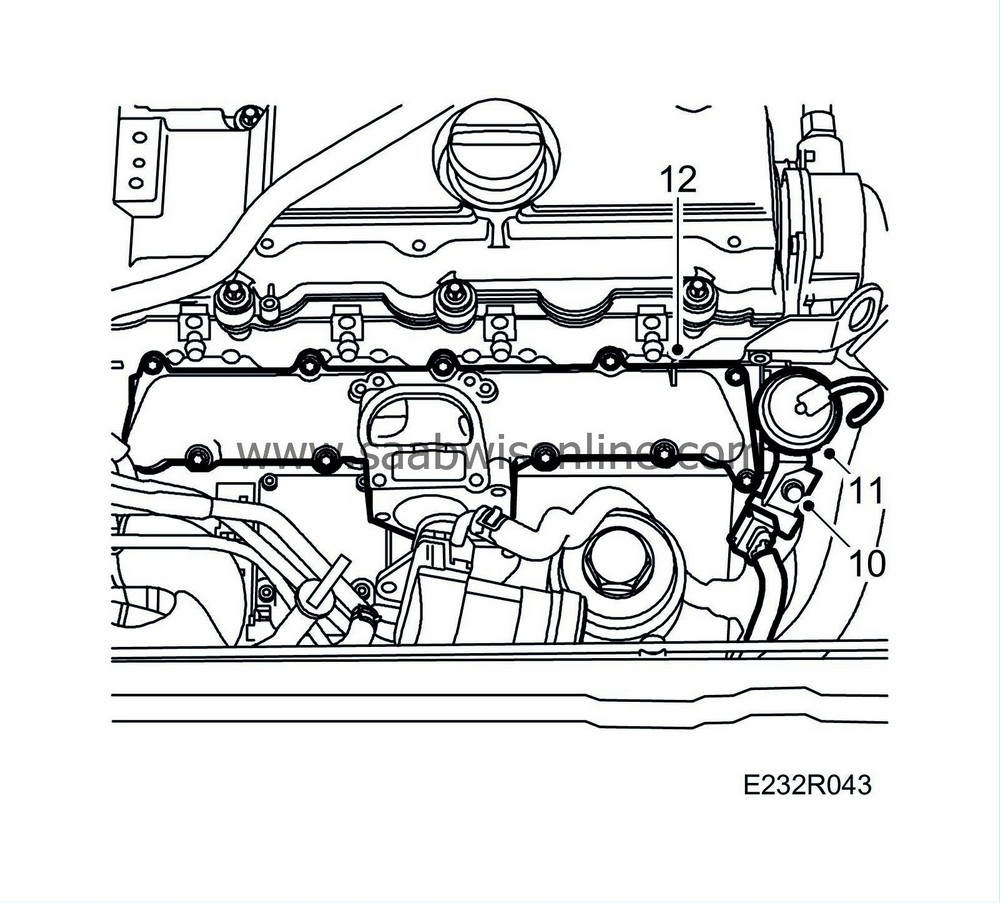
Loosen the bracket of the timing sensor connector.
|
|
11.
|
Loosen the vacuum unit bracket and turn the control arm until the groove corresponds with the recess.
|
|
12.
|
Remove the upper portion of the intake manifold.
|
|
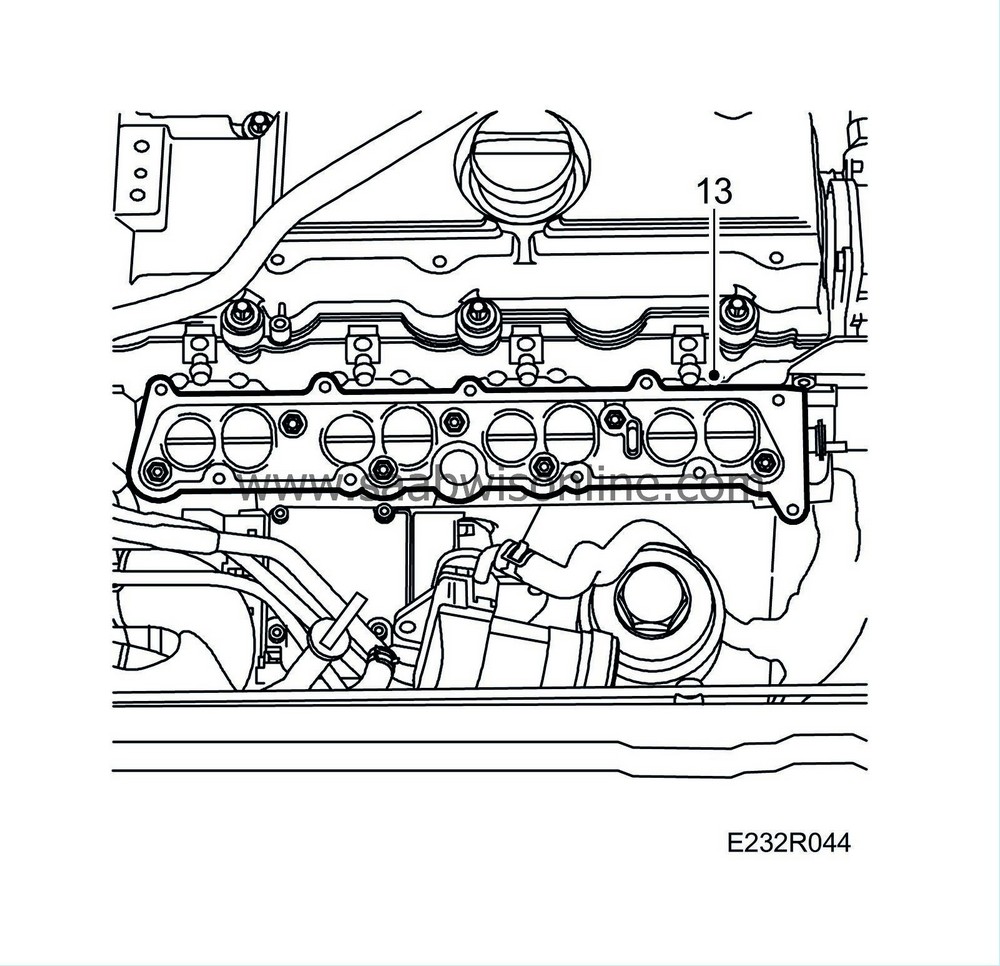
13.
|
Remove the lower portion of the intake manifold.
|
|
1.
|
Clean the sealing surfaces.
|
|
2.
|
Fit a new gasket and fit the lower portion of the intake manifold.
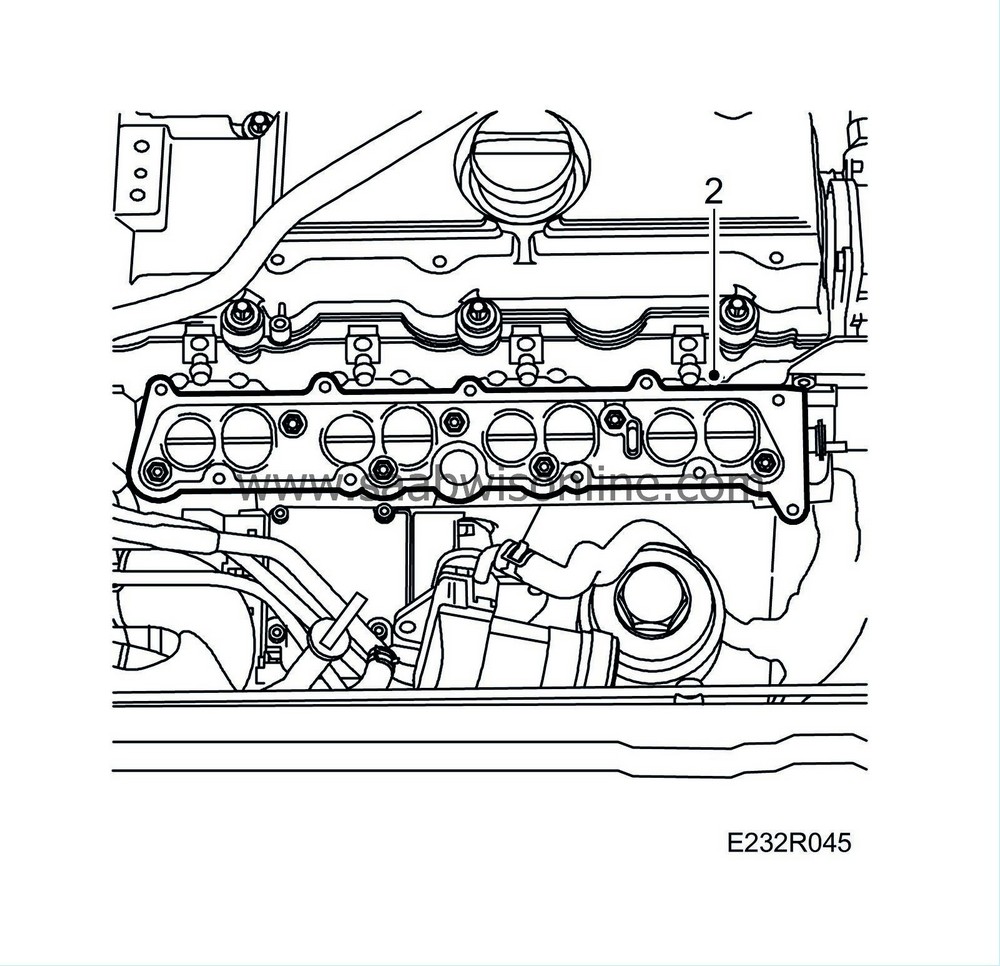
Tightening torque: 20 Nm (15 lbf ft)
|
|
3.
|
Fit a new gasket to the lower portion of the intake manifold and fit the upper portion of the intake manifold.
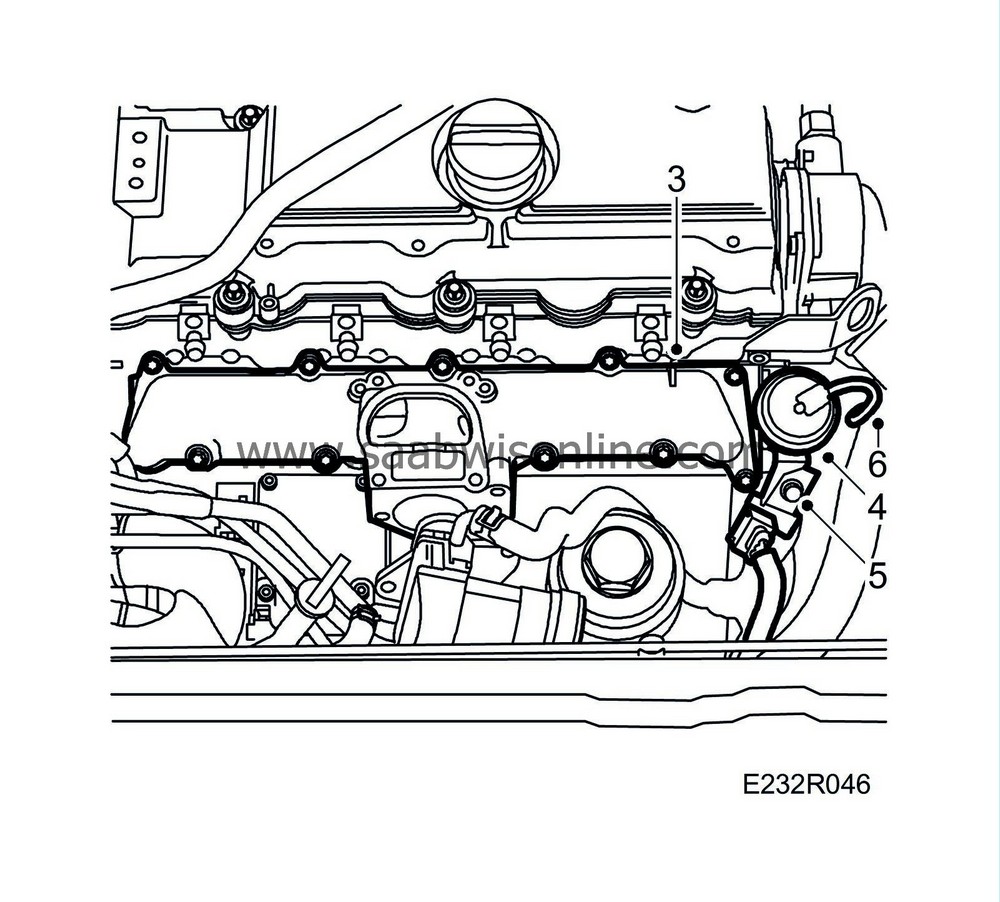
Tightening torque: 10 Nm (7 lbf ft)
|
|
4.
|
Lubricate the control arm pin, turn the control arm until the groove corresponds with the recess and fit the vacuum unit to the intake manifold.
Tightening torque: 8 Nm (6 lbf ft)
|
|
5.
|
Fit the bracket of the timing sensor connector.
|
|
6.
|
Attach the vacuum hose to the vacuum unit.
|
|
7.
|
Check the fuel rail connecting cones. Replace the rails as necessary. Fit the fuel lines with clips to the fuel bridges and fuel pump.
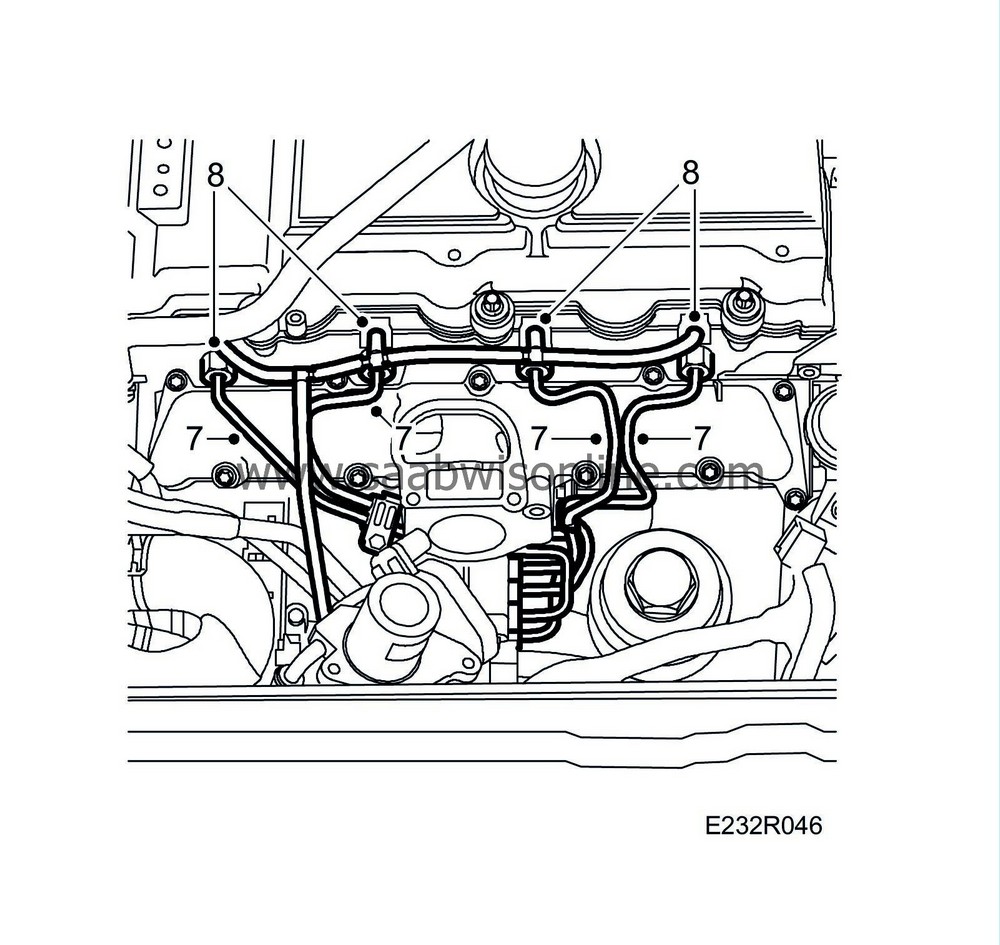
Tightening torque: 25 Nm (18 lbf ft)
|
|
8.
|
Fit new fuel return hoses. Check the condition of the T-pieces. Replace as necessary.
|
|
9.
|
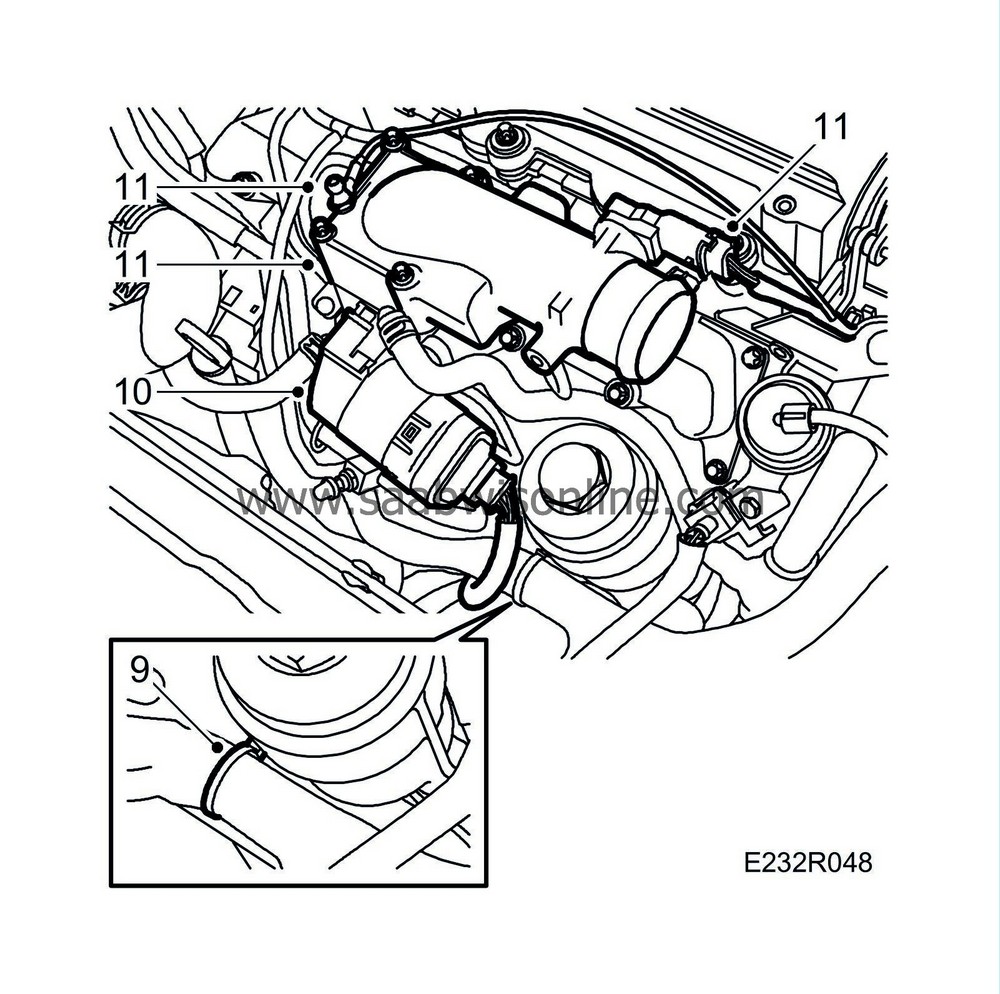
Fit the lower clip for the wiring harness to the oil filter housing.
|
|
10.
|
Fit the EGR valve with new O-ring and plug in its connector.
Tightening torque: 8 Nm (6 lbf ft)
|
|
11.
|
Fit the throttle body with new gasket.
Tightening torque: 10 Nm (7 lbf ft)
Plug in the temperature/pressure sensor connector and ground cable.
|
Important
|
|
To reduce the risk of hoses mounted on the delivery side of the turbocharger coming loose due to low friction at high air pressure, the hoses and connecting pieces must be cleaned thoroughly before fitting. Use a rag dampened with 93 160 907 Motip Dupli cleaning agent to wipe clean inside the ends of the hoses. Clean the connecting pieces as well. If hose clips are rusty or damaged, they must be replaced so the correct clamping force is maintained.
|
|
|
|
|
12.
|
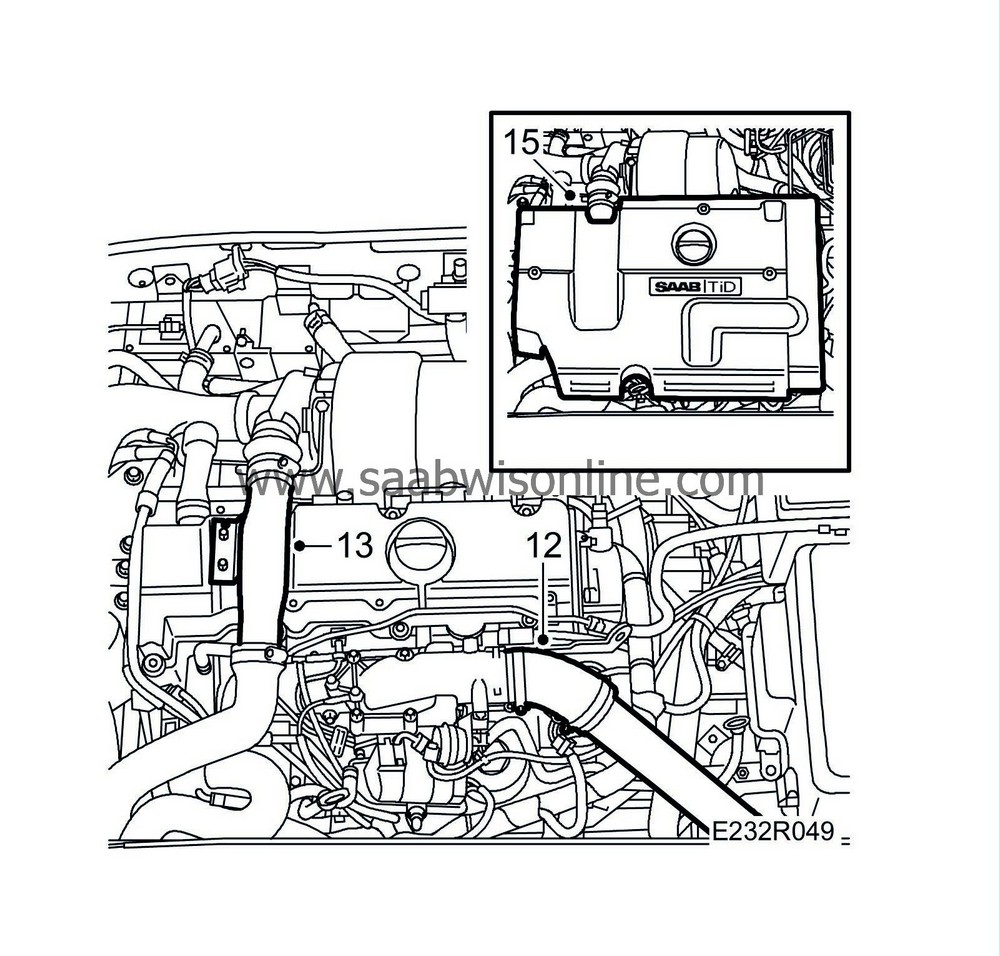
Fit the turbo pressure hose to the throttle body.
|
|
13.
|
Connect the turbocharger delivery pipe to the turbocharger and fit the charge air pipe to the camshaft cover.
|
|
15.
|
Replace the upper engine cover.
|


 Warning

