Receiver for remote control
| Receiver for remote control |
| 1. |
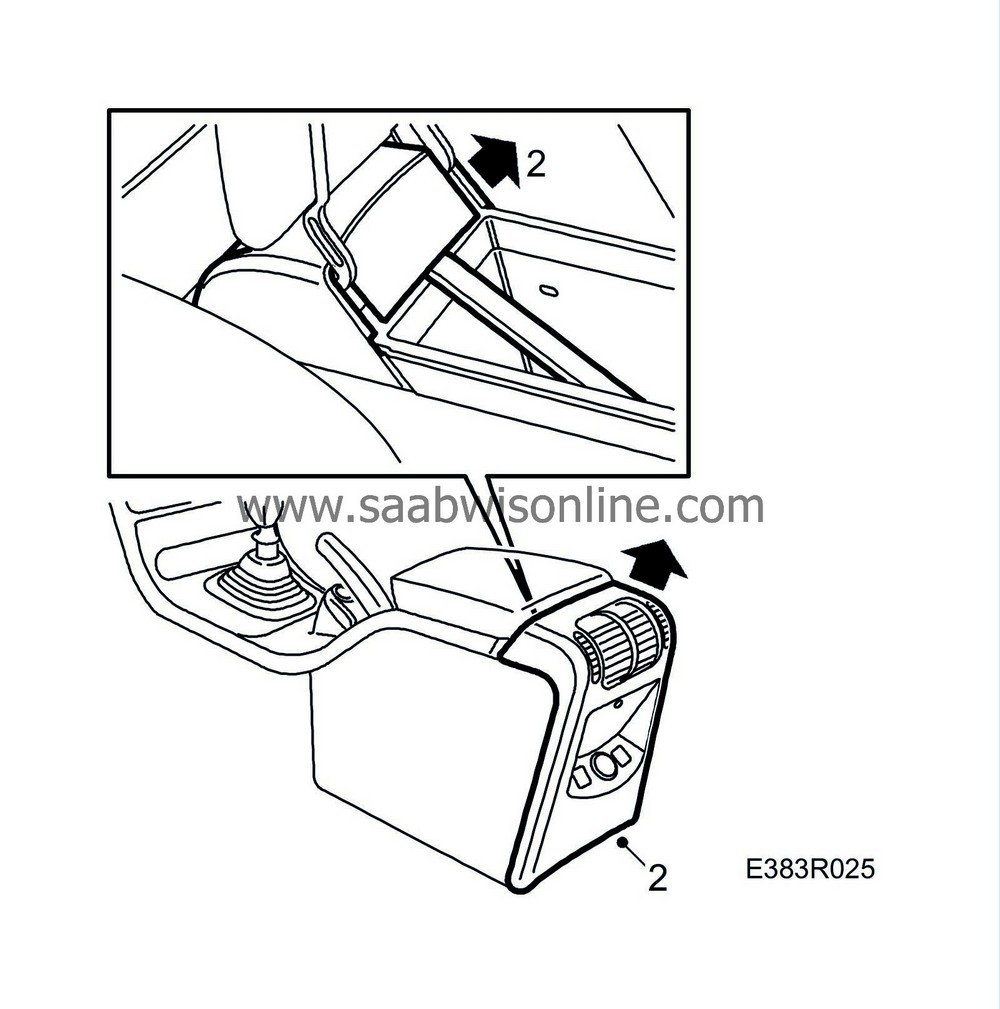
Raise the floor console's armrest.
|
|
| 2. |
Remove the rear portion of the floor console by carefully pulling on the front edge until its catch releases. Lift the rear portion of the floor console upward and fold it back.

|
|
| 3. |
Detach the connector from the rear portion of the floor console.
|
|
| 4. |
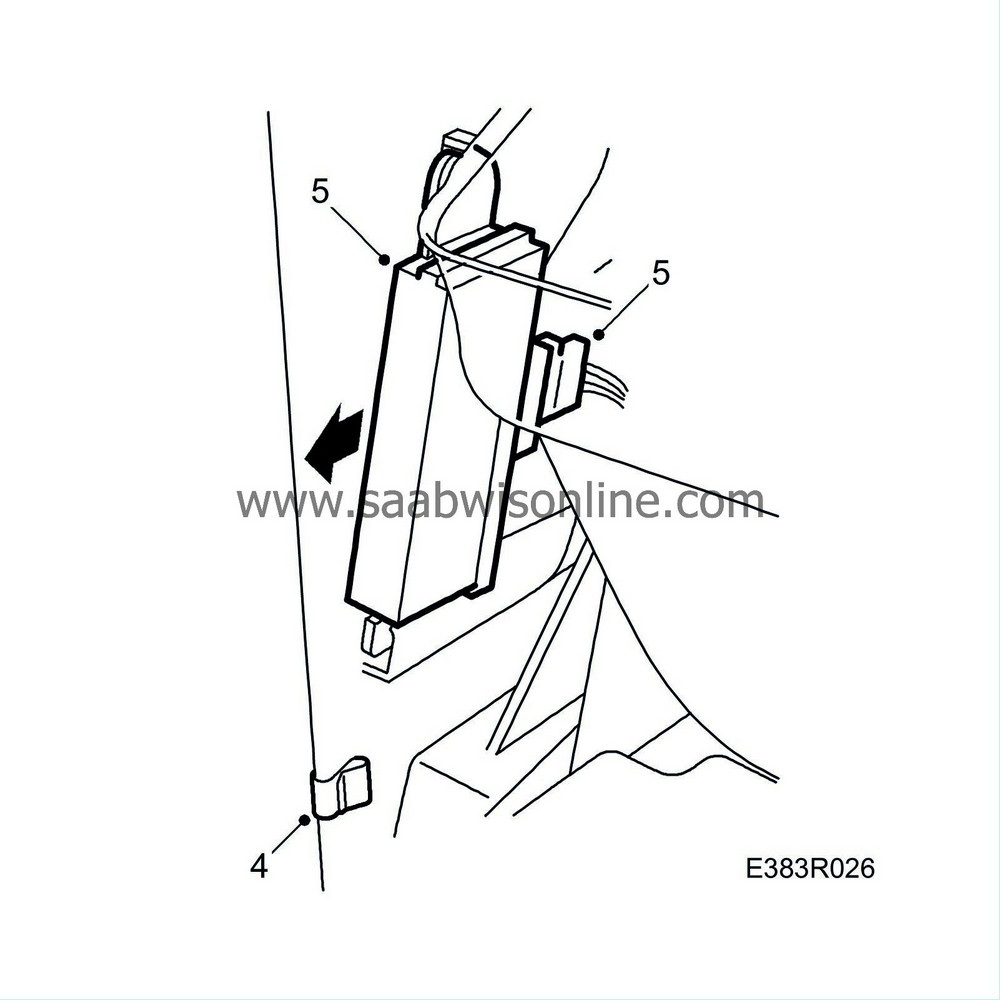
Remove the clip, if fitted, from the floor console's side wall.
|
|
| 5. |
Disconnect the receiver unit from the floor console's side wall and detach the connector in the unit.
|
|
| To fit |

| 1. |
Attach the connector to the receiver unit. Turn the unit so that the connector points to the back of the car.
|
|
| 2. |
Fit the receiver unit in the cavity in the floor console's side wall.
|
|
| 3. |
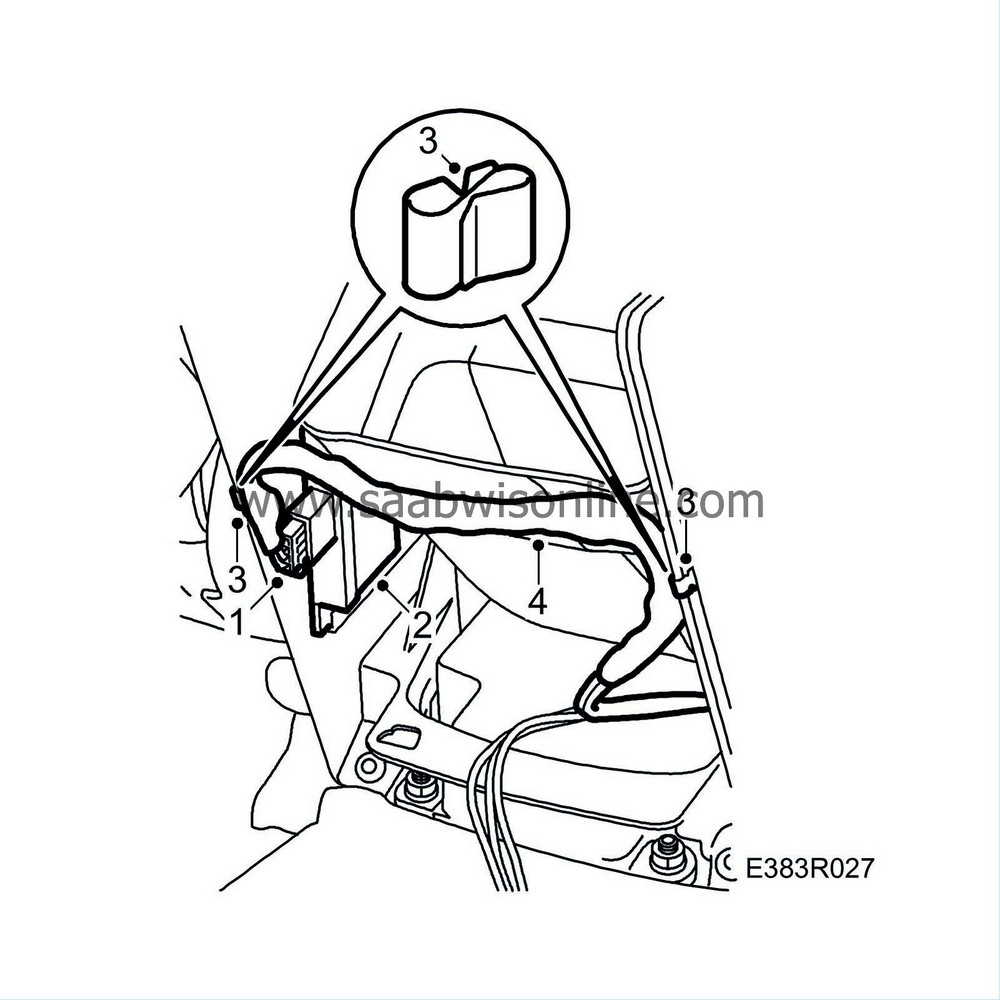
Fit a clip on the LH and RH side wall of the floor console. If there had been a clip mounted on the LH side wall, fit the new clip 35 mm above the previous location.
|
|
| 4. |
Place the wiring harness of the receiver unit in the clips and adjust their placement so that the wiring harness is run just under the lower edge of the air duct opening.
|
|||||||
| 5. |
Attach the connector to the rear portion of the floor console.

|
|
| 6. |
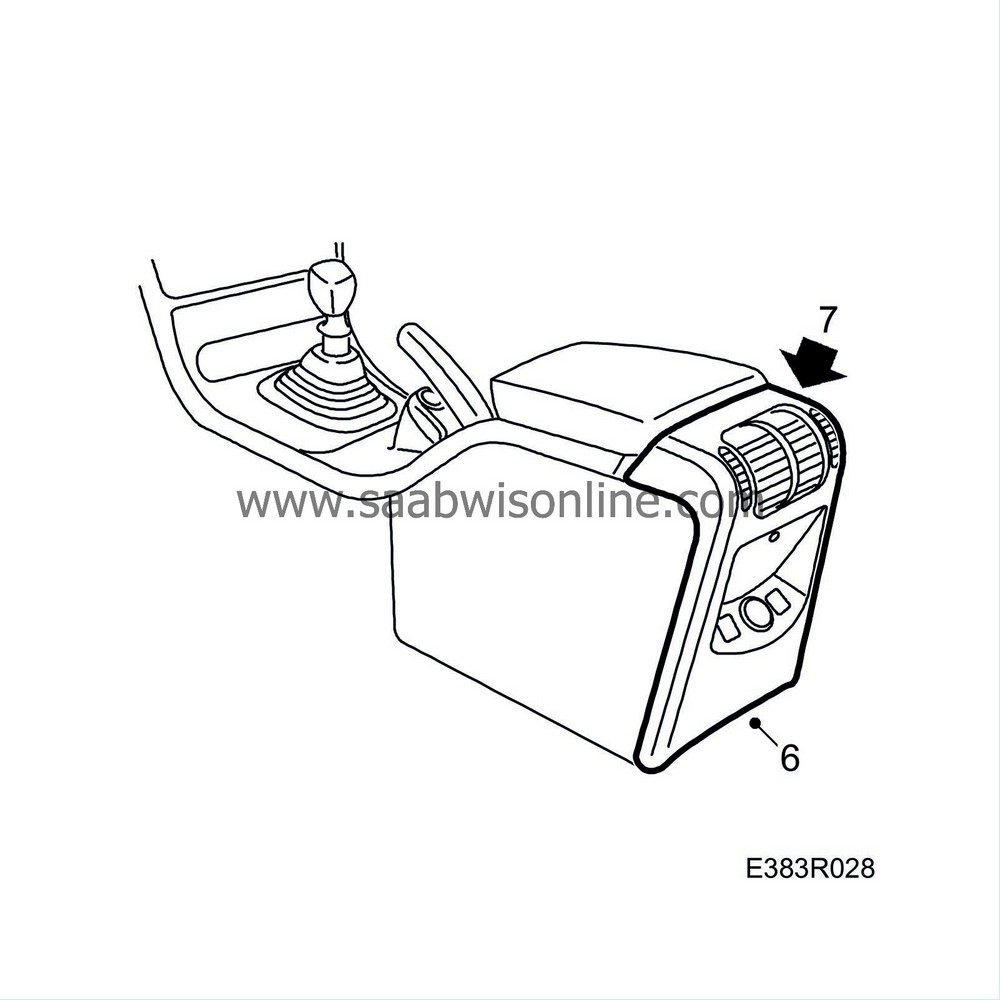
Fit the rear portion of the floor console by fitting the lower journals into the holes and carefully pressing down the front edge so that the catch fastens.
|
|
| 7. |
Lower the floor console's armrest.
|
|
| 8. |
Check the function of the remote control.
|
|


