Fuel filter
| Fuel filter |
|
||||||||||||||||||||||
| To remove |
| Important | ||
|
Maintain a very high level of cleanliness when working with the fuel system. Even very small particles can cause malfunctioning of the system. Store all components in such a way that they cannot be contaminated. |
||
| 1. |
Raise the car.
|
|
| 2. |
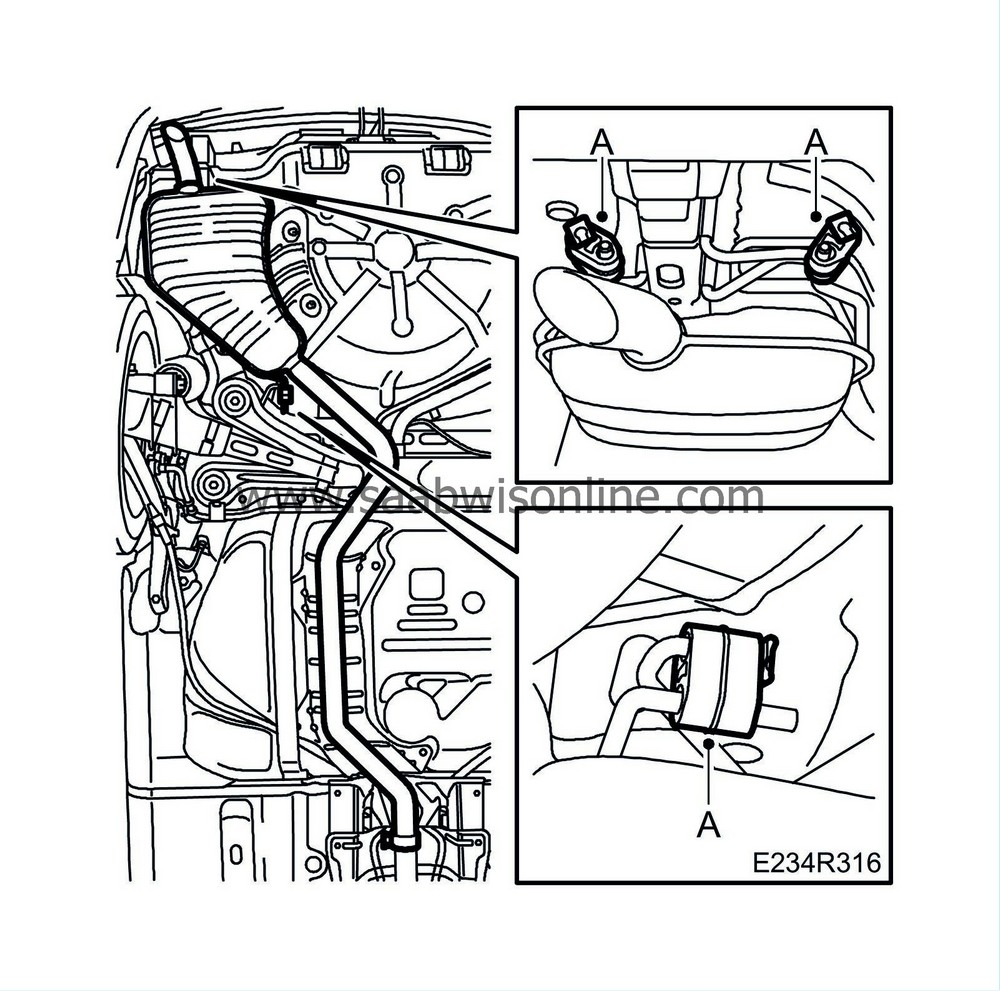
Secure the exhaust system with
83 95 212 Strap
, remove the rubber mountings of the rear silencer (A) and lower the exhaust system approx. 50 mm.
|
|
| 3. |
Relieve the load on the fuel tank using a column jack.
|
|
| 4. |
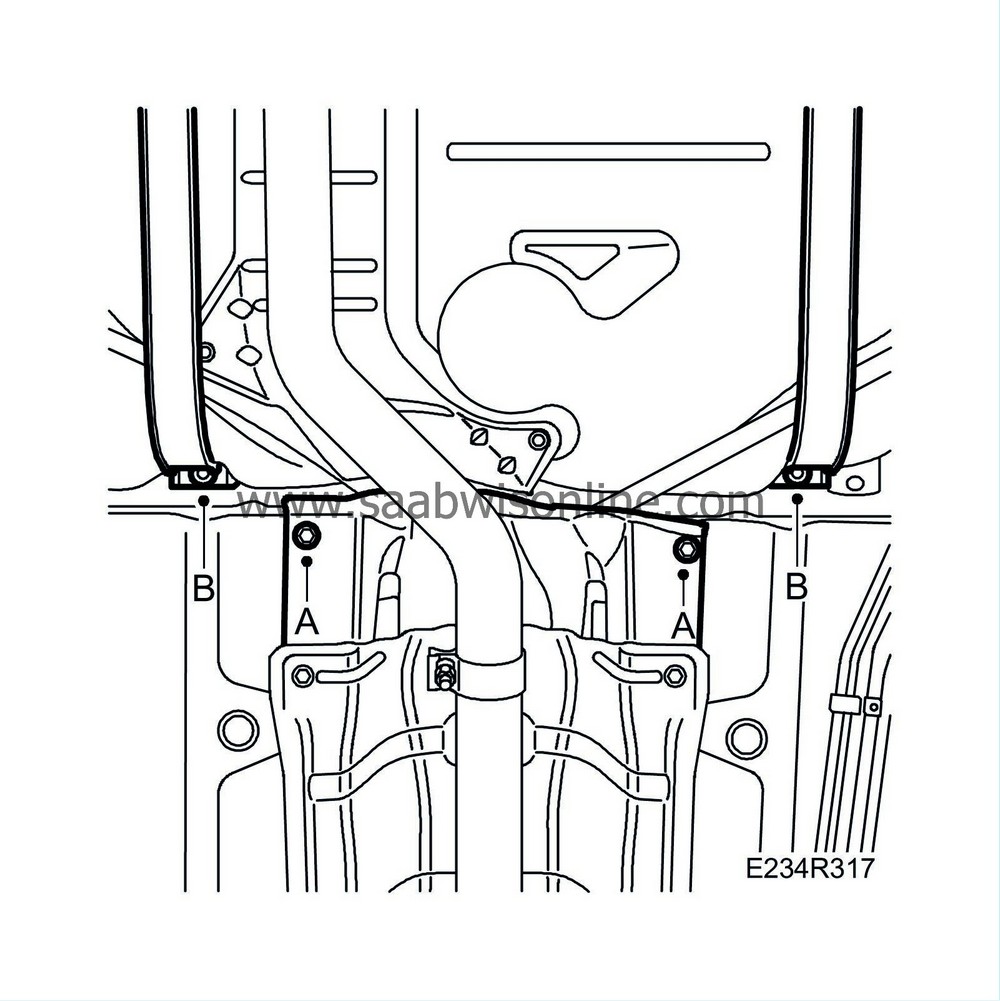
Remove the rear nuts of the heat shield (A).
|
|
| 5. |
Remove the front bolts of the tank strap (B) and lower the front edge of the fuel tank until tool EN-49036 can be connected to the fuel filter's adapter housing.
|
|
| 6. |
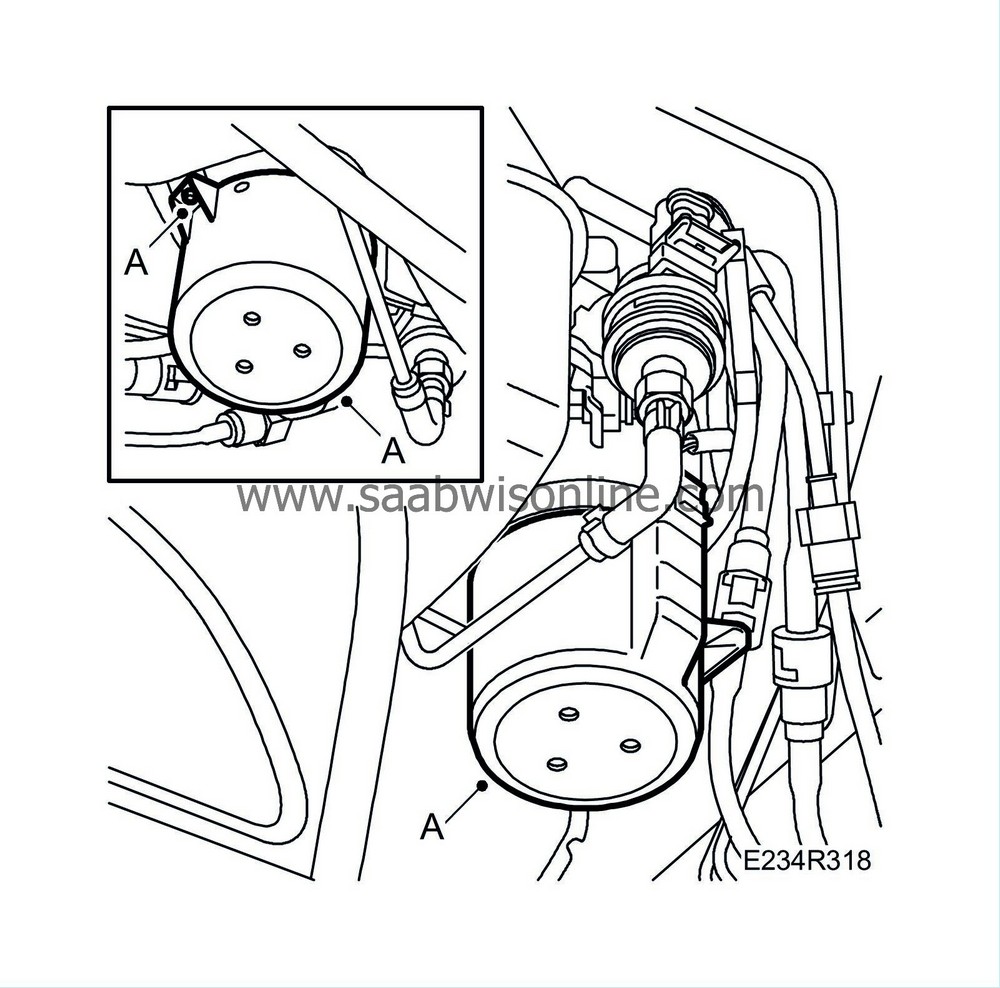
Remove the protective cover (A).
|
|
| 7. |
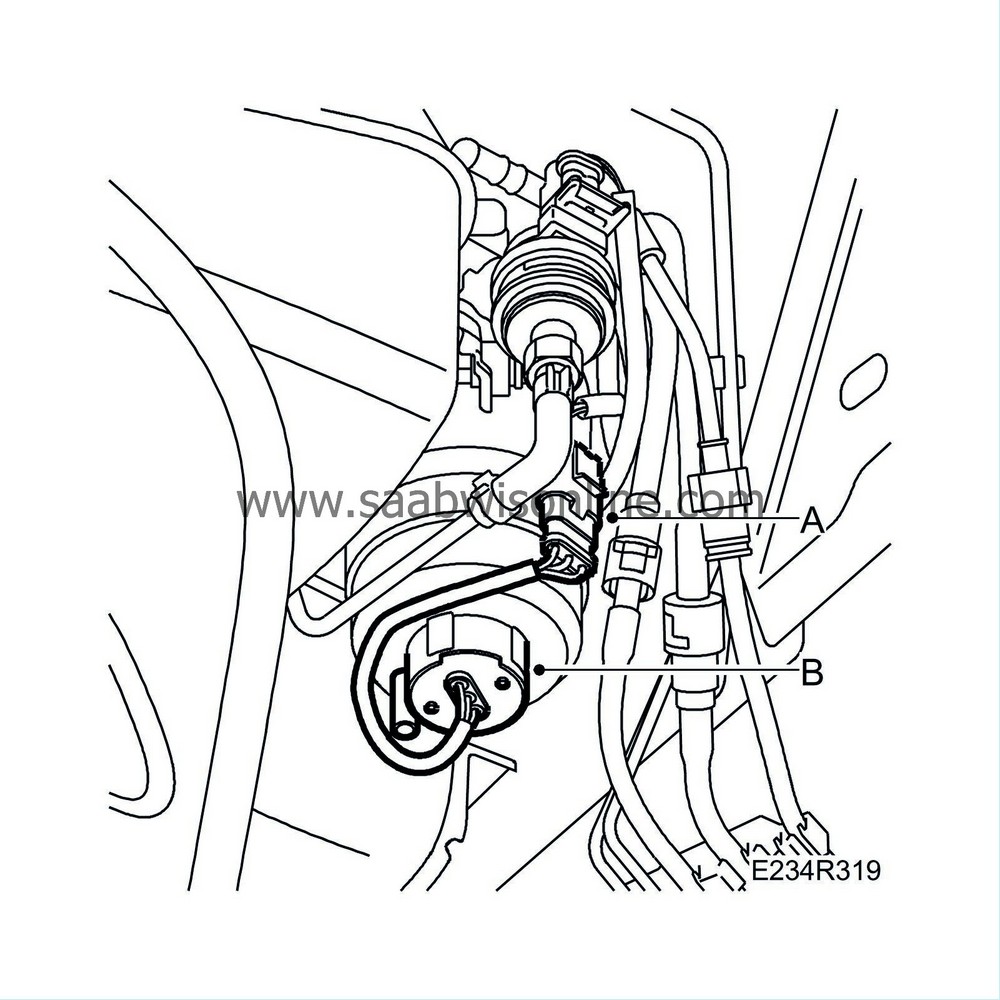
Unplug the water level sensor connector (under the filter) (A). Remove the water level sensor (B) by turning anticlockwise.
|
|
| 8. |
Catch any spilled fuel and clean the area at the filter gasket with compressed air.
|
|
| 9. |
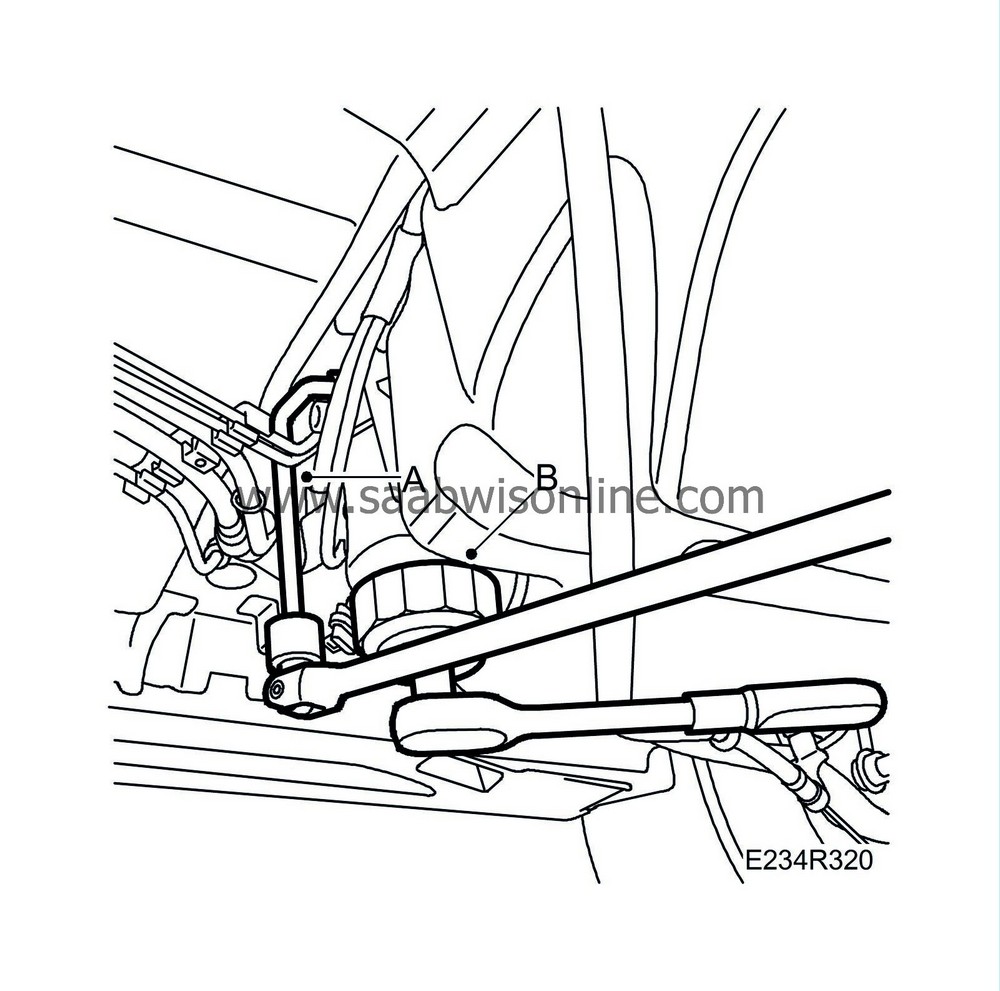
Remove the filter using
32 025 056 Fuel filter wrench
(A). Hold the fuel filter adapter housing with tool
EN-49036 Holding tool
(B). Catch any fuel spill.
|
|
| To fit |
| 1. |
Moisten the gasket with diesel fuel.
|
|
| 2. |
Fit the fuel filter. Use
32 025 056 Fuel filter wrench
(A). Hold the fuel filter adapter housing with tool
EN-49036 Holding tool
(B).
Tightening torque: 20 Nm (15 lbf ft) 
|
|
| 3. |
Fit the water level sensor (B) and plug in the connector (A).

|
|
| 4. |
Fit the protective cover (A).

|
|
| 5. |
Carefully raise the tank, ensuring that its wiring harness does not become trapped.
|
|
| 6. |
Position the handbrake cables in the groove in the tank, fit the tank strap (B) and lower the column jack.
Tightening torque: 25 Nm (18 lbf ft) 
|
|
| 7. |
Fit the rear nuts of the heat shield (A).

|
|
| 8. |
Raise the exhaust system and fit the rubber mountings.
|
|
| 9. |
Lower the car to the floor.
|
|
| 10. |
Connect an exhaust hose and start the engine for a functionality check.
|
|

 Warning

