Ignition discharge module
| Ignition discharge module |
| Important | ||
|
Before replacing the ignition discharge module, carry out Extended ignition discharge module diagnose for Trionic 7 . |
||
| To remove |

| 1. |
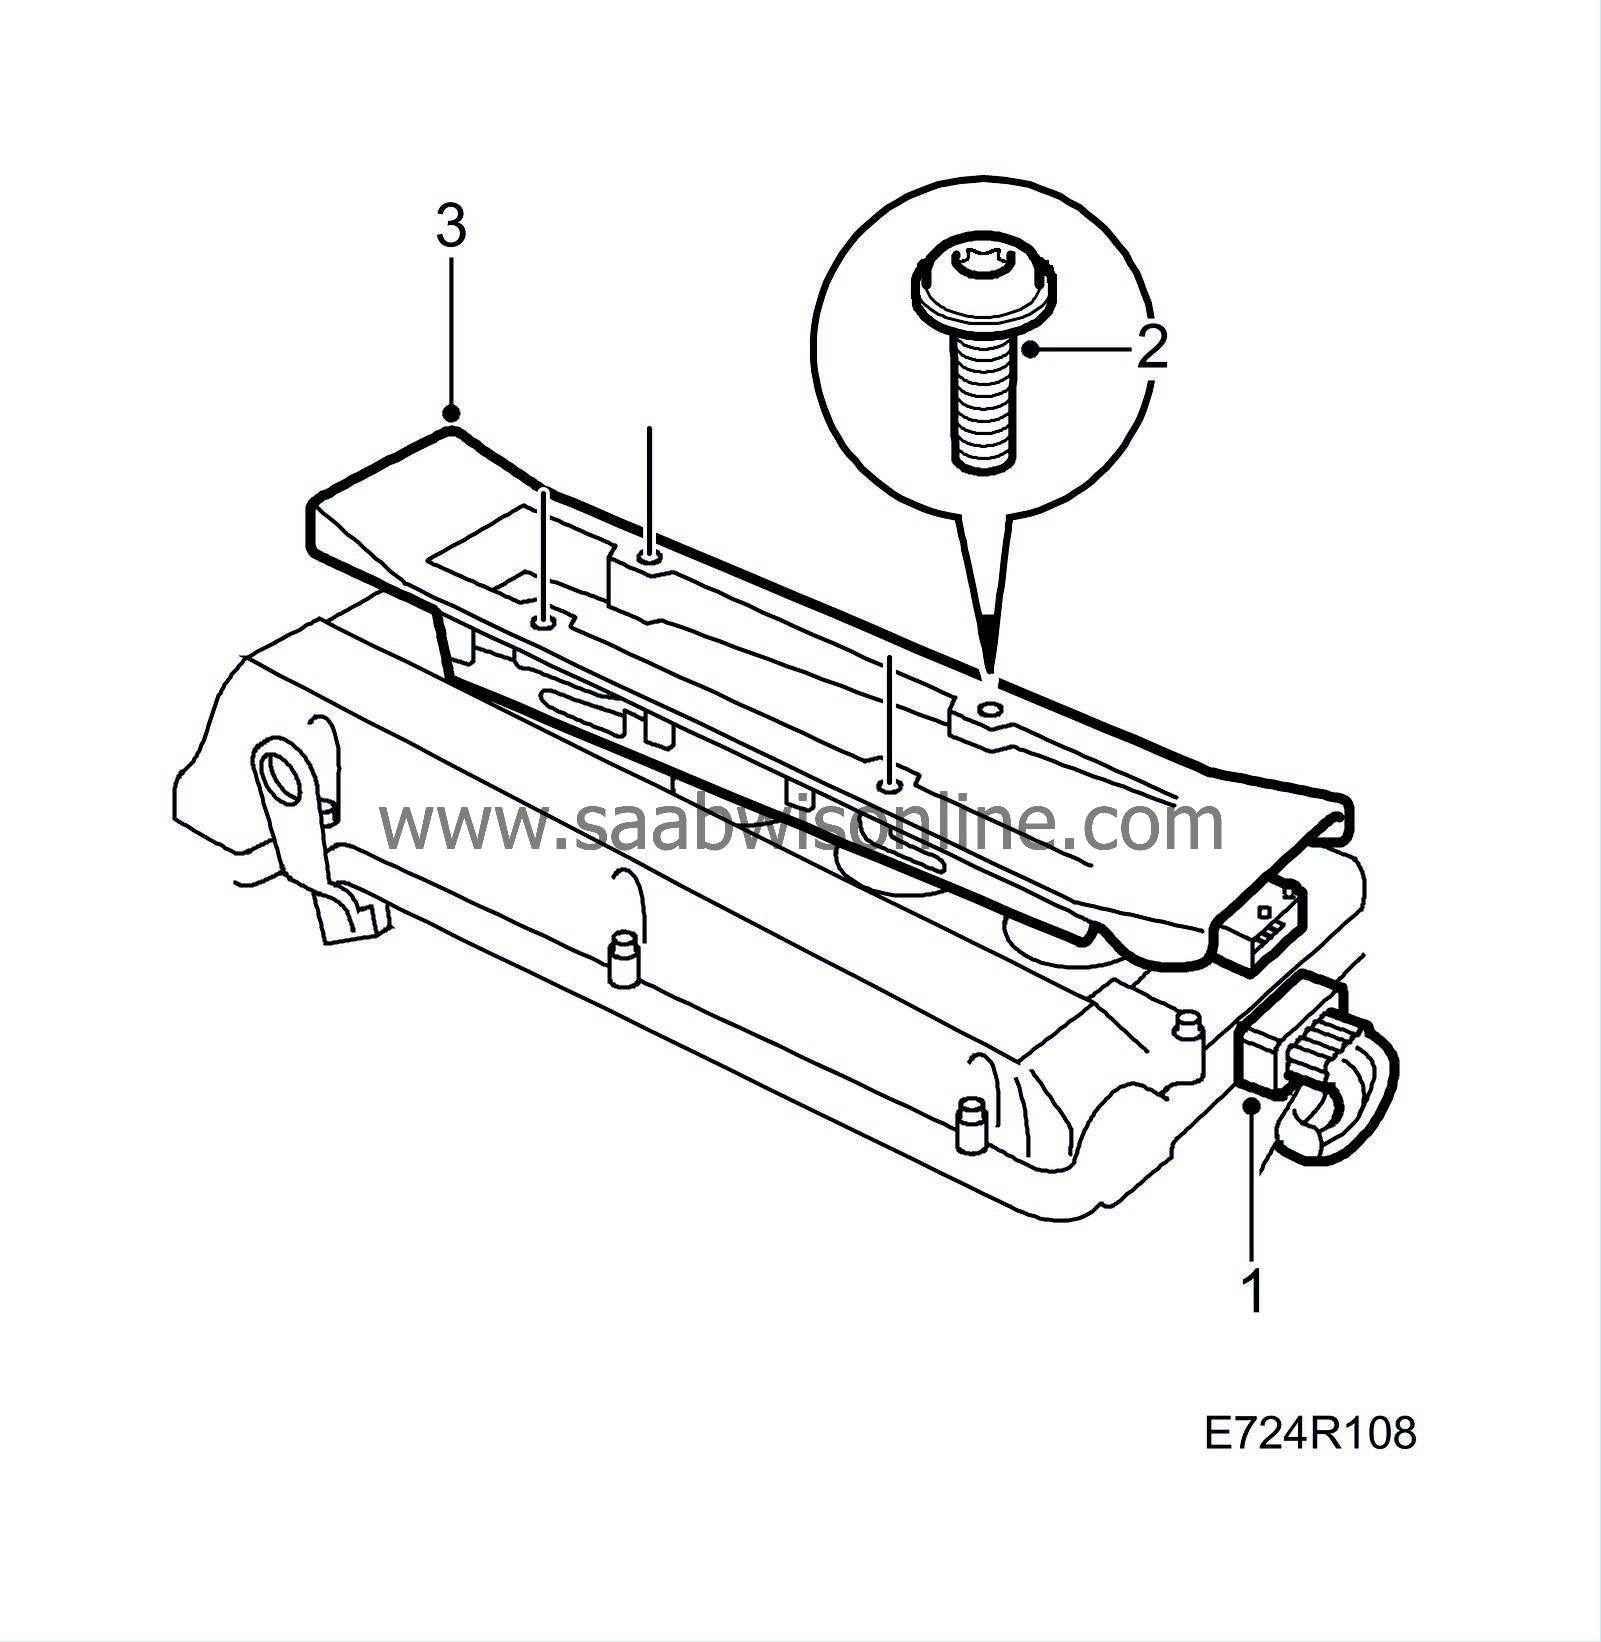
Unplug the 10-pin ignition discharge module connector.
|
|
| 2. |
Remove the 4 screws.
|
|
| 3. |
Lift up the module.
|
|
| To fit |

| 1. |
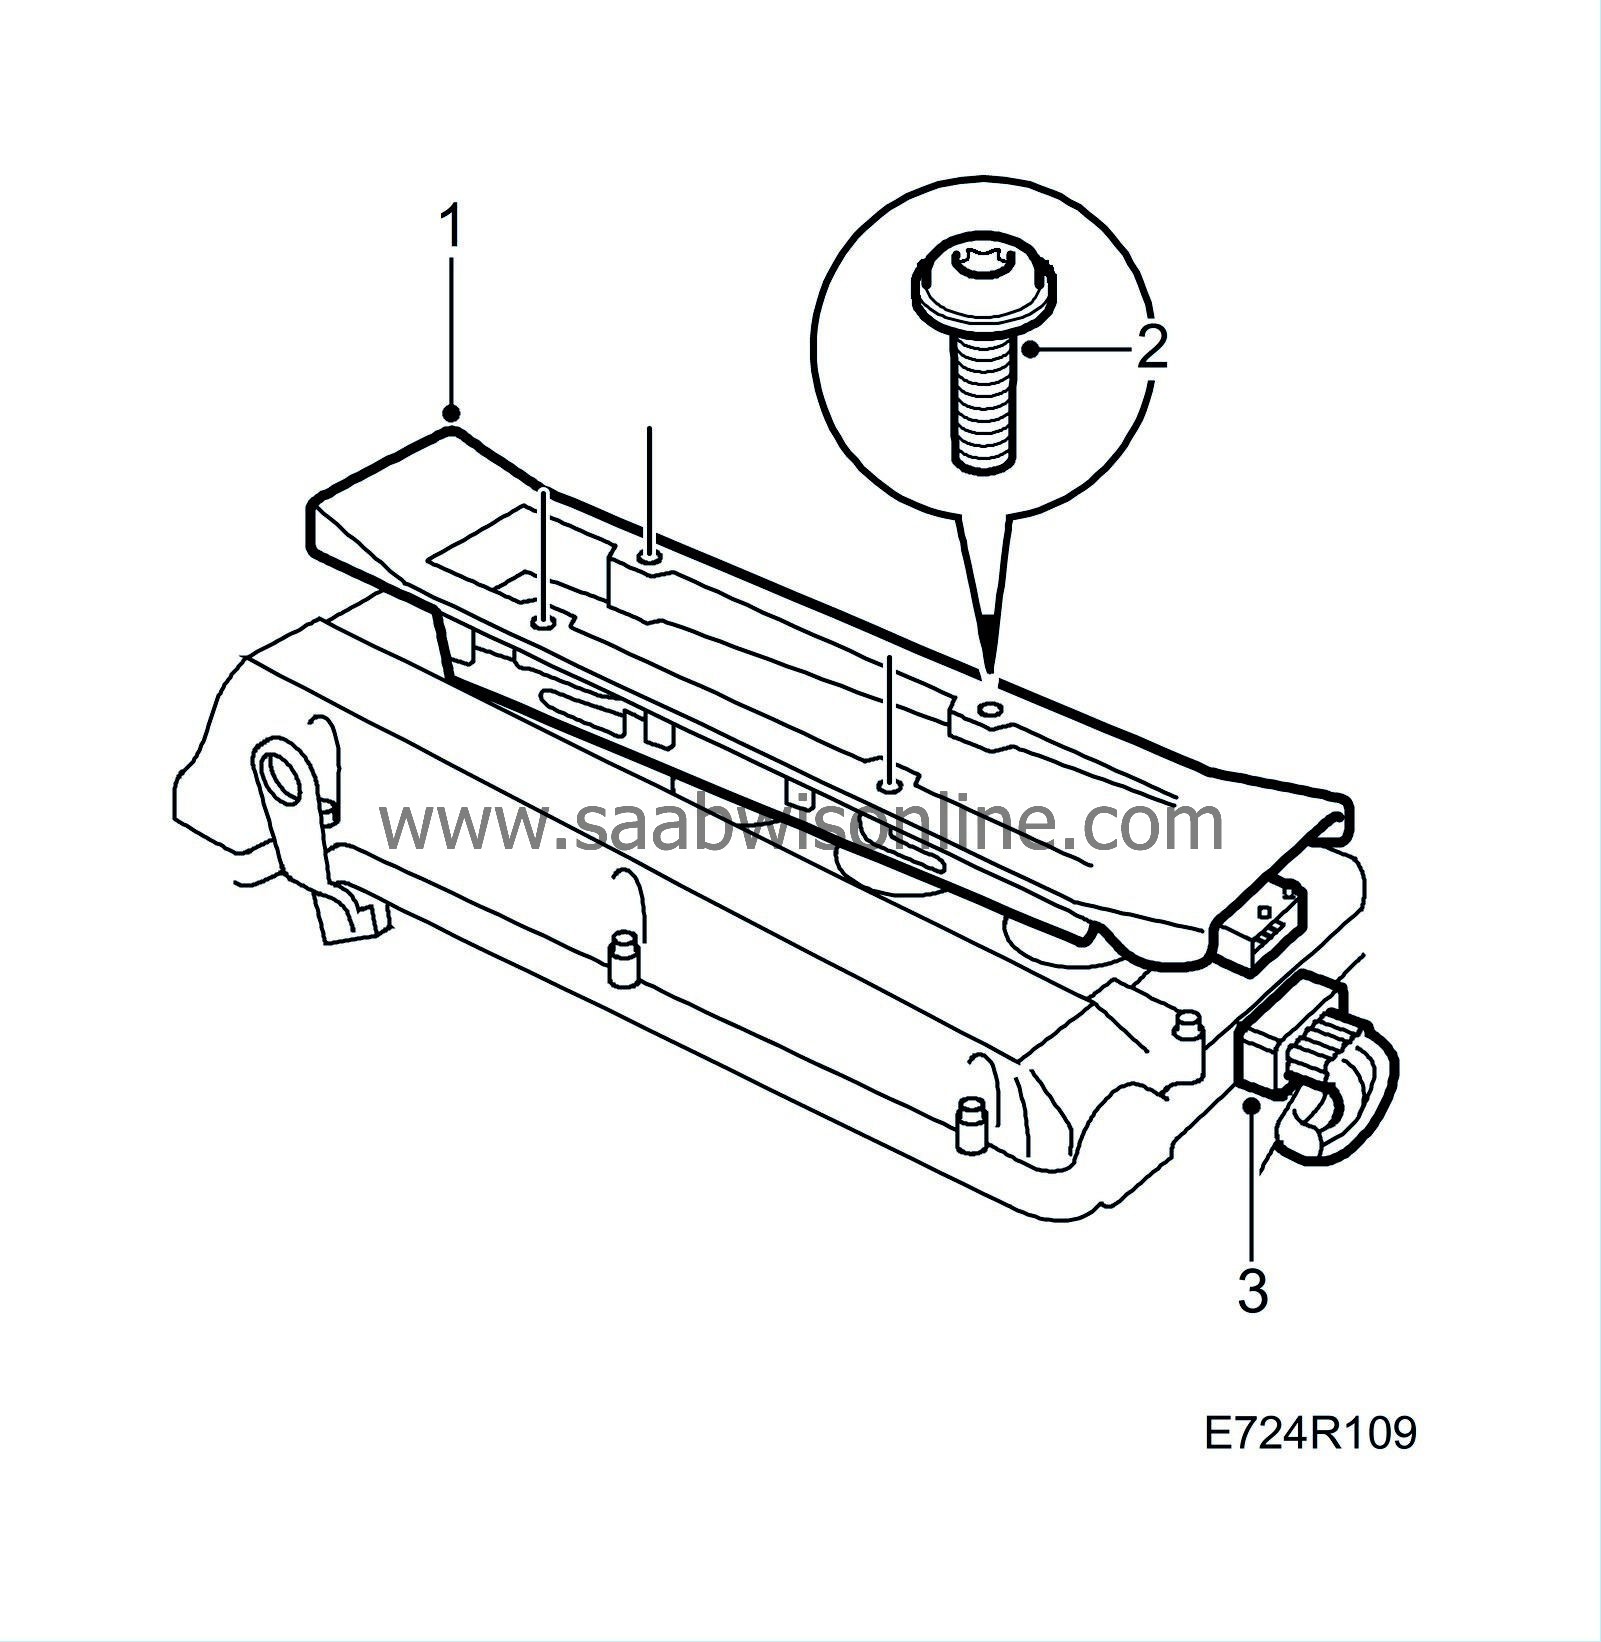
Apply Krytox (part no. 30 19 312) to the rubber seals and fit the ignition discharge module.
|
|
| 2. |
Fit the 4 screws.
Tightening torque 11 Nm (8.1 lbf ft) |
|
| 3. |
Spray the 10-pin ignition discharge module connector with Kontakt 61 (part no. 30 04 520). Plug in the connector.
|
|


