(371-2624 utg. 2) No existing connection for SPA when retrofitting as an accessory
Symptom: No existing connection for SPA when retrofitting as an accessory.
|
TECHNICAL SERVICE BULLETIN
|
|
Bulletin Nbr:
|
371-2624 utg. 2
|
|
Date:
...........
|
November 2006
|
|
Market:
|
all
|
|
|
No existing connection for SPA when retrofitting as an accessory
|
Saab 9-5 M06 without SPA, where SPA shall be retrofitted as an accessory.
Due to changes in the wiring harness that is fitted in cars without parking assistance fitted as original equipment, there is no connection for retrofitting parking assistance.
From and including M07 the wiring harness will be included in the accessory kit for SPA and accordingly no supplementary wiring harness will need to be produced. The wiring harness will also suit the M06.
In the case of customer complaint, the following procedure must be carried out.
Symptom description
No existing connection for SPA when retrofitting as an accessory.
1 x 0.75 mm
2
red cable at a length of 4700 mm
1 x 0.50 mm
2
white cable at a length of 4700 mm
1 x 0.50 mm
2
green cable at a length of 4700 mm
1 x 0.50 mm
2
violet cable at a length of 4700 mm
(if there is no provision for towbar)
95 60 012 Cable connection (x 4)
12 789 794 Cable terminal 0.5-1.0 mm (x 3)
12 789 796 Cable terminal 1.0-1.5 mm (x 1)
79 71 872 Cable tie
4D:
(x 10)
5D:
(x 13)
Thread locking adhesive, Loctite 242
|
1.
|
4D:
Carry out steps 1-39 in the installation instructions 32 025 688 for accessory kit 32 025 686.
5D:
Carry out steps 1-38 in the installation instructions 32 025 690 for accessory kit 32 025 687.
|
|
2.
|
Prepare the wiring harness:
|
|
|
•
|
Tape the cables together (x 3) with protective tape starting 50 mm from one end.
If there is no provision for towbar:
4 cables
|
|
|
•
|
Fit the cable terminals in one end, use crimp tool 86 12 020.
|
|
3.
|
Disconnect the battery's negative cable.
|
|
4.
|
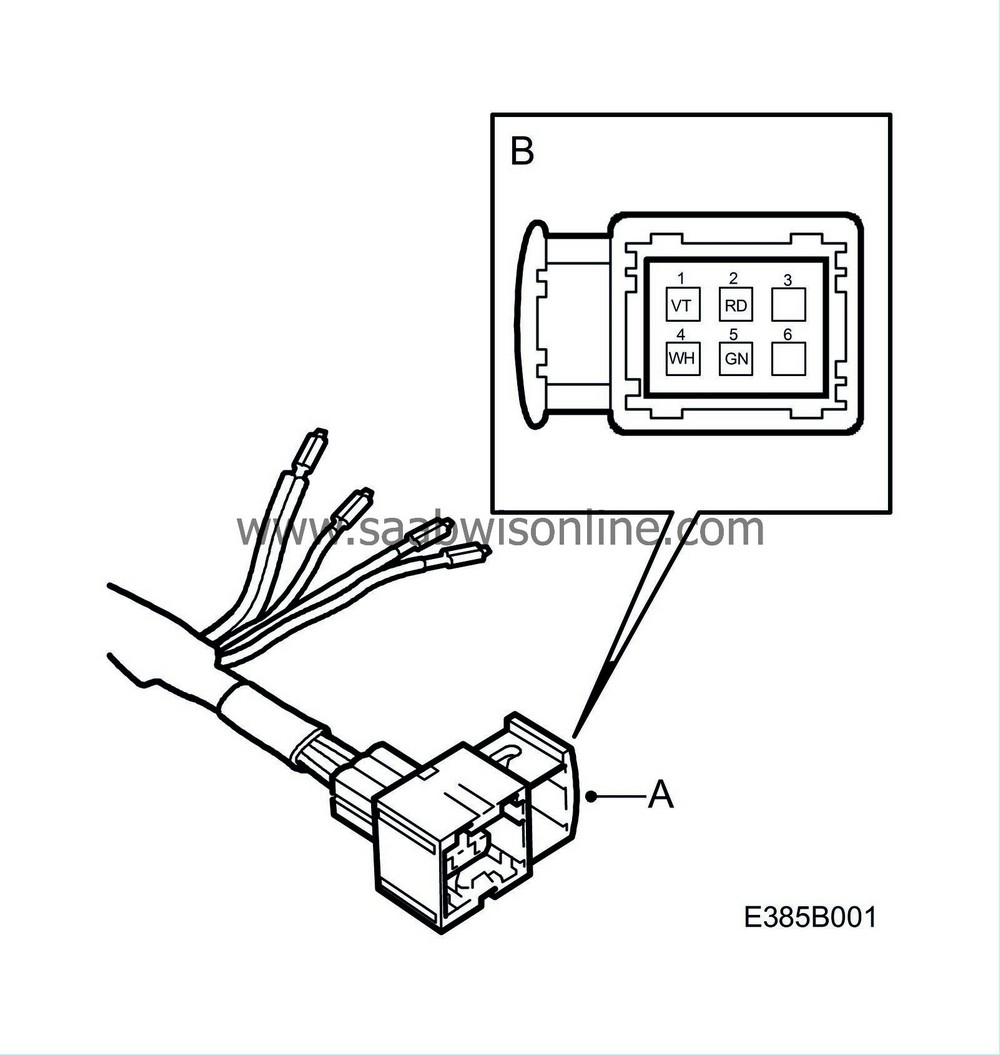
Connect the supplementary wiring harness to the connector (630A) (A) that runs to the SPA control module:
|
|
|
•
|
Undo approx. 50 mm of the tape on the wiring harness to the connector.
|
|
|
•
|
Remove the cable terminals from pos 2, 5 and 4 (pos 4 is paired).
If there is no provision for towbar:
Remove the cable terminal from pos 1.
|
|
|
•
|
Connect (B) the supplementary wiring harness to the connector (630B).
- Red (RD) - pos 2
- White (WH) - pos 4
- Green (GN) - pos 5
-
If there is no provision for towbar:
Violet (VT) - pos 1
|
|
|
•
|
Tape the wiring together at the connector and hide the loose cables under the tape.
|
|
5.
|
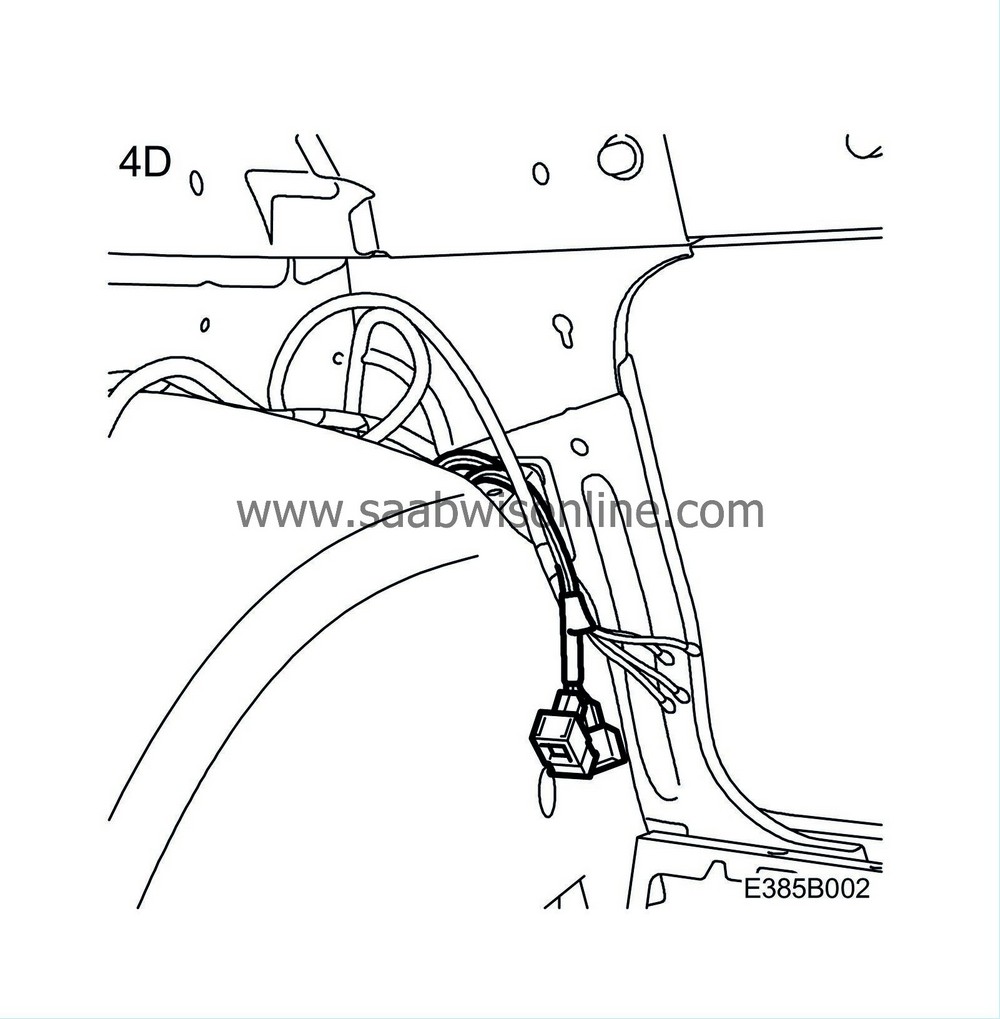
4D:
Route the wiring forward in the car at the seat belt. Allow it to hang loose.
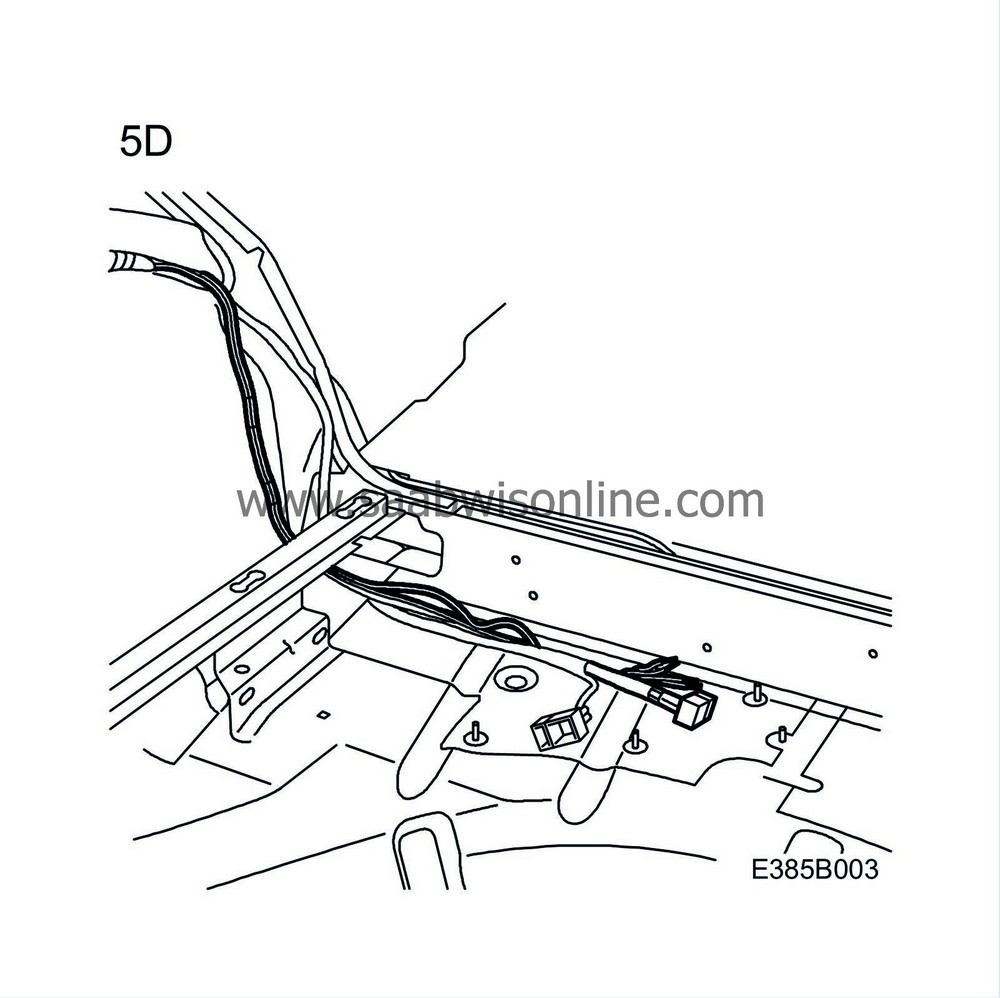
5D:
Route the wiring forward in the car along the SPA wiring up on the wheel housing and then forwards into the car at the seat belt. Allow it to hang loose.
|
|
6.
|
Fold back the left-hand section of the rear seat backrest and the left-hand section of the rear seat's seat cushion.
|
|
7.
|
Remove the left-hand front seat in accordance with WIS - Body - Seats - Adjustment/Replacement.
|
|
8.
|
Remove the front and rear side scuff plates on the left-hand side in accordance with WIS - Body - Interior equipment - Adjustment/Replacement.
|
|
9.
|
Detach the carpet at the B-pillar and remove the carpet support.
|
|
10.
|
Fold up the left-hand section of the rear seat's seat cushion.
|
|
11.
|
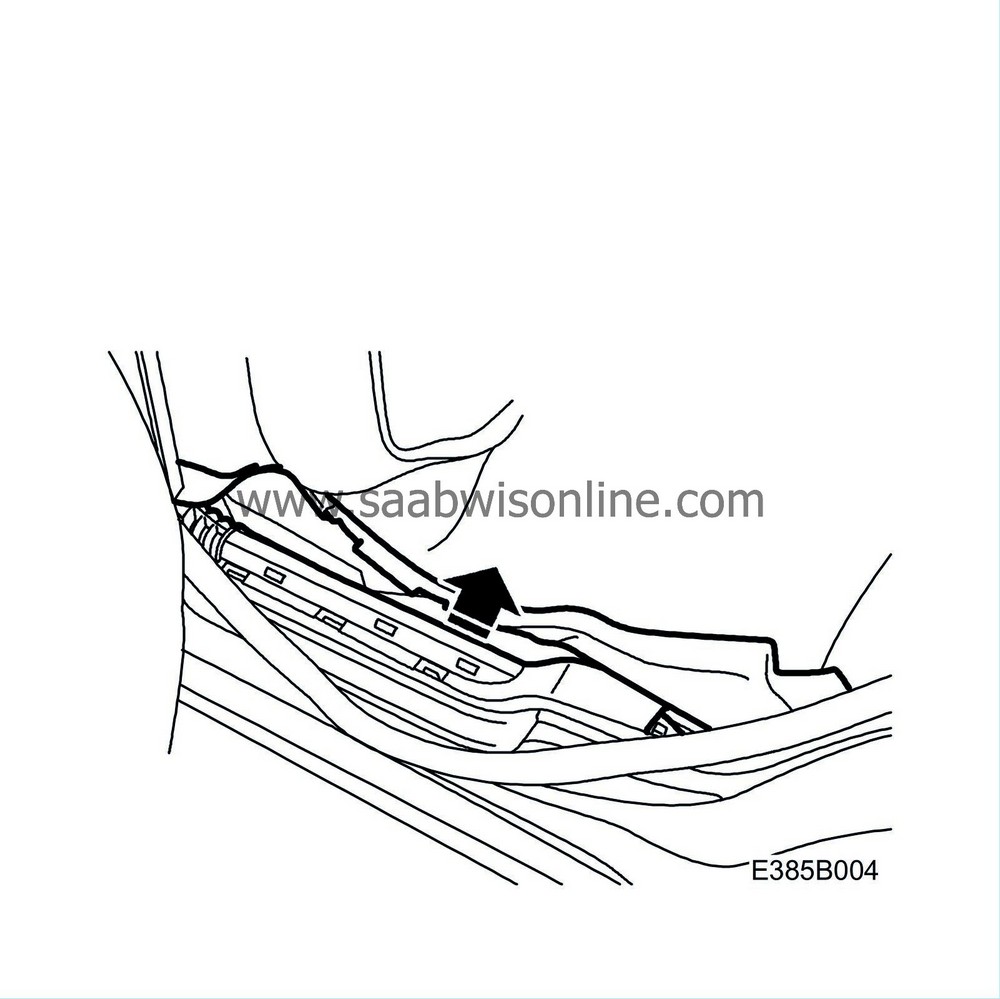
Remove the cover from the rear cable duct.
|
|
12.
|
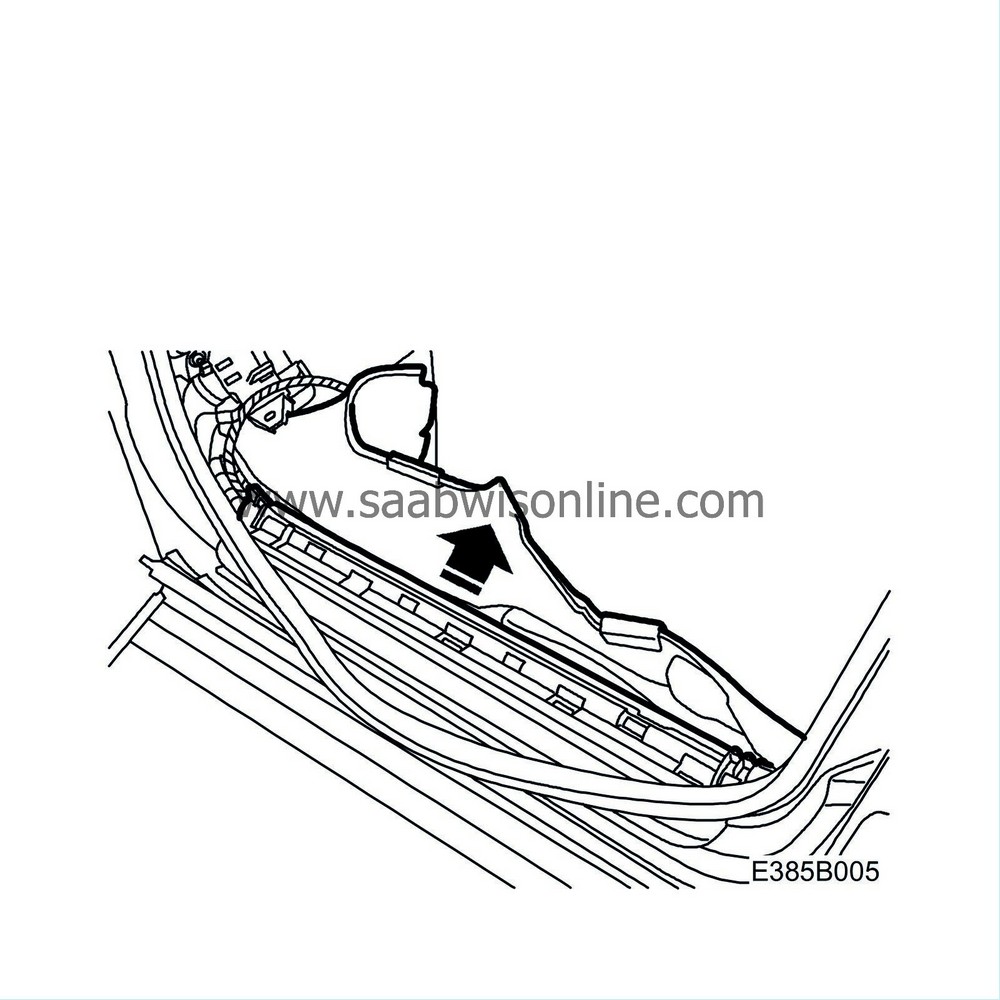
Remove the cover from the front cable duct.
|
|
13.
|
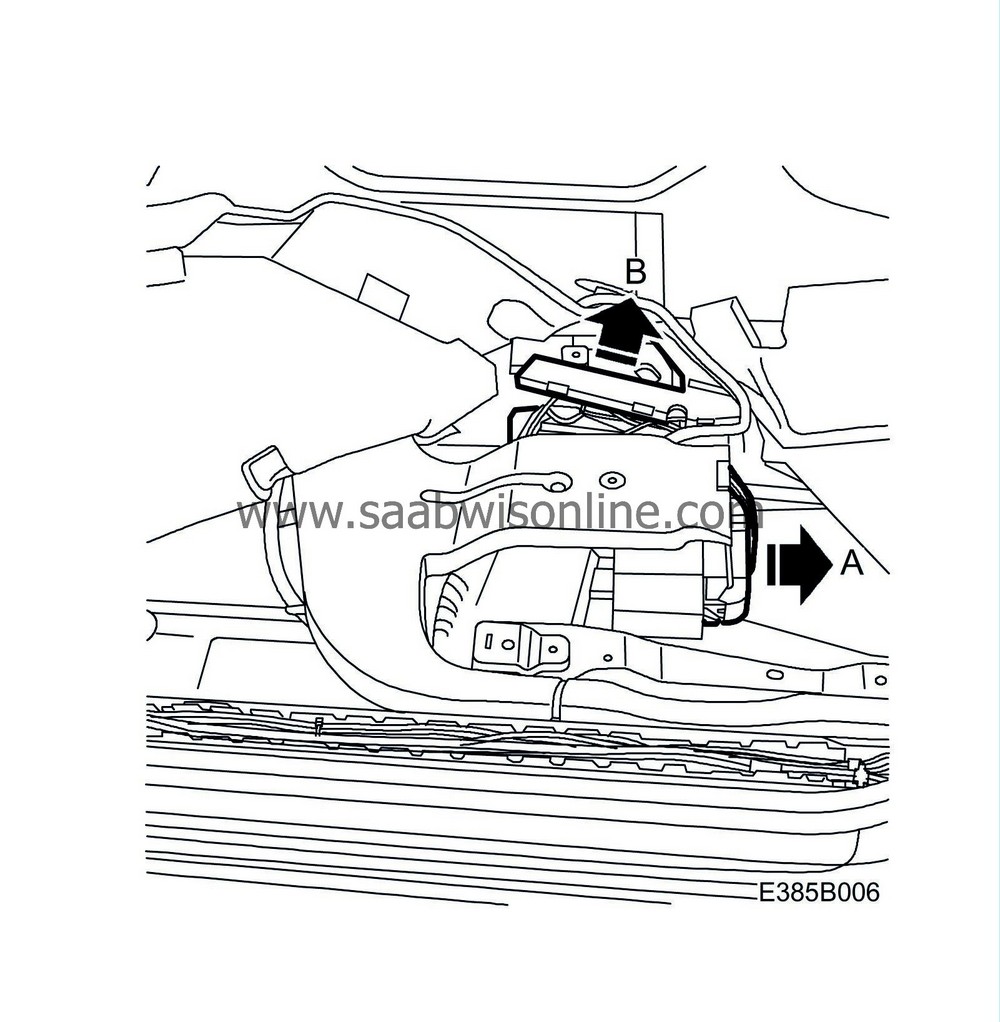
Fold aside the floor carpets. Remove the cover (B) from the cable duct and unplug the connector (A) to the TWICE control module (632).
|
|
14.
|
Position the supplementary wiring harness:
|
|
|
•
|
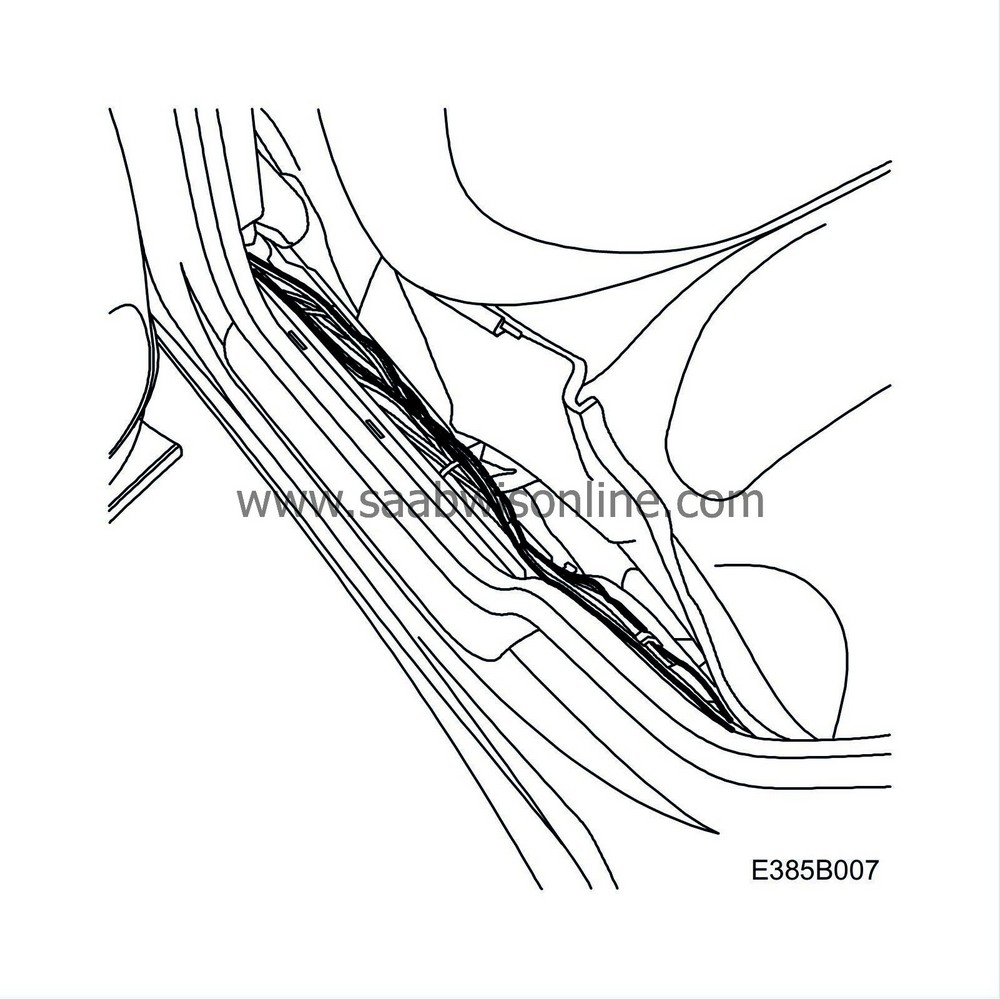
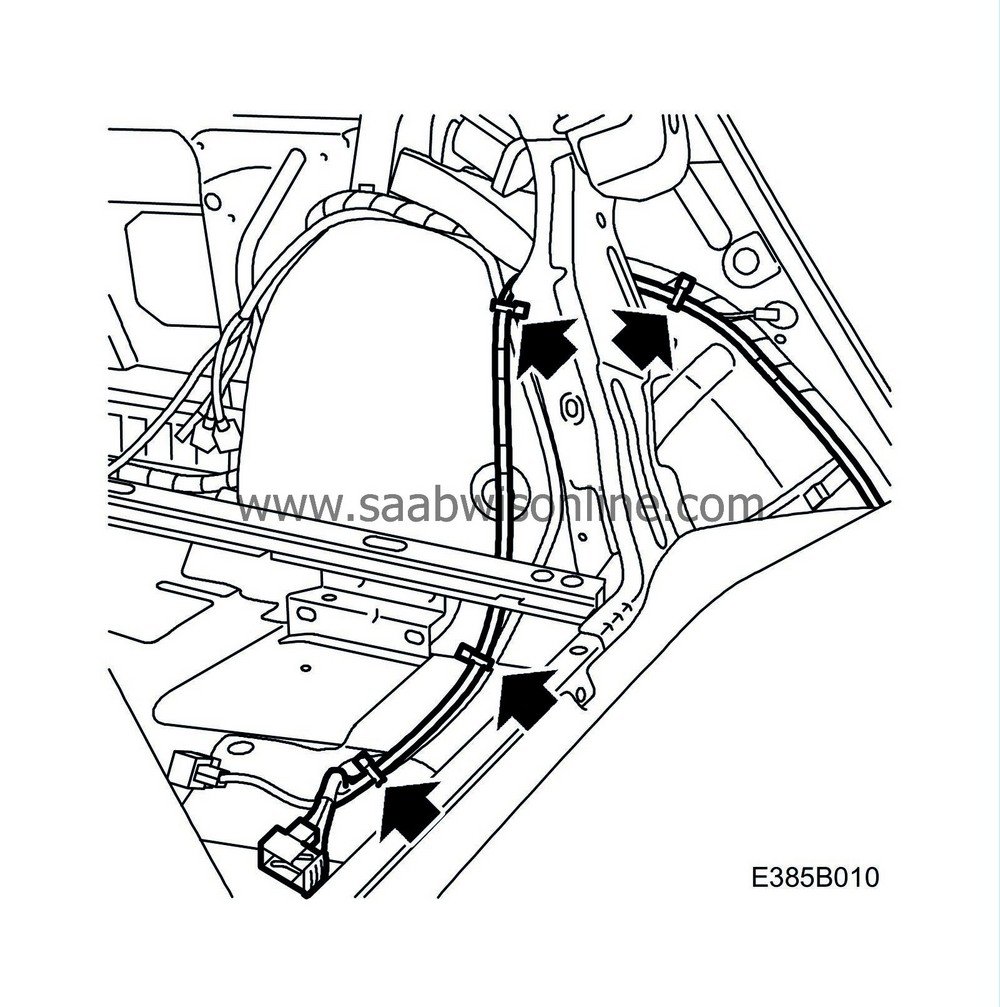
Route it along the existing wiring, from the wheel housing, through the cable ducts forward to the B-pillar.
|
|
|
•
|
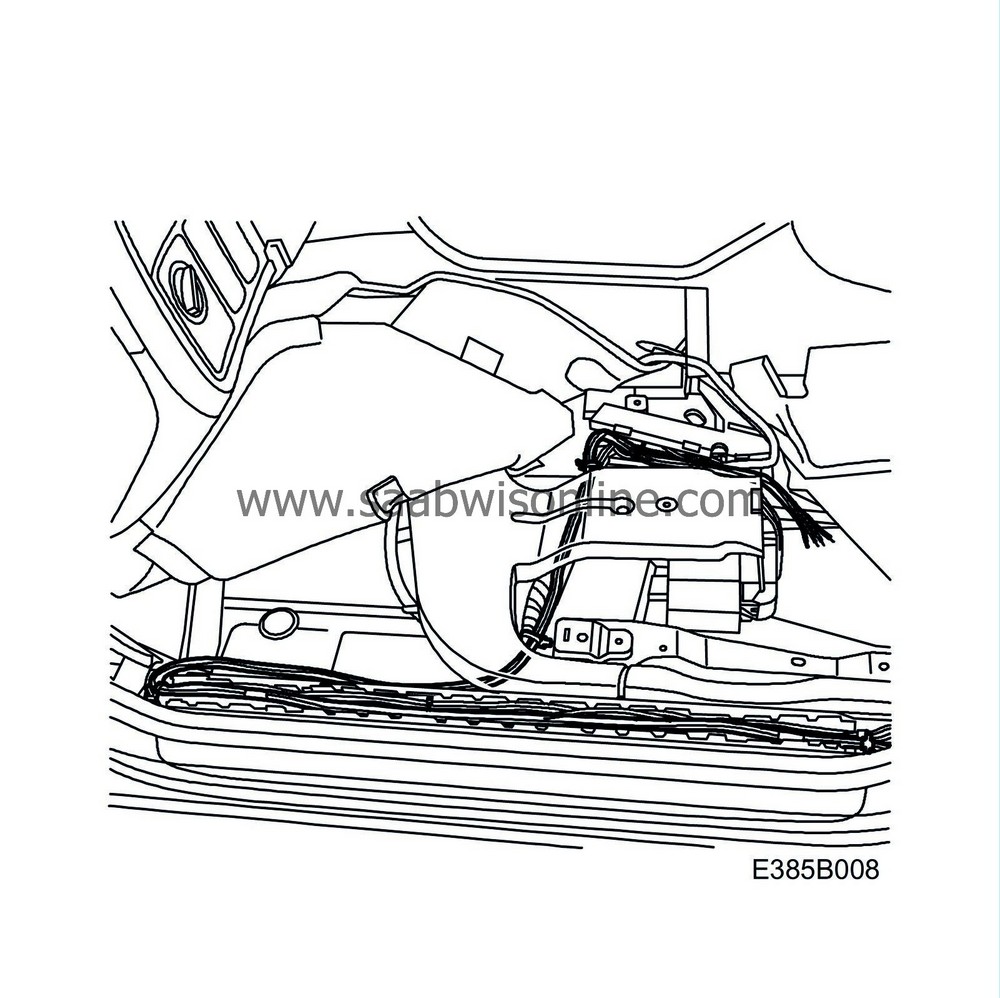
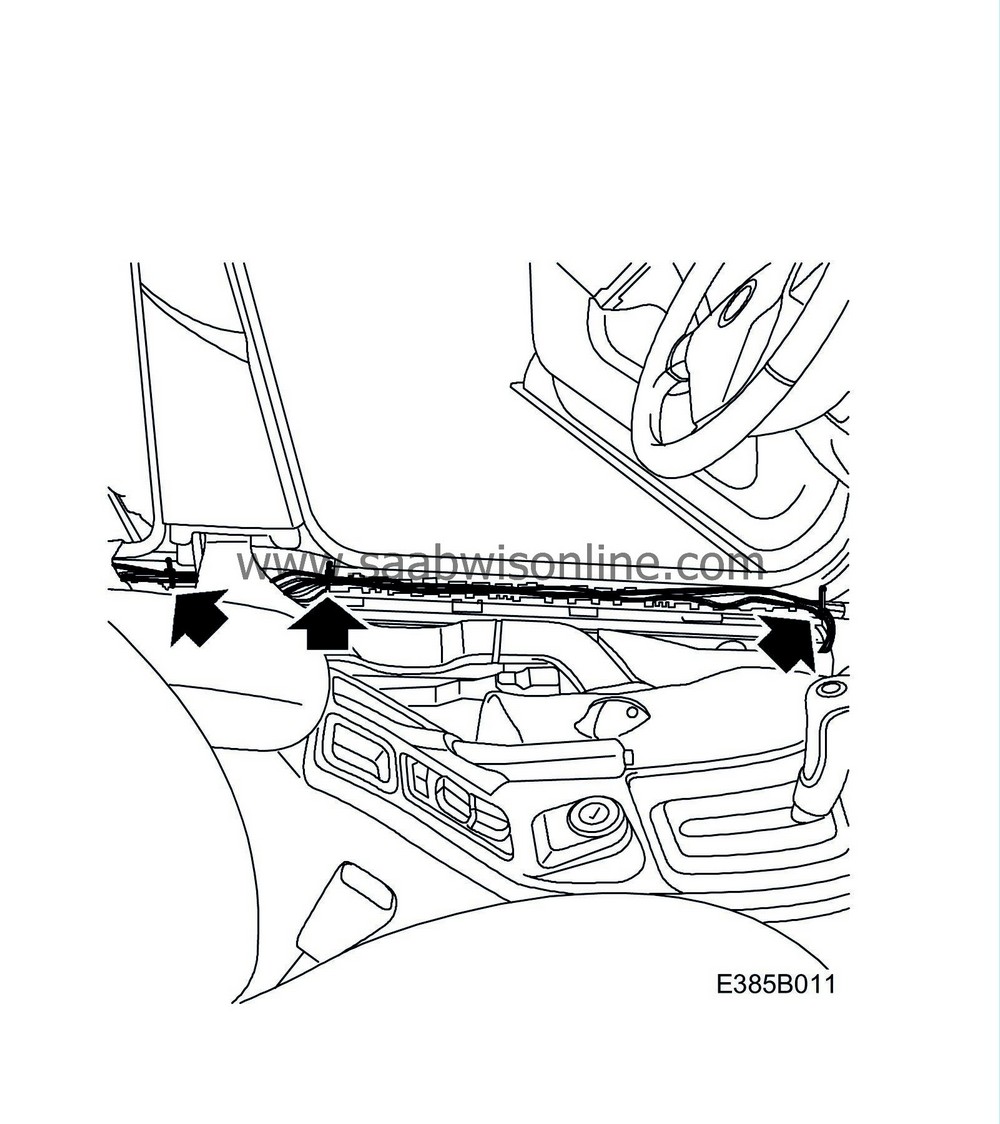
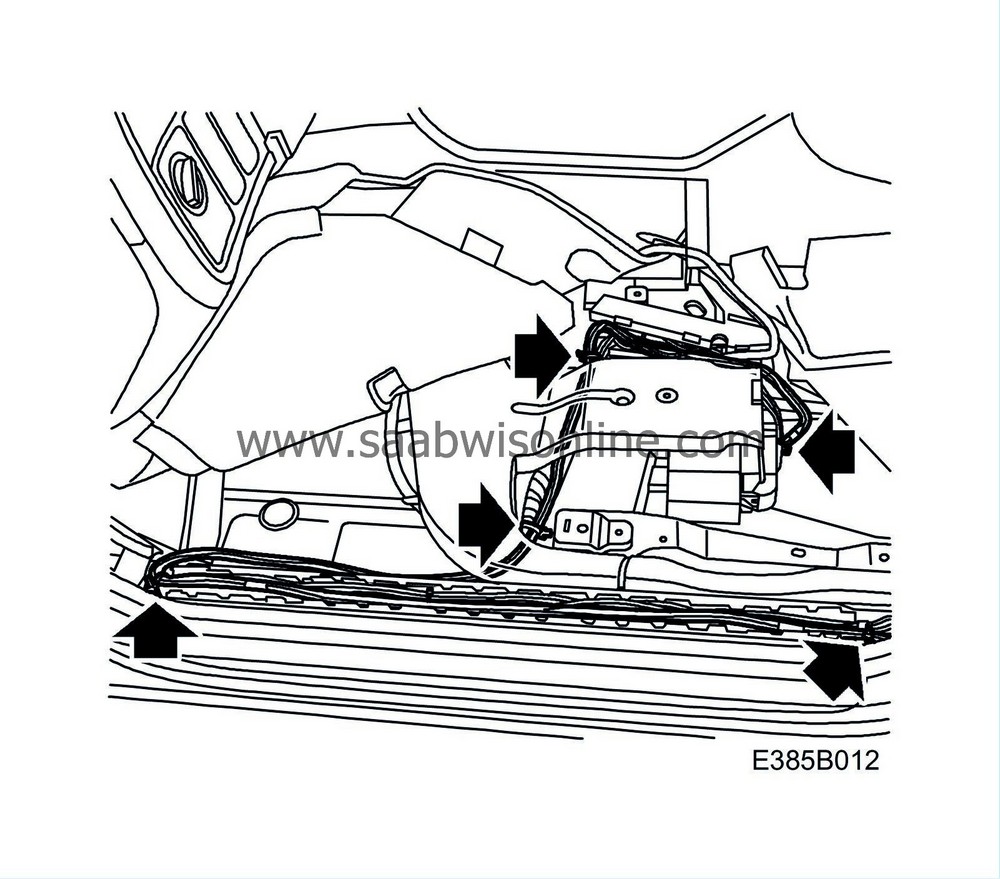
Route the wiring harness on towards the A-pillar. Follow the wiring routed on the floor towards the TWICE control module, under the air ducts and on in the cable duct to the TWICE control module's connector.
|
|
15.
|
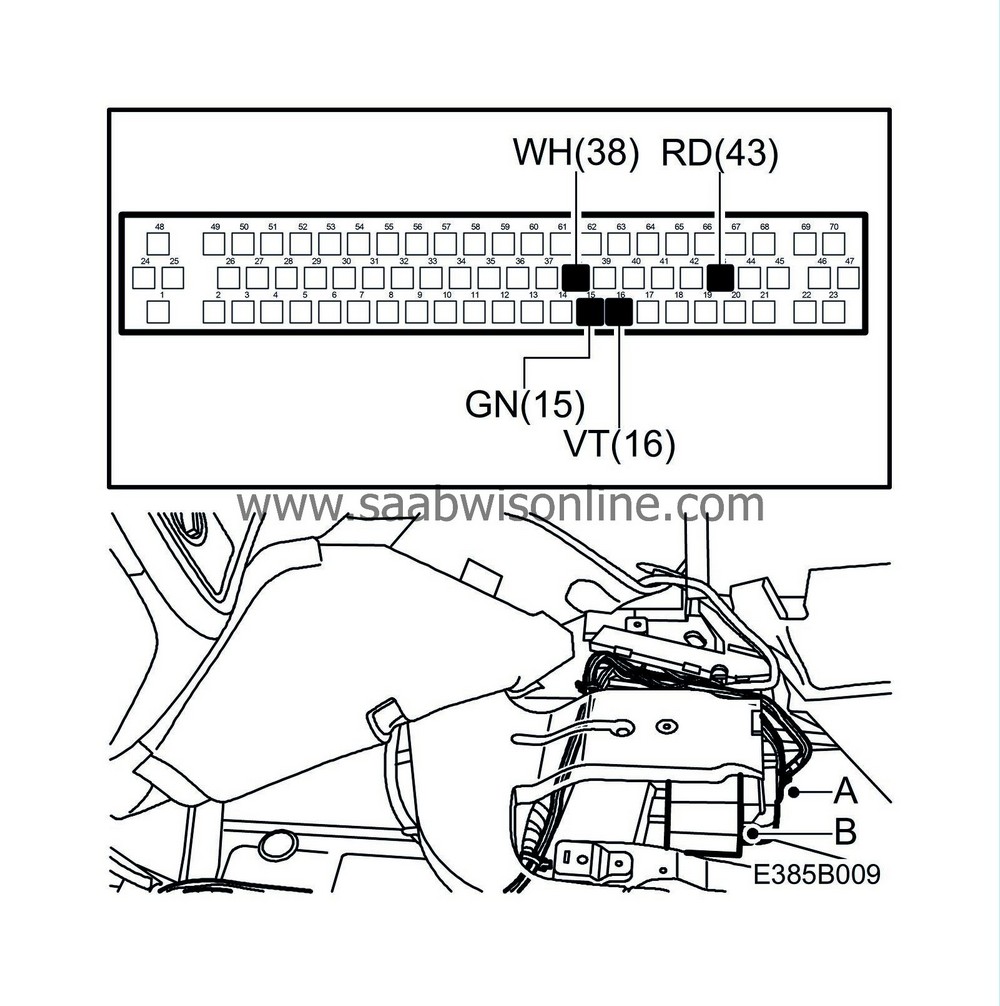
Plug in the supplementary wiring harness at connector (A) to the TWICE control module (B):
|
|
|
•
|
Cut off the cable tie next to the connector:
|
|
|
•
|
Plug in the supplementary wiring harness using the cable connections.
- Red (RD) - pos 43 (+30)
- Green (GN) - pos 15 (Bus -)
- White (WH) - pos 38 (Buss +)
-
If there is no provision for towbar:
Violet (VT) - pos 16 (+15)
|
|
|
•
|
Tape the wiring harness at the connector and hide the loose cables under the tape.
|
|
|
•
|
Tape around the cable connections and secure the wiring harness to the connector so that there is no risk of chafing.
|
|
|
•
|
Plug in the connector to the TWICE control module.
|
|
16.
|
Secure the wiring harness so that it does not chafe and collect any excess and arrange it with the wiring harness between the A-pillar and the air ducts.
|
|
17.
|
Fit the covers to the cable ducts.
|
|
18.
|
Fit the carpet and carpet support.
|
|
19.
|
Fold back the rear seat's seat cushion.
|
|
20.
|
Fit the left-hand front seat in accordance with WIS - Body - Seats - Adjustment/Replacement.
|
|
21.
|
Fit the front and rear side scuff plates in accordance with WIS - Body - Interior equipment - Adjustment/Replacement.
|
|
22.
|
Fold up the left-hand section of the rear seat's seat cushion and fold down the left-hand section of the rear seat backrest.
|
|
23.
|
Secure the connectors to the SPA wiring harness now not in use, use cable ties.
|
|
24.
|
Connect the battery's negative cable.
|
|
25.
|
4D:
Carry out steps 41-49 in the installation instructions 32 025 688 that apply for accessory kit 32 025 686.
5D:
Carry out steps 40-59 in the installation instructions 32 025 690 that apply for accessory kit 32 025 687.
|
|
Warranty/Time Information
|


