(980-2589) Alternative towbar installation
|
TECHNICAL SERVICE BULLETIN
|
|
Bulletin Nbr:
|
980-2589
|
|
Date:
...........
|
Oktober 2005
|
|
Market:
|
SE, NO, NL, GB, FI, DK, BE, CH, FR, US, CA
|
|
|
Alternative towbar installation
|
9-5 4D M98-
When fitting the towbar it may be difficult to fit the press nut at right angles to the reinforcements. This may result in unsuccessful installation to the car.
A normal nut can be used instead of a press nut. In which case, use the following alternative method.
11 900 430 nut M10 (x 2), applies for the following kits: 400133609, 400133617, 400133625, 400133658.
Nuts are included in the other kits
|
1.
|
Detachable towbar
: Follow the installation instructions up to step 19 inclusive.
Fixed towbar
: Follow the installation instructions up to step 17 inclusive.
|
|
2.
|
Remove the bumper, deburr the holes and clean away all swarf from the luggage compartment and bumper.
|
|
3.
|
Detachable towbar EU
: Follow the installation instructions, step 26 - 30.
Detachable towbar US
: Follow the installation instructions, step 26 - 29
Fixed towbar
: Follow the installation instructions, step 24 - 28.
|
|
4.
|
Tighten the four nuts to the bumper.
M02-
: Washers must be fitted under the top nuts.
|
|
5.
|
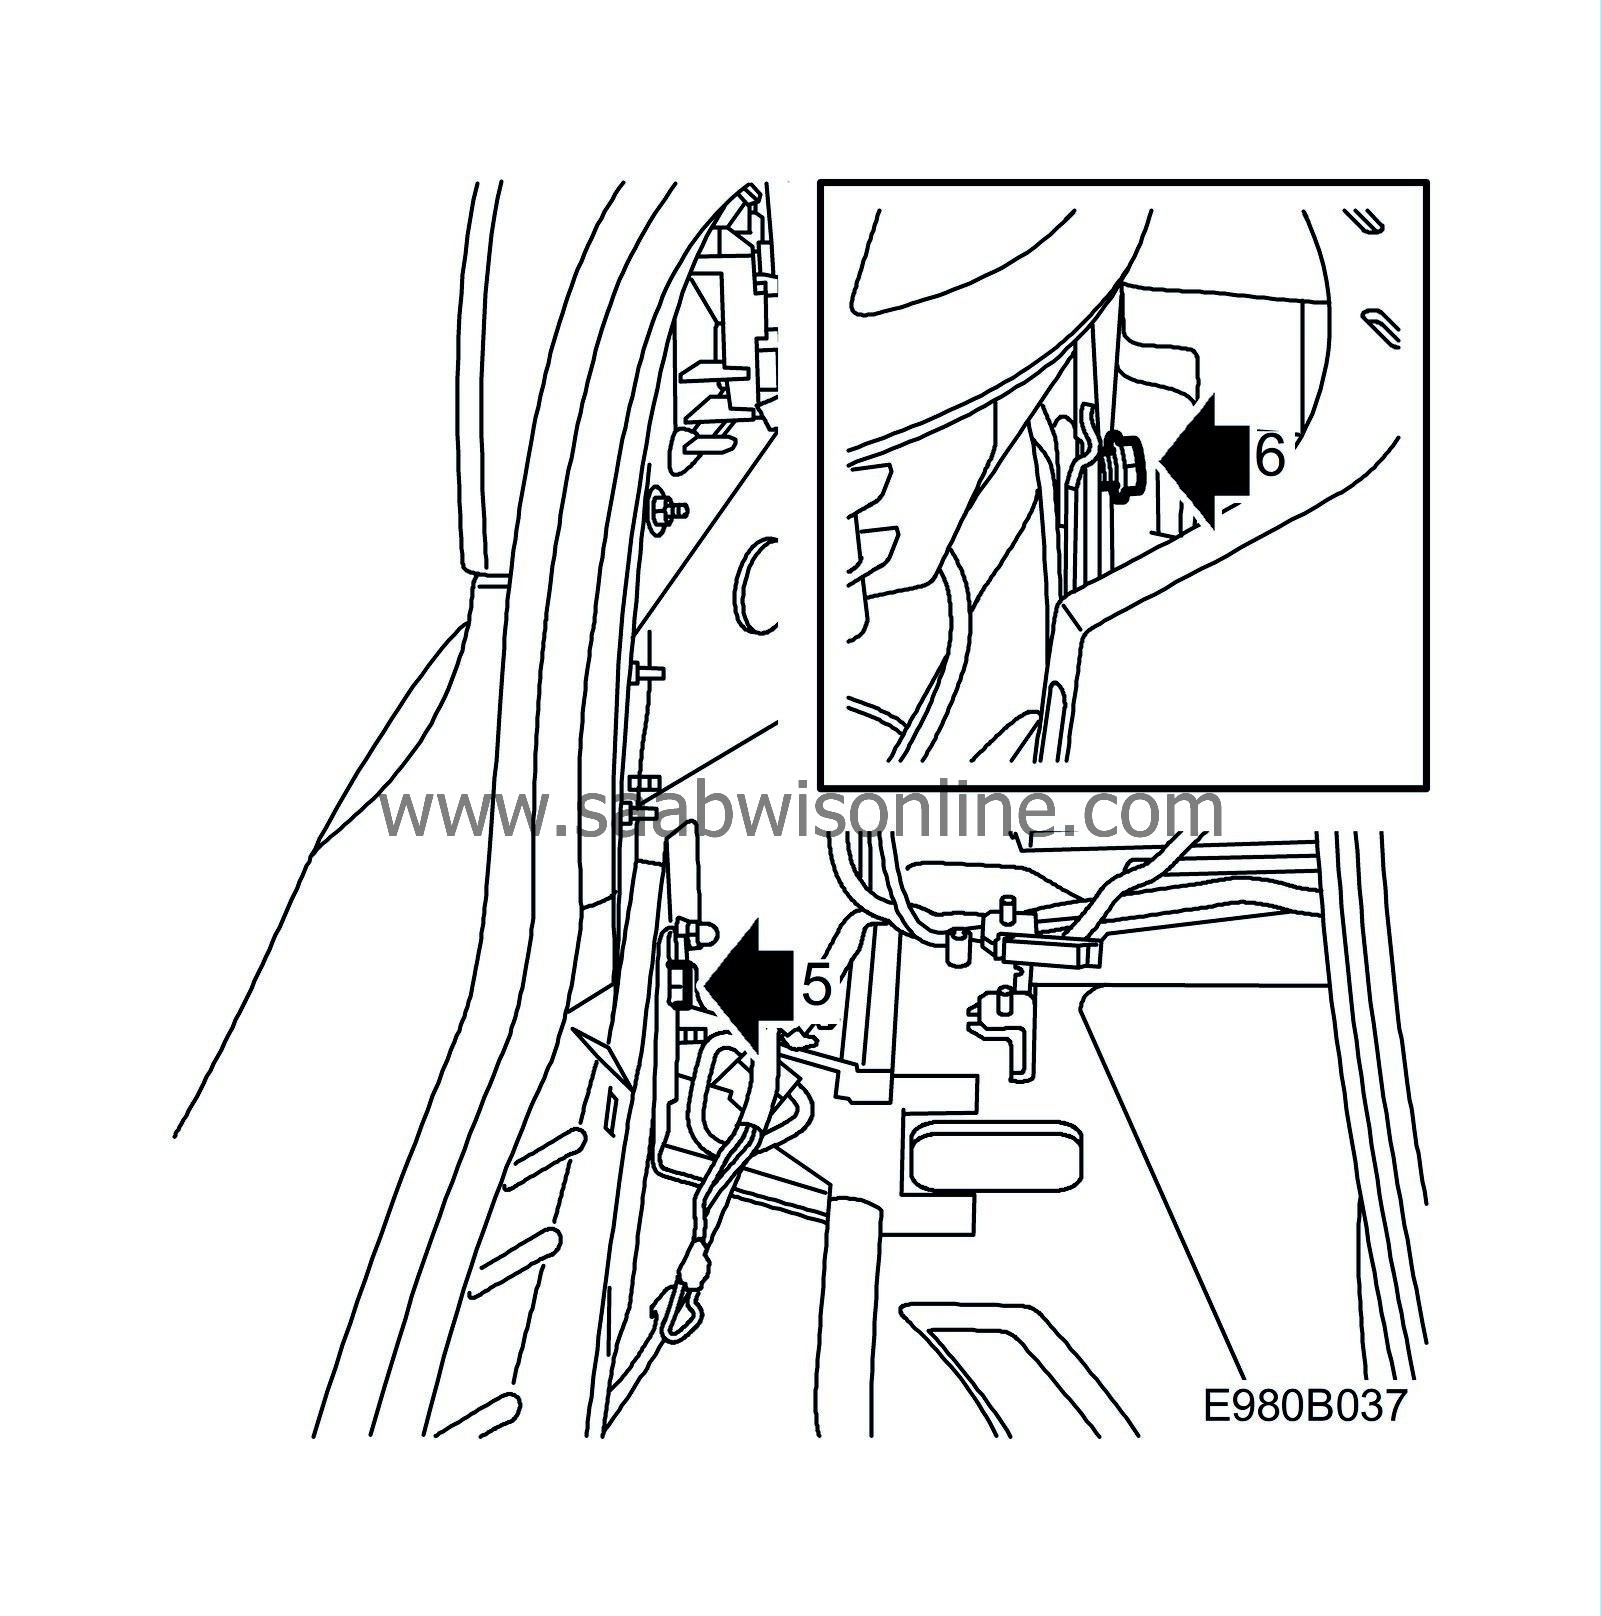
Tighten the two screws from inside the luggage compartment through the sleeves and the reinforcements.

|
|
6.
|
-M01
: Remove the corner spacer panels under the rear lamp clusters. Then tighten the nuts.
M02-M05
: Detach the corner sections of the bumper moulding and remove the centre section. Then tighten the nuts.
M06-
: Carefully bend the bumper cover out at the side under the lamp. Then tighten the nuts on the screws under the lamp.
|
|
7.
|
Tighten the screws and nuts.
Tightening torque 40 Nm (29 lbf ft)
|
|
8.
|
Detachable towbar EU
: Follow the installation instructions from step 33 inclusive.
Detachable towbar US
: Follow the installation instructions from step 32 inclusive.
Fixed towbar
: Follow the installation instructions from step 31 inclusive.
|
|
Warranty/Time Information
|


