Switch panel
| Switch panel |
| To remove |
| 1. |
Ignition switch in the OFF position.
|
|
| 2. |
Cars with navigation
: Remove the radio unit using
84 71 203 Removal tool
.

Cars without navigation : Remove the plugs carefully to avoid damaging the unit. Remove the screws. Pull out the unit. |
|
| 3. |
Unplug the connectors.

|
|
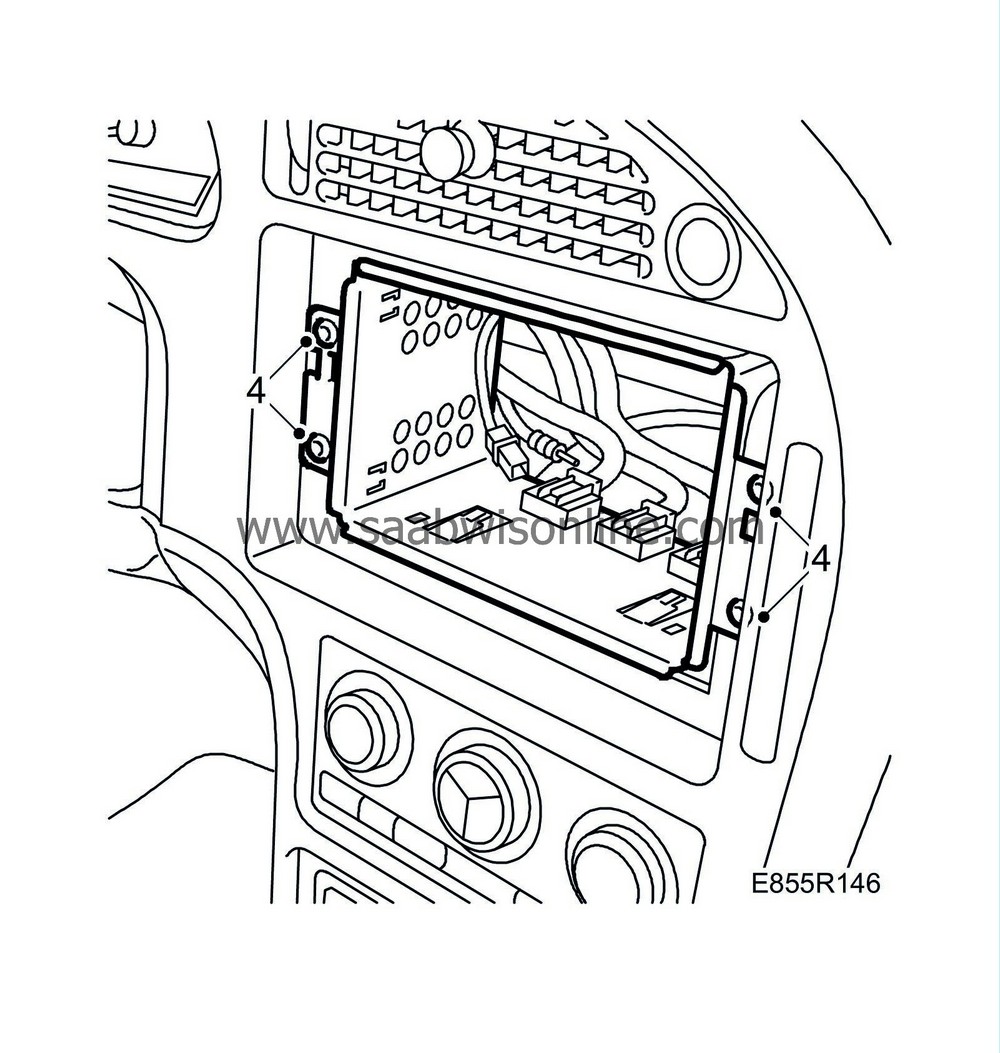
| 4. |
Cars with navigation
: Remove the radio compartment.
|
|
| 5. |
Remove the ACC panel.

|
|
| 6. |
Unplug the connectors.
|
|
| 7. |
Remove the upper and lower steering column cowls, 3 screws.

|
|
| 8. |
Remove the switches for the direction indicators and windscreen wipers. Let them hang loose.

|
|
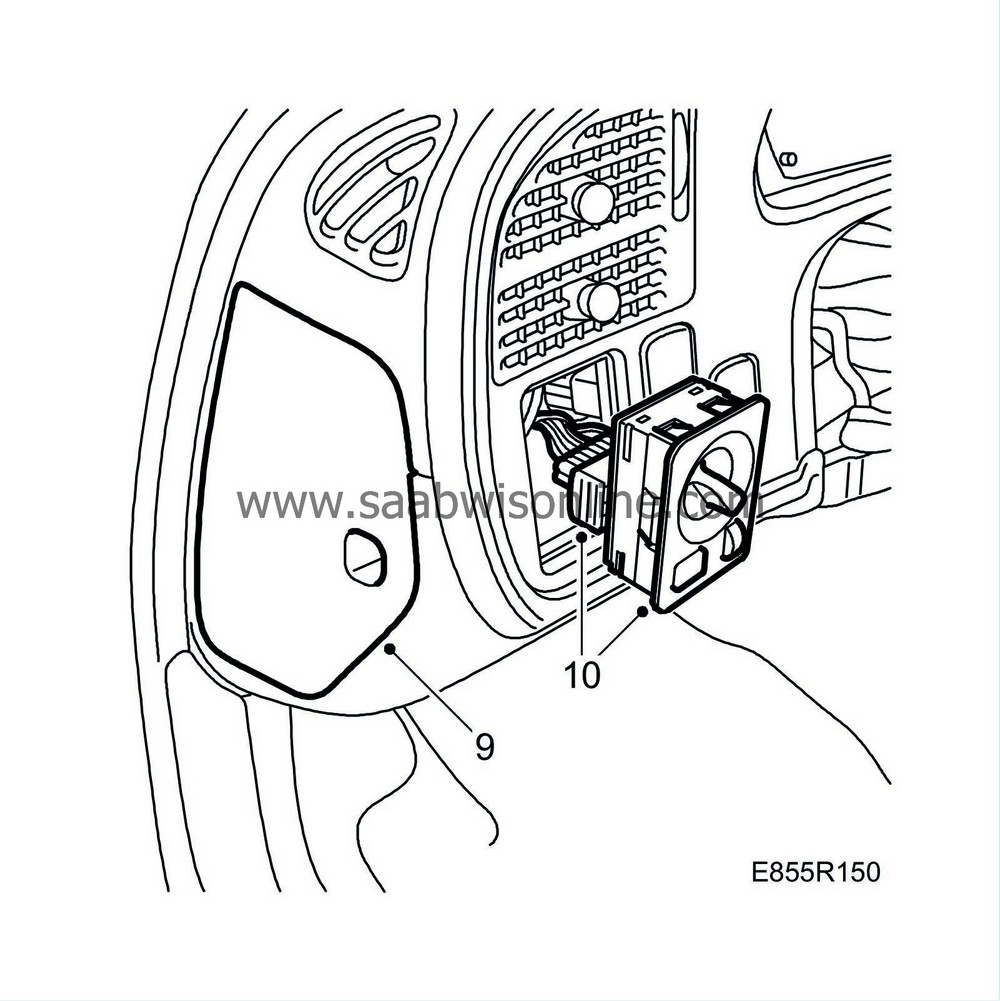
| 9. |
Remove the cover to the fuse holder.
|
|
| 10. |
Remove the light control panel and unplug the connector.
|
|
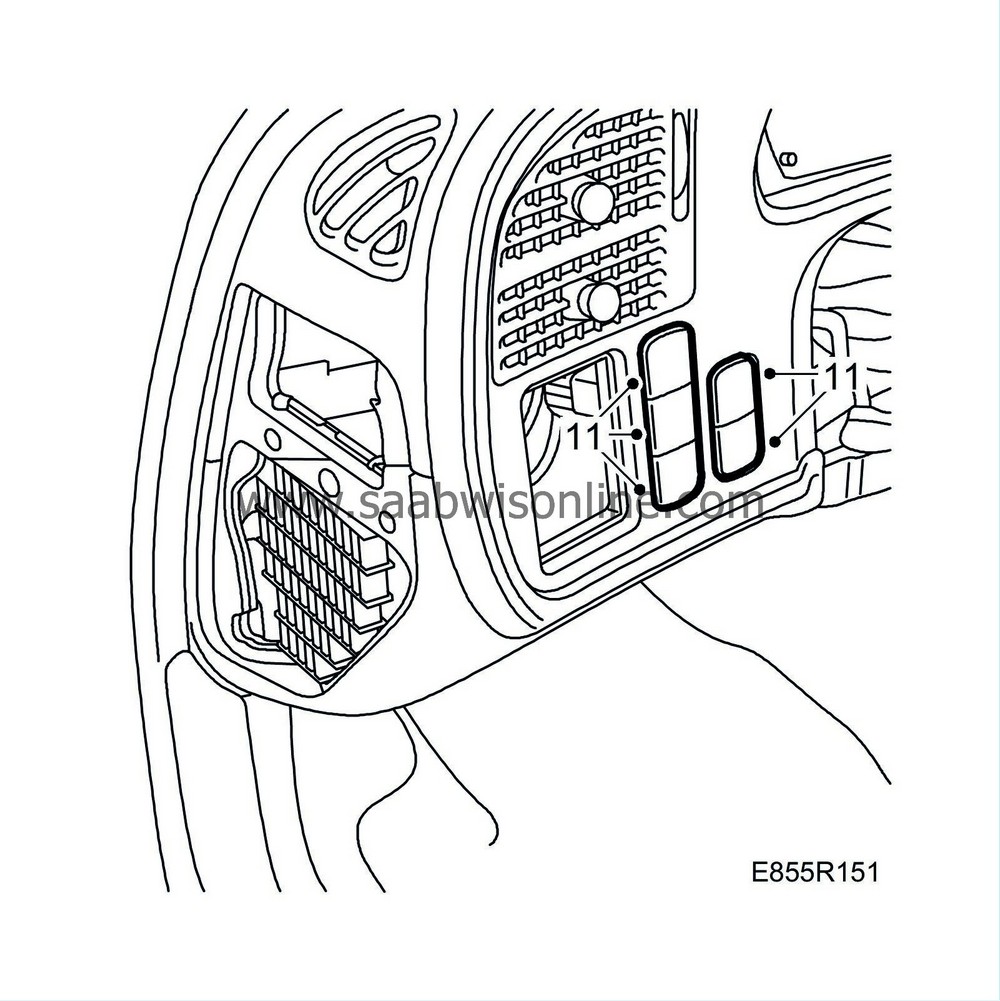
| 11. |
Remove the other switches and their connectors. Note the position of the switches in the panel.
|
|||||||
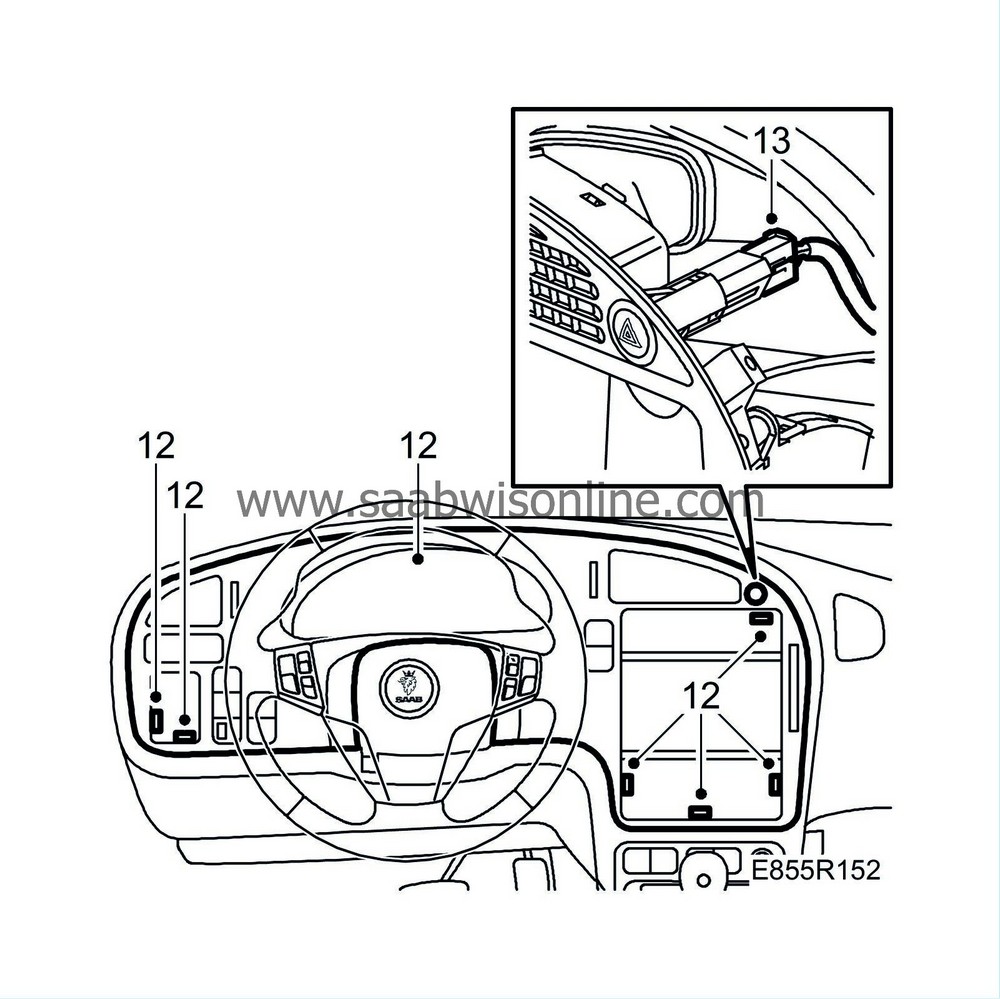
| 12. |
Remove the switch panel.
|
|
| 13. |
Unplug the connector for the hazard flashers.
|
|
| 14. |
Lift away the switch panel.
|
|
| To fit |
| 1. |
When replacing the panel
: Transfer over air vents, cup holder and switch for hazard flashers to the new panel.
|
|||||||
| 2. |
Lift the switch panel into place.
|
|
| 3. |
Check that the air ducts are positioned correctly.
|
|||||||
| 4. |
Fit the switch panel.
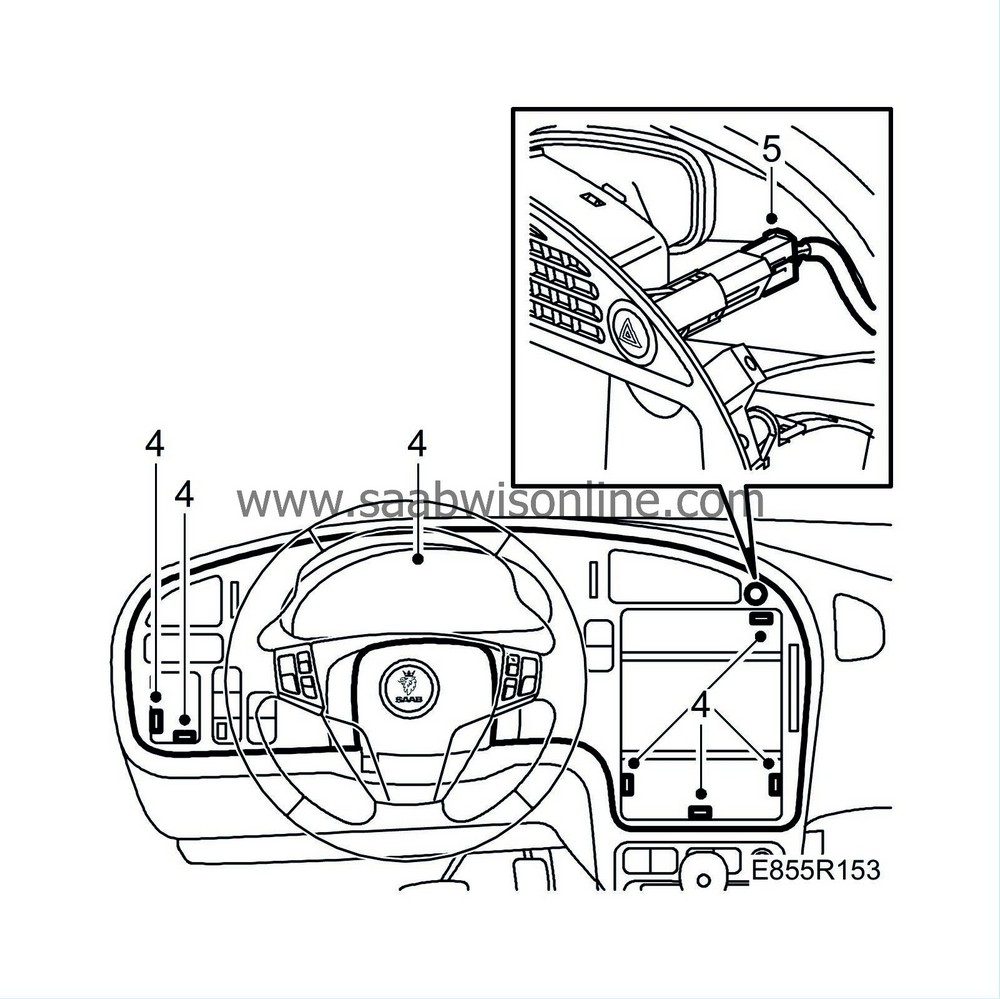
|
|
| 5. |
Plug in the connector for the hazard flashers.
|
|
| 6. |
Connect and fit other switches.
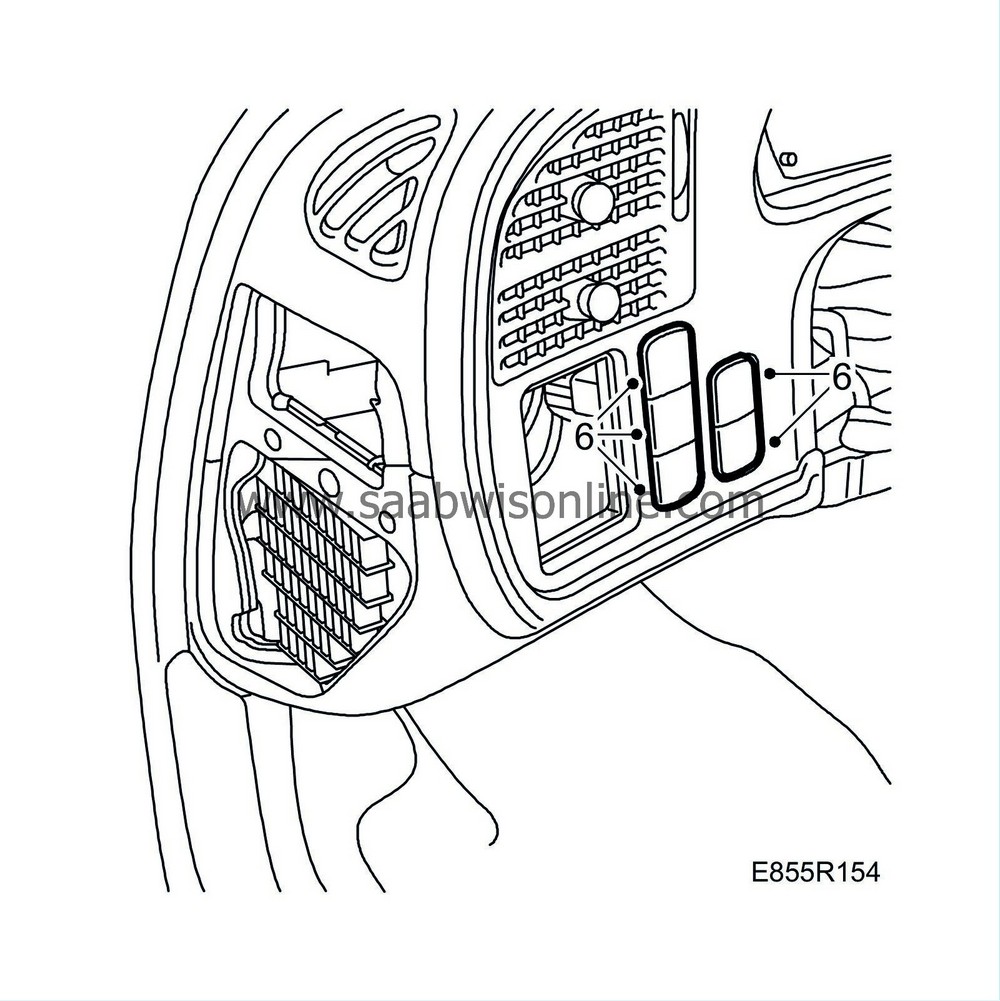
|
|
| 7. |
Connect and fit the light control panel.

|
|
| 8. |
Fit the cover to the fuse holder.
|
|
| 9. |
Fit the switches for the direction indicators and windscreen wipers.

|
|
| 10. |
Fit the upper and lower steering column covers.

|
|
| 11. |
Plug in the connectors to the ACC panel.

|
|
| 12. |
Fit the ACC panel.
|
|
| 13. |
Cars with navigation
: Fit the radio compartment.
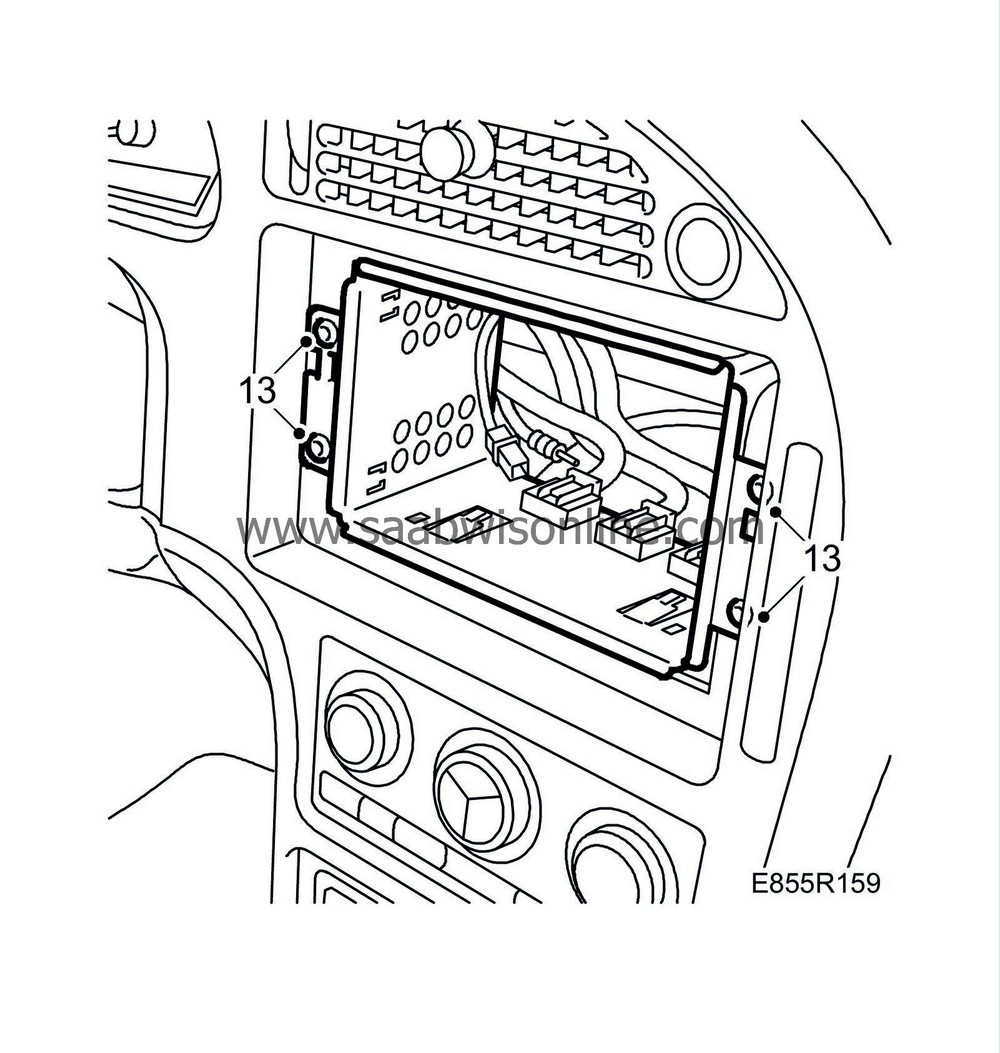
|
|
| 14. |
Plug in the radio unit's connector.

|
|
| 15. |
Fit the radio unit.

Cars without navigation : Fit the screws. Fit the plugs, make sure that the plugs are guided into the grooves. |
|


