Front door lock unit
| Front door lock unit |
| To remove |
| 1. |
Open the window.
|
|
| 2. |
Remove the door trim.
|
|
| 3. |
Remove the water separator carefully using
82 93 474 Removal tool.
|
|
| 4. |
Remove the weatherstrip screw and lift away the strip.

|
|
| 5. |
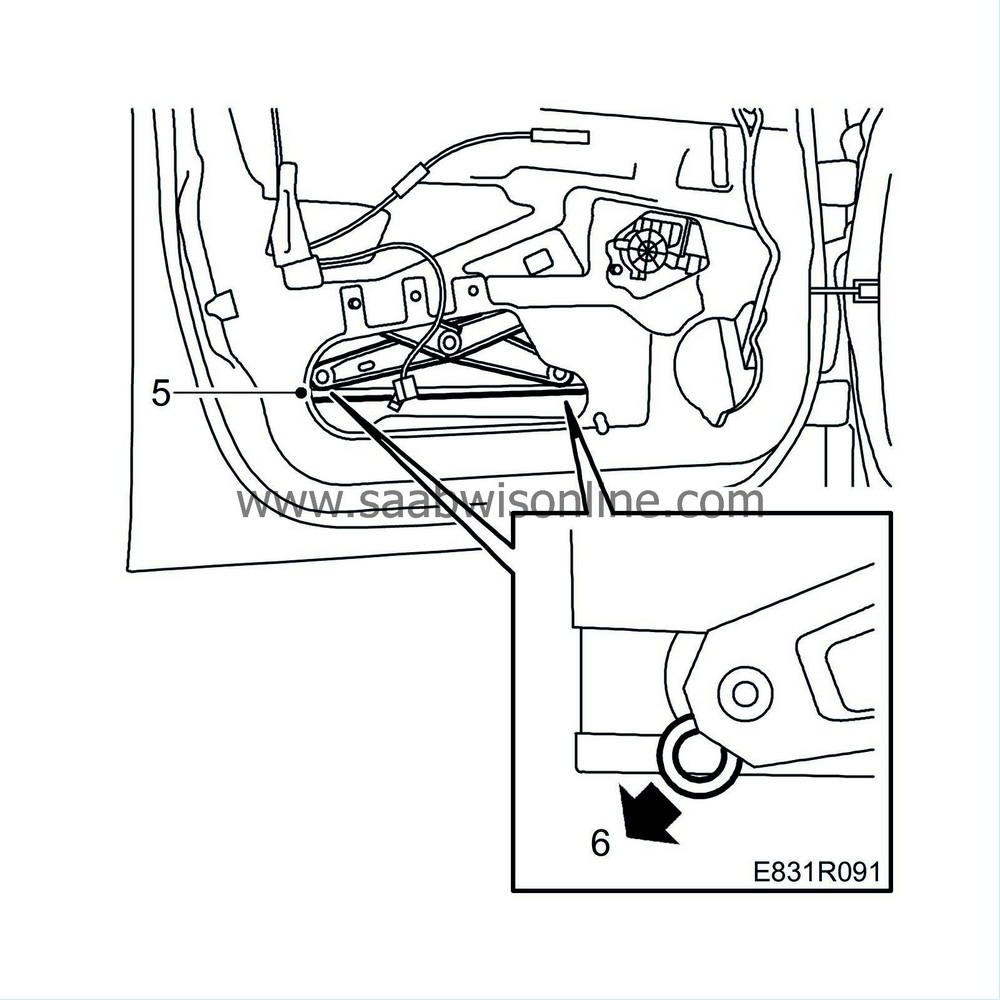
Raise the window lift so that the window mounting becomes visible at the top edge on the lower large hole. The clips on the slide rollers will then become more easily accessible.
|
|
| 6. |
Detach the scissor-lift braces from the window mounting by removing the clips and then prising loose the braces from the rollers with a large flat head screwdriver. Prise between the brace and the rail close to the ball so the brace is not deformed.
|
|
| 7. |
Lift out the window by tilting up the back edge.

|
|
| 8. |
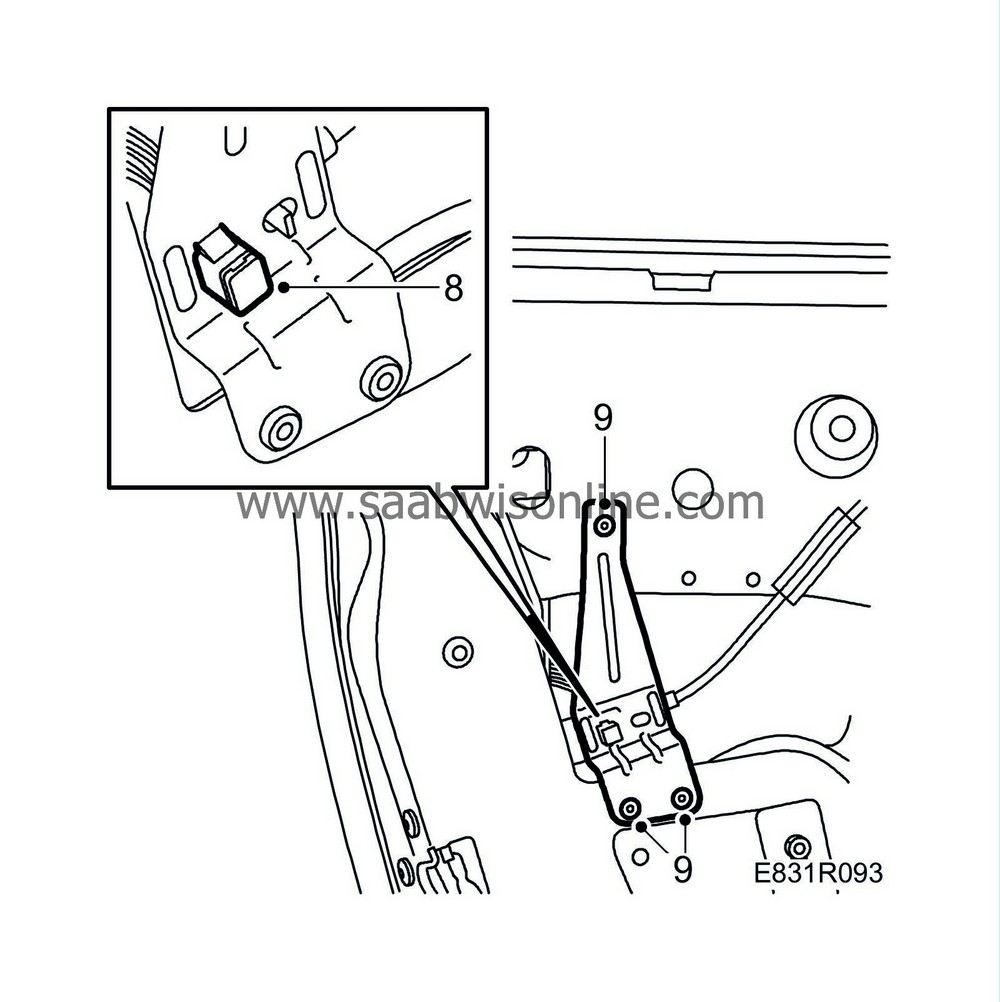
Knock out the steel cores from the rivets securing the metal finisher for the wire to the interior door handle, and remove the wire from the finisher.
|
|
| 9. |
Drill out the rivets, lift out the metal finisher and unhook the wire from the lock.
|
|
| 10. |
Driver's door
: Detach the guard by removing the rear nut for the handle and guard as well as the guard's screw.

|
|
| 11. |
Driver's door
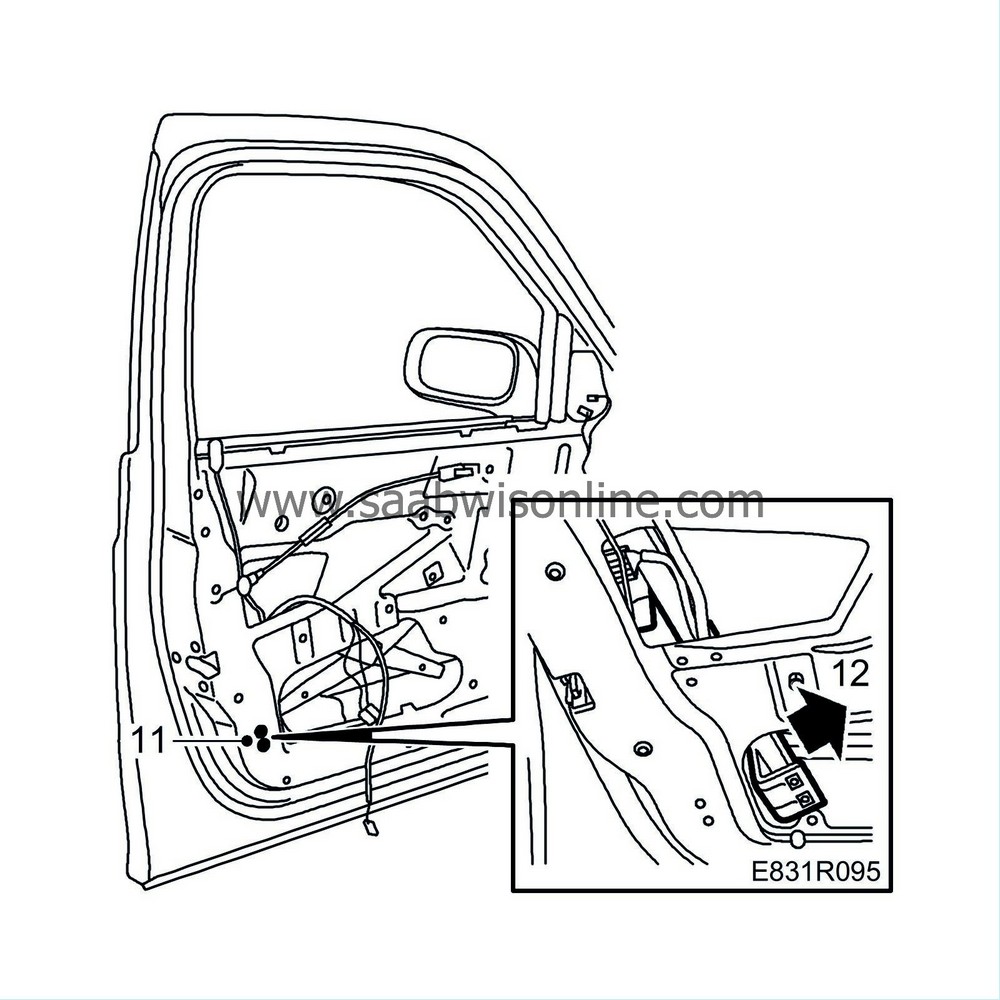
: Undo a section of upper window moulding and drill out the rivet. Loosen the bottom of the guide rail, 2 bolts.
|
|
| 12. |
Driver's door
: Turn the guide rail forward and lift out the guard.
|
|
| 13. |
Remove the three screws that hold the lock to the door.

|
|
| 14. |
Unplug the connector from the lock unit.
|
|
| 15. |
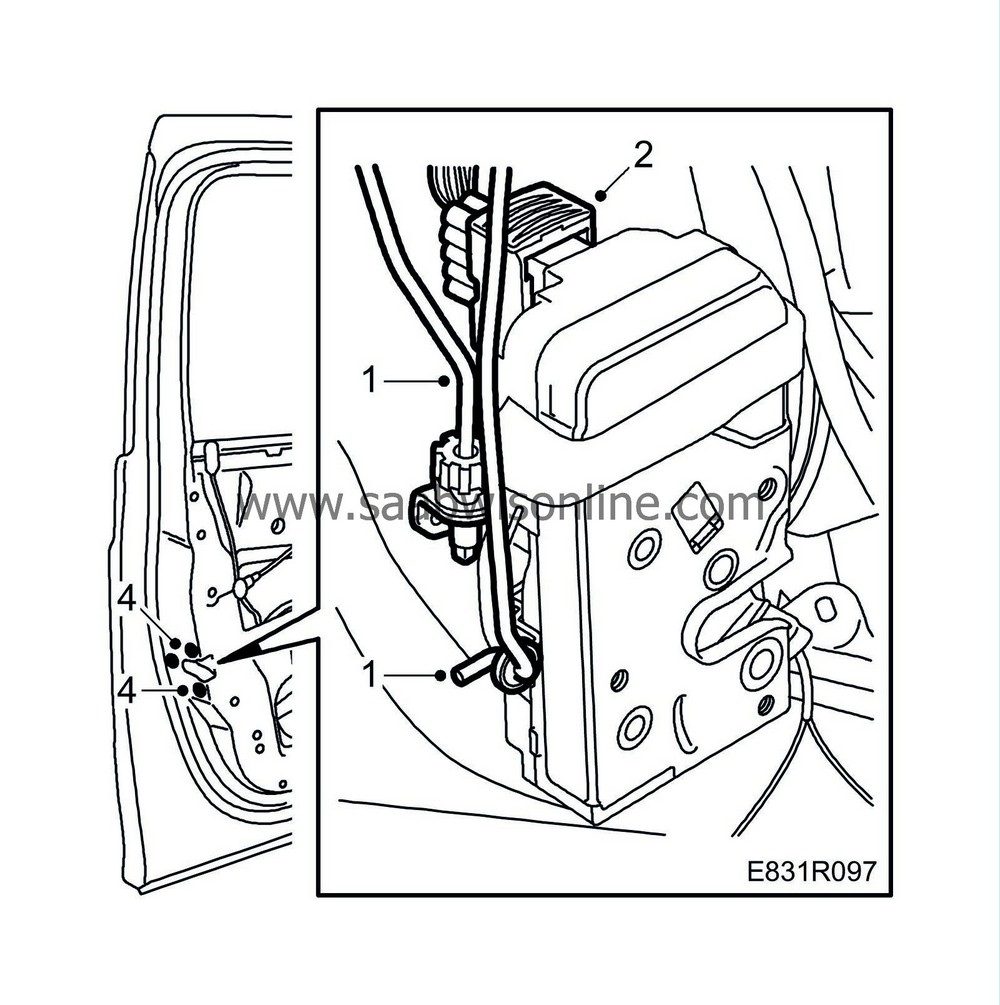
Remove the pull rod from the lock by turning the lock and at the same time unhooking the push rod between the exterior handle and the lock.
|
|
| 16. |
Lift out the lock unit.
|
|
| To fit |
| 1. |
Lift the lock in place in the door. Hook the lock cylinder pull rod into the lock by turning the lock in place while guiding in the handle pushrod into its mounting in the lock.
|
|
| 2. |
Plug in the connector to the lock unit.
|
|
| 3. |
Fit the rod to the lock button, and the wire of the inner door handle.
|
|
| 4. |
Screw on the lock unit.
|
|||||||
| 5. |
Check that the lock functions correctly.
|
|
| 6. |
Lift the guard into place.
|
|
| 7. |
Driver's door
: Turn in the guide rail and fit its lower mounting. Fit the rivet and the upper window moulding.

|
|
| 8. |
Driver's door
: Screw the guard nut onto the handle and the guard screw.

|
|
| 9. |
Transfer the scissors-lift rollers to the new window glass (if changed), checking at the same time that they are intact and undamaged.
|
|
| 10. |
Grease the rollers and sliding surfaces.
|
|
| 11. |
Fit the clips to the rollers.
|
|
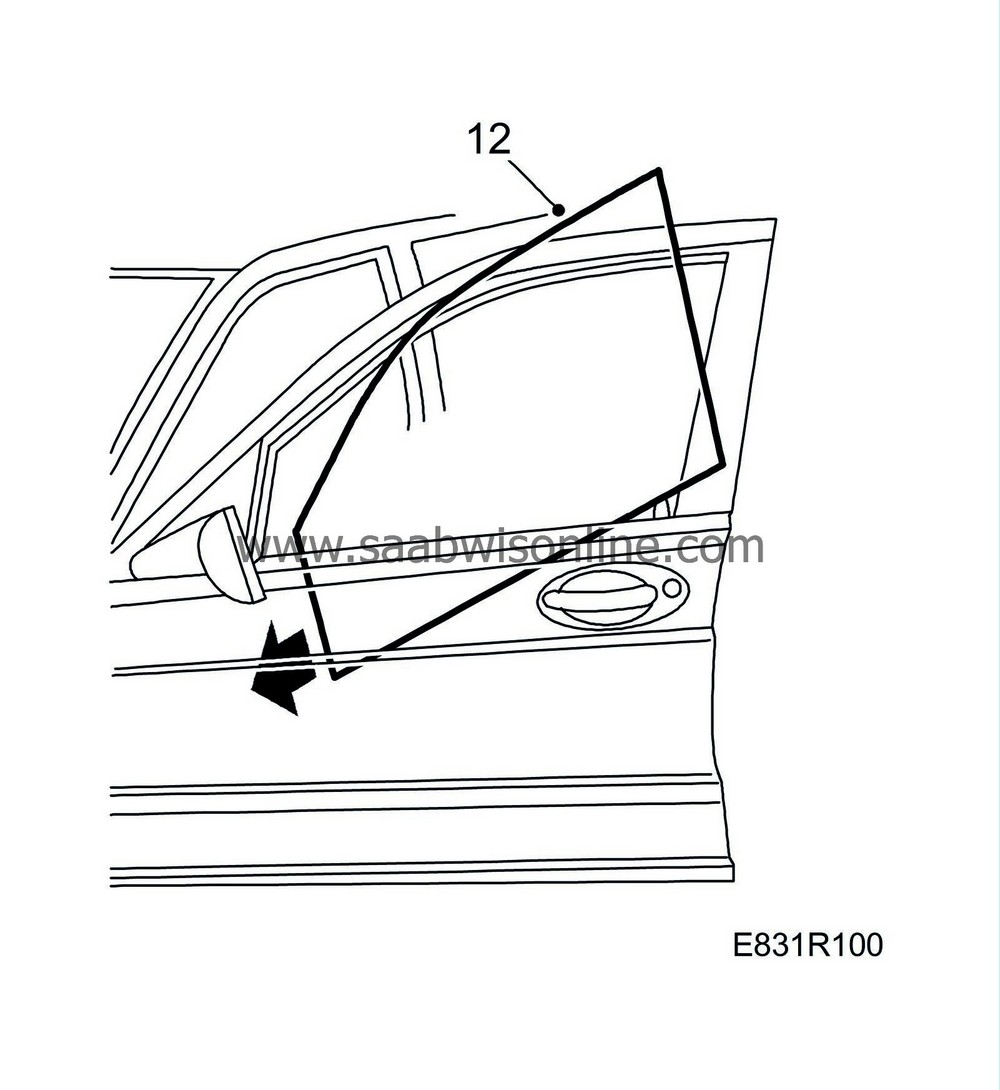
| 12. |
Lift in the window by tilting down the front. Guide the window into the front guide rail. Tilt it back and guide it into the rear guide rail.
|
|
| 13. |
Press the scissor-lift brace into the window mounting rollers.

|
|||||||
| 14. |
If necessary, adjust the window.
|
|
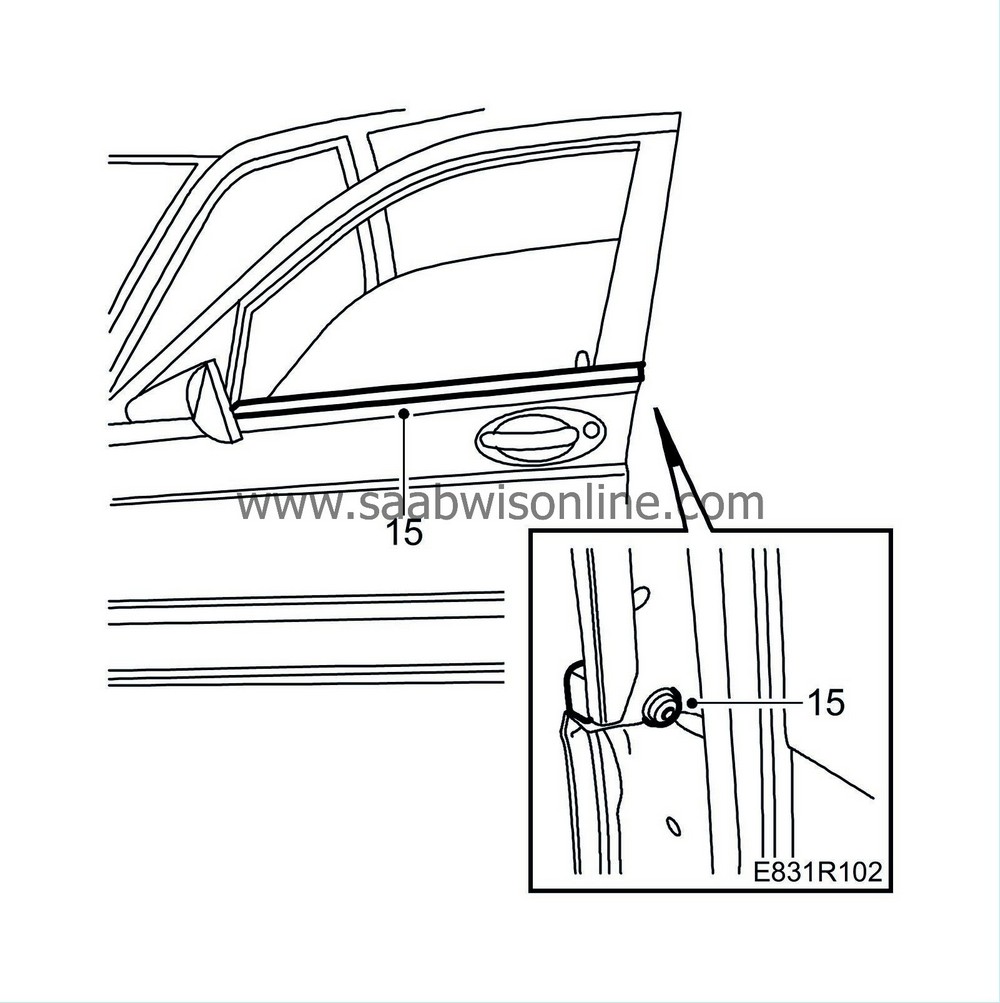
| 15. |
Grease the end of the weatherstrip towards the door mirror base with soapy water. Fit the weatherstrip.
|
|
| 16. |
Check that the window lift functions correctly.
|
|
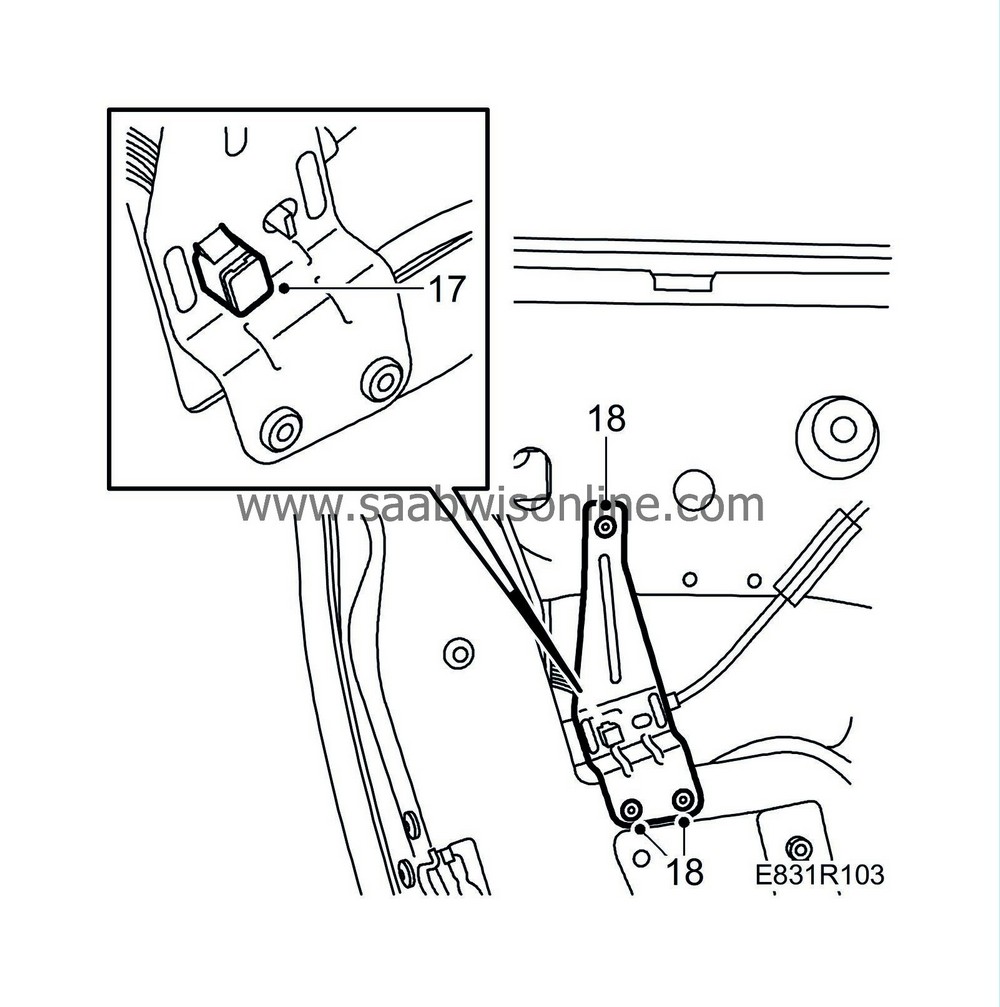
| 17. |
Hook the inner opening handle wire to the lock and metal finisher.
|
|
| 18. |
Rivet on the metal finisher securing the wire to the inner door handle.
|
|
| 19. |
Fit the water separator.
|
||||||||||
| 20. |
Refit the door trim and the cover around the window frame.
|
|
| 21. |
Polish the window.
|
|


