Power train removal
| Power train removal |
| To remove |
| 1. |
Position the car on a lift and put protection on the wings.
|
|
| 2. |
Raise the car somewhat so that the wheels are free from the floor.
|
|||||||||
| 3. |
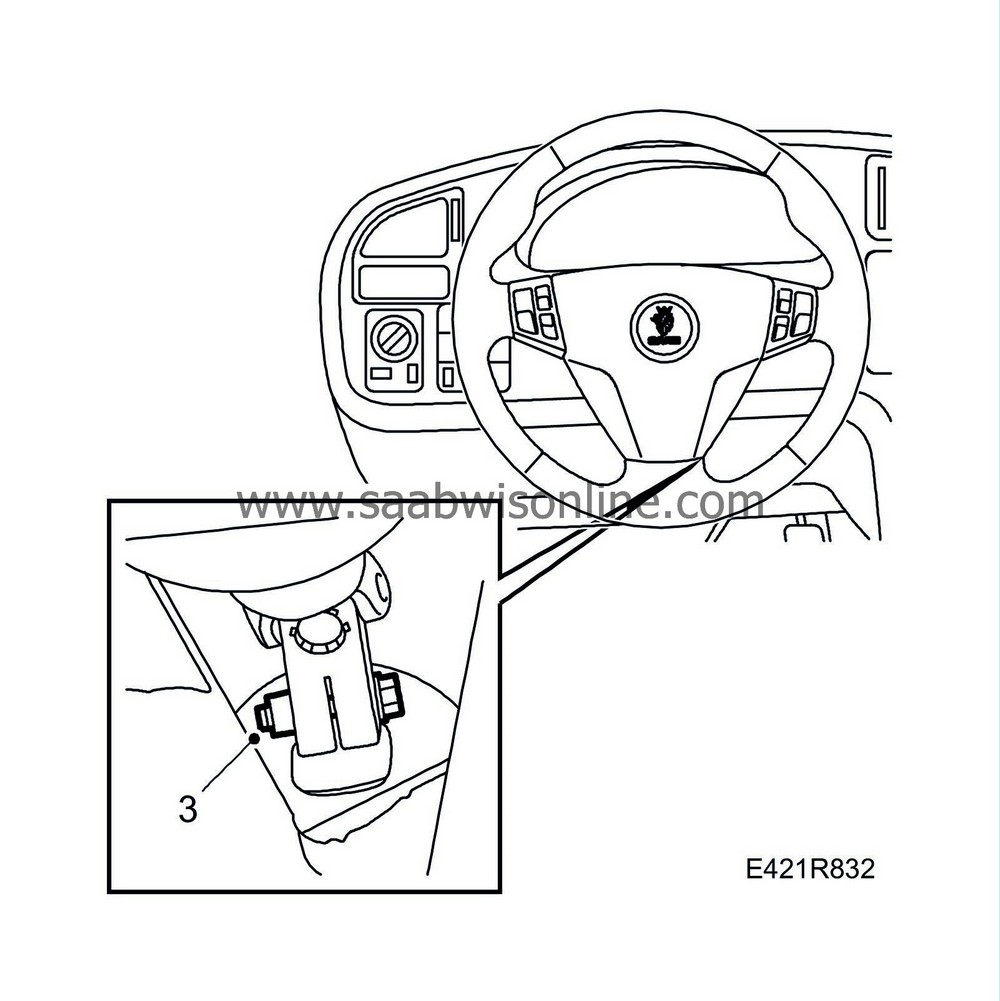
Place the wheels in the straight ahead position, secure the steering wheel and unbolt the steering column from the steering gear inside the cabin.
|
|
| 4. |
Remove the upper engine cover and insulation.
|
|
| 5. |
Open the coolant reservoir cap.
|
|
| 6. |
Disconnect the battery cables and remove the battery.
|
|
| 7. |
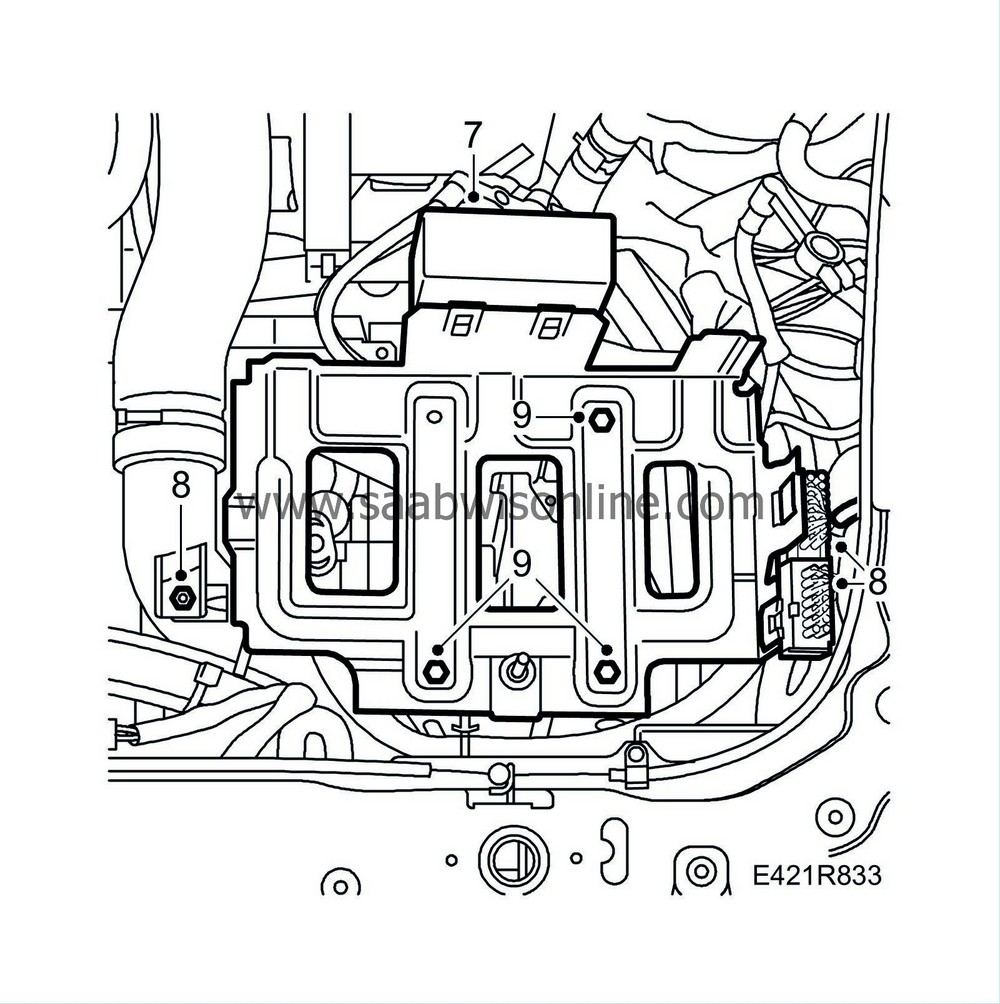
Remove the maxi fuse holder from the battery tray.
|
|
| 8. |
Detach the connectors and charge air pipe from the battery tray.
|
|
| 9. |
Remove the battery tray.
|
|
| 10. |
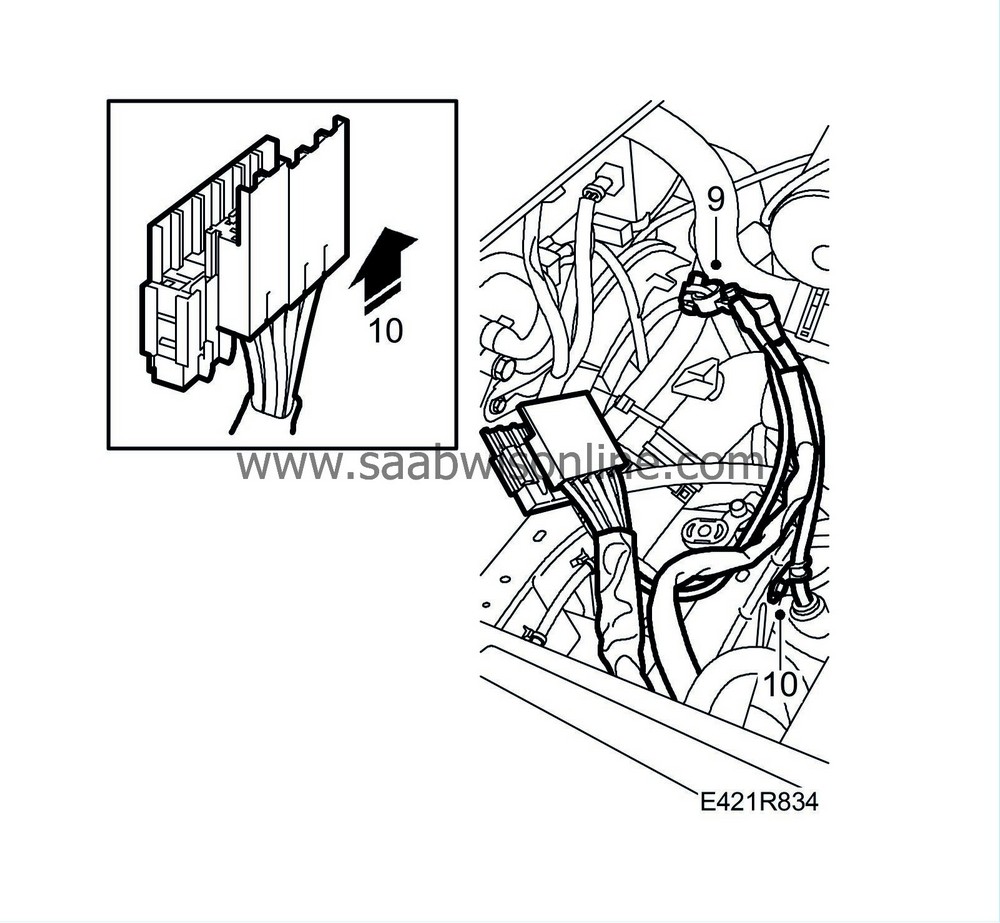
Pull out all maxi fuses and detach the holder.
|
|
| 11. |
Detach the positive cable from the cable terminal and move it aside.
|
|
| 12. |
Remove the clamp holding the positive cable to the body.
|
|
| 13. |
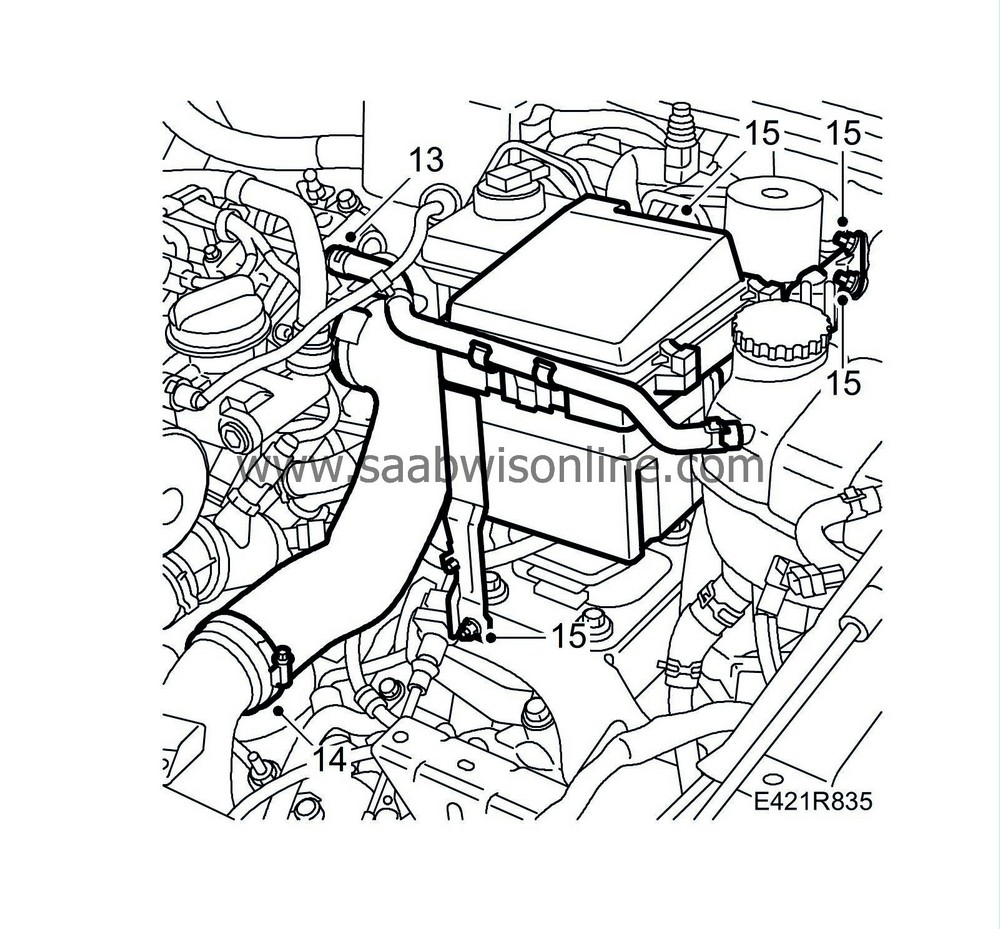
Detach the breather hose between the engine and coolant reservoir.
|
|
| 14. |
Detach the charge air hose from the throttle body and charge air pipe.
|
|
| 15. |
Detach and move aside the electrical distribution box.
|
|
| 16. |
Man:
Engage 4th gear and remove the plastic plug from the gearbox. Lock 4th gear in the gearbox by inserting
87 92 335 Lock pin
.

|
|
| 17. |
Man:
Undo the clamp holding the selector rod to the linkage on the gearbox.
|
|
| 18. |
Man:
Lift up the gear lever gaiter. Engage 3rd gear so that the selector rod leaves the linkage and insert
87 92 335 Lock pin
into the gear lever housing.
|
|
| 19. |
Man:
Prevent brake fluid from running out of the reservoir by using
30 07 739 Hose pinch-off pliers
to block off the brake fluid hose to the slave cylinder.
|
|
| 20. |
Man:
Remove the clip at the slave cylinder and detach the connection to the delivery pipe. Refit the clip.

|
|
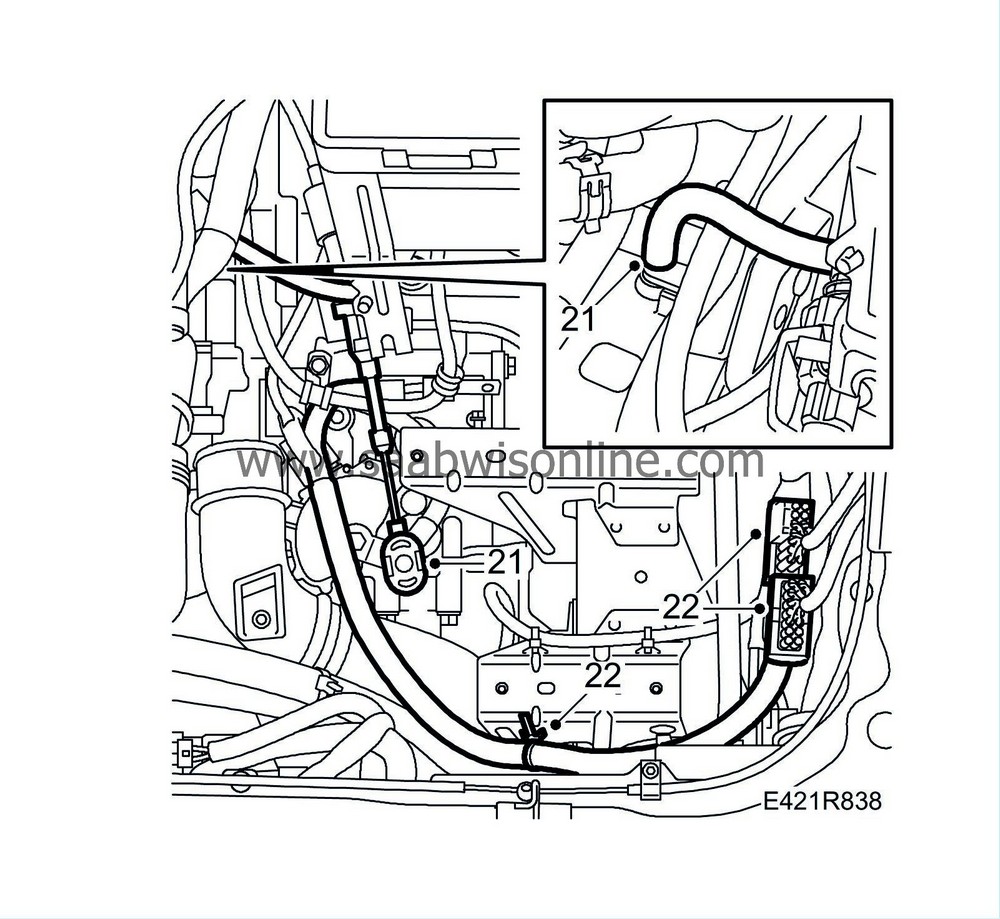
| 21. |
Aut:
Detach the gear selector cable from the gearbox and breather hose. Gather the gear selector cable and secure it to the brake servo.
|
|
| 22. |
Aut:
Unplug the connectors and detach the gearbox wiring harness from the fixing. Place the wiring harness on the gearbox.
|
|
| 23. |
Raise the car.
|
|
| 24. |
Remove the front wheels.
|
|
| 25. |
Remove the hub nuts.
|
|
| 26. |
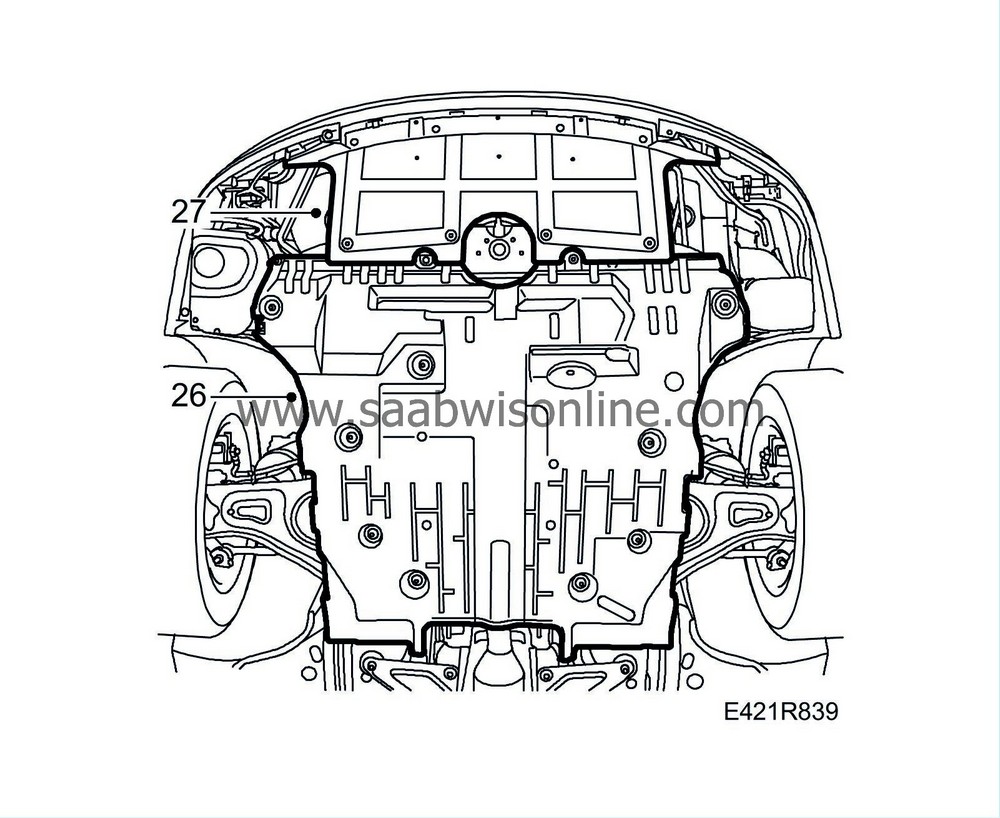
Remove the lower engine cover.
|
|
| 27. |
Remove the front lower engine cover.
|
|
| 28. |
Place a suitable receptacle under the car and drain the cooling system.
|
|
| 29. |
Cars with Xenon headlamps:
Unplug the connector of the headlamp controller on the link arm.
|
|
| 30. |
Remove the belt circuit's cover.

|
|
| 31. |
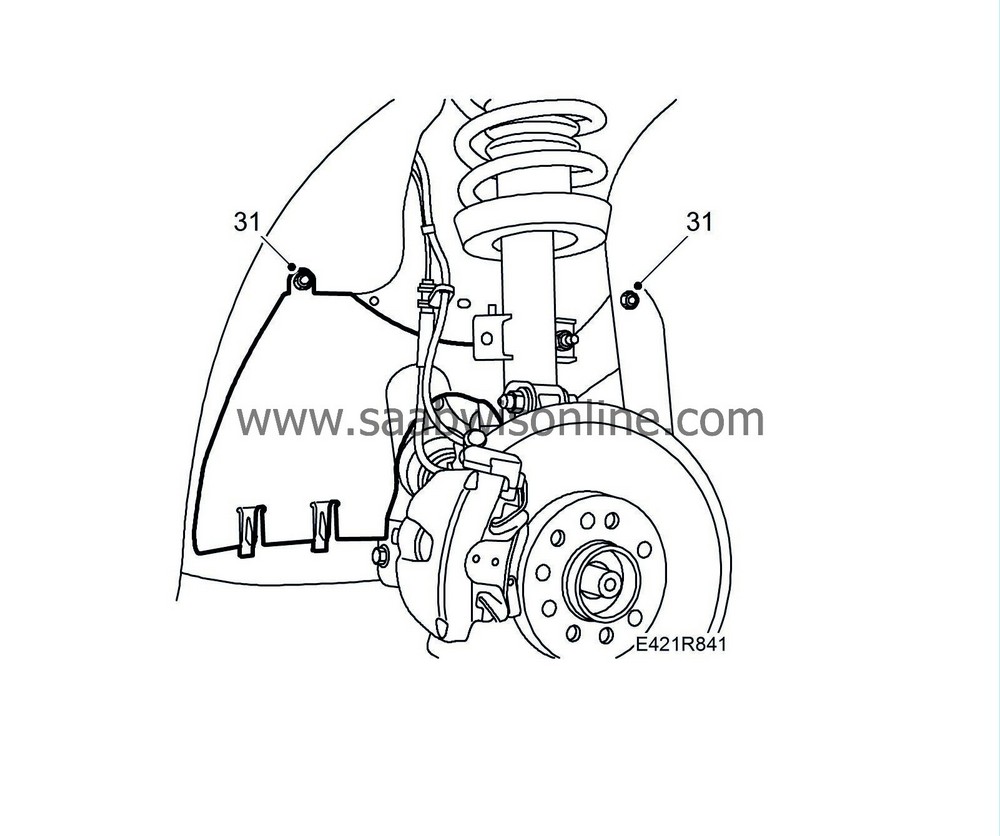
Remove the gearbox cover.
|
|
| 32. |
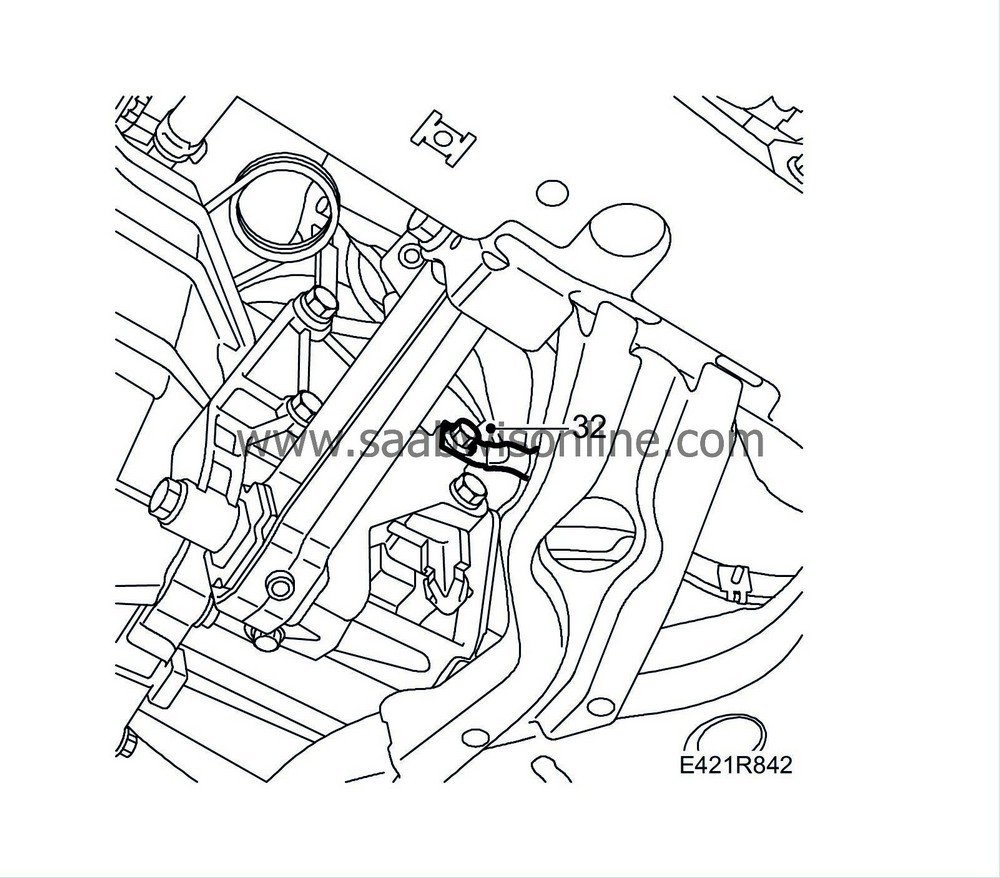
Remove the ground cable from the gearbox mounting.
|
|
| 33. |
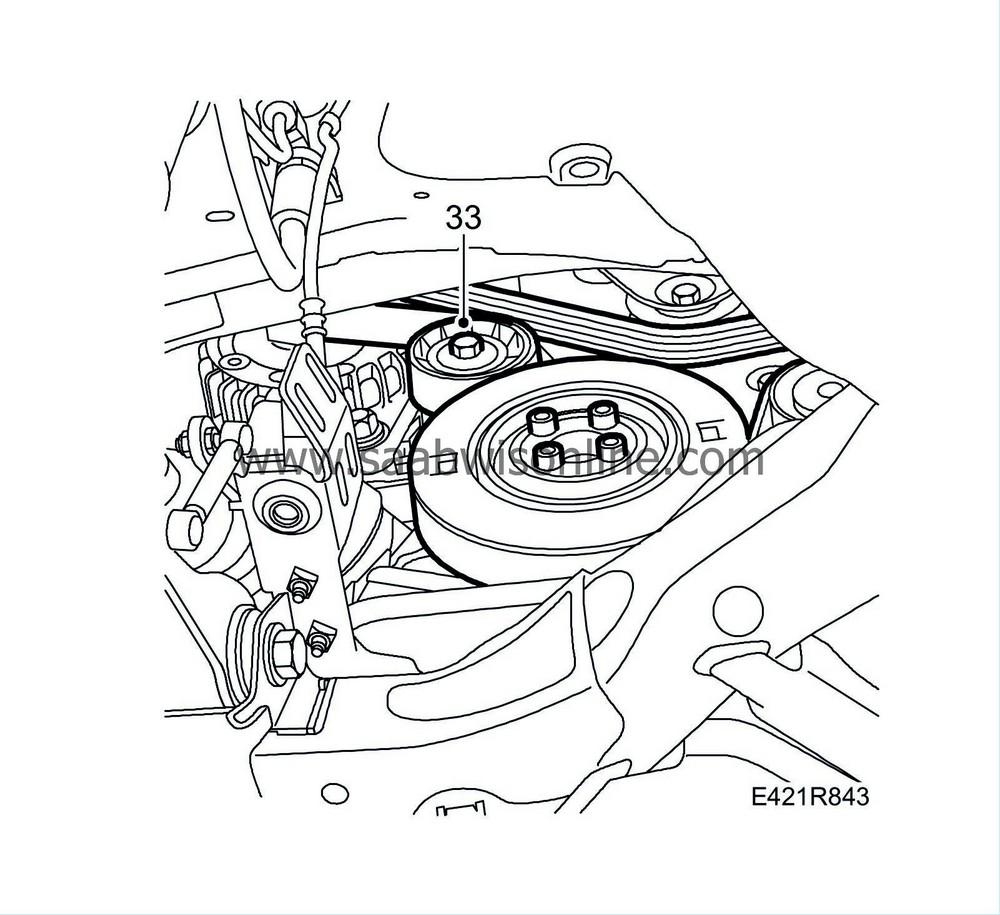
Relieve tension on the belt tensioner by using a jointed wrench to turn it clockwise. Lock the tensioner with
87 92 335
.
|
|
| 34. |
Remove the belt. If the old belt is to be refitted, mark the direction of rotation.
|
|
| 35. |
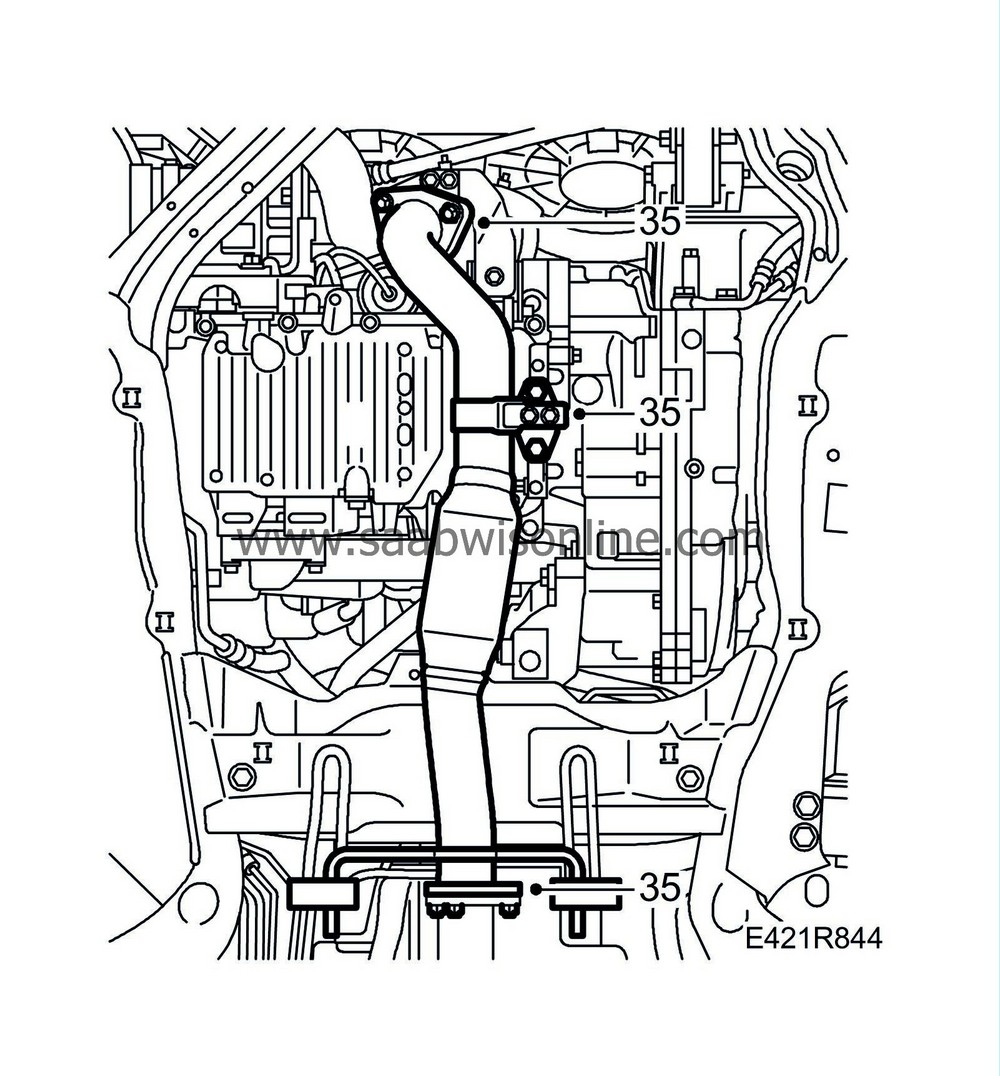
Remove the front exhaust pipe.
|
|
| 36. |
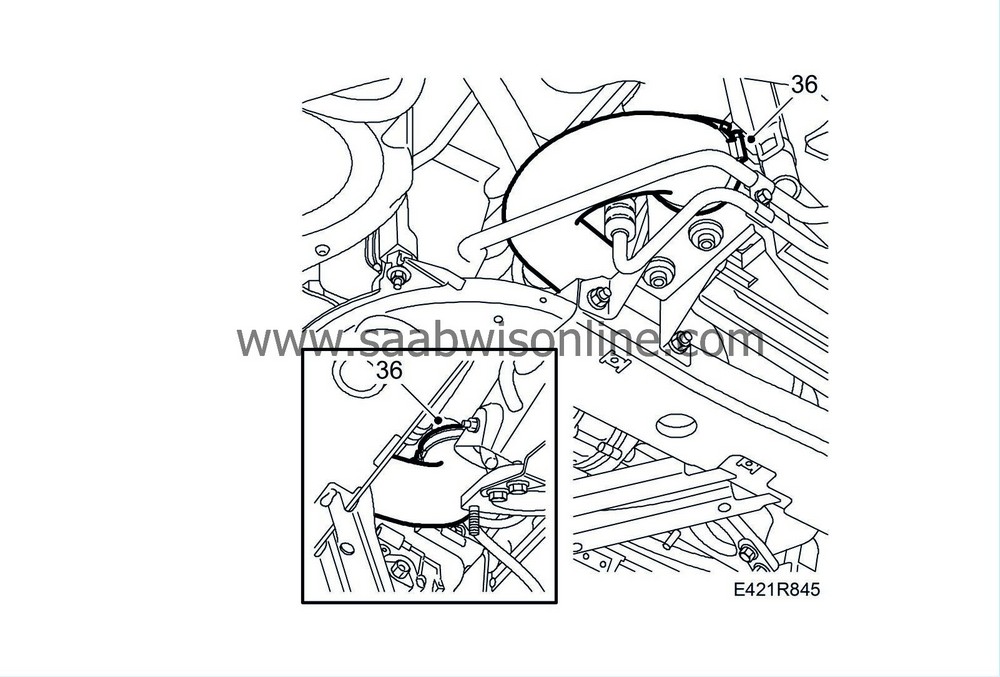
Remove the lower right charge air hose from the charge air cooler and turbocharger.
|
|
| 37. |
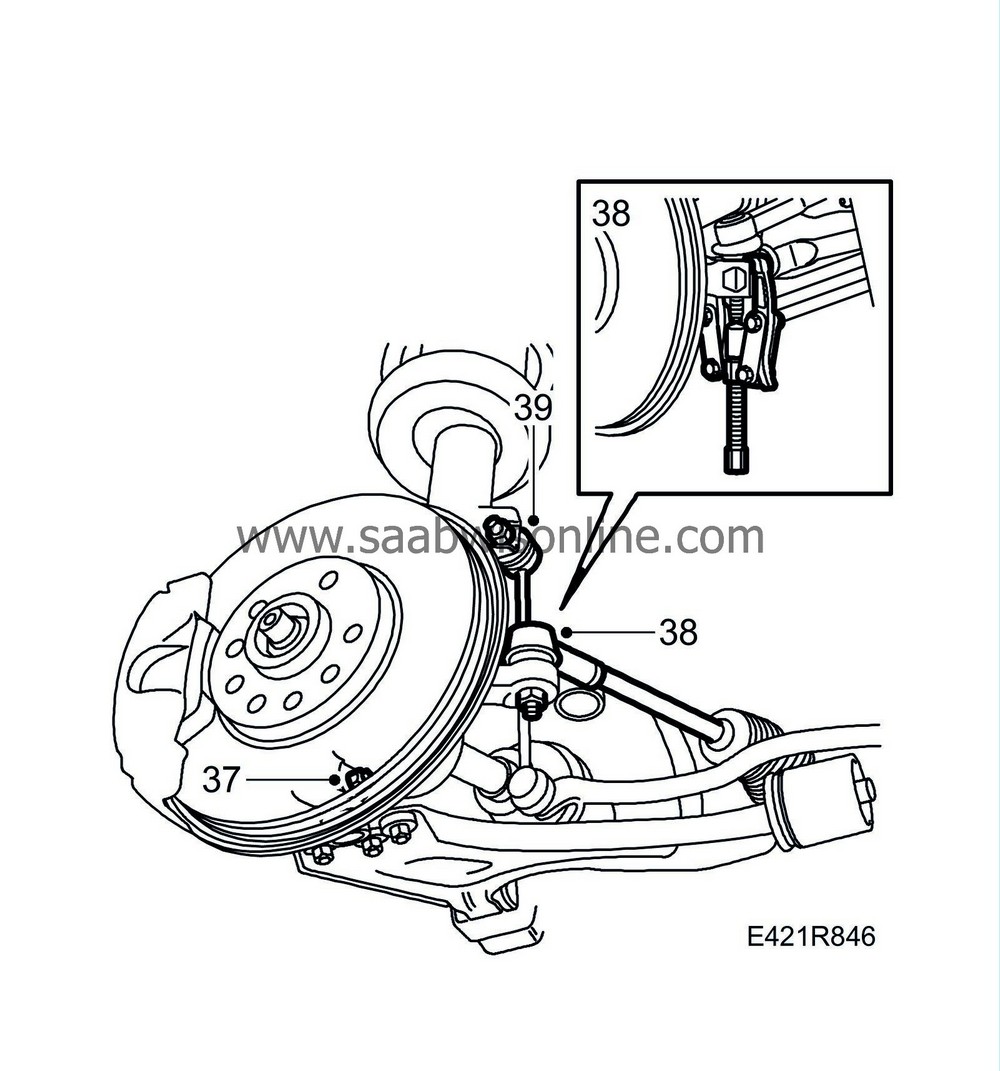
Remove the lead-through bolt and detach the lower spindle joint from the steering swivel member on the right and left-hand sides.
|
|
| 38. |
Remove the nuts securing the track rods and press these out using
87 92 343 Puller
.
|
|
| 39. |
Unscrew the anti-roll bars' upper nuts.
|
|
| 40. |
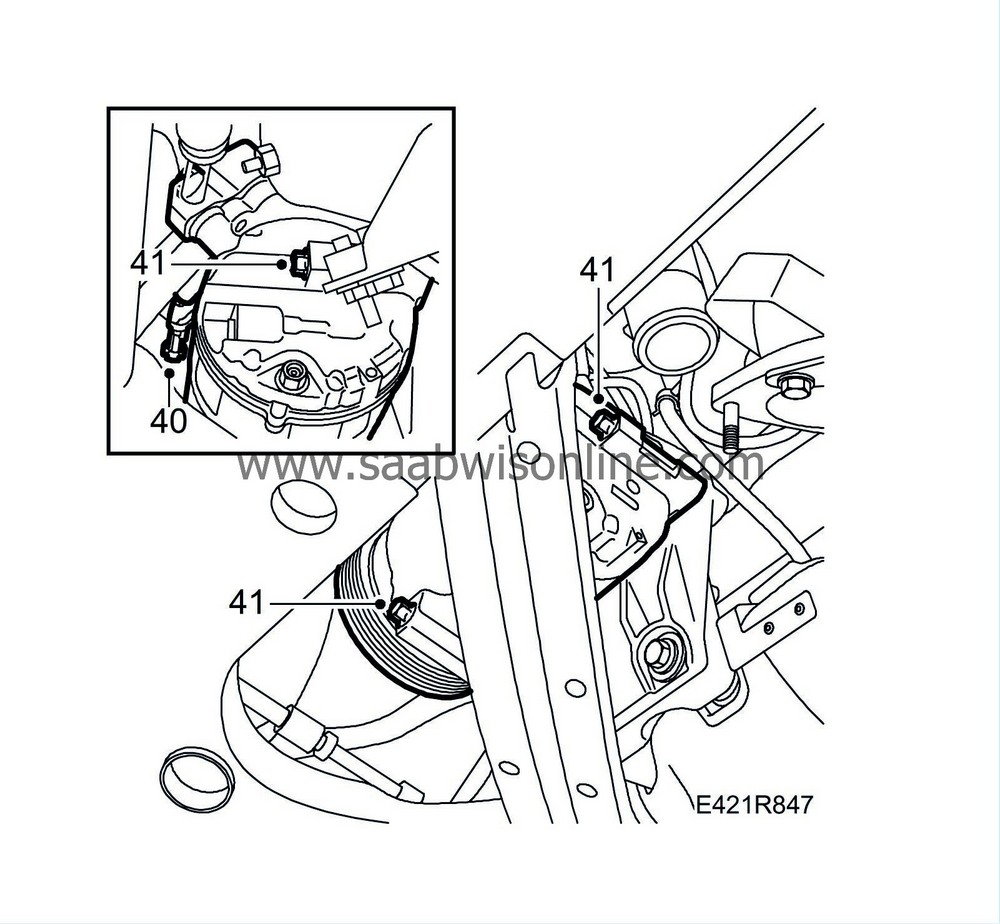
Detach the A/C compressor connector.
|
|
| 41. |
Remove the A/C compressor bolts and release the compressor on the subframe.
|
|
| 42. |
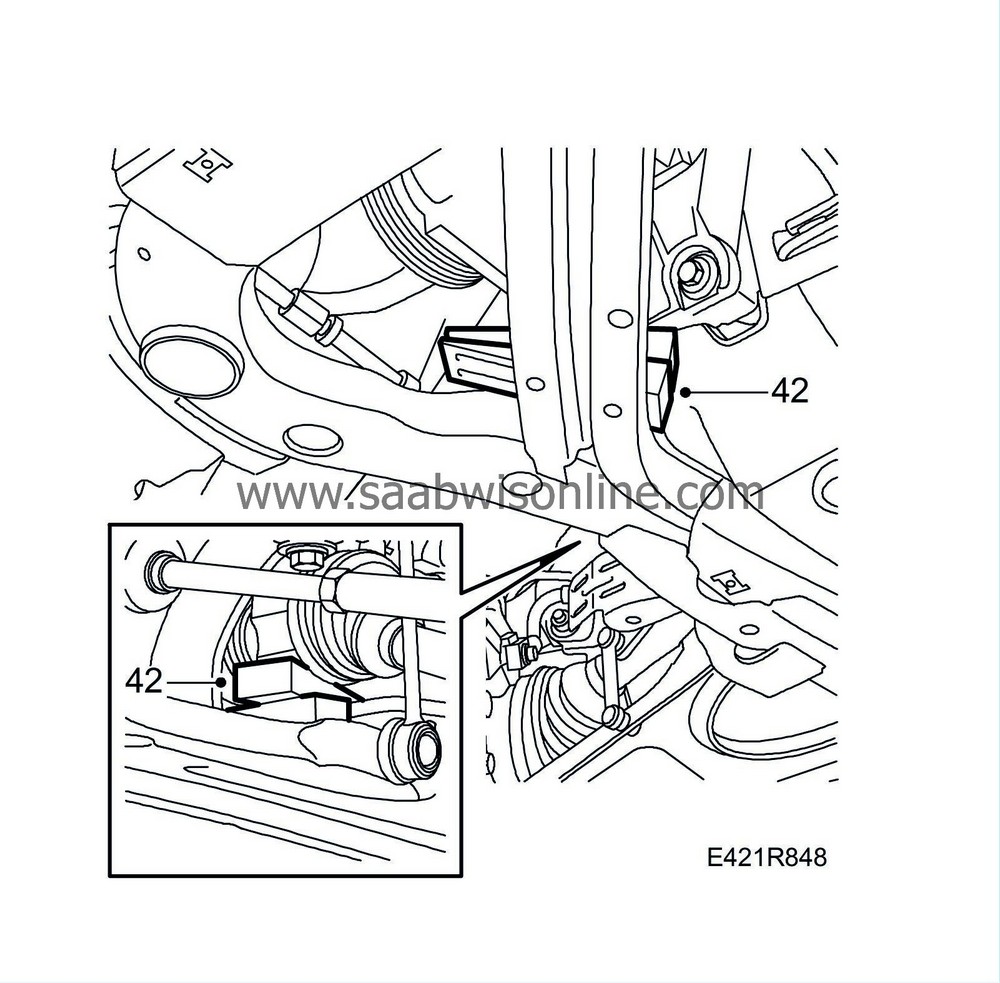
Place plastic wedges between the subframe and A/C compressor bracket as well as between the subframe and intermediate shaft bracket.
|
|
| 43. |
Place two plastic wedges between the gearbox and subframe.

|
|
| 44. |
Aut:
Drain the transmission fluid.
|
|
| 45. |
Aut:
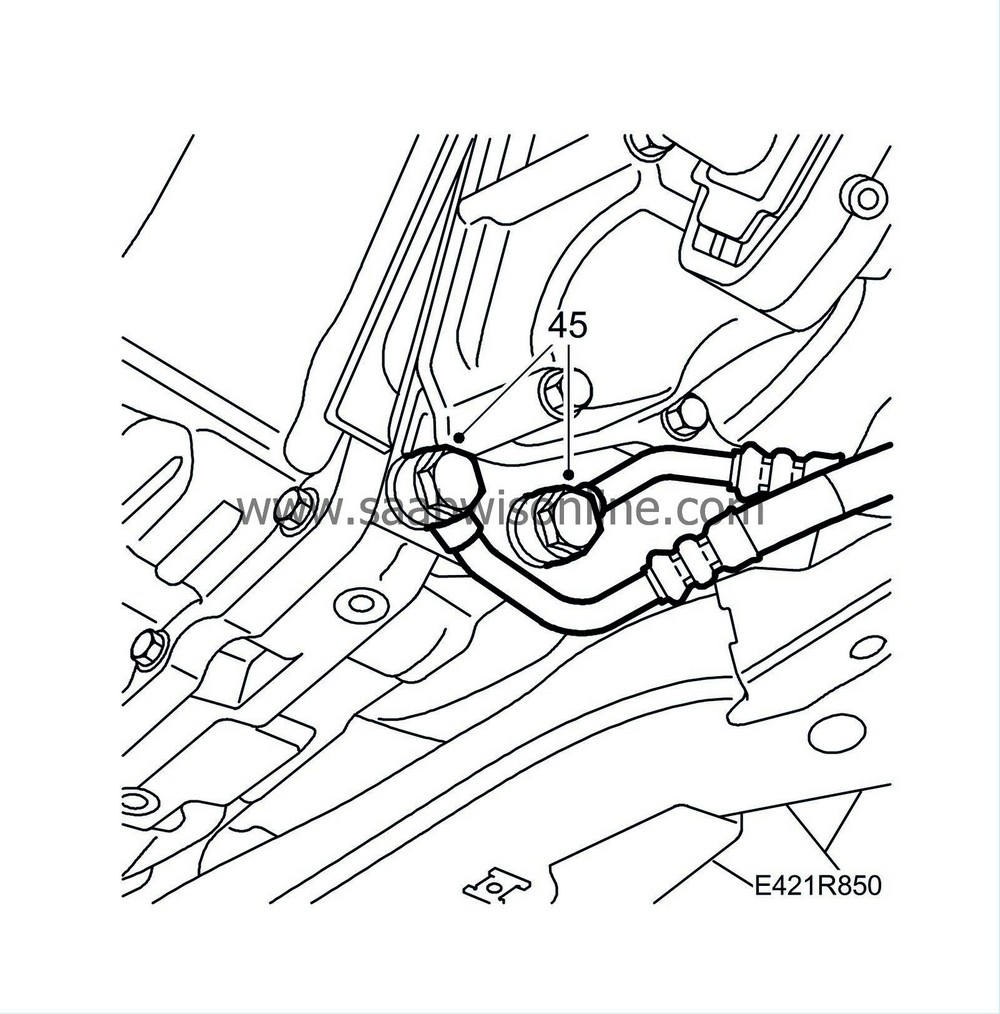
Remove the inlet and outlet hoses of the oil cooler. Plug the inlet and outlet ducts on the gearbox. Use plug no. (10) 91 32 929 and seal no. (10) 91 32 937 from
82 92 948 Plugs, A/C system, kit
|
|
| 46. |
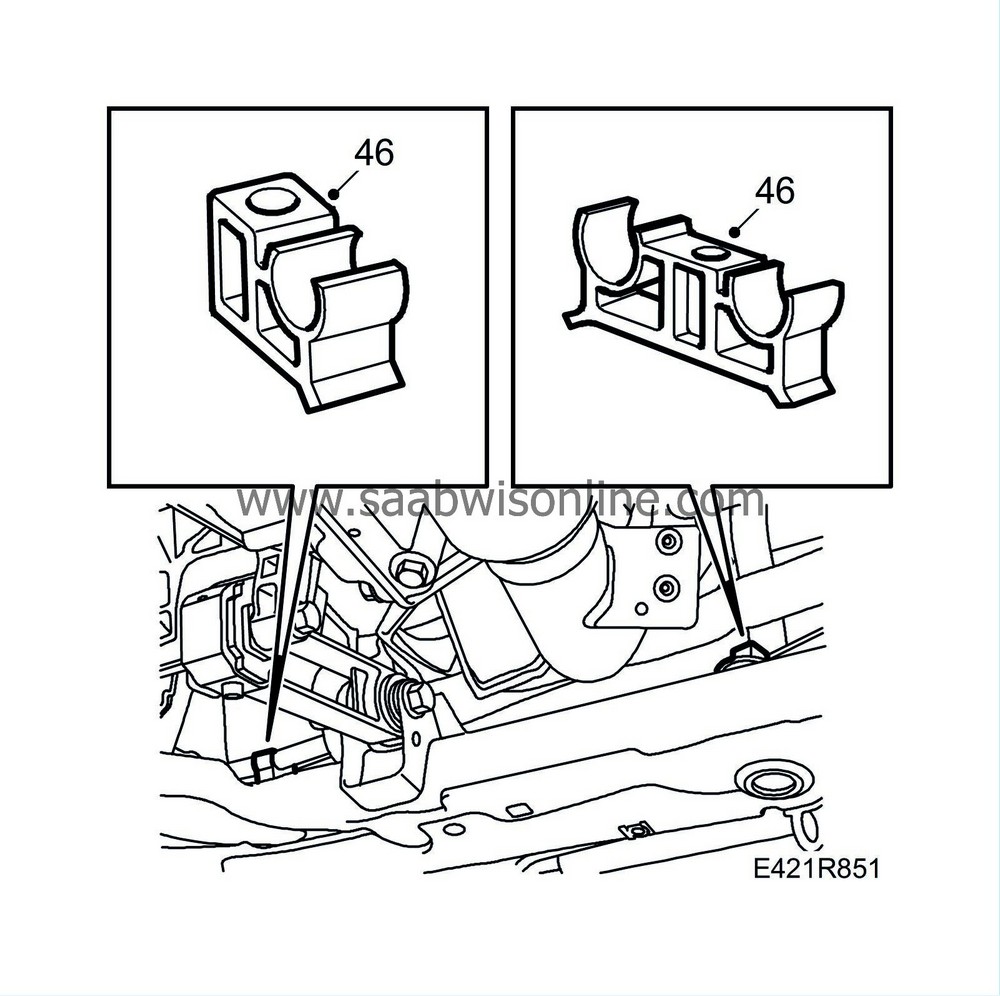
Detach the A/C pipes from the attachment points on the subframe.
|
|
| 47. |
Remove the air filter housing's mountings from the subframe.

|
|
| 48. |
Remove the lower air baffle of the charge air cooler.
|
|
| 49. |
Lower the car.
|
|
| 50. |
Detach the crankcase ventilation pipe and raise it slightly.

|
|||||||
| 51. |
Remove the turbo intake pipe.
|
|
| 52. |
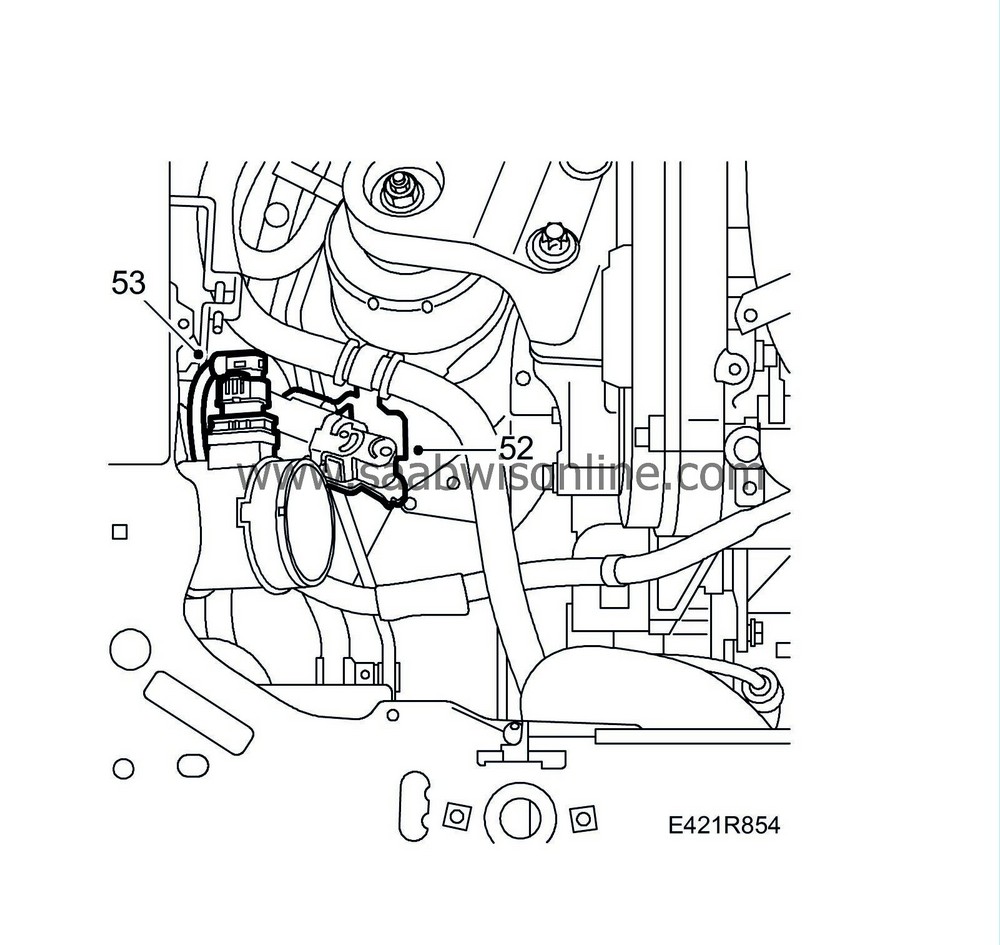
Cut the fixings and unplug the connectors between the engine wiring harness and the body's front right wiring harness.
|
|
| 53. |
Remove the bracket and the mass air flow sensor connector. Fold up the wiring harness on the engine.
|
|
| 54. |
Detach the fuel return hose from the fuel return tank. Plug the connections. Use
83 95 261 Fuel line tool
. Catch any spilled fuel with a cloth.

|
|
| 55. |
Detach the fuel supply hose from the pipe. Plug the connections. Use 83 95 261 Fuel line tool.
|
|
| 56. |
Clamp the power steering pump feed hose with
30 07 739 Hose pinch-off pliers
.

|
|
| 57. |
Detach the power steering delivery hose from the pump. Plug the connections and guide the hose under the A/C pipes toward the subframe.
|
|
| 58. |
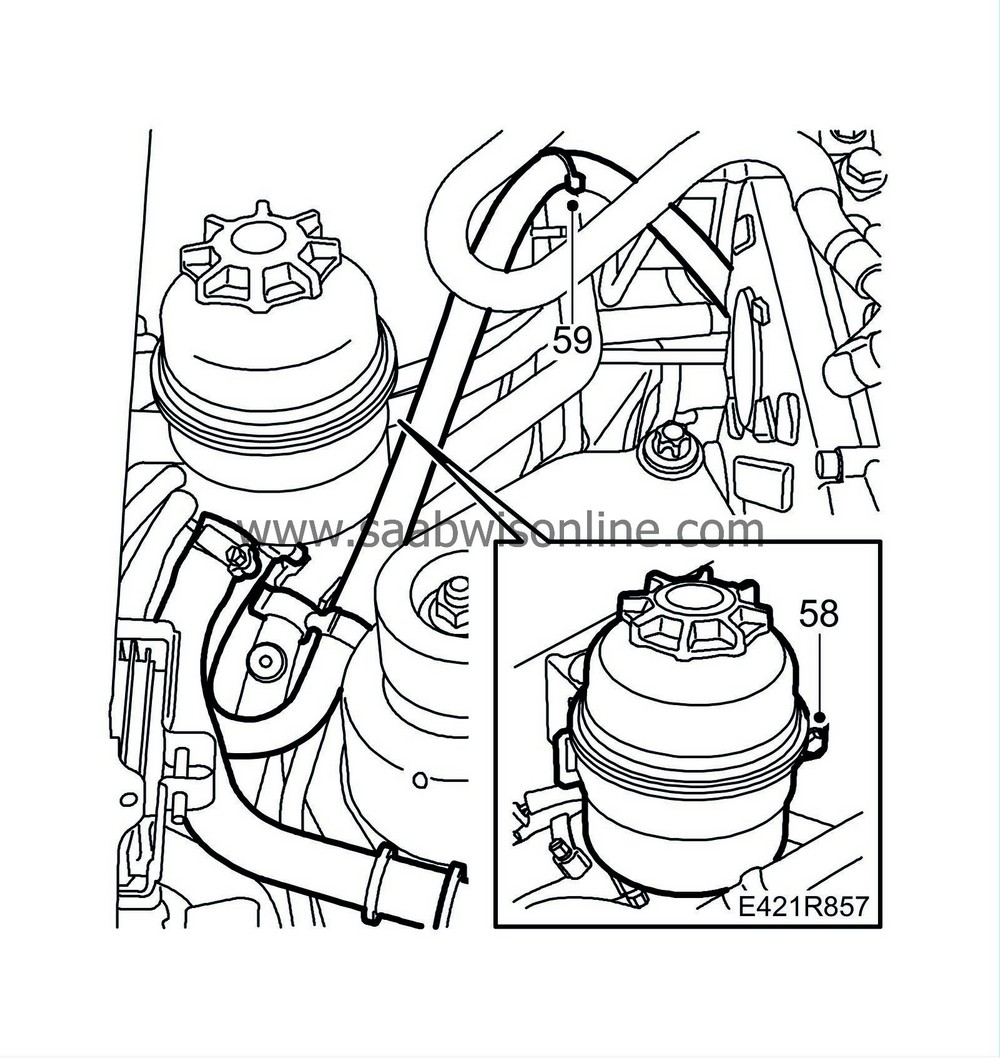
Remove the power steering fluid reservoir from its mounting.
|
|
| 59. |
Remove the servo hose from its fixing and attach the power steering fluid reservoir to the engine.
|
|
| 60. |
Remove the blanking-off washers on the wiper spindle nuts and loosen the nuts slightly.
|
|
| 61. |
Remove the windscreen wipers using
85 80 144 Puller, windscreen wiper arm
.

|
|
| 62. |
Remove the rubber wiper spindle seals.
|
|
| 63. |
Remove the two screw clips on the ends of the windscreen cover.
|
|
| 64. |
Loosen the rubber seal.
|
|
| 65. |
Remove the windscreen cover by grasping the front edge and lifting upward/forward. Be careful with the bonnet release wire on the left-hand side.
|
|
| 66. |
Undo the protective cover on the control module.

|
|
| 67. |
Open the protective cover and detach the control module's multicontacts by turning the catches up.
|
|
| 68. |
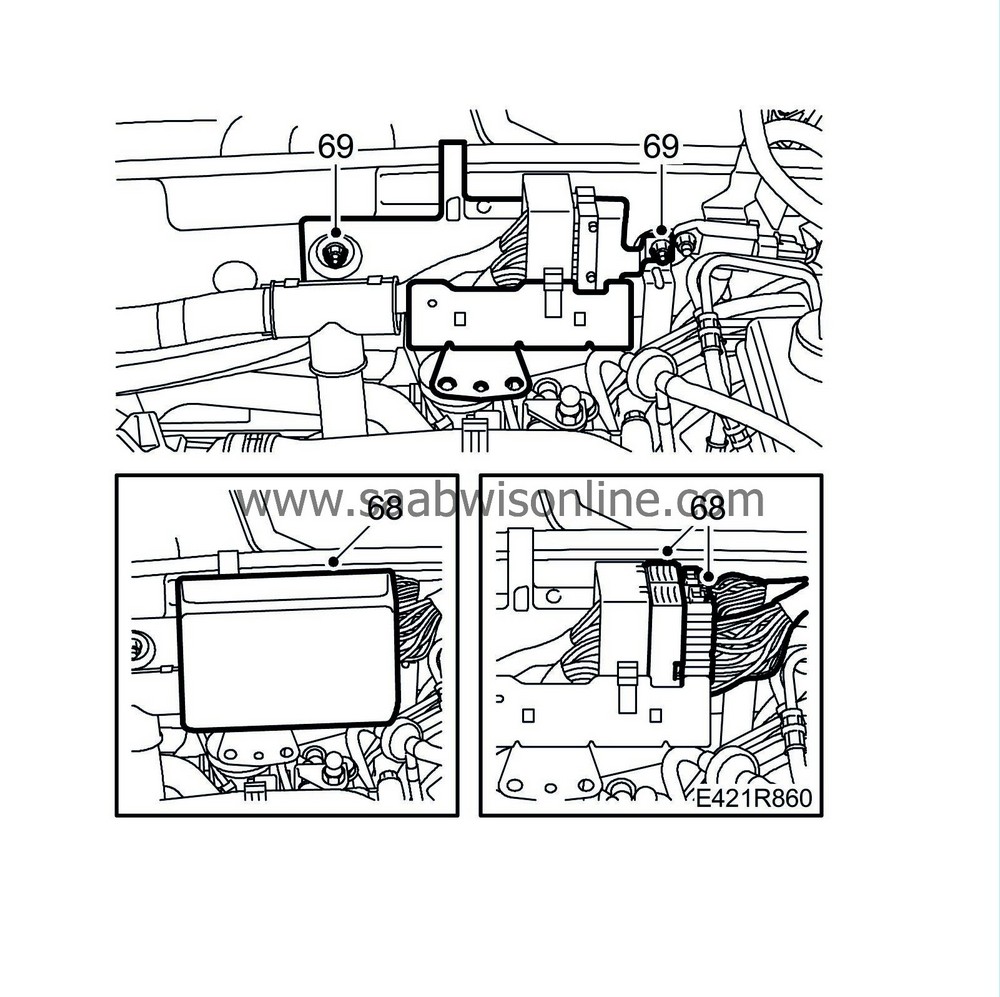
Unplug the connectors between the engine wiring harness and the body harness on the bulkhead.
|
|
| 69. |
Remove the bracket from the bulkhead and place the wiring harness on the engine.
|
|
| 70. |
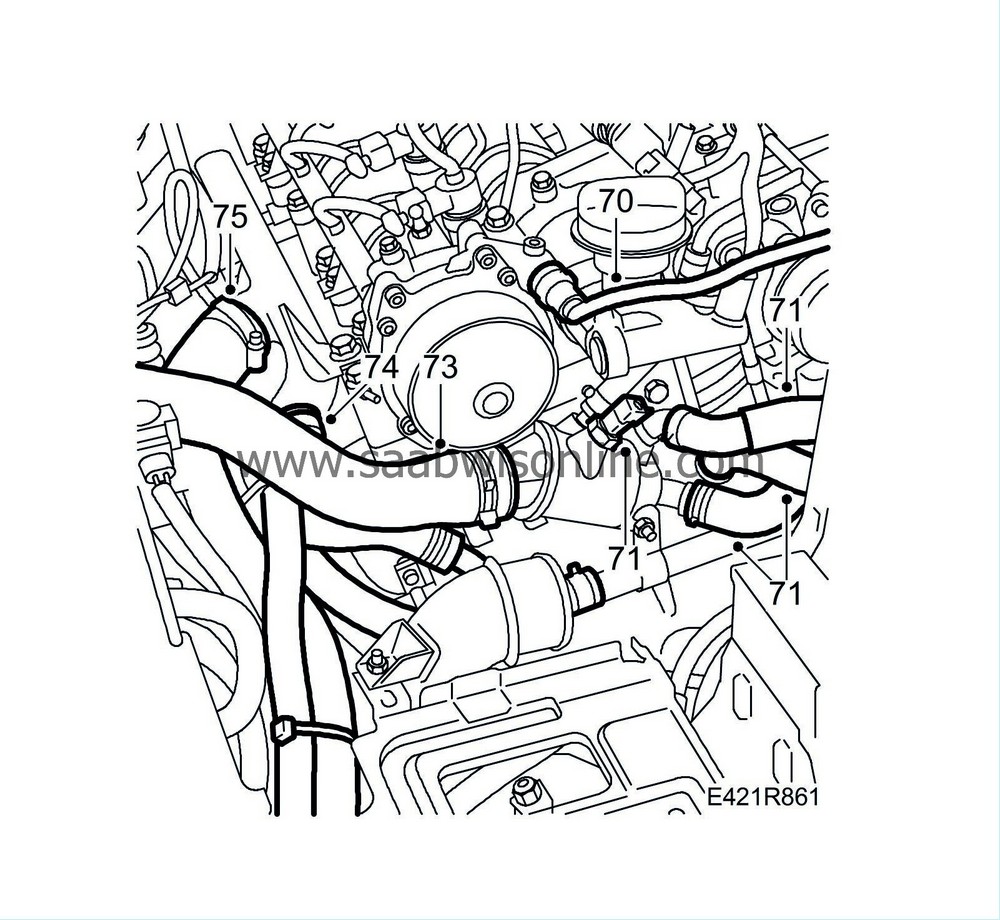
Detach the brake vacuum hose from the vacuum pump.
|
|
| 71. |
Detach the rear coolant hoses from the thermostat housing and the EGR cooler. Open the fixing and move the hoses aside.
|
|
| 72. |
Place a receptacle under the engine.
|
|
| 73. |
Detach the upper coolant hose from the thermostat housing.
|
|
| 74. |
Detach the coolant reservoir hose from the coolant pipe.
|
|
| 75. |
Detach the lower radiator hose from the coolant pipe.
|
|
| 76. |
Move aside the two hoses.
|
|
| 77. |
Detach the vacuum hoses from the boost pressure control valve (179a)

|
|
| 78. |
Unplug the front temperature sensor connector and detach the connector from the mounting; put the cable on the engine.
|
|
| 79. |
Fit two
83 95 212 Straps
and secure the radiator core.

|
|||||||
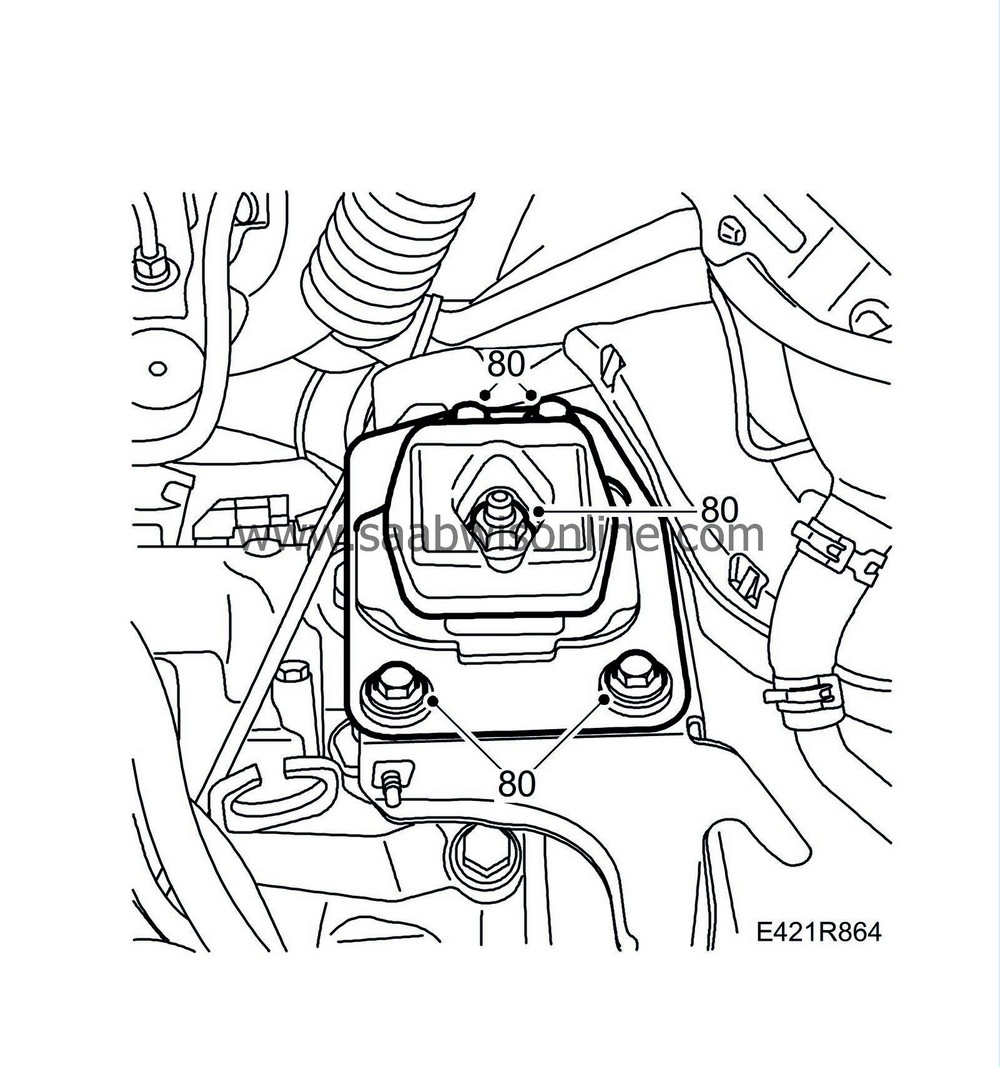
| 80. |
Remove the nut and the four bolts of the gearbox mounting.
|
|
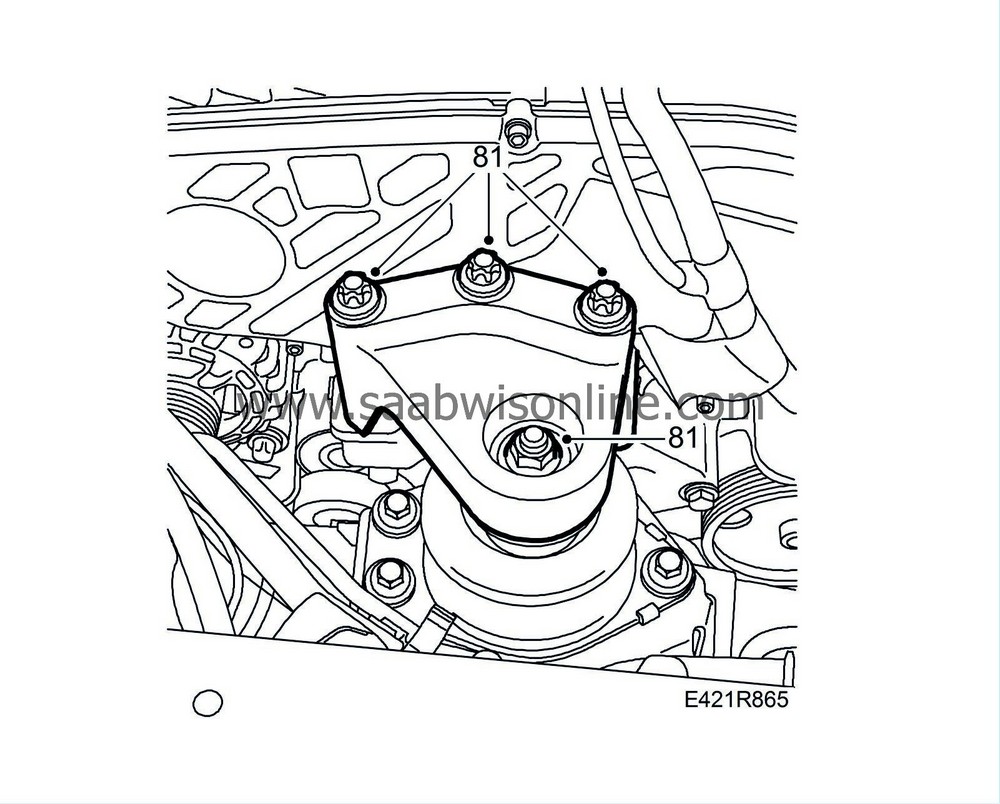
| 81. |
Remove the right engine mounting.
|
|
| 82. |
Check to make sure that everything has been detached and moved aside so that no damage will occur when the power train is removed.
|
|
| 83. |
Raise the car.
|
|
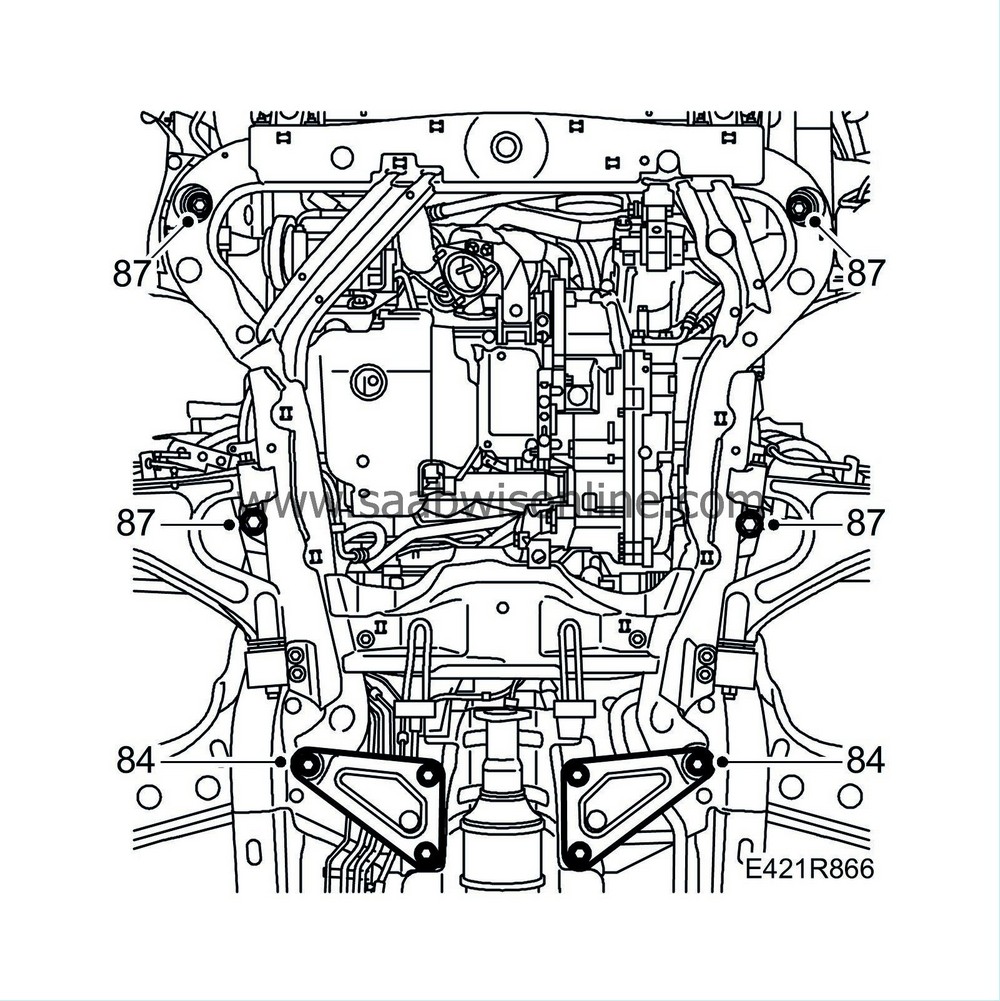
| 84. |
Remove the triangular stiffeners.
|
|
| 85. |
Position
83 95 311 Trolley lift
with
83 94 801 Parent fixture
,
83 95 170 Adapter
,
83 95 188 Basic fixture
and
83 95 196 Holder, front
under the power train. The height adjusters of the fixture must be in their lowest position.
|
|
| 86. |
Raise the lifting table and adjust it according to the locating points on the car body and fixture. Continue raising the lifting table until it touches the subframe. Raise it a little more and then adjust its height until it abuts evenly against the subframe.
|
|
| 87. |
Remove the subframe retaining bolts.
|
|
| 88. |
Carefully lower the power train slightly and detach the drive shafts from the hubs using
89 96 951 Puller, drive shaft
.
|
|
| 89. |
Lower slightly further and make sure that the A/C compressor comes out between the subframe and the body so that the engine can move down unhindered. Suspend the A/C compressor using a
83 95 212 Strap
.
|
|
| 90. |
Lower the power train more. Be careful to ensure that nothing gets jammed or overlooked during removal and gets damaged.
|
|

 Warning

