Tailgate 5D, changing
| Tailgate 5D, changing |
When changing the tailgate, remove the trim, handles, cables, etc. to be used on the new tailgate.
| To remove |

| 1. |
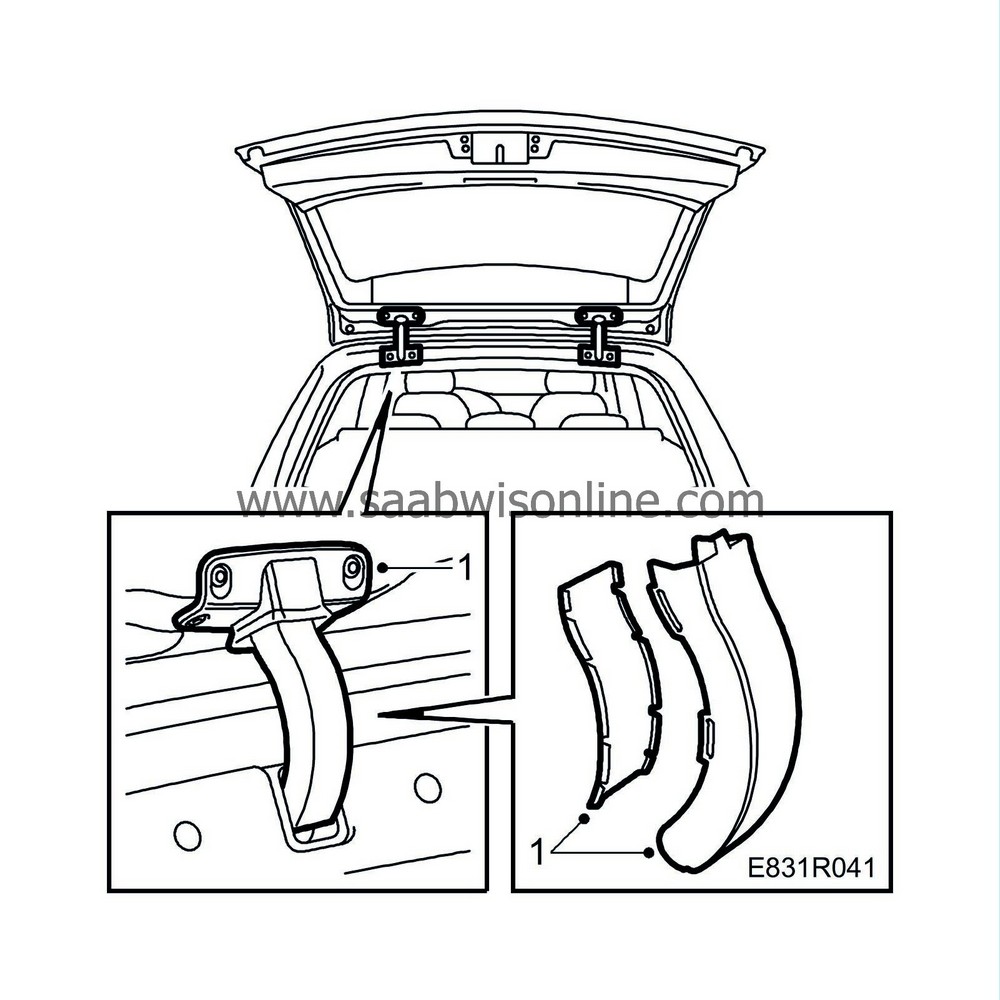
Open the tailgate and remove the seals from the hinges. Remove the cable ducting by the hinges.
|
|
| 2. |
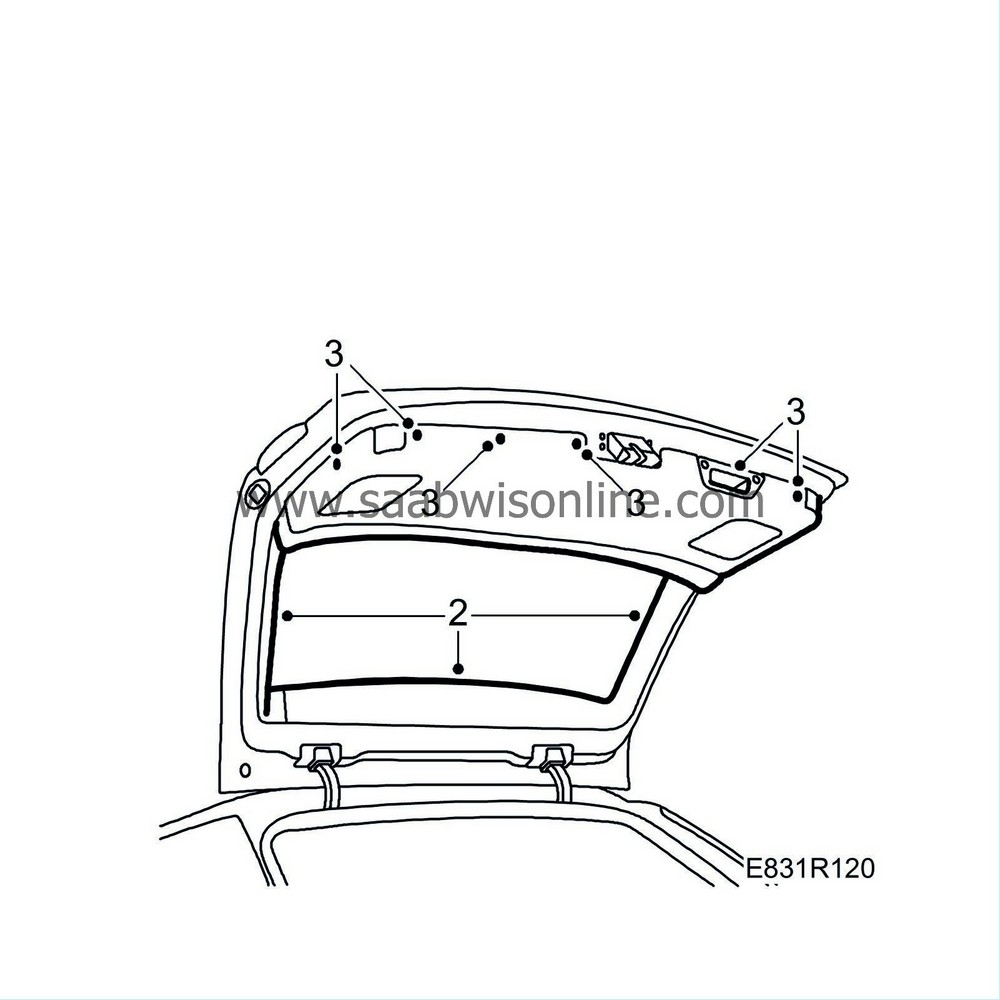
Remove the trim mouldings.

|
|
| 3. |
Remove the inner tailgate trim by removing the door pull retaining screws and the plastic clips in the trim.
|
|
| 4. |
Remove the
Tailgate trim, 5D.
|
|
| 5. |
Mark the wiring harness to show how it was fitted and unplug all the connectors and disconnect the rear window washer hose. Unsnap all the clips securing the wiring harness to the tailgate.

|
|
| 6. |
Extract the wiring harness from the tailgate at the hinges.

|
|
| 7. |
Protect the area between the roof and the tailgate to avoid damage to paintwork and body.
|
|
| 8. |
Have a couple of assistants hold the tailgate and unscrew the four bolts securing the tailgate to the hinges.
|
|
| 9. |
Carefully lift off the boot lid.
|
|
| To fit |
After painting the tailgate, Teroson Terotex HV 400 T129 must be applied from inside in the lower edge of the tailgate. Apply it so that the fluid runs into the gap between the outer and inner plate. Allow the agent to dry for a time.

Wipe away any excess that runs out through the drain holes.
| 1. |
Lift the tailgate into position and have a couple of assistants to hold the tailgate for you.

|
|
| 2. |
Adjust the tailgate, see
 .
.
Tighten the bolts. |
|
| 3. |
Insert the cables into the tailgate at the hinges.
|
|
| 4. |
Fit the wiring harness to the tailgate and plug in the connectors and attach the washer hose.

|
|
| 5. |
Fit the
Tailgate trim, 5D
.

|
|
| 6. |
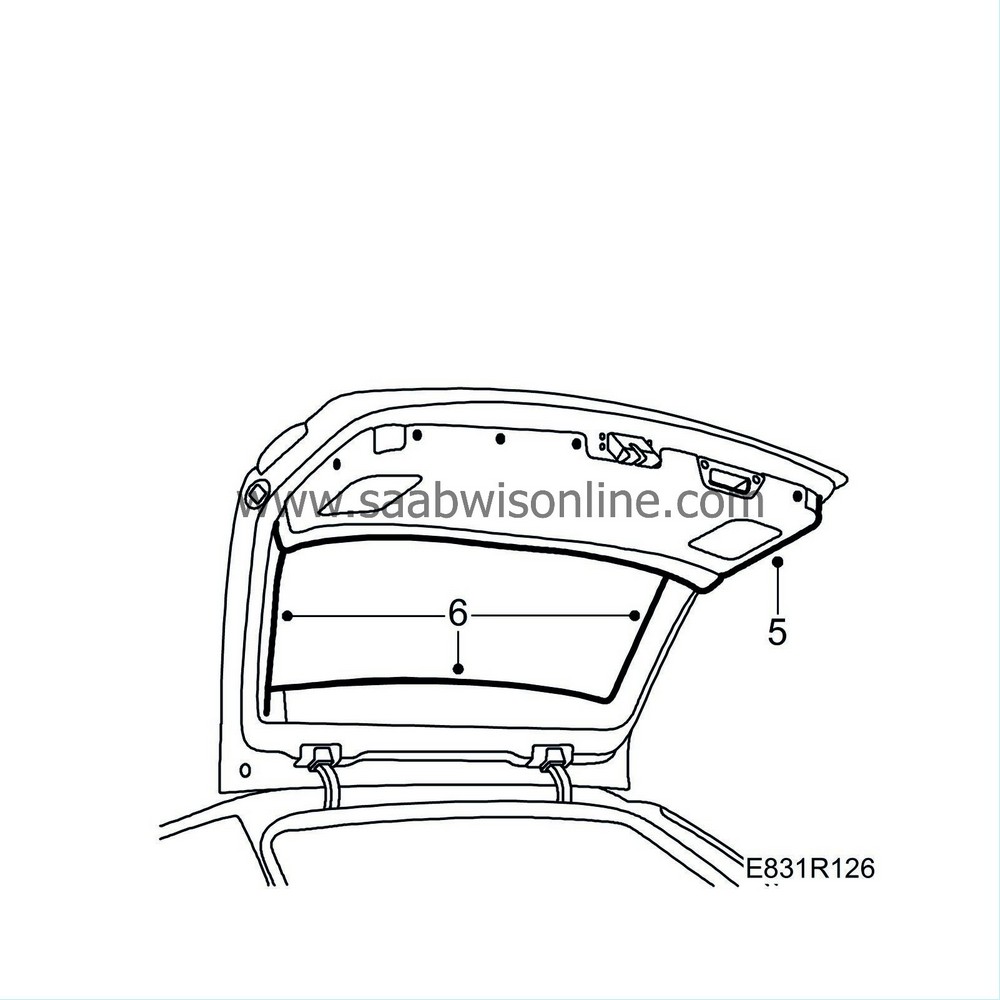
Fit the window cover plate.
|
|
| 7. |
Fit the cable channels and the hinge seals to the hinges.

|
|


