B-pillar trim
| B-pillar trim |
| To remove |
|
|||||||
| 1. |
Move the seat as far forward as possible.
|
|
| 2. |
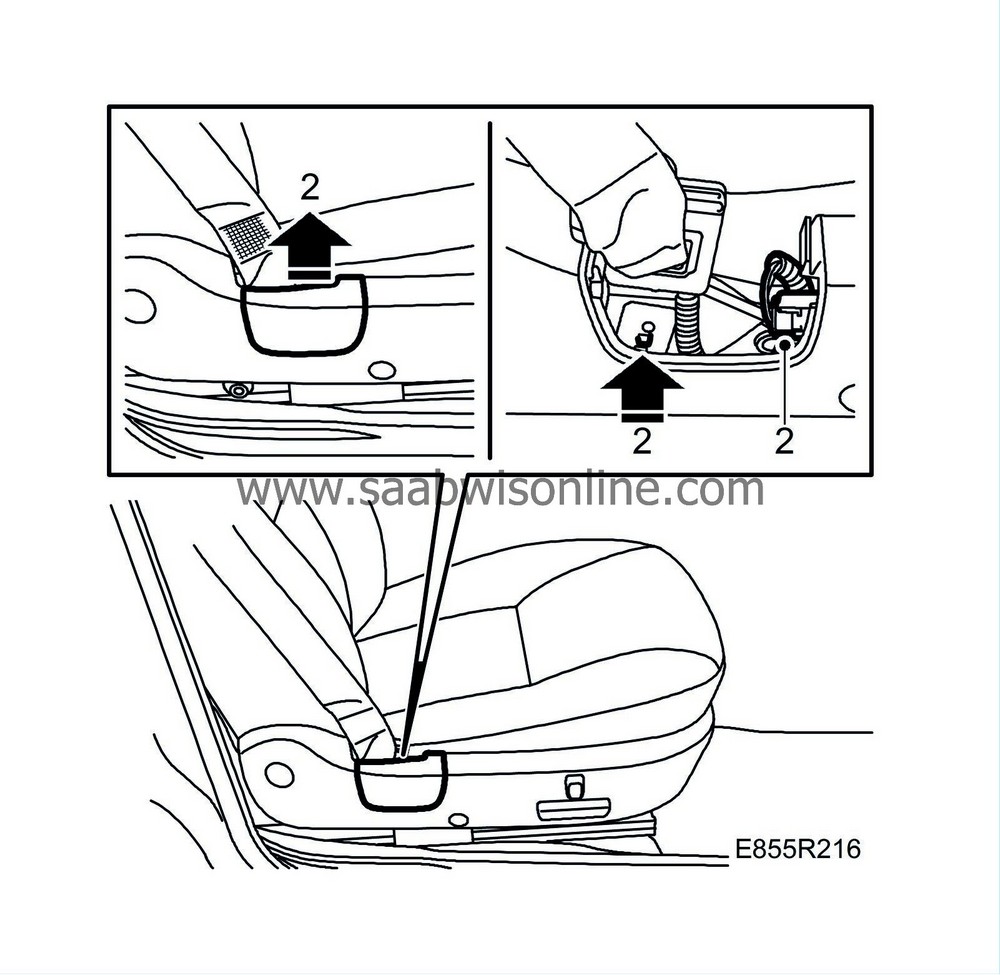
Cars with PPS
: Remove the cover. Unplug the belt force sensor's connector. Remove the seatbelt's mounting by pressing in the catch with a screwdriver.

|
|
| 3. |
Cars without PPS
: Remove the seatbelt's mounting in the front seat by pressing in the catch with a bent screwdriver.

|
|
| 4. |
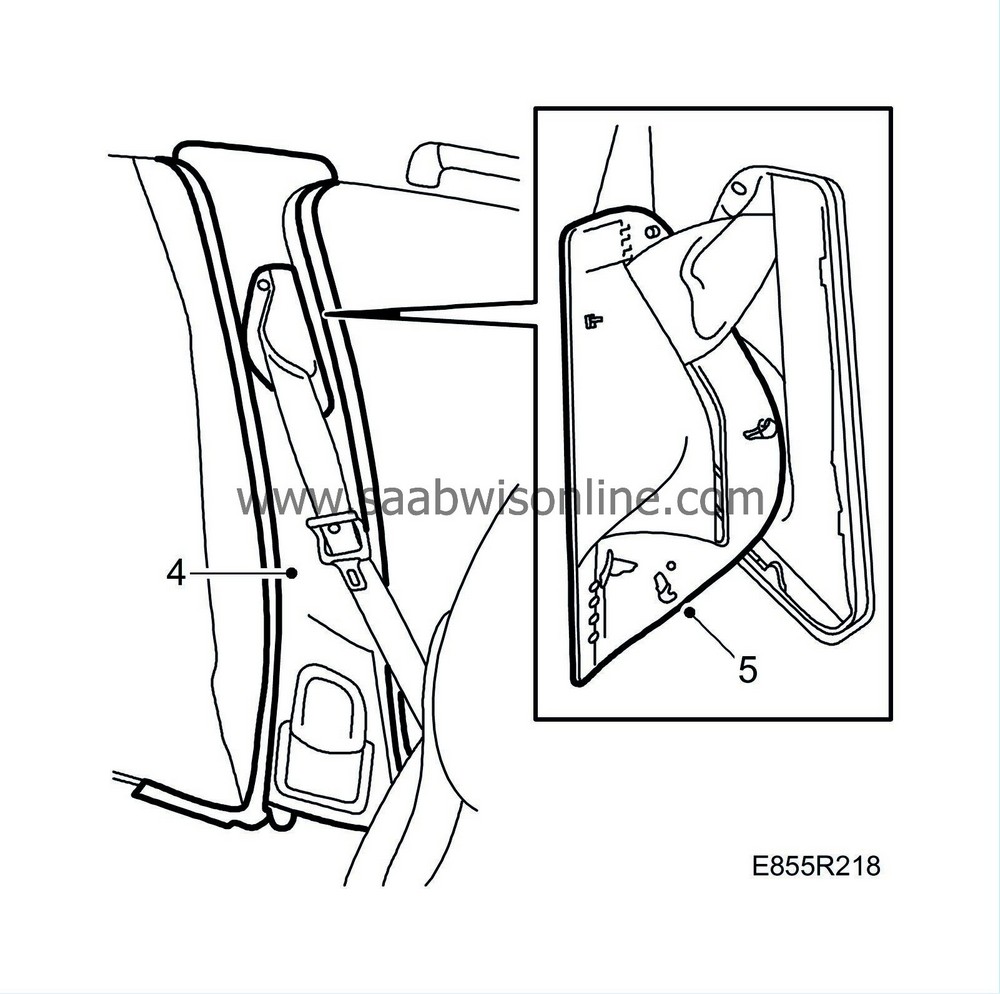
Pull off the B-pillar trim (fastened with clips) and lift up the pillar trim out of the air duct.

|
|
| 5. |
Remove the strap guide and pull the belt through the B-pillar trim.
|
|
| To fit |
|
|||||||
| 1. |
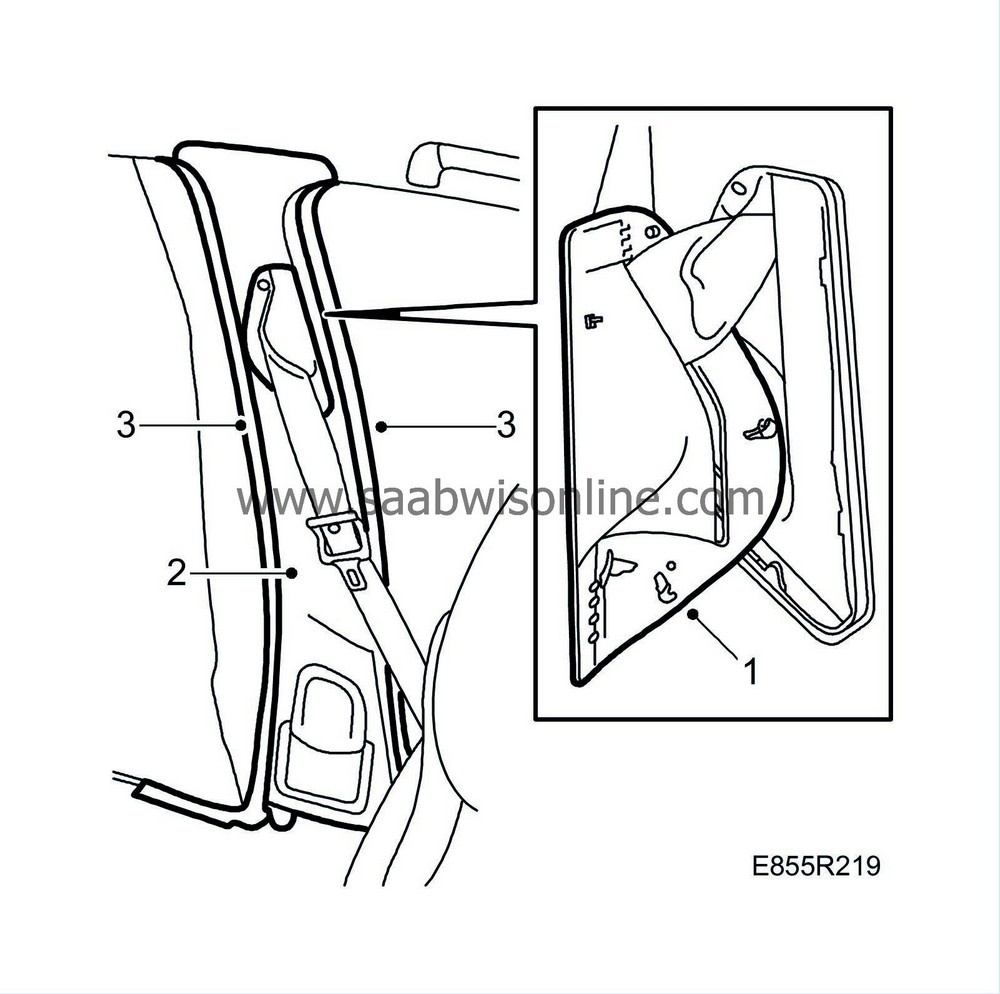
Draw the belt through the B-pillar trim and refit the strap guide.

|
|
| 2. |
Fit the B-pillar trim. Check that the carpet and sill scuff plate are covered by the B-pillar trim.
|
|
| 3. |
Fit the door sealing strips around the B-pillar trim.
|
|
| 4. |
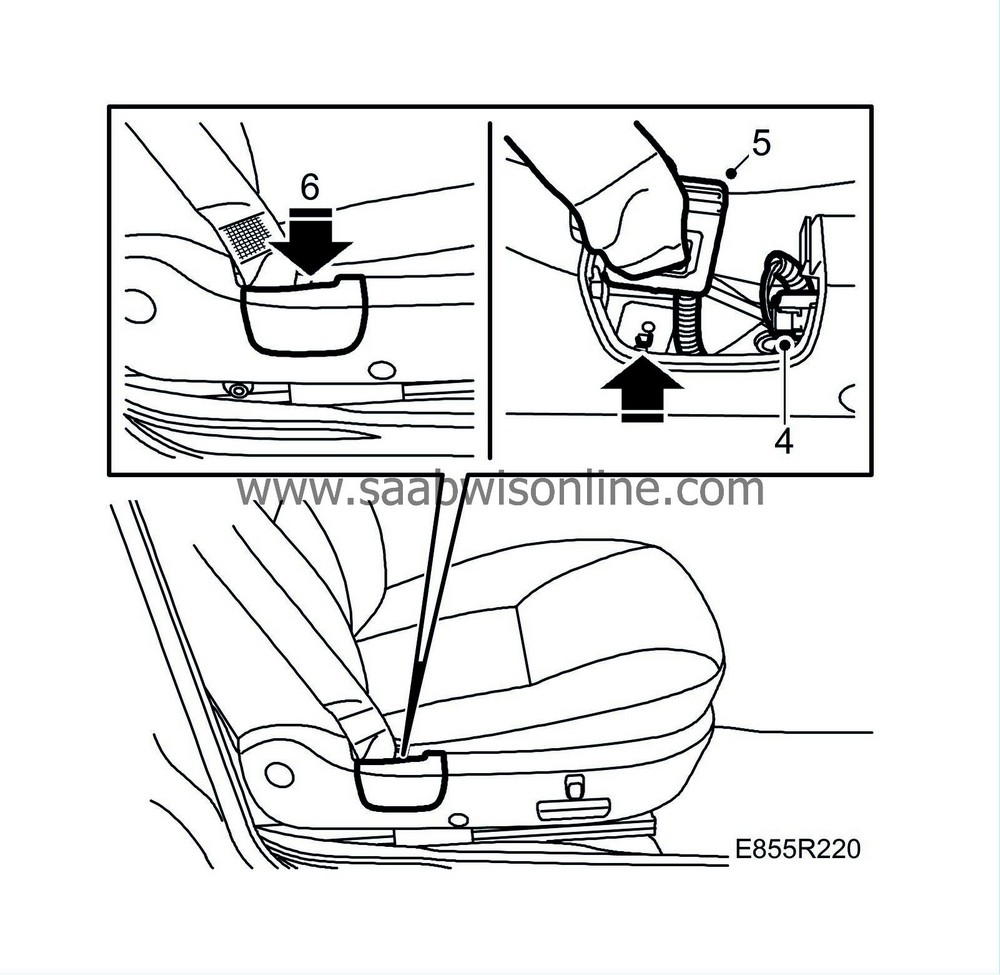
Cars with PPS
: Plug in the belt force sensor's connectors.

|
|
| 6. |
Cars with PPS
: Fit the cover.
|
|
| 7. |
Then check the following with the diagnostic tool:
Connect the diagnostic tool to the connector under the dashboard. Clear any diagnostic trouble codes. Switch off the ignition and switch it on again. Wait at least 10 minutes with the ignition switched on. Check whether a diagnostic trouble code (DTC) is displayed: If a diagnostic trouble code is shown:Carry out a fault diagnosis as instructed in Group 8, Airbag (SRS), ”Fault diagnosis by diagnostic trouble codes”. If no diagnostic trouble code is shown:Installation is complete. Disconnect the diagnostic tool. |
|

 Warning


