(254-2614) Lit CHECK ENGINE lamp and engine in Limp-home
Symptom: MIL on and P1909 detected, engine in Limp home mode.
|
TECHNICAL SERVICE BULLETIN
|
|
Bulletin Nbr:
|
254-2614
|
|
Date:
...........
|
Februari 2006
|
|
Market:
|
se separat lista
|
|
|
Lit CHECK ENGINE lamp and engine in Limp-home
|
Saab 9-5 M06- with engine alternative Z19
In many cases diagnostic trouble code P1909 appears without any obvious visible failure. The following 4 trouble types can result in the diagnostic trouble code being detected:
|
1.
|
MIL on during the first 1000-2000 km (600-1200 miles). (After manual regeneration the car works normally.)
|
|
2.
|
An abnormally rapid carbon build-up caused by, e.g. an air leak on the intake side, sticking EGR valve, wrong injectors, sticking swirl throttle, etc
|
|
3.
|
Repeated lighting of the MIL and code P1909 may not be caused by component failure but due to the criteria for dynamic regeneration not being achieved.
|
|
4.
|
Diagnostic trouble codes on other components in EDC 16 block the regeneration and so diagnostic trouble code P1909 is generated. These failures must be rectified and the diagnostic trouble code cleared before fault diagnosis can continue.
|
In the event of customer complaints the following procedure must be undertaken.
Symptoms
MIL on and P1909 detected, engine in Limp home mode.
Depending on the procedure, see EPC for part numbers.
|
1.
|
After fault diagnosis has been concluded, always finish with a manual regeneration. This is because the calculated carbon value could be incorrectly calculated depending on trouble type. Certain cars may have a more significant carbon build-up than calculated during the first 2000 km/1200 miles.
|
Note
|
|
After manual regeneration the carbon supplement value is about 70%. This is normal as manual regeneration is not as comprehensive as automatic.
|
|
|
2.
|
Check whether the car is equipped with software trim kit by reading the software number using Tech2. Compare with the software in question as set out in TIS2000.
If no hardware failure is discovered and the car still comes back numerous times, this may be due to it being tuned. The higher power output is reached, via software or hardware, by allowing more carbon, which means the amount of carbon calculated by the control module does not correspond. This means that the particle filter becomes full before regeneration is performed.
|
|
3.
|
Use of tuning products not approved by Saab Automobile AB results in the termination of the Saab warranty.
|
|
4.
|
Remove the upper engine cover and insulation and check the function of the EGR valve by activating it with Tech2. When activating the EGR you normally hear the sound of the engine changing and/or engine stalls.
|
|
5.
|
Check that the swirl throttles move by activating them with Tech2.
|
|
6.
|
Check the vacuum system as follows:
|
|
|
6.a.
|
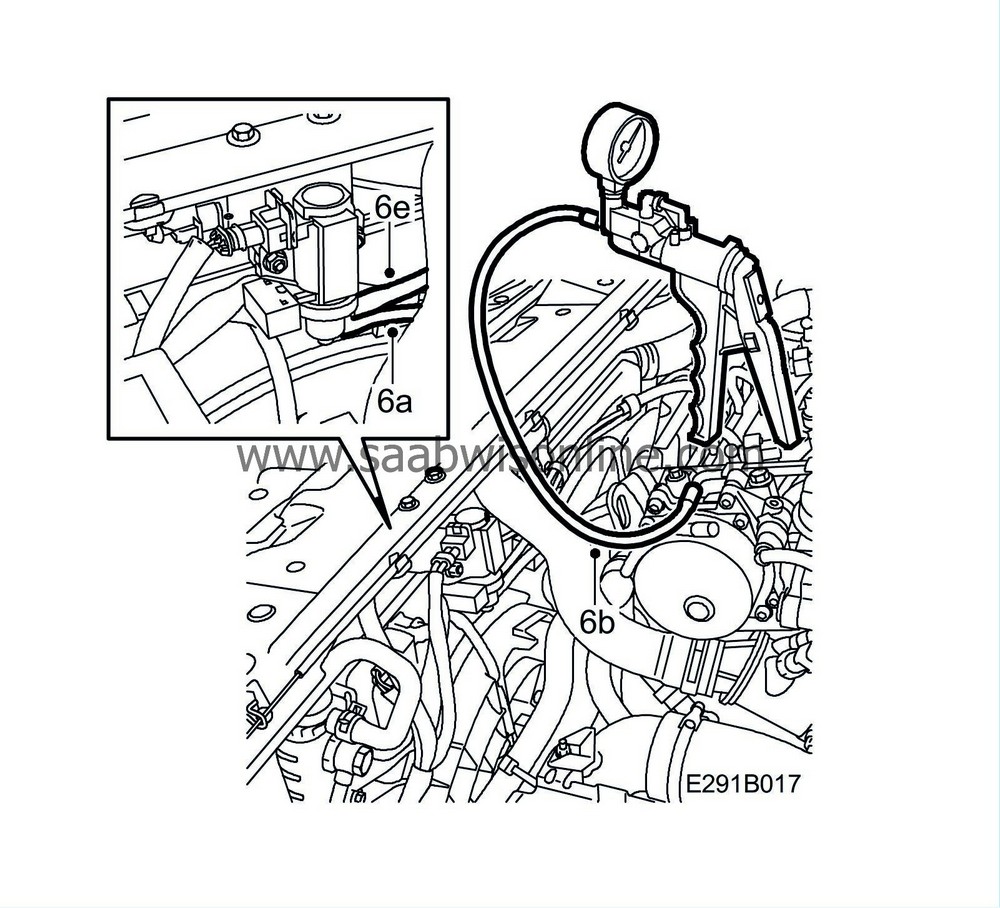
Remove the input (lower) vacuum hose from the charge air valve (179a). Plug the hose.
|
|
|
6.b.
|
Remove the vacuum hose from the vacuum pump and connect 30 14 883 Pressure/vacuum pump.
|
|
|
6.c.
|
Pump up an underpressure of approx. 0.5 bar and check that it does not leak.
|
|
|
6.d.
|
Remove 30 14 883 Pressure/vacuum pump and the plug, connect the hoses to the vacuum pump and to the charge air valve (179a).
|
|
|
6.e.
|
Remove the output (upper) vacuum hose from the charge air valve (179a) and connect 30 14 883 Pressure/vacuum pump.
|
|
|
6.f.
|
Pump up an underpressure of approx. 0.5 bar and check that the turbocharger's diaphragm box does not leak.
|
|
|
6.g.
|
Remove 30 14 883 Pressure/vacuum pump and connect the vacuum hose.
|
|
7.
|
Raise the car and pressure test the charge air system as follows:
|
|
8.
|
Remove the lower engine cover.
|
|
9.
|
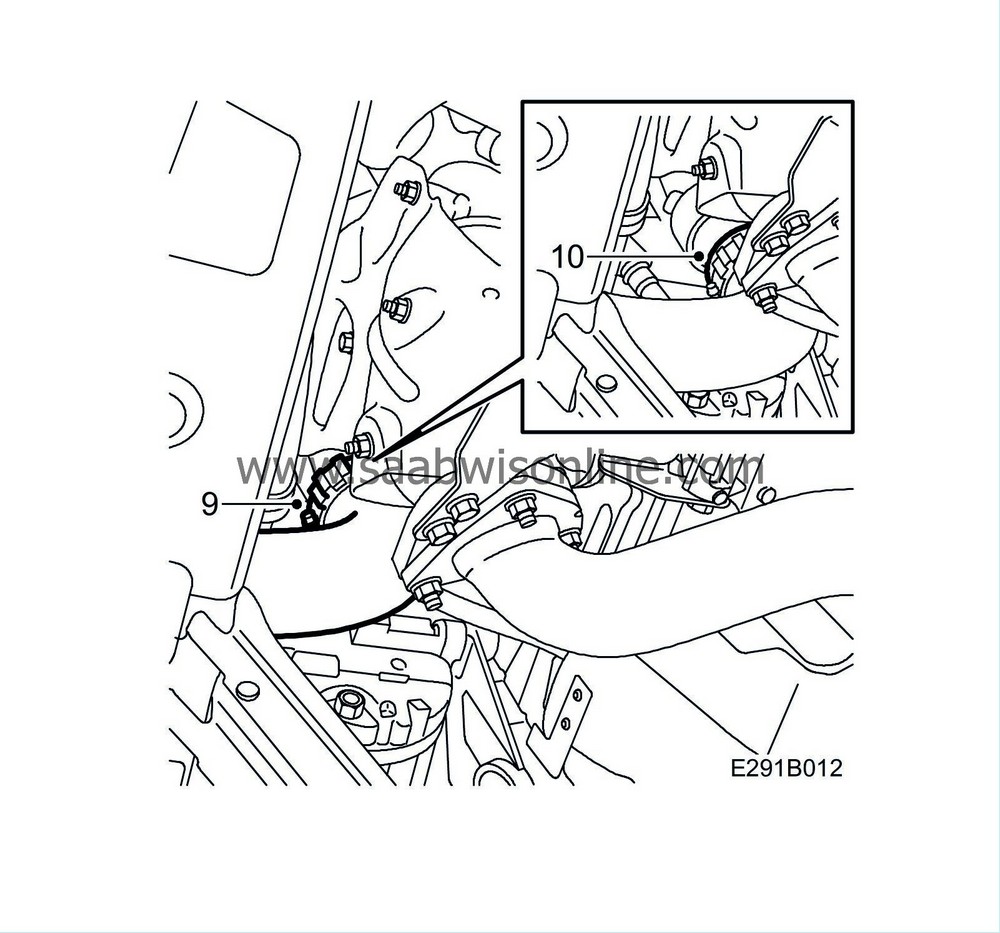
Remove the turbo pressure hose from the turbo.
|
|
10.
|
Clean the hose with solvent. Fit 83 94 587 Plug, turbo hose. Tighten the hose clip.
|
|
12.
|
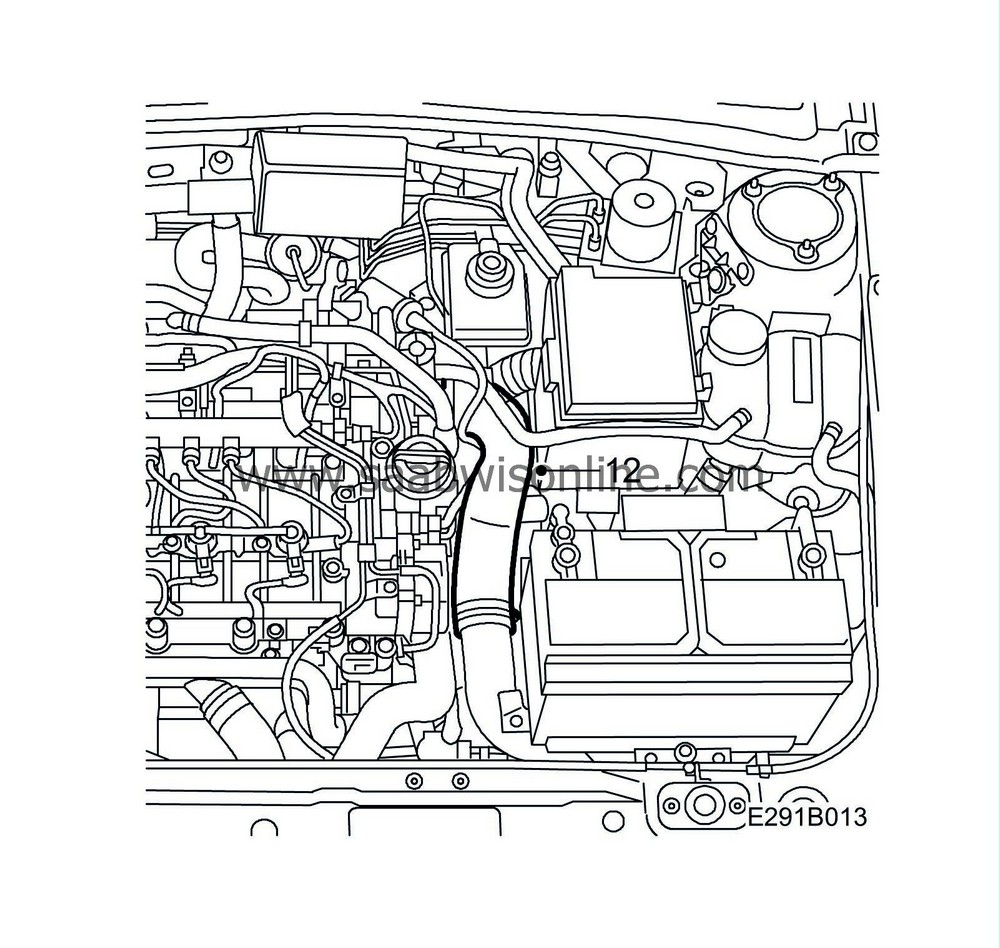
Remove the turbo pressure hose from the throttle body. Clean the hose with solvent before plugging.
|
|
13.
|
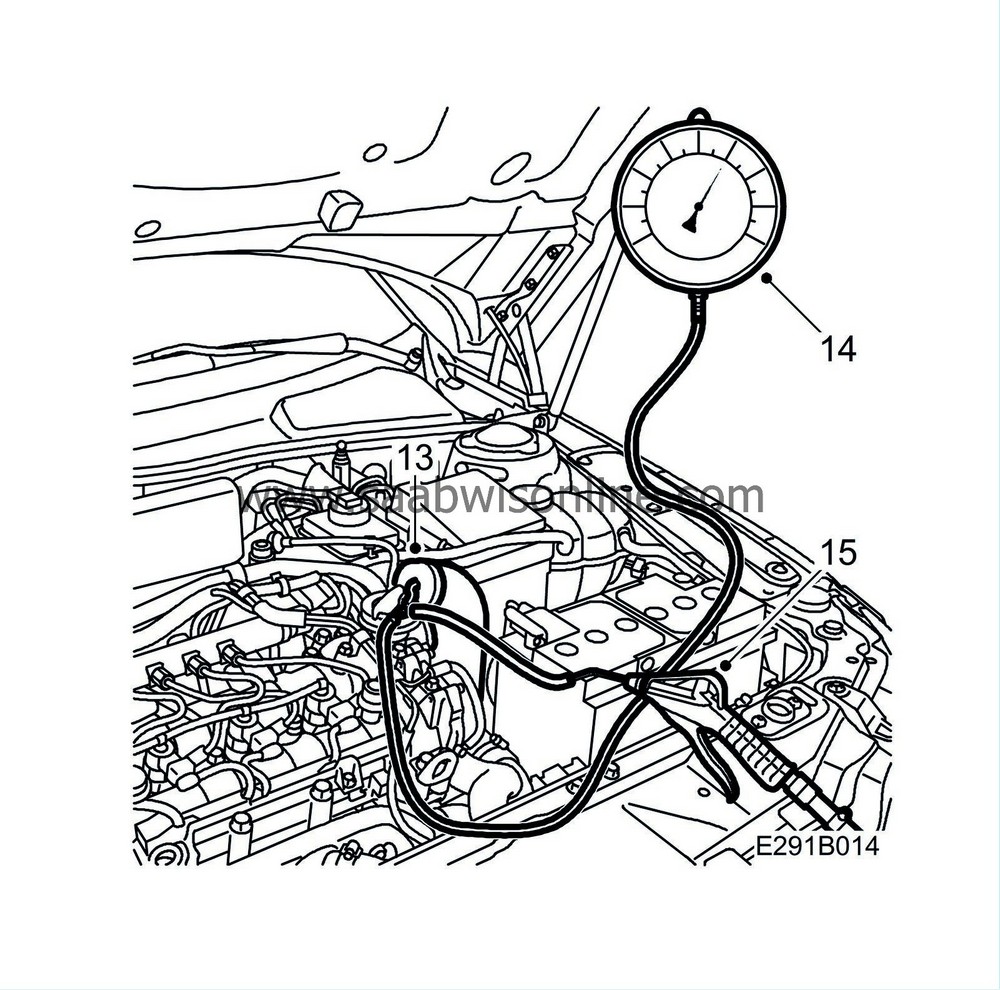
Fit 83 95 030 Plug, turbo hose. Increase the diameter of the plug by winding a few turns of plastic tape around the plug. Tighten the hose clip.
|
|
14.
|
Connect 83 93 514 charge pressure meter to the plug.
|
|
15.
|
Connect a compressed air gun to the charge pressure meter's T-coupling.
|
|
16.
|
Carefully create an overpressure of about 1 bar.
|
Note
|
|
The pressure must not exceed 1.5 bar.
|
|
|
17.
|
Check that the pressure does not drop by more than 0.1 bar over 30 seconds. With a large pressure drop, or audible hissing sound, check the hoses, pipes and connections for leakage. Use soapy water or the like, to detect any leakage.
|
|
18.
|
Release the overpressure and remove the charge pressure meter.
|
|
19.
|
Remove the plug from the charge air pipes' hoses.
|
|
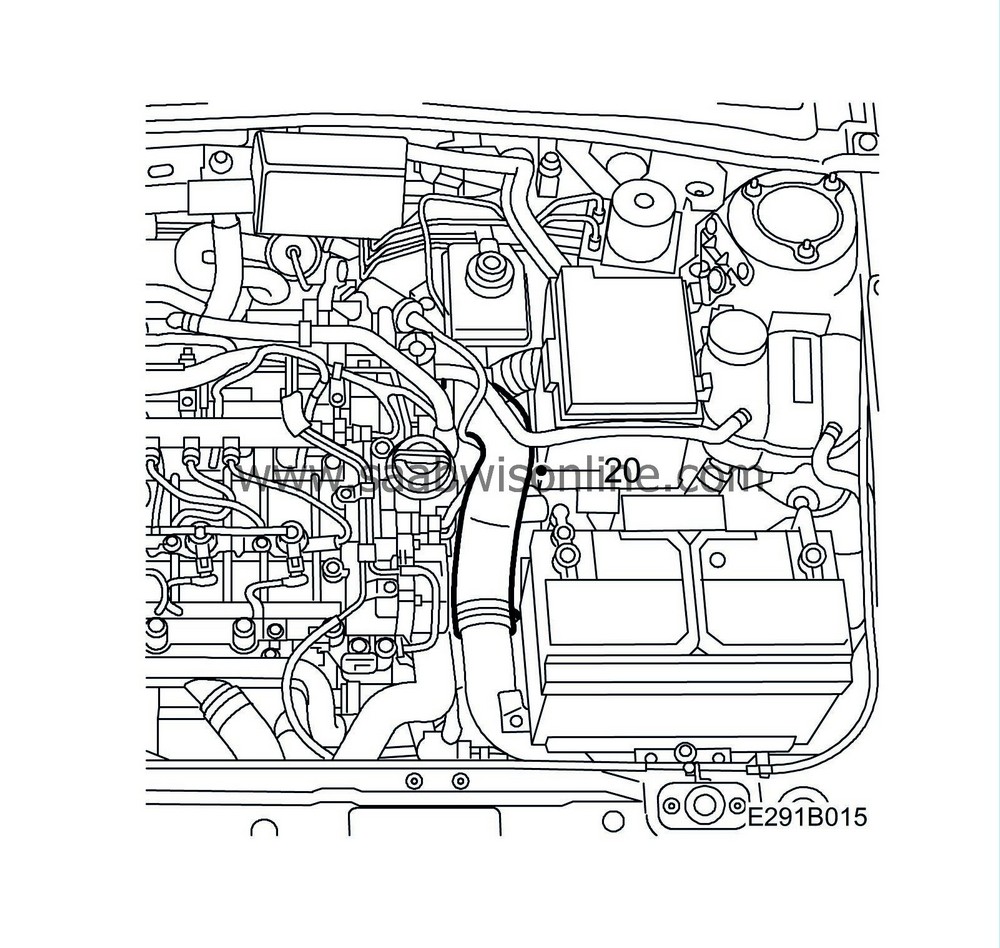
20.
|
Fit the turbo pressure hose on the throttle body.
|
|
21.
|
Fit the insulation and the upper engine cover.
|
|
23.
|
Remove the plug for the charge air pipe's hose.

|
|
24.
|
Fit the turbo pressure hose on the turbo.
|
|
25.
|
Fit the lower engine cover.
|
|
27.
|
If no fault is found in steps 4-27, speak with the driver about how the car is driven and inform about the system's function and that the car should be driven at a higher speed now and then so that the system has the opportunity to regenerate the particle filter.
|
Note
|
|
Do not replace the particle filter if manual regeneration is possible, as it is very rare for this to be faulty.
|
|
|
Standard times-/Warranty information
|
In the case of customer complaint and if the car is
within the warranty period
, use the following information to fill out the claim:
Failed Object: 25452
Fault/Reason code: 08
Location code: 09
Repair/Action code: 08
Time: 0.7 hr.


