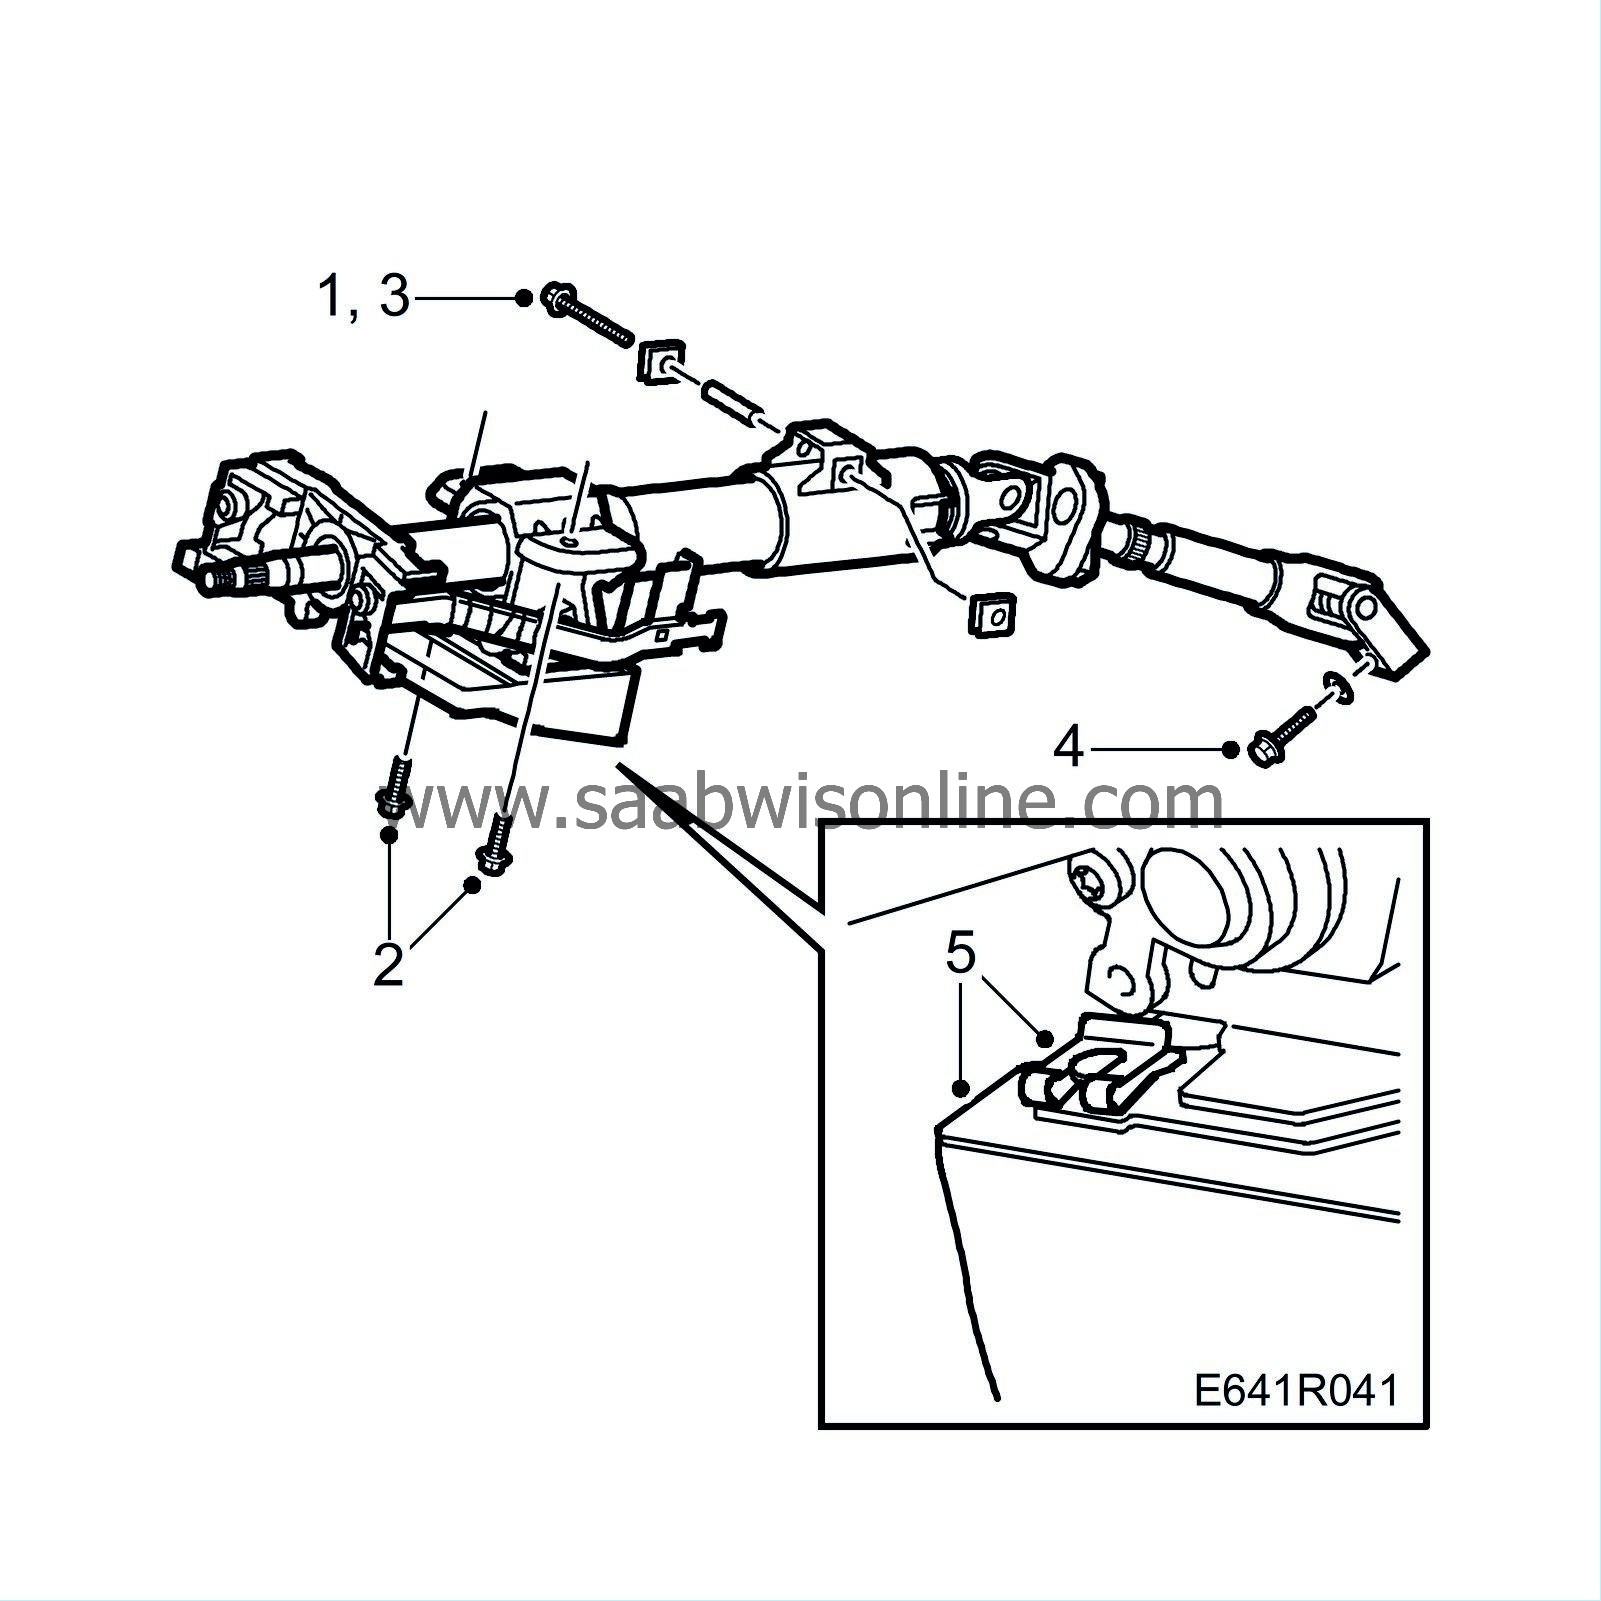
Steering column assembly
| Steering column assembly |
|
||||||||||||||||
| To remove |
| 1. |
Turn the steering wheel to the straight-ahead position.
|
|
| 2. |
Remove the steering wheel, refer to
Steering wheel
.
|
|
| 3. |
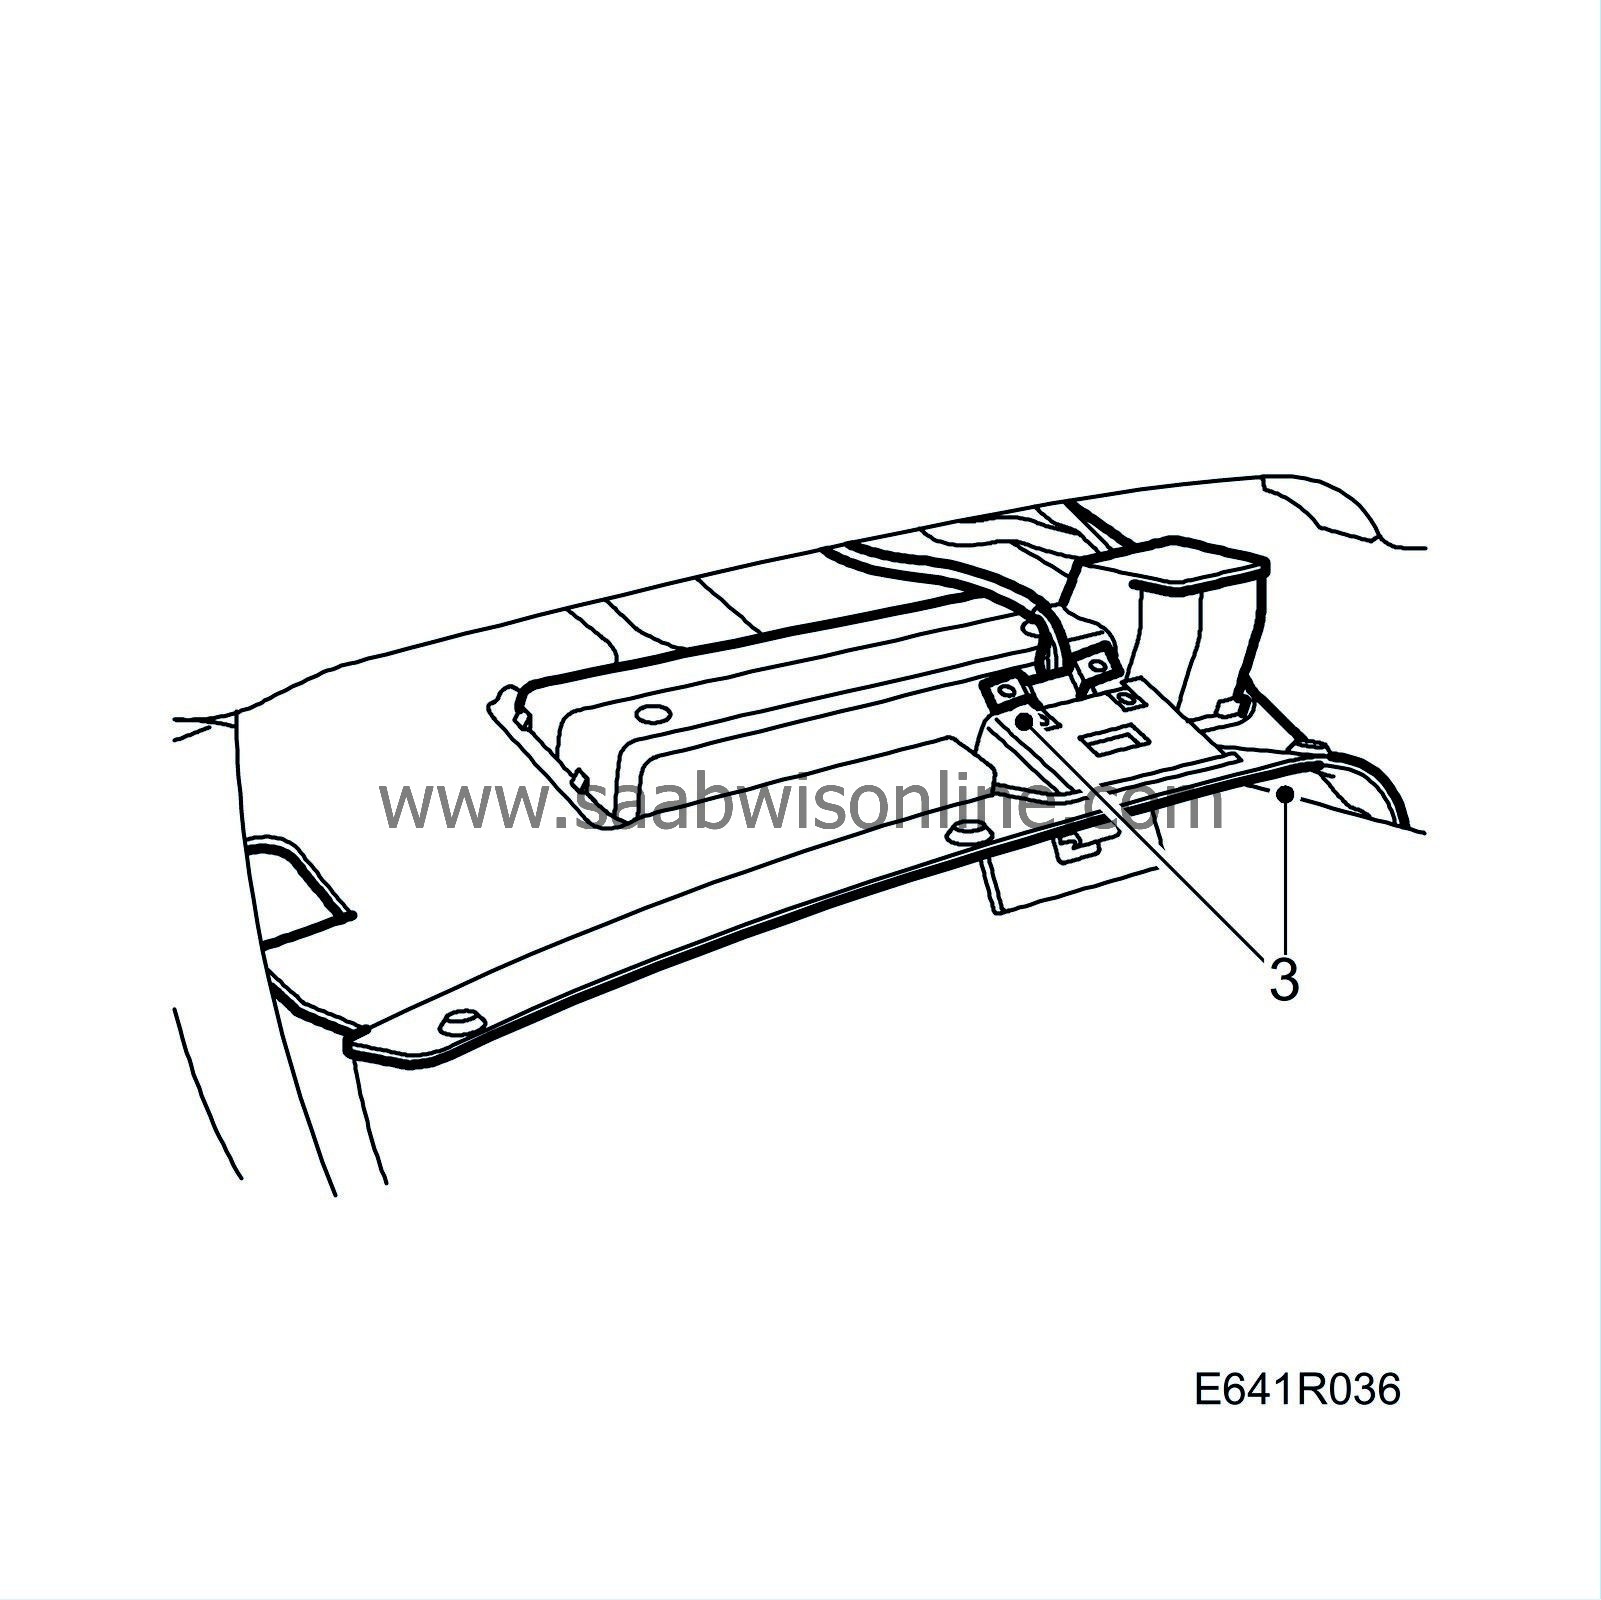
Remove the lower section of the dashboard on the driver's side.
|
|
| 4. |
Release the steering wheel adjustment lever.
|
|
| 5. |
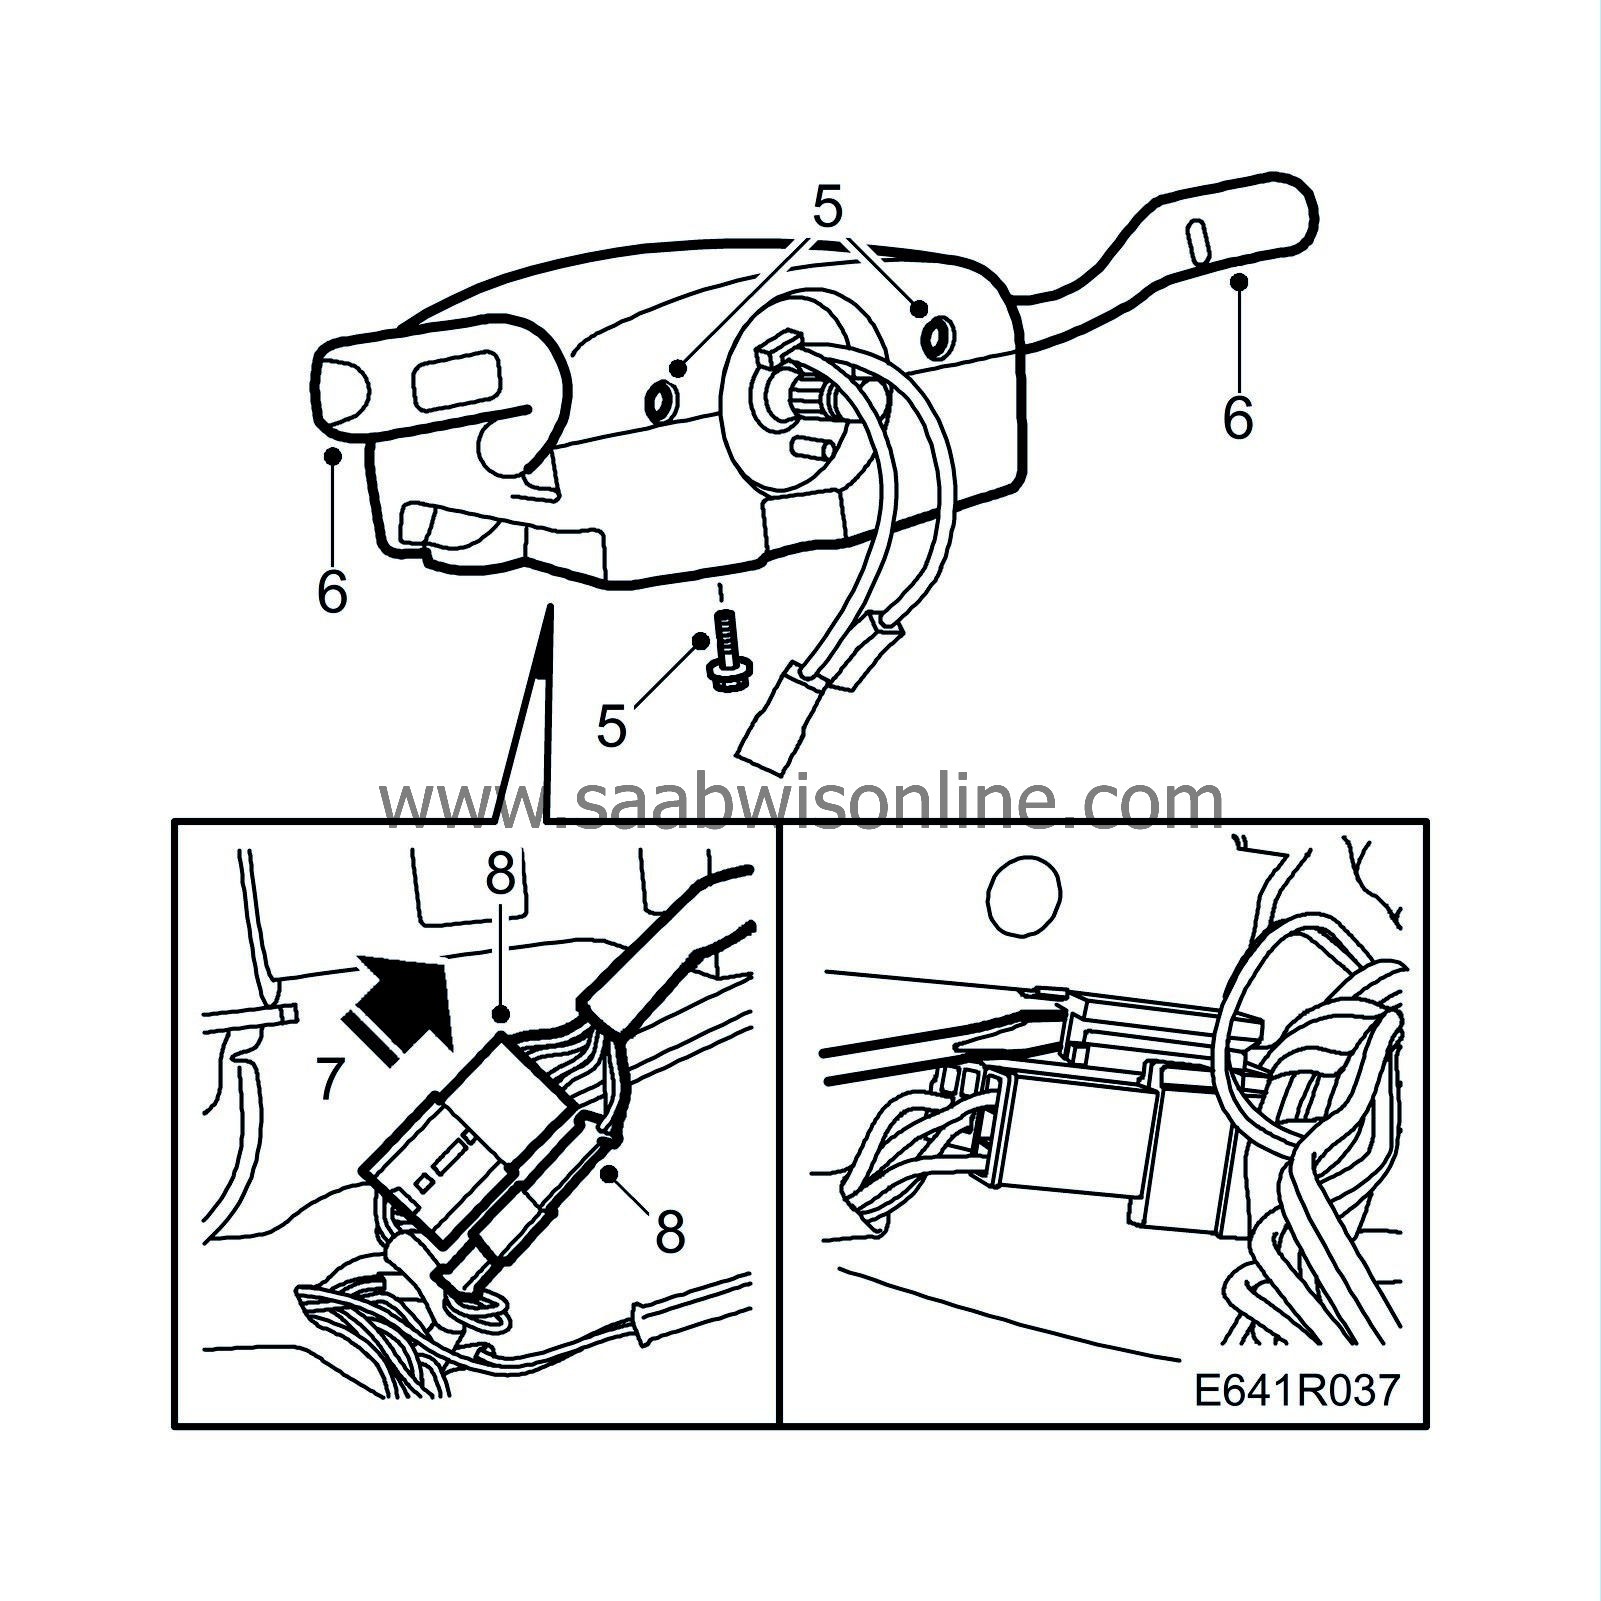
Remove the steering column cowls.
|
|
| 6. |
Remove the steering wheel stalk switches and unplug their connectors.
|
|
| 7. |
Remove the connectors for the contact roller from the duct.
|
|
| 8. |
Unplug the connectors of the coil spring unit.
|
|
| 9. |
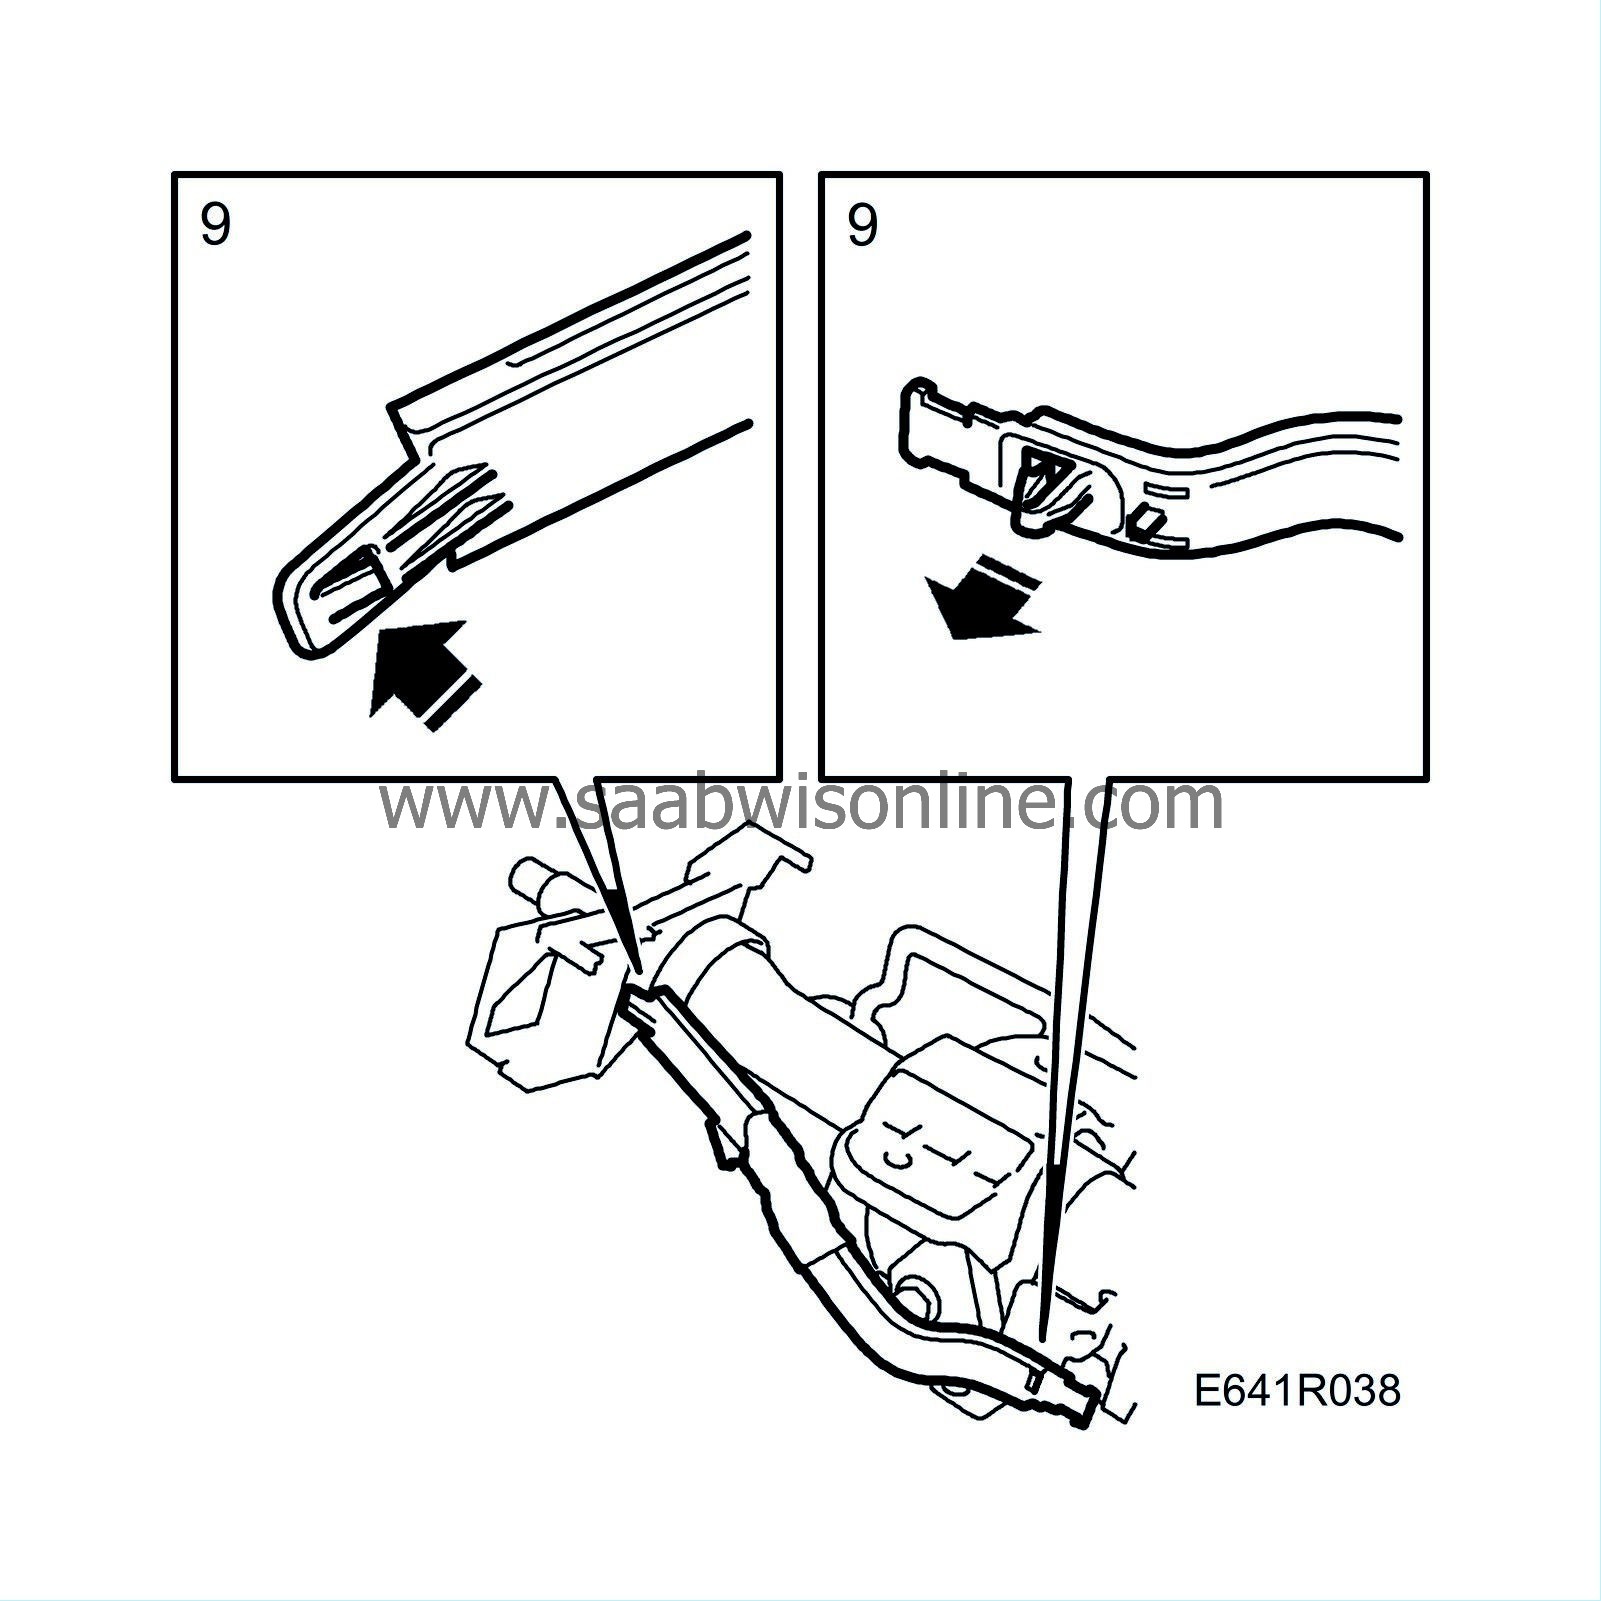
Disconnect the top and bottom of the duct.
|
|
| 10. |
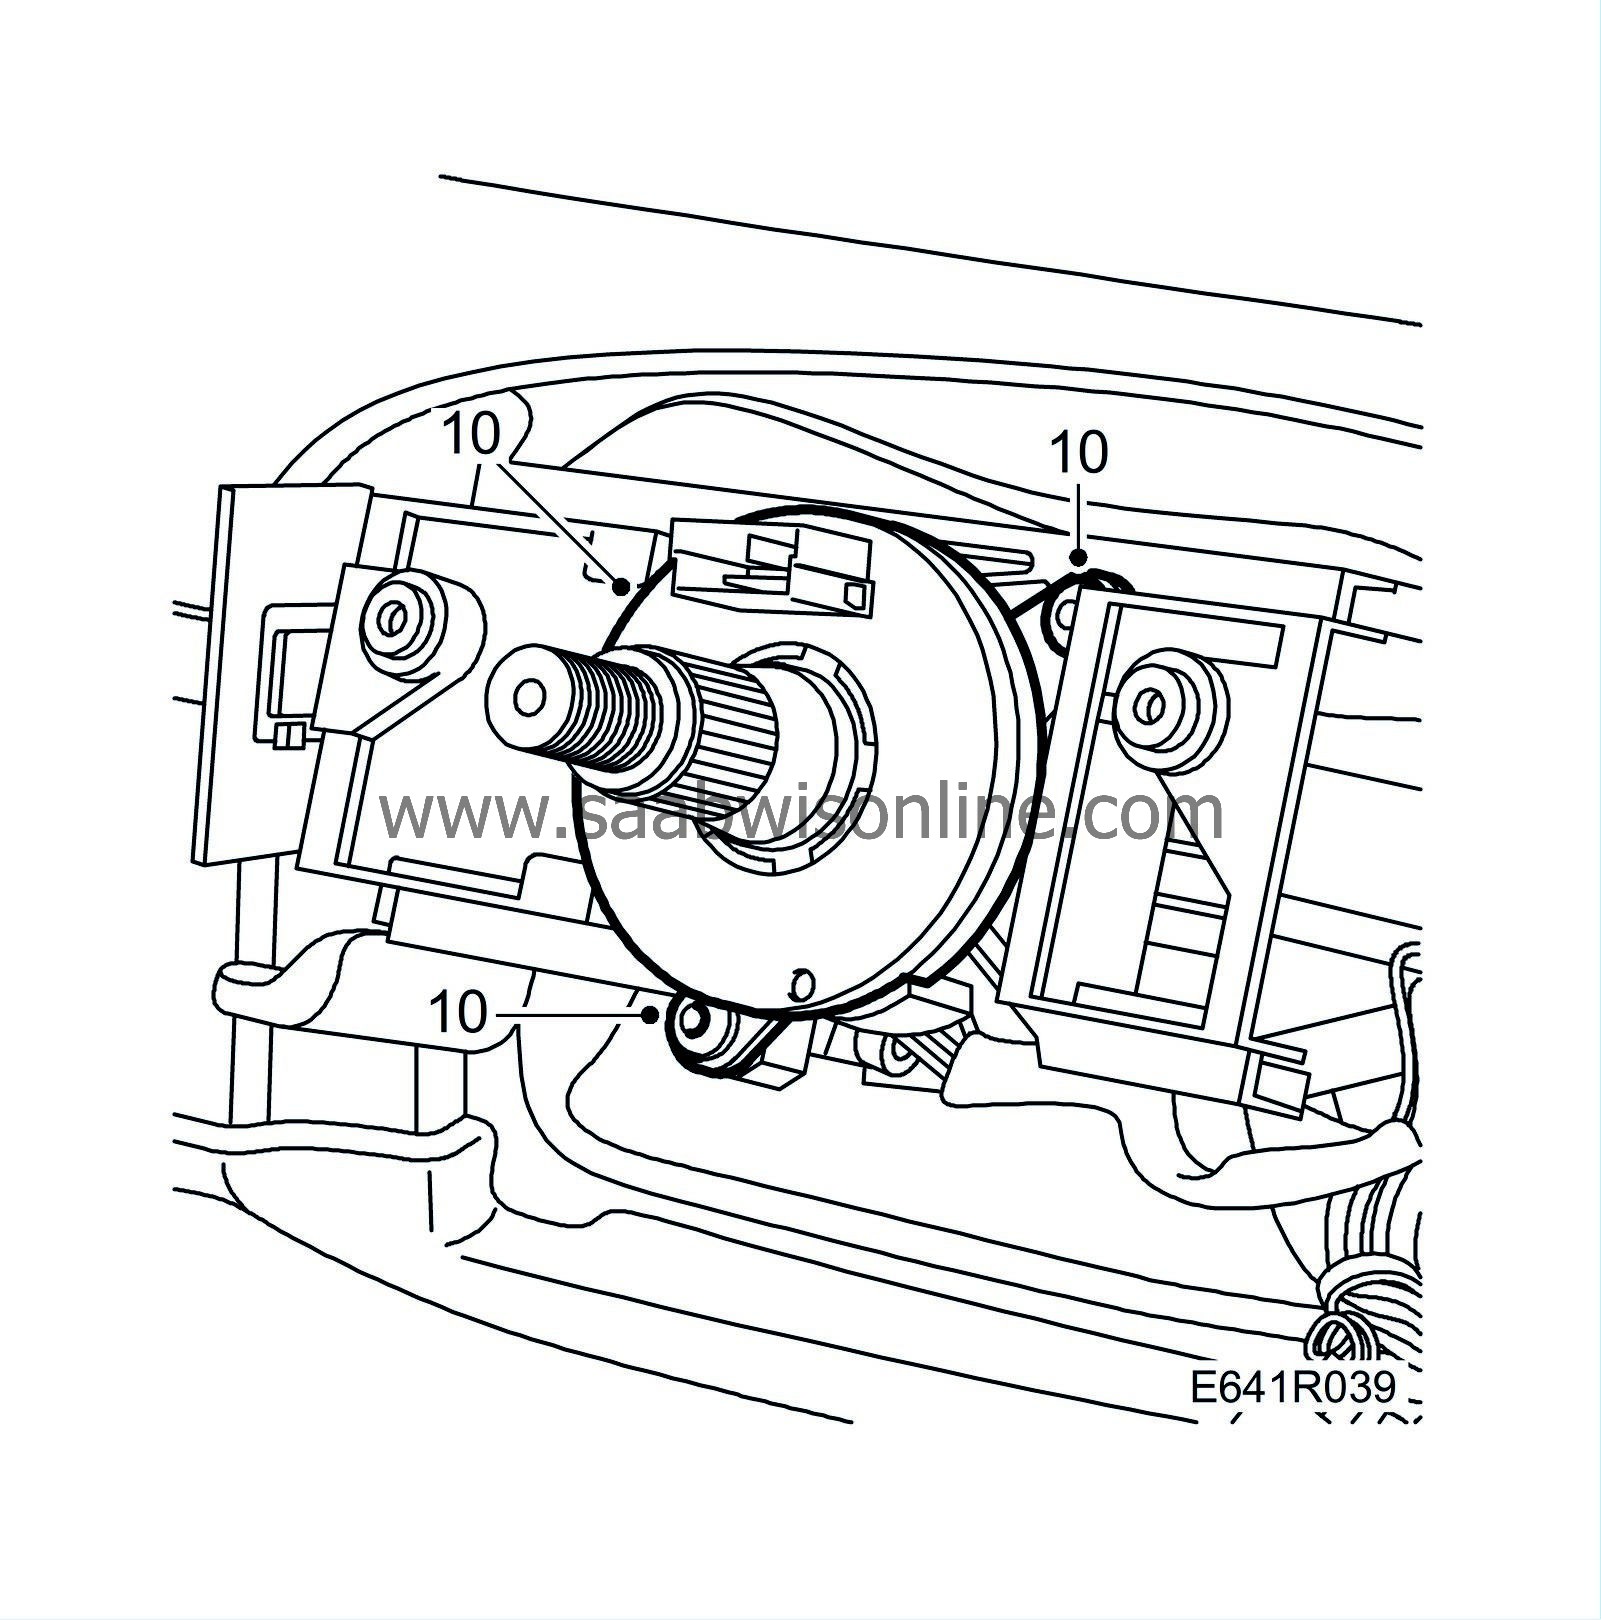
Remove the holder for the contact roller and the steering wheel stalk switches.
|
|
| 11. |
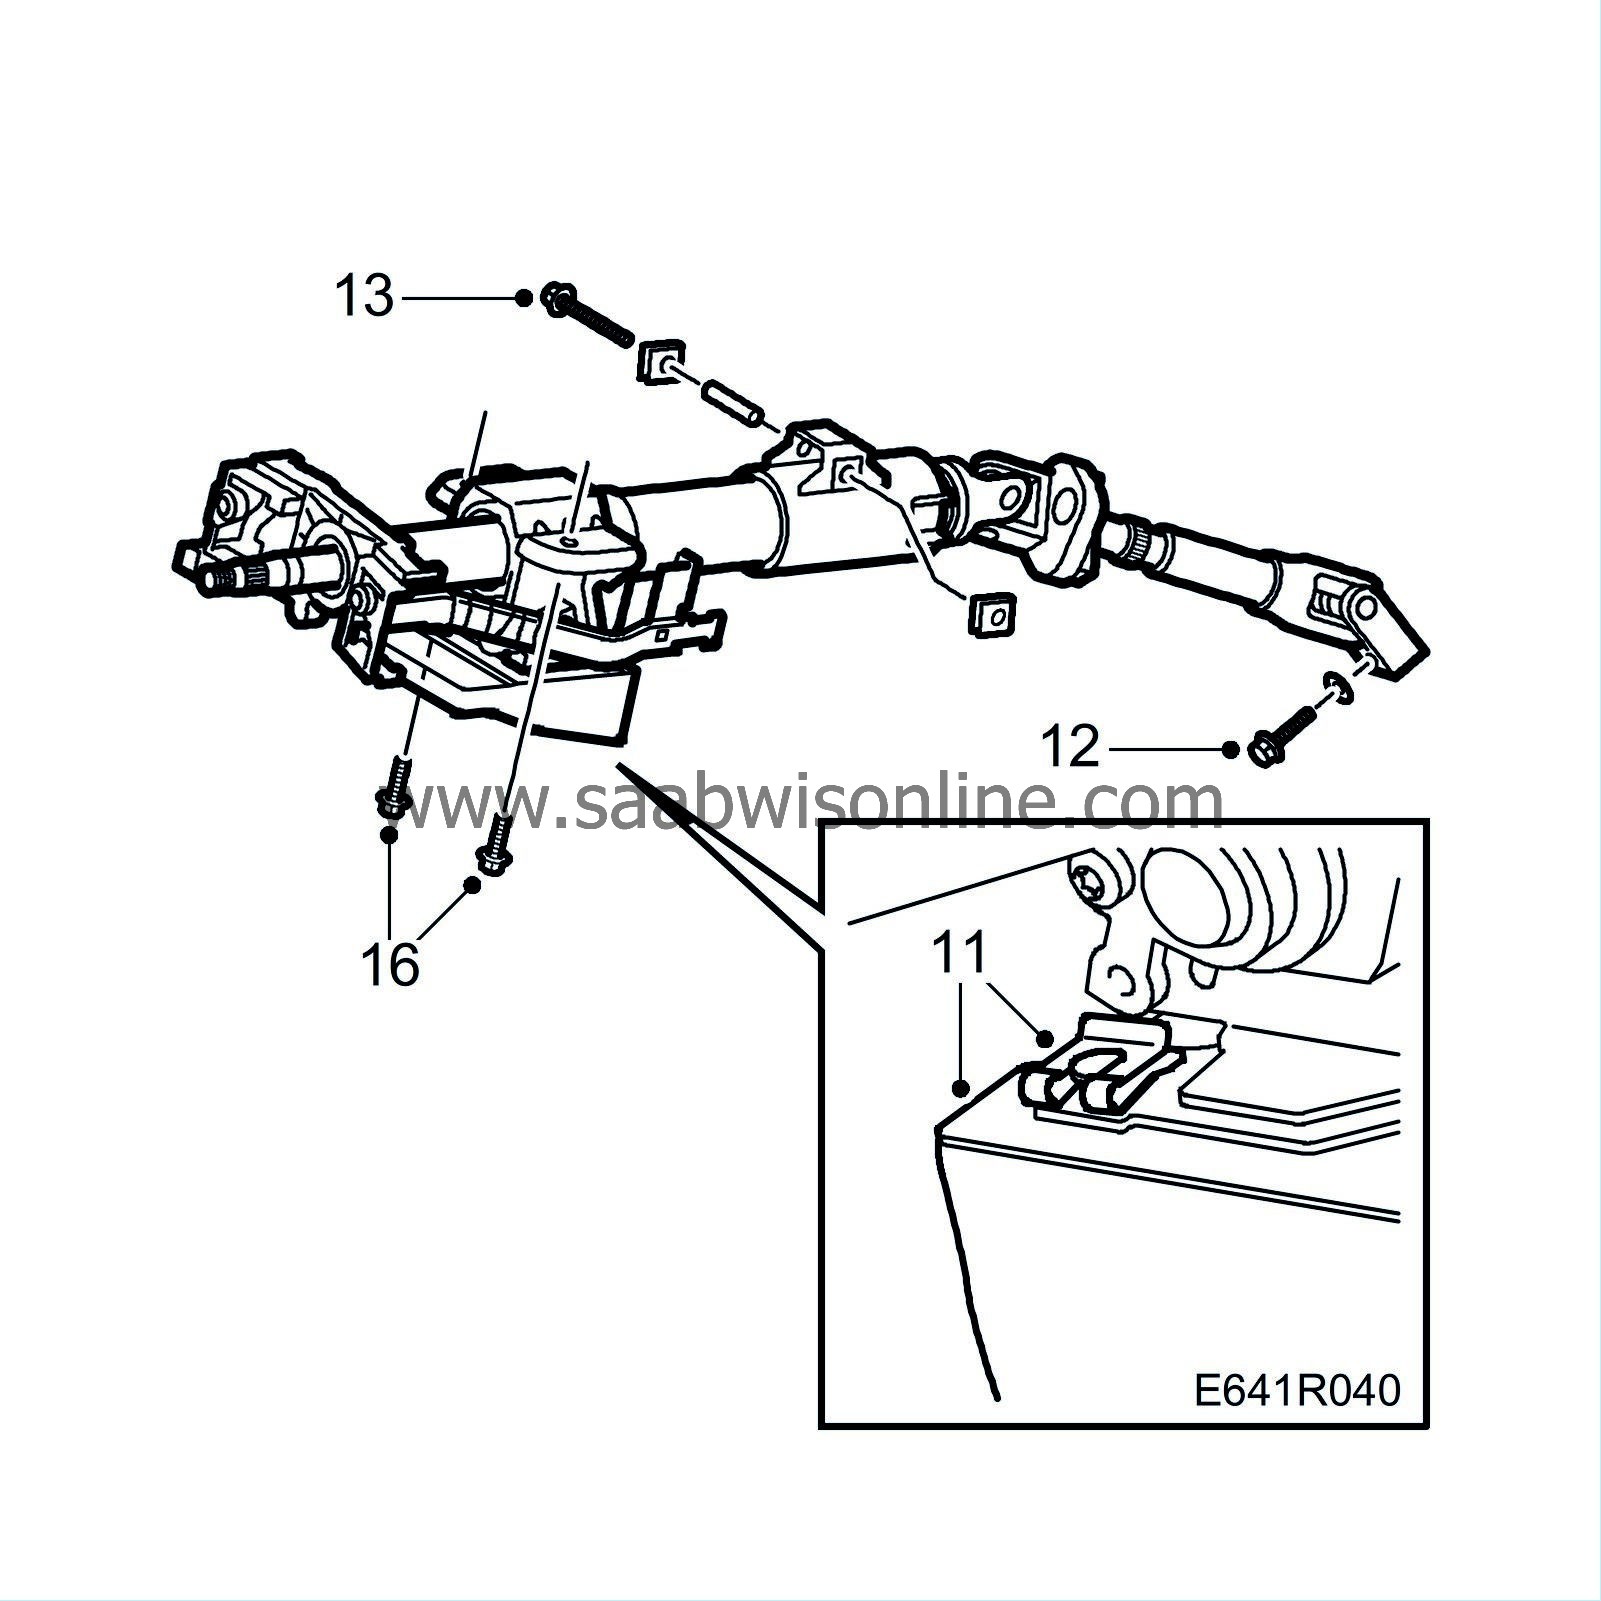
Remove the knee protector from the steering column.
|
|
| 12. |
Remove the bolt securing the steering column shaft to the steering gear, and push the steering column shaft upwards, withdrawing it from the steering gear.
|
|||||||||
| 13. |
Undo the lower bolt of the steering column assembly. It cannot however be removed in this position.
|
|
| 14. |
Remove any cable ties and the like securing the wiring harness, and bend the harness aside.
|
|
| 15. |
Work the dust excluder (gaiter) over the steering wheel adjustment lever so that the lever comes out through the same hole as the steering column shaft.
|
|
| 16. |
Remove the upper bolts of the steering column assembly and lift out the assembly.
|
|
| To fit |
| 2. |
Tighten the upper retaining bolts of the steering column assembly.
Tightening torque 25 Nm (20 lbf ft) |
|
| 3. |
Tighten the lower retaining bolts of the steering column assembly.
Tightening torque 25 Nm (20 lbf ft)
|
||||||||||
| 4. |
Align the steering column shaft with the steering gear and tighten the bolt securing them to each other. Make sure that the steering gear bolt enters the milled groove on the pinion shaft.
Tightening torque 30 Nm (25 lbf ft) |
|
| 5. |
Fit the knee protector to the steering column.
|
|
| 6. |
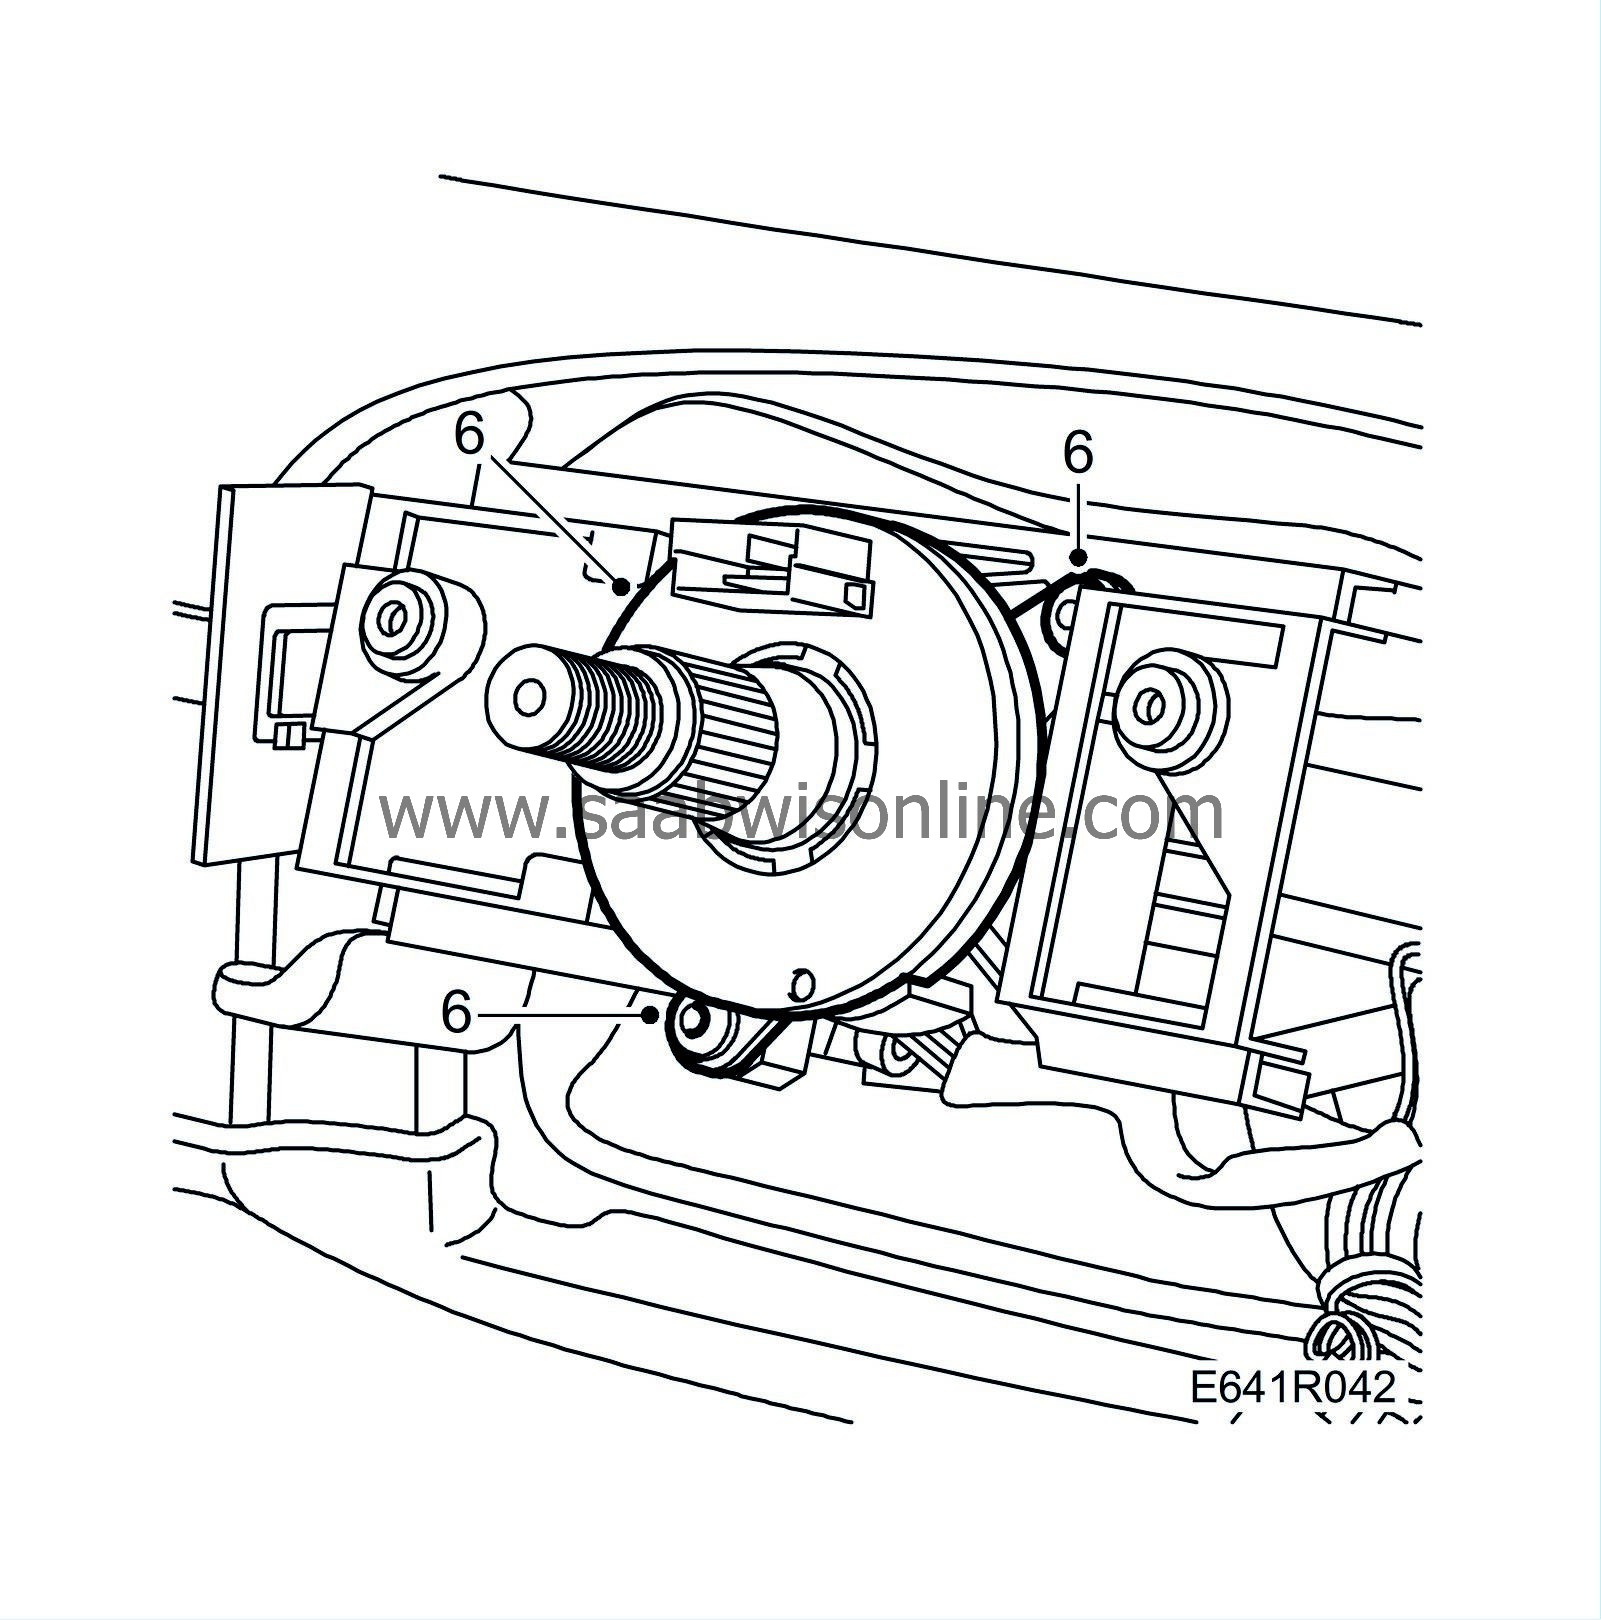
Fit the holder for the coil spring unit and steering wheel stalk switches with the groove upwards.
|
|
| 7. |
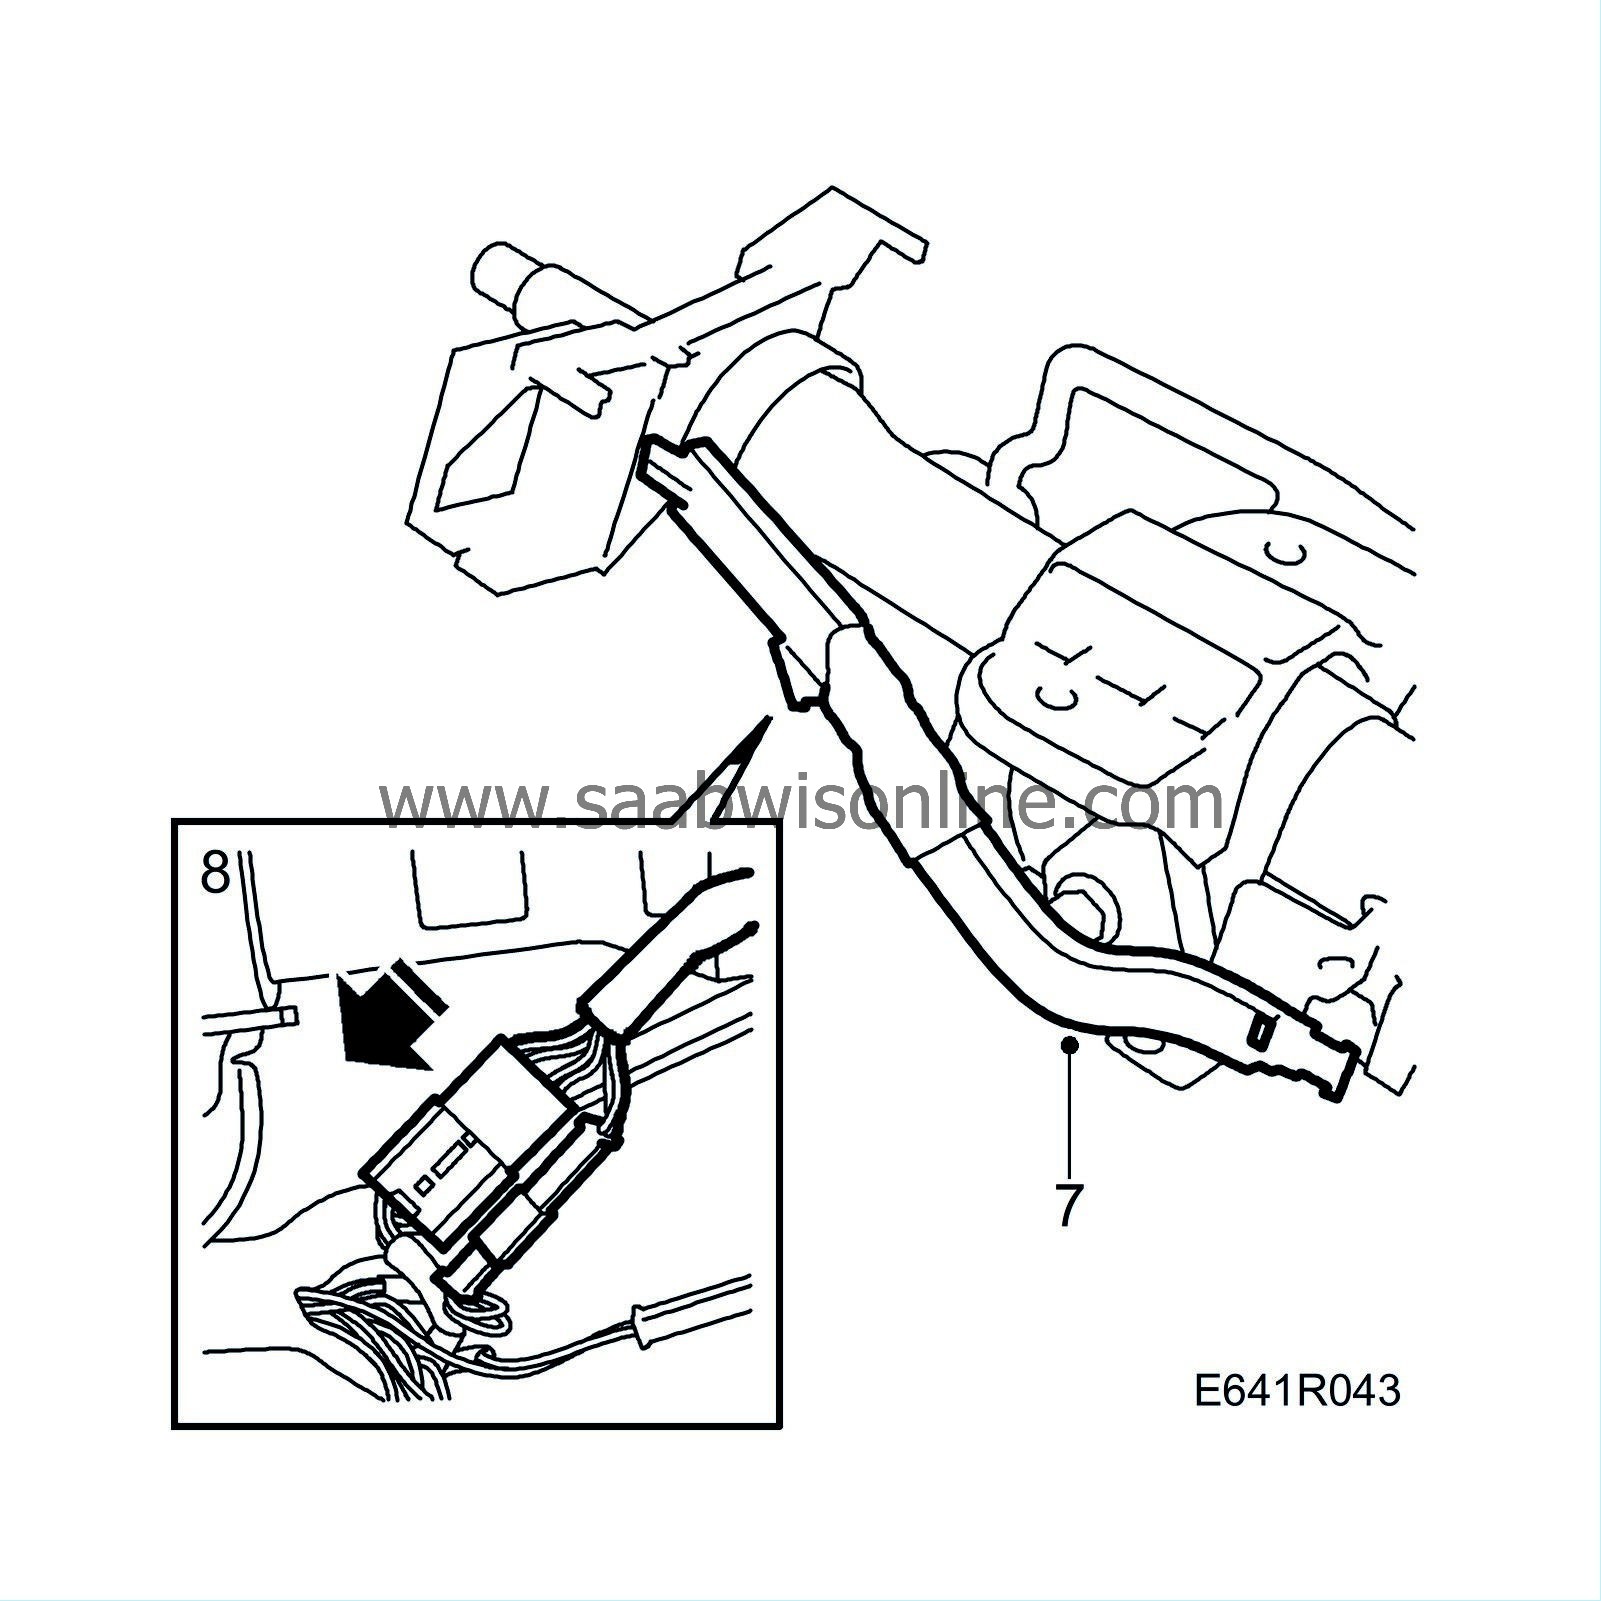
Fit the cable duct.
|
|
| 8. |
Plug in the connectors for the contact roller.
Fit the connectors to the cable duct. |
|
| 9. |
Fit the wiring harness in place and fasten it to the steering column assembly.
|
|
| 10. |
Lift the dust excluder (gaiter) over the steering wheel adjustment lever, so that the lever protrudes from its hole in the excluder.
|
|
| 11. |
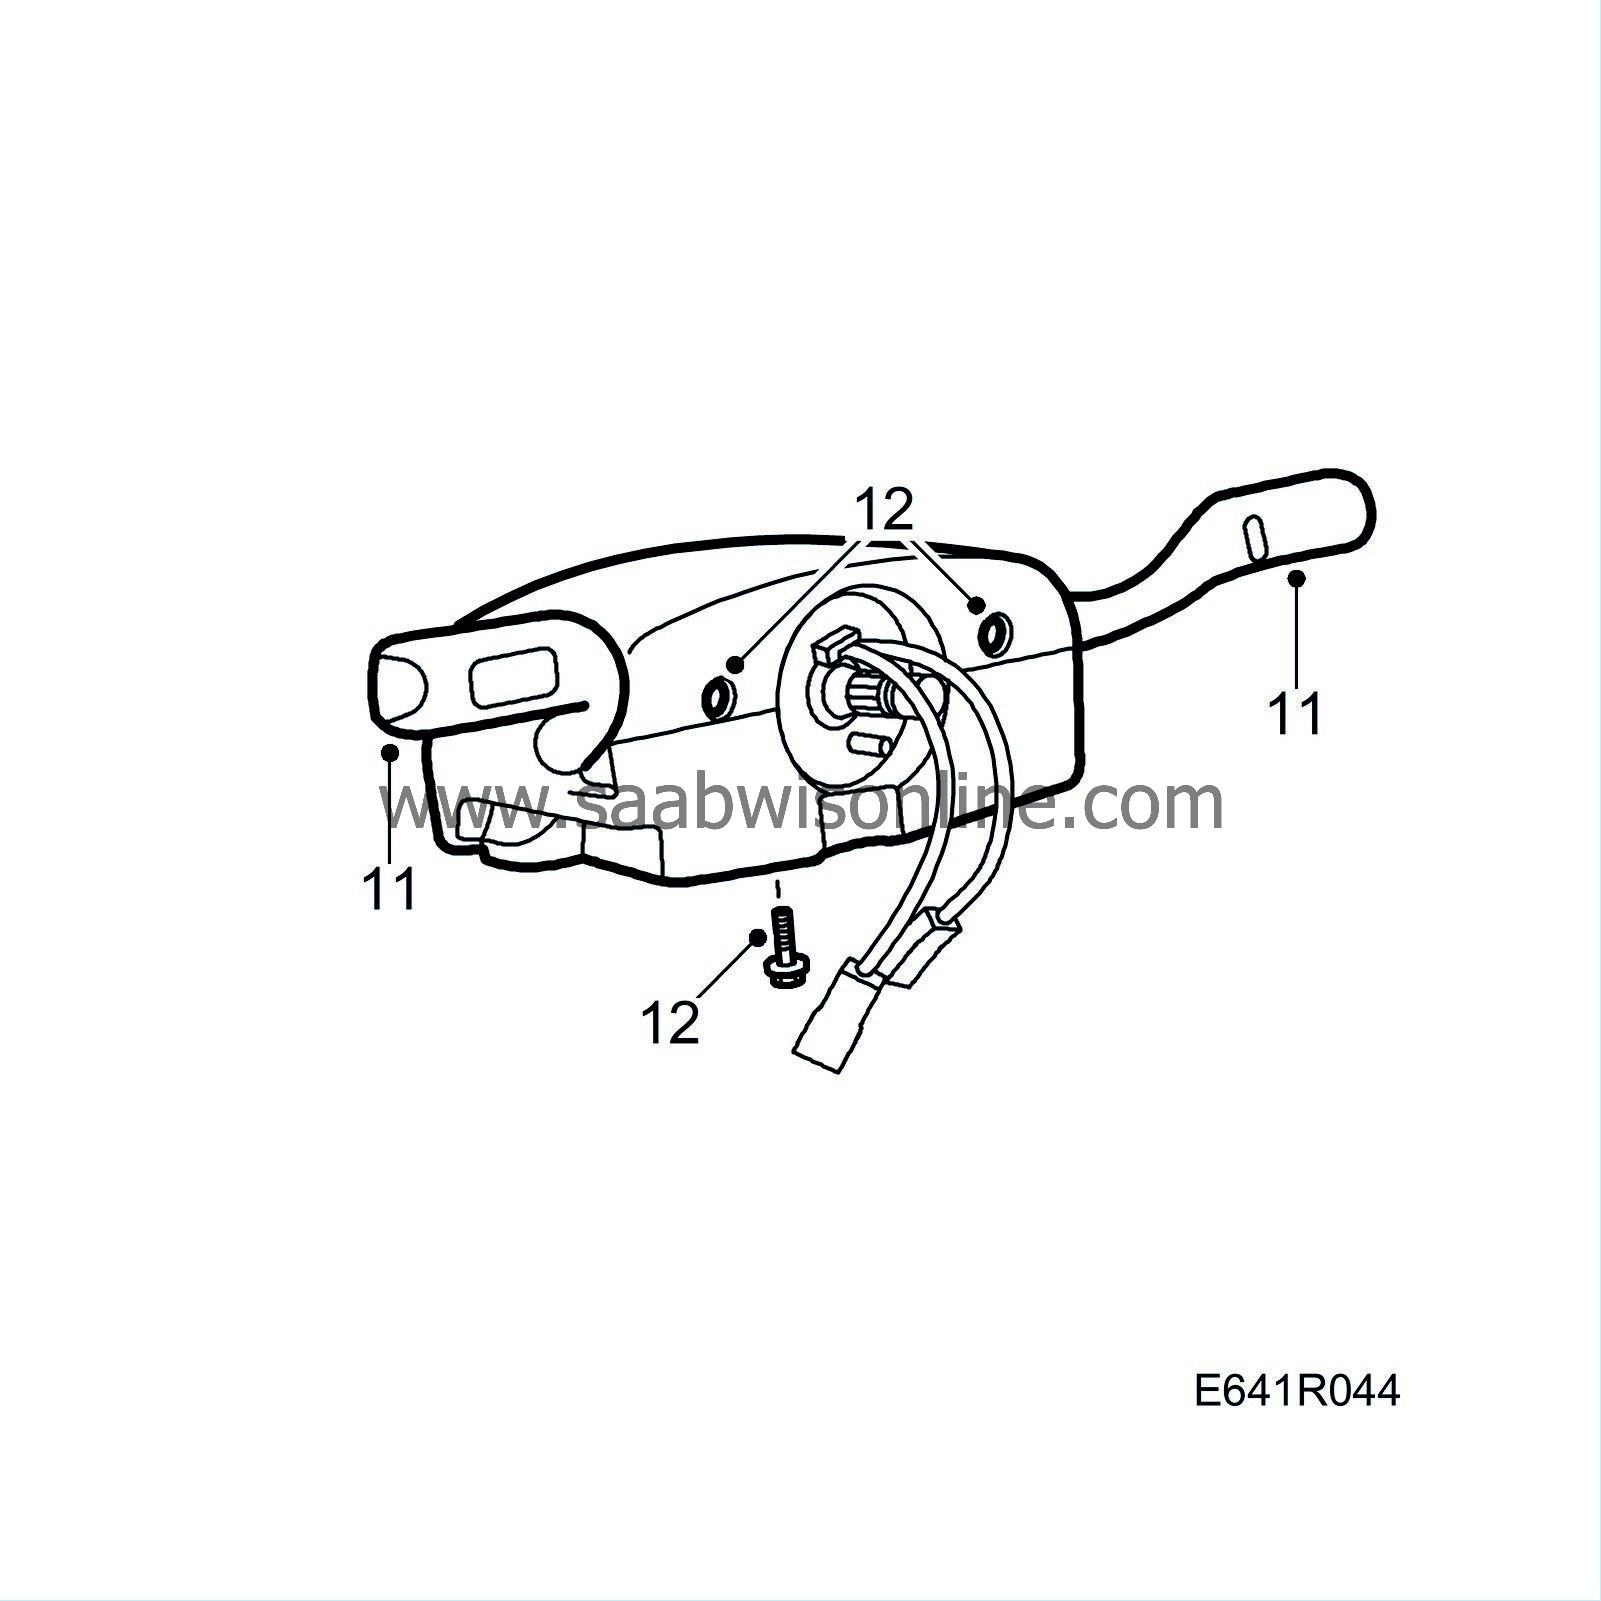
Plug in the steering wheel stalk switches and fit them in place.
|
|
| 12. |
Fit the steering column cowls.
|
|
| 13. |
Fit the steering wheel, refer to
To fit
.
|
|
| 14. |
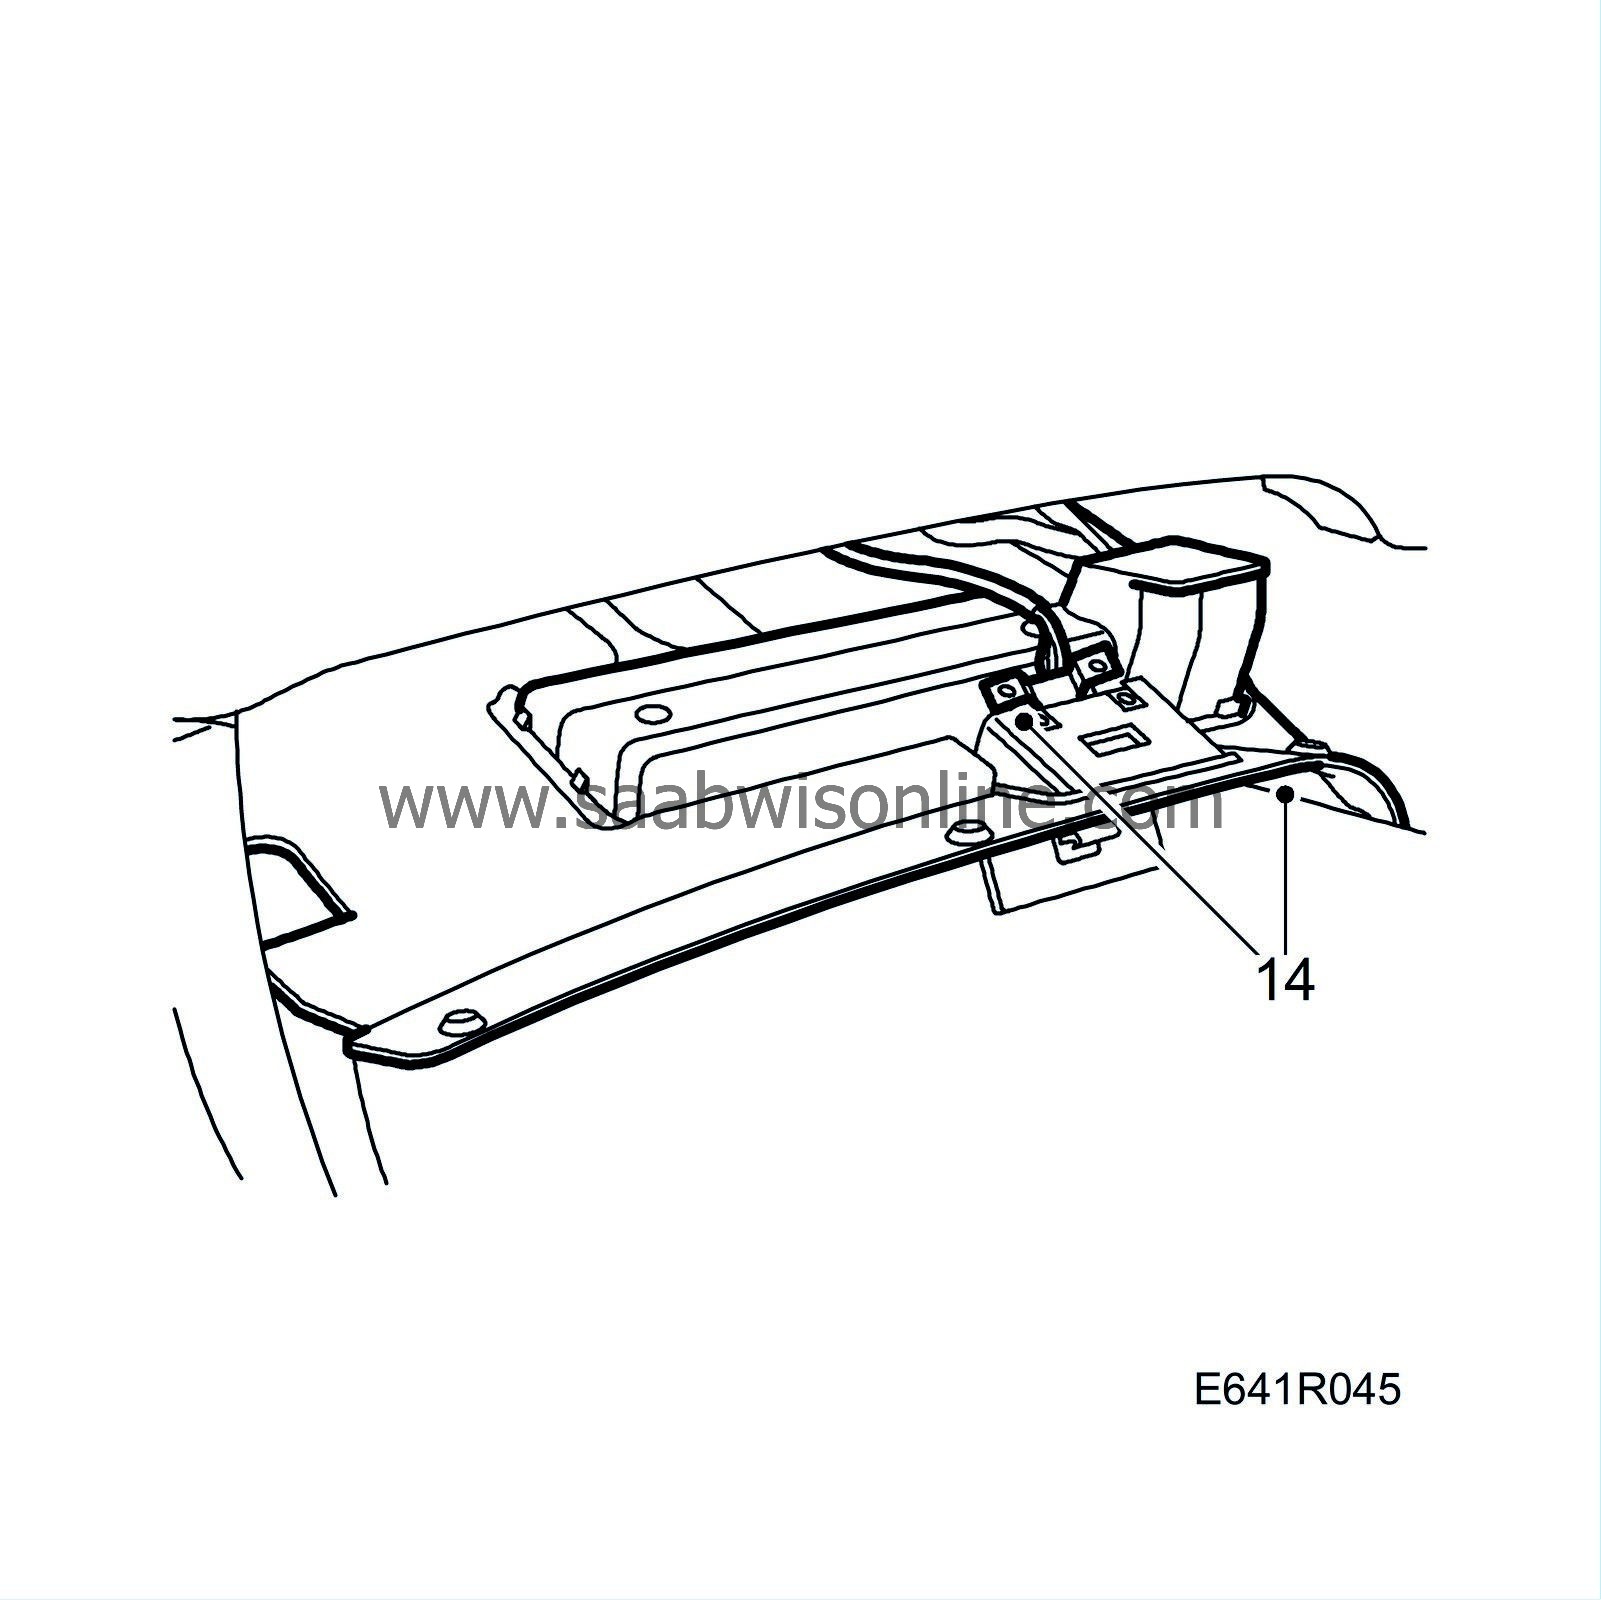
Fit the lower section of the dashboard.
|
|

 Warning
