(774-2723) Replacement of screws to front wheel bearing
|
MODIFICATION INSTRUCTION
|
|
Bulletin Nbr:
|
774-2723
|
|
Date:
...........
|
December 2008
|
|
Market:
|
BE DK FR IT NL NO PL SE CH UK
|
|
|
Replacement of screws to front wheel bearing
|
Cars in stock must be rectified before delivery.
Cars already delivered must be rectified in connection with a scheduled visit to the garage for service or repairs.
Saab 9-5 M09 within the Vehicle Identification Number range 93504706-93504834.
|
Note
|
|
Some vehicles within the Vehicle Identification Number range are not affected, see separate information for the Vehicle Identification Numbers affected.
|
Front wheel bearing screws may interfere with the driveshaft ABS ring causing a metal noise while cornering.
51 25 570 Screw (x6)
53 90 471 Locking nut (x2)
Paint (e.g. Saab touch-up paint)
For fitting the modification identity plate
12 785 148 Modification identity plate
|
Checking the modification identity plate
|
Before proceeding, check box A1 of the modification identity plate. From and including M04, the table "Table of Modifications" can be found in the car's Warranty and Service Book. A modification identity plate must be fitted in accordance with the section "Fitting the modification identity plate" where local directives require the marking of the car. If the box is not marked, continue as follows.
|
Note
|
|
This procedure must be performed on both sides.
|
|
1.
|
Raise the car. If a jack is used, the car must be supported on axle stands.
|
|
3.
|
If the car is equipped with xenon light, remove the sensor from the subframe.

|
|
4.
|
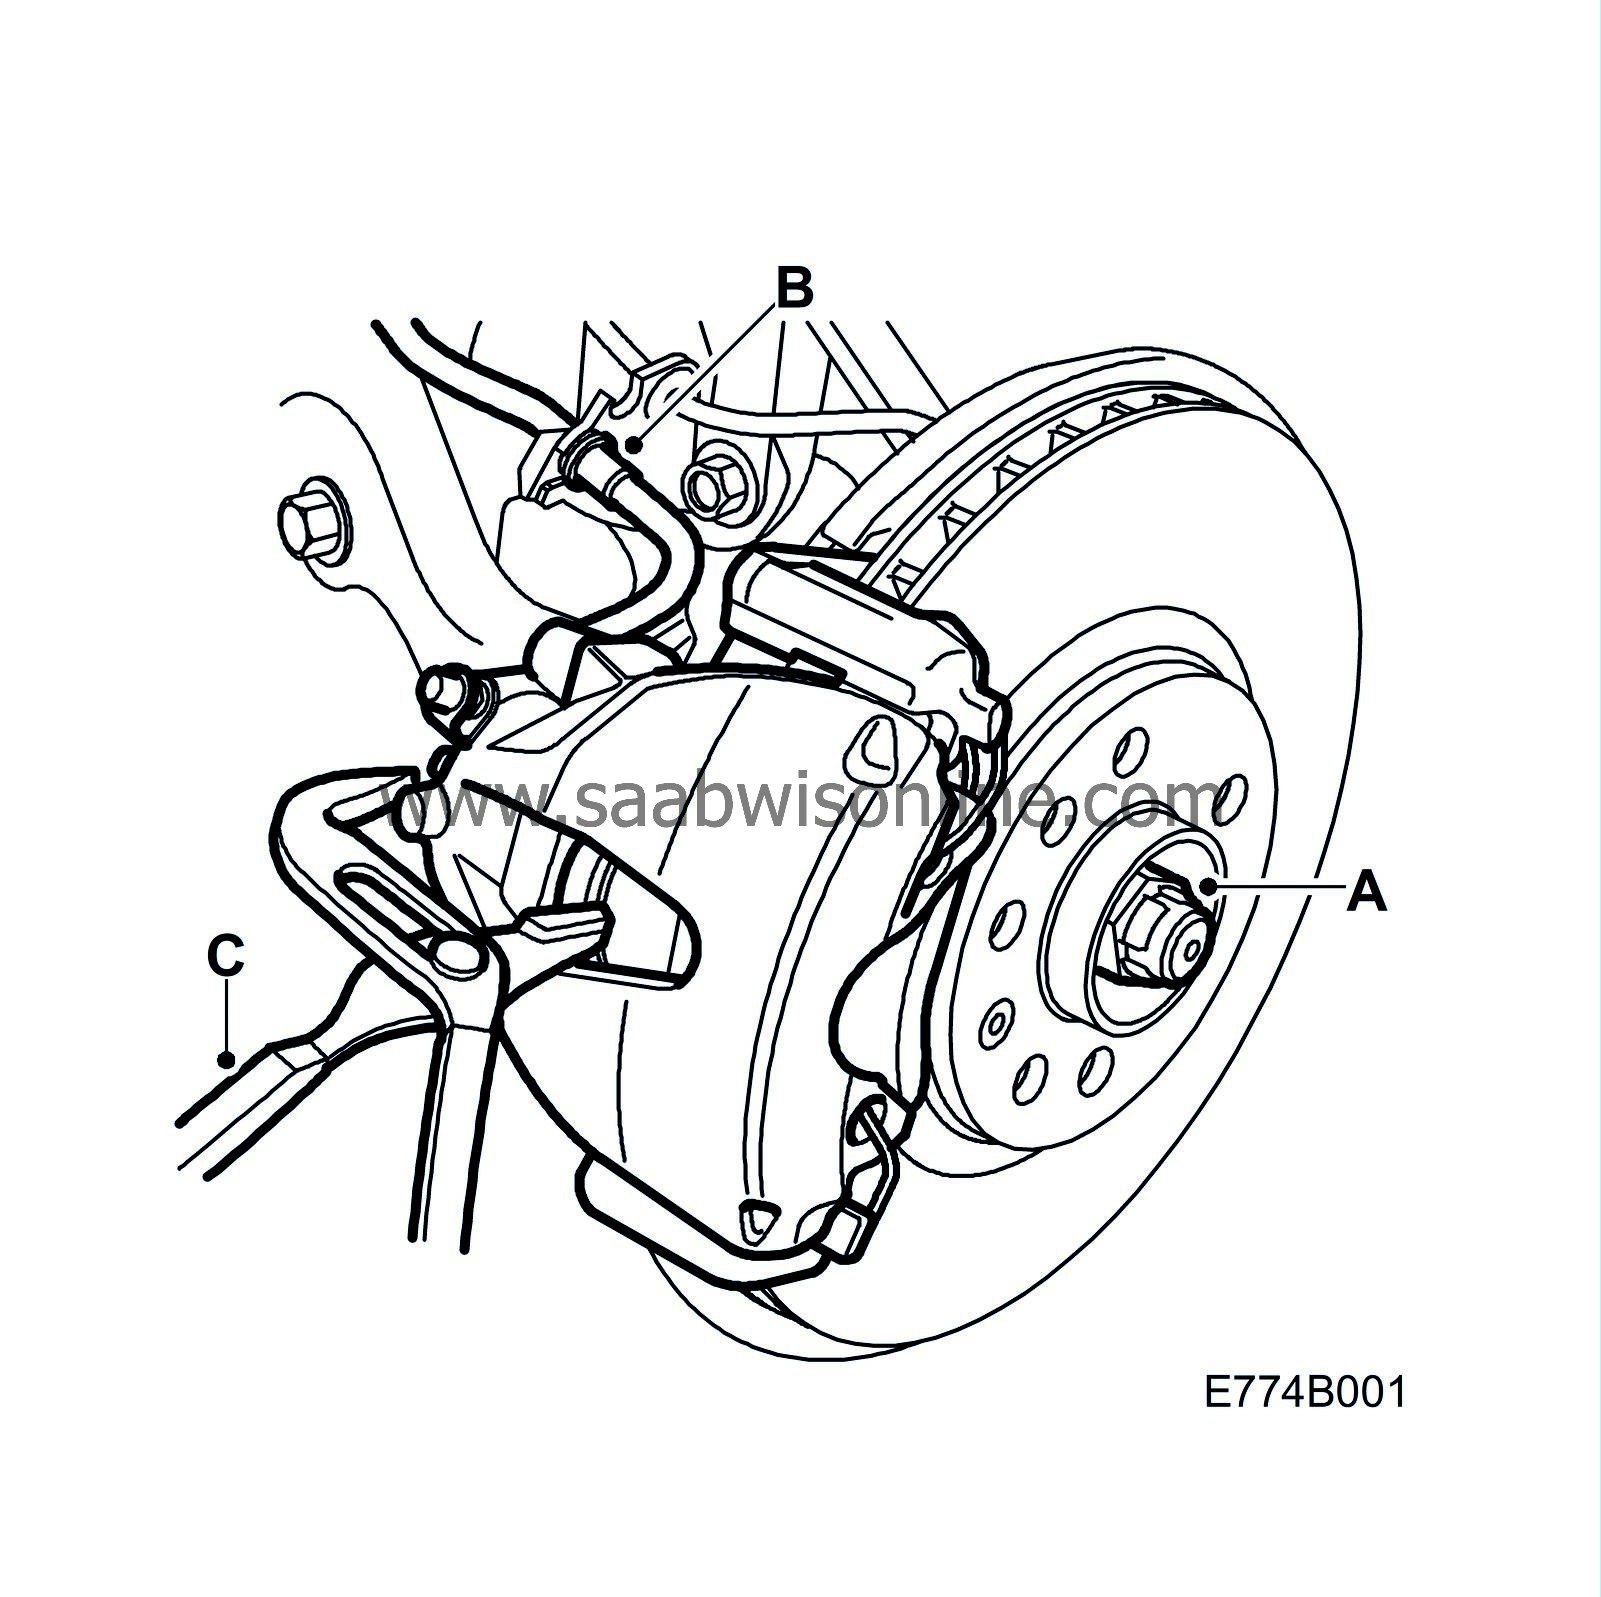
Remove the hub centre-nut (A).
|
|
5.
|
Detach the brake hose from the clips (B).
|
|
6.
|
Press back the brake piston using slip-joint pliers (C).
|
|
7.
|
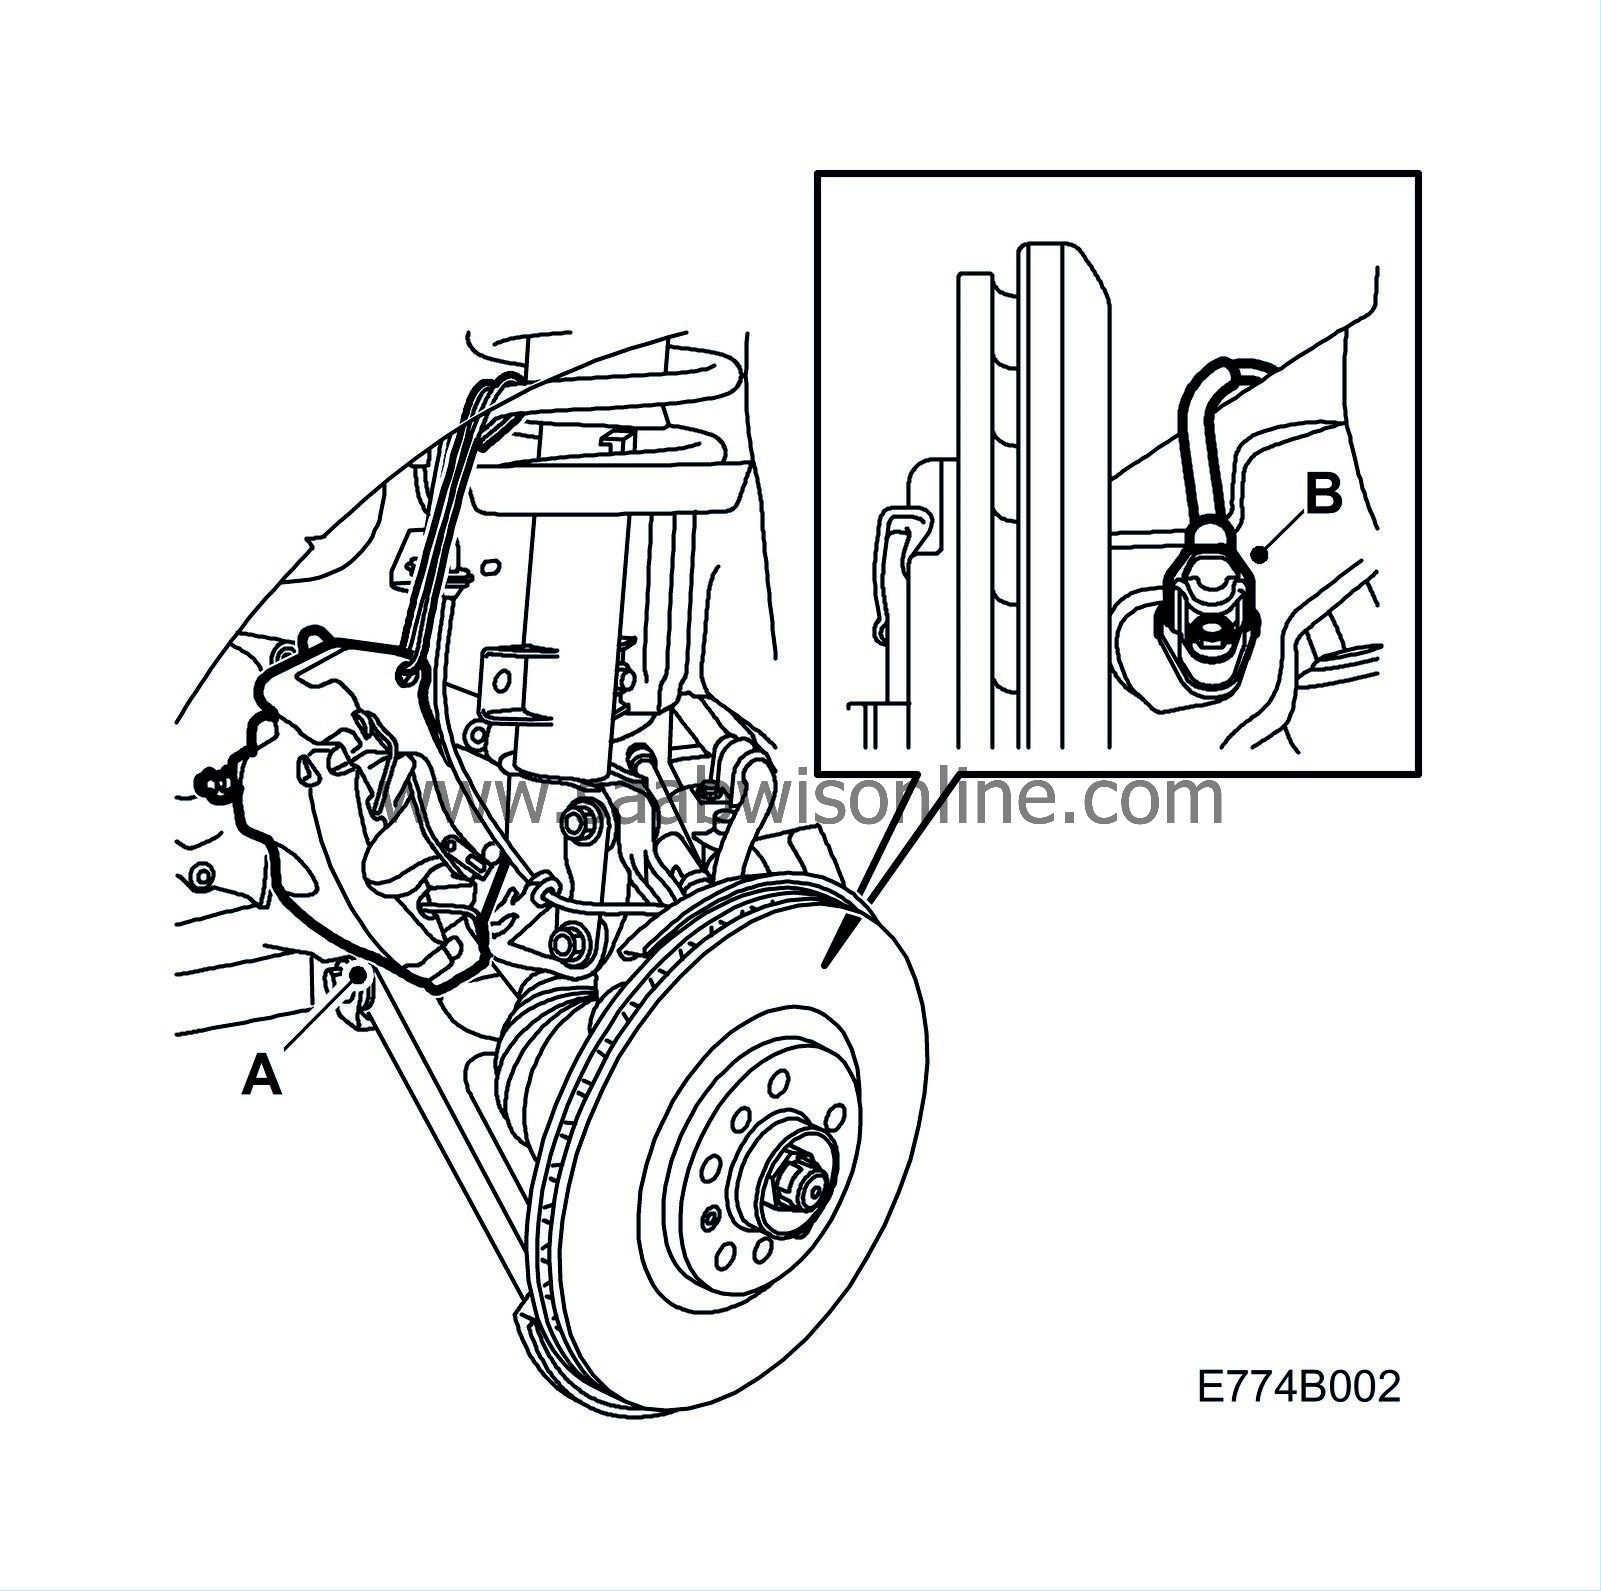
Remove the brake caliper and suspend it to the spring with suitable steel wire (A).

|
|
8.
|
Remove the wheel sensor (B).
|
|
9.
|
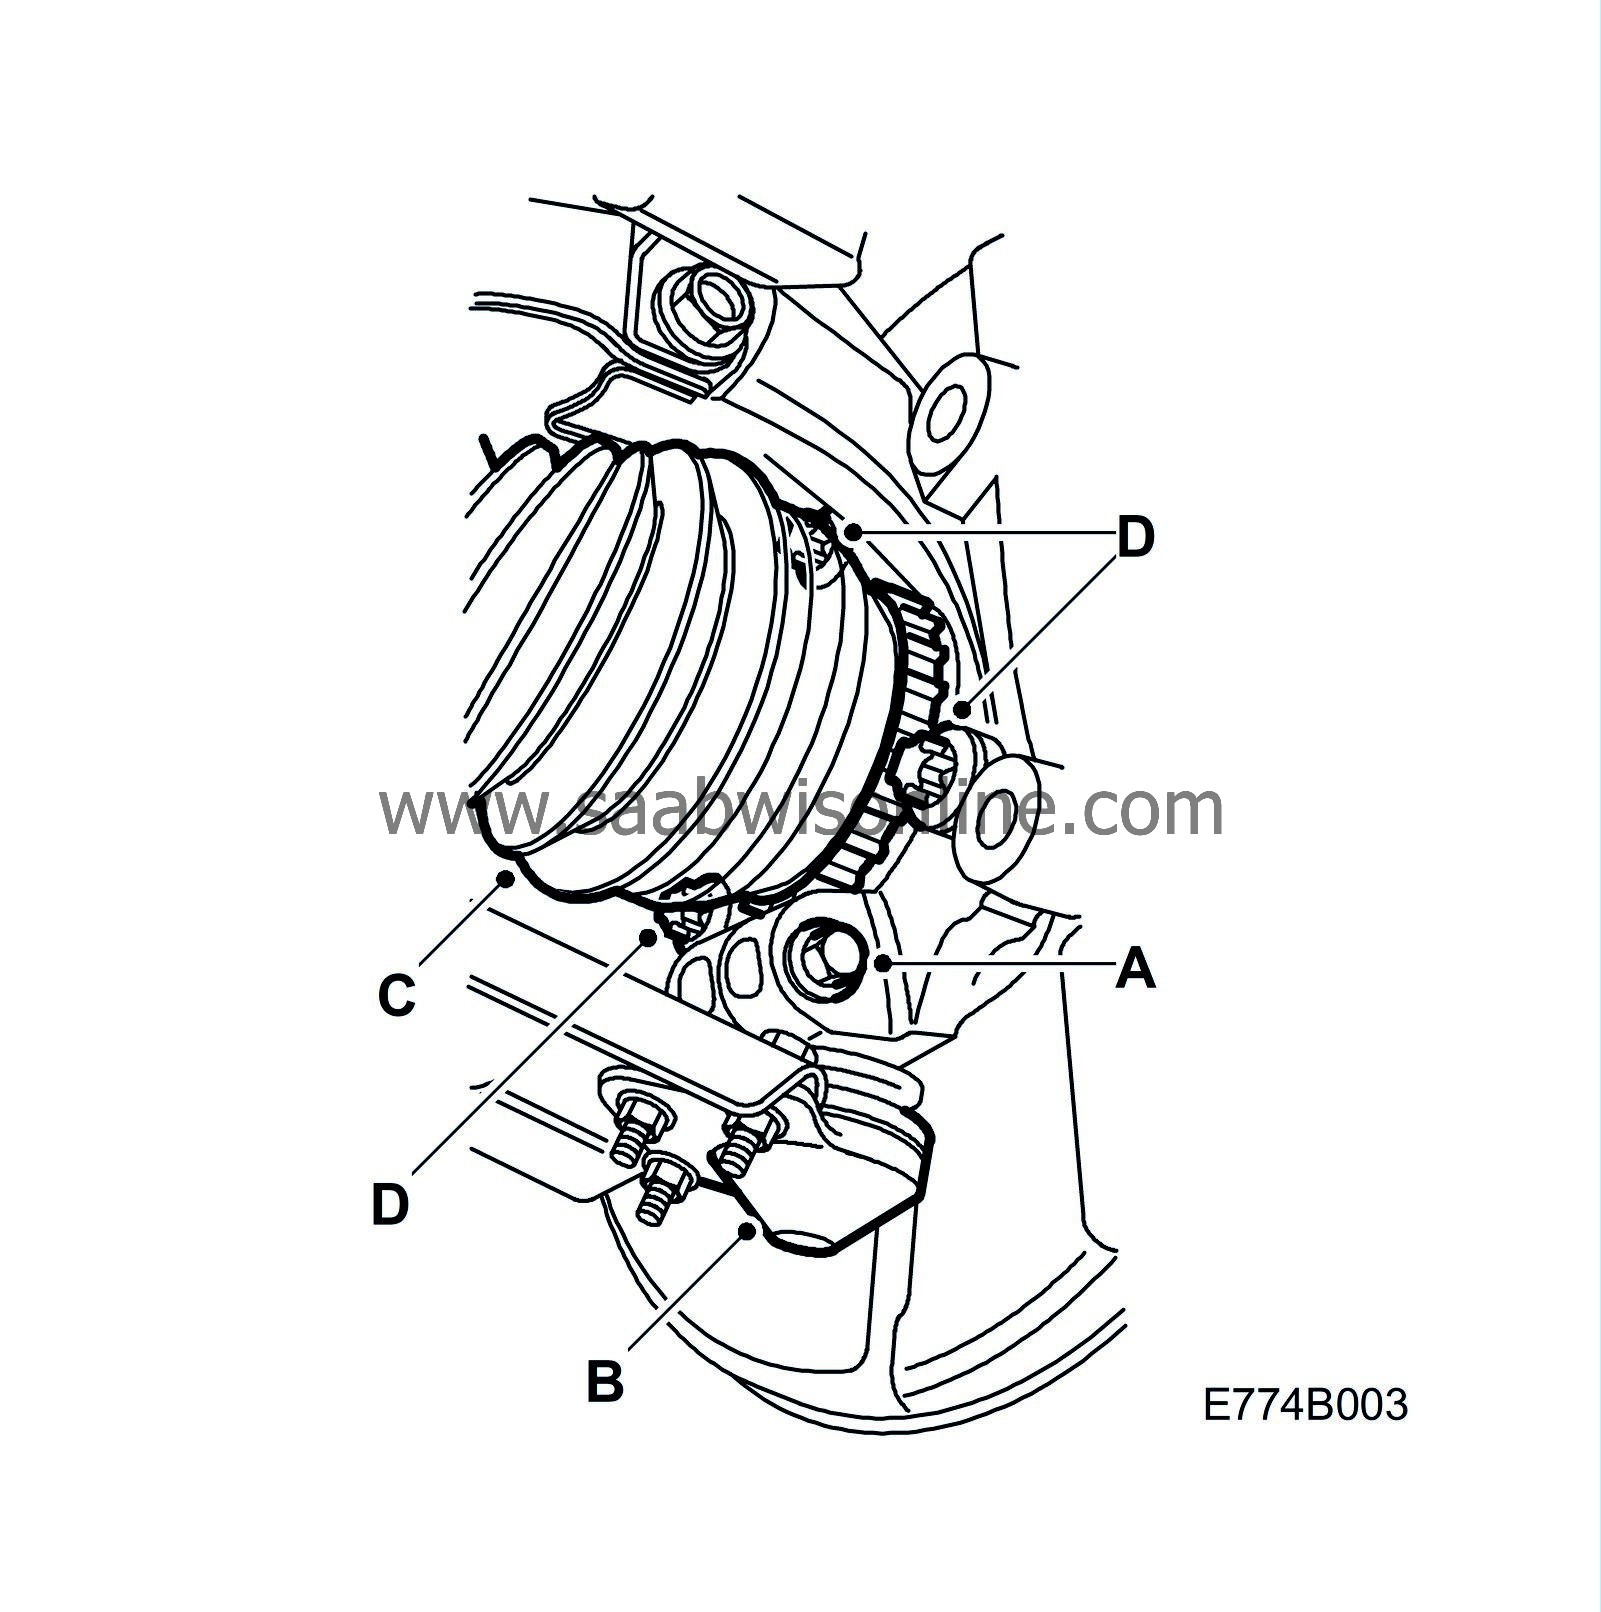
Remove the bolt securing the wishbone ball joint to the steering swivel member (A).

|
|
10.
|
Pull out the ball joint journal (B). Use 83 95 238 Wedge between stabilizer shaft and wishbone.
|
|
11.
|
Pull out the drive shaft from the hub using 89 96 951 Puller, drive shaft. Lift the hub and steering swivel member from the shaft (C).
|
Note
|
|
Take care so that the inboard universal joint does not separate.
|
|
|
12.
|
Install the ball joint journal when losing and tighten the hub bolts.
|
|
13.
|
Remove/fit one hub bolt at the time (D).
Tightening torque: 90 Nm +45° (66 lbf ft +45°)
|
|
14.
|
Apply slight coating of paint to the ABS tooth wheel if there are signs of wear.
|
|
15.
|
Fit the drive shaft to the hub (C).

|
|
16.
|
Fit the hub centre nut and pull the shaft in place using the nut.
|
|
17.
|
Fit the ball joint to the steering swivel member (B).
|
Note
|
|
Make sure the ball joint journal protrudes through the attachment.
|
|
|
18.
|
Fit the bolt securing the wishbone ball joint to the steering swivel member (A).
Tightening torque: 49 Nm (36 lbf ft)
|
|
19.
|
Fit the wheel sensor (B).

|
|
20.
|
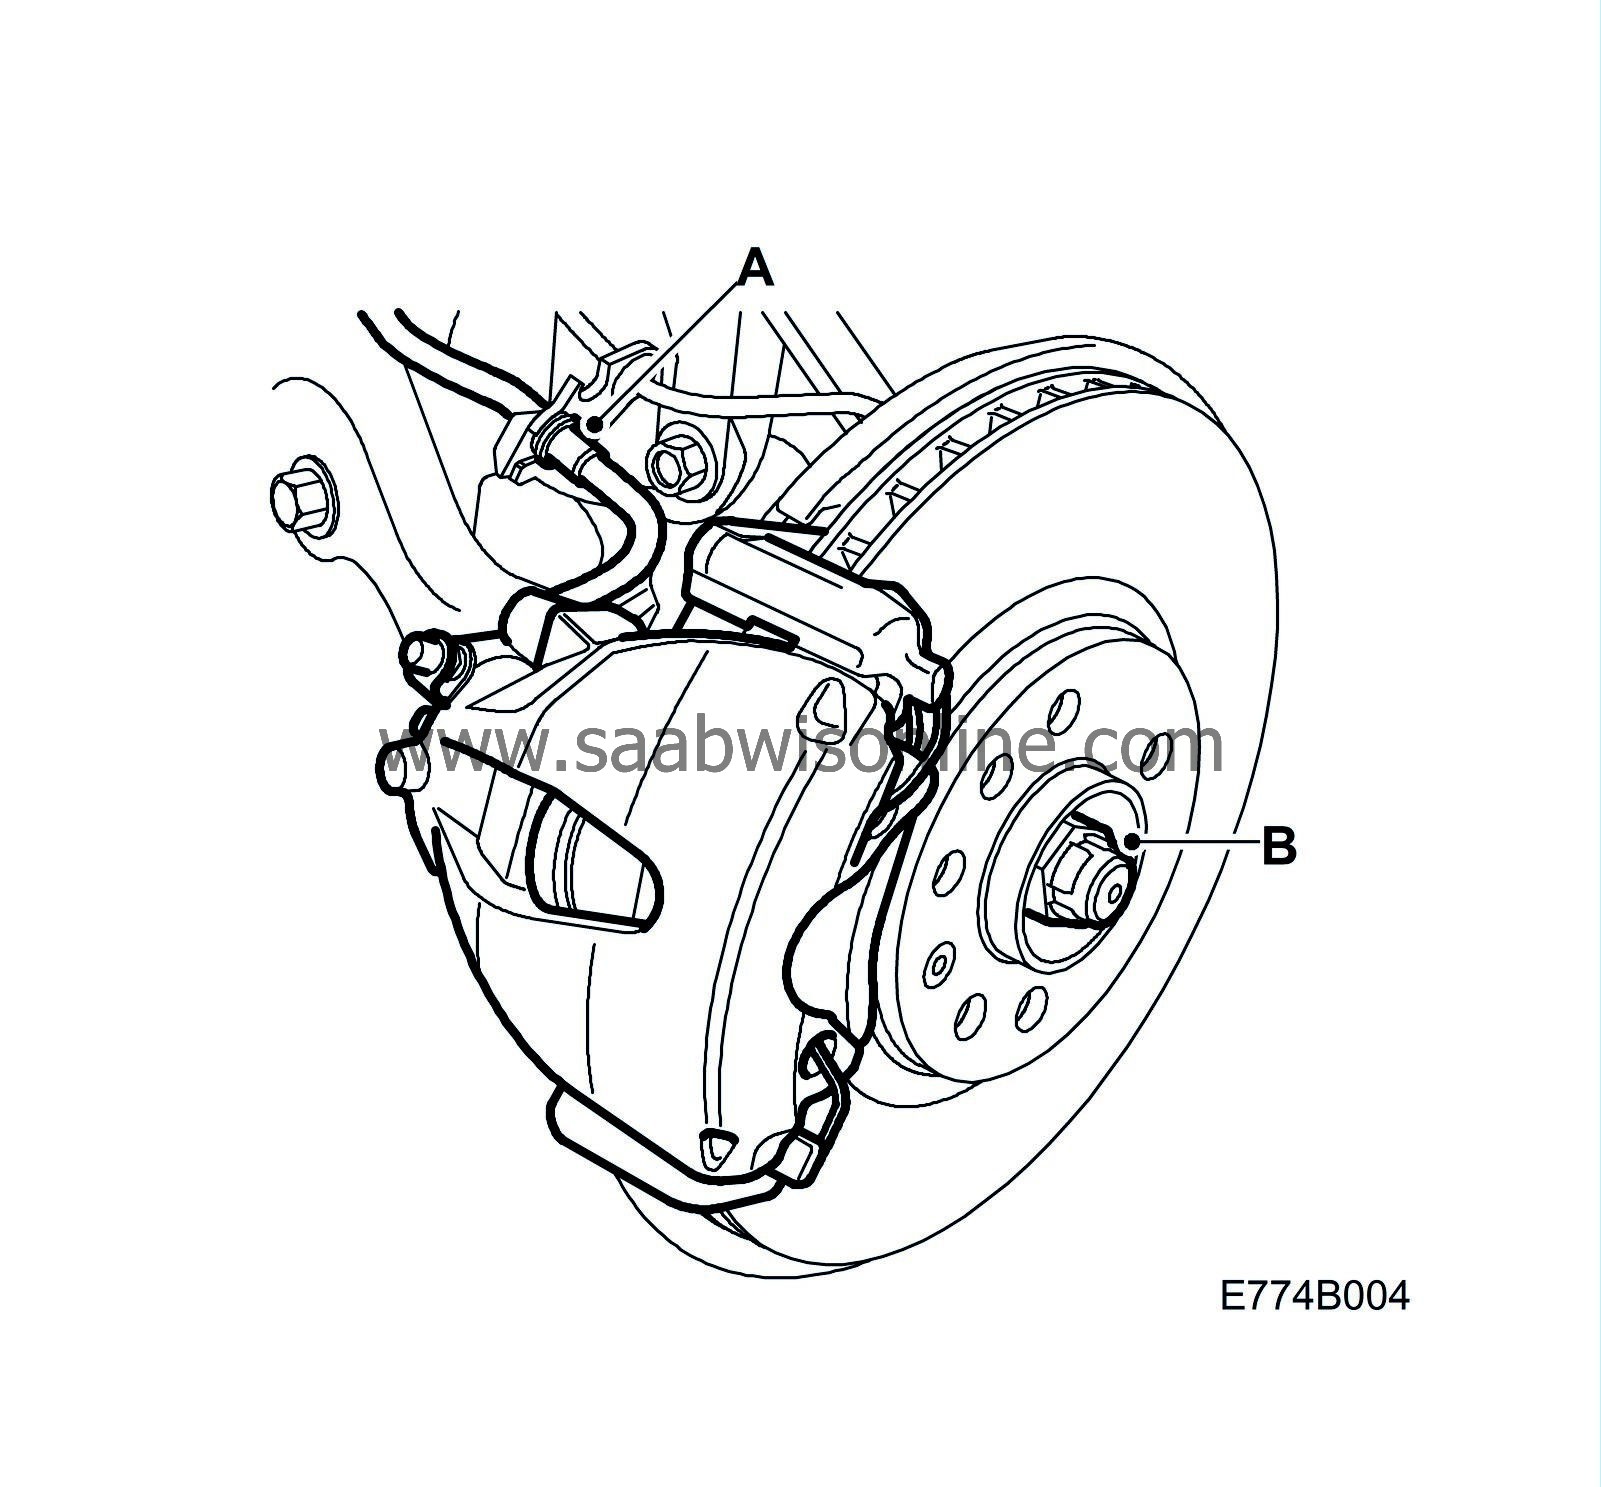
Fit the brake caliper (A). Apply 74 96 268 Thread locking adhesive to the bolts.
Tightening torque: 140 Nm +45° (103 lbf ft +45°)
|
|
21.
|
Fit the brake hose into the attachment and fit the clip (A).

|
|
22.
|
If the car is equipped with xenon light, install the sensor to the subframe.
|
|
23.
|
Fit the wheel. The centre emblem on aluminium rims must be removed before fitting the wheel.
Tightening torques
Aluminium rim 110 Nm (81 lbf ft)
Pressed steel rim 50 Nm +2x90°, max. 110 Nm (37 lbf ft +2x90°, max. 81 lbf ft)
|
|
24.
|
Lower the car so that wheels are on the ground.
|
|
25.
|
Tighten the hub centre-nut (B).
Tightening torque: 230 Nm (170 lbf ft)
|
|
26.
|
Fit the centre emblem.
|
|
27.
|
Depress the brake pedal to press out the piston in the brake caliper.
|
|
Marking the modification identity plate
|
After carrying out the procedure, box A1 on the modification identity plate must be marked. From and including M04 the table "Table of Modifications" can be found in the car's Warranty and Service Book. Mark the box with the number "7" if the procedure was carried out by the importer or with the number "8" if carried out by the dealer.
|
Fitting the modification identity plate
|
|
Note
|
|
A modification identity plate must only be fitted where local directives require the marking of the car.
|
Fit the modification identity plate in accordance with Tis2Web
9-5 M04 - General - General - Technical data - Plates and labels.
|
Warranty/Time Information
|
See separate information.


