Side impact sensor, RH
| Side impact sensor, RH |
| 1. |
Ignition switch in the OFF position.
|
|
| 2. |
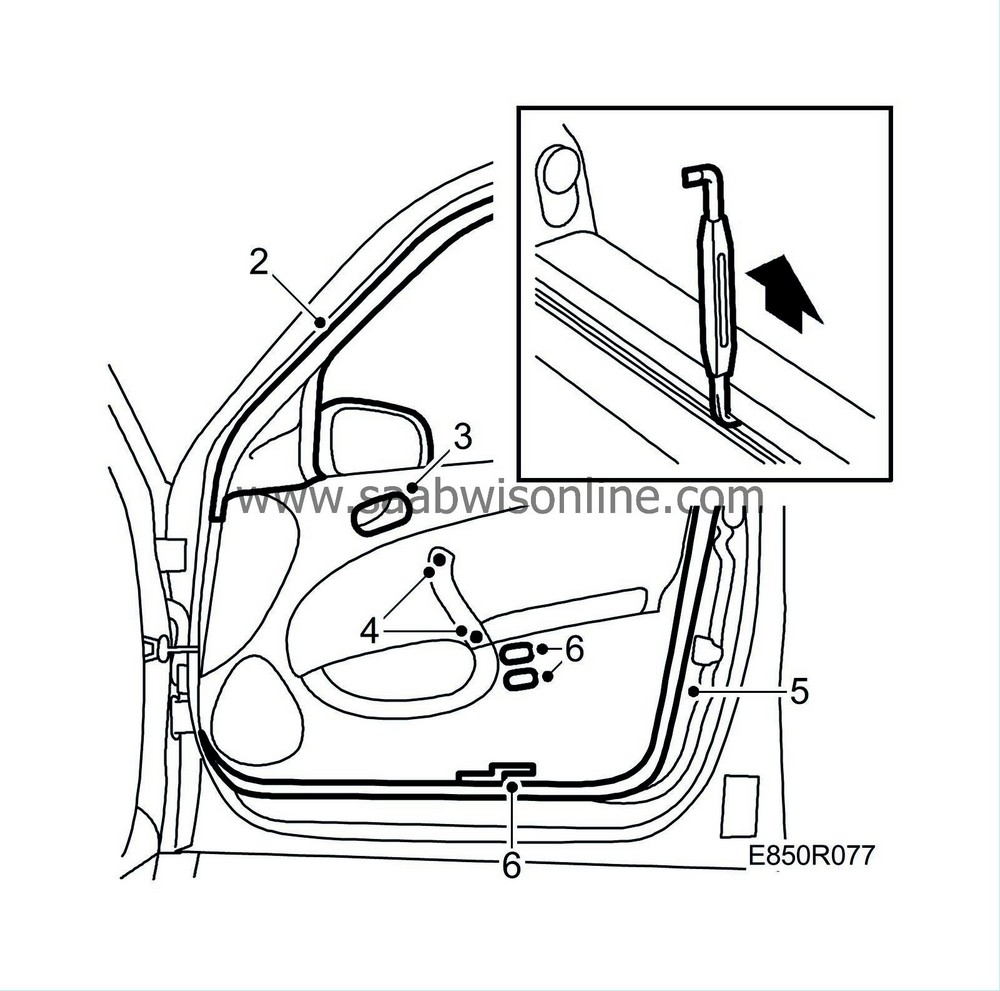
Remove the trim moulding (secured with clips).
Driver's side: Unplug the connector to the door mirror. |
|
| 3. |
Remove the inside door handle, 1 cover piece and screw.
|
|
| 4. |
Remove the door pull, 2 cover pieces and screws.
|
|
| 5. |
Remove the door trim (fastened with clips) by levering it out at the recesses along the edge with a screwdriver.
Lift the door trim off the lock button. This will be easier if you raise the edge against the window moulding using an offset screwdriver or other locally fabricated tool. |
|
| 6. |
Remove the door lamp from the trim.
Driver's side: Unplug the connectors for the tailgate release and fuel filler cap. |
|
| 7. |
Unplug and remove the loudspeaker. Carefully remove the moisture barrier.

|
|
| 8. |
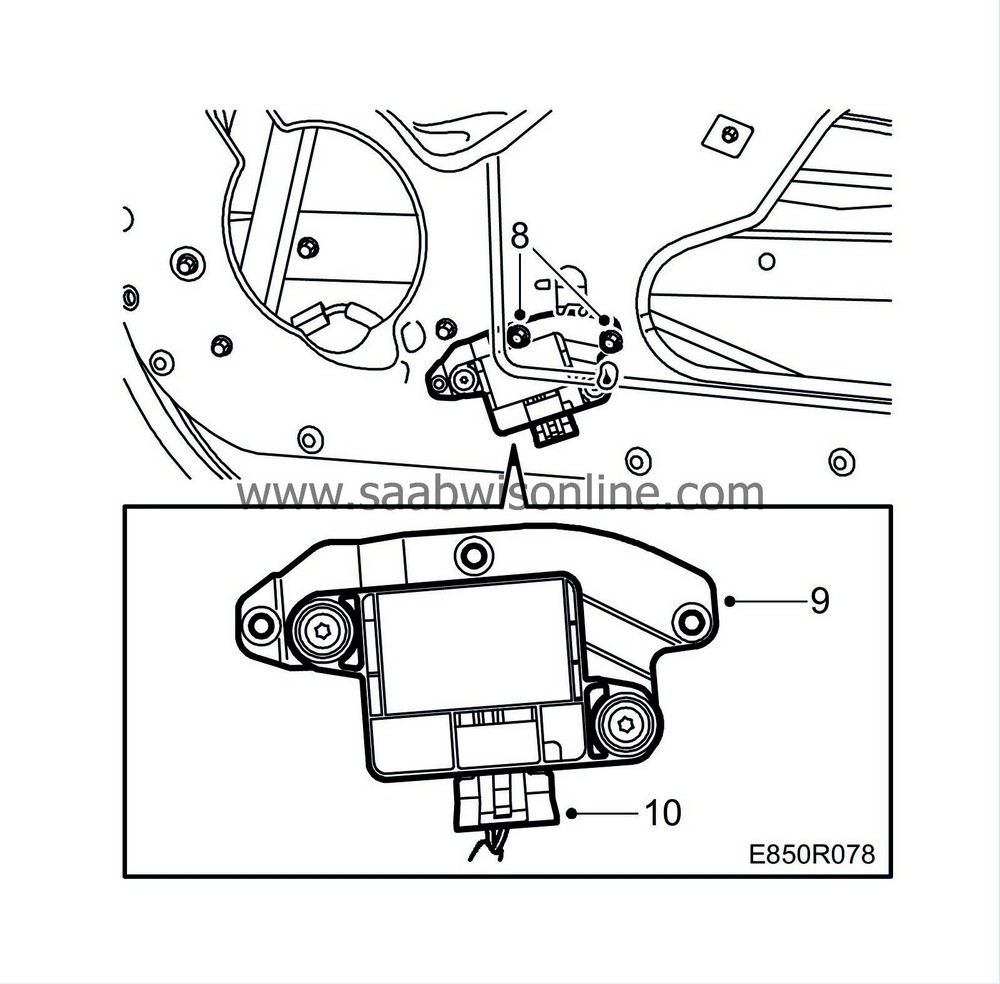
Undo the screws securing the side impact sensor.
|
|
| 9. |
Lift the side impact sensor out of the door.
|
|
| 10. |
Unplug the connector from the side impact sensor.
|
|
| To fit |

| 1. |
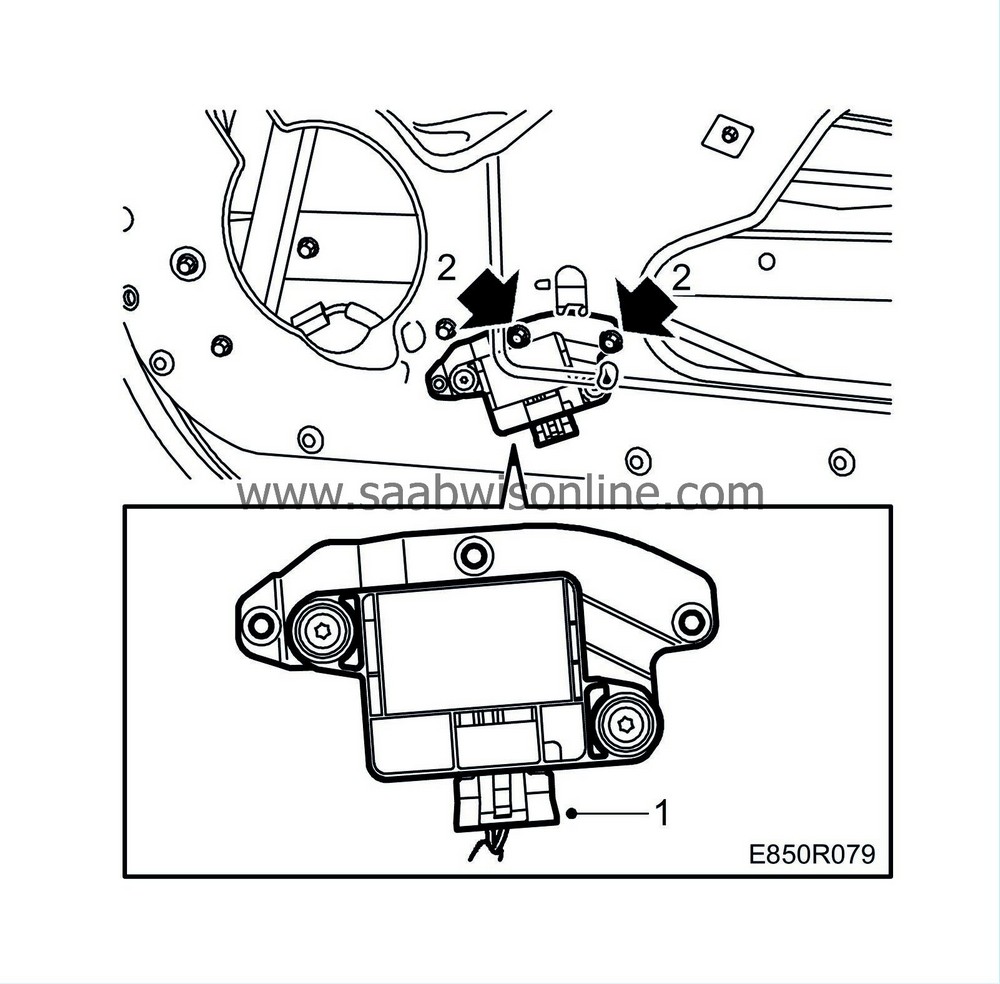
Plug the connector into the side impact sensor.
|
|||||||||
| 2. |
Screw the side impact sensor in place. Make sure the cable to the side impact sensor does not get trapped.
Tightening torque: 5 Nm (3.7 lbf ft) |
|
| 3. |
Fit the moisture barrier. Plug in and fit the loudspeaker.
|
||||||||||
| 4. |
Refit the door lamp.

Driver's side: Plug in the connectors in the door trim for the tailgate release and fuel filler cap. |
|
| 5. |
Lift the trim in place over the lock buttons.
Fit the door trim. |
|
| 6. |
Fit the door handle.
|
|
| 7. |
Fit the door pull.
|
|
| 8. |
Driver's side:
Plug in the connector to the door mirror.
Fit the trim moulding. |
|
| 9. |
Turn on the ignition and check the SRS system and control module with the diagnostic tool as follows:
Connect the diagnostics instrument to the diagnostics socket under the dashboard. Delete any trouble codes. Switch off the ignition and then on again. Wait at least 1 minute with the ignition switched on. Check whether a diagnostic trouble code is displayed: If a diagnostic trouble code is displayed: Carry out the appropriate fault diagnosis as directed for the diagnostic trouble code in question. If no diagnostic trouble code is displayed: Fitting completed correctly. Disconnect the diagnostics instrument. |
|

 Warning


