Head unit
| Head unit |
| Note | ||
|
If the unit is removed but is to be re-installed in the same vehicle, the Tech2 divorce/marriage procedure is not required. |
| Note | ||
|
To divorce/marry the head unit from/to the car requires security access from TIS 2000. |
| Removal |
| 1. |
Connect Tech2.
|
|
| 2. |
Establish communication with the audio system.
|
|
| 3. |
Select “
Programming ” from the system menu.
|
|
| 4. |
Press “
ENTER”.
|
|
| 5. |
Select DIVORCED with the change button and press “
OK ”.
|
|
| • |
“
DIVORCED ” must be selected when removing the head unit (to be installed in another car or to be returned for warranty repair).
|
| 6. |
The radio becomes silent and “NO VIN” is shown on the radio display.
|
|
| 7. |
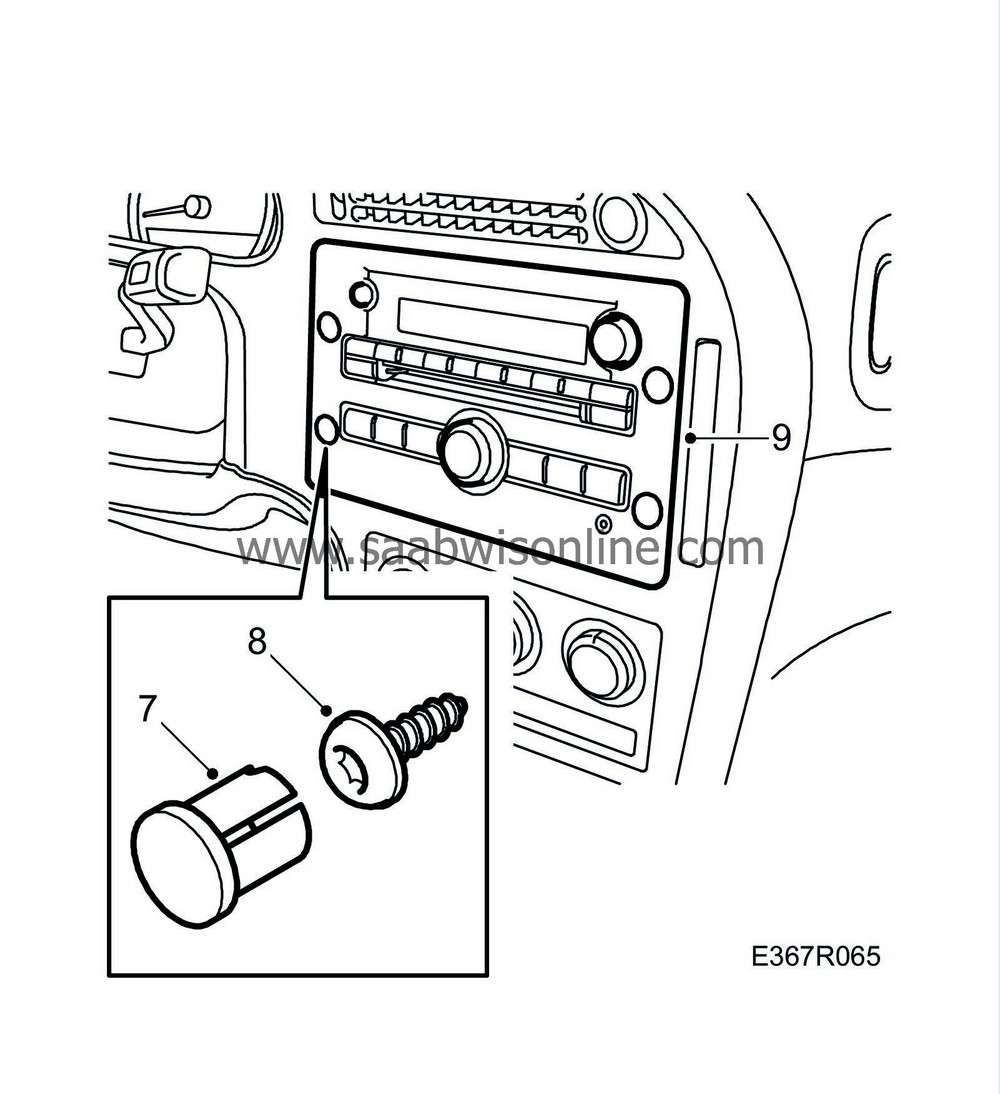
Carefully remove the plugs by pressing a small screwdriver through the plugs. Pull out the plugs with the screwdriver.

|
|
| 8. |
Remove the bolts.
|
|
| 9. |
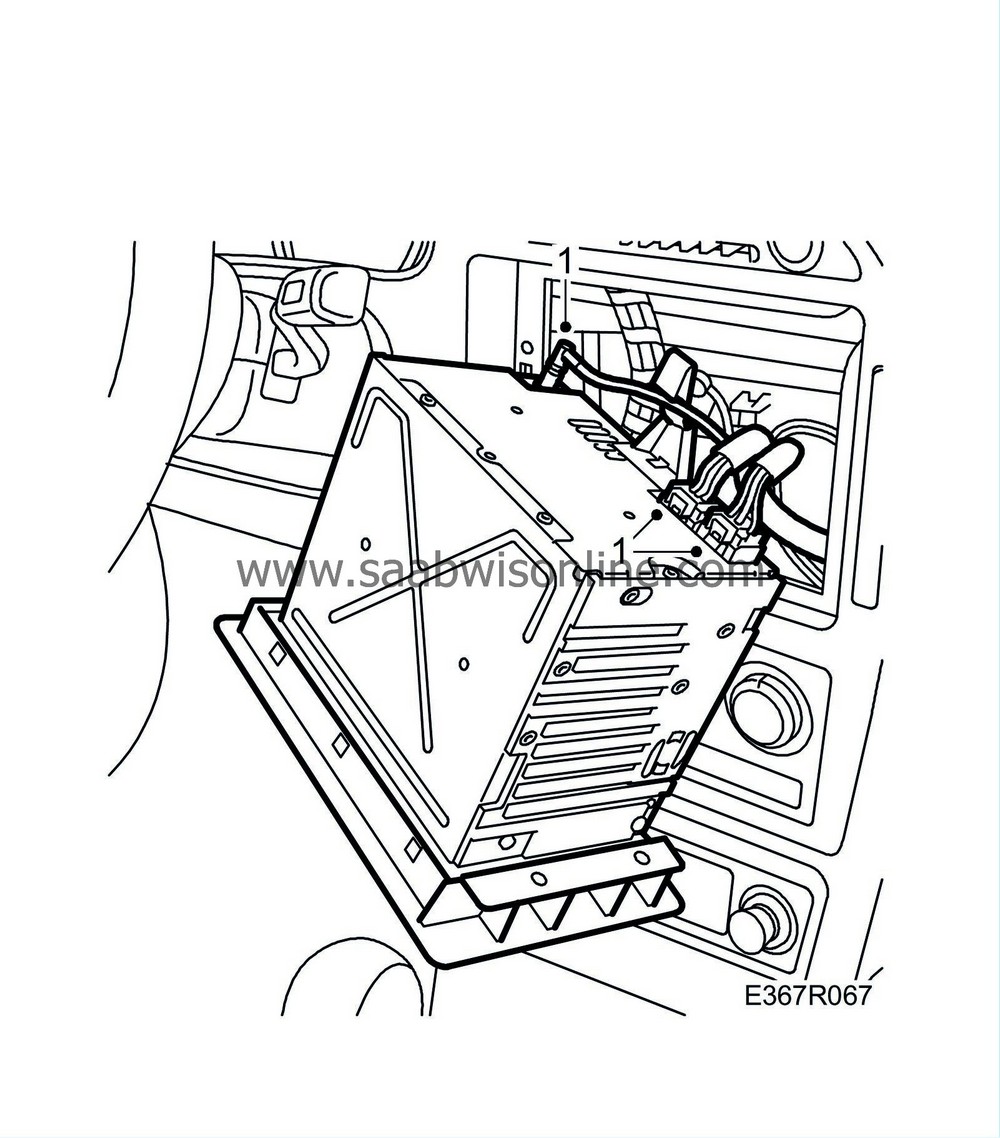
Pull out the unit
|
|
| 10. |
Undo the connector and the antenna connection.

|
|
| Refitting |
| 1. |
Plug in the connector and the antenna.

|
|||||||
| 2. |
Push the unit into the centre console.
|
|
| 3. |
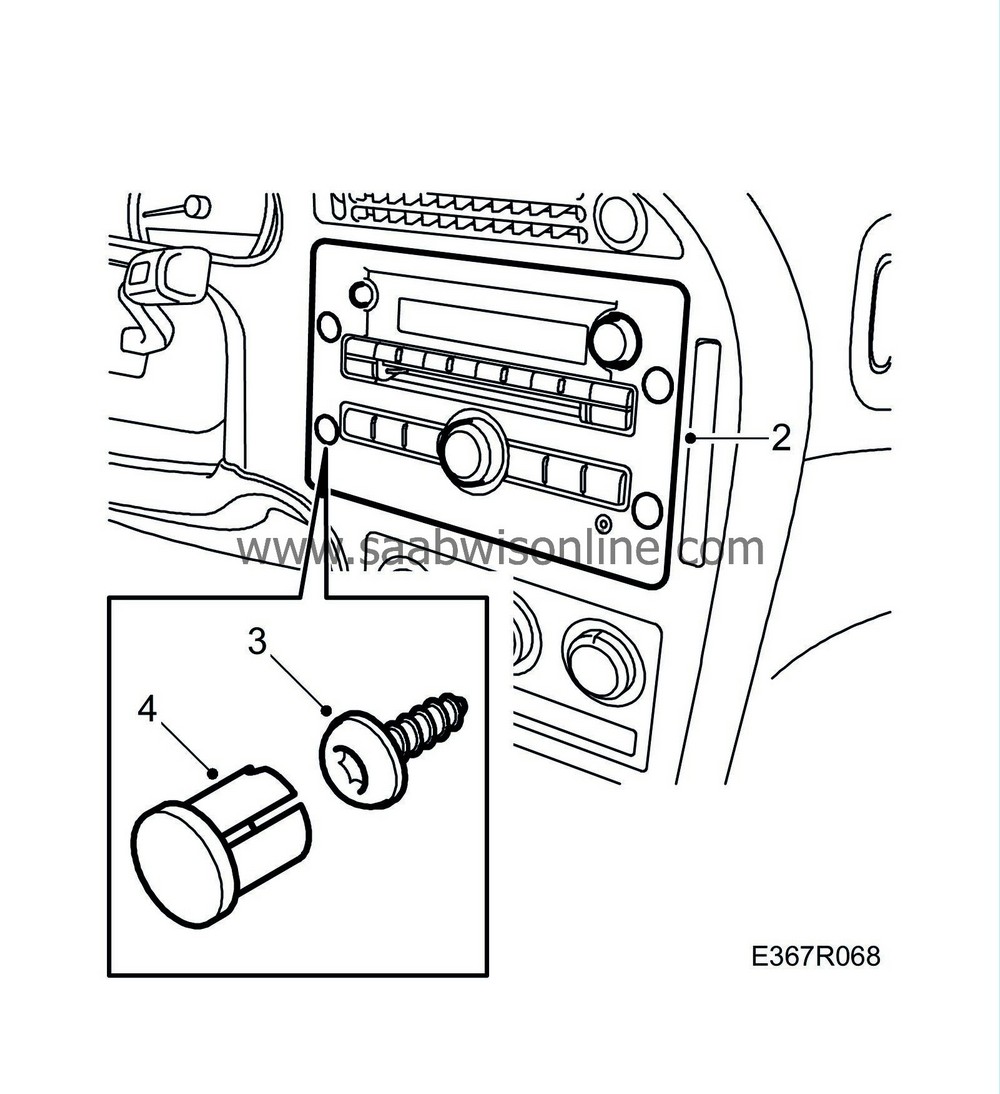
Fit the bolts.

|
|
| 4. |
Fit new plugs, ensuring that the plugs are guided into the location grooves.
|
|
| 5. |
With Tech2 connected and communicating with the audio system, select “
PROGRAMMING” from the system menu.
|
|
| 6. |
Press “
ENTER”.
|
|
| 7. |
Select MARRIED with the change button and press “
OK ”.
|
|
| • |
“
MARRIED ” must be selected when installing a head unit into a Saab 9-5.
|
| 8. |
“NO VIN” disappears from the radio display and the sound returns.
|
|
| 9. |
Carry out spare parts programming using Tech 2.
|
|
| 10. |
Set the time and date on the unit's clock.
|
|
|
|||||||||||||

 Warning

