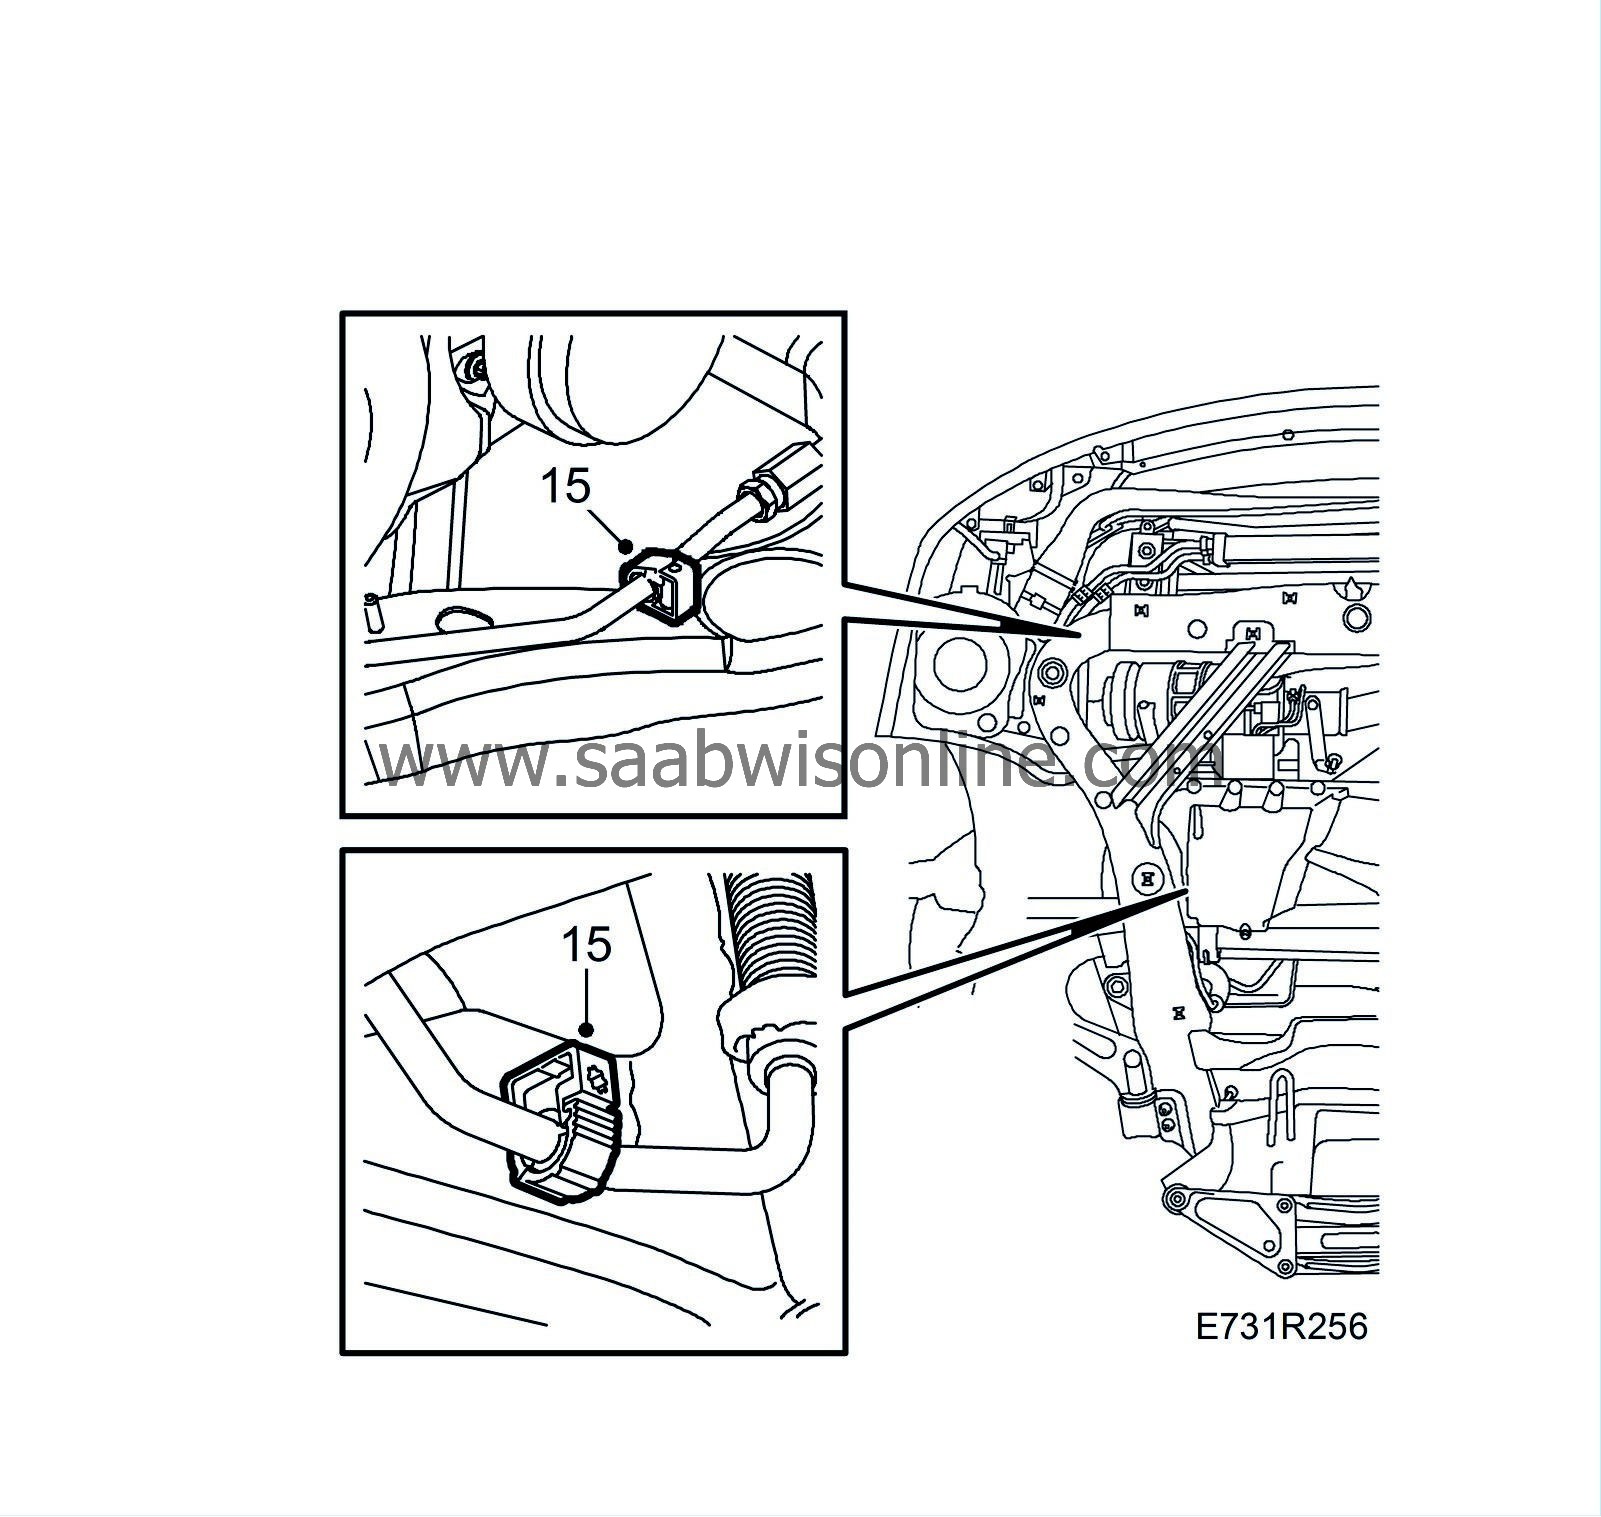
Subframe, petrol engines, change
| Subframe, petrol engines, change |
This method is used when the a new subframe is to be fitted.
| To remove |
| 1. |
Remove the front exhaust system with catalytic converter
B205E
,
B235E/R
.
|
|
| 2. |
MAN:
Undo the bolts securing the rear engine pad using a long 10 mm socket, two extensions with ball fastening (e.g. 30 17 613) and
82 93 102 Extension 500 mm, 3/8 square
. Leave the bolts in place.
AUT: Remove the nut of the rear engine mounting and slacken the two visible bolts holding the rear engine pad. 
|
|
| 3. |
Hang
strap 83 95 212
over the radiator assembly but do not pull it tight.
|
|
| 4. |
Raise the car and remove the front wheels.
|
|
| 5. |
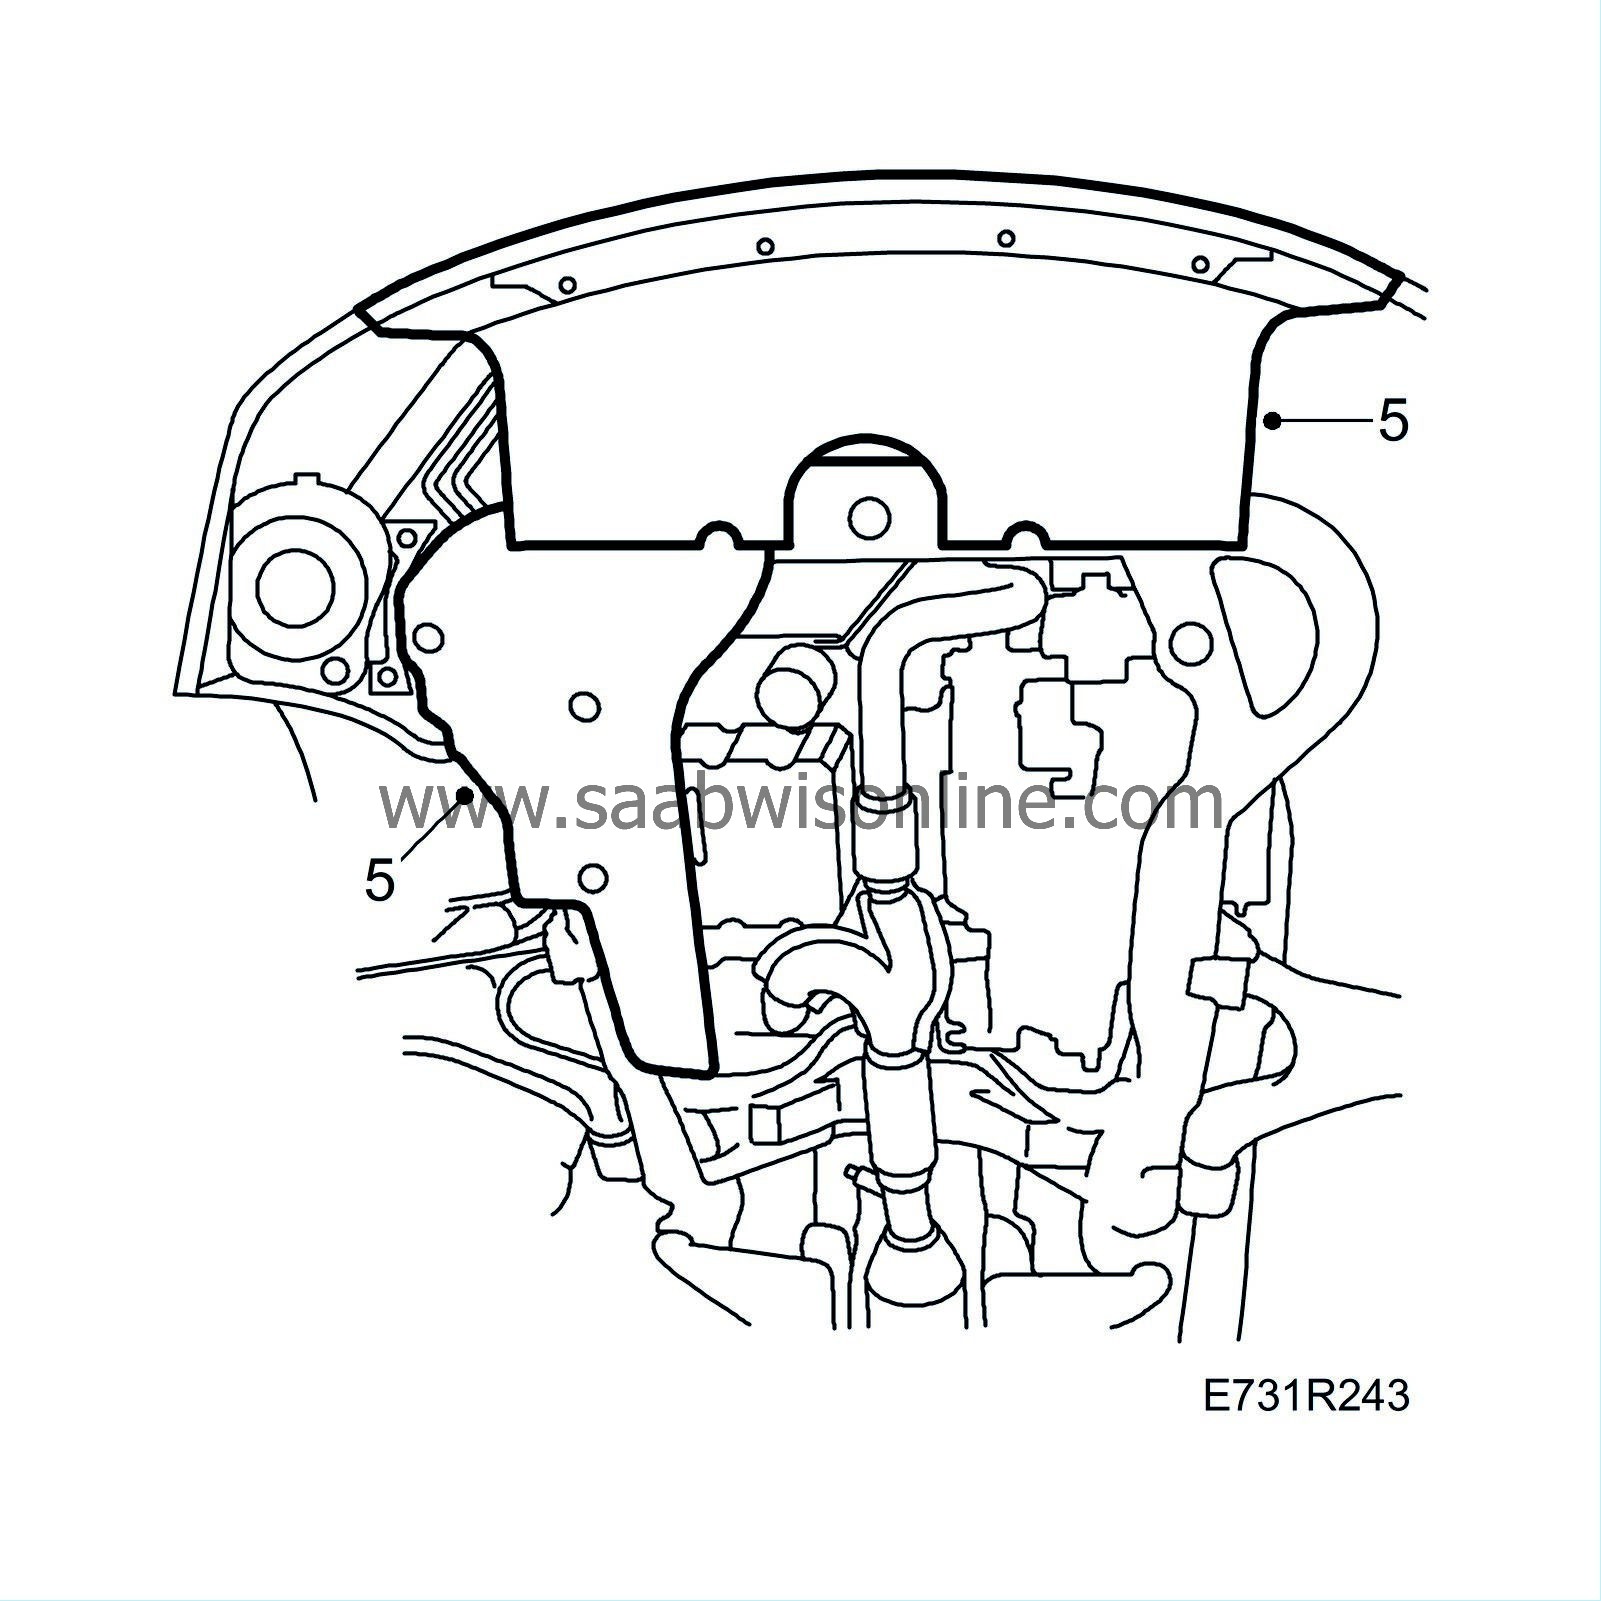
Remove the air shields.
|
|
| 6. |
Detach the engine oil cooler and suspend it with a
83 95 212 Strap
.

|
|
| 7. |
Remove the retaining bolts from the power steering cooling coil.

|
|
| 8. |
Pull the strap tight round the radiator member and radiator assembly.
|
|
| 9. |
Remove the reinforcement at the subframe rear mounting point.

|
|
| 10. |
Remove the two steering gear retaining bolts.
|
|
| 11. |
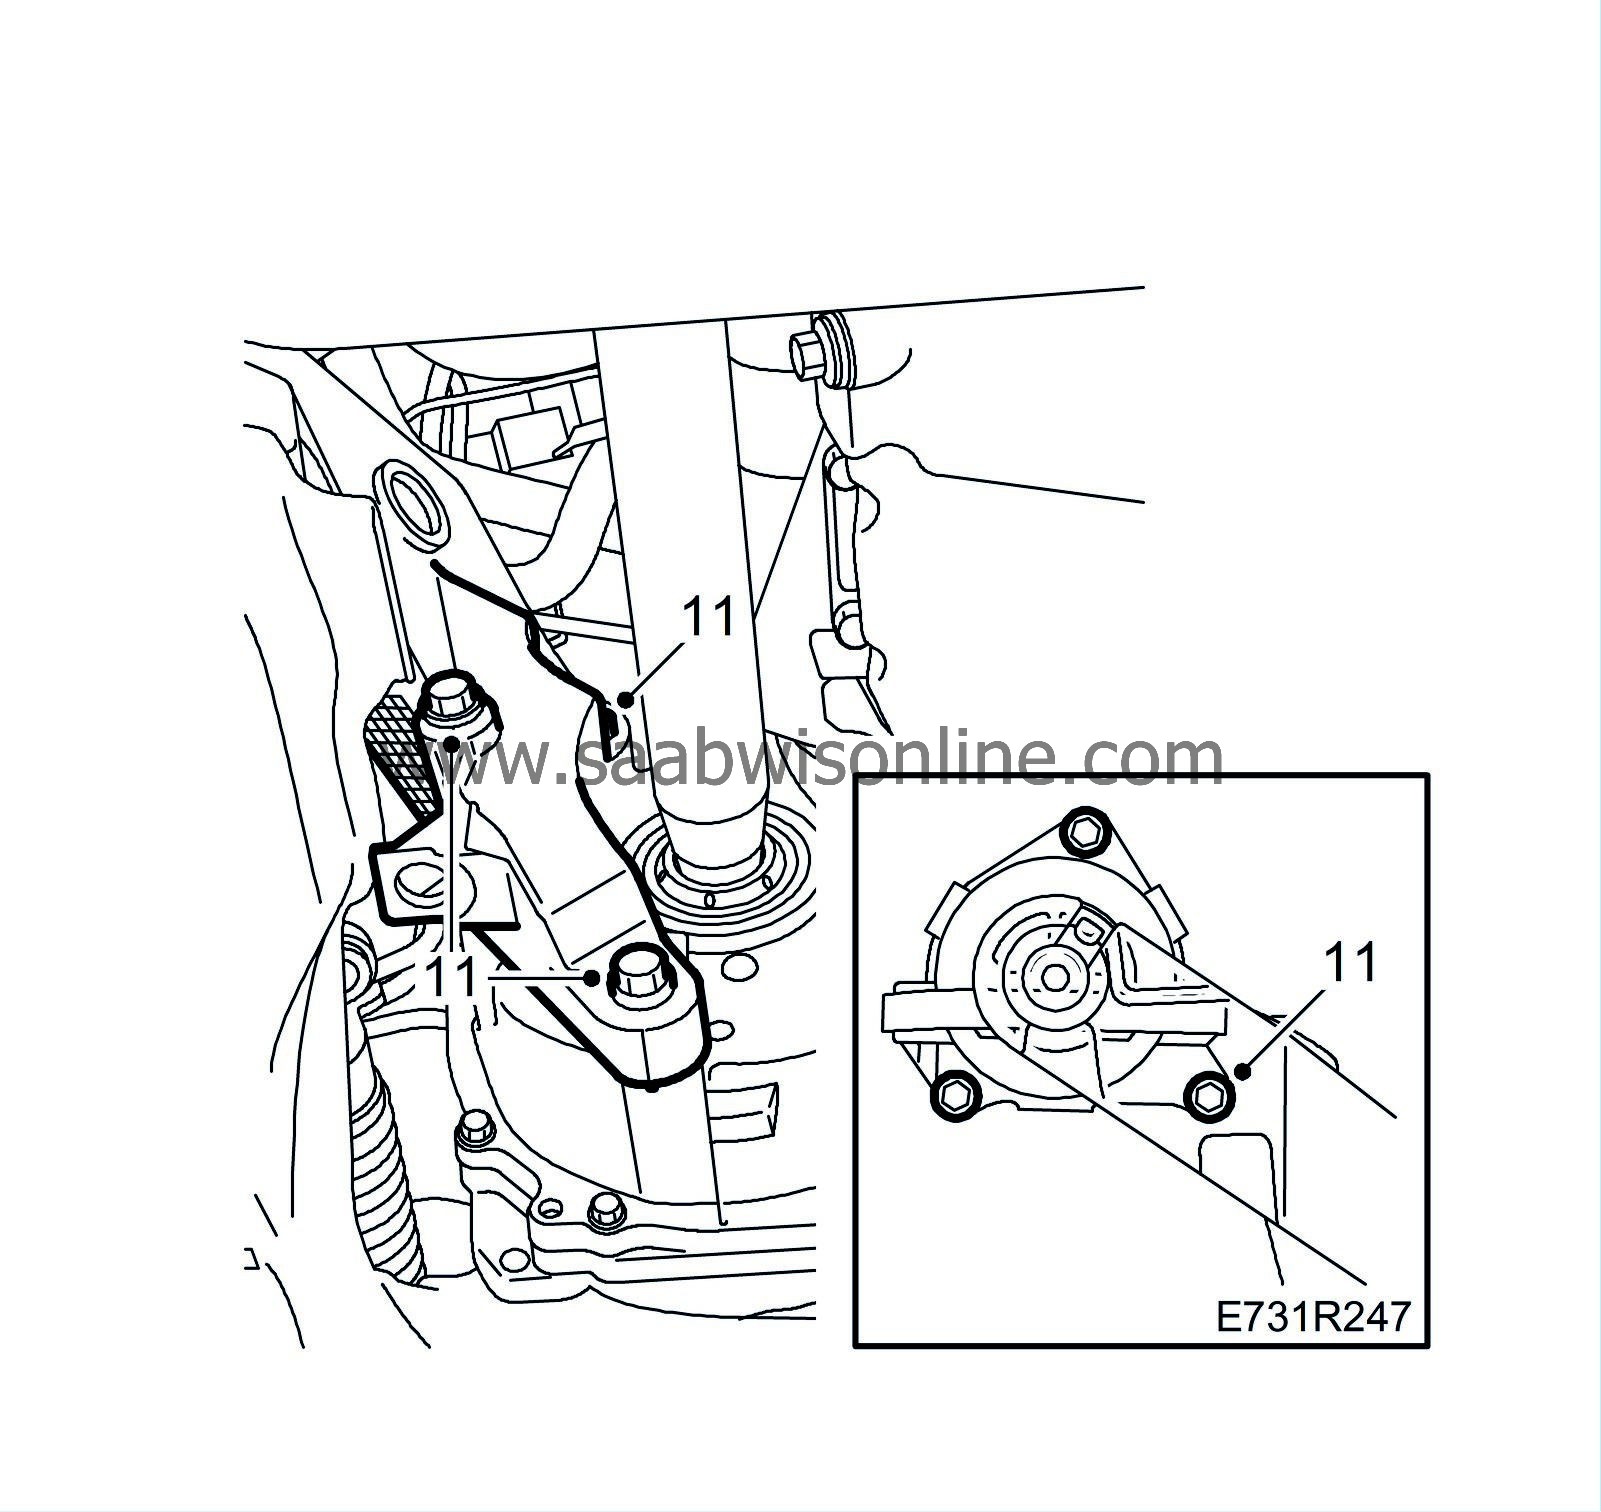
AUT:
Remove the rear engine bracket and the engine pad.
|
|
| 12. |
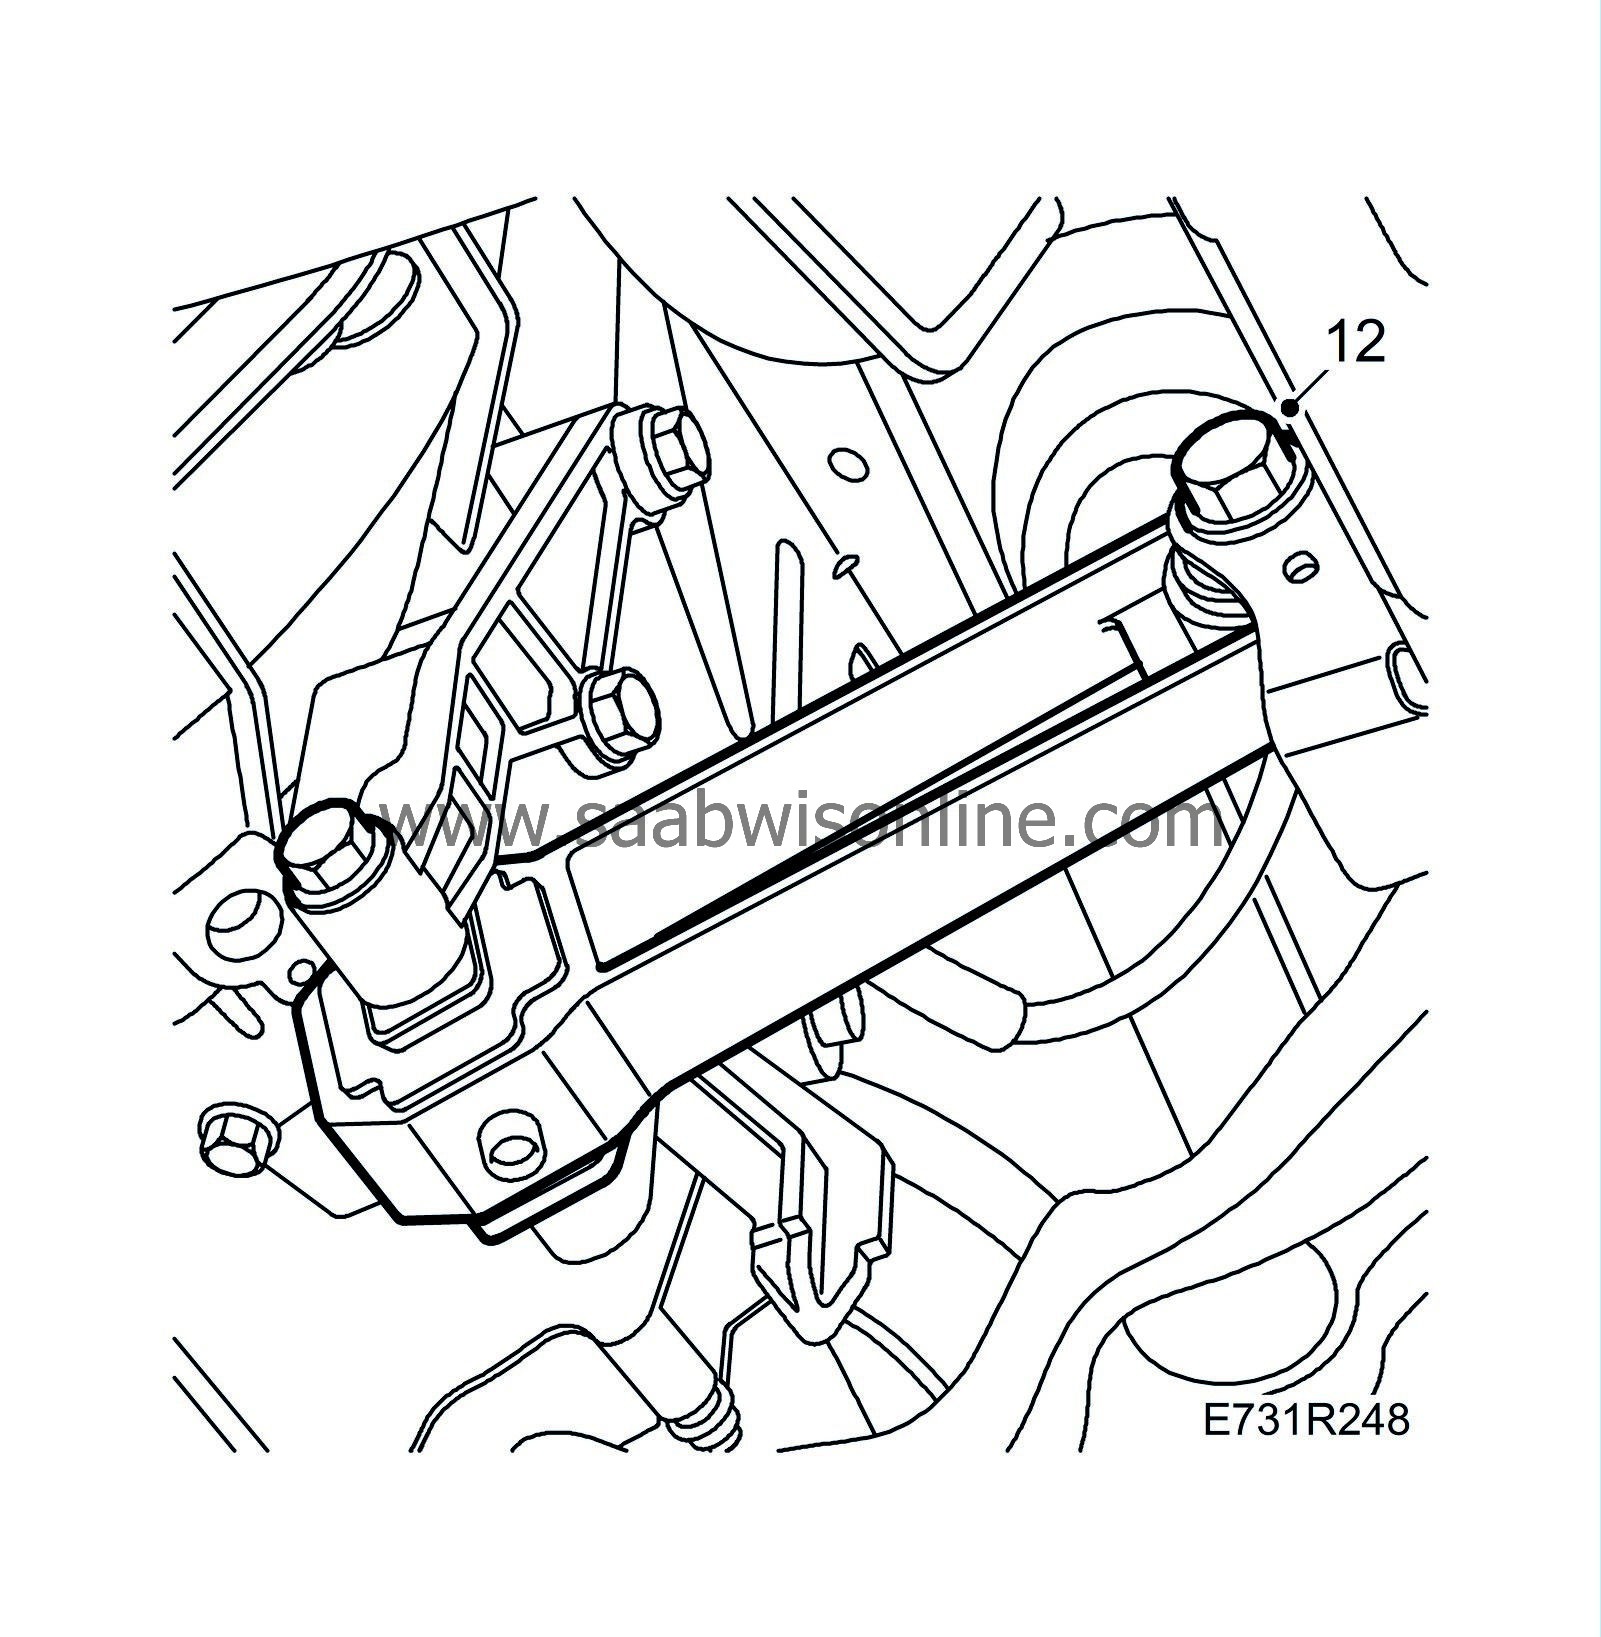
Detach the gearbox torque arm from the subframe.
|
|
| 13. |
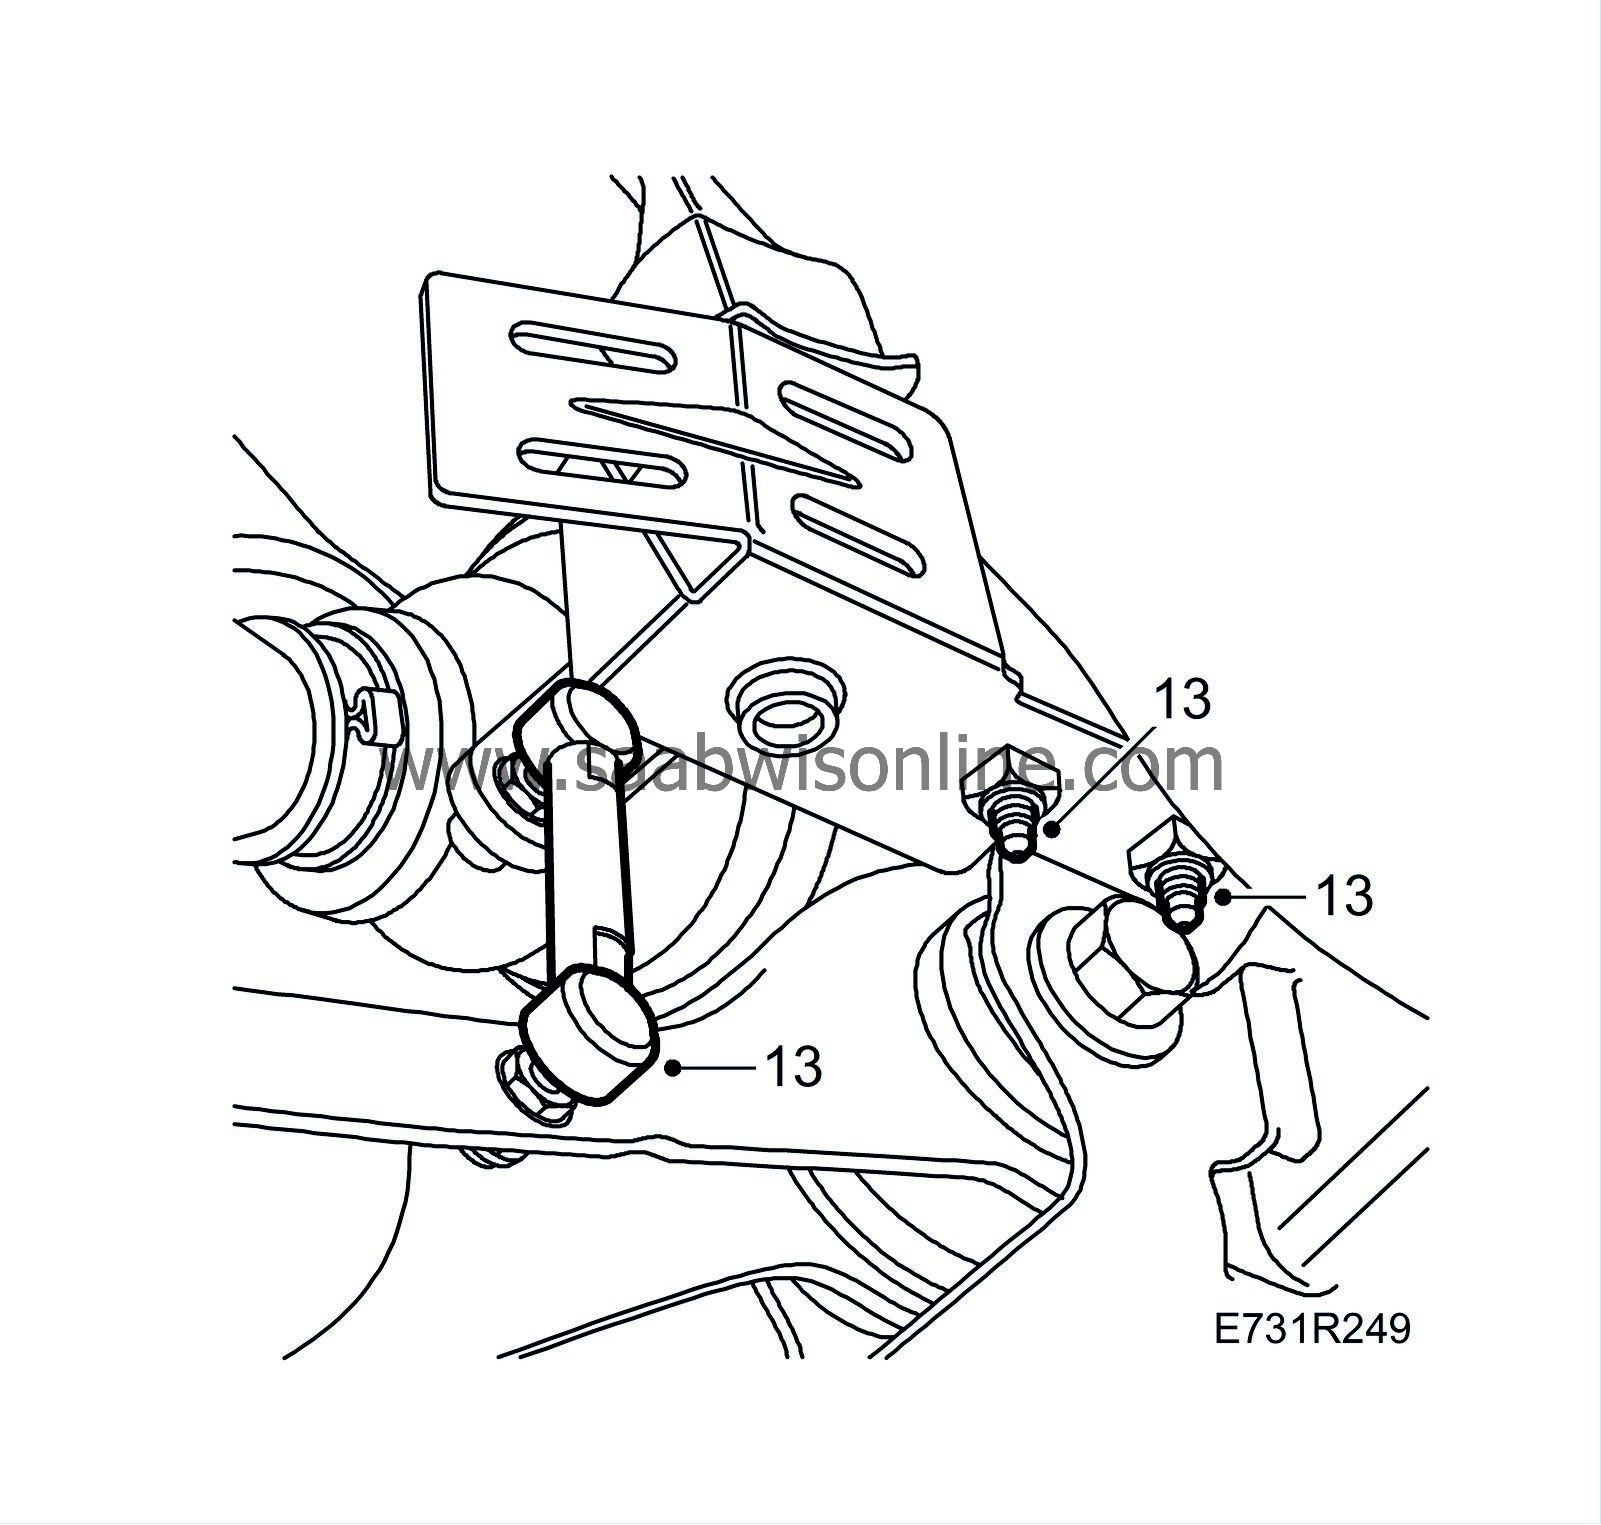
Cars with xenon headlamps:
Undo the level sensor for the xenon headlamps from the bracket and move it to one side.
|
|
| 14. |
Detach the suspension arms from the subframe.

|
|
| 15. |
Remove the anti-roll bar from the subframe.
|
|
| 16. |
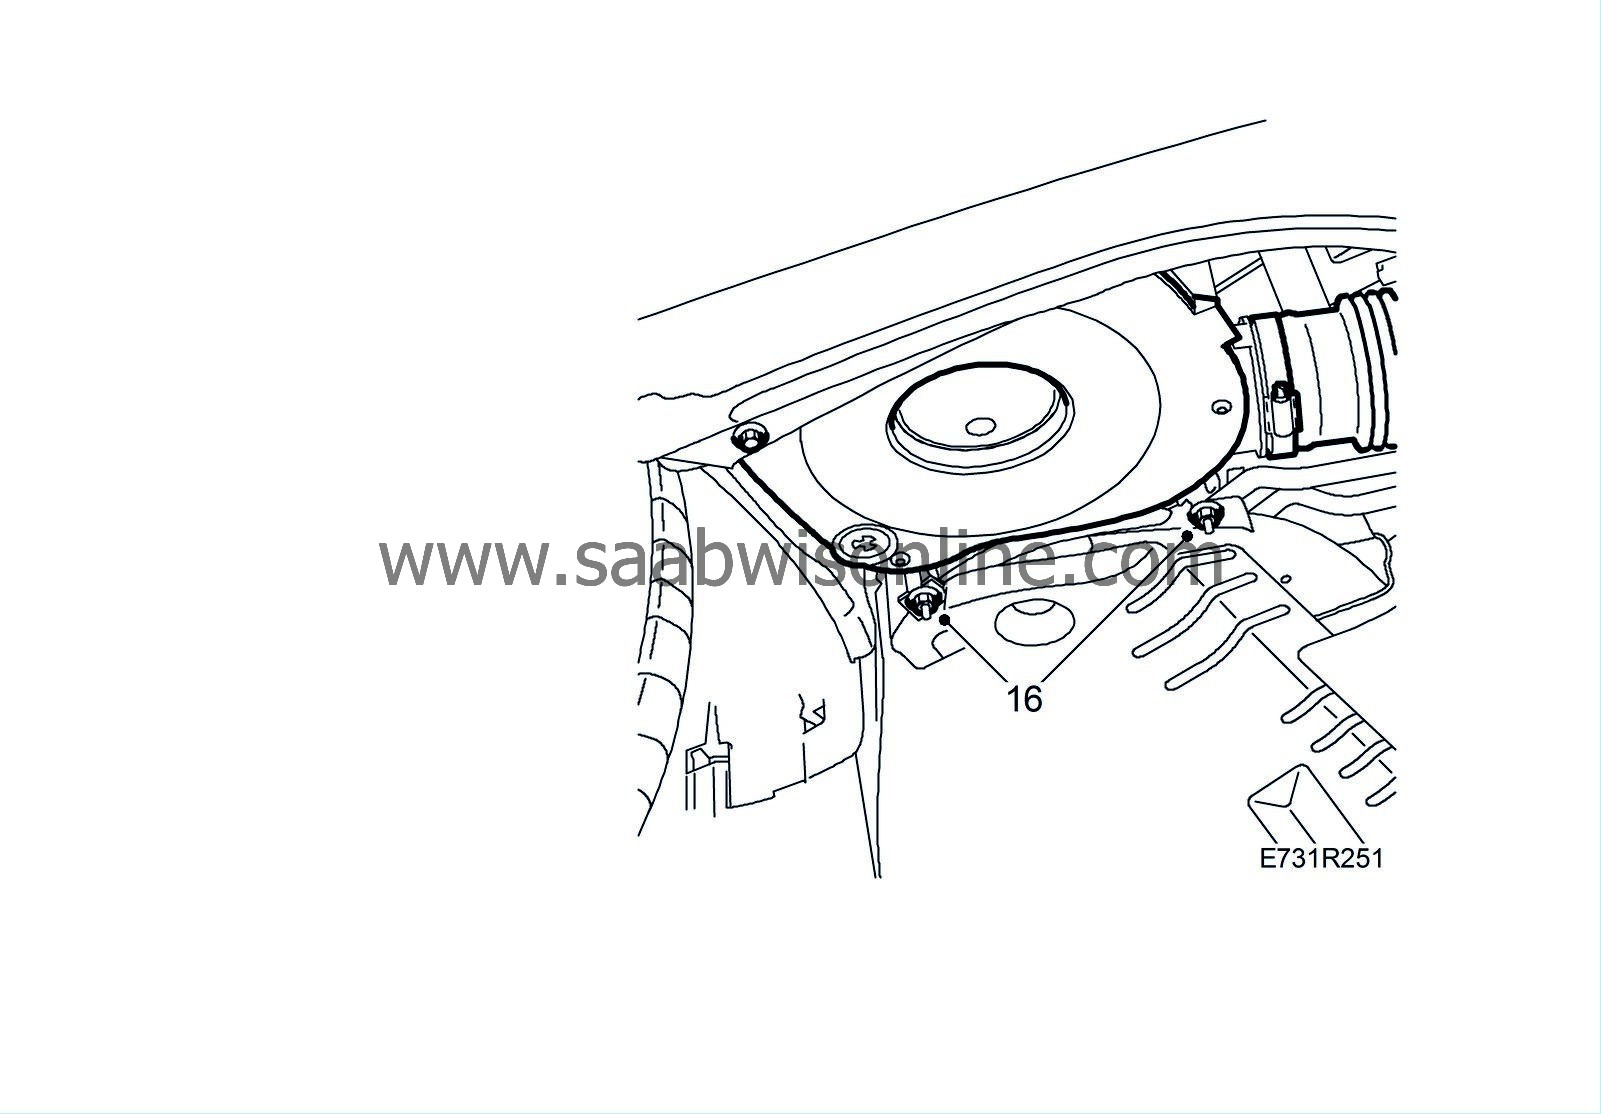
Unscrew the air cleaner retaining nuts from the subframe.
|
|
| 17. |
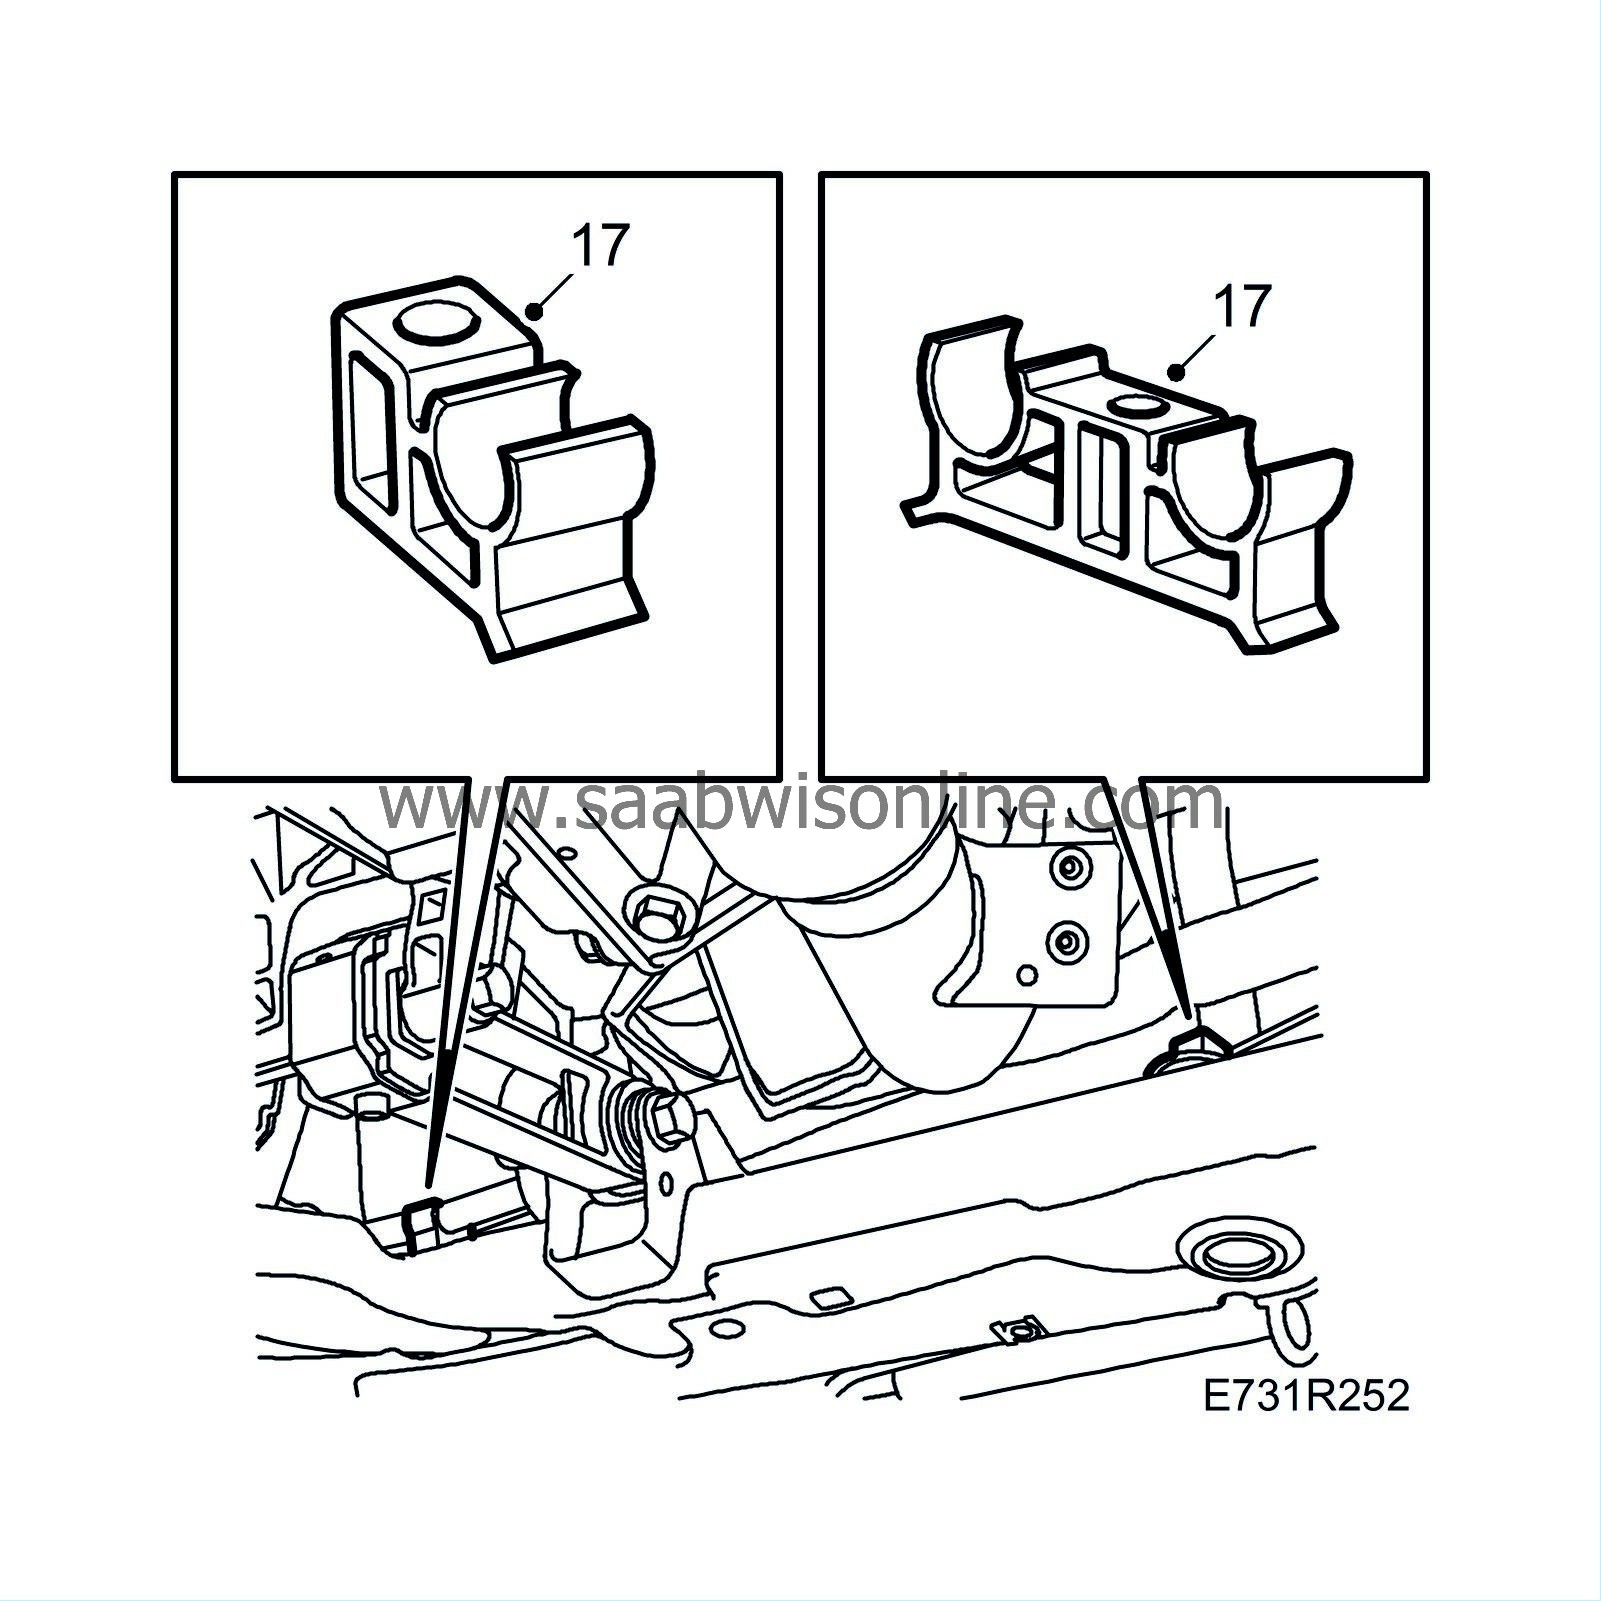
Remove the A/C pipes from their brackets.
|
|
| 18. |
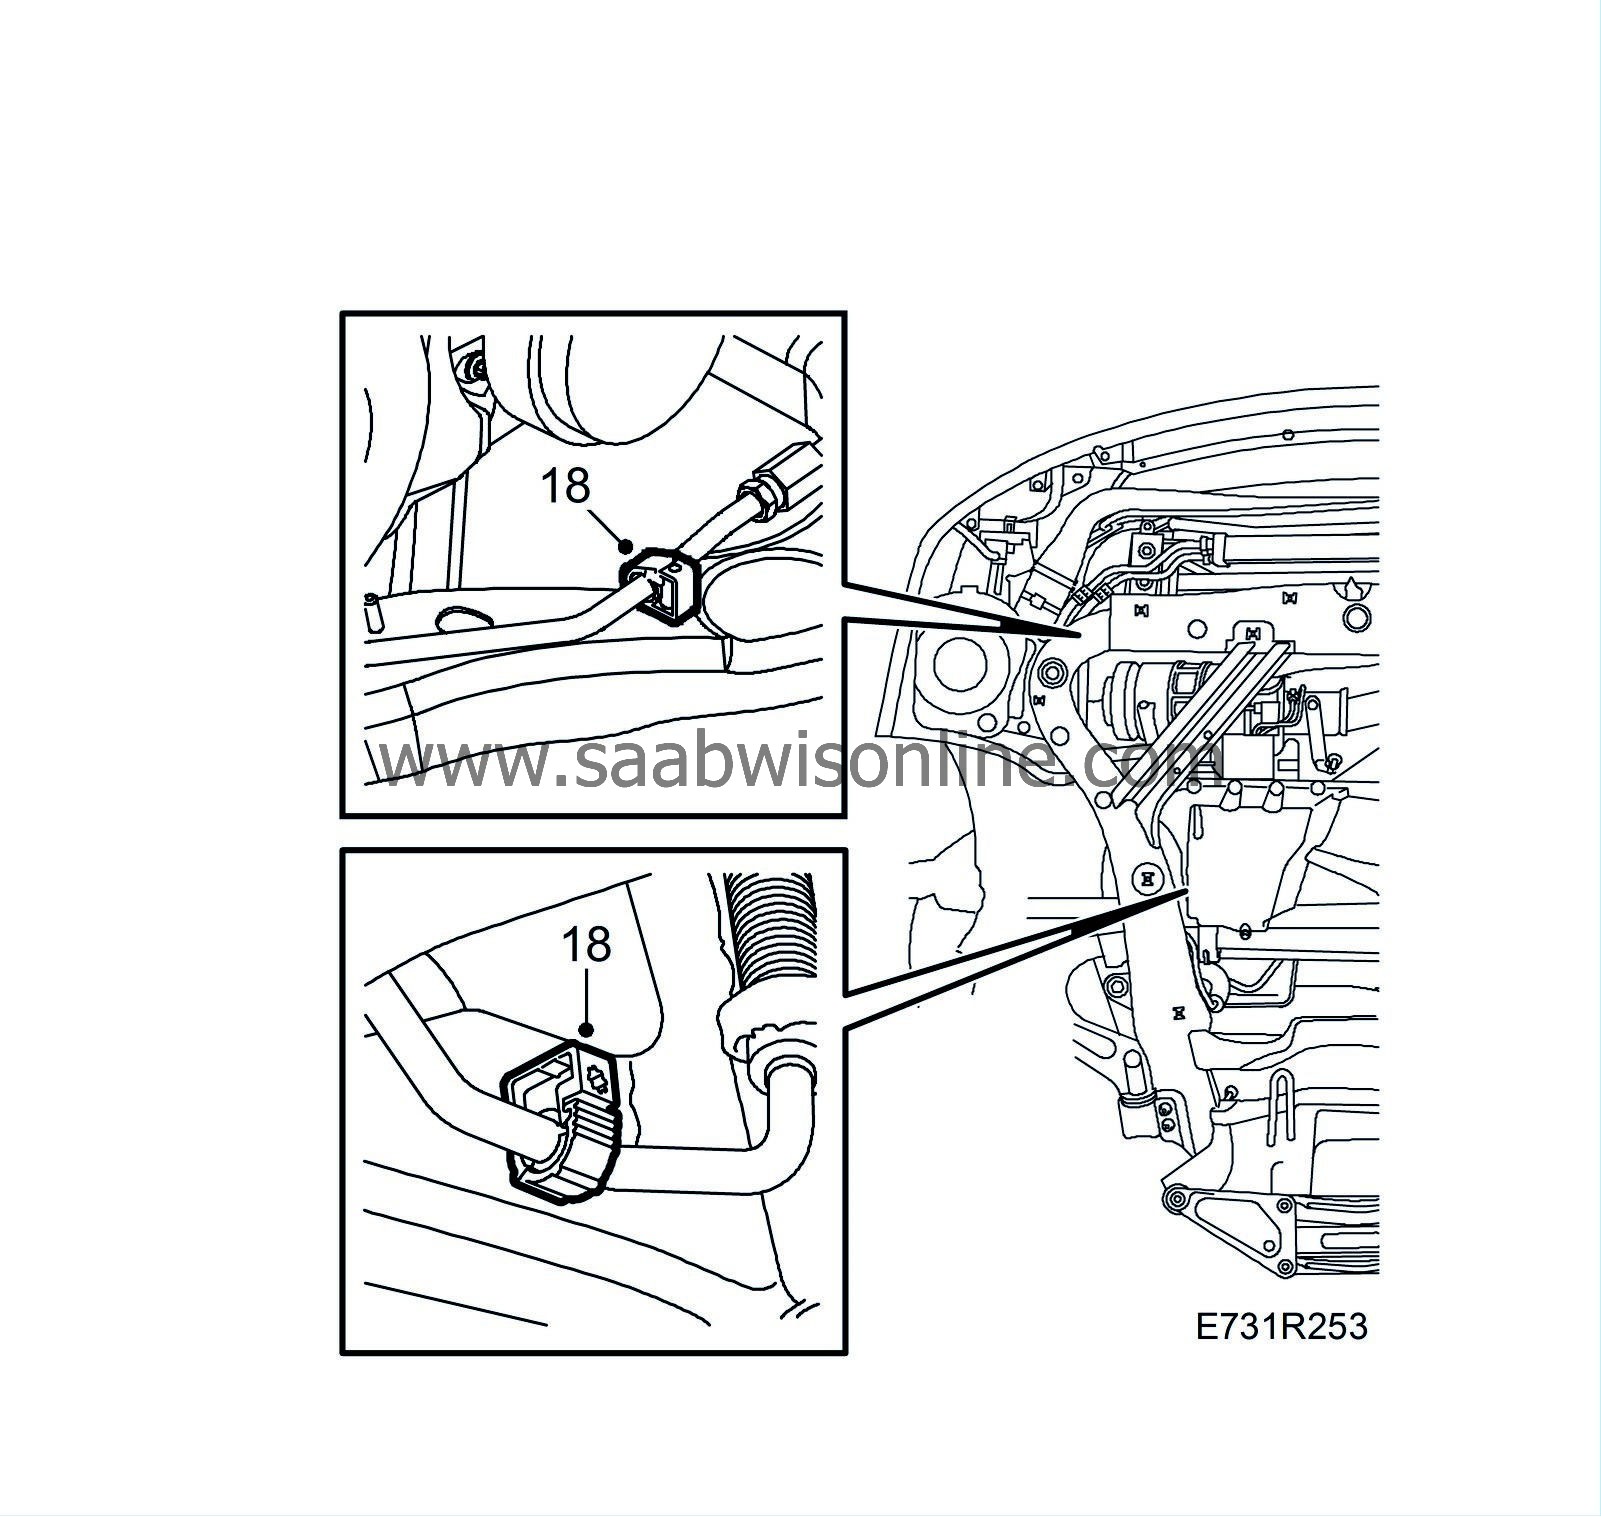
Remove the power steering pipe from clip.
|
|
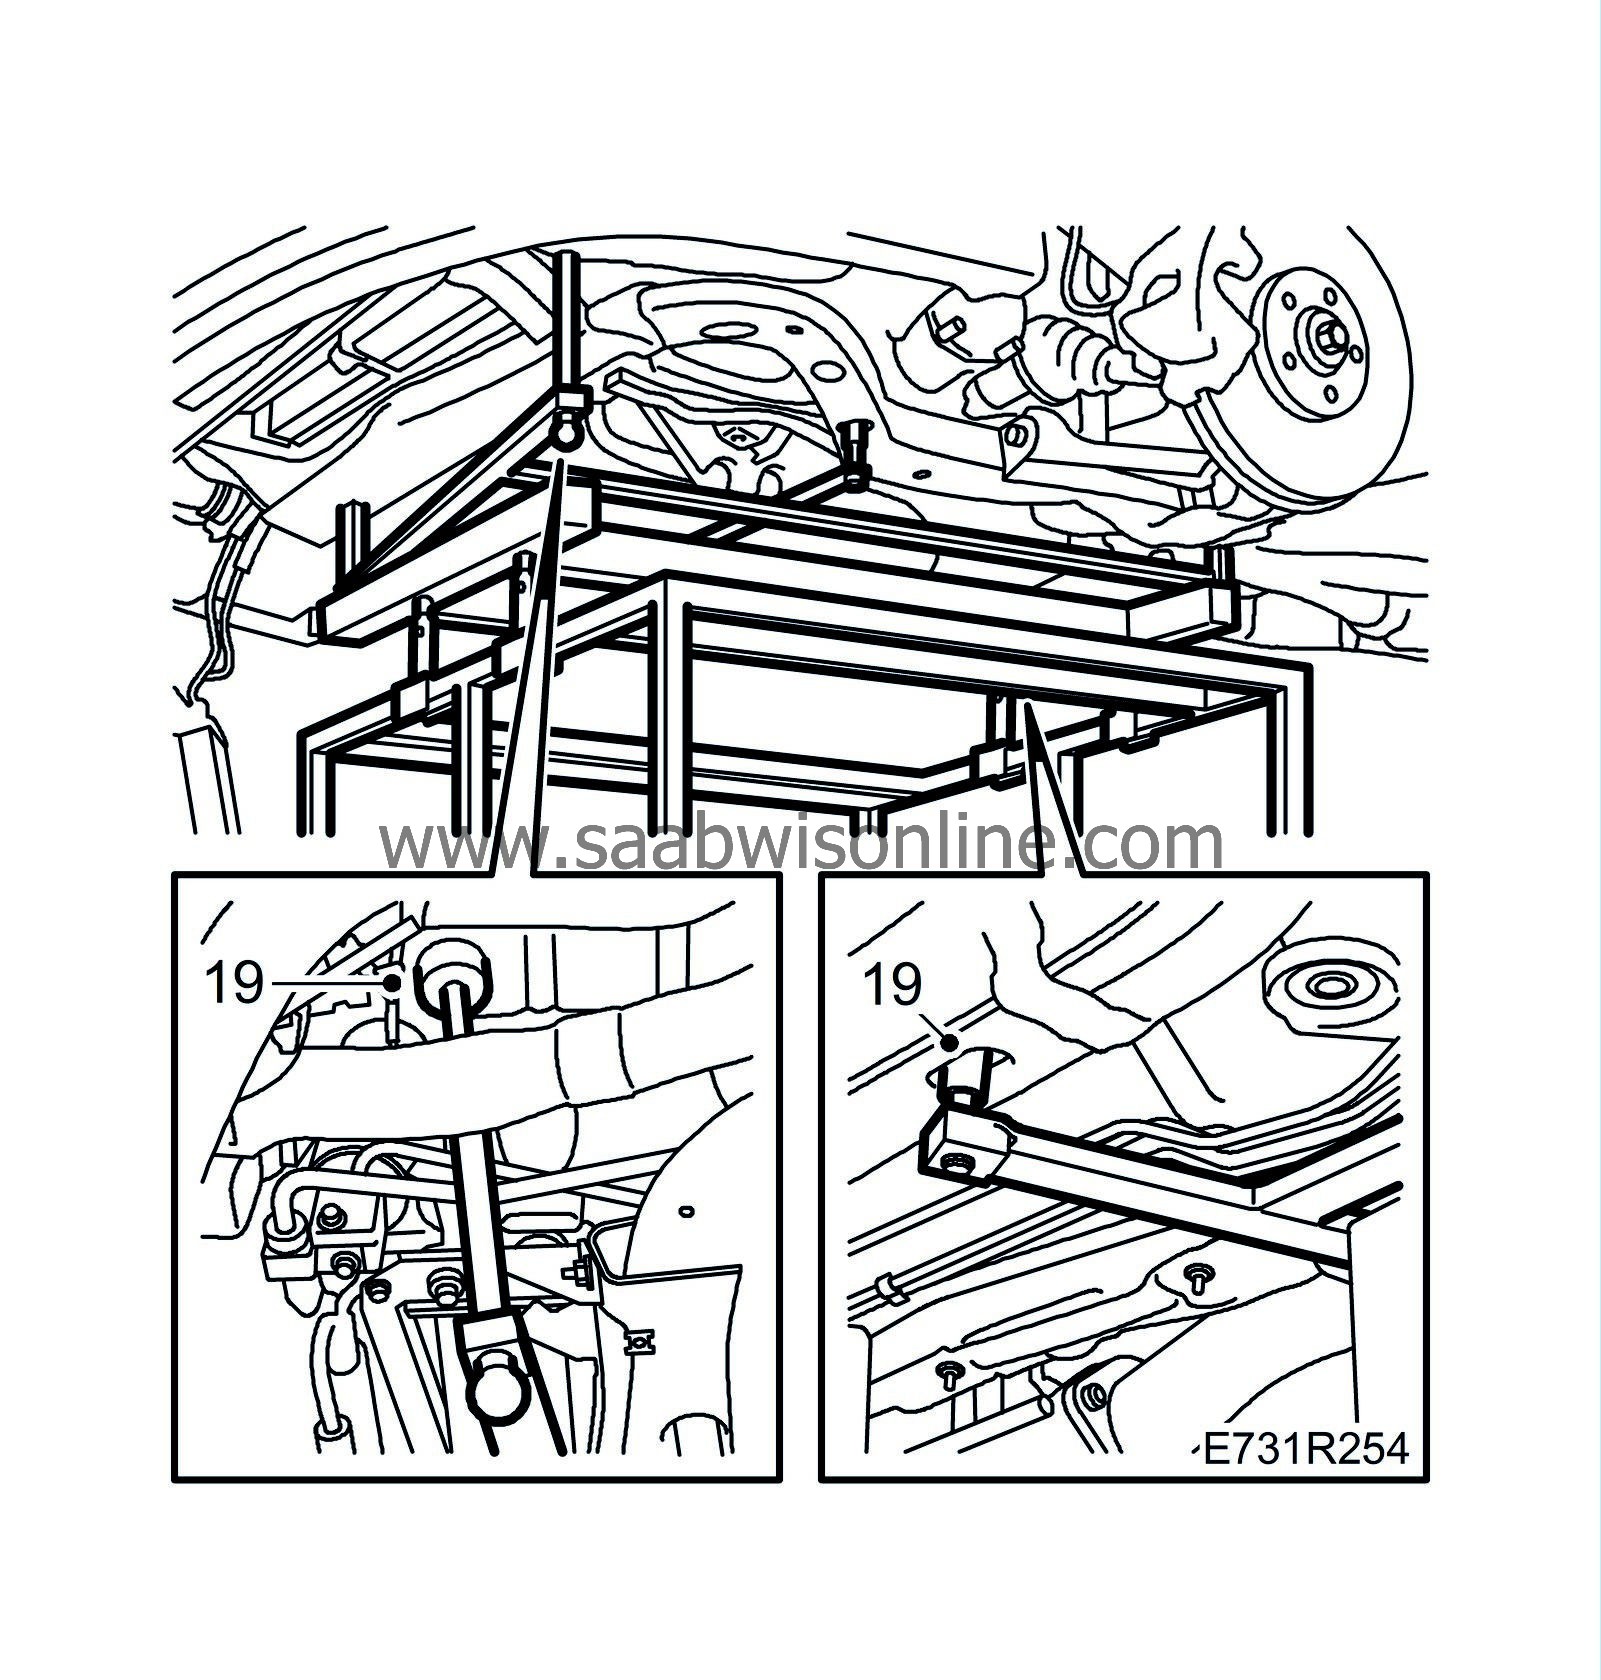
| 19. |
Run
trolley lift 83 95 311
with
parent fixture 83 94 801
,
intermediate support 83 95 170
,
basic fixture 83 95 188
and
holder 83 95 196
underneath the car and remove the remaining subframe bolts.
|
|
| 20. |
Lower the subframe.
|
|
| 21. |
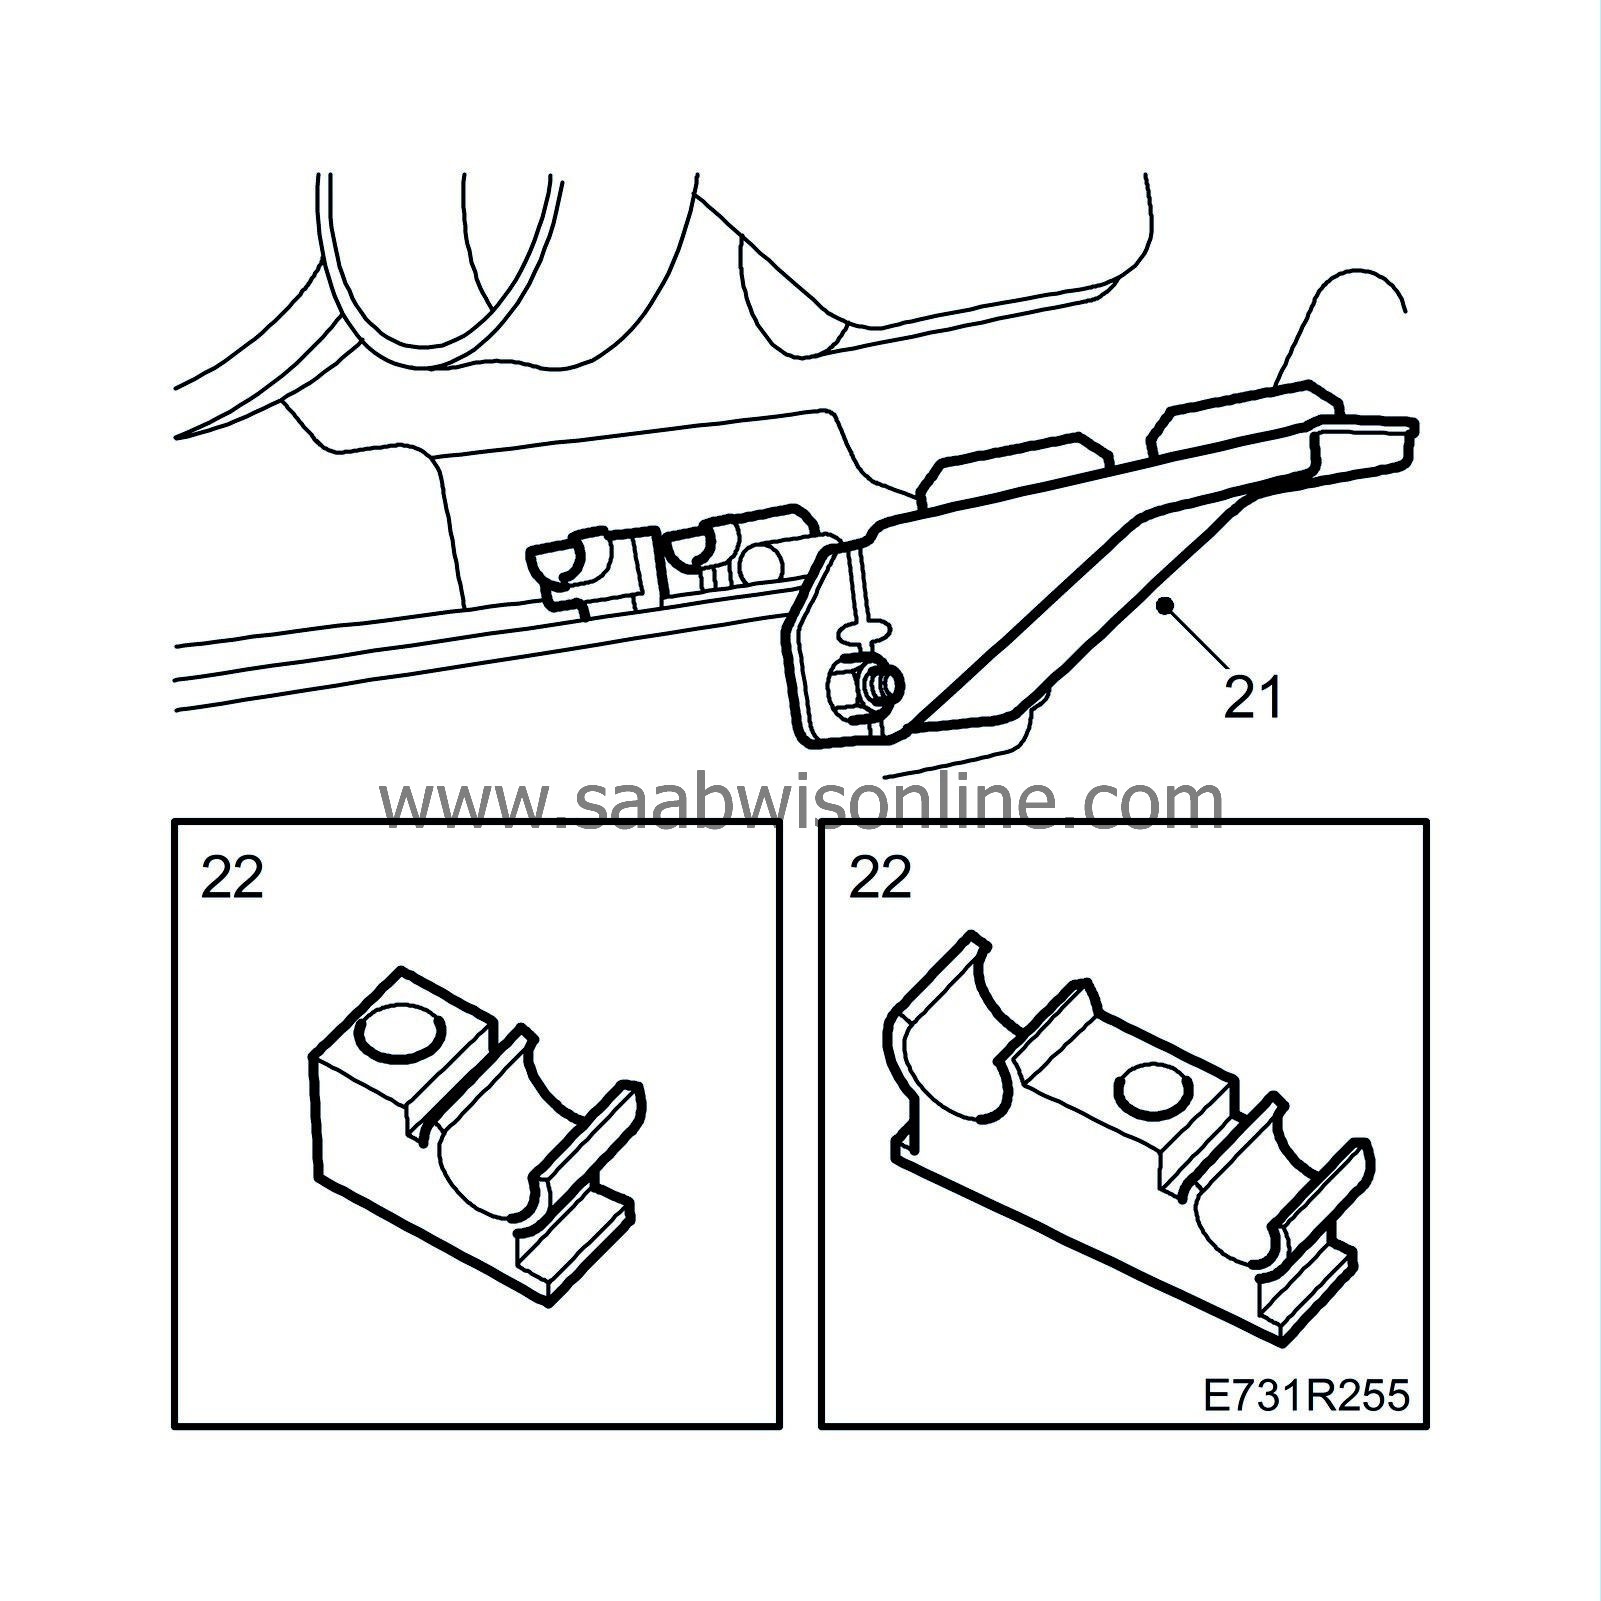
Remove the mountings of the radiator assembly.
|
|
| 22. |
Remove the mountings of the A/C pipes.
|
|
| To fit |
| 1. |
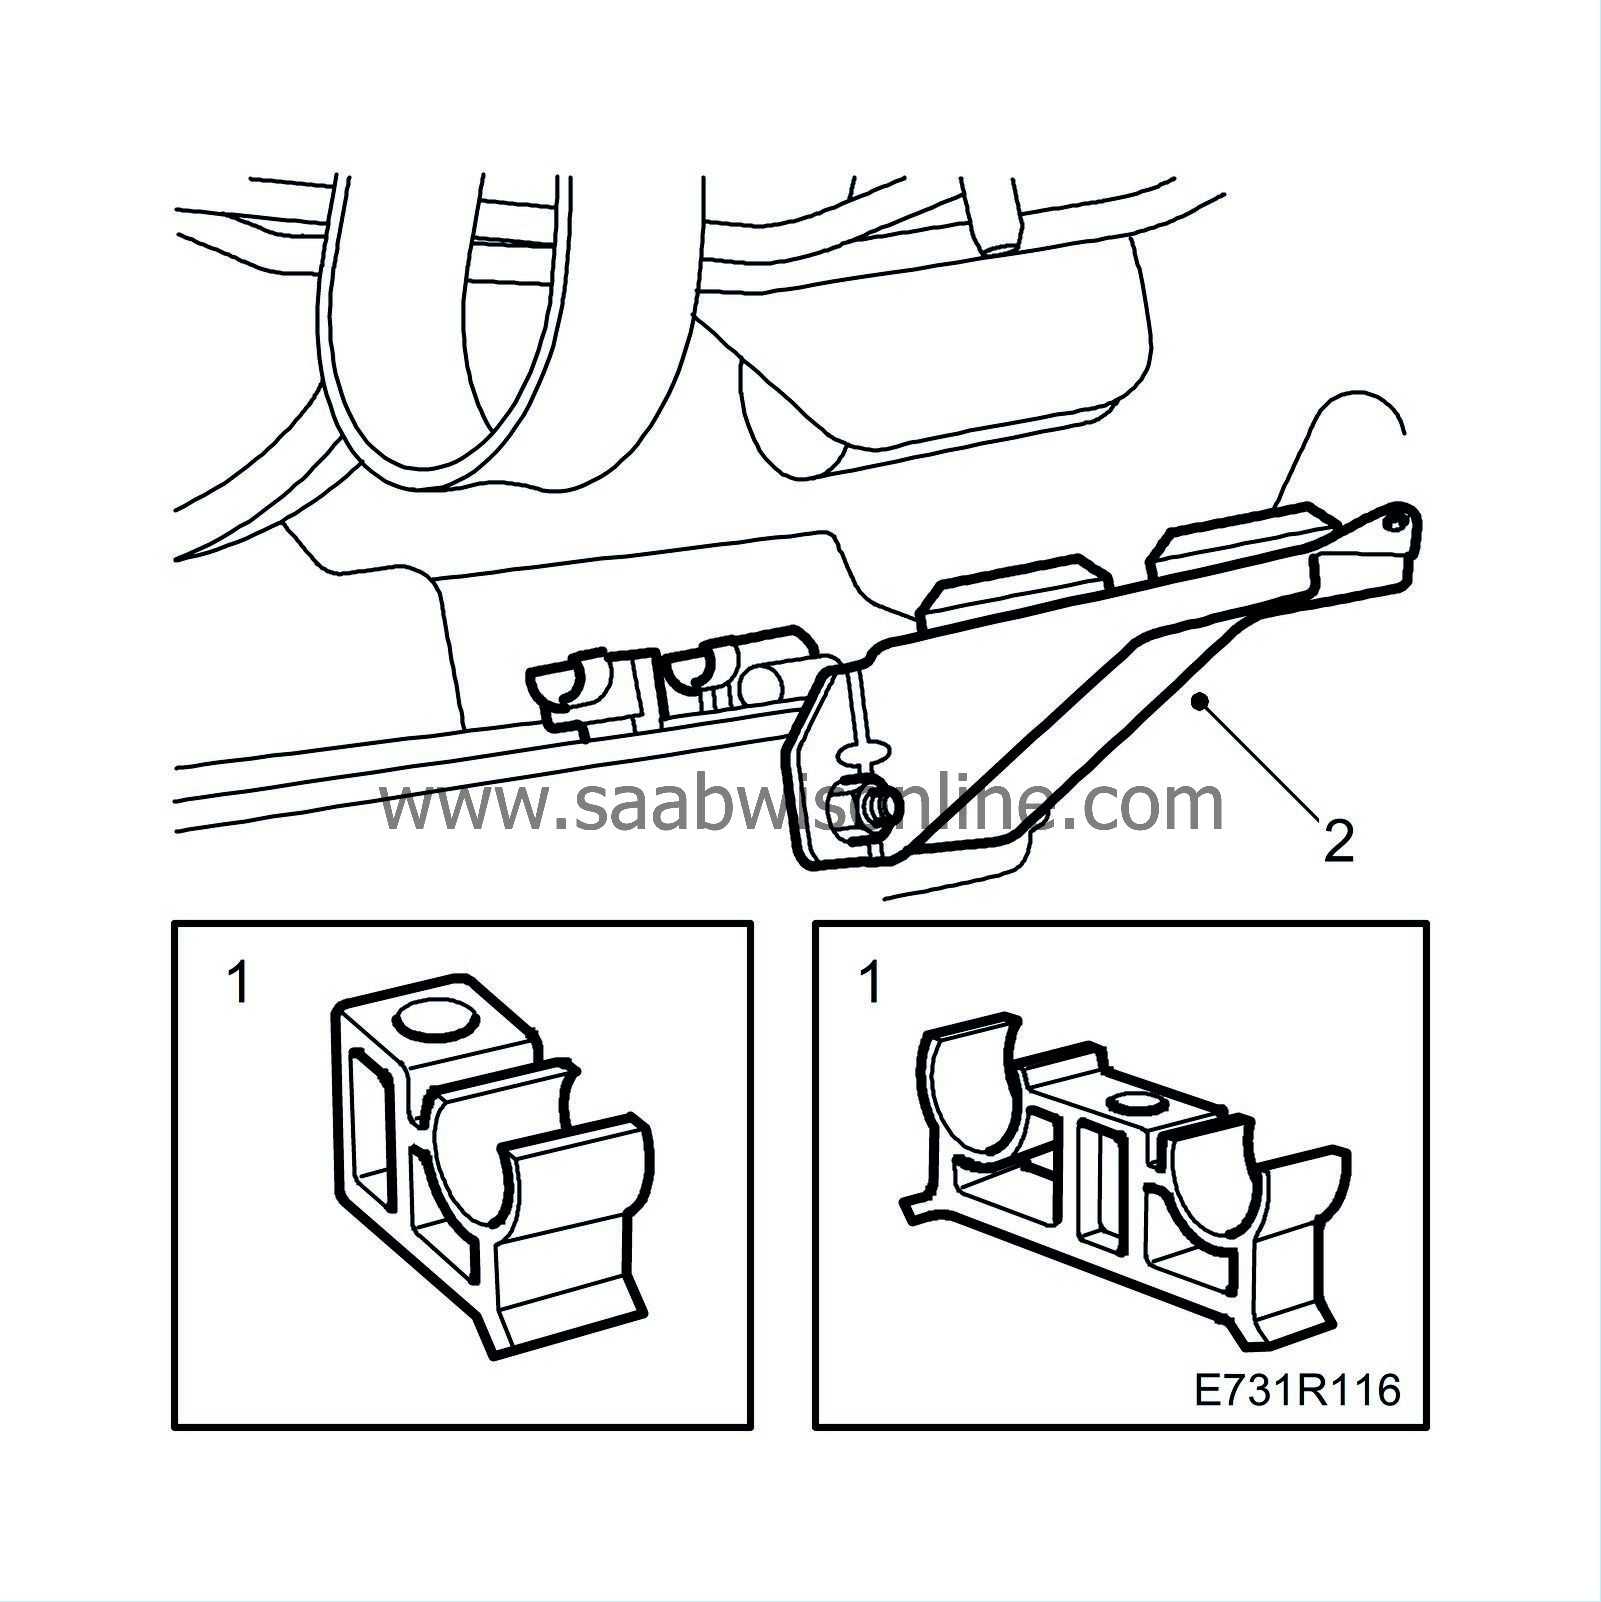
Bolt the brackets for the A/C pipes in place.
|
|
| 2. |
Mount the brackets for the radiator assembly.
|
|
| 3. |
Lift up the subframe carefully. Make sure the rubber boots on the inner drivers do not knock against the middle brackets on the subframe before the subframe is firmly against the body.
|
|
| 4. |
Fasten the power steering pipe in the clips.
|
|
| 5. |
Guide the radiator assembly guide pins into the subframe.
|
|||||||
| 6. |
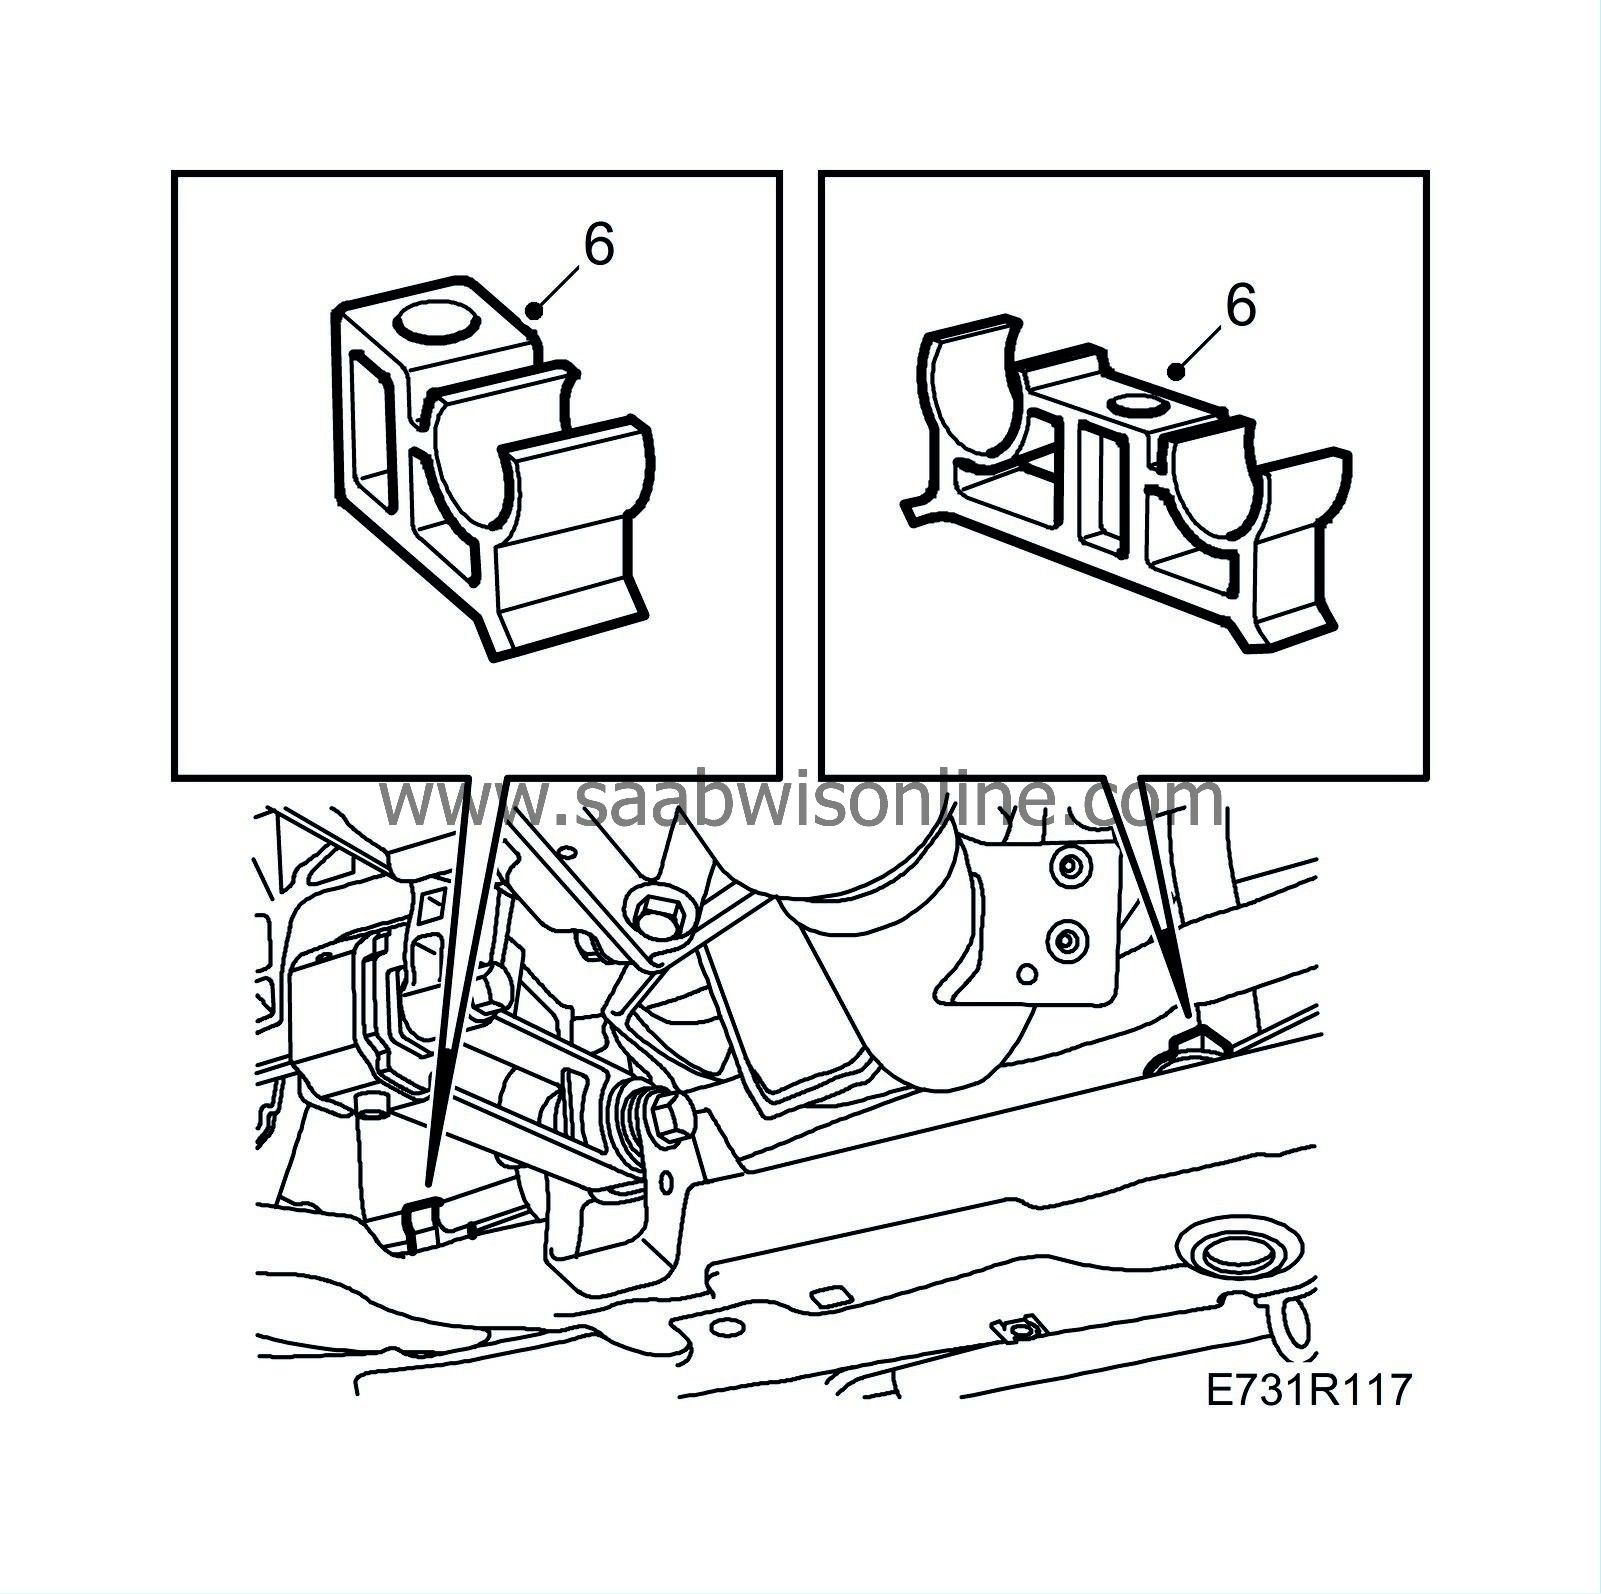
Guide the A/C pipes into their holders on the subframe.
|
|
| 7. |
Fit the power steering cooling pipe.

|
|
| 9. |
Fit the bolts to secure the subframe and the rear support plates. Tighten the bolts enough to ensure the subframe does not move when the lifting trolley and fixture are removed.
|
|||||||
| 10. |
Lower the lifting trolley and move it away.
|
|
| 11. |
Tighten the bolts on the subframe.
Tightening torque 100 Nm +45° (74 lbf ft +45°) 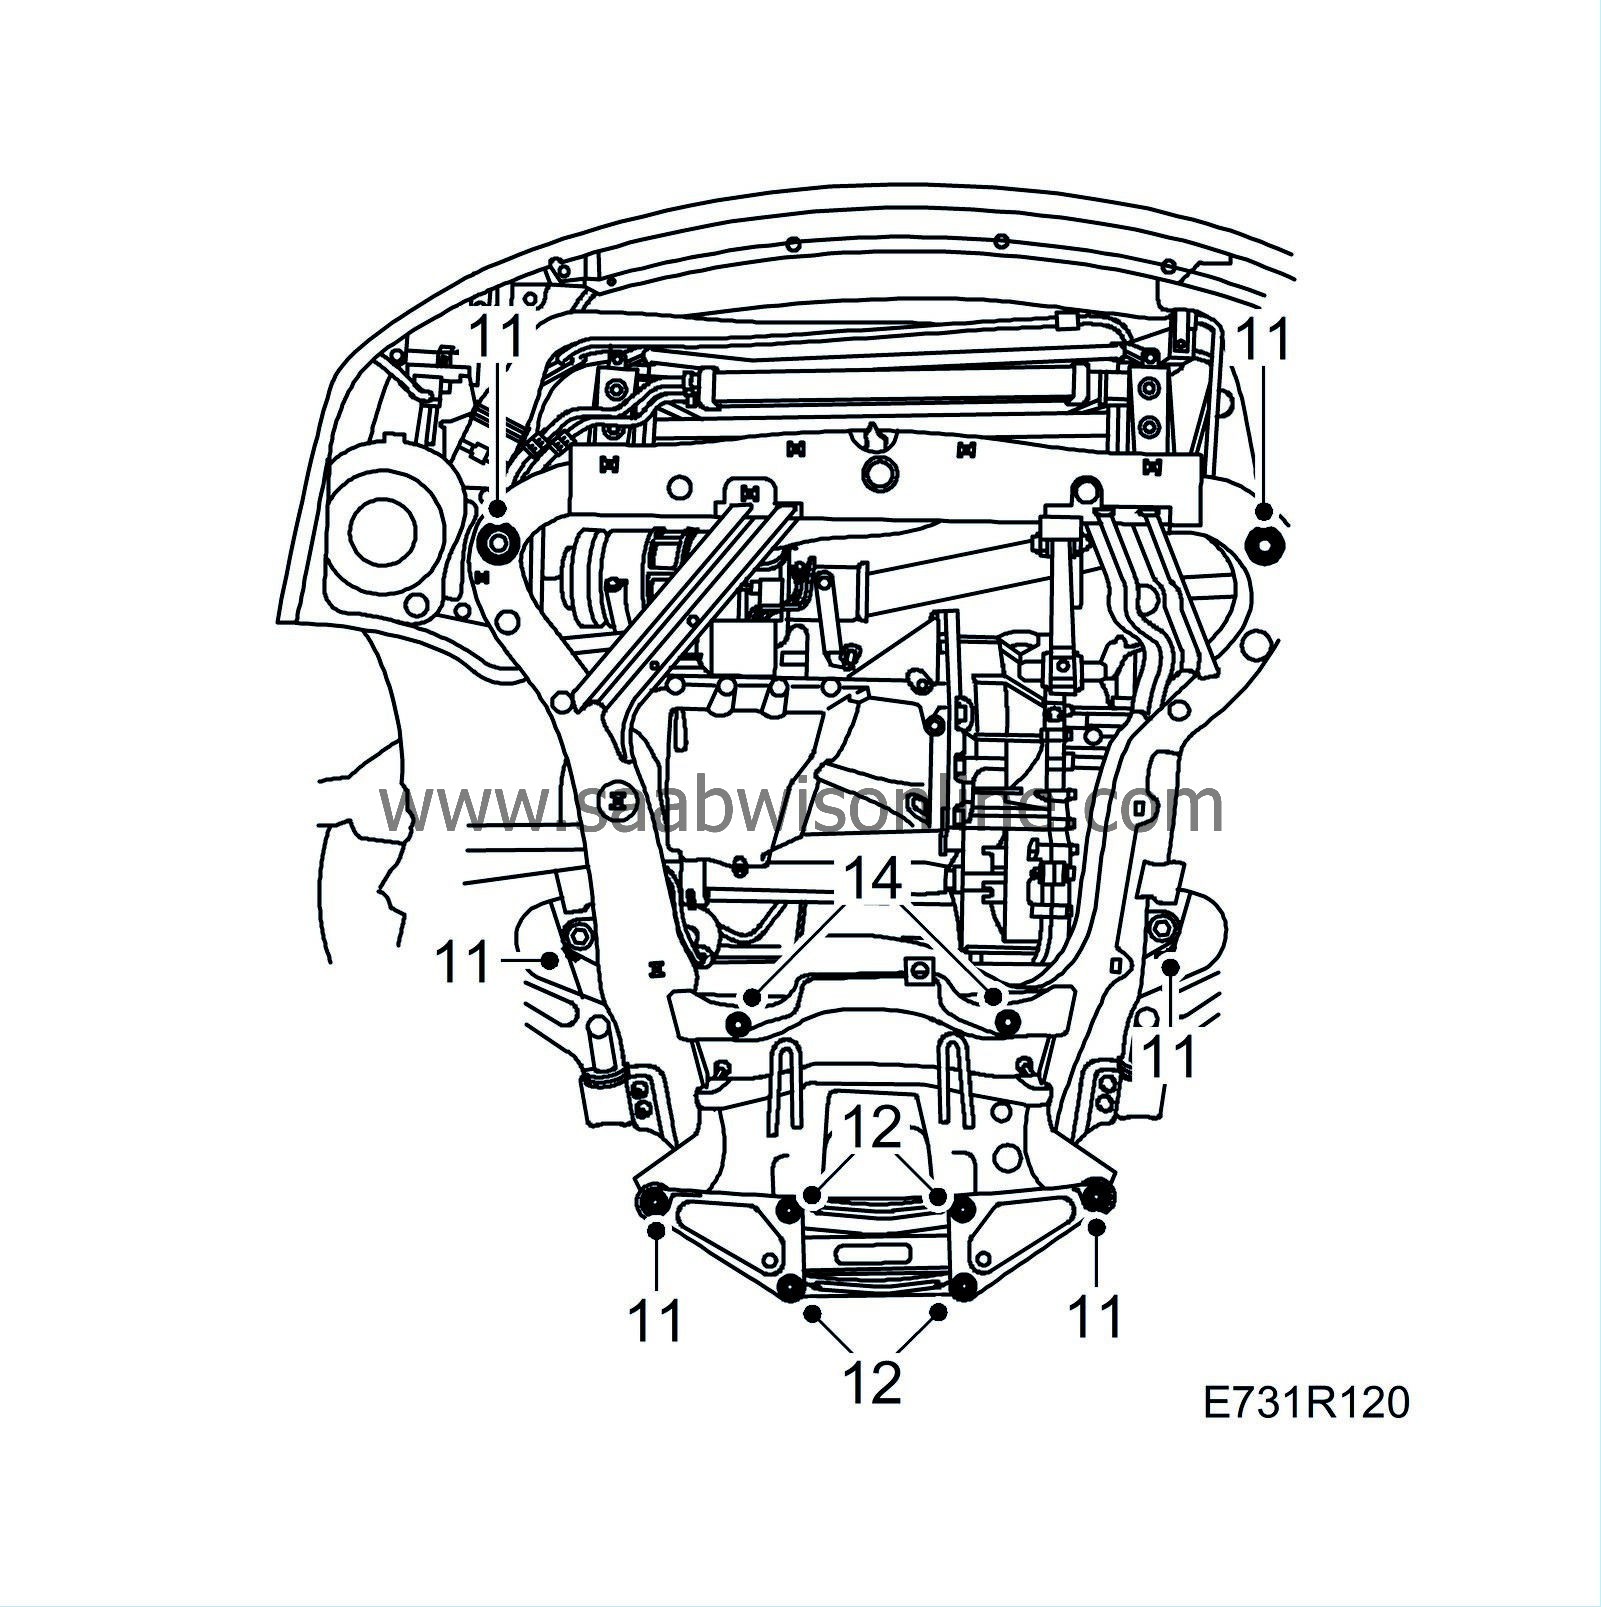
|
|
| 12. |
Tighten the reinforcement at the subframe's rear attachment point.
Tightening torque 65 Nm (50 lbf ft) |
|
| 13. |
Remove the strap.
|
|
| 14. |
Tighten the steering gear's retaining bolts.
Tightening torque 95 Nm (70 lbf ft) |
|
| 16. |
Fit the anti-roll bar retaining bolts.
Tightening torque 25 Nm (20 lbf ft) 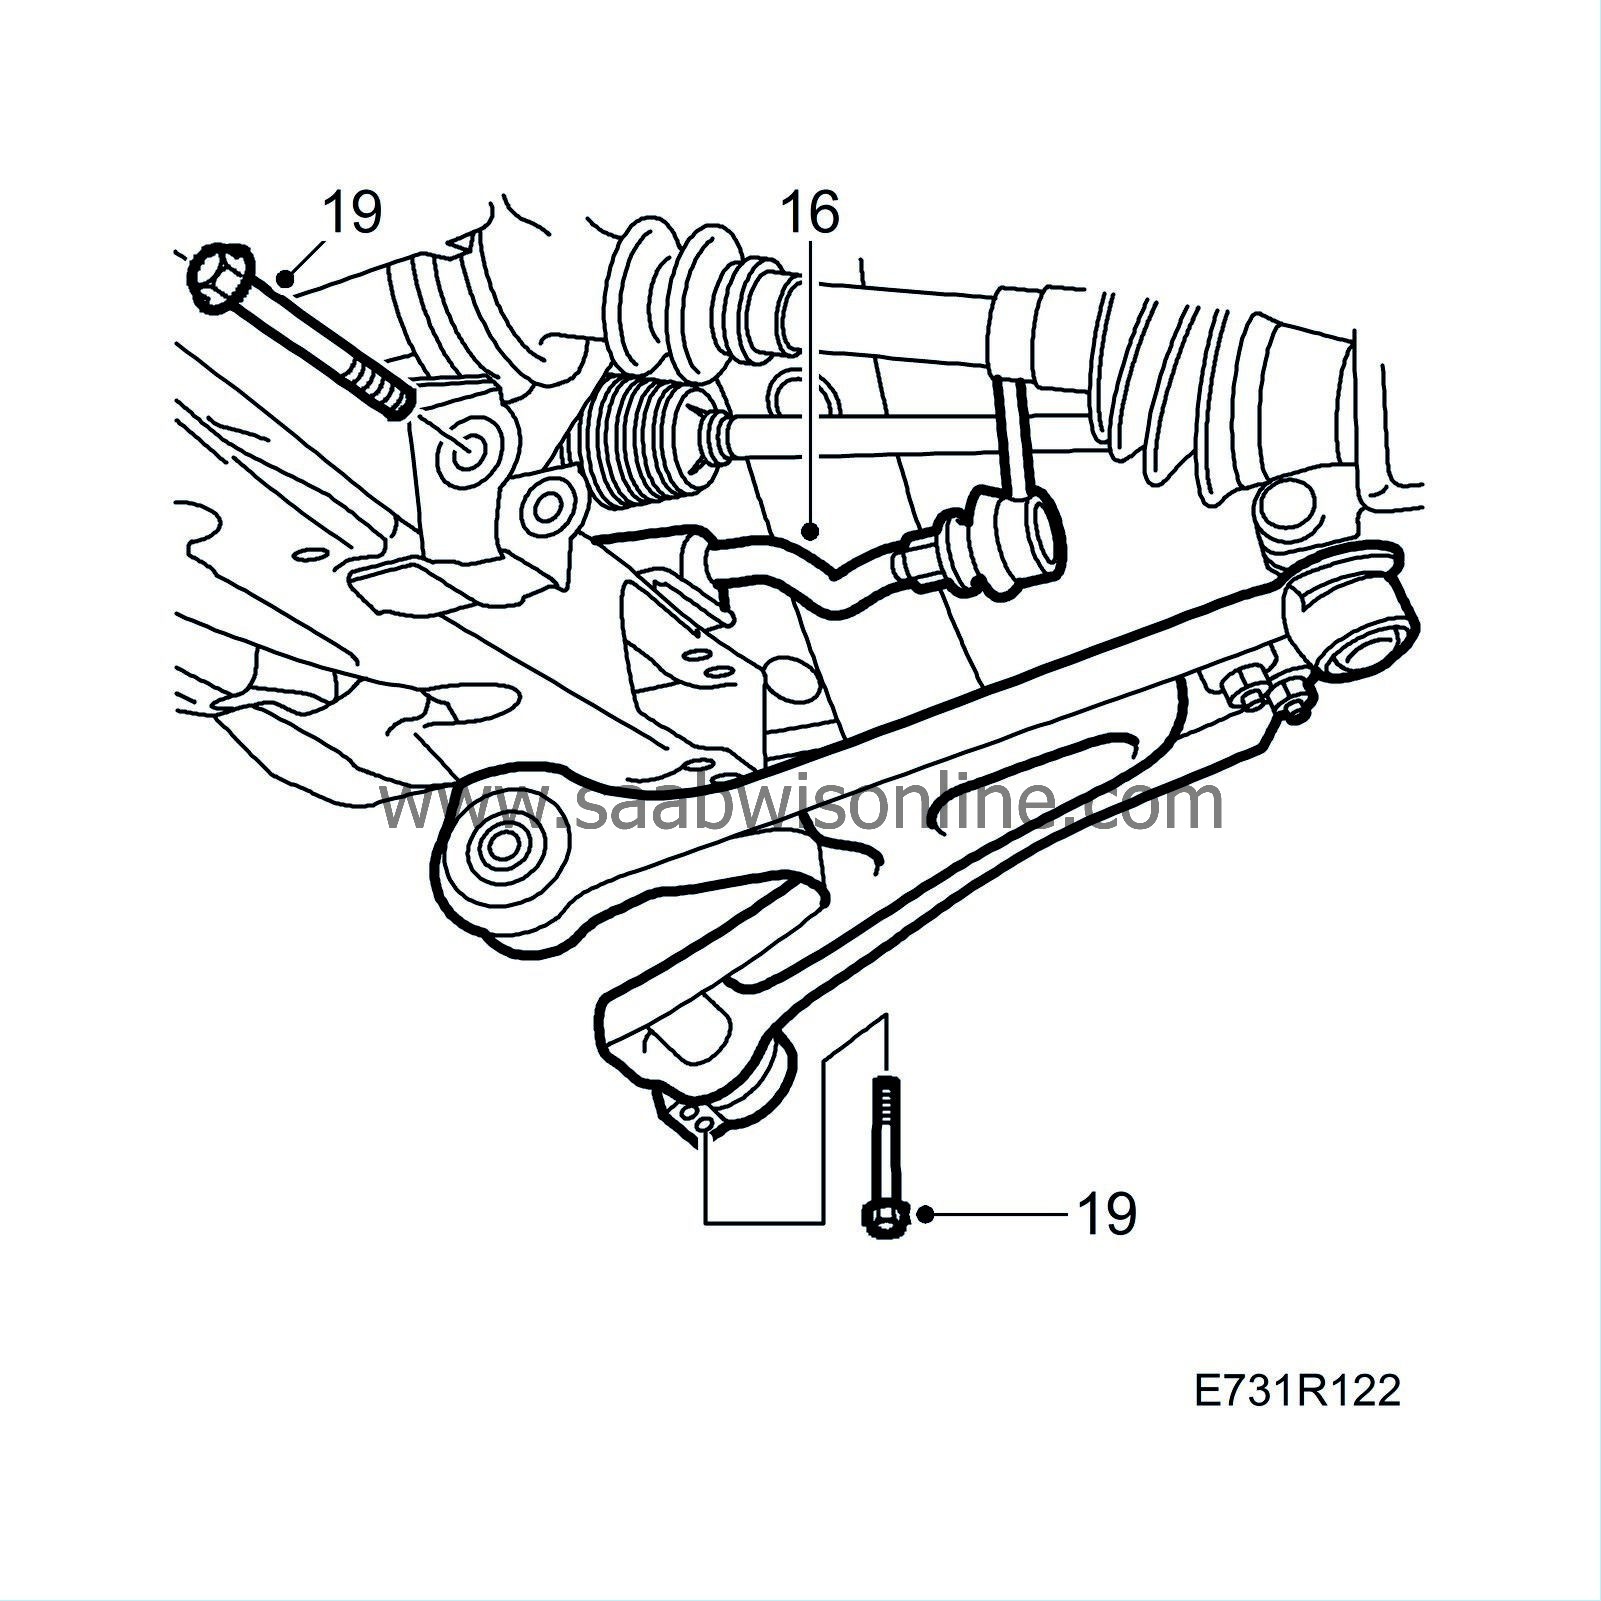
|
|
| 17. |
Position the suspension arms on the subframe and fit the bolts for the front and rear attachment points.
|
|
| 18. |
Place a jack under the steering swivel member's ball joint and raise until the suspension arm is 1° below the horizontal line.
|
|
| 19. |
Tighten the bolts securing the suspension arms to the subframe.
Tightening torque: front 110 Nm +90° (81 lbf ft +90°), rear 120 Nm +90° (88 lbf ft +90°) |
|
| 20. |
Cars with xenon headlamps:
Fit the level sensor for the xenon headlamps.

|
|
| 21. |
Remove the engine oil cooler.

|
|
| 22. |
Fit the air cleaner retaining nuts.
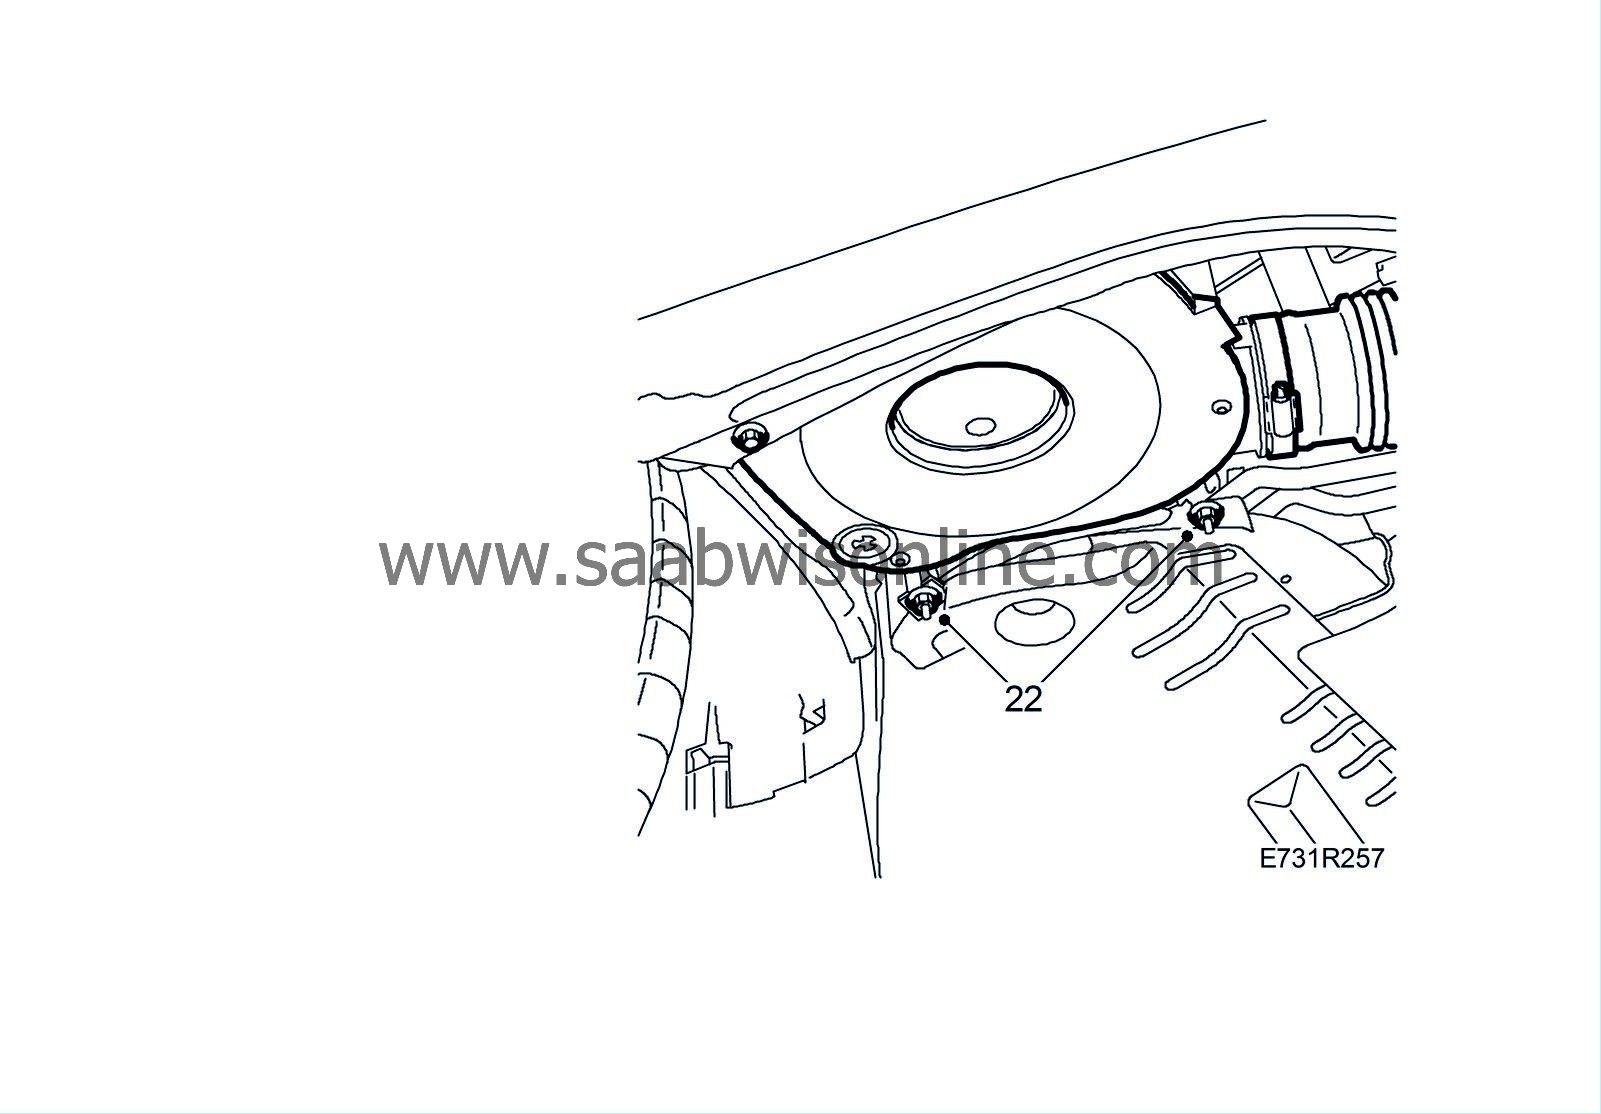
|
|
| 23. |
Cars with automatic gearbox:
|
|
| • |
Insert the bolts of the rear engine pad.
|
| • |
Lower the car and tighten the engine pad bolts from above.
Tightening torque: 24 Nm (18 lbf ft) |
| • |
Raise the car and attach the engine bracket to the gearbox.
Tightening torque: 60 Nm (44 lbf ft). |
| 24. |
Fit the front exhaust system with catalytic converter
B205E
,
B235E/R
.
|
|
| 25. |
Fit the air shields.
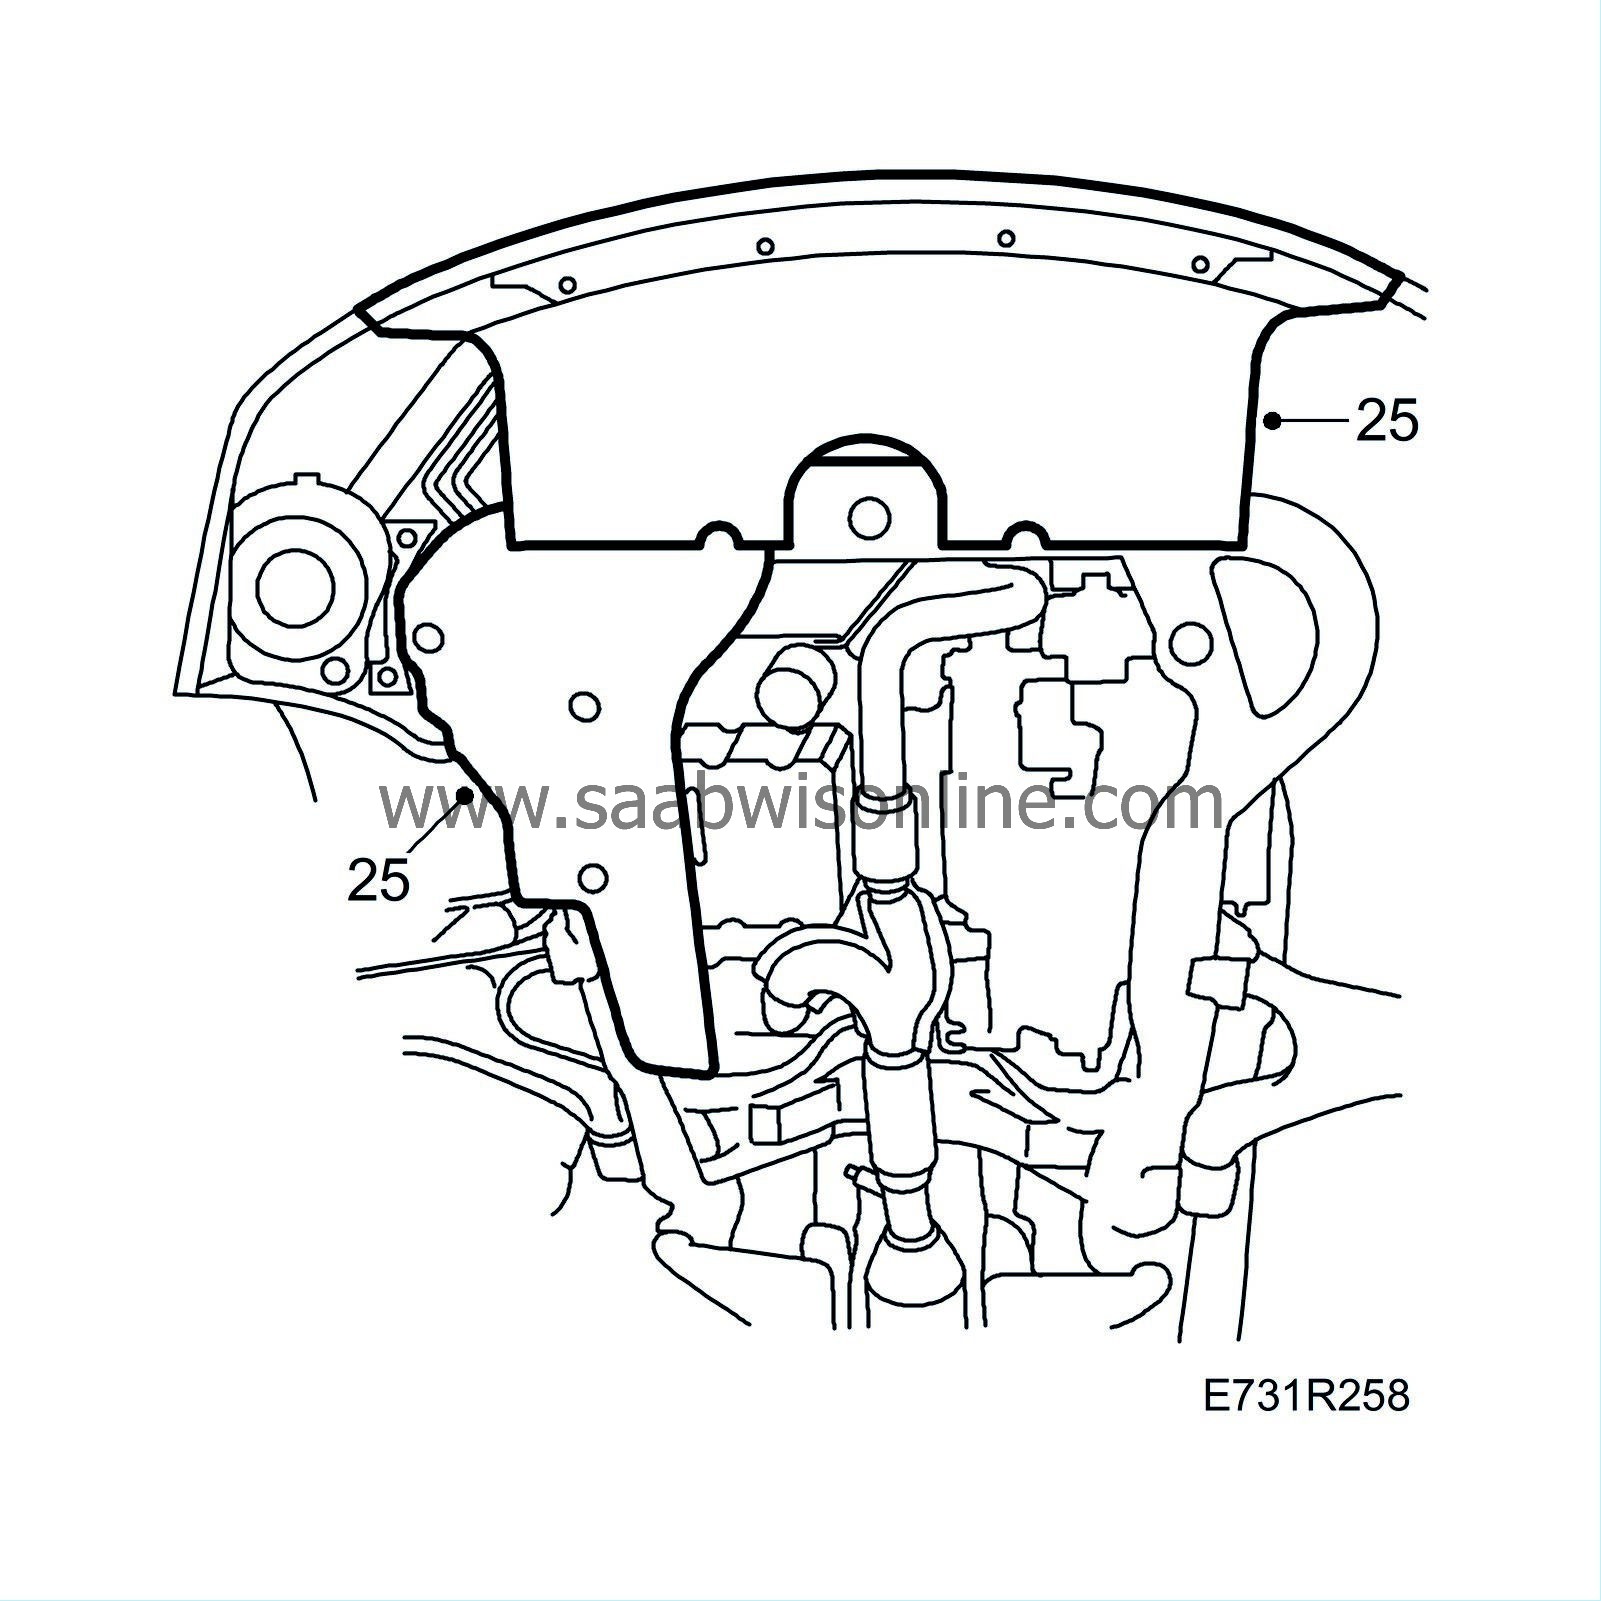
|
|
| 26. |
Tighten the bolts securing the gearbox torque arm to the subframe.
Tightening torque 90 Nm +90° (66 lbf ft +90°) 
|
|||||||
| 27. |
Fit the wheels, see
Wheels
.
Lower the car to the floor. |
|
| 28. |
MAN:
Tighten the bolts holding the rear engine pad to the subframe.
Tightening torque 25 Nm (20 lbf ft) 
AUT: Fit the rear engine pad nut. Tightening torque: 47 Nm (35 lbf ft). |
|
| 29. |
Check the toe angles and adjust as necessary, see
Wheel alignment
.
|
|


