Lower Crankcase Installation (LDK, LHU)
|
|
Lower Crankcase Installation (LDK, LHU)
|
Special Tools
EN-45059
Angle Meter
For equivalent regional tools, refer to
Special Tools (LDK, LHU)
.
|
1.
|
Install the upper crankshaft bearings (1) in the engine block (2) and lubricate bearing surfaces with engine oil.

|
|
2.
|
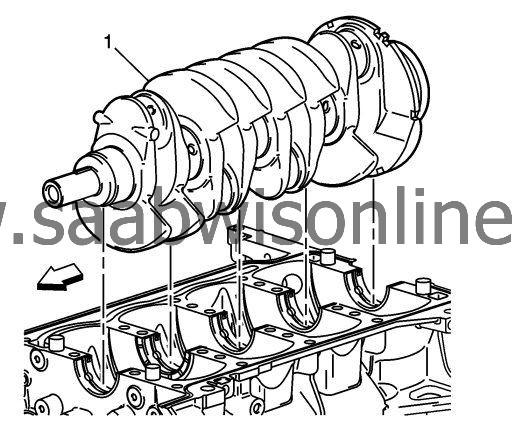
Install the crankshaft (1) on the journals.

|
|
3.
|
Install the lower bearing halves (1), without grooves, into the lower crankcase (2). Apply oil to bearing surfaces.

|
|
4.
|
|
Note
|
|
•
|
The block assembly surface must be free of contamination prior to applying the sealer.
|
|
•
|
Install and align the bedplate to block within 20 minutes of applying the sealer.
|
|
•
|
The bedplate must be fastened to final torque specification within 60 minutes of applying the sealer.
|
Apply a 4.25 mm bead of sealer, dimension a, directly in the groove of the block to bedplate mating surfaces. Refer to
Adhesives, Fluids, Lubricants, and Sealers (LDK, LHU)
.

|
|
5.
|
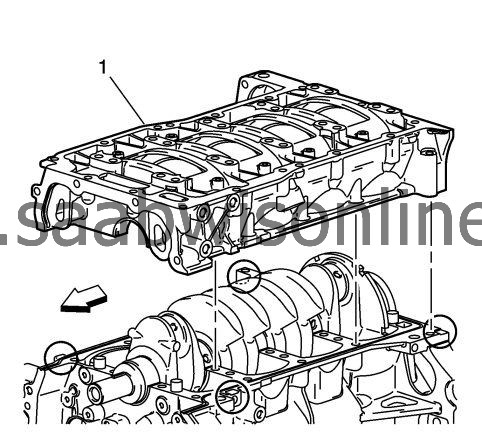
Install the lower crankcase (1). Tap gently into place with a suitable tool, if necessary. Ensure the lower crankcase is aligned properly on the dowels.

|
|
6.
|
Refer to
Fastener Caution
.
Install the NEW crankshaft bearing bolts in sequence finger tight.

|
|
7.
|
Tighten the crankshaft bearing bolts:
|
|
|
7.1.
|
Tighten the crankshaft bearing bolts a first pass in sequence to
20 Nm (15 lb ft)
.
|
|
|
7.2.
|
Using the
EN-45059
angle meter , tighten the crankshaft bearing bolts a final pass in sequence to
70 degrees
.
|
|
8.
|
|
Note
|
|
Do not forget the 2 rear outer bolts.
|
Install the lower crankcase perimeter bolts (1-10) and tighten to
25 Nm (18 lb ft)
.

|


