Clutch Actuator Cylinder Pipe Replacement
|
|
Clutch Actuator Cylinder Pipe Replacement
|
|
2.
|
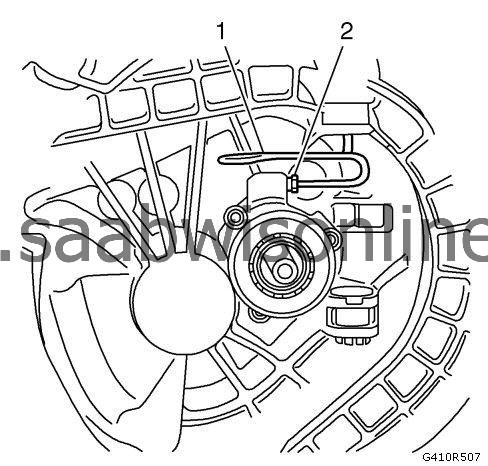
Detach pressure line (1) from central release and unscrew bolt (2).
|
|
3.
|
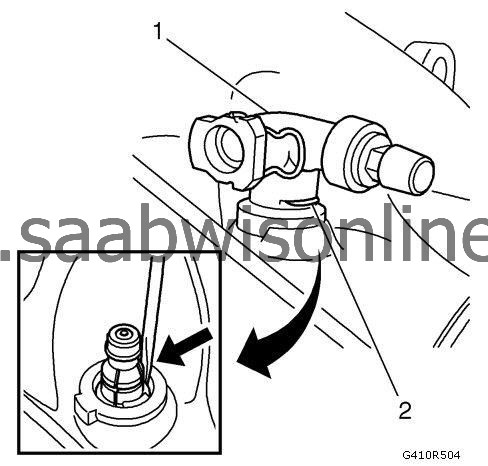
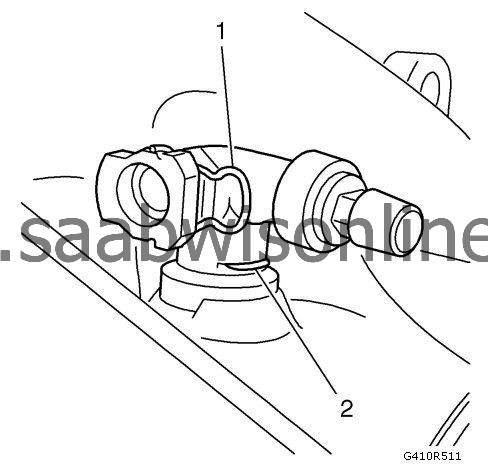
Remove connector for pressure line (1).
|
|
|
3.1.
|
Remove retaining clip (2).
|
|
|
3.3.
|
|
Note
|
|
If necessary, bend squeeze together slightly.
|
Replace retaining clip in connector.
|
|
|
4.1.
|
|
Note
|
|
Carefully disengage retaining lugs.
|
Clip pressure line out of fastening sleeve using a screwdriver or equivalent.
|
|
|
4.2.
|
Remove pressure line.
|
|
5.
|
|
Note
|
|
Fastening sleeve must be replaced after removal.
|
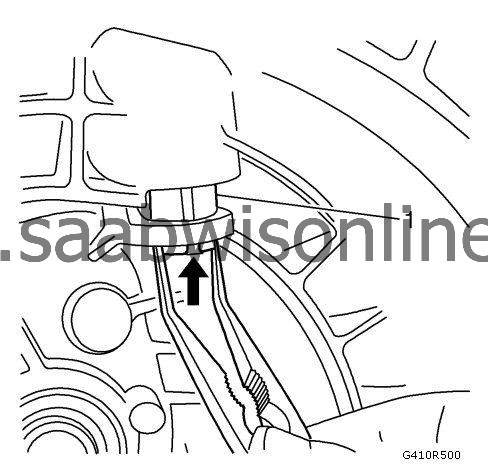
Remove fastening sleeve.
|
|
|
5.1.
|
Disengage fastening sleeve (1) from clutch housing.
|
|
|
5.2.
|
Slide fastening sleeve upwards.
|
|
|
5.3.
|
Remove fastening sleeve.
|
|
6.
|
Check seal ring and pressure line for damage, replace if necessary.
|
|
1.
|
|
Note
|
|
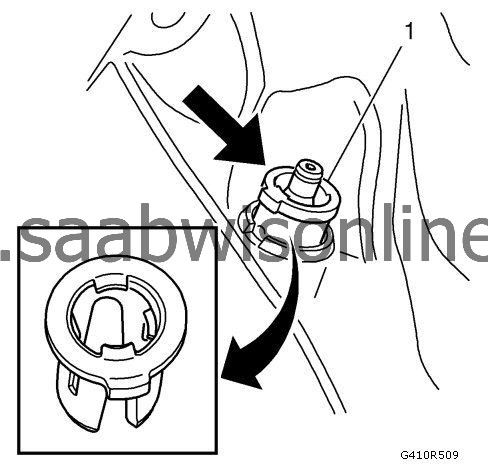
Insert projection on sleeve in the slot provided in the transmission.
|
Attach fastening sleeve (1). Push into transmission housing - must noticeably engage.
|
|
2.
|
Install pressure line (1) and insert in fastening sleeve - must noticeably engage.

|
|
3.
|
Attach pressure line and tighten nut (2).
|
|
4.
|
Attach connector for pressure line (1) and put connector on pressure line - retaining clip (2) must noticeably engage.
|


