Heater Water Auxiliary Pump Replacement
| Heater Water Auxiliary Pump Replacement |
| Removal Procedure |
| 1. |
Remove the front bumper fascia. Refer to
Front Bumper Fascia Replacement
|
|
| 2. |
Release the engine coolant inlet hose.
Close the inlet hose (1) with a suitable tool (2). 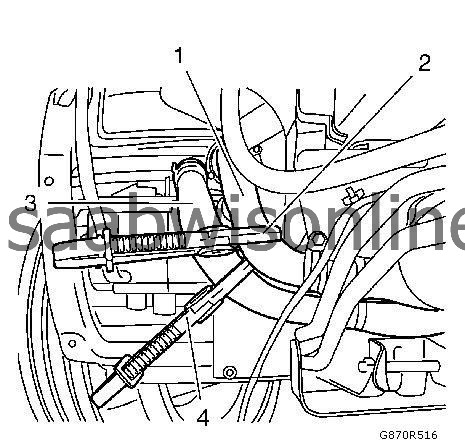
|
|
| 3. |
Release the engine coolant outlet hose.
Close the outlet hose (3) with a suitable tool (4). |
|
| 4. |
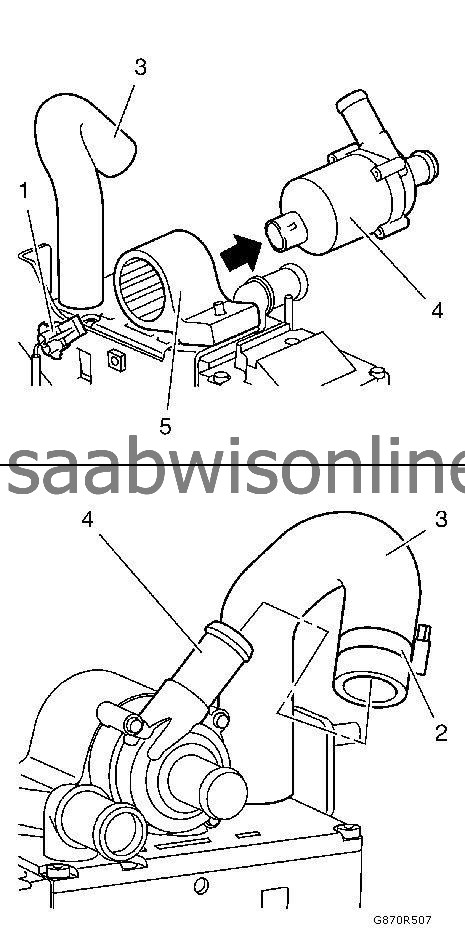
Disconnect the electrical connector (1) from the heater water auxiliary pump (4).
|
|
| 5. |
Release the heater water auxiliary hose retainer (2).
|
|
| 6. |
Release the heater water auxiliary hose (3) from the heater water auxiliary pump (4).
|
|
| 7. |
Remove the heater water auxiliary pump (4) from the heater water auxiliary pump bracket (5).
|
|
| Installation Procedure |
| 1. |
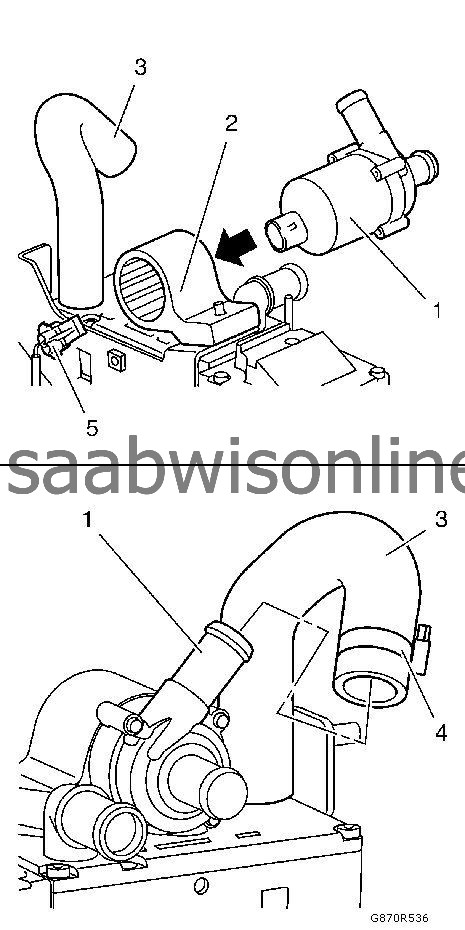
Install the heater water auxiliary pump (1) to the heater water auxiliary pump bracket (2).
|
|
| 2. |
Install the heater water auxiliary hose (3) to the heater water auxiliary pump (1).
|
|
| 3. |
Install the heater water auxiliary hose retainer (4).
|
|
| 4. |
Connect the electrical connector (5) to the heater water auxiliary pump (1).
|
|
| 5. |
Install the engine coolant inlet hose (1) to heater water auxiliary pump (2).

|
|
| 6. |
Bleeding the cooling system into the following steps. 
|
|||||||
| 6.1. |
Lock the connection pieces from the output connection with a suitable finger.
|
| 6.2. |
Open the clip from the inlet side of the heating.
|
| 6.3. |
Open carefully the output connection of the heating.
|
| 6.4. |
If coolant liquid withdraws, put the outlet hose from the outlet connection on the connection piece.
|
| 7. |
Install the engine coolant outlet hose.
|
|
| 8. |
Install the front bumper fascia. Refer to
Front Bumper Fascia Replacement
|
|
| 9. |
Check the engine coolant fluid.
|
|
This project is supported by memberships and donations. If you use this site, please consider Joining SCNA and/or making a donation.
Our Friends
