Replacement of crankshaft seal (front)
|
|
Replacement of crankshaft seal (front)
|
|
1.
|
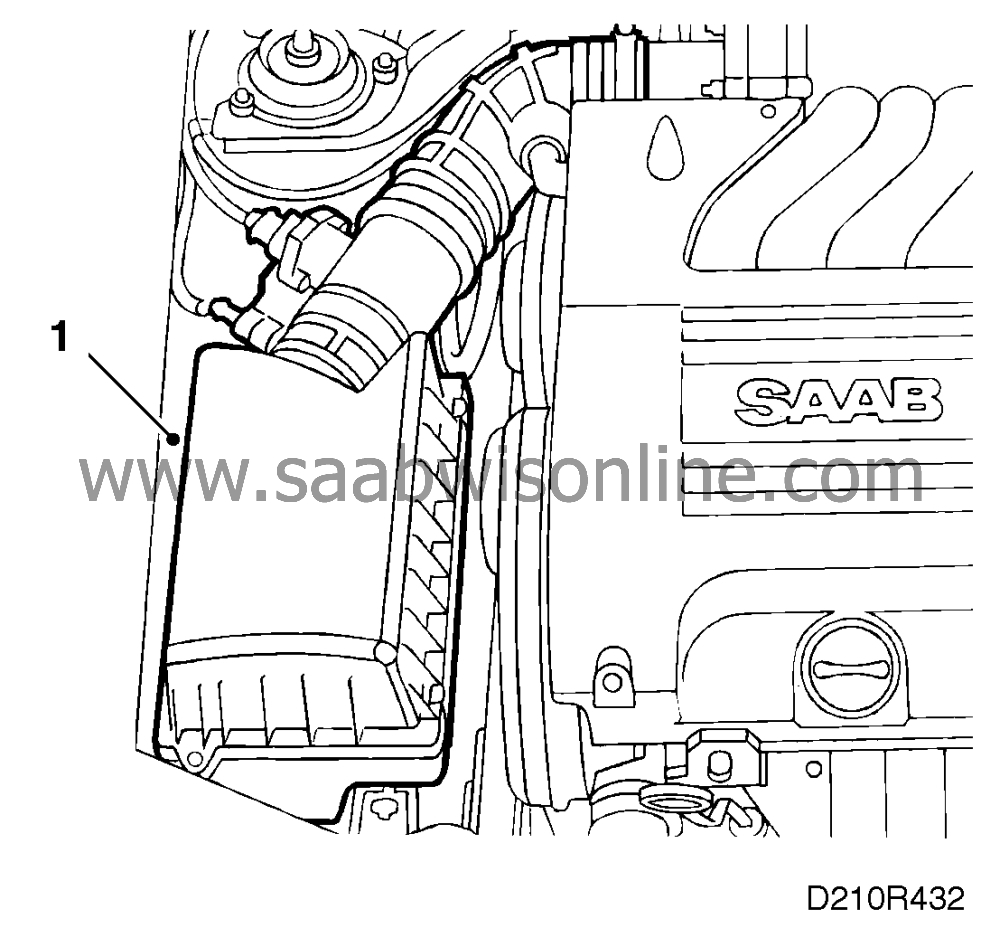
Remove the air cleaner and the mass air flow sensor.
|
|
2.
|
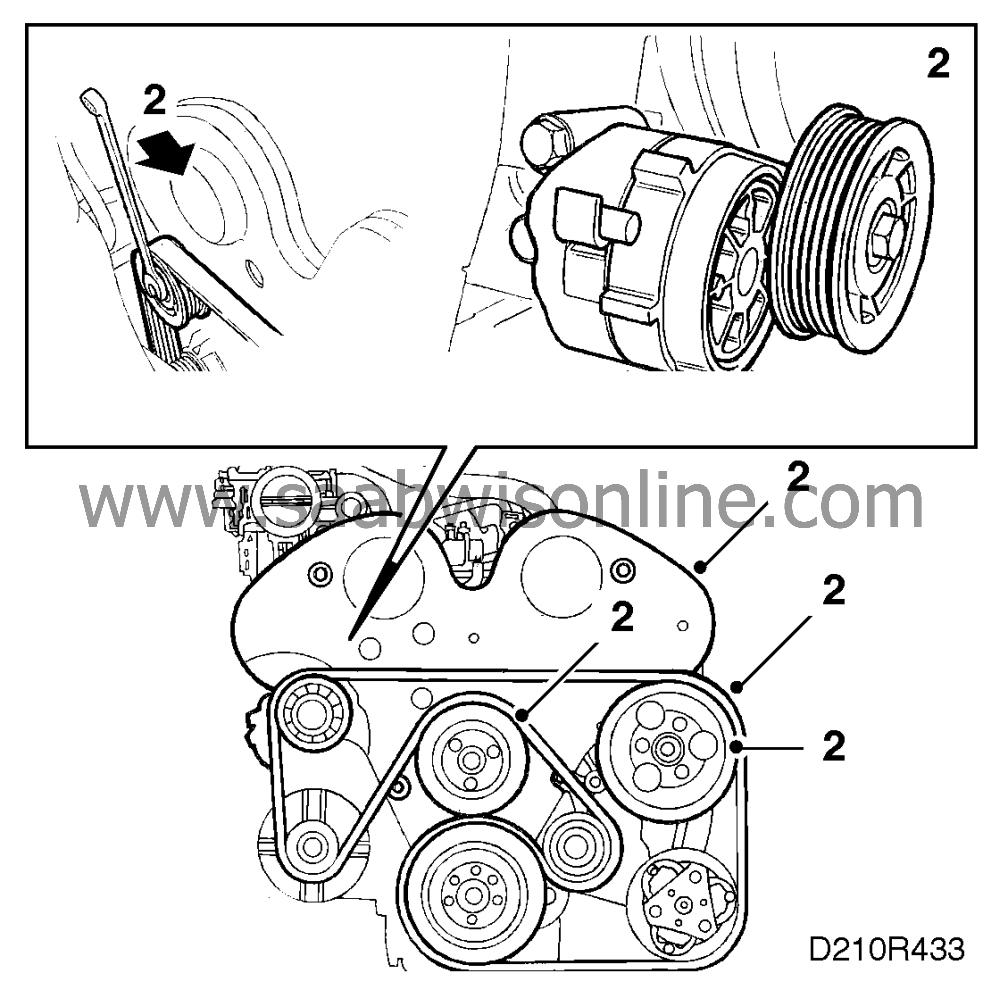
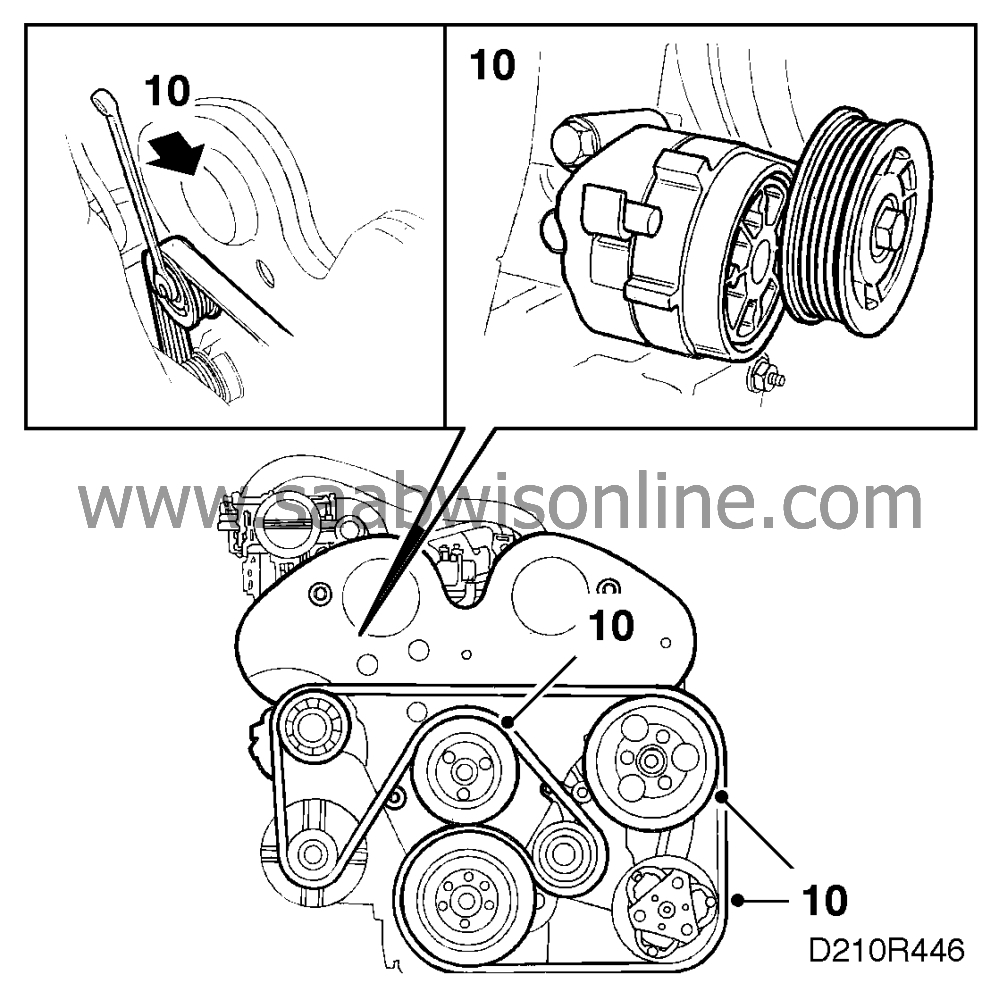
Slightly loosen the bolts securing the crankshaft pulley. Remove the multigroove drive belt, the belt tensioner, the power steering pump pulley, the coolant pump pulley and the cover.
|
|
3.
|
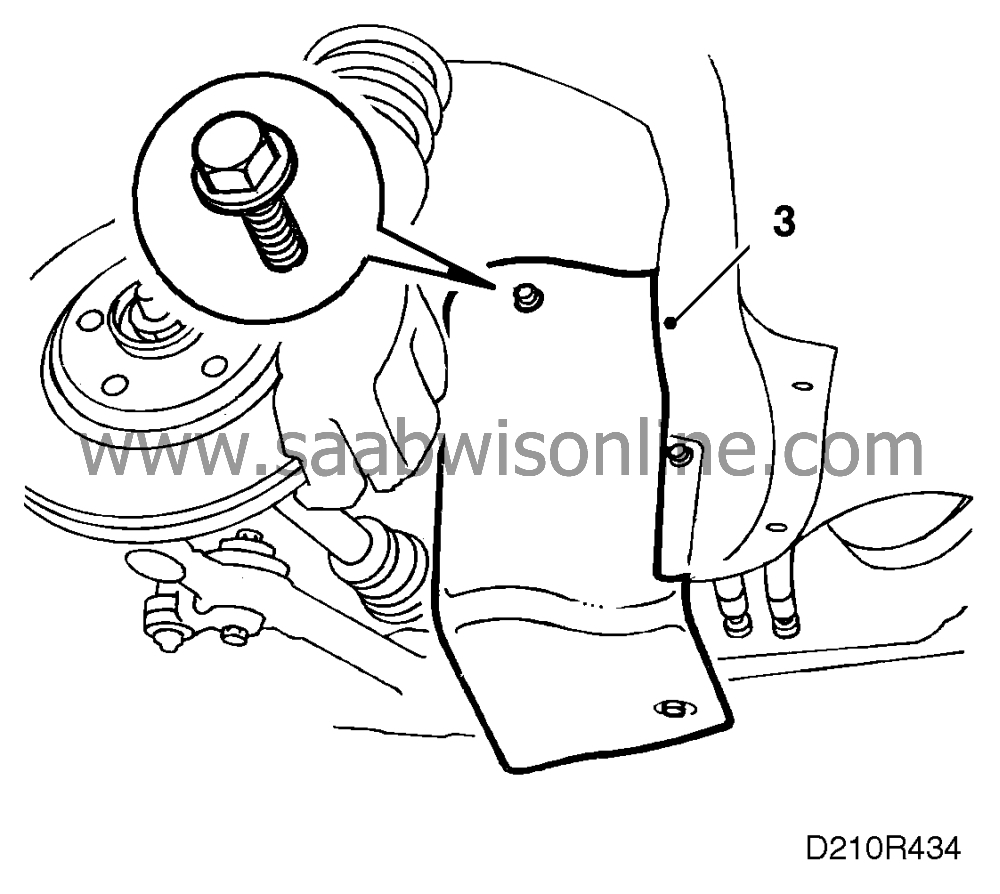
Remove the right-hand front wheel and the cover in the wheel housing. Remove the crankshaft pulley (undo the six bolts but do
not
remove the centre bolt).
|
|
4.
|
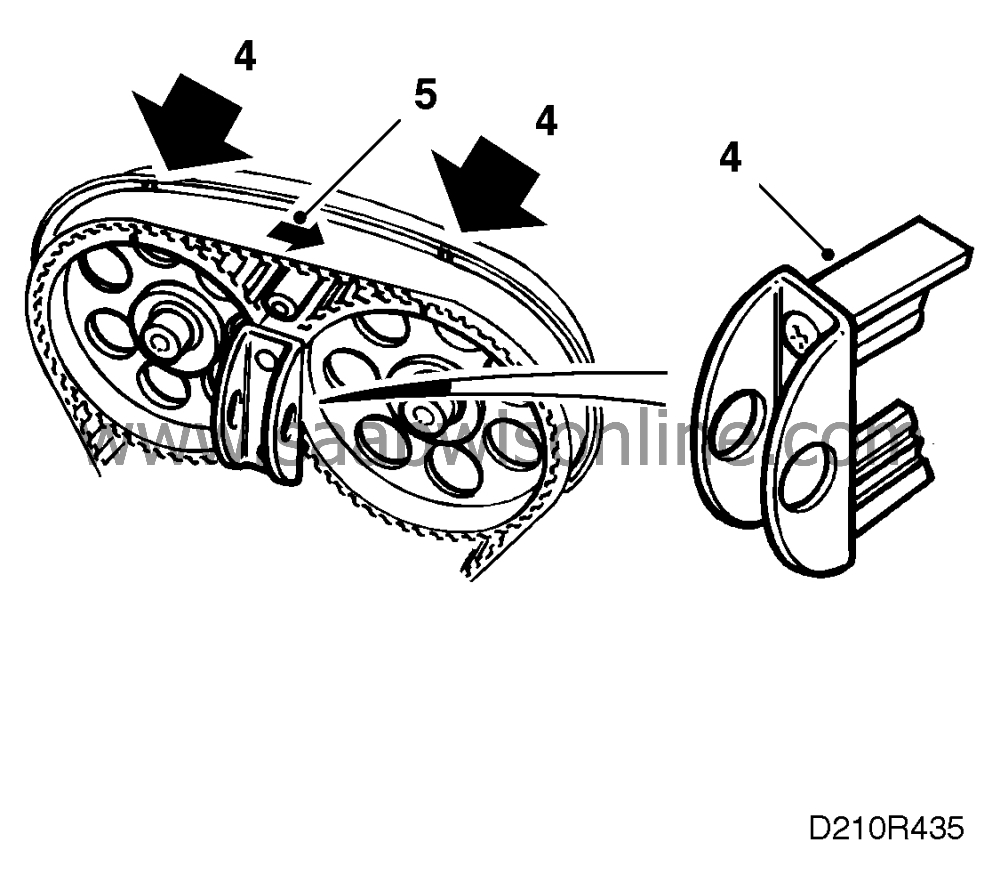
Put the No. 1 cylinder in the compression position. The markings on the camshaft sprockets and the timing cover should be aligned as should the markings on the crankshaft. Insert the locking tools for the camshaft sprockets on the cylinder heads.
|
|
5.
|
Before removing the toothed belt, mark its direction of rotation. To facilitate refitting, the belt can be marked at both the camshaft markings and at the crankshaft marking.
|
|
6.
|
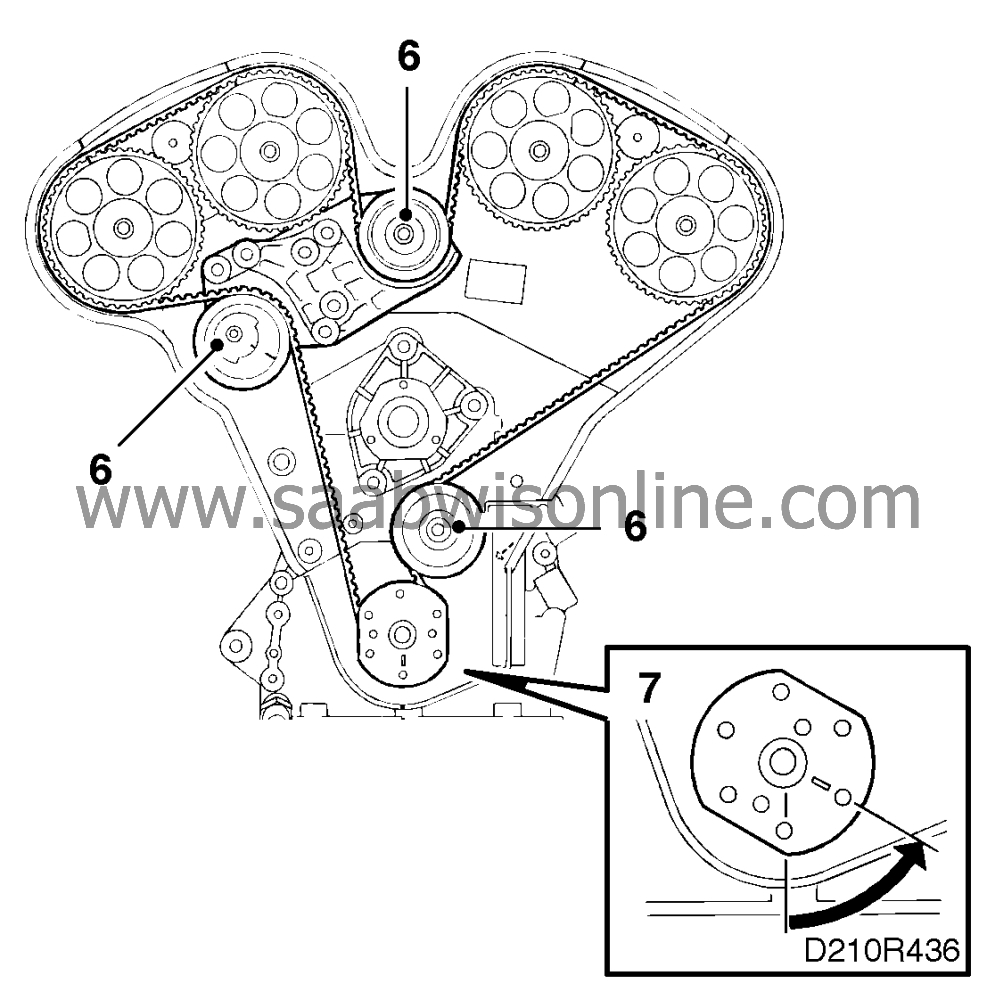
Release the belt tension and remove the toothed belt.
|
|
7.
|
Turn the crankshaft back 60° BTDC.
|
|
8.
|
Raise the car and remove the cover plate.

|
|
9.
|
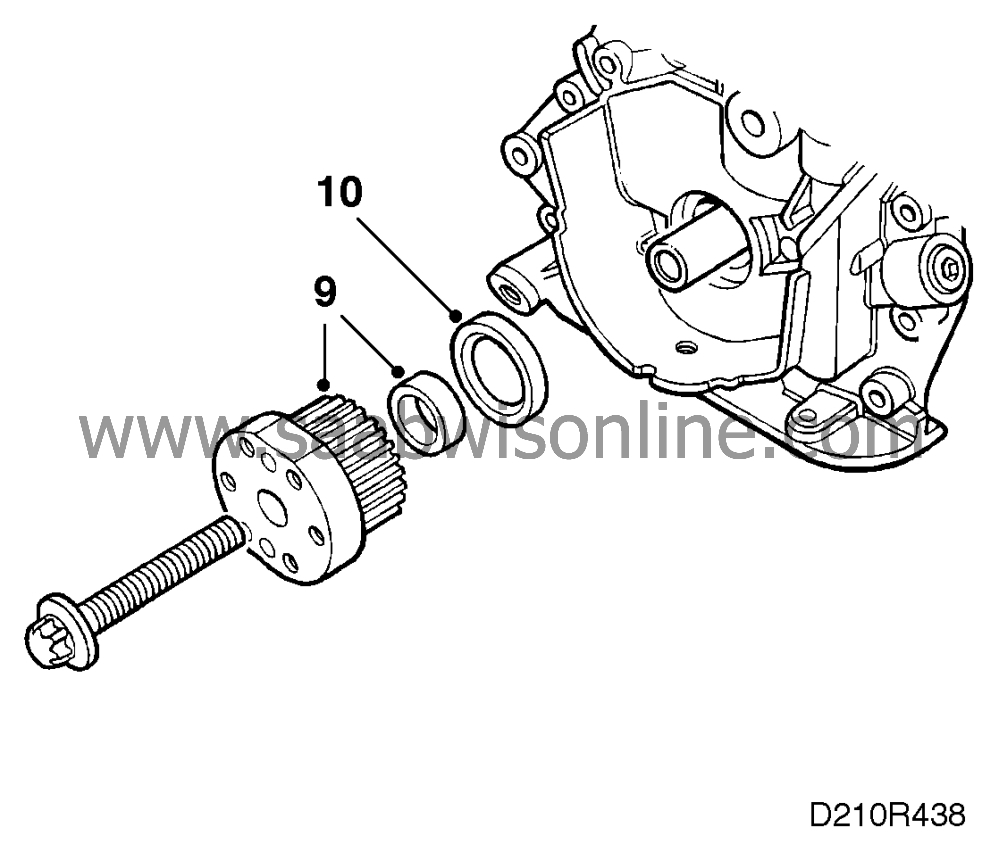
Fit holder 83 95 063 and remove crankshaft toothed belt sprocket and spacer ring.
|
|
10.
|
Lever out the seal, taking care not to damage the sealing surface on the crankshaft.
|

|
1.
|
Fit the inner part of tool 83 94 942 on the crankshaft with the cone outward. Lubricate the seal and fit it on the shaft. Tap the seal in place using the outer part of tool 83 94 942.
|
|
2.
|
Fit the spacer ring. Apply 93 21 795 to the back of the crankshaft's toothed belt sprocket and fit. Use holder 83 95 063.
Tightening torques
250 Nm (184.5 lbf ft) + 45.
|
|
3.
|
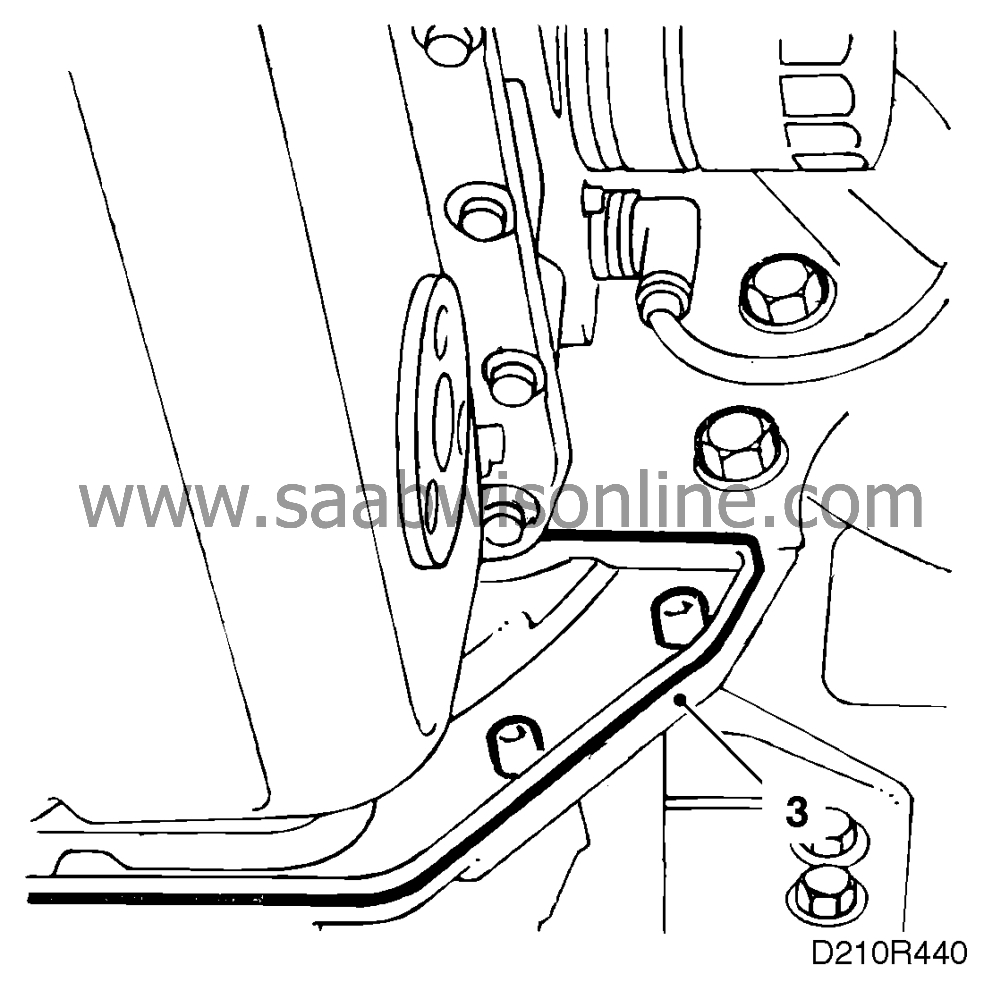
Remove the holder and fit the cover plate.
|
|
4.
|
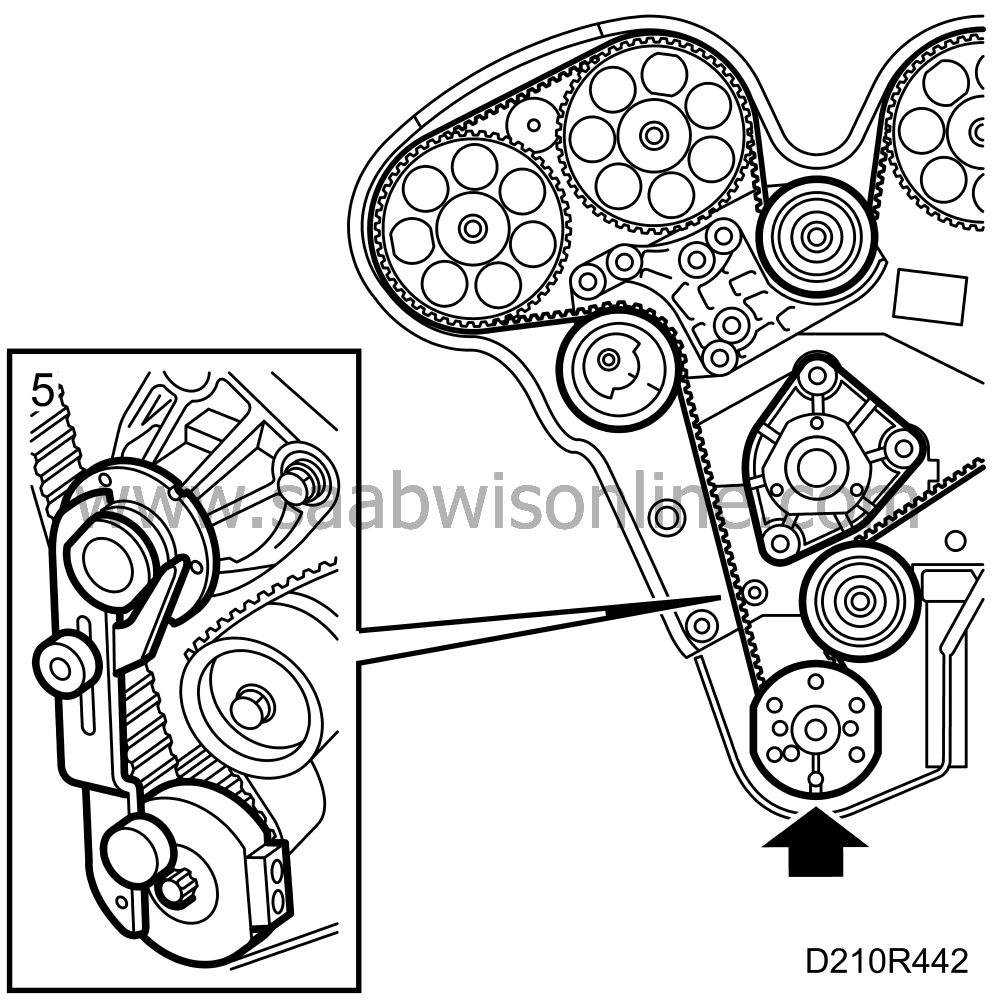
Fit setting tool 83 95 006 on camshaft sprockets Nos. 1 and 2, 3 and 4.

|
|
5.
|
Turn the crankshaft to just before the 0 point and fit setting tool 83 95 006 on it. Carefully turn the crankshaft in the direction of engine rotation until the arm rests against the coolant pump's flange and tighten it.
|
|
6.
|
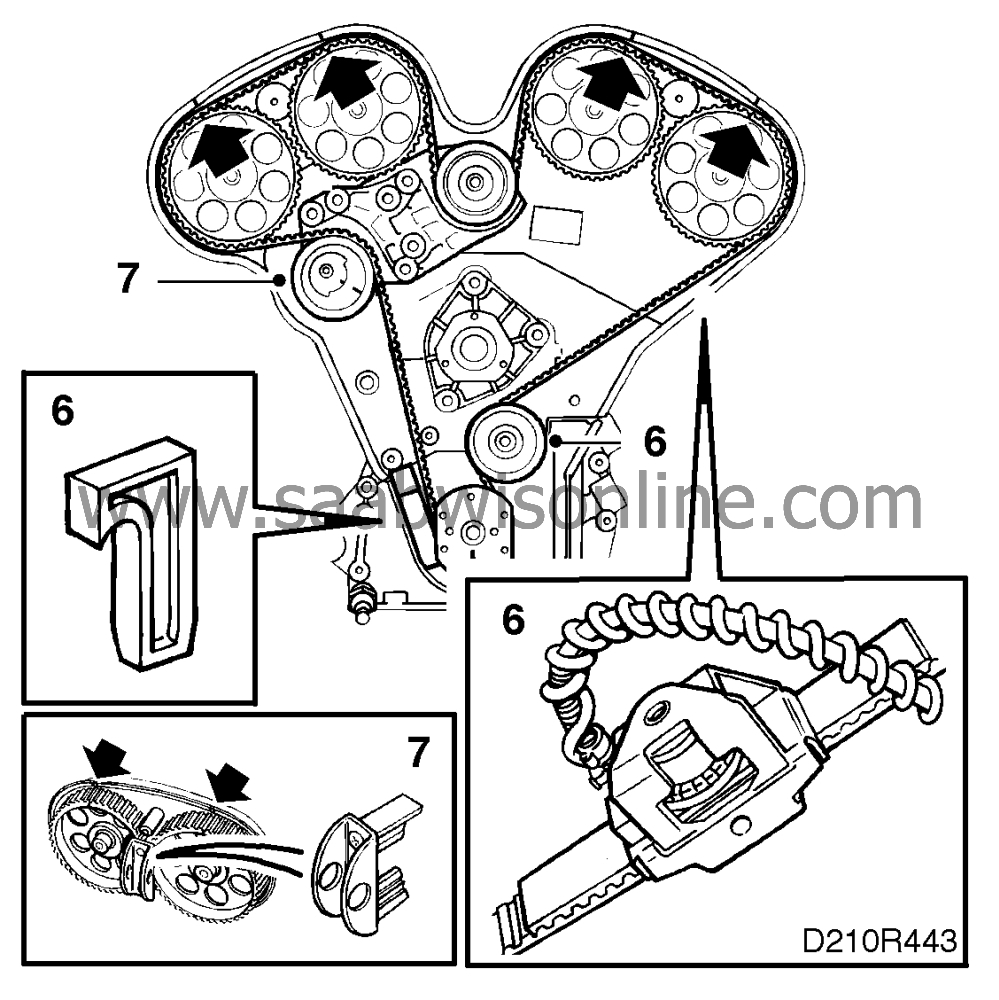
Fit the toothed belt according to the marked direction of rotation. Use setting tool 83 95 006 to keep the belt in place and adjust the tensioning roller loosely by hand to prevent the belt from jumping off. Adjust anticlockwise. Fit a section of toothed belt and fit tool 83 93 985 to measure the belt tension. Lightly tighten the centre bolts of the adjusting rollers. Adjust the lower roller anticlockwise to a belt tension of 275-300 Nm.
Turning torque 40 Nm (30 lbf ft).
|
Important
|
|
The adjustment of the belt tension is
only
a preparatory measure and
must not
be used as a check when the belt is finally adjusted.
|
|
|
|
|
7.
|
Adjust the tensioning pulley with an allen wrench until the two marks are aligned. Tighten.
Tightening torque 20 Nm (15 lbf ft).
Remove the locking tool for camshaft sprockets 1 and 2. Adjust the upper adjusting roller counter-clockwise until the No. 2 sprocket moves 1-2 mm clockwise.
Turning torque 40 Nm (30 lbf ft).
Remove the upper locking tool.
|
|
8.
|
Turn the engine over two revolutions until just before the zero mark and place the locking tool on the crankshaft. Carefully turn the crankshaft in the direction of engine rotation until the arm rests against the coolant pump's flange and then tighten the arm. Fit setting tool 83 95 006 and check that the markings on the camshaft sprockets are aligned with the markings in the tool.

|
Important
|
|
Also check the tensioning roller to ensure that the marks are in alignment.
|
|
|
|
|
9.
|
Fit the crankshaft pulley.
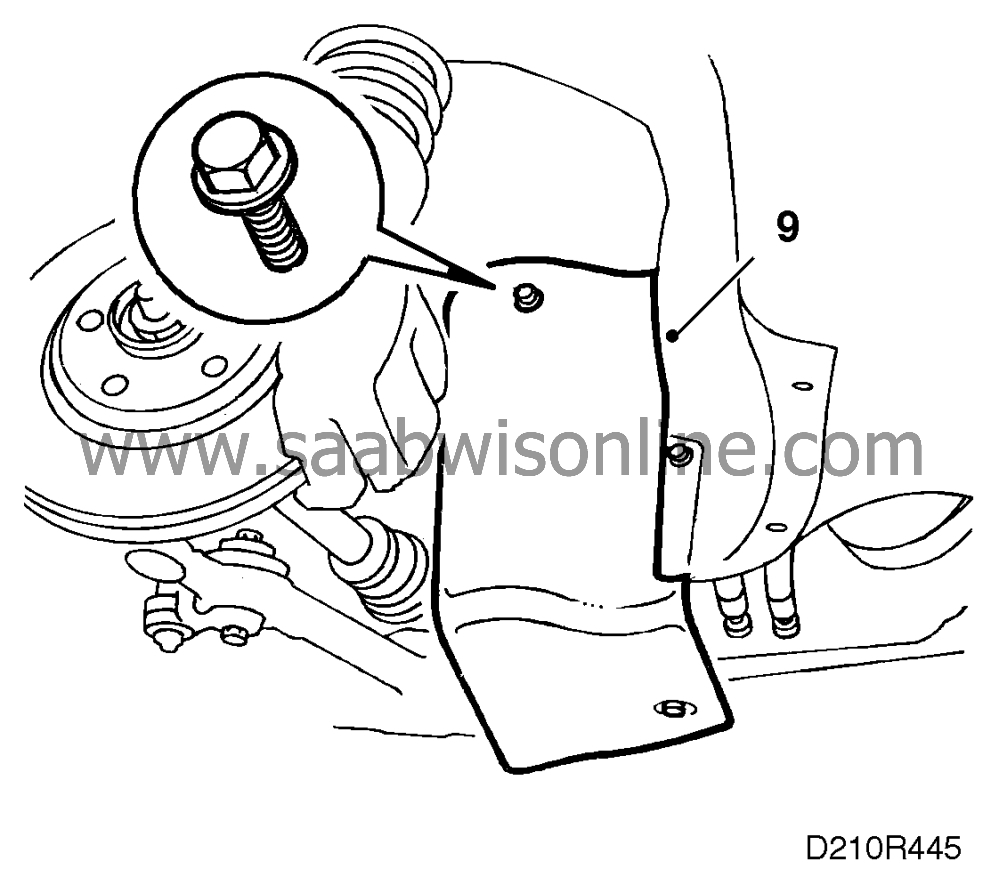
Tightening torque 20 Nm (15 lbf ft).
Fit the cover in the wheel housing and the right-hand front wheel.
Tightening torques
110 Nm (81 lbf ft)
|
|
10.
|
Fit the cover, coolant pump pulley, power steering servo pump pulley, belt tensioner and multigroove drive belt.
|
|
11.
|
Fit the air cleaner and the mass air flow sensor.

|


