Ignition coil
Symptom: Engine misfires or fails to start

Fault symptom
Engine misfires or fails to start
|
1.
|
If possible, start the engine and
use the ISAT commands "IGNITION
COIL 1+4", "IGNITION COIL 2+5" AND "IGNITION COIL 3+6" in the
"READ ON/OFF" menu.
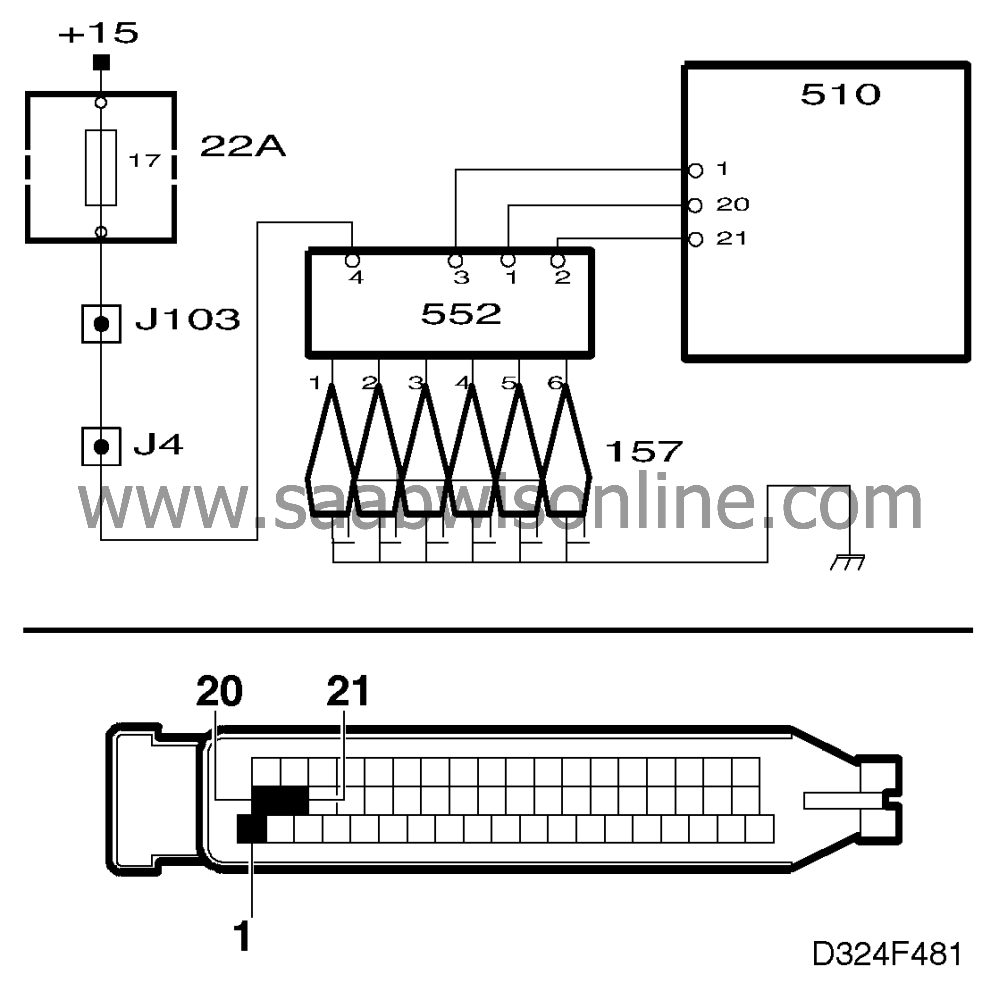
If the control module sends trigger signals from pin 1 (cyl. 1+4), pin
20 (cyl. 2+5) and pin 21 (cyl. 3+6), the ISAT should show "ACTIVE"
when each command is used.
If the ISAT shows "INACTIVE", turn to
 for further
diagnostic instructions.
|
|
2.
|
Remove the HT lead from any spark plug in cylinders 2, 4 or 6 and
connect it to a test spark plug with a wide gap. Ground the spark plug
and use the ISAT commands "FIRING CYL 1-4", "FIRING CYL 2-5"
and "FIRING CYL 3-6" in the "ACTIVATE" menu. The spark plugs
corresponding to the relevant commands should now produce a spark. If
they do not, the relevant ignition coil is not producing ignition
current. Check the leads between pins 1, 20 or 21 of the control unit
and pins 3, 1 or 2 of the ignition coils.
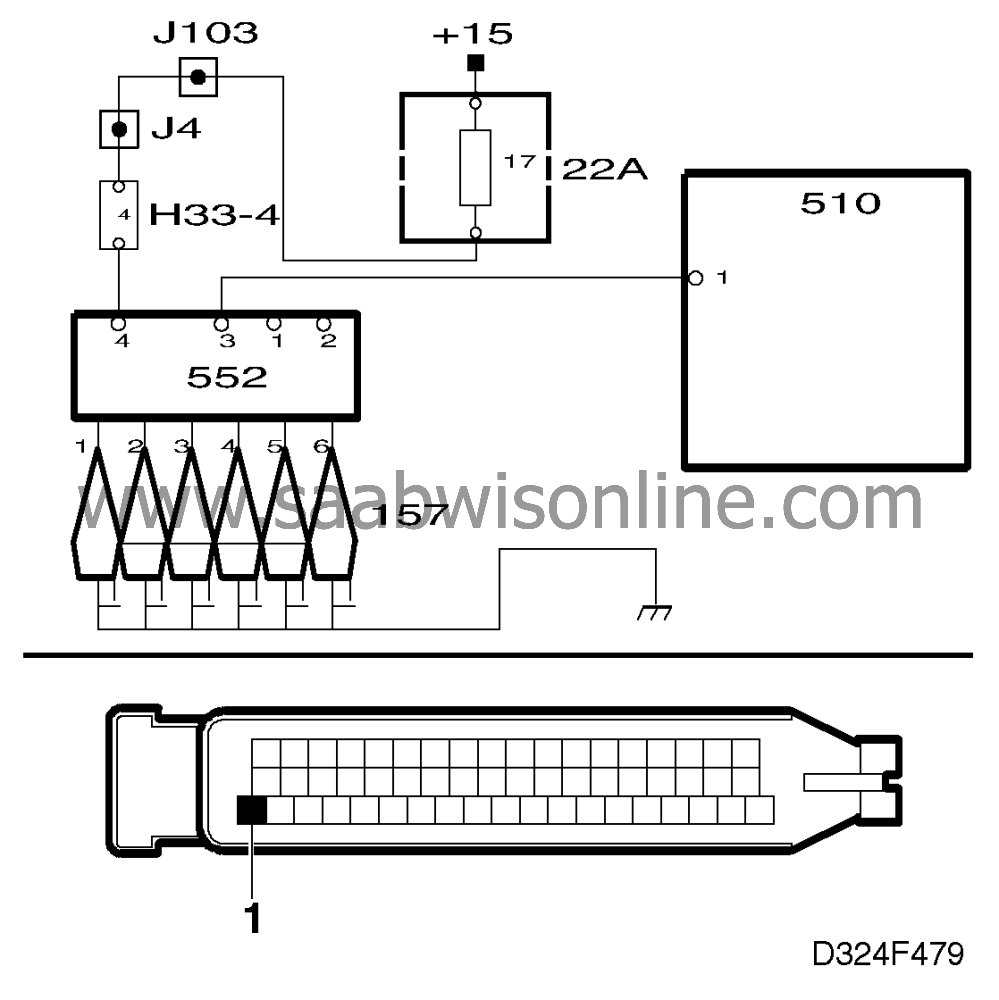
If none of the ignition coils produces ignition current, also check
whether pin 4 of the coils receives current from fuse 17.
|
|
3.
|
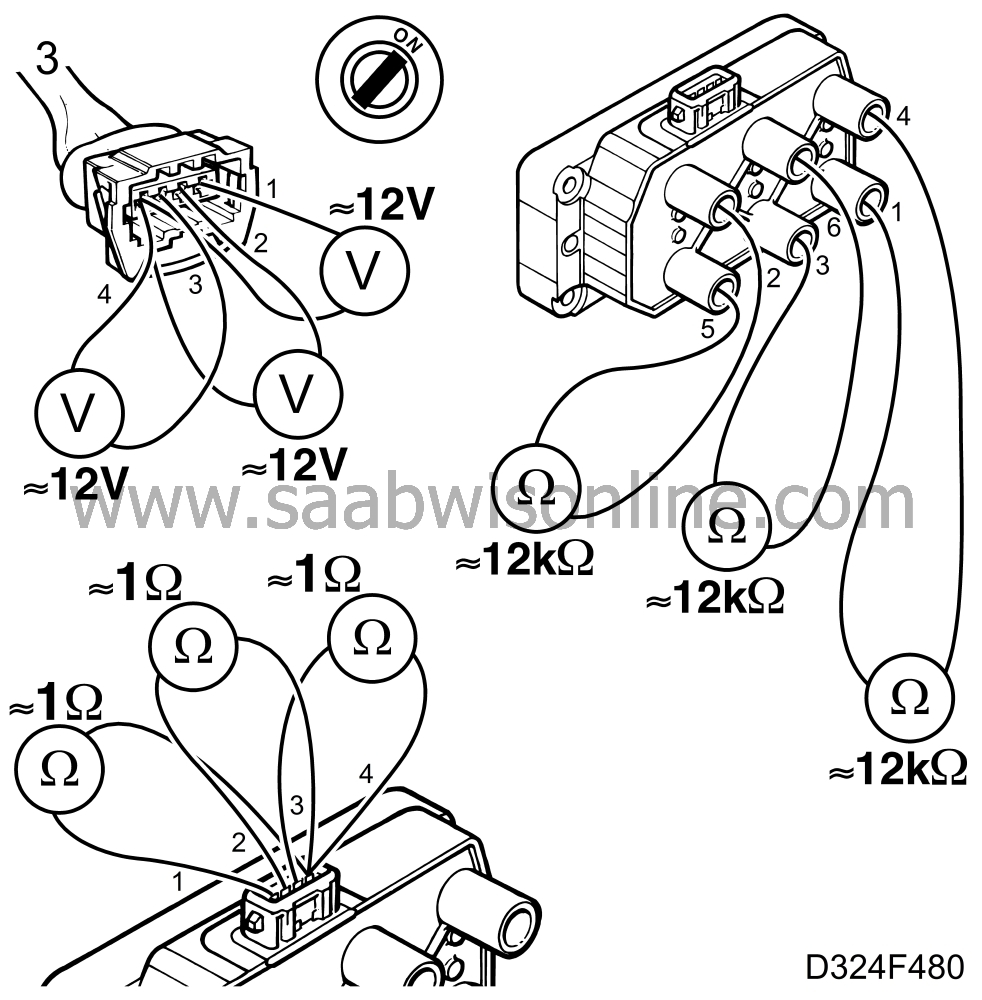
Unplug the ignition coils' 4-pin connector and use a voltmeter to
take readings across pins 4 and 1, 4 and 2, and 4 and 3. With the
ignition switch in the Drive position, the voltmeter should show about
12 V and on engagement of the starter motor it should fluctuate between
about 4 and 6 V.


If the readings are not OK, continue with the next point.
If the readings are OK, check the resistance of the primary circuit in
the ignition coils by taking a reading across pins 4 and 1, 4 and 2,
and 4 and 3. The correct resistance is about 1 ohm.
Also check the secondary windings by measuring the resistance across the
HT lead outlets for spark plugs 1+4, 2+5 and 3+6. The correct
resistance is about 12,000 ohms. If the resistance is not OK, change
the ignition coil.
|
|
4.
|
If no diagnostic trouble codes have been generated in the MOTRONIC
system, also check that the control module is supplied with the correct
voltage and that its ground connection is good.
Also check that the crankshaft position sensor is in satisfactory
working order, see
 .
.
If no faults have been detected after carrying out the above checks,
change the control module.
|


