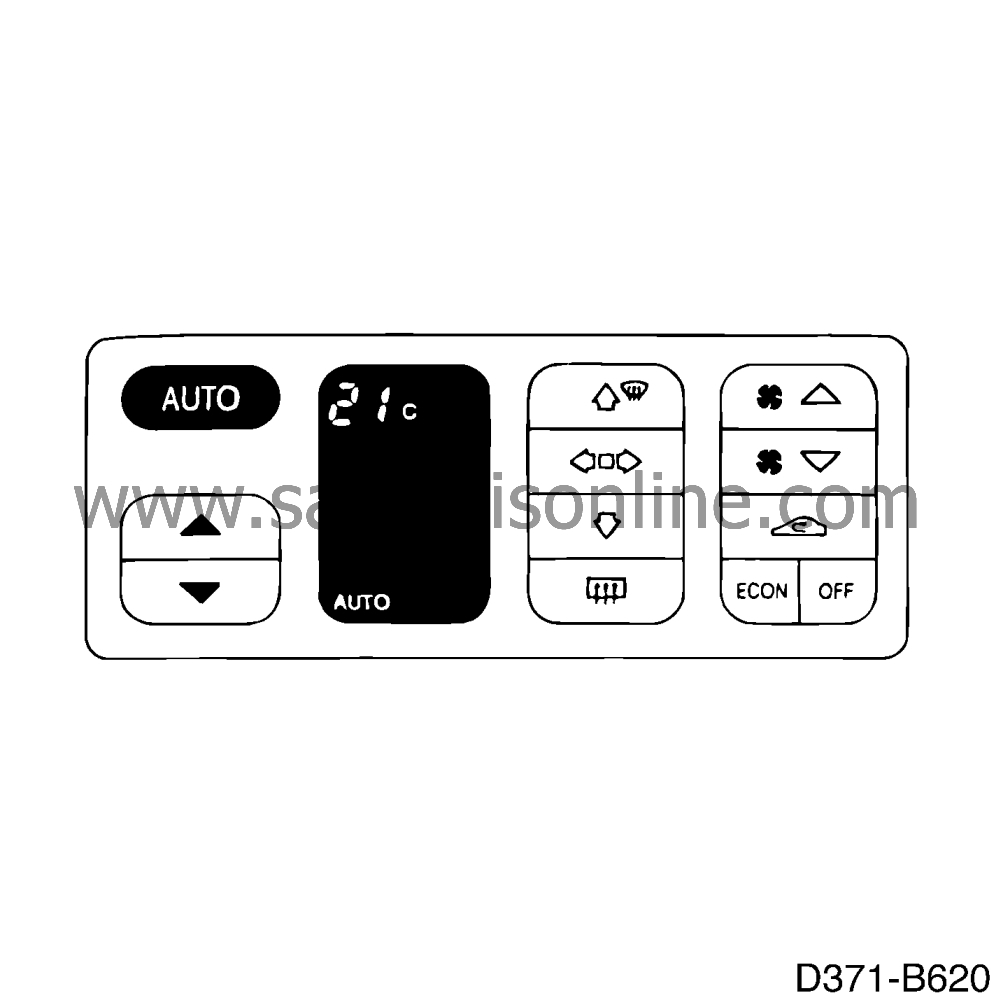
Fast idling speed compensation on ACC cars in cold weather
|
MODIFICATION INSTRUCTION
|
|
Bulletin Nbr:
|
371-1519
|
|
Date:
...........
|
APRIL 1994
|
|
Market:
|
S, EU
|
|
|
Fast idling speed compensation on ACC cars in cold weather
|
Saab 900 2,3i M94 with manual gearbox
and
ACC between VIN R10016954 and R10029019.
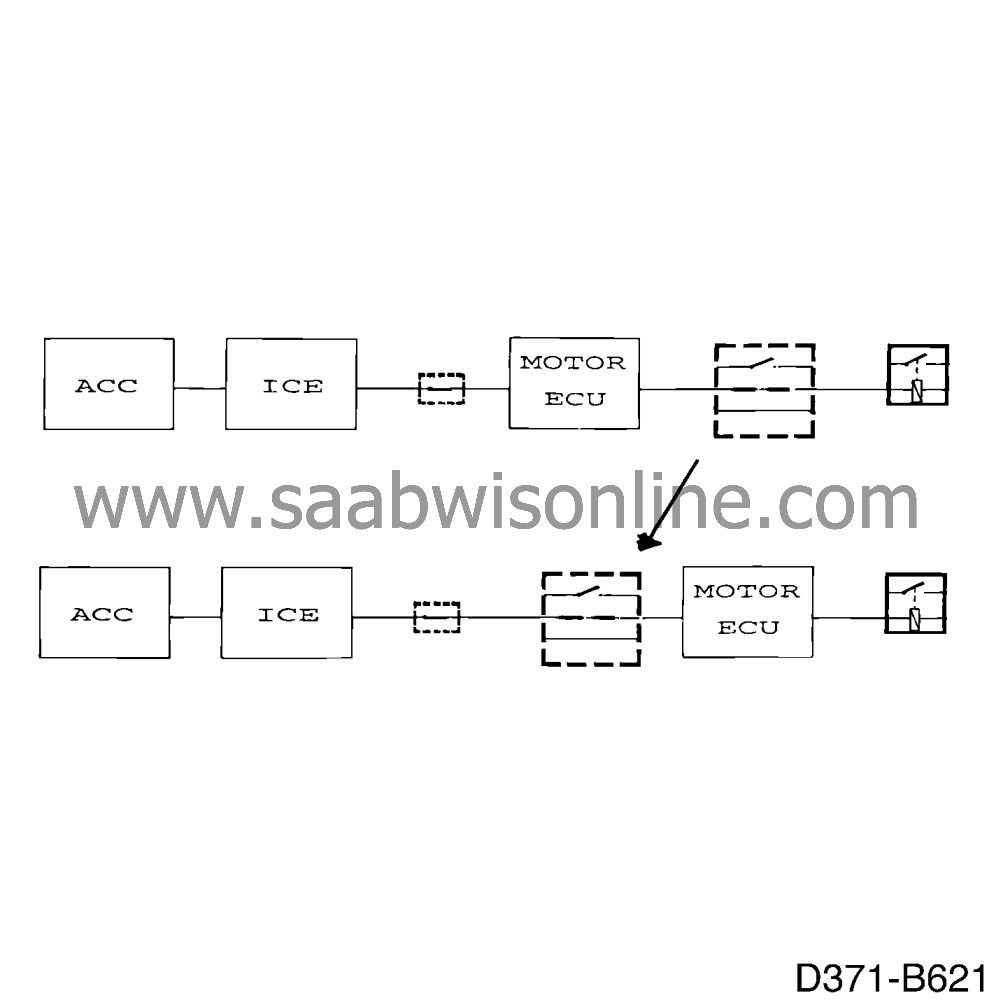
It is possible that the fast idle speed compensation will engage when the ACC system is on and the outside temperature is approx. 0
°
C (32
°
F). This problem is caused by the anti-frost thermostat between ICE and the engine control module closing due to the heat in the cabin. The anti-frost thermostat then gives a signal to the engine control module for the compressor to start but without the low pressure switch closing because the pressure in the A/C system is too low at a temperature of approx. 0
°
C (32
°
F). Consequently, the A/C relay will not operate. However, the engine control module will not receive this information and is therefore not able to lower the engine speed. This trouble can be prevented by connecting the low pressure switch in series with the anti-frost thermostat with an extra wiring harness.
Component
|
Part no.
|
Wiring harnesses
|
45 89 891
|
Cable tie
|
79 71 864
|
Cable tie (replaced if necessary)
|
40 63 681
|
Cable tie
|
79 84 784
|
Branching, lower
|
95 59 998
|
Branching, upper
|
95 60 004
|
Connector
|
91 24 157
|
Removal tool, part number 85 80 110 for extracting cable lugs from connector.
First, check the modification identity plate, box "C1". If it is not marked, carry out the following measures on the car.
|
1.
|
Disconnect the battery's negative cable.
|
|
2.
|
On LHD cars: Remove the glove box.
On RHD cars: Remove the lower dashboard panel.
|
|
3.
|
Detach the cruise control module and put it to one side, cut the cable tie and tape on the engine harness by the bulkhead rubber grommet on the engine bay side.

|
|
4.
|
Insert a screwdriver through the grommet from the engine bay side and feed through the section of additional wiring harness without connecting lugs until the marking tape reaches the grommet. Seal with deka-plastic, refit a cable tie (79 71 864) and apply adhesive tape around the grommet.
|
Important
|
|
It is essential that the grommet be sealed properly to prevent water leaking into the cabin.
|
|
|
|
|
5.
|
Refit the cruise control module.
|
|
6.
|
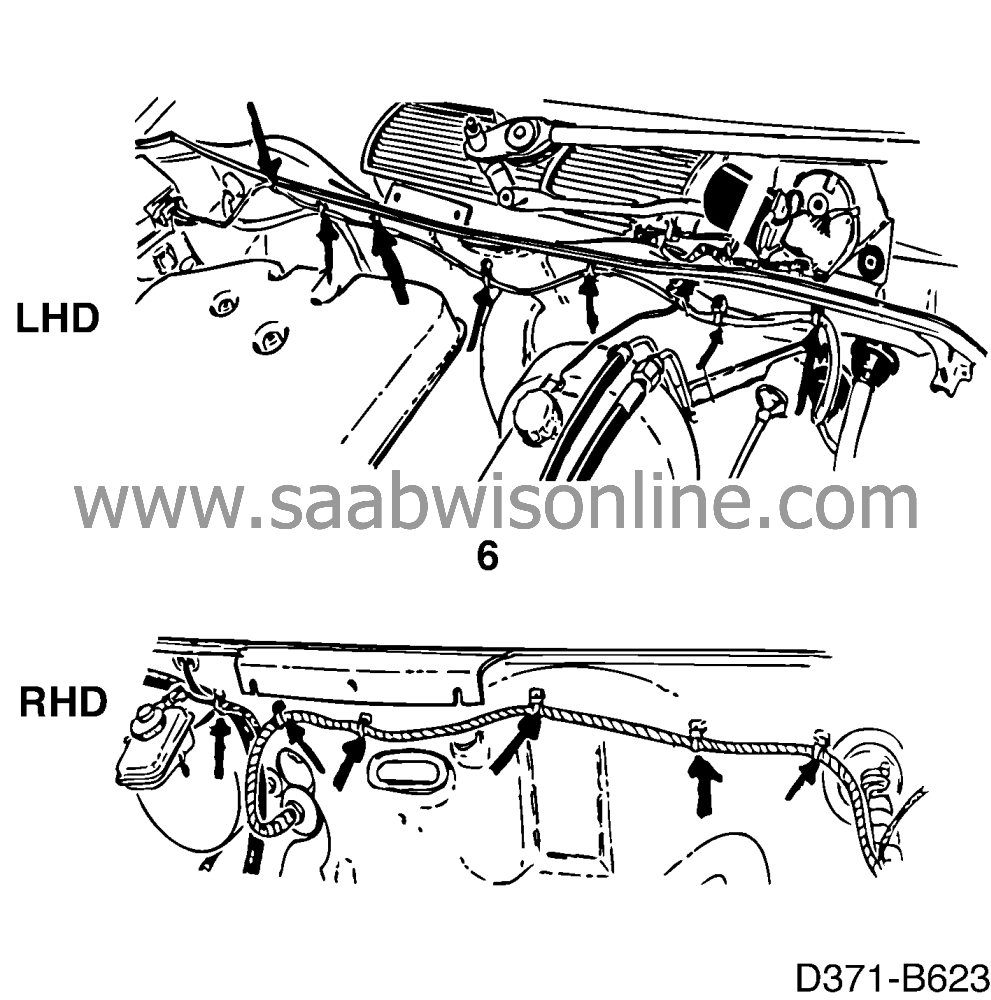
Run the wiring harness on the bulkhead using existing cable ties, see illustration (the cable ties can be opened, replace if necessary with part no. 40 63 681)
|
|
7.
|
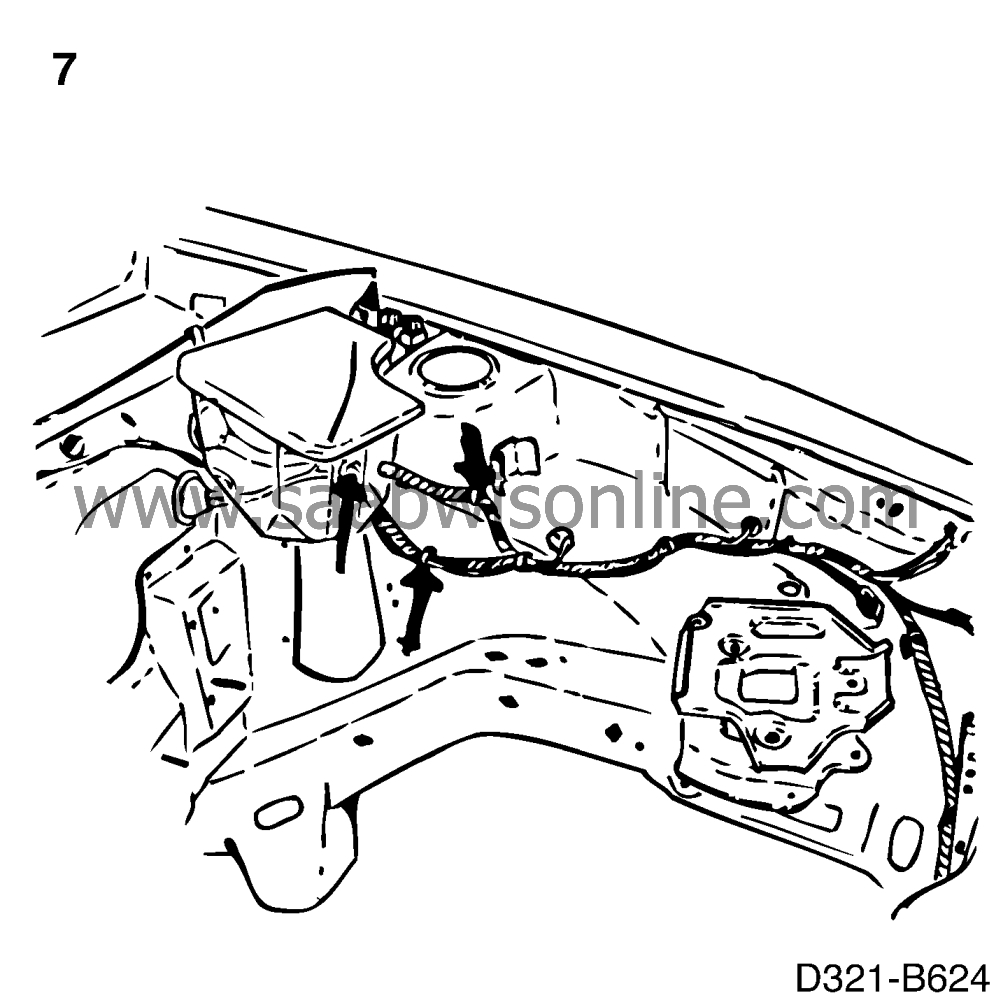
Run the wiring harness on the rear left part of the structural member in existing cable ties, see illustration (replace if necessary with part no. 79 84 784).
|
|
8.
|
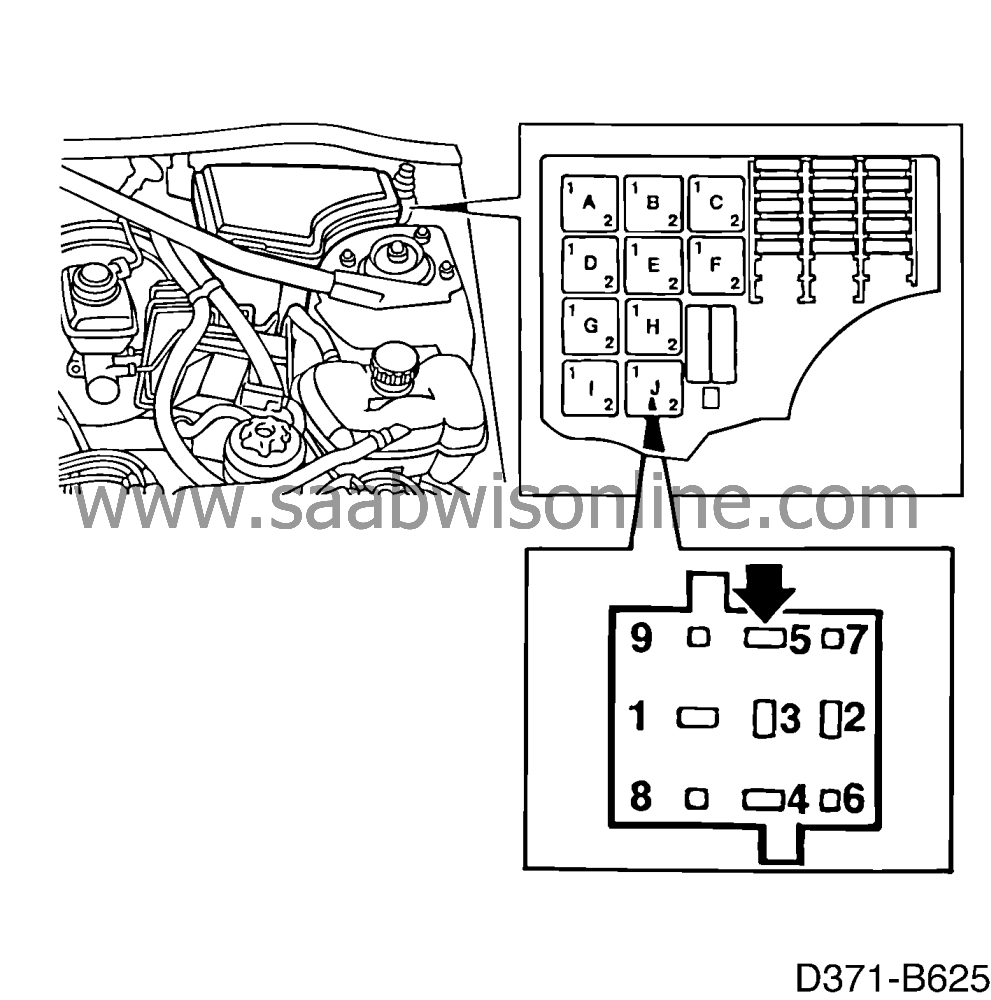
Remove the front main fuse box.
|
|
9.
|
Undo the relay plate in the front main fuse box, remove the AC/ACC relay (relay position J).
|
|
10.
|
Cut away the cable tie and extract the white lead from pin 5 on the relay board.
|
|
11.
|
Connect the white lead to a 2-pin connector (91 24 157) in position 1 and connect it to the 2-pin connector on the extra wiring harness.
|
|
12.
|
Connect the red/white lead of the extra harness to pin 5 on the relay board AC/ACC.
|
|
13.
|
Fit a new cable tie, snap on the relay plate and refit the relay and main fuse box.
|
|
14.
|
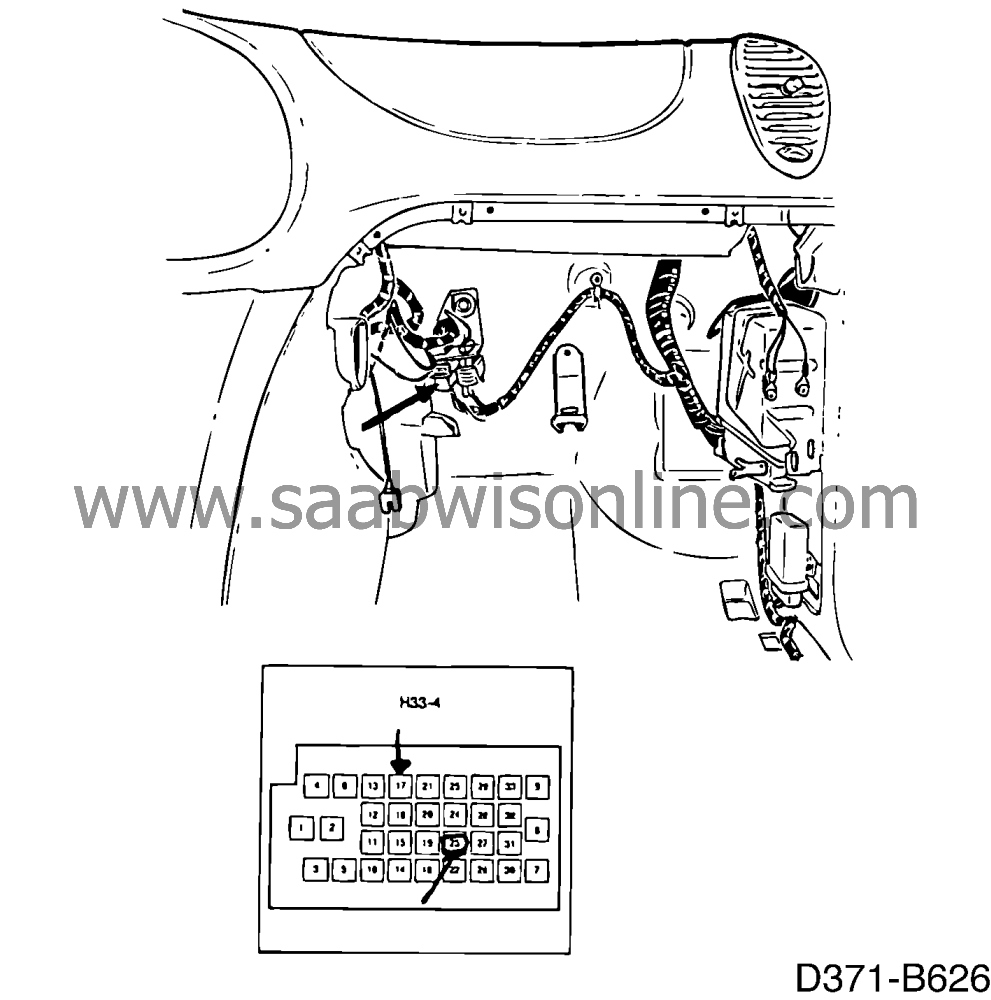
Unplug the 33-pin connector to the engine harness.
|
|
15.
|
Extract the red/white lead from pin 17 and the green/grey lead from pin 23 of the instrument harness connector.
|
|
16.
|
Connect together these leads with the branching (95 59 998 and 95 60 004). Cut off the cable lugs as close to the branching as possible.
|
|
17.
|
Connect the red/white lead on the extra wiring harness to pin 17 and the white lead to pin 23.
|
|
18.
|
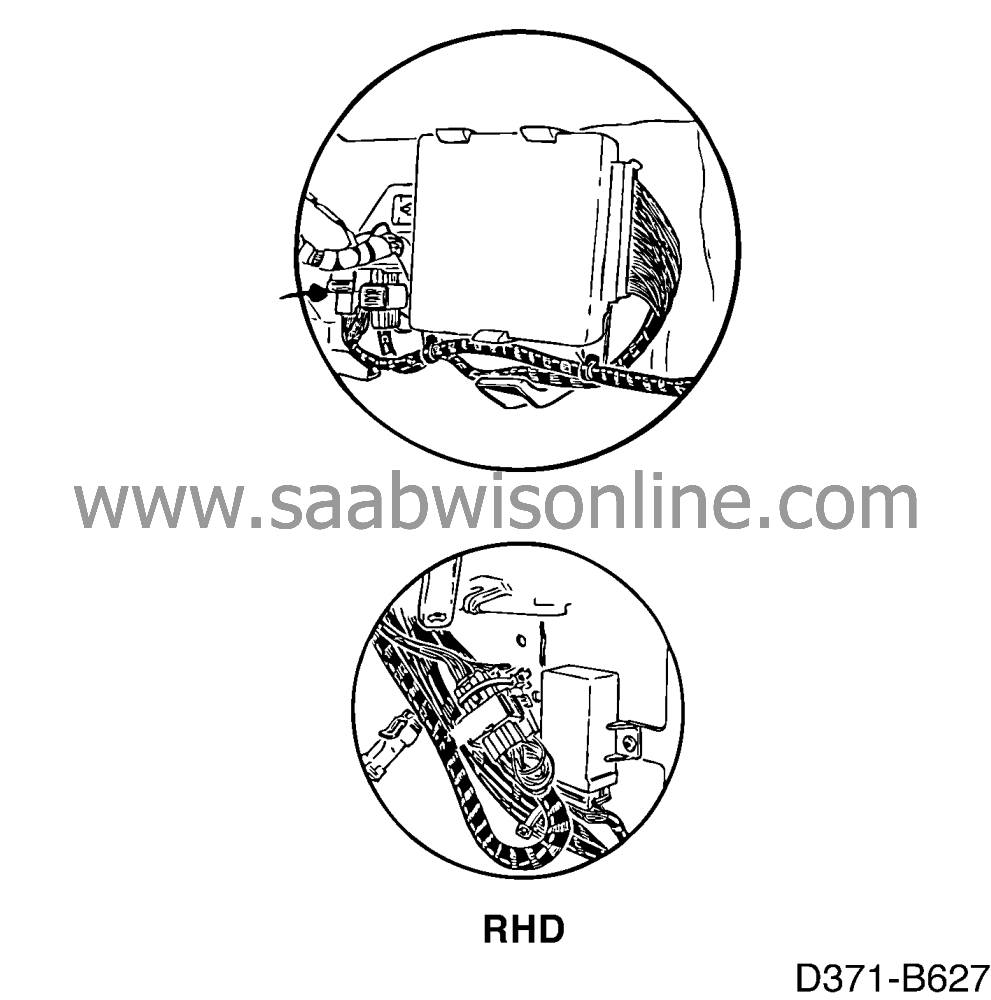
Secure the wiring harness with existing cable ties.
|
|
19.
|
Connect the battery's negative cable.
|
|
20.
|
Check the operation of the compressor by performing the following at an outside temperature above +5
°
C (41
°
F):
|
|
|
•
|
Step through the temperature on the ACC panel to "LO".
|
|
|
•
|
Wait for the compressor to start and let it run for 30 seconds.
|
|
|
•
|
Set the temperature on the ACC panel to 21
°
C (70
°
F).
|
|
21.
|
Refit the glove box (LHD) or the lower dashboard panel (RHD).
Pay particular attention to the fit!
|
|
Marking the modification identity plate
|
Mark the modification identity plate with the number 8 in box C1 if the measure was carried out by the dealer and with the number 7 if carried out by the importer. See Service Information 010-052.
|
Standard time information
|
See separate information.


