Selector lever
| Selector lever |
| To remove |
| 1. |
Remove the selector lever housing, see
 .
.
|
|
| 2. |
Release the wiring by snipping the cable ties.
|
|
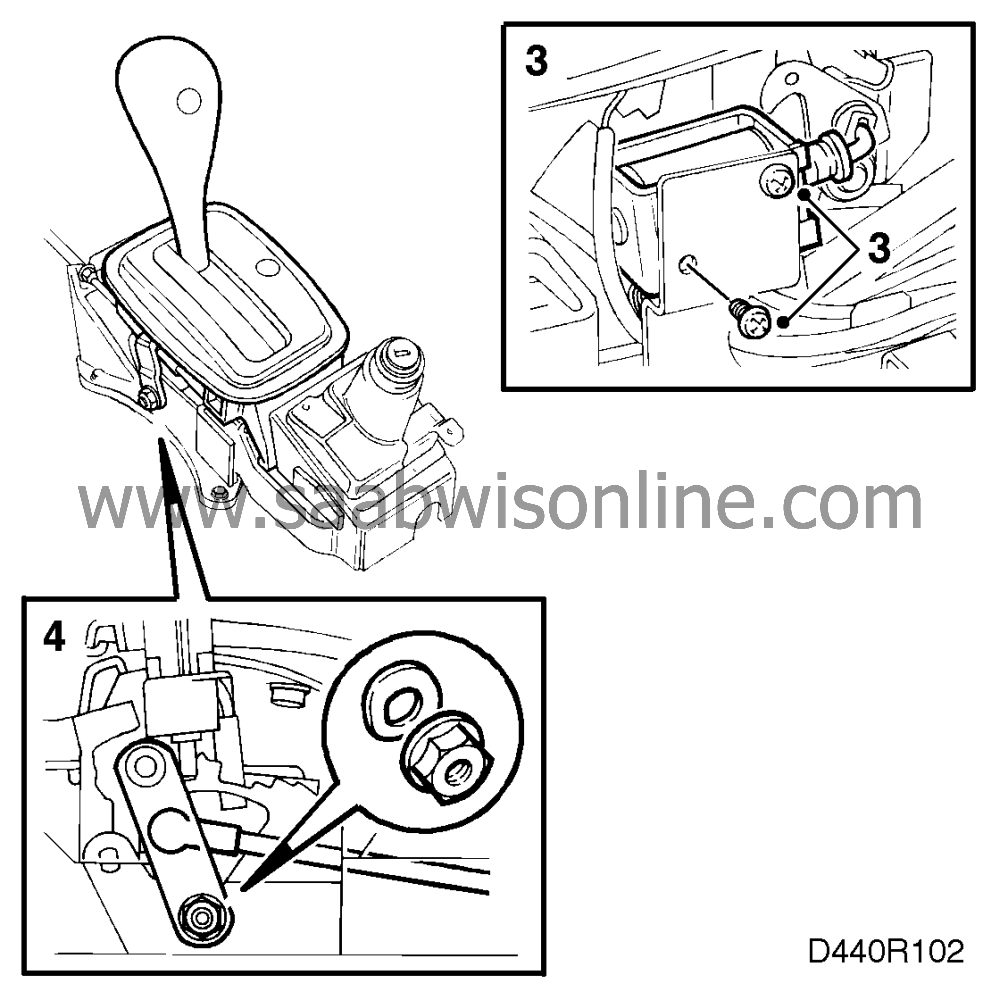
| 3. |
Remove the electromagnet.
|
|
| 4. |
Remove the lever by undoing the nut and withdrawing the ball joint.
|
|
| - |
Note
|
|||||||
| 5. |
Remove the plastic housing which is secured to the metal housing by catches.
|
|
| 6. |
Withdraw the selector lever shaft from its mounting.
|
|
| To fit |
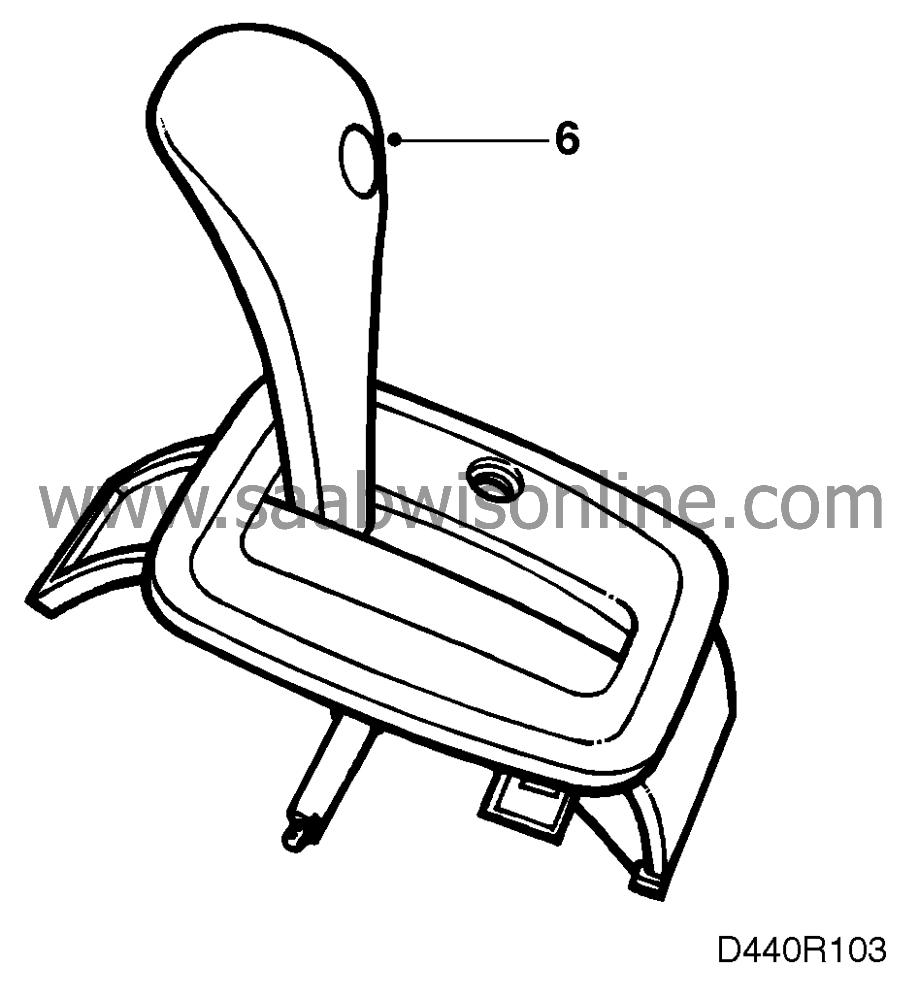
| 1. |
Transfer the bulbs and the WINTER switch to the new selector lever.

|
|
| 2. |
Lubricate the selector lever shaft, the bushes in the mounting and the linkage with grease (42 38 671).
|
|
| 3. |
Press the selector lever shaft into the mounting.
|
|
| 4. |
Fit the lever, not forgetting the washer.
Tightening torque: 30 Nm (22 lbf ft). |
|
| 5. |
Fit the plastic housing, making sure that it snaps properly into place.
|
|
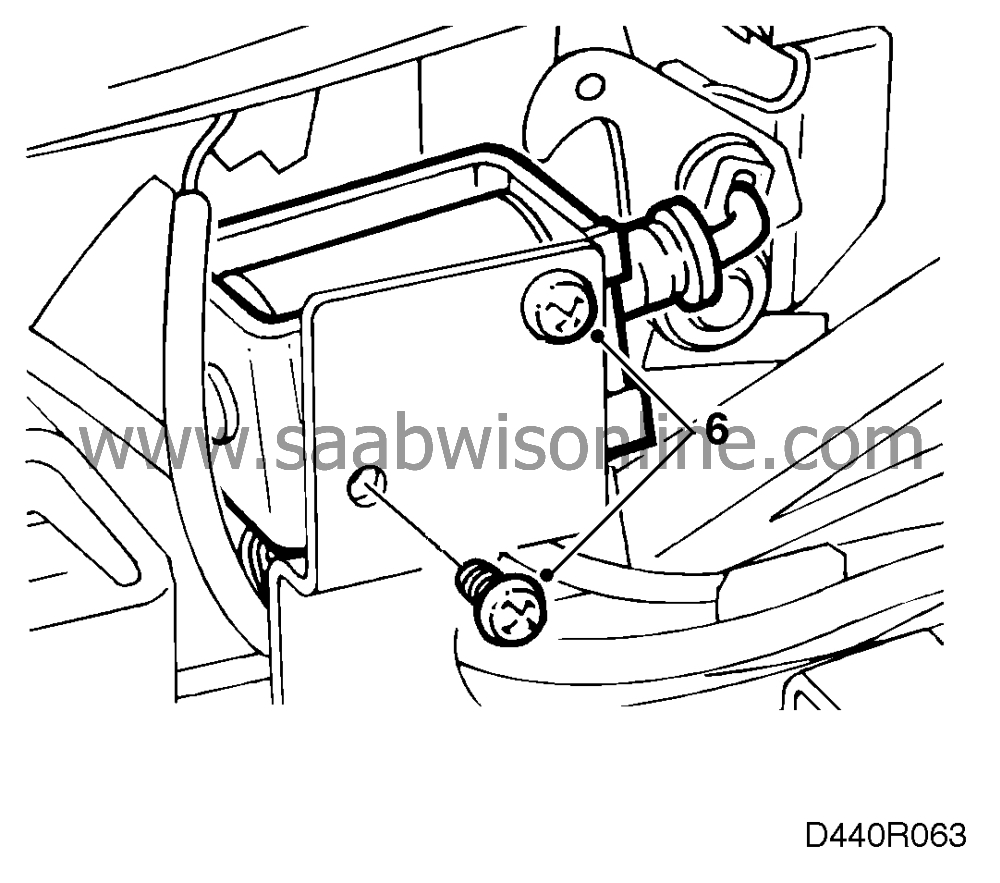
| 6. |
Fit the electromagnet and adjust the shift-lock function, see
.
|
|
| 7. |
Fasten the wiring to the housing by means of cable ties.
|
|
| 8. |
Adjust the amount of play in the parking lock, see
.
|
|
| 9. |
Fit the selector lever housing to the car body, see
.
|
|
| 10. |
Adjust the position of the selector lever, see “Adjusting” below.
|
|
| Adjusting |
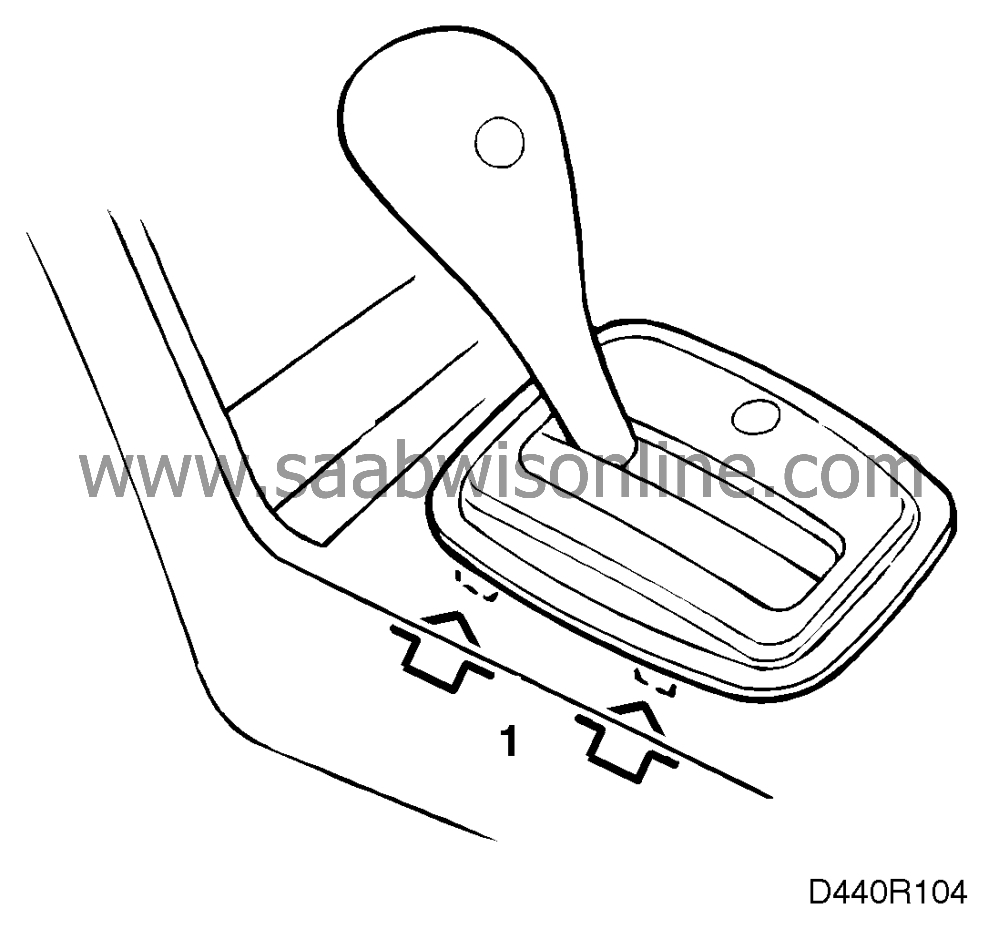
| 1. |
Remove the selector lever cover, as shown.
Note
|
||||||||||
| 2. |
Move the selector lever to position 1, lift the front of the indicator plate and move the lever to position R.

|
|
| 3. |
Using a 10 mm socket ( " Square drive) and extension bar, undo the nut securing the selector lever cable so that the end of the cable runs freely.
|
|
| 4. |
Check that the selector lever is in position R and tighten the nut.
Tightening torque: 8 Nm (6 lbf ft) |
|
| 5. |
Move the selector lever to ascertain whether the play is the same in positions N and D and that all gear positions can be engaged. If this is not the case, it will be necessary to repeat points 3 and 4.
|
|
| 6. |
Move the selector lever to position 1 and fit the indicator plate in place. Press it home adjacent to the selector lever.
|
|
This project is supported by memberships and donations. If you use this site, please consider Joining SCNA and/or making a donation.
Our Friends
