Disconnection andreconnection of the driver-side airbag
|
SERVICE INFORMATION
|
|
Bulletin Nbr:
|
850-1744
|
|
Date:
...........
|
MAY 1997
|
|
Market:
|
US
|
|
|
Disconnection and
reconnection of the driver-side airbag
|
Saab 900 M90-93 and Saab 900 M94 onwards equipped with driver-side
airbag
This SI describes the method of disconnection of the driver-side airbag
recommended by Saab for those owners with written approval for such disconnection from the
National Highway Traffic Safety Administration, US DOT. Saab has no role in the decision to
undertake such a disconnection or any subsequent
reconnection.
|
Information/Parts Request Procedure
|
|
•
|
The individual identified in the NHTSA approval must
make a written request to Saab Cars USA, Inc. (Attention: Compliance) for this SI. The
Vehicle Identification Number (VIN) of the applicable Saab automobile must be
included.
|
|
•
|
A copy of the written approval from NHTSA must be included with the above
request.
|
|
•
|
Saab will send this SI directly to the above individual.
|
|
•
|
If the individual making the request wishes to use the following parts available
from Saab through any authorized Saab dealer, the ordering dealer must include the VIN with
the order.
|
50 10 236 ‘‘Disconnection Kit” ( for 900 driver-side
airbag)
Contents:
Resistor
Fabric-backed tape
Foam plastic
Label
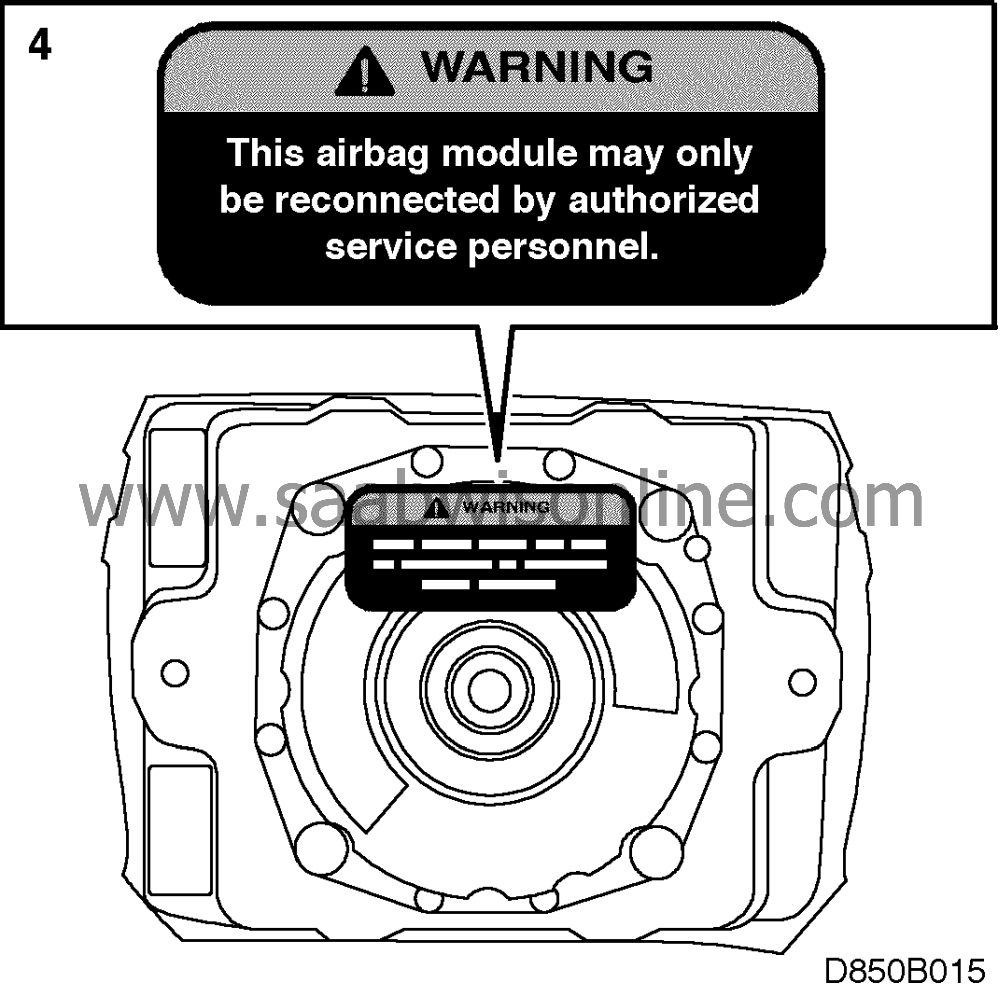
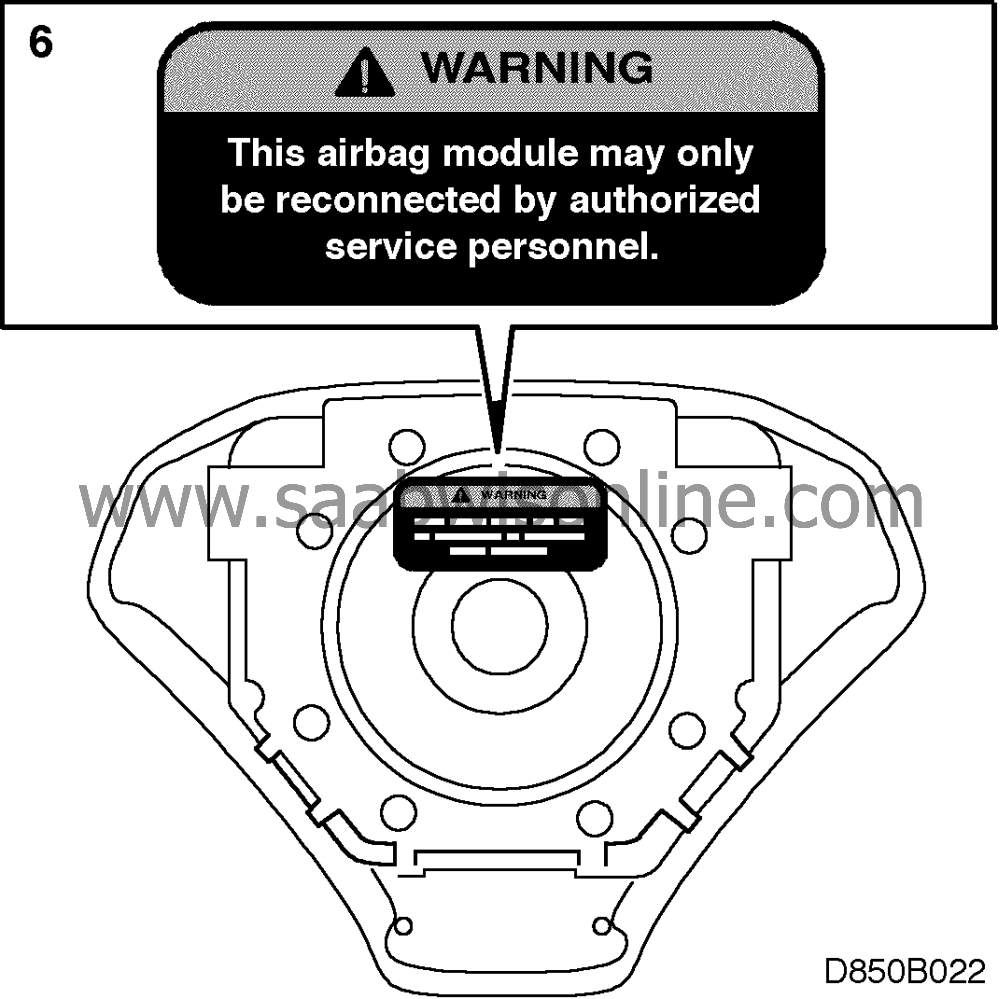
Label (‘‘WARNING: This airbag module may only be reconnected by
authorized service personnel”.
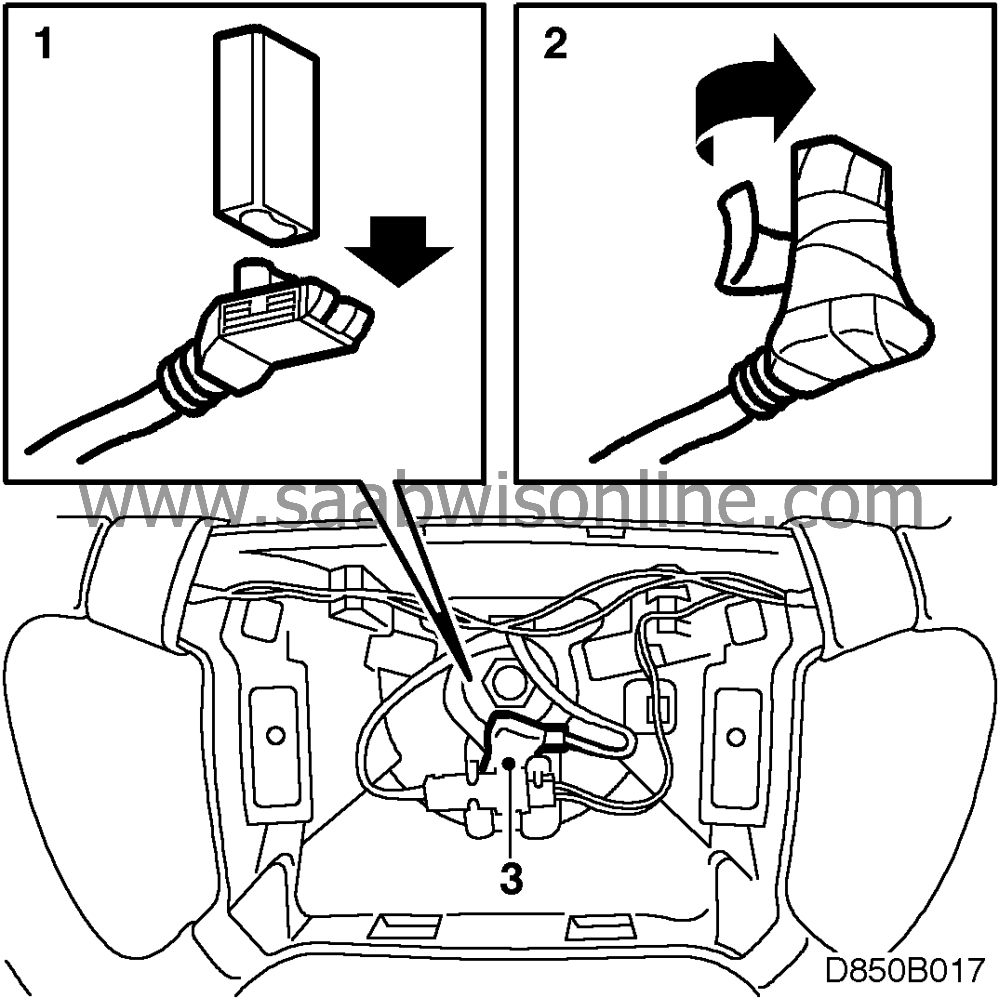
To remove: four-spoke steering whee, M90-93
Make sure that the steering wheel is centred before starting work.
|
1.
|
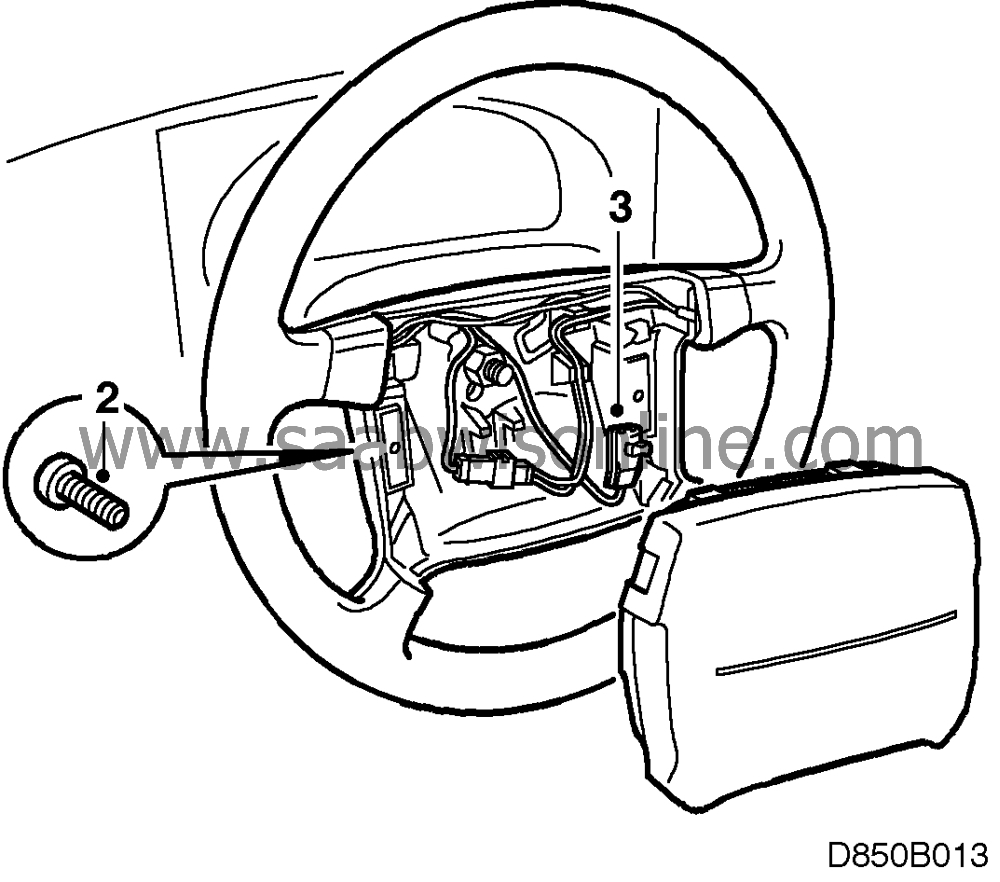
Disconnect the negative (-) battery
lead.
|
|
2.
|
Undo the screws in the airbag unit.
|
|
3.
|
Remove the unit and un plug the connector.
|
|
1.
|
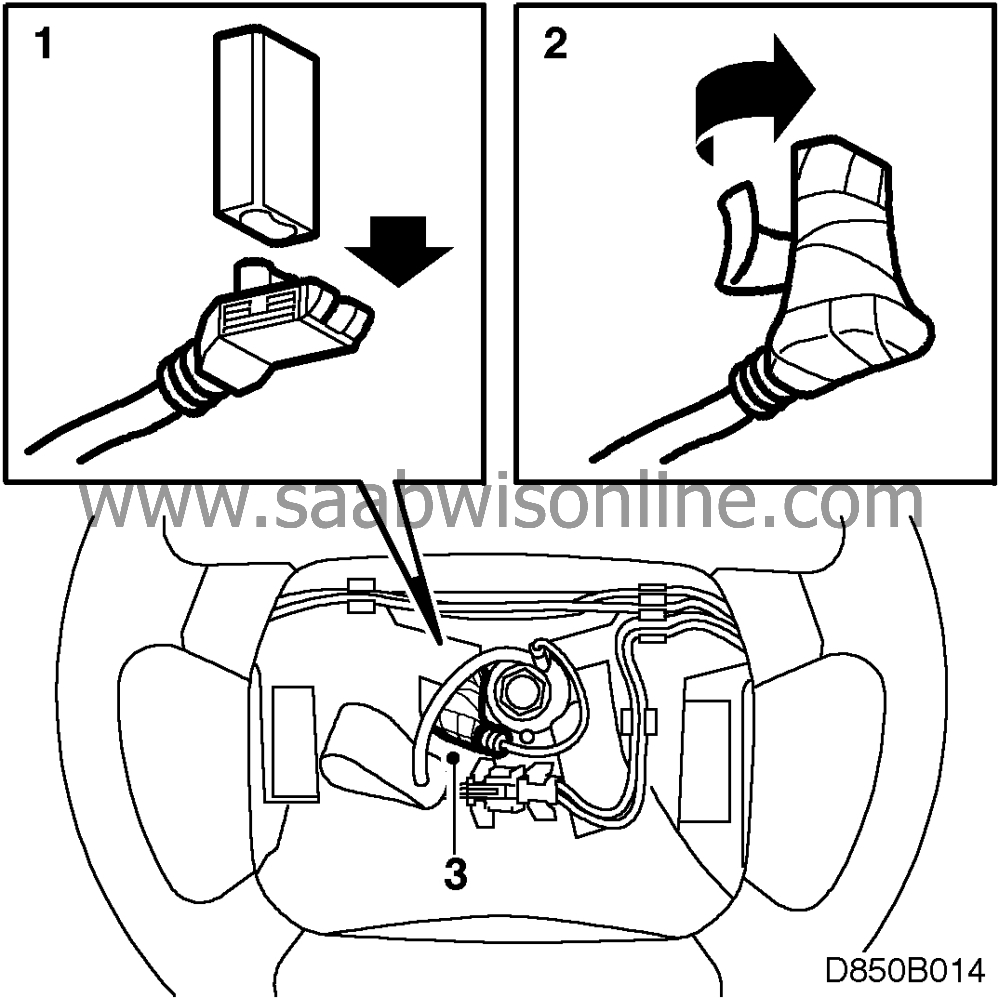
Fit resistor to the connector.
|
|
2.
|
Wind at least five turns of tape round the connector and resistor.
|
|
3.
|
Tuck the connector inside the steering wheel, towards the bottom.
|
|
4.
|
Affix label above the switch on the airbag module.
|
|
5.
|
Refit the airbag unit in the steering wheel and tighten the
screws.
 Warning
|
|
Make sure that nobody is inside the car before reconnecting the battery
lead.
|
|
|
|
|
|
|
|
6.
|
Reconnect the negative (-) battery lead.
|
|
7.
|
Connect the ISAT scan tool and delete any diagnostic trouble codes
(DTCs).
|
|
8.
|
Switch on the ignition and wait at least 10 seconds. Check that the SRS symbol
shows for 3 or 4 seconds and then goes out. Check that the SRS lamp is not indicating a fault
(lamp remains on if fault detected).
If a DTC is displayed, carry out the diagnosis procedure as specified in Service Manual
8:6 SRS (Airbag).
|
|
9.
|
Disconnect the ISAT scan tool.
|
|
10.
|
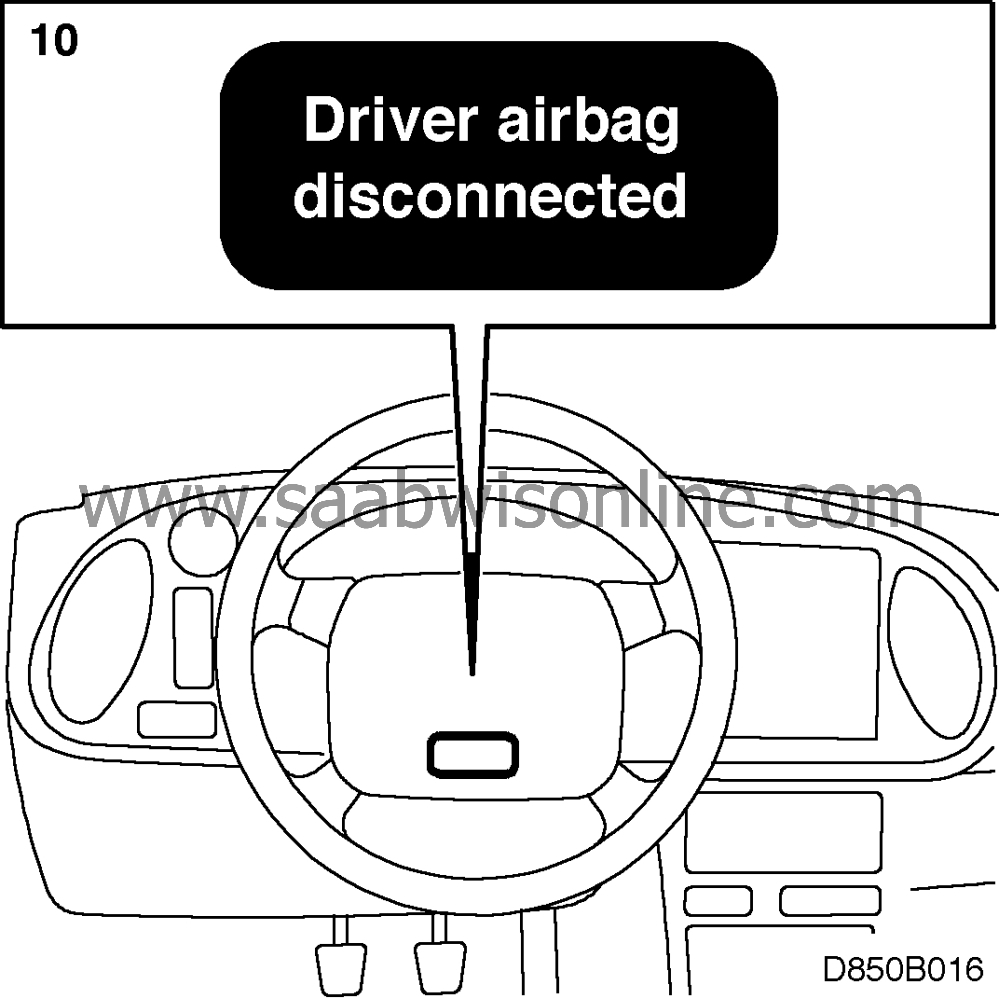
Affix label in a visible position on the steering wheel.
|
|
1.
|
Fit resistor to the connector.
|
|
2.
|
Wind at least five turns of tape round the connector and resistor.
|
|
3.
|
Place the connector behind the connector holder for the horn.
|
Note
|
|
The horn connector must not be rotated inside the holder.
|
|
|
4.
|
Affix label above the switch on the airbag module.

|
|
5.
|
Refit the airbag unit in the steering wheel and tighten the
screws.
 Warning
|
|
Make sure that nobody is inside the car before reconnecting the battery
lead.
|
|
|
|
|
|
|
|
6.
|
Reconnect the negative (-) battery lead.
|
|
7.
|
Connect the ISAT scan tool and delete any diagnostic trouble codes
(DTCs).
|
|
8.
|
Switch on the ignition and wait at least 10 seconds. Check that the SRS symbol
shows for 3 or 4 seconds and then goes out. Check that the SRS lamp is not indicating a fault
(lamp remains on if fault detected).
If a DTC is displayed, carry out the diagnosis procedure as specified in Service Manual
8:6 SRS (Airbag).
|
|
9.
|
Disconnect the ISAT scan tool.
|
|
10.
|
Affix label in a visible position on the steering wheel.

|
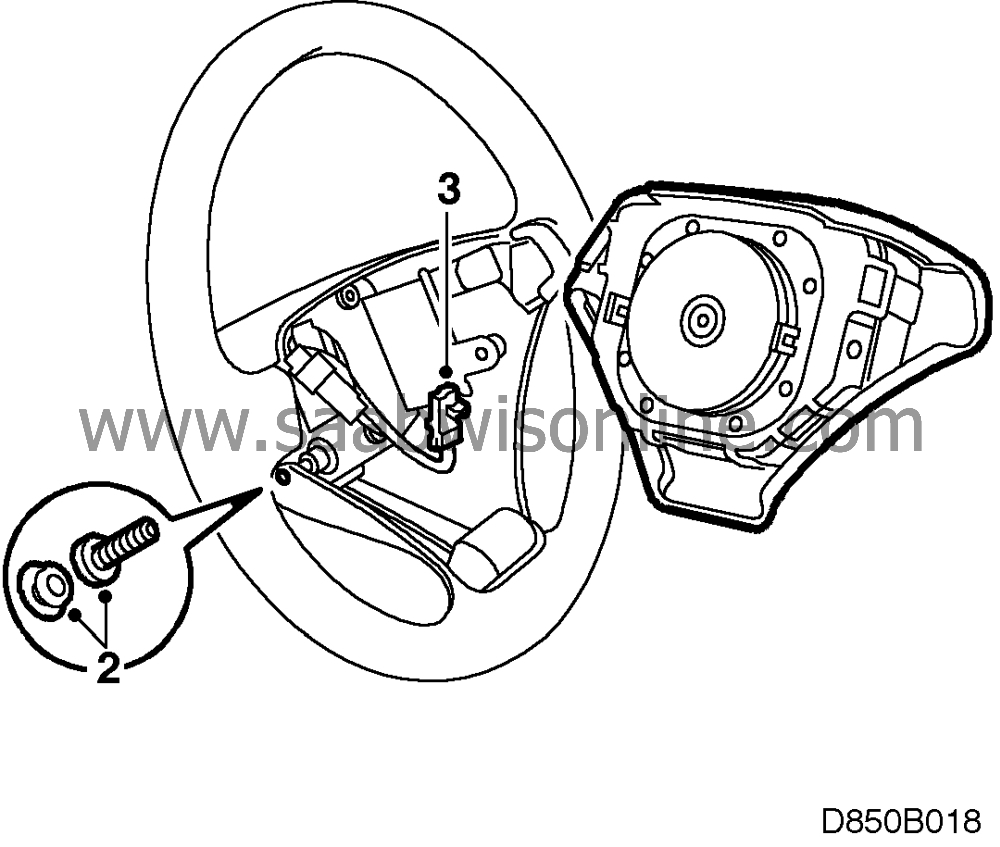
Make sure that the steering wheel is centered before starting work.
|
1.
|
Disconnect the negative (-) battery
lead.
|
|
2.
|
Undo the screws in the airbag unit.
|
|
3.
|
Remove the unit and unplug the connector.
|
|
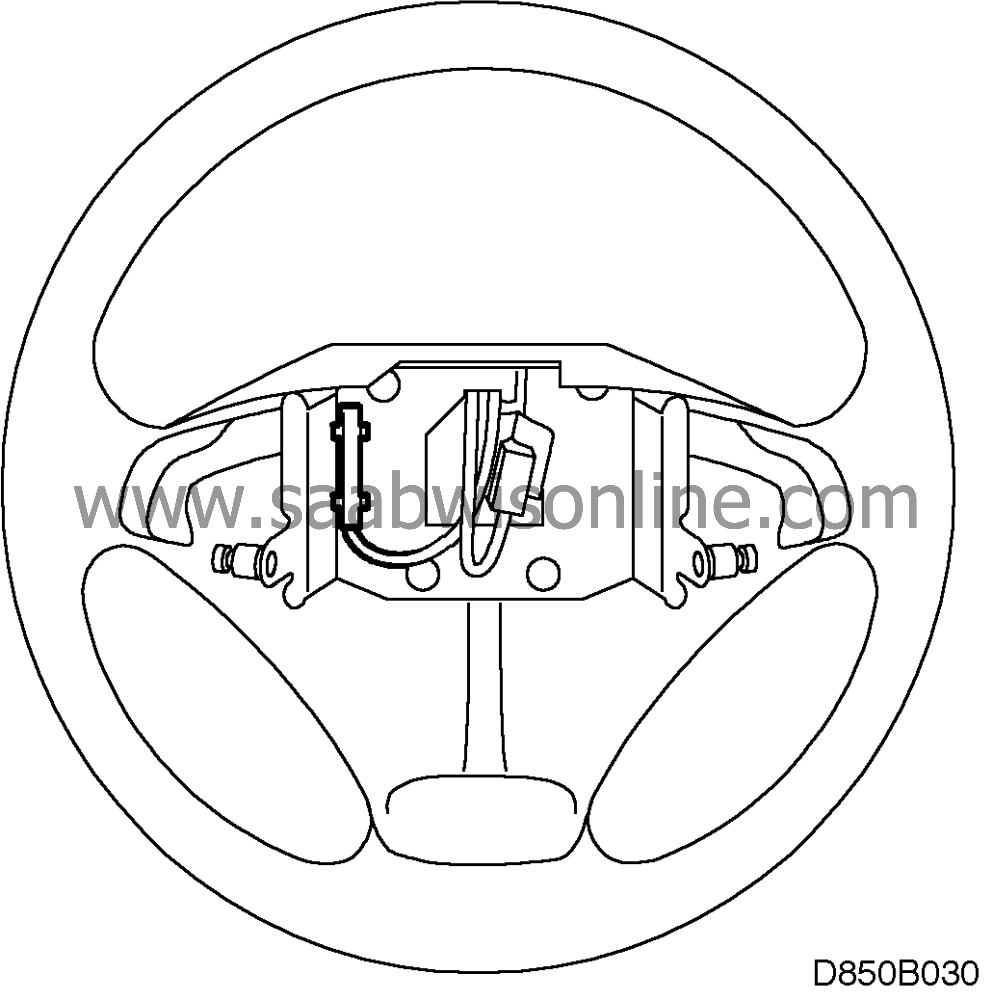
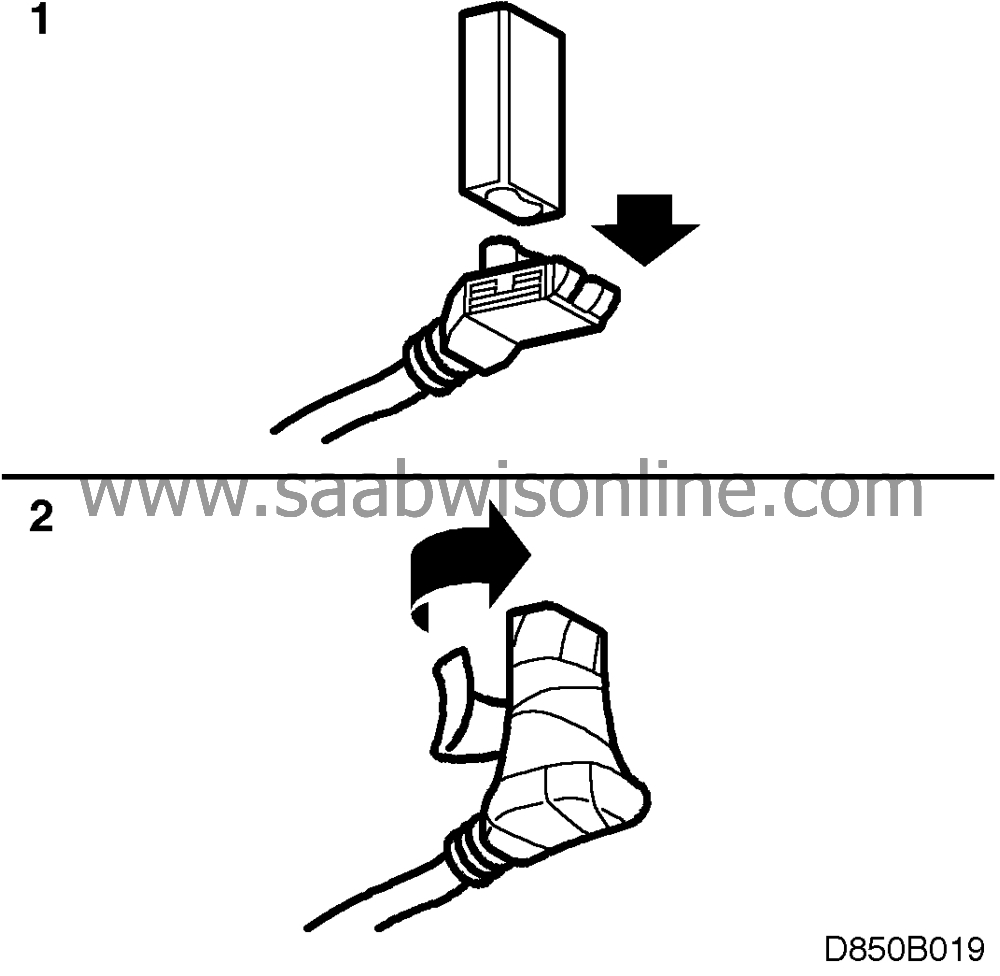
1.
|
Fit resistor to the connector.
|
|
2.
|
Wind at least three turns of tape round the connector and resistor.
|
|
3.
|
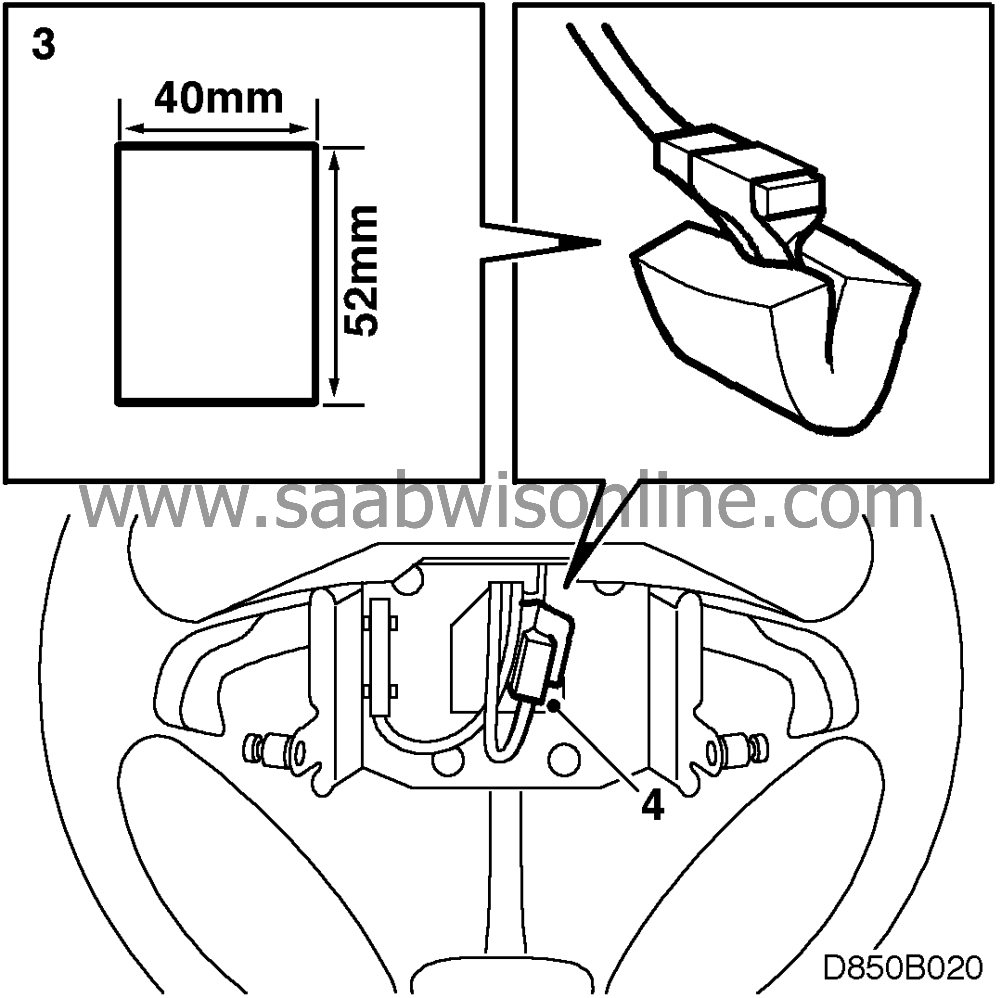
Cut the foam to size (40 x 52 mm) and tape it round the
connector.
|
|
4.
|
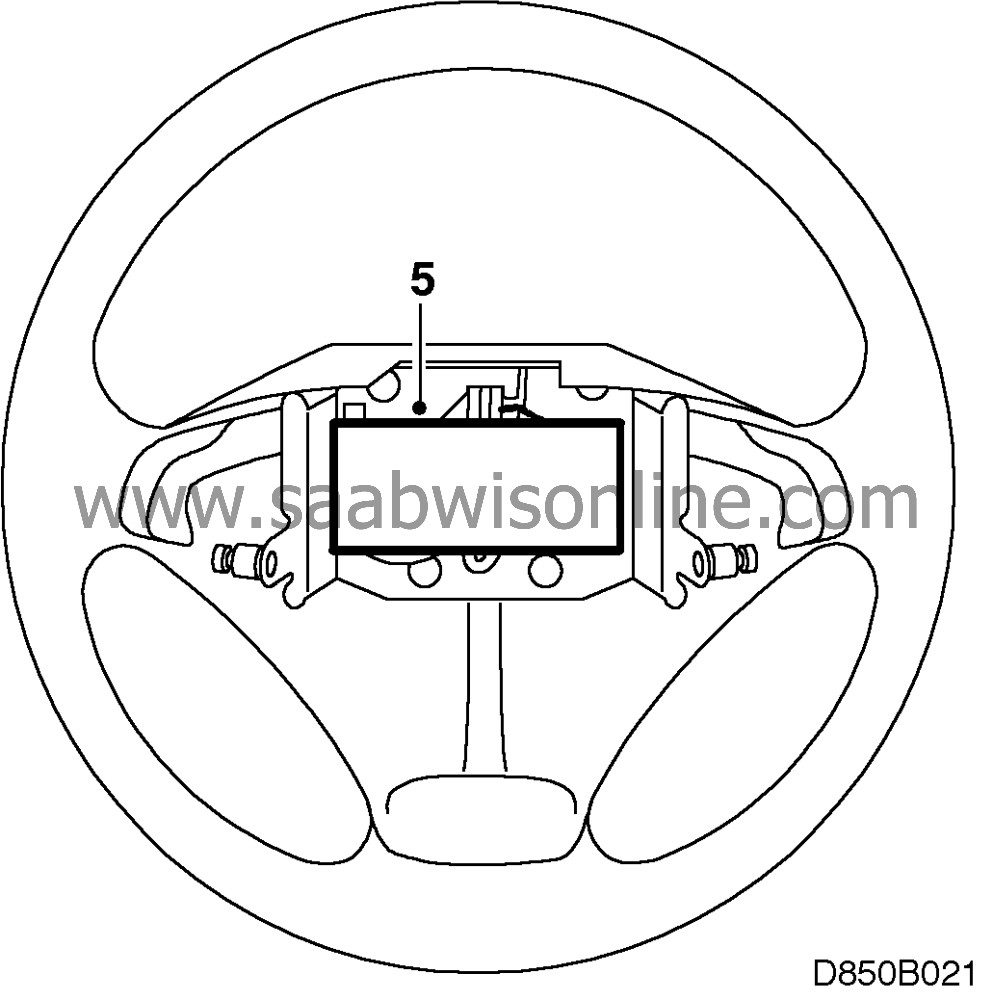
Place the connector inside the steering wheel as shown.
|
|
5.
|
Place the remaining piece of foam, protective tape uppermost, over the
connector. Do not remove the protective tape.
|
|
6.
|
Affix label above the switch on the airbag module.
|
|
7.
|
Refit the airbag unit in the steering wheel and tighten the
screws.
 Warning
|
|
Make sure that nobody is inside the car before reconnecting the battery
lead.
|
|
|
|
|
|
|
|
8.
|
Reconnect the negative (-) battery lead.
|
|
9.
|
Connect the ISAT scan tool and delete any diagnostic trouble codes
(DTCs).
|
|
10.
|
Switch on the ignition and wait at least 10 seconds. Check that the SRS symbol
shows for 3 or 4 seconds and then goes out. Check that the SRS lamp is not indicating a fault
(lamp remains on if fault detected).
If a DTC is displayed, carry out the diagnosis procedure as specified in Service Manual
8:6 SRS (Airbag).
|
|
11.
|
Disconnect the ISAT scan tool.
|
|
12.
|
Affix label in a visible position on the steering wheel.

|
|
1.
|
Fit resistor to the connector.

|
|
2.
|
Wind at least three turns of tape round the connector and resistor.
|
|
3.
|
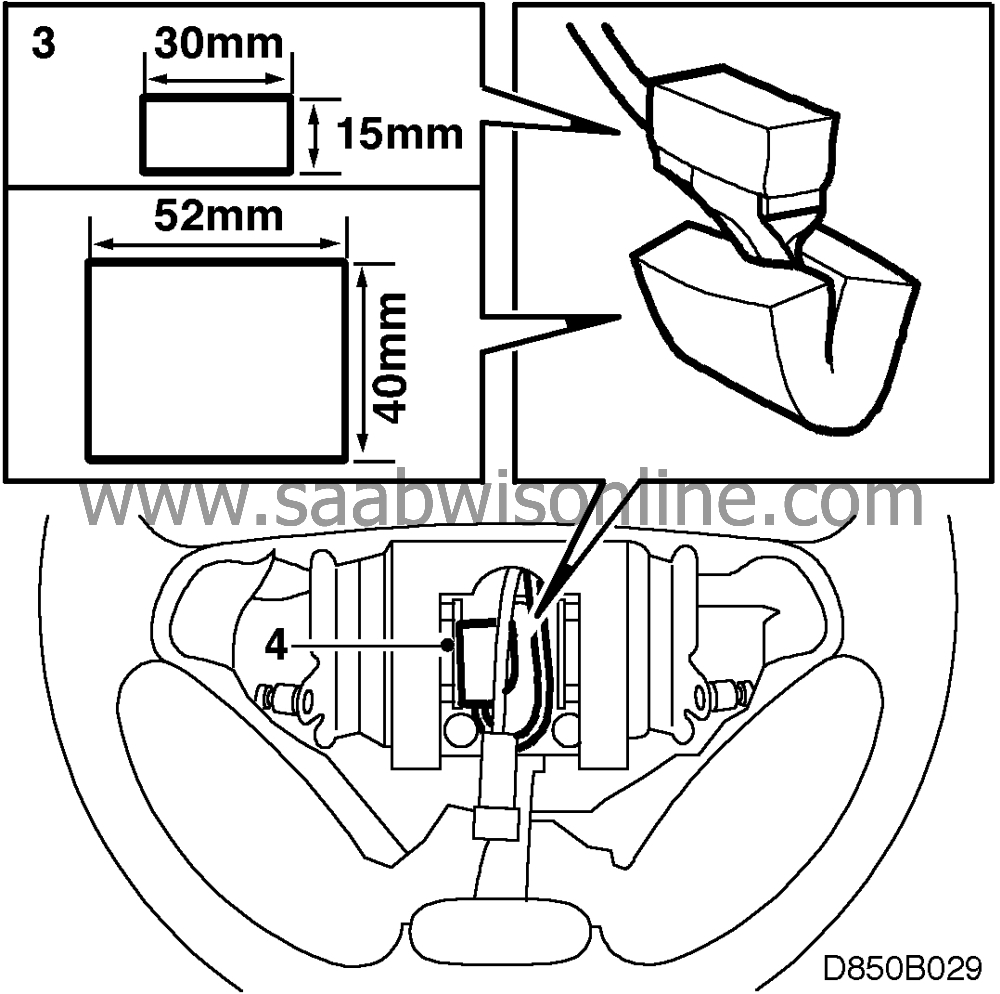
Cut the foam to size (40 x 52 mm) and tape it round the connector. Cut another
piece of foam to size (15 x 30 mm) and tape it onto the top of the connector.

|
|
4.
|
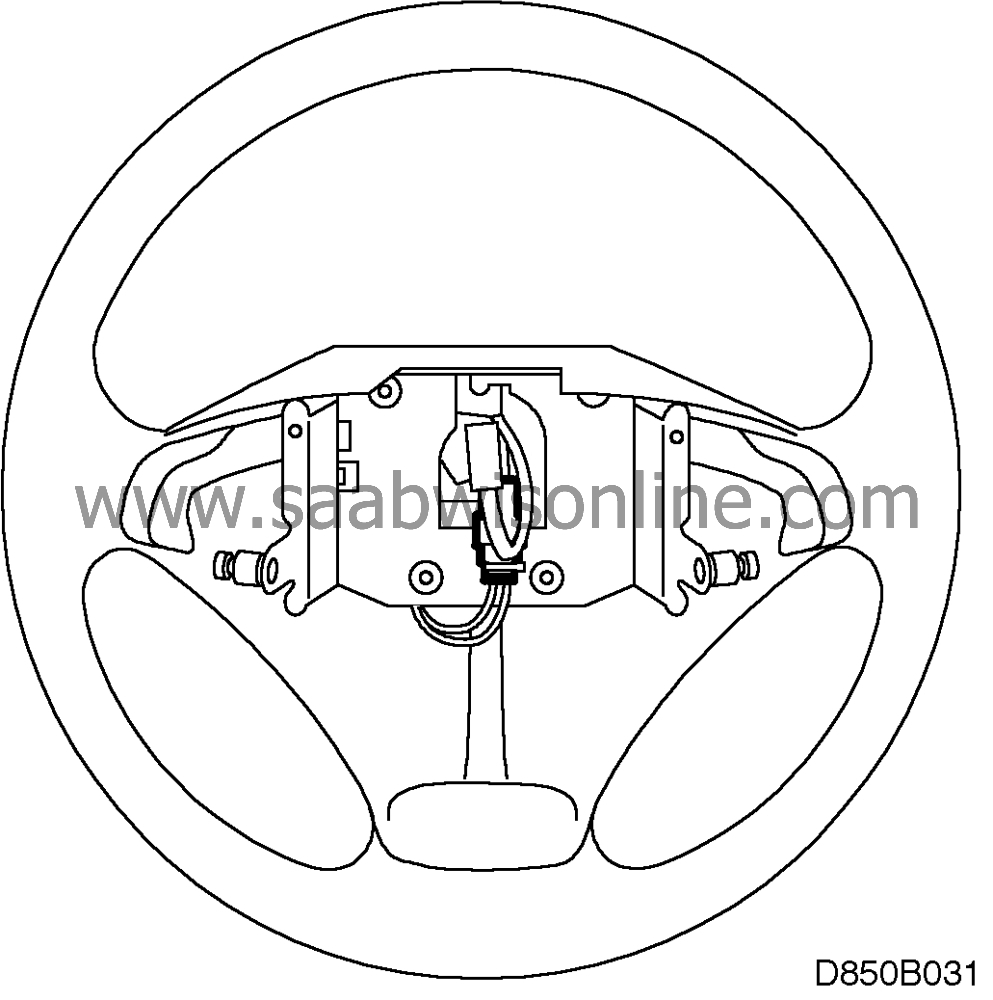
Place the connector inside the steering wheel and tuck it down as
shown.
|
|
5.
|
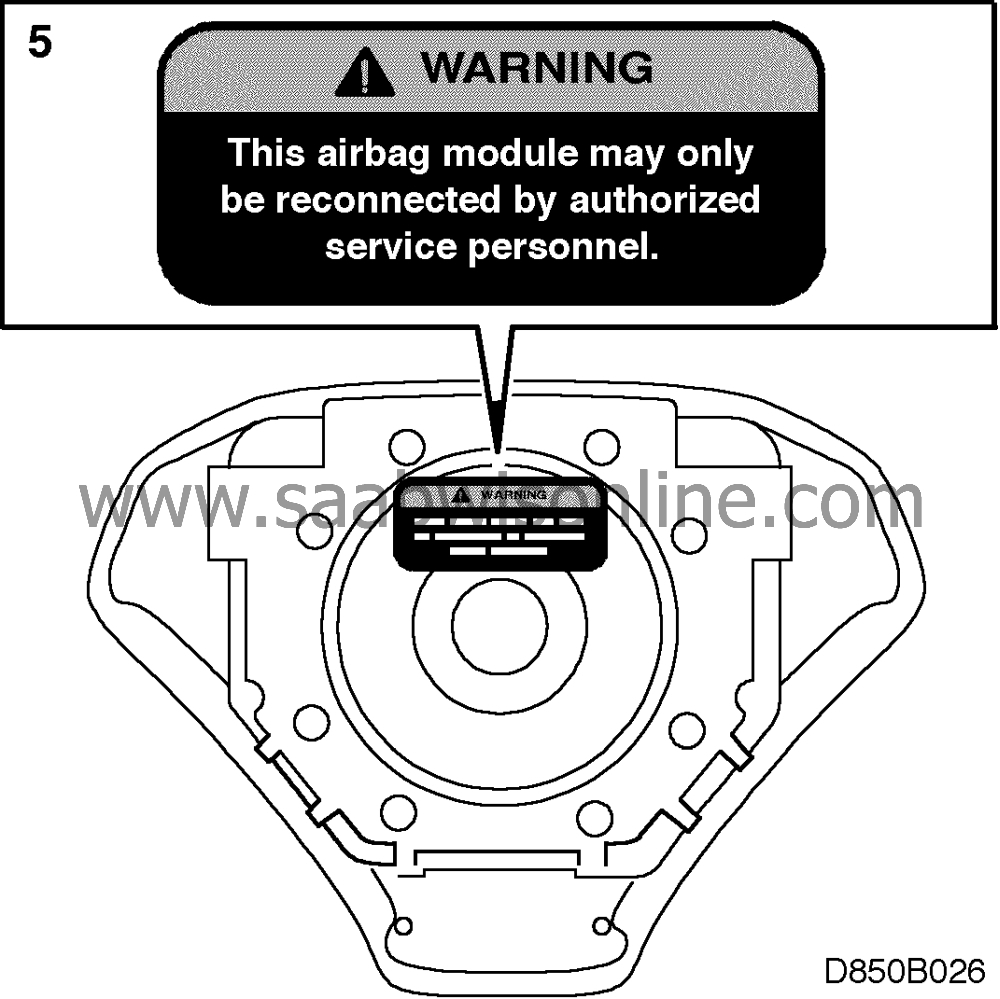
Affix label above the switch on the airbag module.
|
|
6.
|
Refit the airbag unit in the steering wheel and tighten the
screws.
 Warning
|
|
Make sure that nobody is inside the car before reconnecting the battery
lead.
|
|
|
|
|
|
|
|
7.
|
Reconnect the negative (-) battery lead.
|
|
8.
|
Connect the ISAT scan tool and delete any diagnostic trouble codes
(DTCs).
|
|
9.
|
Switch on the ignition and wait at least 10 seconds. Check that the SRS symbol
shows for 3 or 4 seconds and then goes out. Check that the SRS lamp is not indicating a fault
(lamp remains on if fault detected).
If a DTC is displayed, carry out the diagnosis procedure as specified in Service Manual
8:6 SRS (Airbag).
|
|
10.
|
Disconnect the ISAT scan tool.
|
|
11.
|
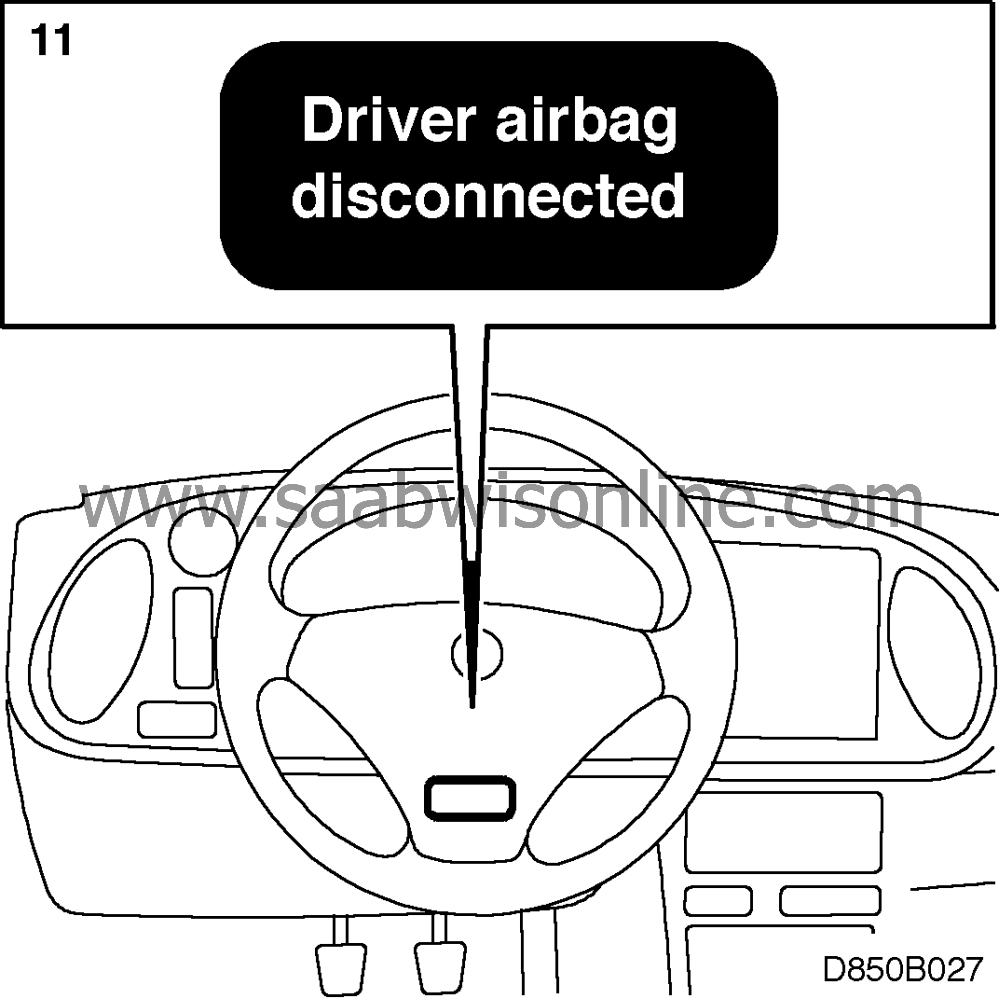
Affix label in a visible position on the steering wheel.
|

|
1.
|
Fit resistor to the connector.
|
|
2.
|
Wind at least three turns of tape round the connector and resistor.
|
|
3.
|
Cut the foam to size (40 x 52 mm) and tape it round the connector. Cut another
piece of foam to size (15 x 30 mm) and tape it onto the top of the connector.
|
|
4.
|
Place the connector inside the steering wheel and tuck it down as
shown.
|
|
5.
|
Affix label above the switch on the airbag module.

|
|
6.
|
Refit the airbag unit in the steering wheel and tighten the
screws.
 Warning
|
|
Make sure that nobody is inside the car before reconnecting the battery
lead.
|
|
|
|
|
|
|
|
7.
|
Reconnect the negative (-) battery lead.
|
|
8.
|
Connect the ISAT scan tool and delete any diagnostic trouble codes
(DTCs).
|
|
9.
|
Switch on the ignition and wait at least 10 seconds. Check that the SRS symbol
shows for 3 or 4 seconds and then goes out. Check that the SRS lamp is not indicating a fault
(lamp remains on if fault detected).
If a DTC is displayed, carry out the diagnosis procedure as specified in Service Manual
8:6 SRS (Airbag).
|
|
10.
|
Disconnect the ISAT scan tool.
|
|
11.
|
Affix label in a visible position on the steering wheel.

|
|
1.
|
Disconnect the negative (-) battery
lead.
|
|
2.
|
Undo the screws in the airbag unit.
|
|
3.
|
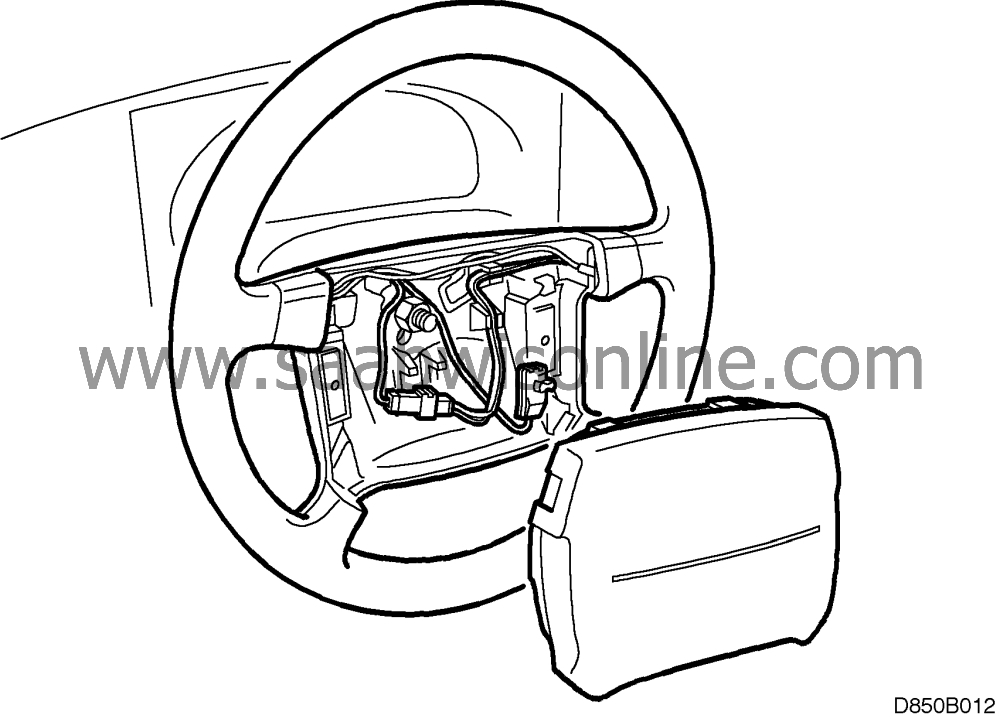
Remove the airbag unit.
|
|
4.
|
Remove the tape, together with any pieces of foam, from the connector and
remove the resistor.
|
|
5.
|
Remove the warning label from the back of the airbag control
module.
|
|
6.
|
Plug in the connector to the airbag module.
|
|
7.
|
Refit the airbag unit in the steering wheel and tighten the screws.
|
|
8.
|
Remove the label from the steering wheel and clean off all traces of adhesive.
 Warning
|
|
Make sure that nobody is inside the car before reconnecting the battery
lead.
|
|
|
|
|
|
|
|
9.
|
Reconnect the negative (-) battery lead.
|
|
10.
|
Connect the ISAT scan tool and delete any diagnostic trouble codes
(DTCs).
|
|
11.
|
Switch on the ignition and wait at least 10 seconds. Check that the SRS symbol
shows for 3 or 4 seconds and then goes out. Check that the SRS lamp is not indicating a fault
(lamp remains on if fault detected).
|
|
12.
|
If a DTC is displayed, carry out the diagnosis procedure as specified in Service
Manual 8:6 SRS (Airbag).
|
|
13.
|
Disconnect the ISAT scan
tool.
|


 Warning

