B pillar, five-door body
| B pillar, five-door body |
The sill is reinforced. This reinforcement must not be damaged when the B pillar is cut.
| Important | ||
|
Body reinforcement components should be cut and joined only if they are specifically covered in the description of methods. Unless otherwise stated, a damaged reinforcement component must be discarded and a new one fitted in its place. This is mandatory. |
||
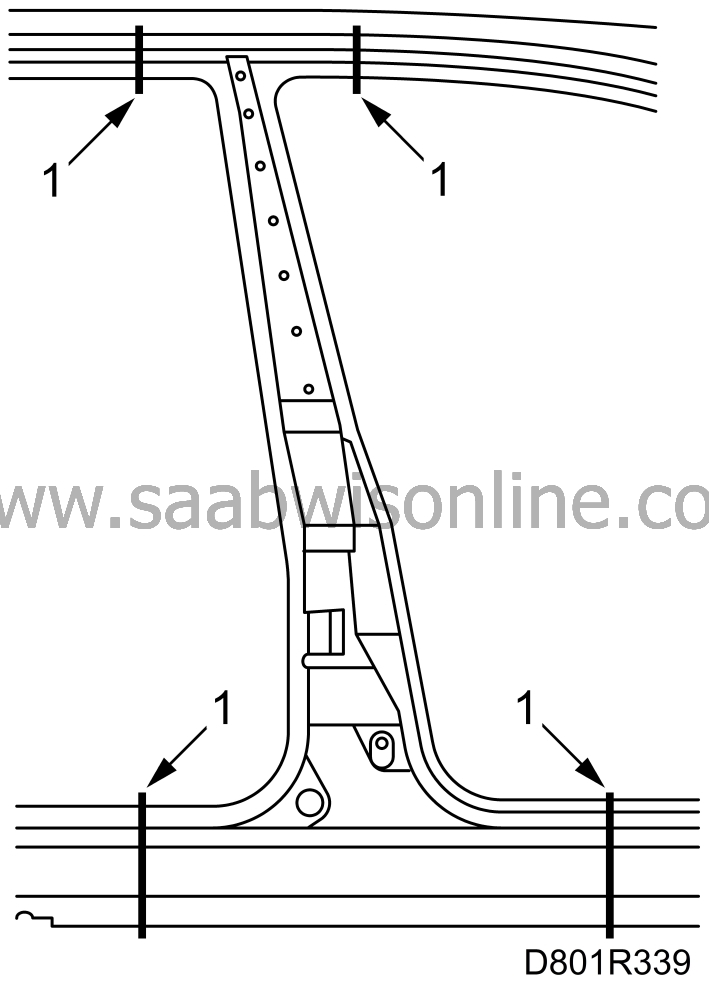
| 1. |
Cut away the B pillar. B pillar joints, see
 Joints. Be careful that the underlying metalwork is not damaged.
|
|
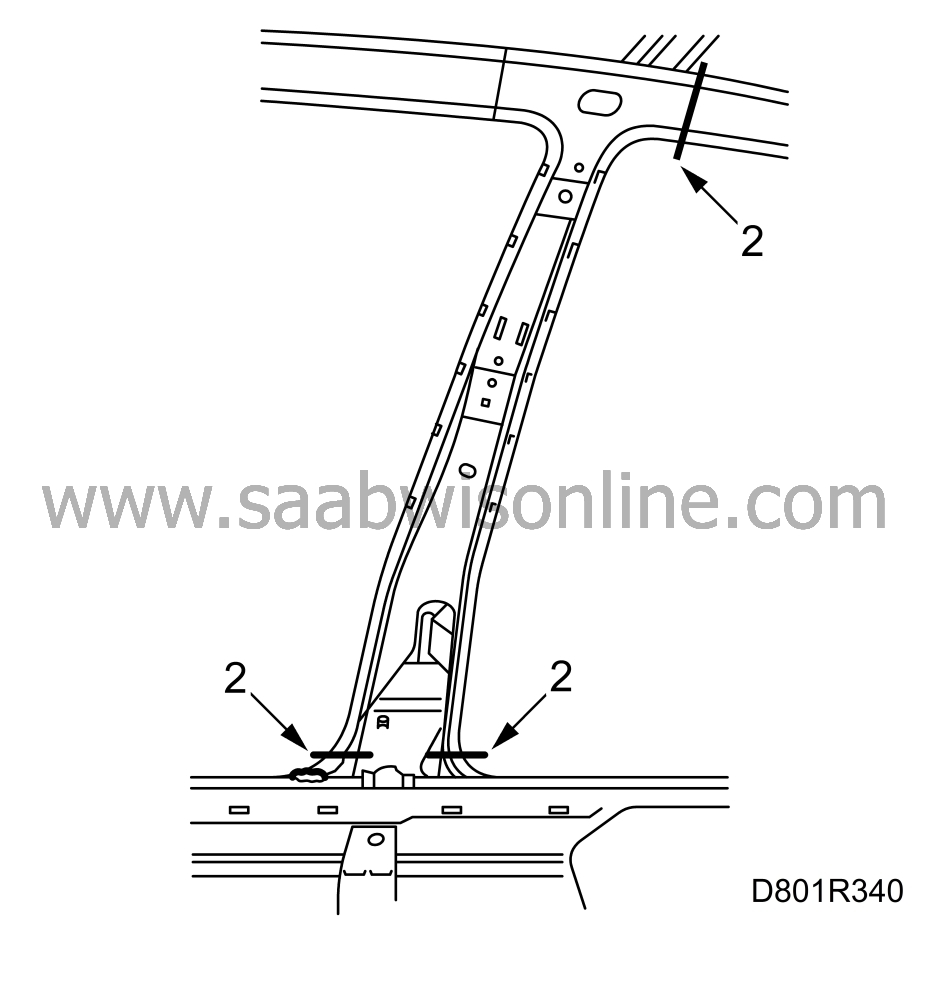
| 2. |
Cut the inner part of the B pillar above the seam welds at the lower end.
|
|
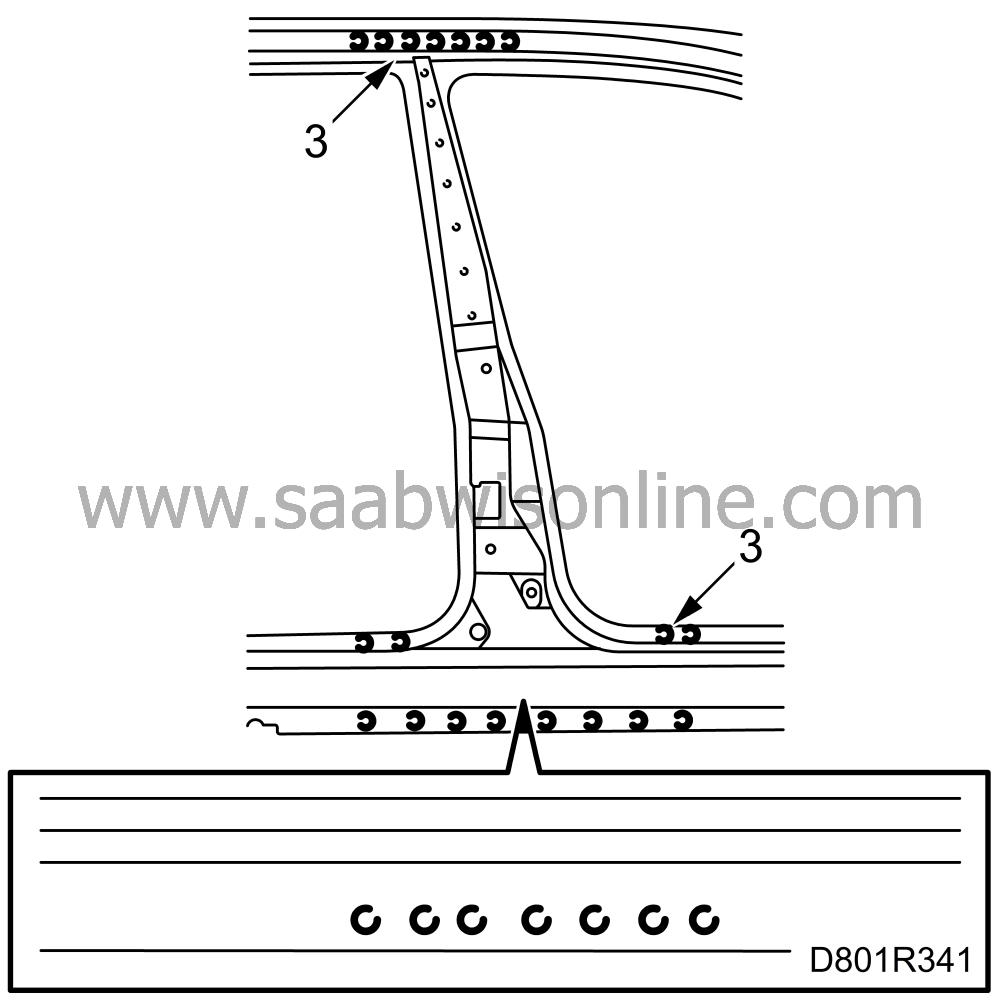
| 3. |
Drill out the spot welds.
|
|
| 4. |
Drill out the spot welds in the inside of the B pillar at the upper end and remove the B pillar.

|
|
| 5. |
Realign any deformed metalwork.
|
|
| 6. |
Use a grinder to clean the areas on the new reinforcement and body that are to be welded.
|
|
| 7. |
Position the reinforcement component and fix it with a few welding clamps.
|
||||||||||
| 8. |
Cut the B-pillar's outer panel roughly to size so that it will overlap the joint by about three centimetres.
|
|
| 9. |
Drill holes for plug welding in the outer panel.

|
|
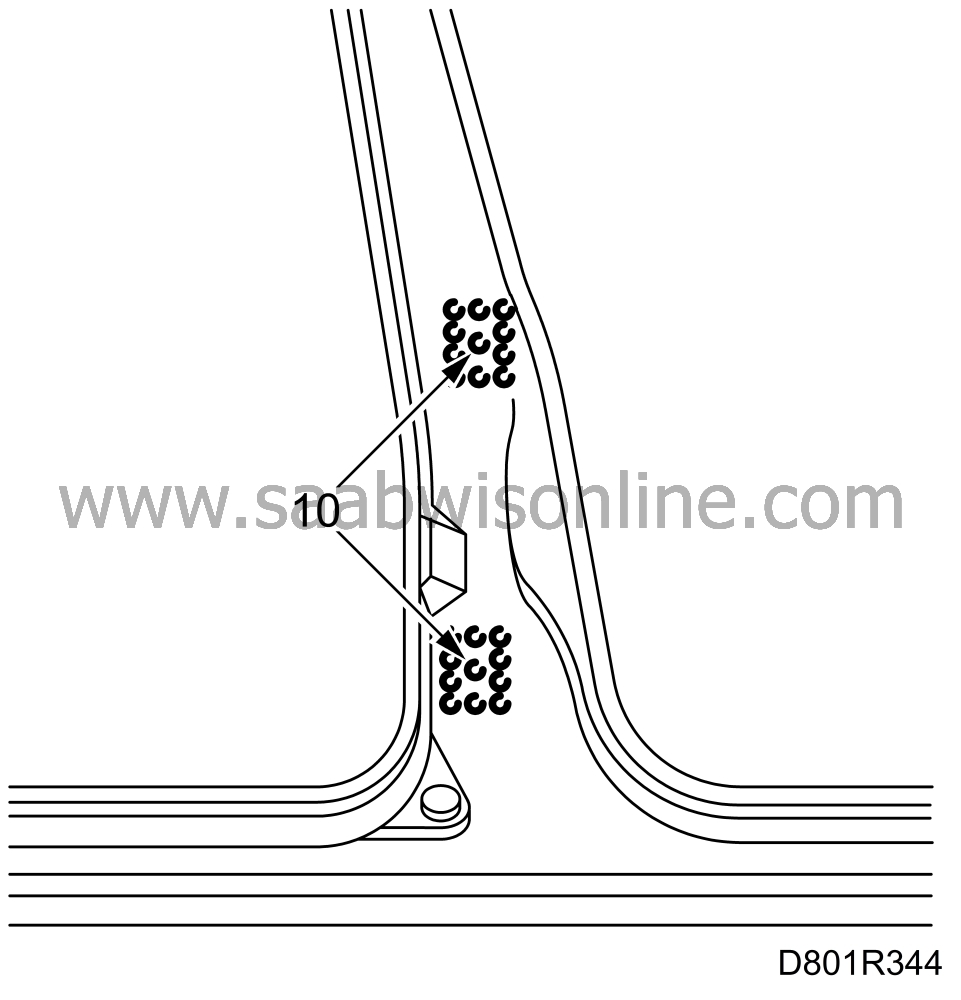
| 10. |
Drill holes for the hinge mountings at the pre-stamped punch marks in the outer panel.
|
|
| 11. |
Drill holes for the hinges as shown.
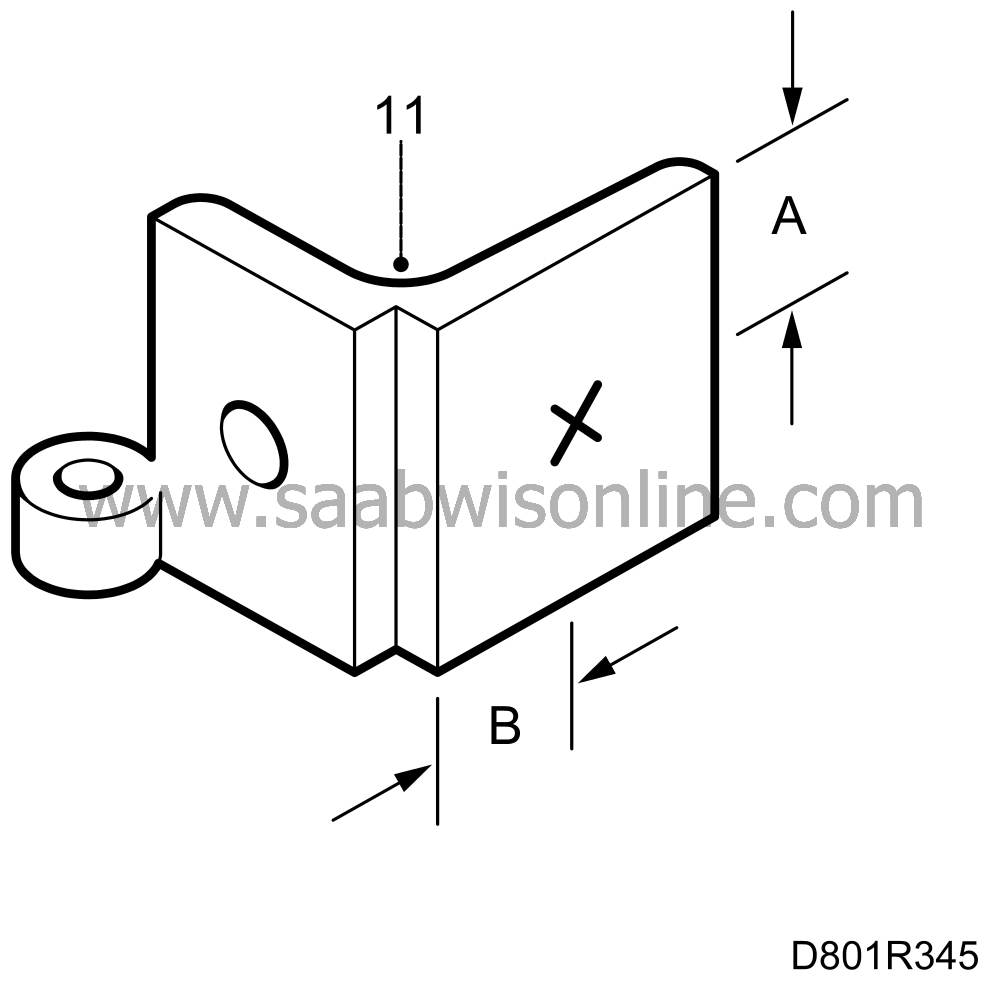
Upper hinges: A = 24.1 mm, B = 30.2 mm Lower hinges: A = 25.1 mm, B = 30.2 mm |
|
| 12. |
Screw the hinges to the outer panel with nuts and bolts. Scratch round the hinge to mark its position on the outer panel.
|
|
| 13. |
Remove the hinges and drill holes for plug welding in the hinge markings. The outer panel is to be welded to the reinforcement so that the hinges can subsequently be welded to both the outer panel and the reinforcement.

|
|
| 14. |
Use a grinder to clean the areas on the outer panel and body that are to be welded.
|
|
| 15. |
Position the outer panel and fix it with a few welding clamps.
|
|
| 16. |
Roughly cut the B-pillar's new inner part.
|
|
| 17. |
Position the spare part and fix it with a few welding clamps. Cut through the rear edge of the spare part and roof member simultaneously so that the joint can be welded edge-to-edge.
|
|
| 18. |
Cut through the outer panels of the B pillar and door frame simultaneously so that the joints can be welded edge-to-edge.
|
|
| 19. |
Mark the positions where holes for plug welding are to be drilled in the inner part at the top.
|
|
| 20. |
Remove the spare part and drill holes for plug welding.
|
|
| 21. |
Use a grinder to clean the areas on the spare part and the body that are to be welded.
|
|
| 22. |
Apply welding primer to the surfaces which are to be spot and plug welded. Use Teroson Zinkspray.
|
|
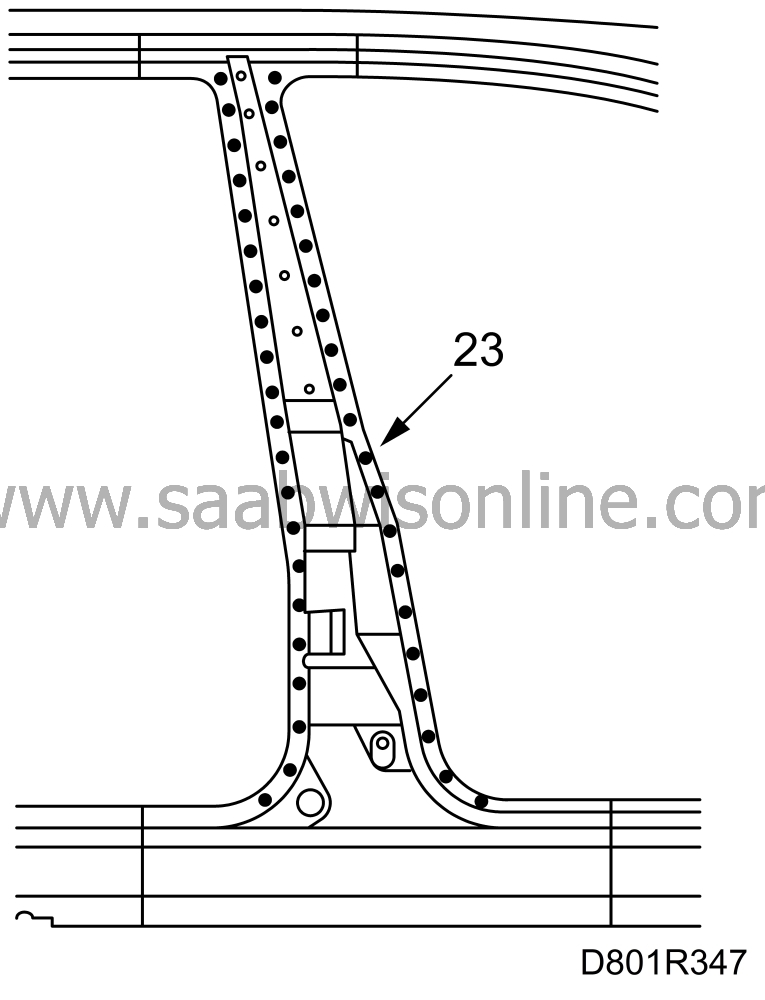
| 23. |
Position the spare part and fix it with a few welding clamps. Spot weld the inner part to the outer part and the reinforcement component.
|
|
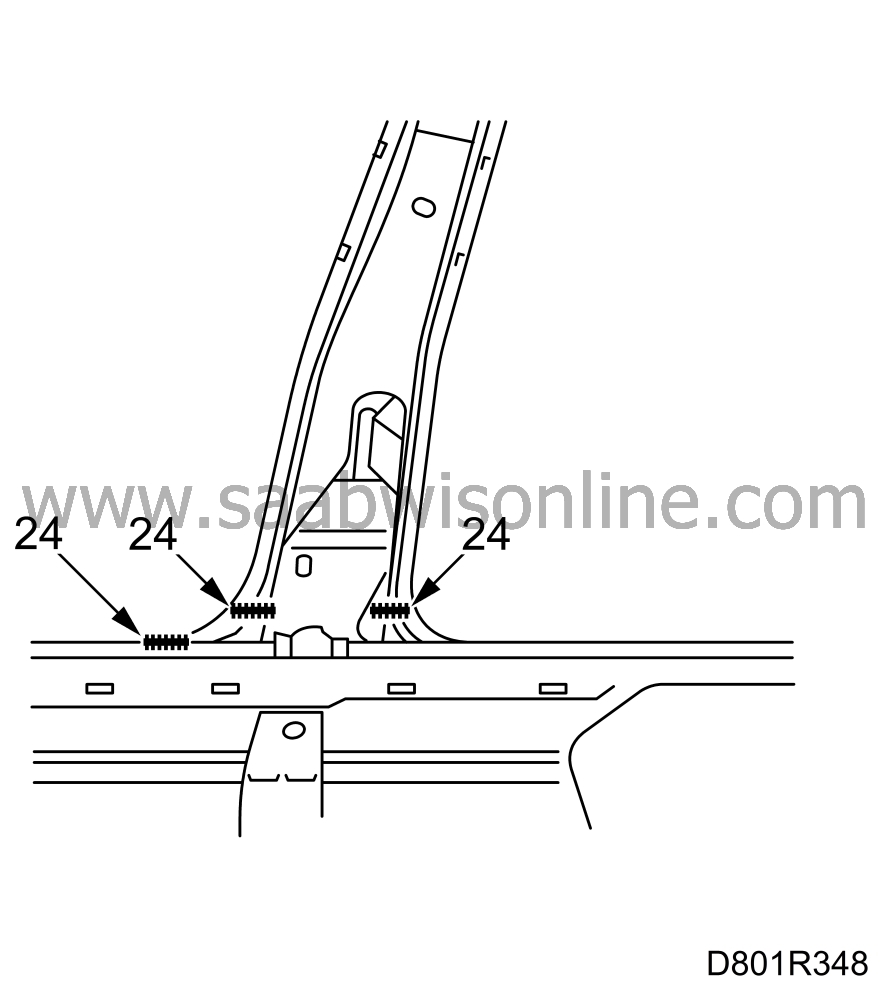
| 24. |
Weld the joint at the lower end of the inner part.
|
|
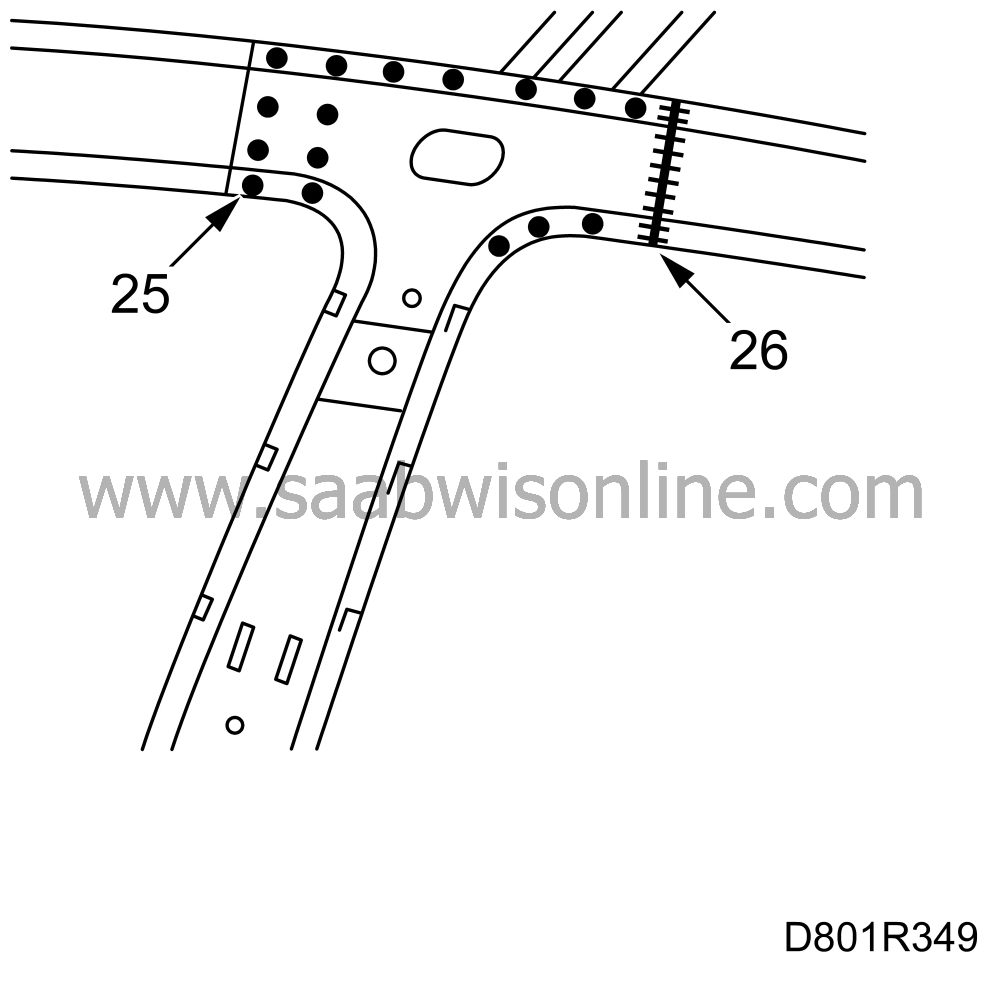
| 25. |
Plug weld the upper parts of the inner part and reinforcement to the roof member.
|
|
| 26. |
Weld the joint between the inner part and the roof member.
|
|
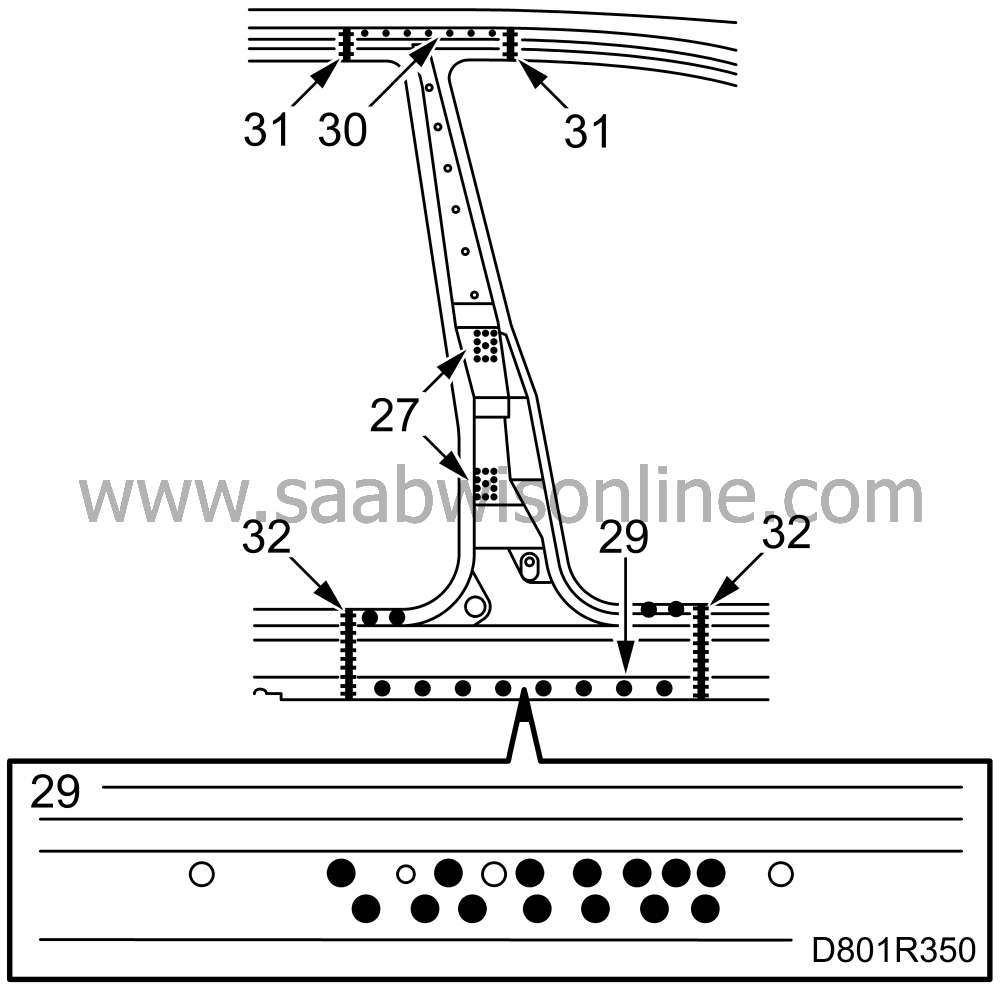
| 27. |
Plug weld the outer panel to the reinforcement.
|
|
| 28. |
Grind the welds clean.
|
|
| 29. |
Weld the lower end of the outer panel.
|
|
| 30. |
Spot weld the upper end of the B pillar in place.
|
|
| 31. |
Weld the roof member joints.
|
|
| 32. |
Weld the sill joints.
|
|
| 33. |
Apply welding primer to the surfaces which have been ground clean. Use Teroson Zinkspray.
|
|
| 34. |
Screw the hinges in place with nuts and bolts.
|
|
| 35. |
Hang the door on and check its fit. Adjust as necessary and then fix the hinges with a couple of tack welds.
|
|
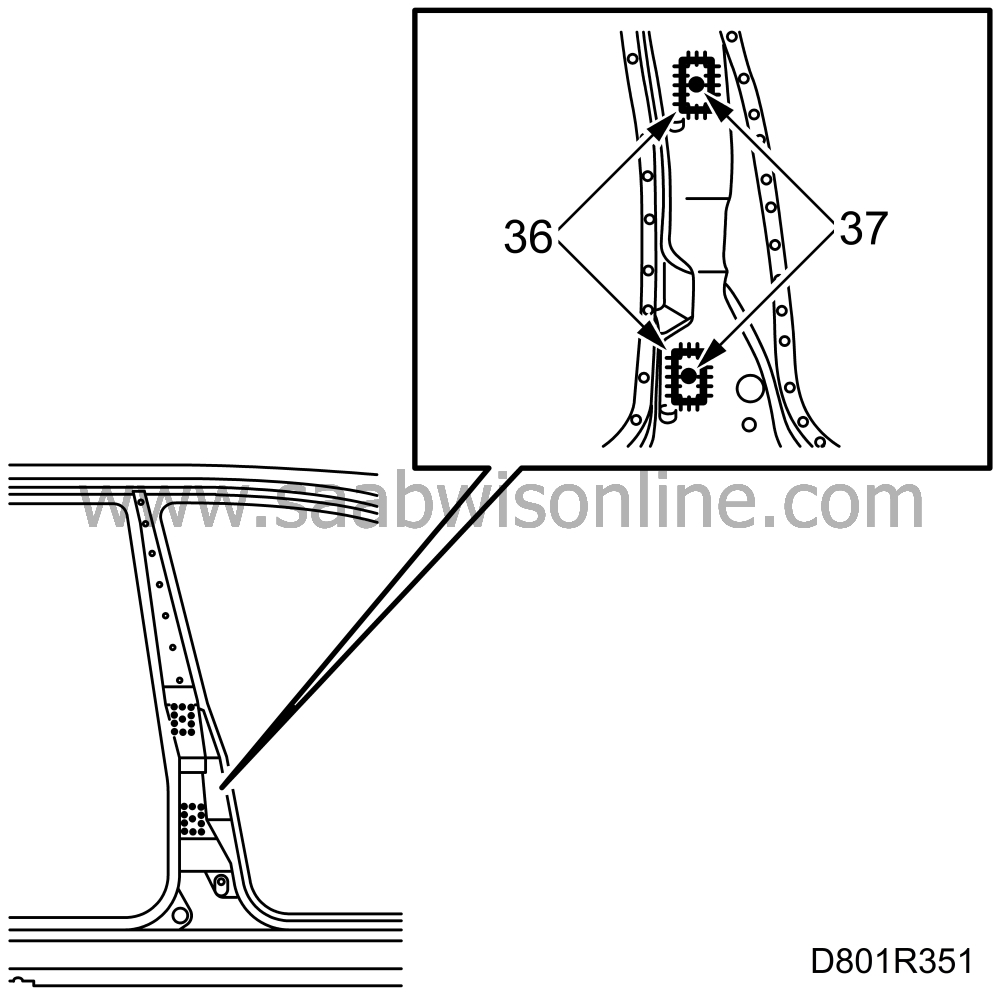
| 36. |
Weld the hinges in place.
|
|
| 37. |
Remove the nuts and bolts and weld up the holes in the hinges.
|
|
| 38. |
Grind the welds clean.
|
|
| 39. |
Wash off surplus welding primer. Welding primer makes for poorer adhesion of paint, filler and sealant.
|
|
| 40. |
Apply primer to all surfaces that have been ground clean. Use Standox 1K Füllprimer.
|
|
| 41. |
Seal joints and metal folds with putty. Use Terostat 1K-PUR.
|
|
| 42. |
Apply anti-corrosion agent to the lower end of the B pillar on the inside after painting. Use Terotex HV 400 or Mercasol 1.
|
|
This project is supported by memberships and donations. If you use this site, please consider Joining SCNA and/or making a donation.
Our Friends
