Windscreen member (conv.)
|
|
Windscreen member (conv.)
|
|
1.
|
Mount the car in an alignment bench with measuring fixture and cross-measure as necessary.
|
|
2.
|
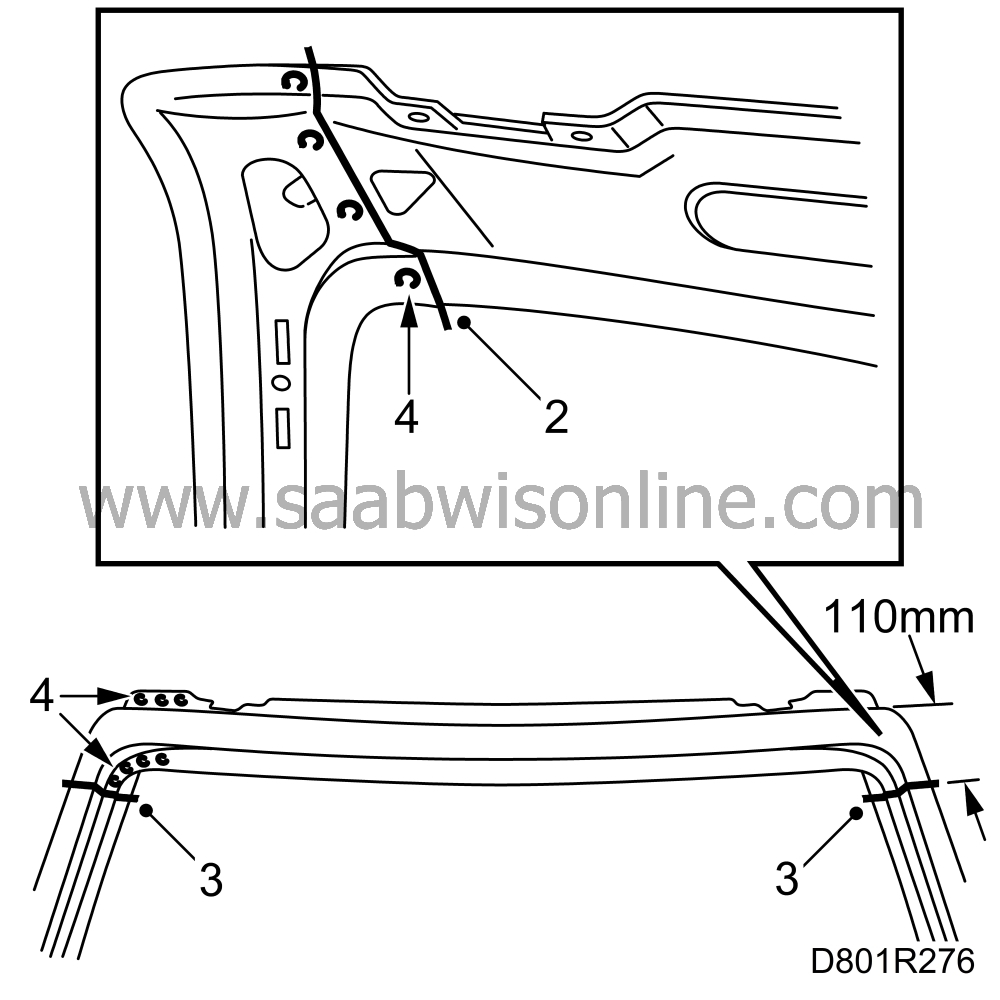
Cut the windscreen member along the edge of the inner section of the A pillar.

|
|
3.
|
Cut the outer panel of the windscreen member 110 mm from the top edge.
|
|
4.
|
Drill out the spot welds securing the remaining sections of the windscreen member.
|
|
5.
|
Knock away the remaining sections and align any deformed metal.
|
|
6.
|
Grind the areas to be welded on the inner and outer panels of the new windscreen member and on the body.
|
|
7.
|
Apply welding primer to the surfaces which are to be spot welded. Use Teroson Zinkspray.
|
|
8.
|
Put the new inner and outer panels of the windscreen member in place and secure them with some welding clamps. Measure out the exact position with the measuring fixture.
|
|
9.
|
Cut through the outer panels of the windscreen member and the A pillar at the same time so that the joints can be butt welded.
|
|
10.
|
Tack on the outer panel of the windscreen member with a couple of welds on the joints.
|
|
11.
|
Put the windscreen and doors in place and check the fit. The door windows must be raised.
|
|
12.
|
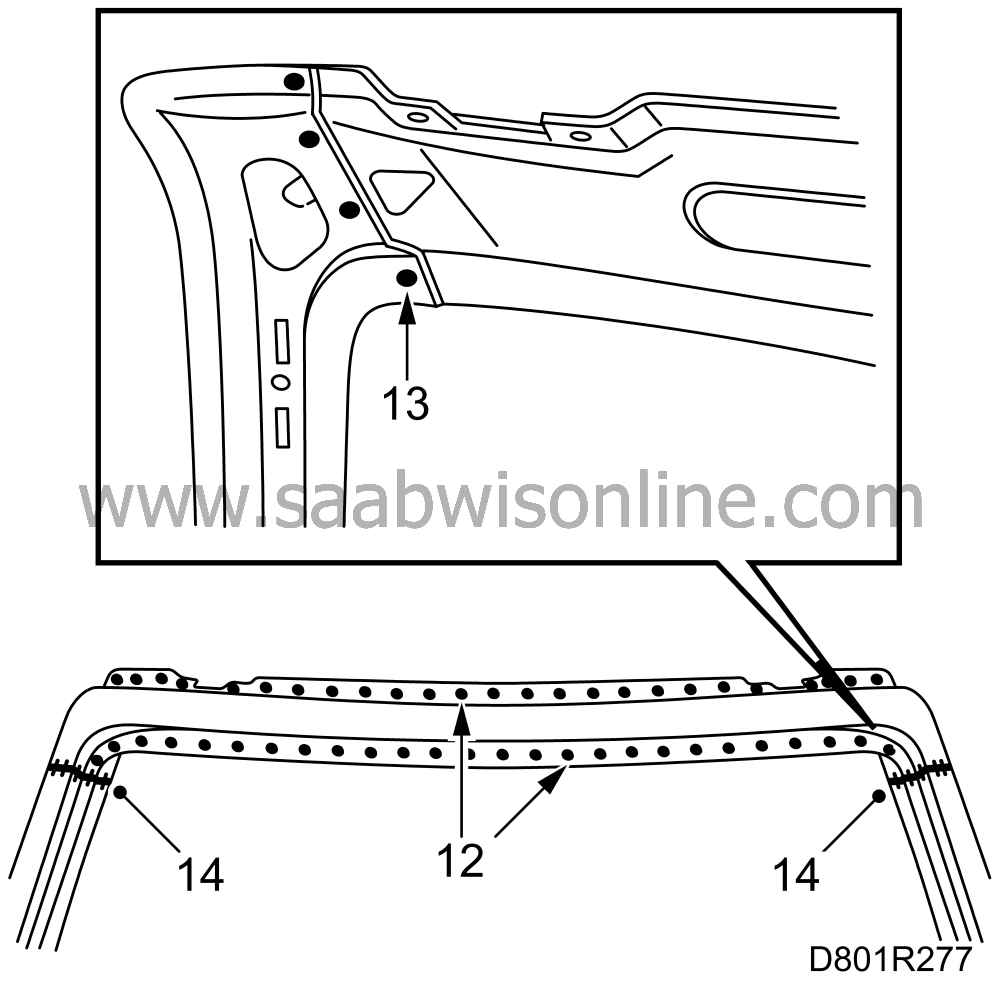
Spot weld the outer and inner sections of the windscreen member.

|
|
13.
|
Plug weld the inner section of the A pillar to the windscreen member.
|
|
15.
|
Grind the welds clean.
|
|
16.
|
Wash off surplus welding primer. Welding primer makes for poorer adhesion of paint, filler and sealant.
|
|
17.
|
Apply tin filler to the joints.
|
|
18.
|
Apply primer to all bare metal surfaces. Use Standox 1K Füllprimer.
|
|
19.
|
Seal joints and metal folds with putty. Use Terostat 1K-PUR.
|
|
20.
|
Apply anti-corrosion agent to internal surfaces after painting. Use Terotex HV 400.
|


