Electronic anti-frost thermostat
|
SERVICE INFORMATION
|
|
Bulletin Nbr:
|
870-1688
|
|
Date:
...........
|
OKTOBER 1996
|
|
Market:
|
ALL
|
|
|
Electronic anti-frost thermostat
|
All Saab 900.
To ensure a safer and better function of the anti-frost thermostat an electronic anti-frost thermostat was introduced starting with VIN T2037750 and convertible T7010027. Follow the description below for fitting into cars with VINs before those stated above.
46 35 231 Electronic anti-frost thermostat
46 35 785 Adapter wiring
47 58 439 Seal
|
2.
|
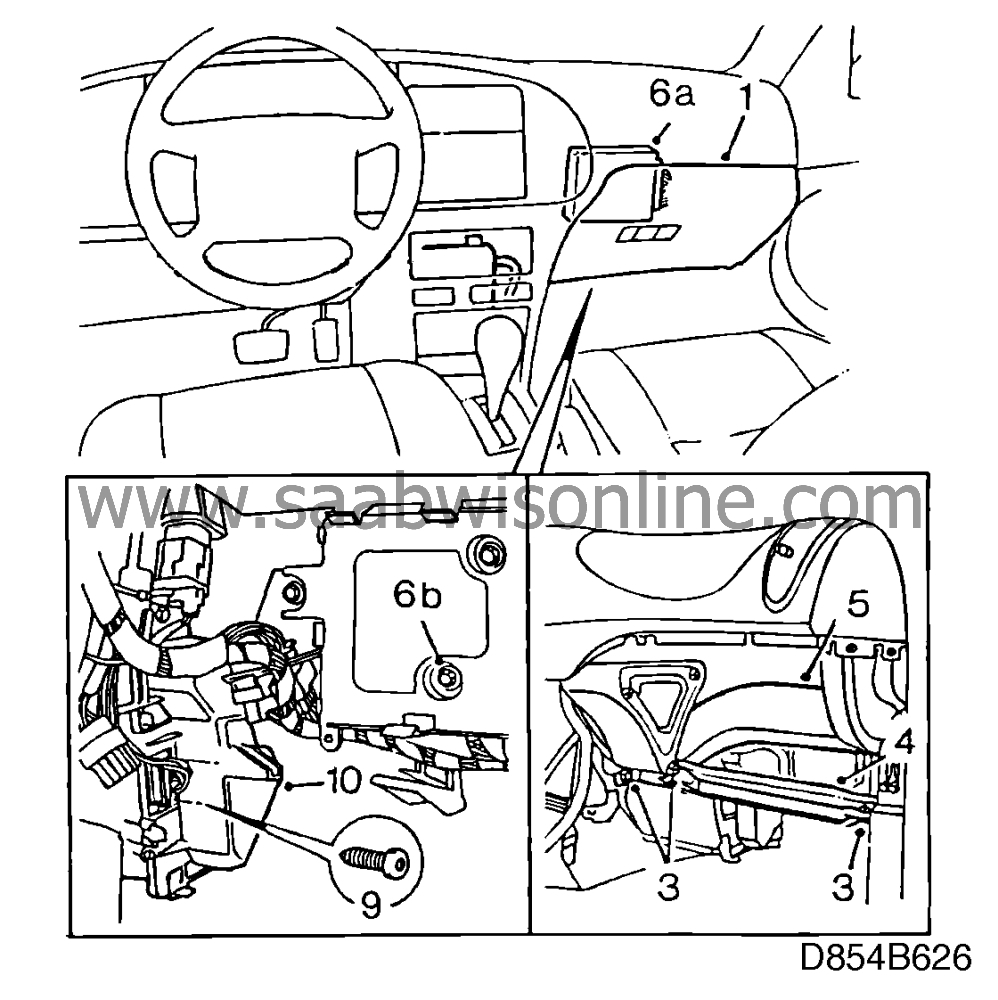
Remove the centre console's side panel.
|
|
3.
|
Cars with an airbag on the passenger's side:
Remove the knee guard.
|
|
4.
|
Remove the air duct on the floor.
|
|
5.
|
Remove the air duct to the dashboard's side vent.
|
|
6.
|
Cars with automatic transmission:
|
|
|
6.a.
|
Detach the transmission control module from the bracket on the bulkhead and leave it hanging by the wiring.
|
|
7.
|
Unplug the dashboard wiring. Open the cable ties and bend the cables to one side.
|
|
8.
|
Turn down the carpet and remove the protective cover.
|
|
9.
|
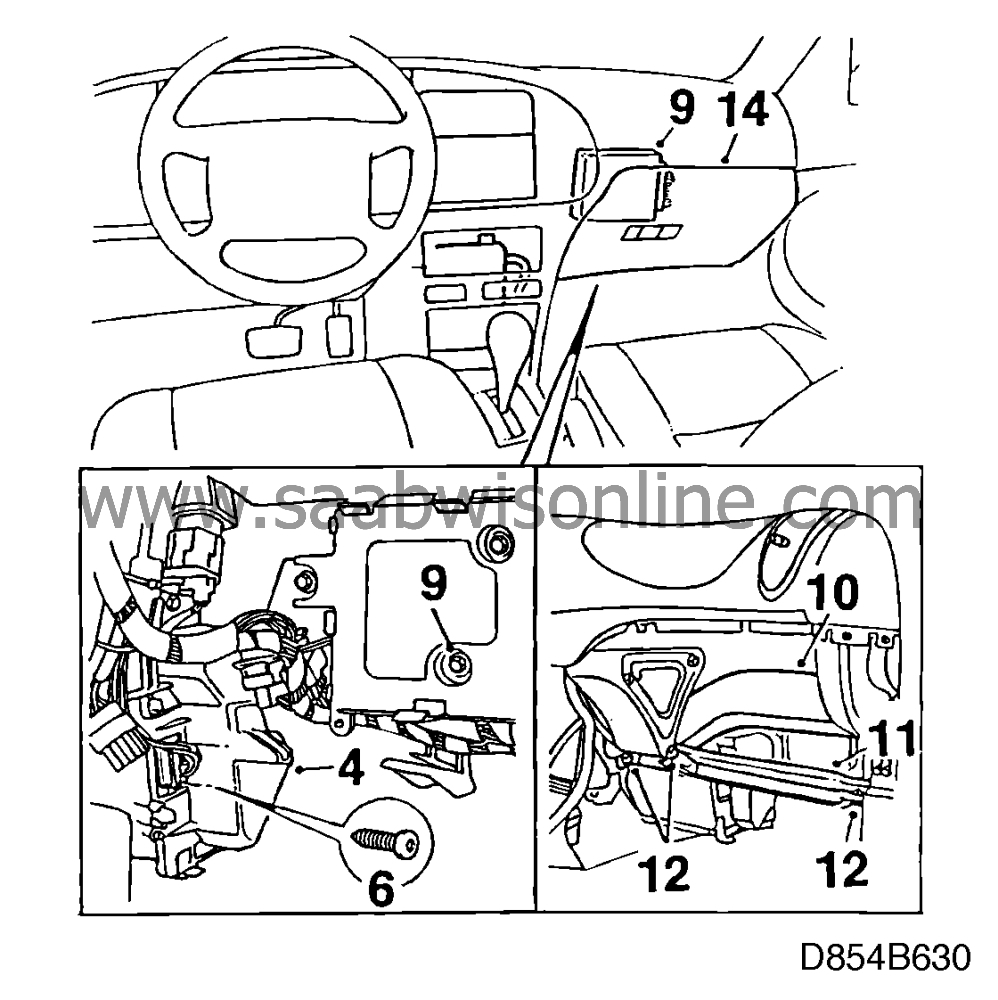
Remove the screws securing the fan control unit (cars with ACC).
|
|
10.
|
Remove the nut securing the antifrost thermostat and remove the evaporator casing cap on the climate control unit. Take care that the recirculation motor does not fall off its bracket. To ease removal the clip may be broken. The evaporator cap should be screwed on when fitting.
|
|
11.
|
Dismantle the electrical connection and remove the anti-frost thermostat.
|
|
1.
|
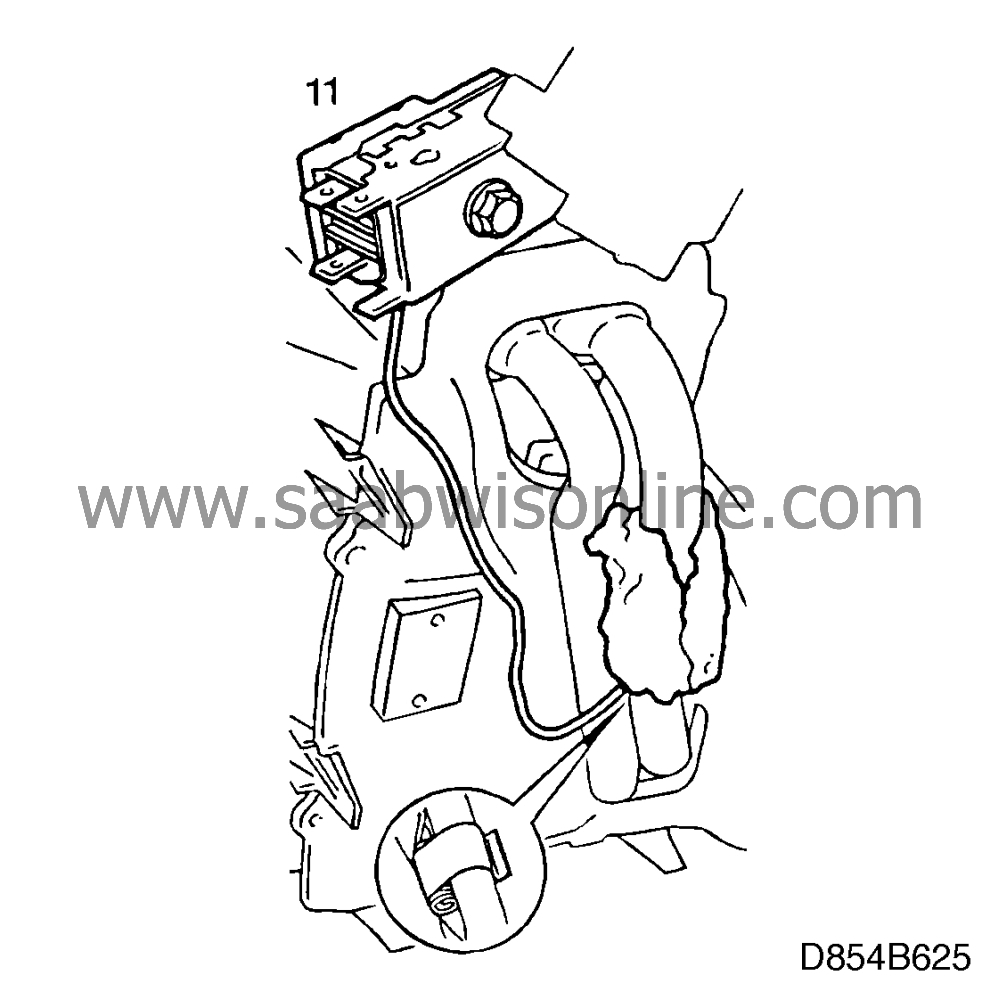
Clean the low pressure pipe from remaining sealing compound where necessary using petrol.
|
|
2.
|
Connect the antifrost thermostat sensor to the low pressure pipe with the clip. Turn the clip as shown in the illustration so that it is not touching the evaporator casing cap.
|
Important
|
|
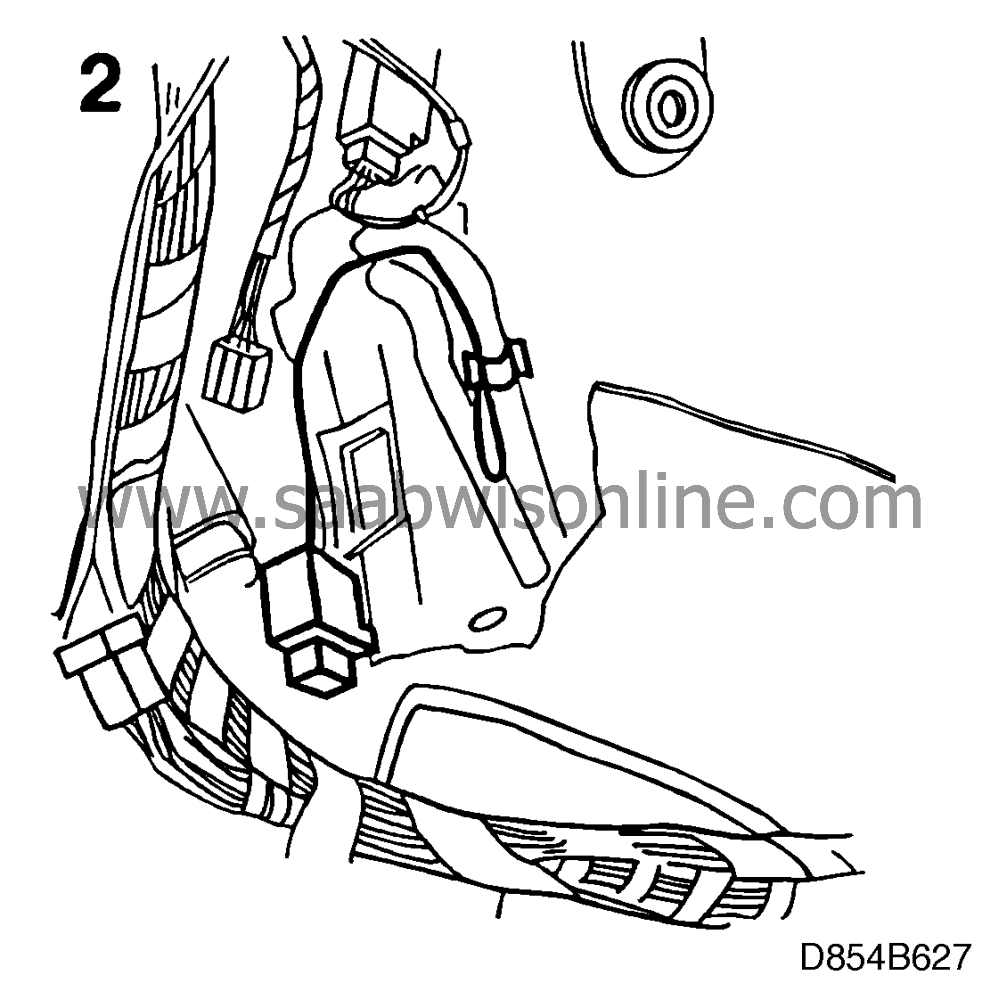
Do not use sealing compound.
|
|
|
|
|
3.
|
Snap on the new antifrost thermostat to the evaporator casing cap.
|
|
|
3.a.
|
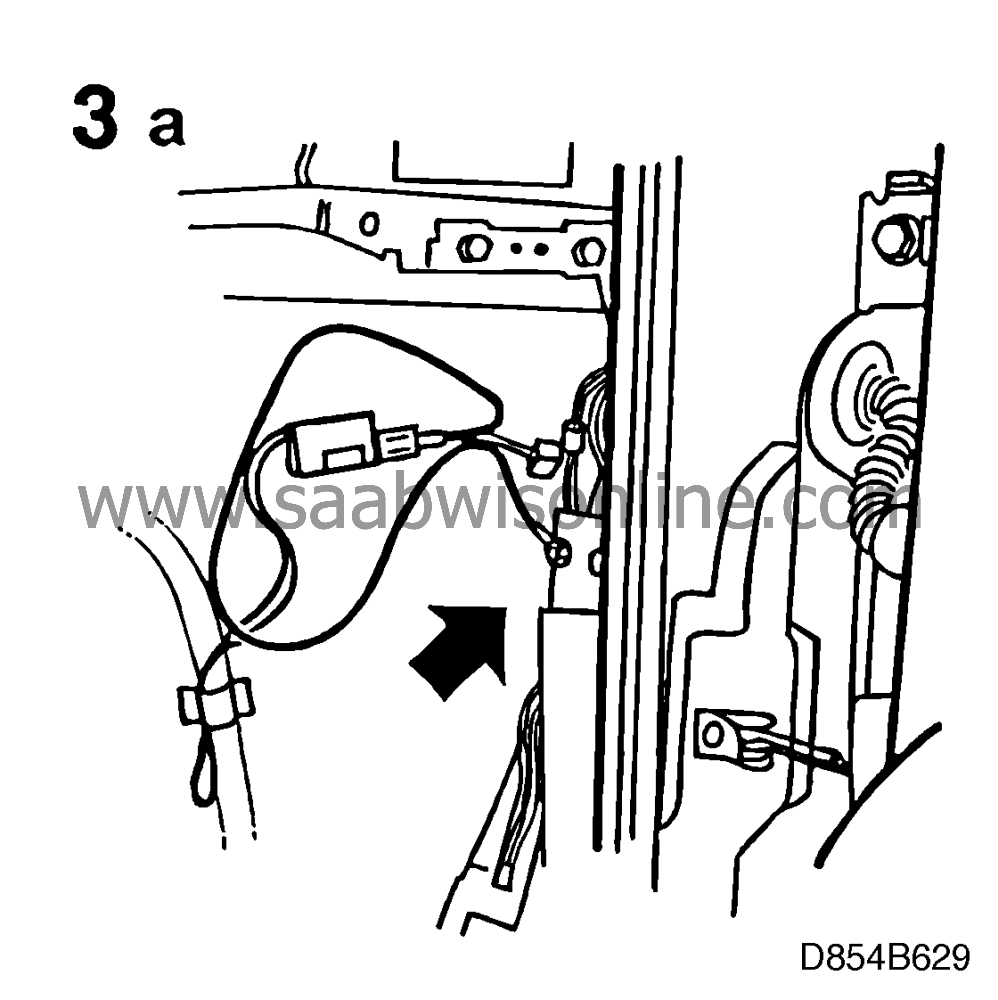
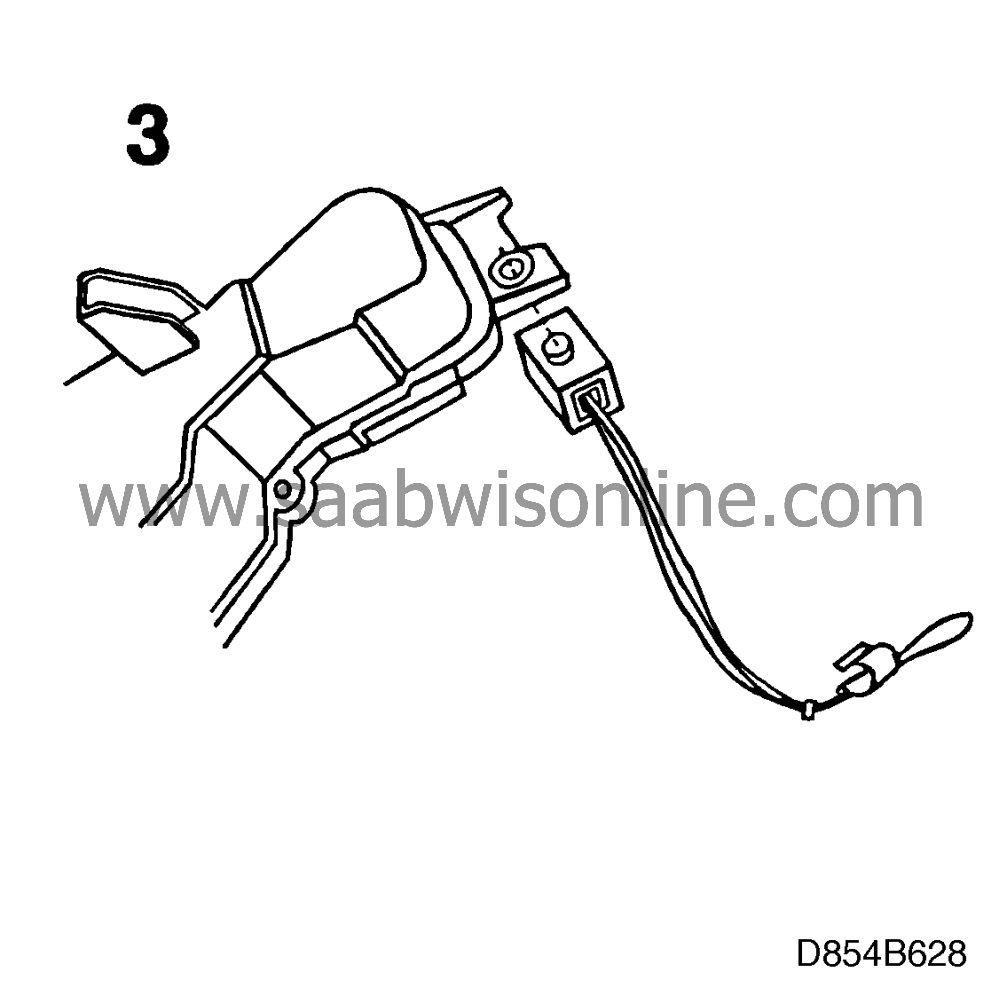
Fit the adapter wiring 46 35 785. Connect the 4-pin connector to the antifrost thermostat and green cable to green cable on the car wiring harness and white cable to green/grey alternatively the white cable on the car wiring harness. Connect the ground to G34S. Secure the wiring harness with a cable tie.
|
|
|
3.b.
|
Connect the car's existing wiring harness to the anti-frost thermostat.
|
|
4.
|
Fit a
between the evaporator casing cover and the climate control unit. Refit the evaporator casing cover on the climate control unit and tighten the bolts. Check to make sure that no condensation leaks out from the evaporator.
|
|
5.
|
Check that the compressor cycles by
|
|
|
5.a.
|
ACC:
Setting the temperature to 25
°
C and low fan speed.
|
|
|
5.b.
|
Manual control panel:
Setting the temperature control to medium with the A/C button pressed in and fan in position 1.
|
|
6.
|
Refit the fan control unit and tighten the screws (cars with ACC).
|
|
7.
|
Refit the protective cover.
|
|
8.
|
Plug in the dashboard wiring. Secure the wiring by means of cable ties.
|
|
9.
|
Cars with automatic transmission:
|
|
|
9.a.
|
Screw the bracket for the automatic transmission control module to the bulkhead wall.
|
|
|
9.b.
|
Fit the control module in the bracket.
|
|
10.
|
Refit the air duct to the panel side vents.
|
|
11.
|
Refit the floor ducts.
|
|
12.
|
Cars with an airbag on the passenger's side:
Fit the knee guard in place and tighten the attaching bolts.
|
|
13.
|
Refit the side panel on the centre console.
|
|
14.
|
Fit the glove compartment in place and tighten the screws.
|
Failed Object: 87062
Fault code: 61
Location code: 09
Repair/Action code: 01
Time: 0.7
Normal warranty regulations apply.


