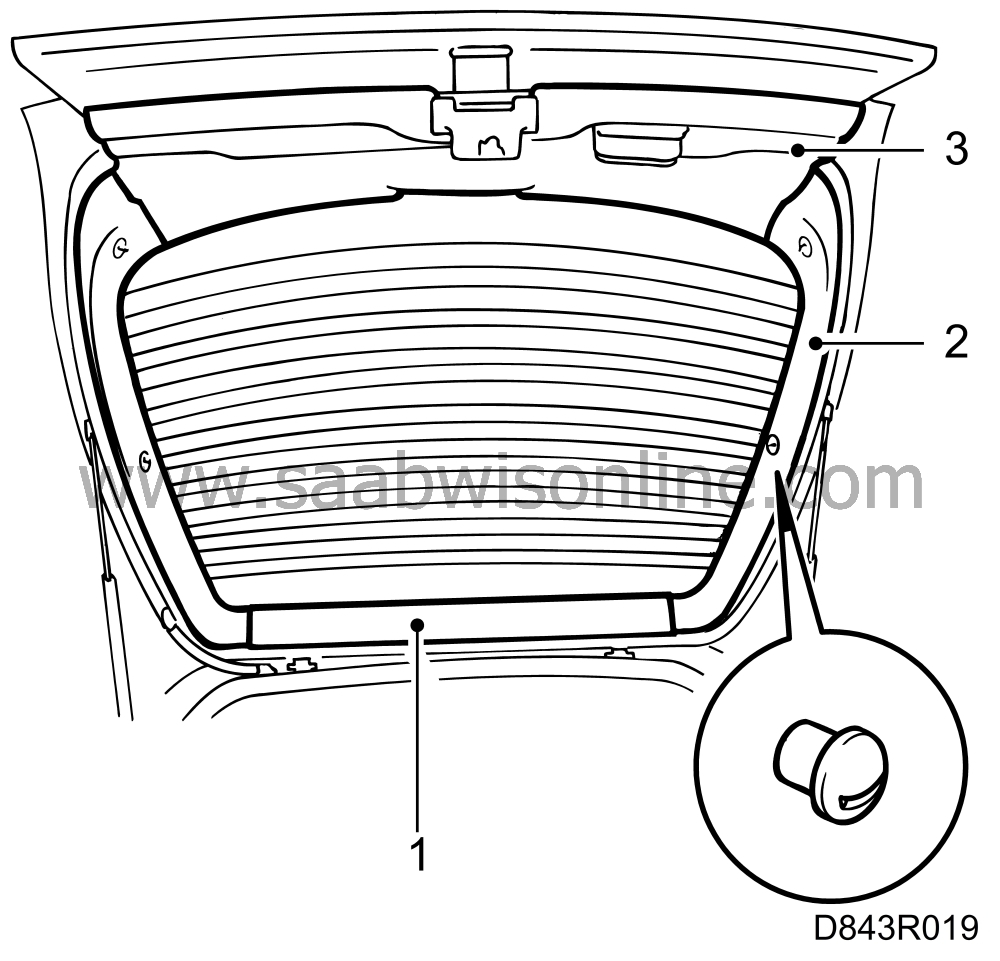
Rear window
| Rear window |
| To remove |
| 1. |
Remove the trim moulding above the rear window on the inside of the tailgate.
|
|
| 2. |
Remove the trim mouldings from the sides of the rear window on the inside of the tailgate.
|
|
| 3. |
Remove trim from the tailgate:
|
|
| 3.a. |
Remove the tailgate handle.
|
| 3.b. |
Remove the screws securing the trim. Note that the screws are of different lengths.
|
| 3.c. |
Lift out the trim.
|
| 4. |
Cars with a spoiler and rear wiper system on the tailgate:

|
|
| 4.a. |
Remove the rear window wiper arm.
|
| 4.b. |
Remove the wiper motor.
|
| 4.c. |
Undo the screws securing the spoiler. Remove the spoiler.
|
| 5. |
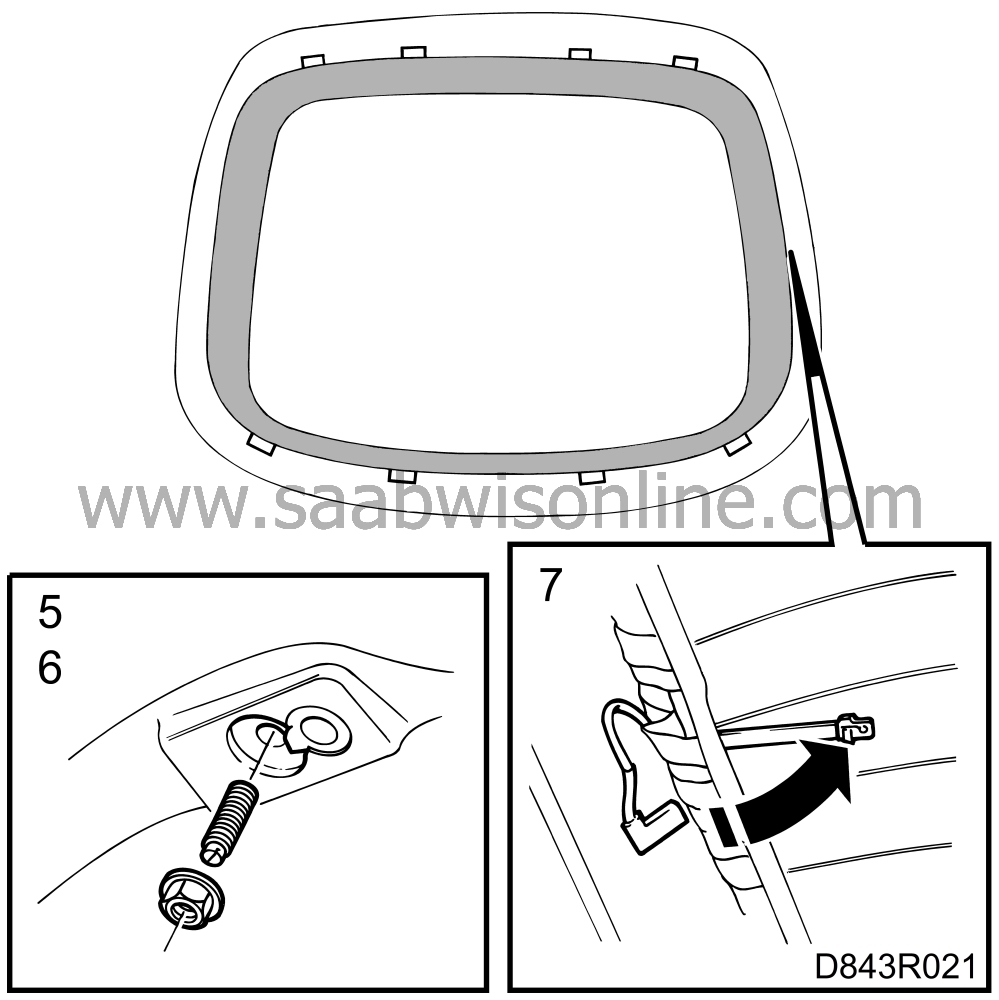
Undo the nuts and studs securing the top of the rear window.
|
|
| 6. |
Undo the nuts and studs securing the bottom of the rear window.
|
|
| 7. |
Unplug the connector for the rear window heating element and bend the connector half up against the window.
|
|
| 8. |
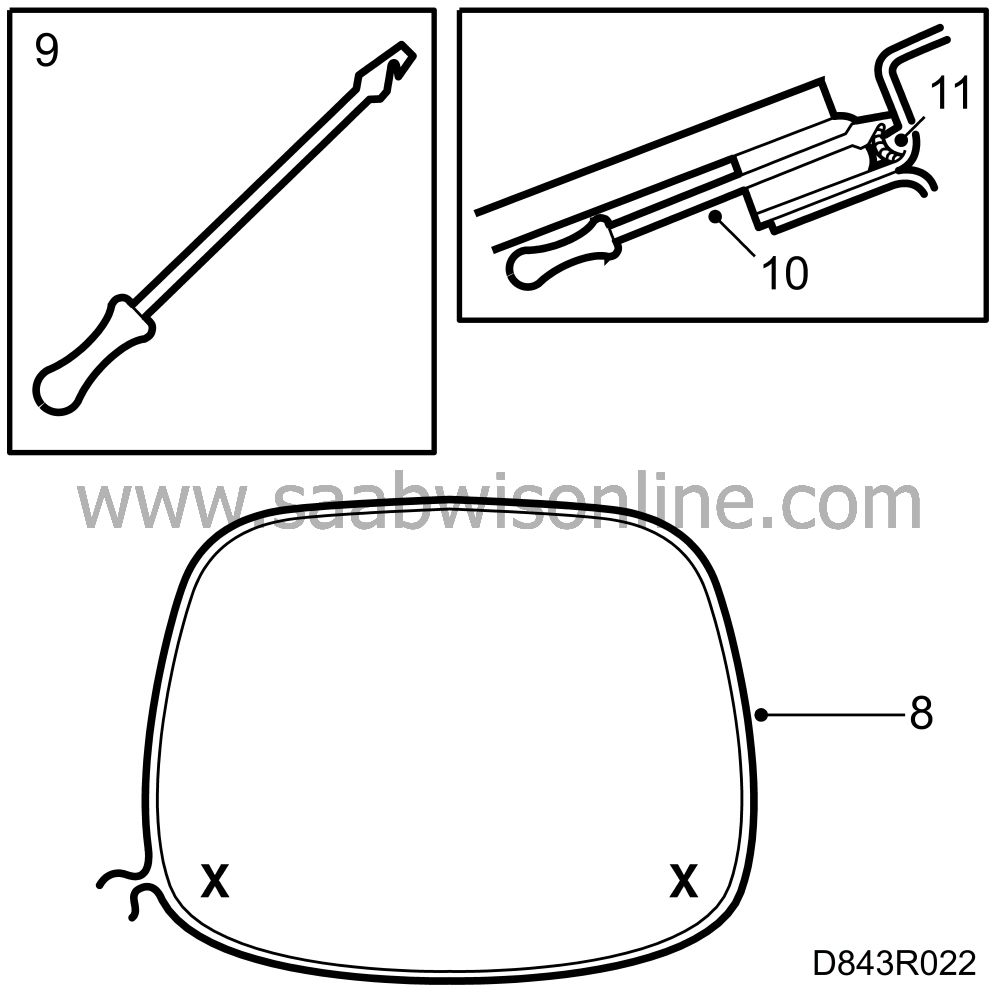
Lay cutting wire, part no. (16) 82 92 831 or (16) 82 93 219, round the rear window so that the ends meet at one of the bottom corners. The wire must lie under the decor strip.
|
|
| 9. |
Fabricate a special tool by cutting a slot in a long, narrow screwdriver as shown. This will enable you to pull the cutting wire through the adhesive quickly and easily. Alternatively, music wire could be used instead.
|
|
| 10. |
Press the screwdriver through the adhesive at the corner of the rear window where the ends of the cutting wire meet.
|
|
| 11. |
Hook one end of the cutting wire in the screwdriver and pull the wire through the adhesive.
|
|
| 12. |
Pull the other end of the wire through the adhesive in the same way. Avoid crossing the wires.
|
|
| 13. |
Fit the wire coiler, part no. (16) 82 92 823, on the inside of the rear window.

|
|
| 14. |
Pull out the end of the cutting wire nearest the wire coiler and fasten it to the coiler reel.
|
|
| 15. |
Tie the other end of the cutting wire to the gas spring.
|
|
| 16. |
Use a ratchet handle to crank the coiler so that the wire cuts through the adhesive. Reposition the wire coiler as the windscreen comes loose. Keep the wire cutting the whole time and do not just pull it through. Resistance will be greatest at the corners. If there is a danger of the wire breaking, wait for 10-15 seconds to give the wire time to work into the adhesive.
|
|
| To fit |
| Important | ||
|
Use an adhesive kit, part No. (45) 30 05 618, when fitting embedded window glass. This adhesive kit contains the special primer (Betawipe 4000) that must be used on embedded window glass. |
||
| 1. |
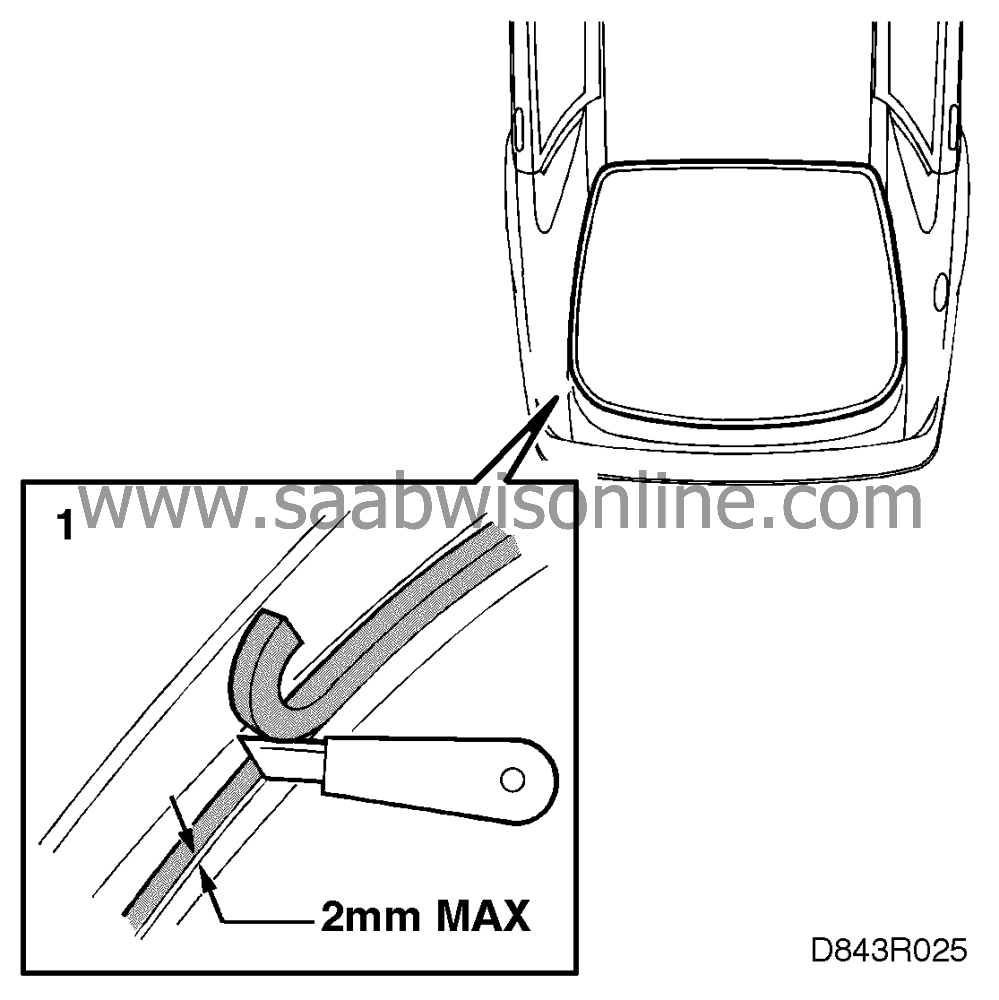
Trim the bead of adhesive on the tailgate to a maximum thickness (height) of 2 mm. If the old window is to be fitted back in place, the bead of adhesive on it must also be trimmed to a thickness of 2 mm. Old, firmly-adhering adhesive makes a good key for the fresh bead of adhesive. Remove all loose adhesive from the paintwork and glass.
|
|
| 2. |
Make good any damage to the paintwork that has occurred in connection with removing the rear window. Use a paint applicator.
|
|
| 3. |
If there is no old bead of adhesive or if it is not intact, apply paint primer to the areas on the tailgate with which the adhesive comes into contact. Use paint primer, part No. 30 07 119.
|
||||||||||
| 4. |
Rest the rear window on trestles and fit suckers to its exterior surface.

|
|
| 5. |
Apply primer to the embedment where the adhesive is to be applied. Use Betawipe 4000 primer, which is included in the adhesive kit. Using a cloth, wet the edge thoroughly and dry it with another cloth. Use clean, lint-free cloths and refold them frequently.
|
||||||||||
| 6. |
Apply the adhesive as follows:
|
|
| • |
Cut 5 mm off the tip of the adhesive applicator nozzle. Heat the nozzle in hot water and adjust the opening to a size of 8 x 8 mm.
|
| • |
Adjust the pressure of the adhesive gun to obtain a bead of adhesive measuring 8 x 8 mm.
|
| • |
Hold the gun perpendicular to the surface and apply a bead of adhesive to the embedment round the rear window. Avoid getting adhesive on the trim moulding.
|
||||||||||
| 7. |
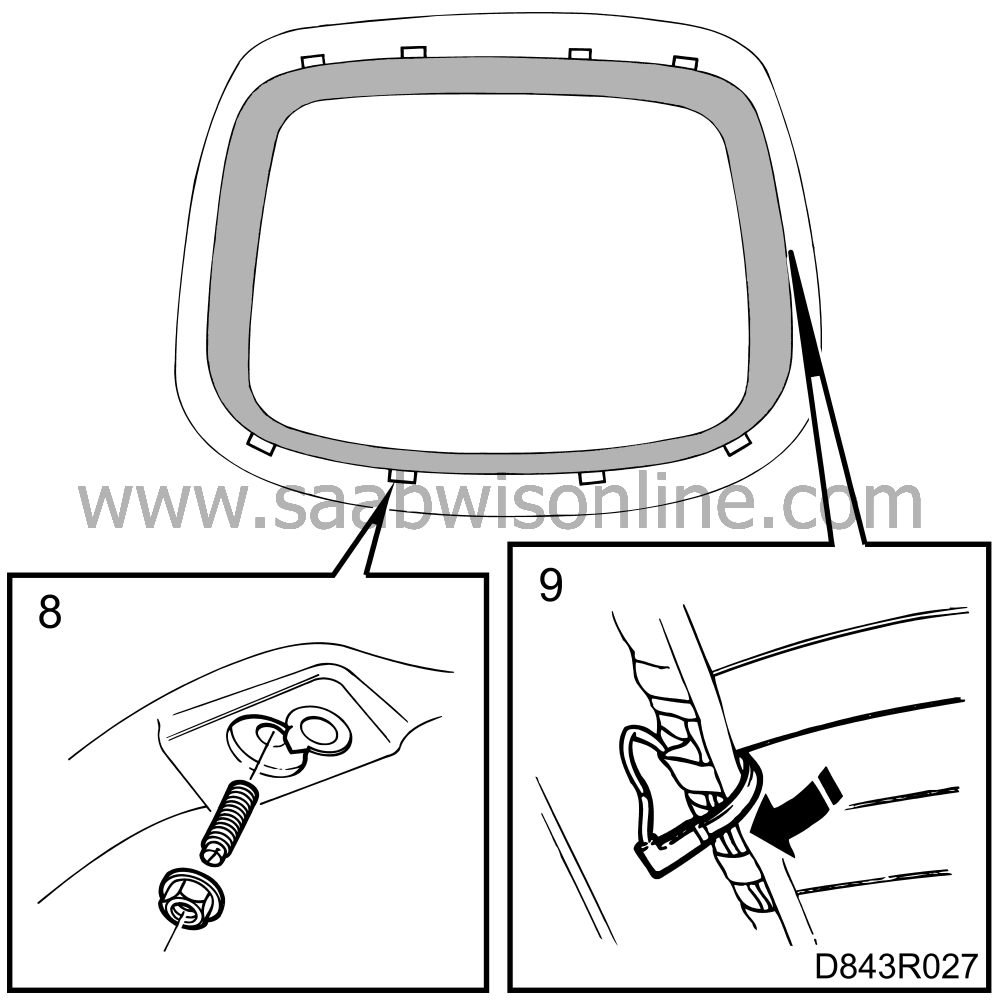
Fit the rear window in position. Start by aligning the upper edge and fitting it in place.
|
|
| 8. |
Tighten the nuts securing the rear window.
Tightening torque: 3 Nm (2.2 lbf ft) |
|
| 9. |
Plug in the connector for the rear window heating element and bend the connector-half round the flange.
|
|
| 10. |
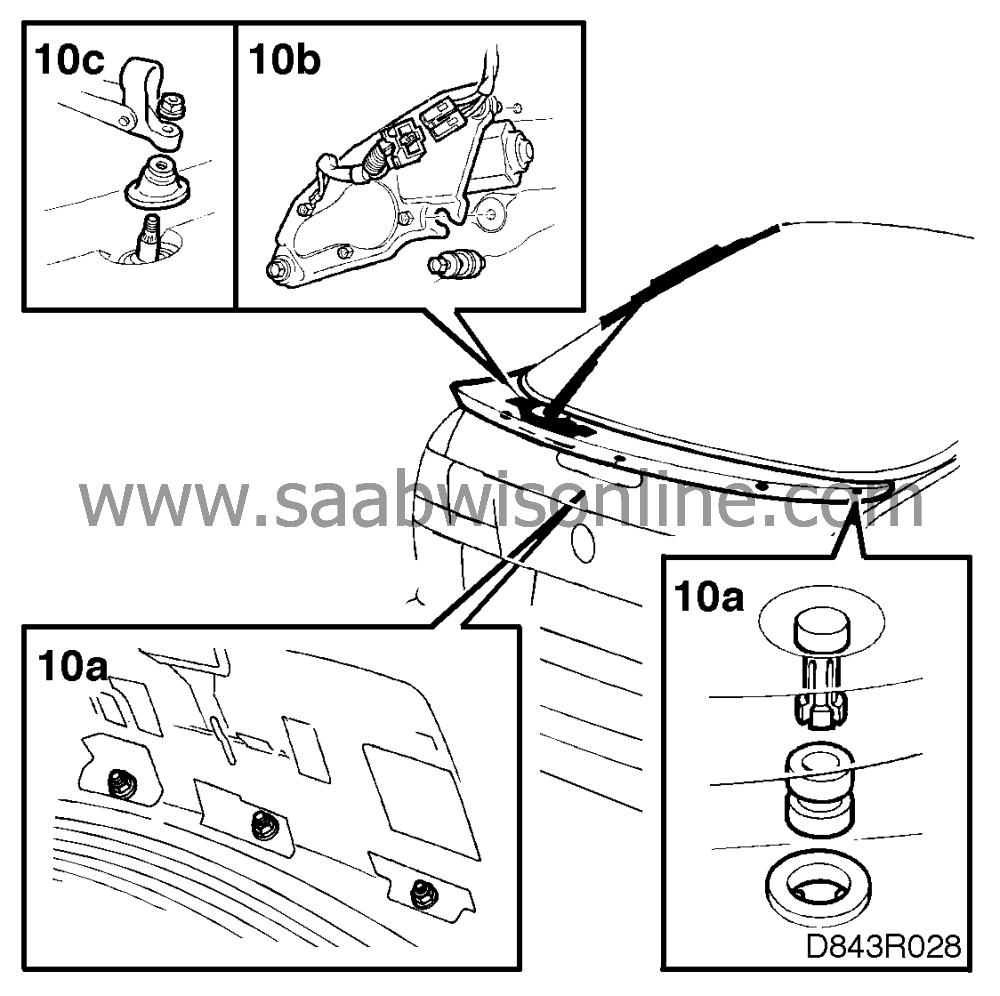
Cars with a spoiler and rear wiper system:
|
|
| 10.a. |
Refit the spoiler and tighten the screws.
|
| 10.b. |
Refit the wiper motor.
|
| 10.c. |
Refit the wiper arm.
|
| 11. |
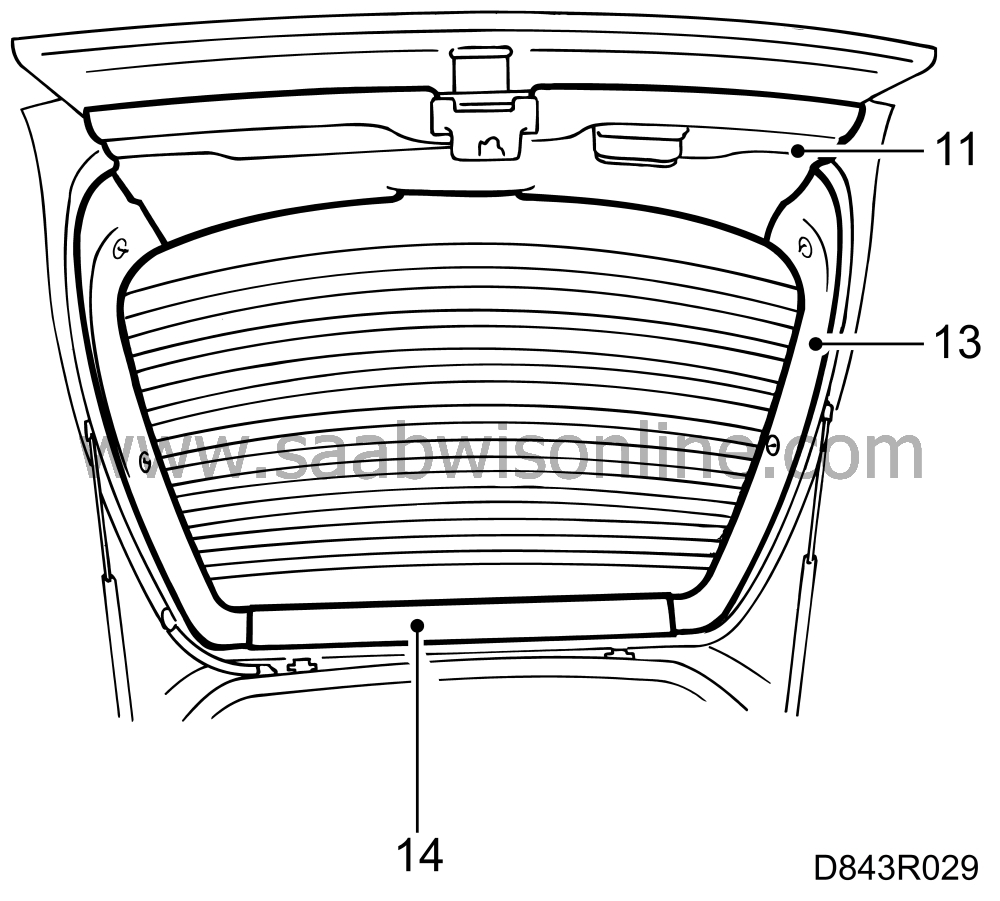
Refit the luggage compartment trim and tighten the screws.
|
|
| 12. |
Screw the tailgate handle back into place.
|
|
| 13. |
Refit the side trim mouldings on the inside of the tailgate.
|
|
| 14. |
Press the trim moulding into place at the top of the rear window on the inside.
|
|
| 15. |
Carefully close the tailgate without locking it.
|
|
| 16. |
Leave the adhesive to harden before continuing the fitting process. Betamate E 2400 hardens in 4 hours at + 23
°
C and 50%% relative humidity.
|
|

