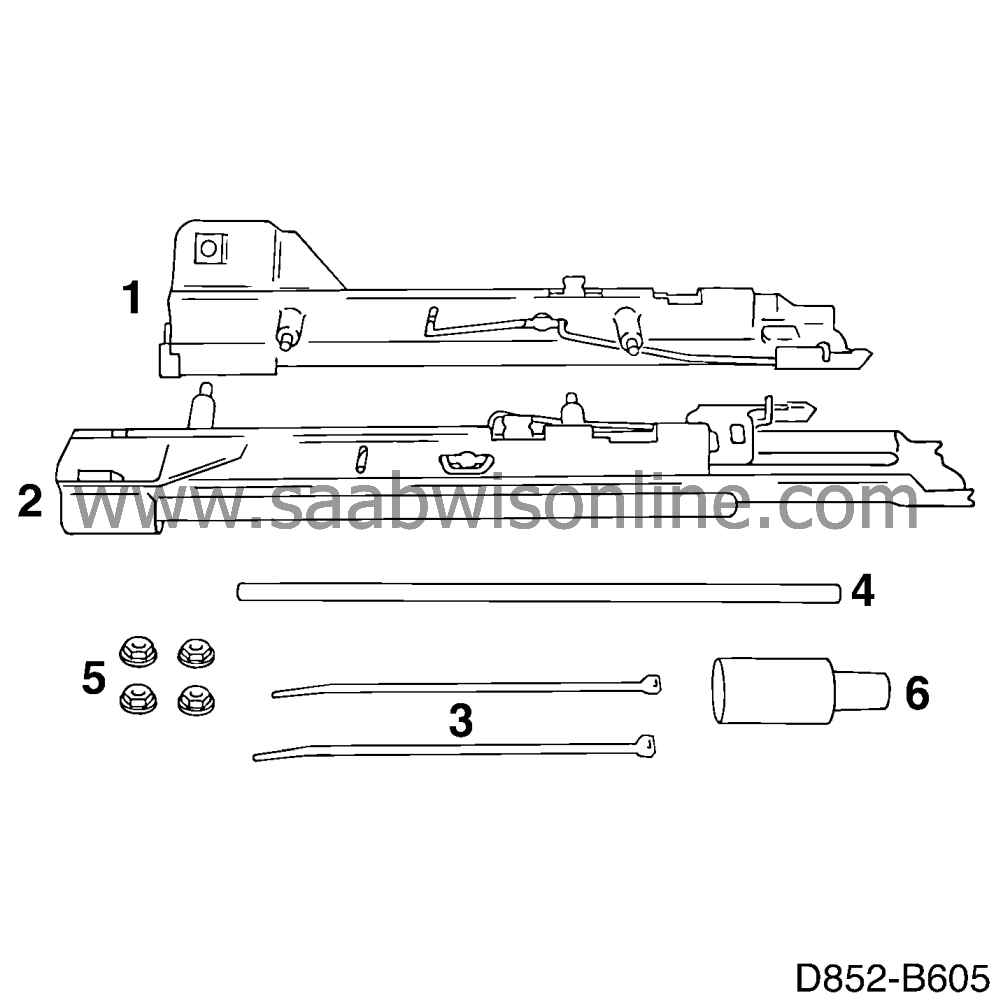
Replacing seat rails
| MODIFICATION INSTRUCTION | |
| Bulletin Nbr: | 852-1527 |
| Date: ........... | AUGUSTI 1994 |
| Market: | ALL |
| Replacing seat rails |
| Cars concerned |
Saab 900 MY 1994 with 5 doors and manual driver's seat up to and including VIN R2022754.
| Background |
It has become apparent that seat rails on certain manual driver's seats in the cars concerned are not of sufficiently high quality.
| Materials |
| • |
Spare parts kit LHD 46 52 681
|
|
| • |
Spare parts kit RHD 46 53 697
The contents of the spare parts kit is shown in the illustration above and the list below. |
|
| • |
Seat rail right side
|
|
| • |
Seat rail left side
|
|
| • |
Cable tie (2 pcs)
|
|
| • |
Pipe 300 mm
|
|
| • |
Nuts (4 pcs.)
|
|
| • |
Loctite thread sealant
|
|
| Diagnostic procedure |
Check the modification identity plate first. If box "C2" is not marked the measures described in this SI must be carried out.
Replace both seat rails on the driver's seat on the cars concerned as described in the method description in this service information.
Replace one seat rail at a time. Replacement of the left seat rail is described below. The right seat rail is replaced in the same manner.
| 1. |
Remove the seat from the car. See Service Manual 8:2 Interior equipment
 .
.
|
|
| 2. |
Remove the seat-belt buckle and anchorage.
|
|
| 3. |
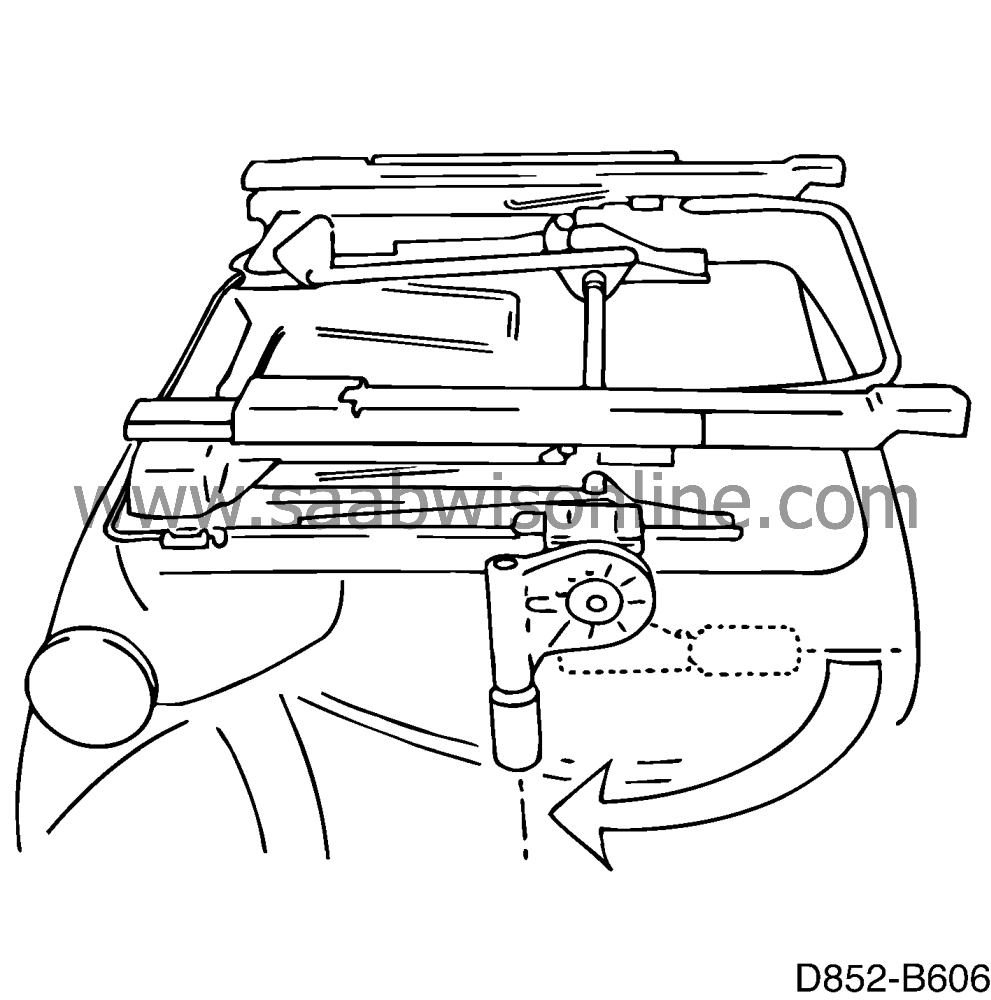
Place the height adjusting handle in the upper position.
|
|
| 4. |
Remove the legroom adjustment handle as follows:
|
|
| 4.a. |
Unhook the control rod from the notch in the legroom adjustment handle.
|
| 4.b. |
Pull off the handle from the legroom adjustment mechanism.

|
| 5. |
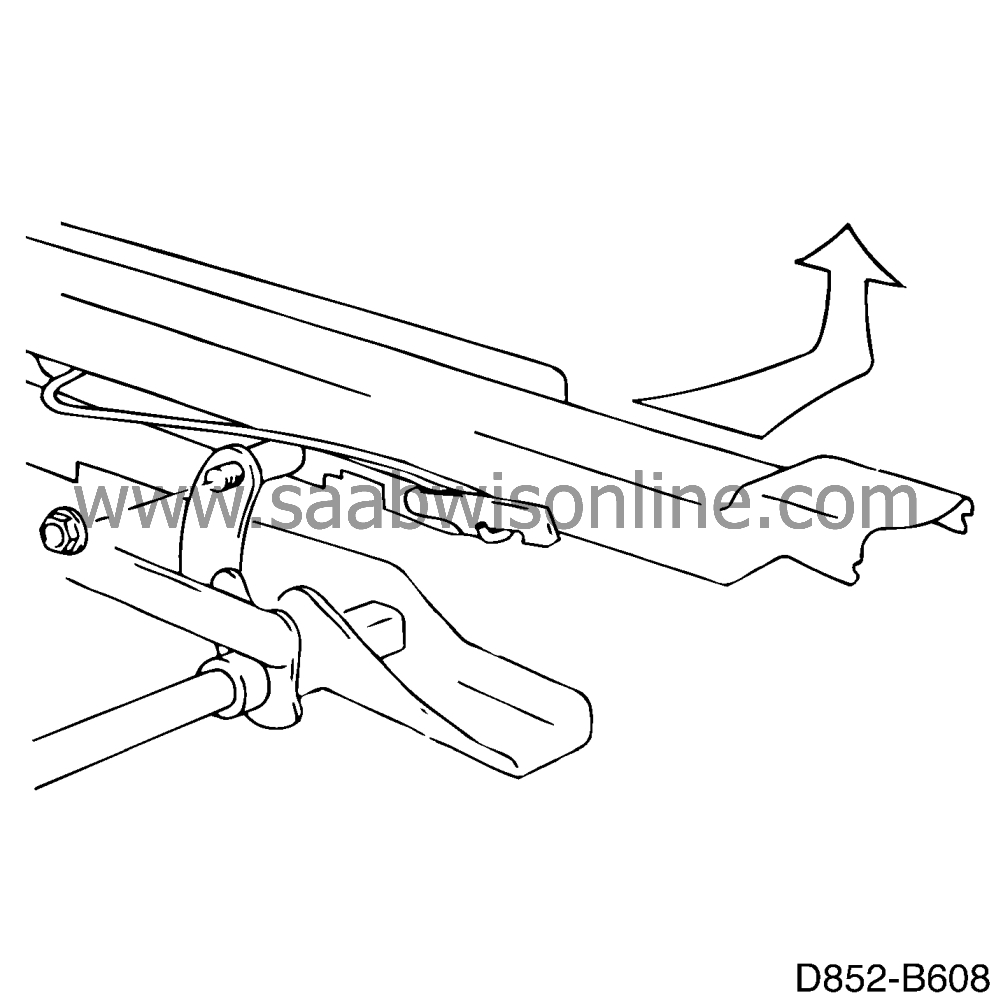
Remove the front nuts securing the height adjustment mechanism to the seat rail and unhook the rail from the mechanism. Discard the nut.
|
|
| 6. |
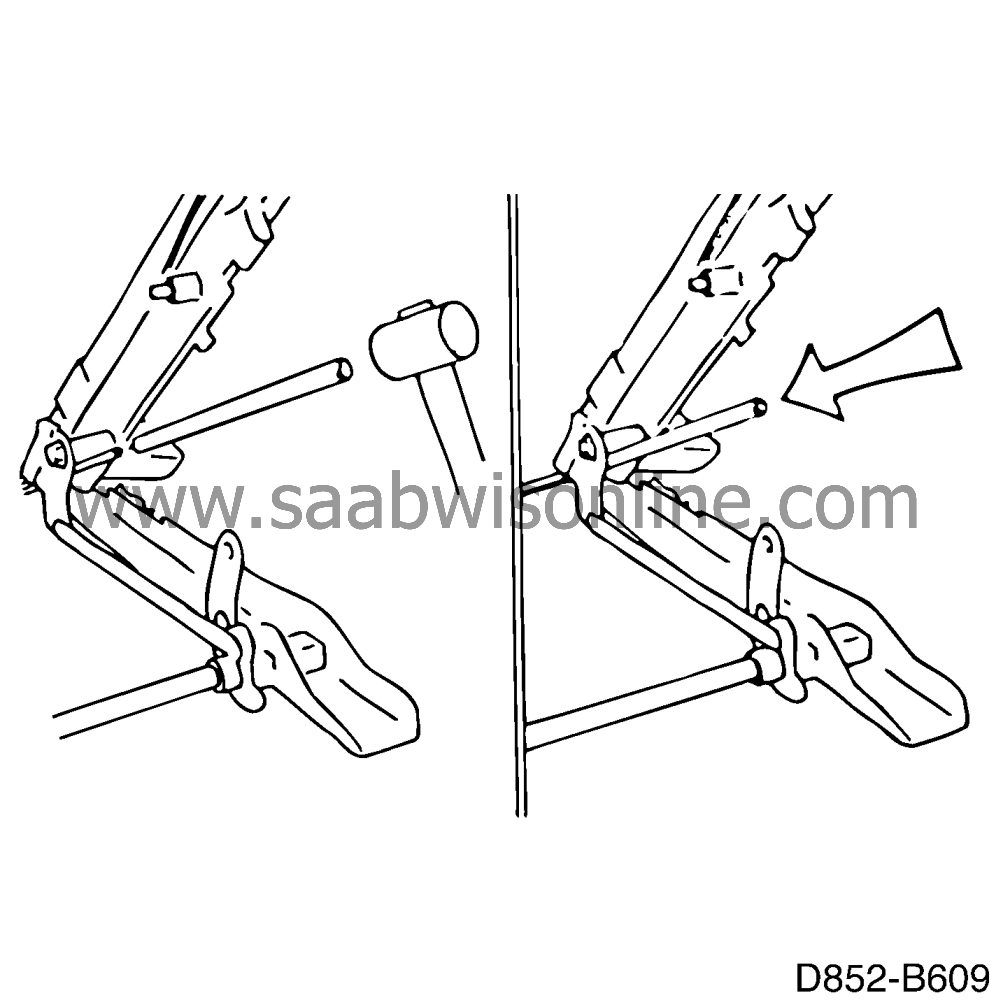
Relieve the torsion spring as follows:
|
|
| 6.a. |
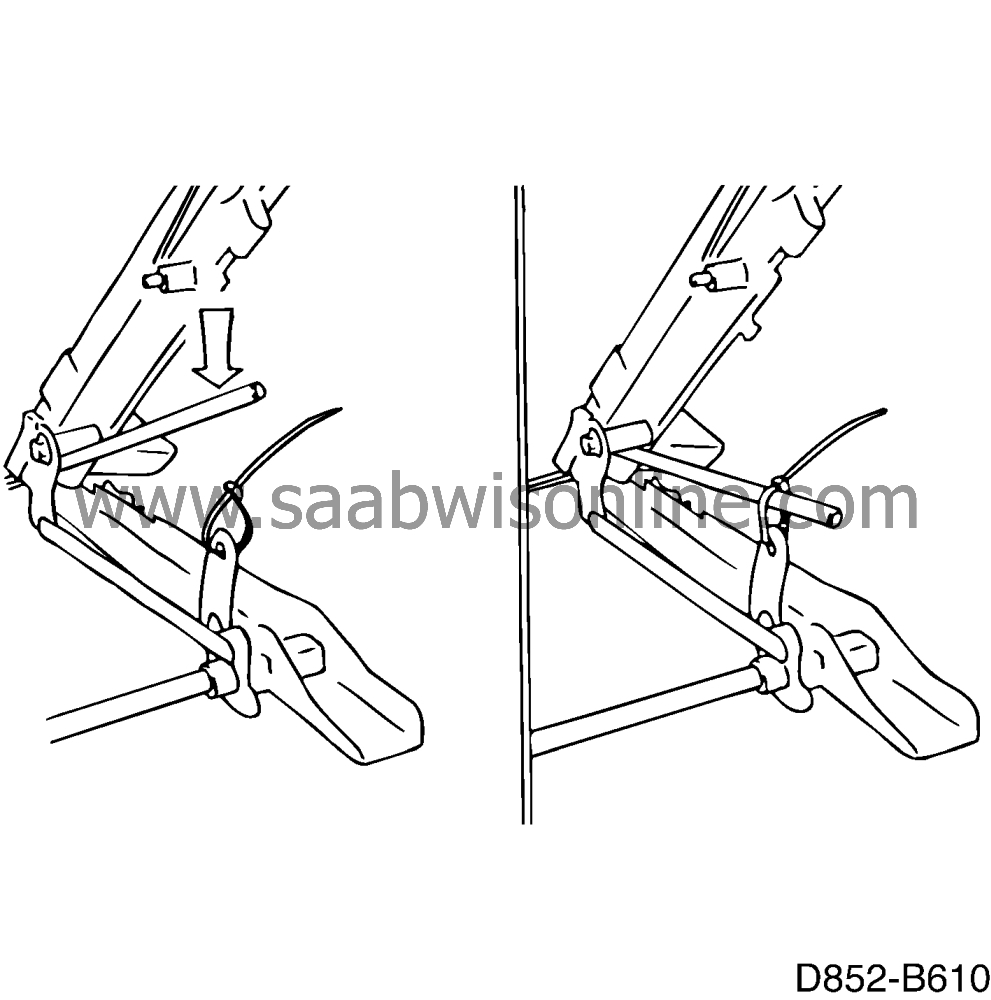
Lift up the seat rail and slip the pipe onto the end of the torsion spring. The pipe is included in the spare parts kit.
|
| 6.b. |
Knock at least 50 mm of the pipe onto the end of the torsion spring.
|
| 6.c. |
Attach a cable tie as shown. The loop should have a diameter of approx. 40 mm.
|
| 6.d. |
Bend down the pipe and thread it into the loop.
|
| 7. |
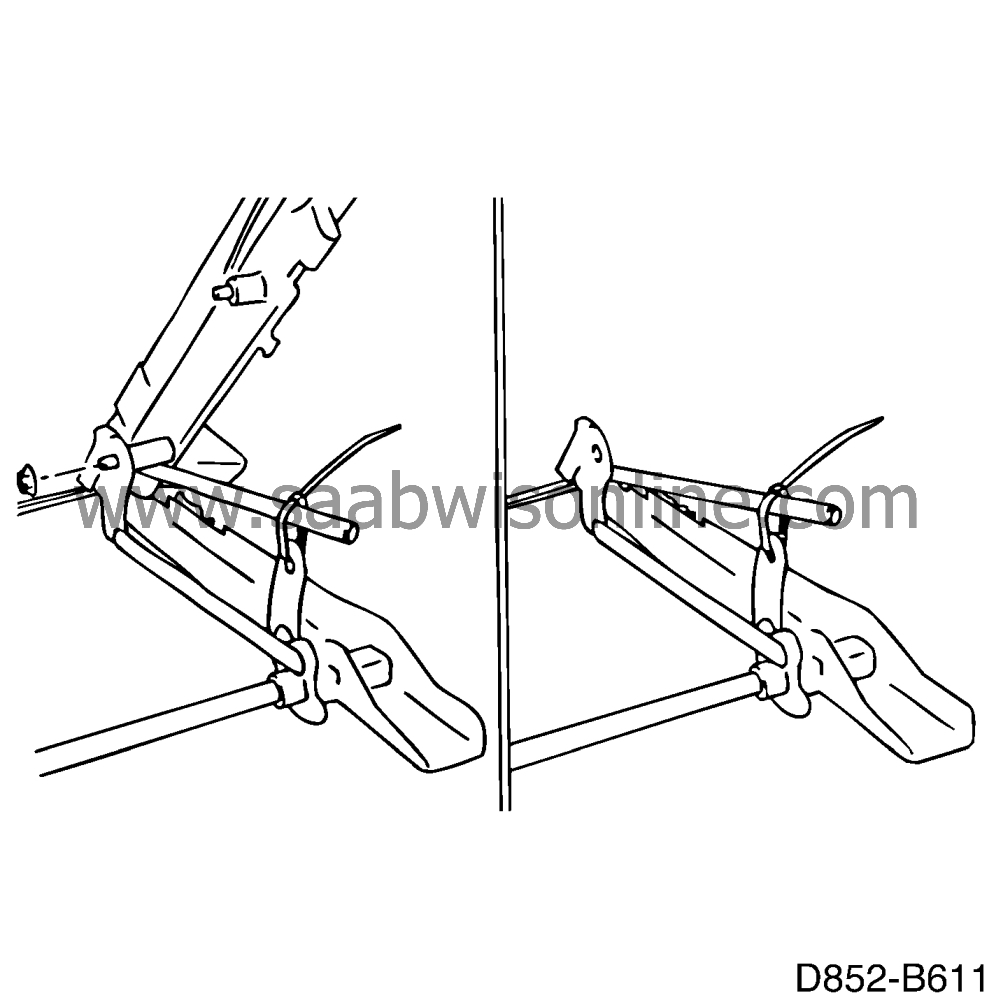
Remove the rear nuts securing the height adjustment mechanism to the seat rail and unhook the rail from the mechanism. Discard the nut.
|
|
| 8. |
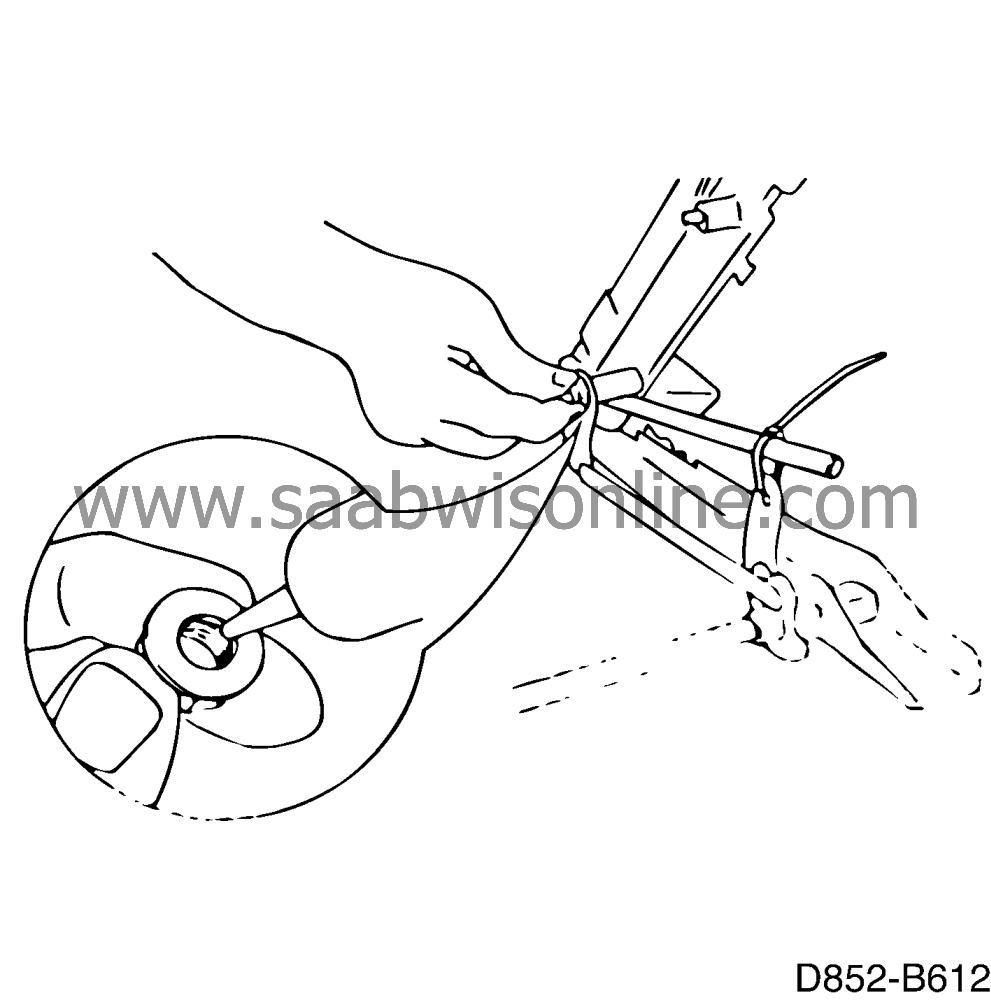
Tighten the rear nut in the joint between the seat rail and height adjustment mechanism according to the following description to ensure optimum function of the height adjustment function:
|
|
| 8.a. |
Apply two drops of thread sealant on the threads of a new nut (included in the spare parts kit). {
|
| 8.b. |
Tighten the rear nut in the joint between the seat rail and height adjustment mechanism.
Tightening torque: 20 Nm (14.8 lbf ft). |
| 8.c. |
Then, loosen the nut 1/4 turn.
|
| 9. |
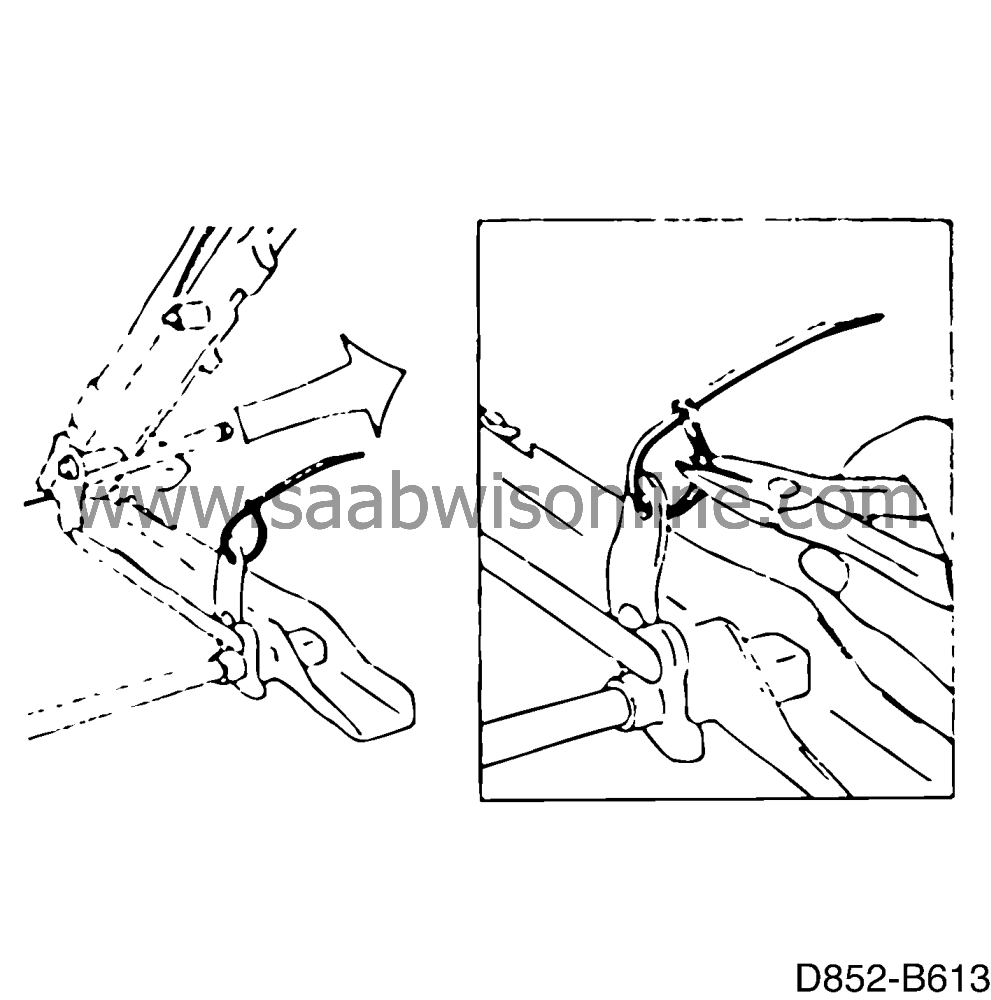
Push down the pipe and unhook the cable tie.
|
|
| 10. |
Remove the pipe and cable tie.
|
|
| 11. |
Tighten the front nut in the joint between the seat rail and height adjustment mechanism according to the following description to ensure optimum function in the height adjustment function:

|
|
| 11.a. |
Apply two drops of thread sealant on the threads of a new nut (included in the spare parts kit). {
|
| 11.b. |
Tighten the front nut in the joint between the seat rail and height adjustment mechanism.
|
| 11.c. |
Then, loosen the nut 1/4 turn.
Tightening torque: 20 Nm (14.8 lbf ft). |
| 12. |
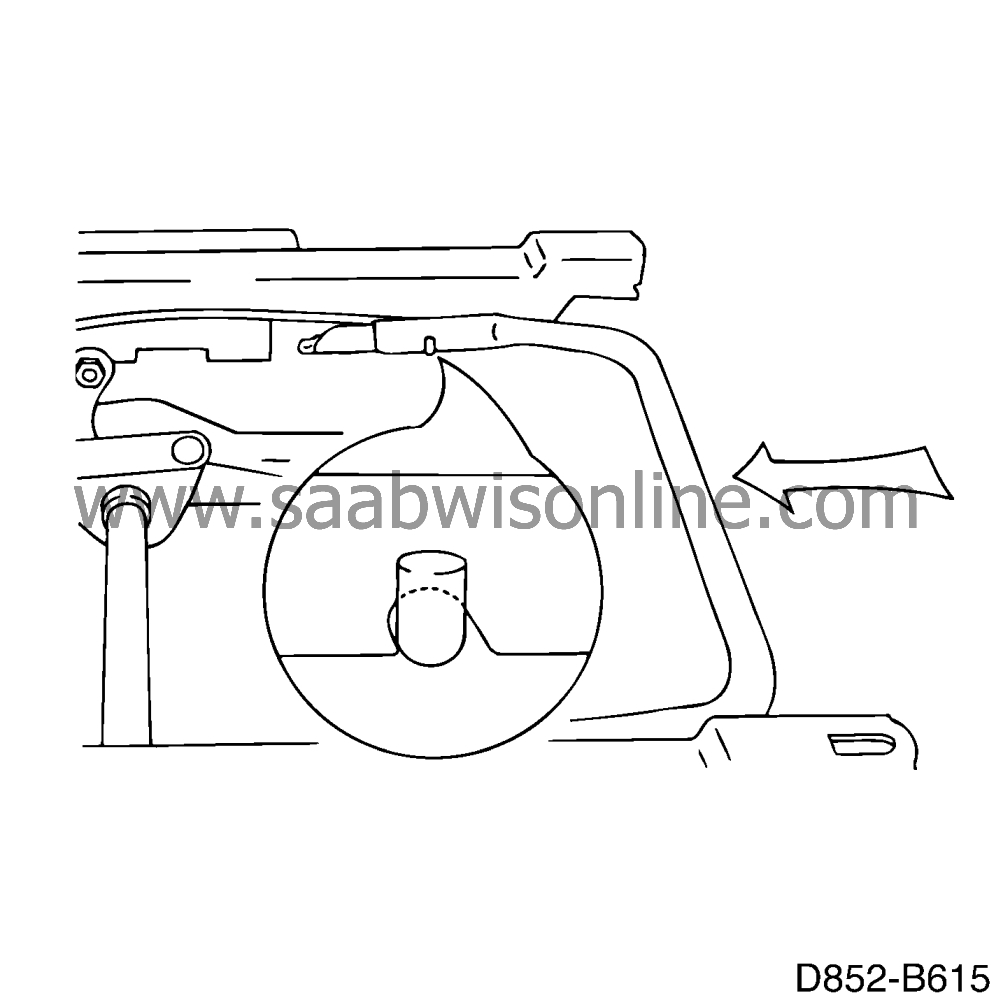
Repeat points 5-11 on the right-hand side of the seat. Then, refit the legroom adjustment handle and hook the ends of the control rods onto the notch on the legroom adjustment handle.
|
|
| 13. |
Refit the seat-belt buckle and anchorage.
Tightening torque: 45 Nm (33.2 lbf ft) |
|
| 14. |
Fit the seat in the car. See Service Manual 8:2 Interior equipment
 .
.
|
|
| Marking the modification identity plate |
When these measures have been carried out, the modification identity plate should be marked in the "C2" box with the number "7" if carried out by the importer and with the number "8" if carried out by the dealer.
| Warranty/Time information |
Failed object: see separate information
Time: see separate information

