Fifth bow latch motor, up to and including VIN V7010305
|
|
Fifth bow latch motor, up to and including VIN V7010305
|
As a spare part, the fifth bow latch motor is only available in its latest version with new lock tabs. Therefore, it is necessary to change the motor and modify the locking arrangement on cars up to and including VIN V7010305 as described below.
Use spare parts kit 74 97 878, replacing latch motor.
|
1.
|
Operate the soft top so that the fifth bow and soft top cover are completely raised.

|
|
2.
|
Connect the diagnostic tool and operate the fifth bow latch motor to half open position (the rotating covers on the soft top cover are in half open position) with the diagnostic tool command:
“TSAS”
“ACTIVATE”
“#5 BOW LATCH MOTOR”
“UP”
|
Important
|
|
This function cannot be performed unless the control module has previously been changed in accordance with SI 812-1566.
|
|
|
|
|
3.
|
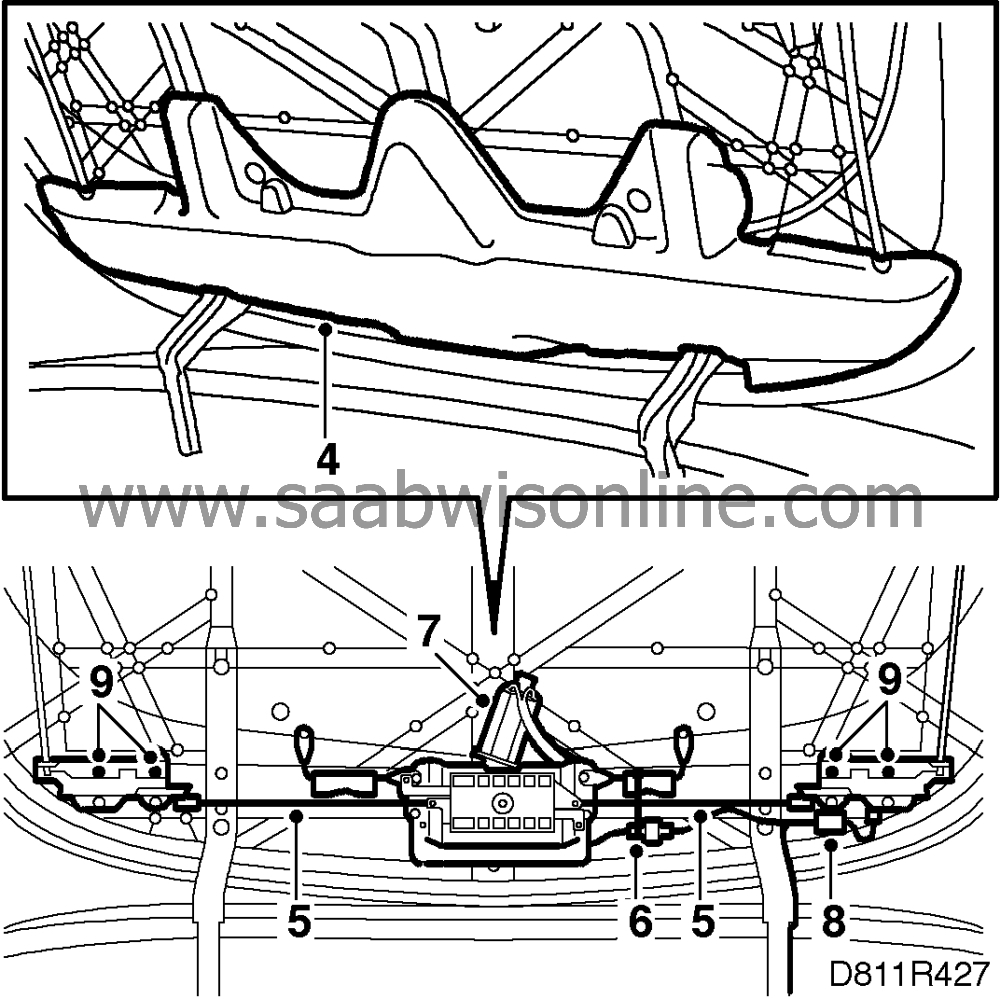
Protect the rear wings and boot lid with covers. Tuck the cover under the soft top cover as the motor can easily fall on the boot lid.
|
|
5.
|
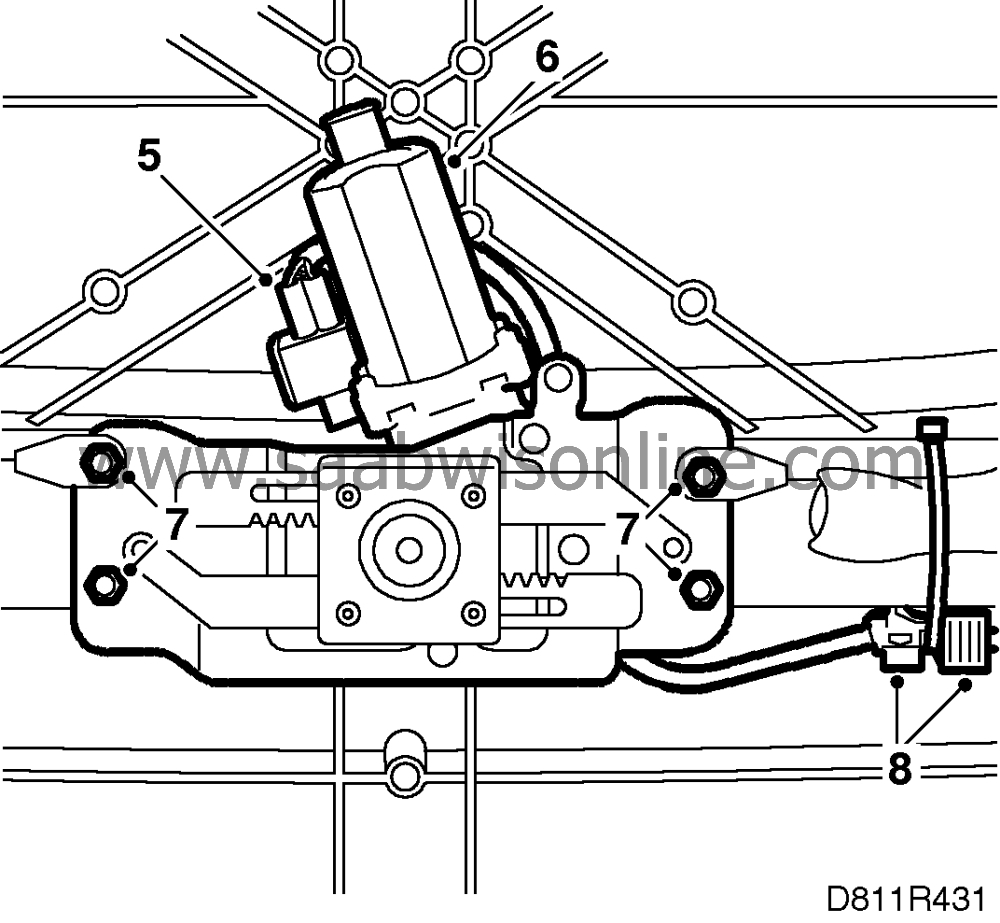
Remove the locking rods.
|
|
6.
|
Cut off the cable tie securing the wiring harness and unplug the connector.
|
|
7.
|
Remove the four latch motor retaining screws and lift away the motor.
|
|
8.
|
Unplug the microswitch connector on the left-hand latch mechanism. Cut off the cable tie.
|
|
9.
|
Remove the two fifth bow latch mechanisms and place them on a workbench.
|
Important
|
|
It is important that the lock washers are changed.
|
|
|
|
|
10.
|
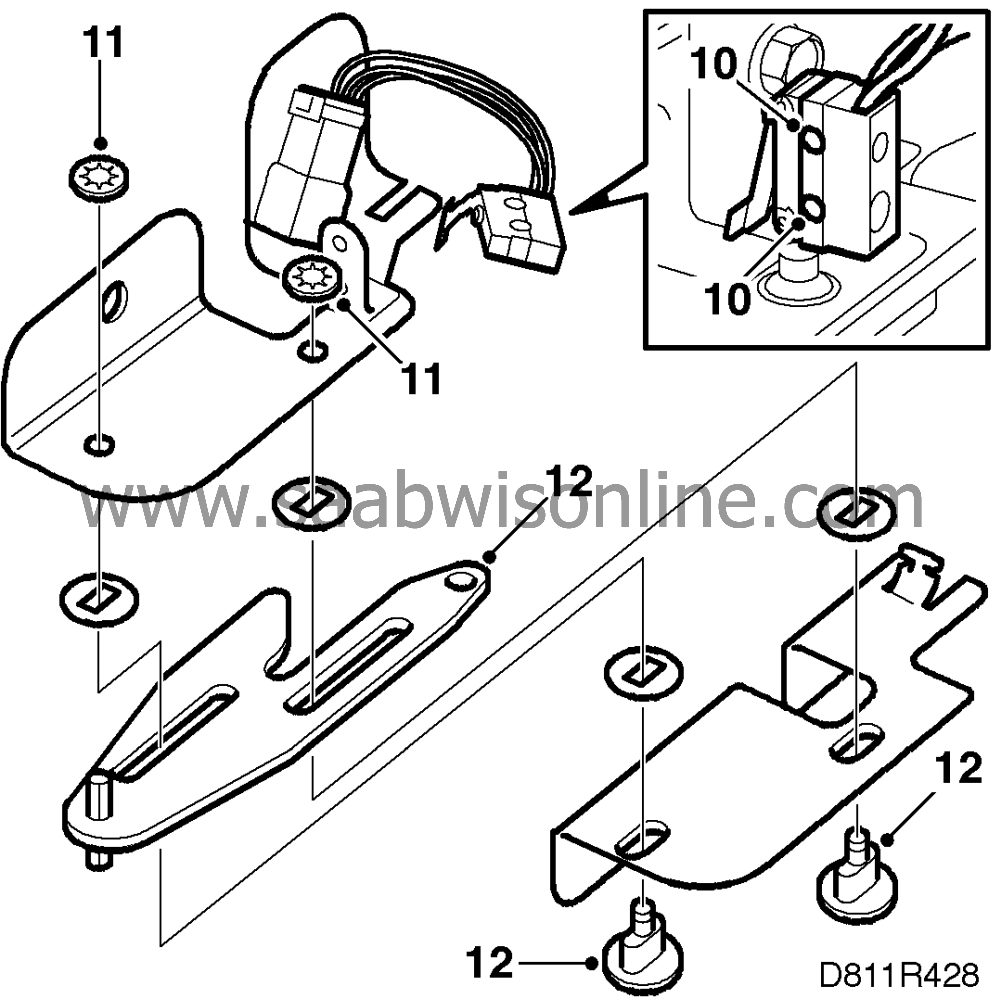
Undo the screws securing the microswitch and remove it.
|
|
11.
|
Remove the lock washers by bending up them and cutting them with pliers.
|
|
12.
|
Remove the pins and take out the lock tab. Be careful not to loose the plastic washers (4 pcs.)
|
|
1.
|
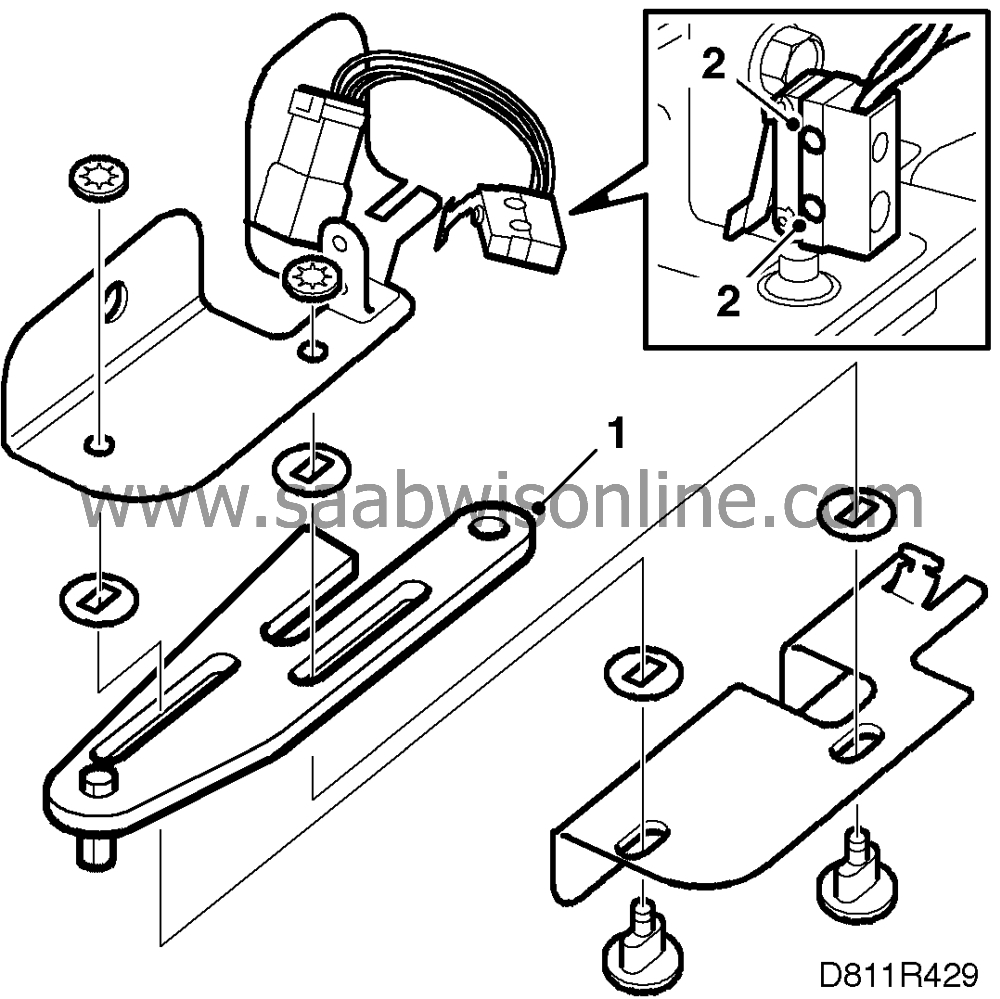
Fit the new lock tab. First, insert the two plastic pins into the holder with two oval holes and fit two plastic washers. Continue with the lock tab and two plastic washers. Finally, fit the outer holder and the lock washers.
|
Note
|
|
The washers do not have fixed positions after fitting.
|
|
|
2.
|
Screw the microswitch to the holder on the left-hand latch mechanism.
|
|
3.
|
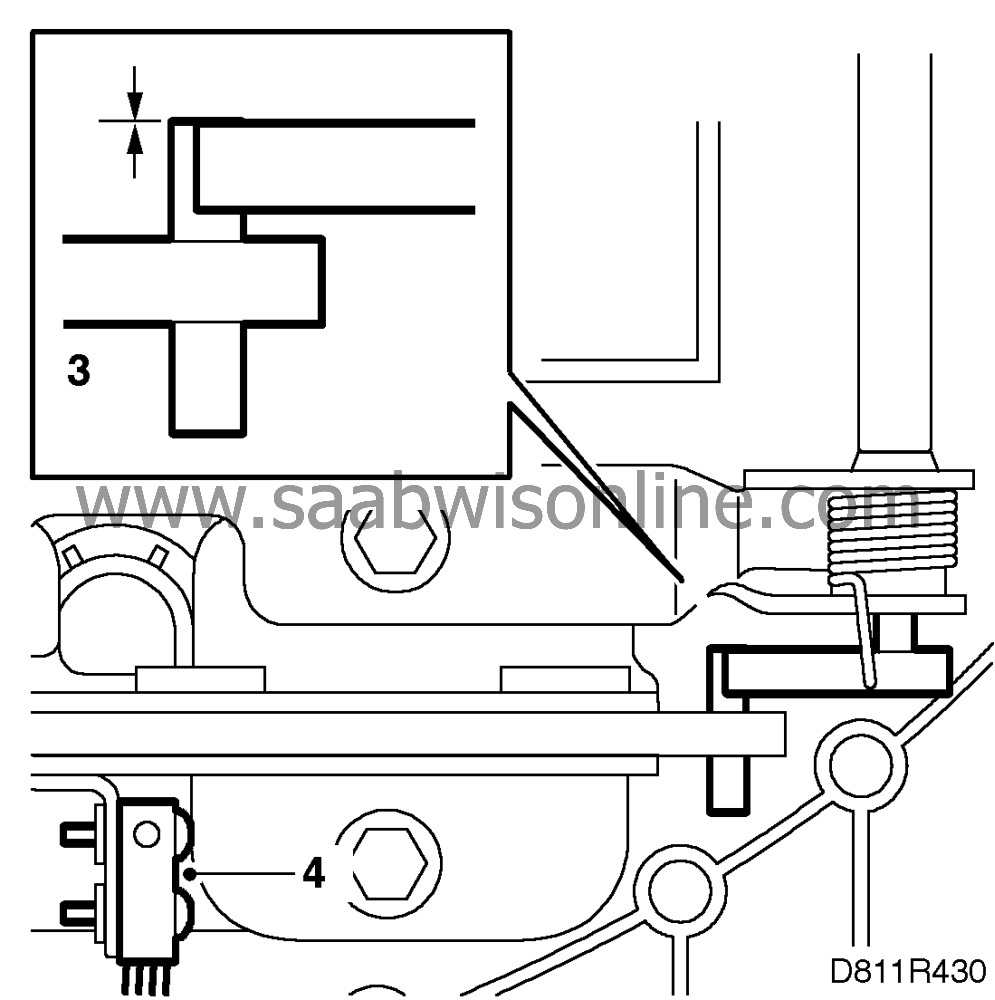
Fit the latch mechanisms on the soft top cover. Make sure the pin on the lock tab makes contact with the cable guide on the rotating cover on the soft top cover.
|
|
4.
|
Plug in the connector on the microswitch. Fit a new cable tie.
|
|
5.
|
Connect the cable supplied with the parts kit to the new motor.
|
|
6.
|
Place the motor on the soft top cover. Let the cable go behind the motor holder and out on the left-hand side of the car.
|
|
7.
|
Fit the motor and fasten the crash wires to the top screws on the motor bracket.
Tightening torque 7 Nm (5.2 lbf ft)
|
Note
|
|
The wires must run parallel to the aluminium member.
|
|
|
8.
|
Connect the motor wiring to the car's wiring harness and fit a new cable tie round the connector.
|
|
9.
|
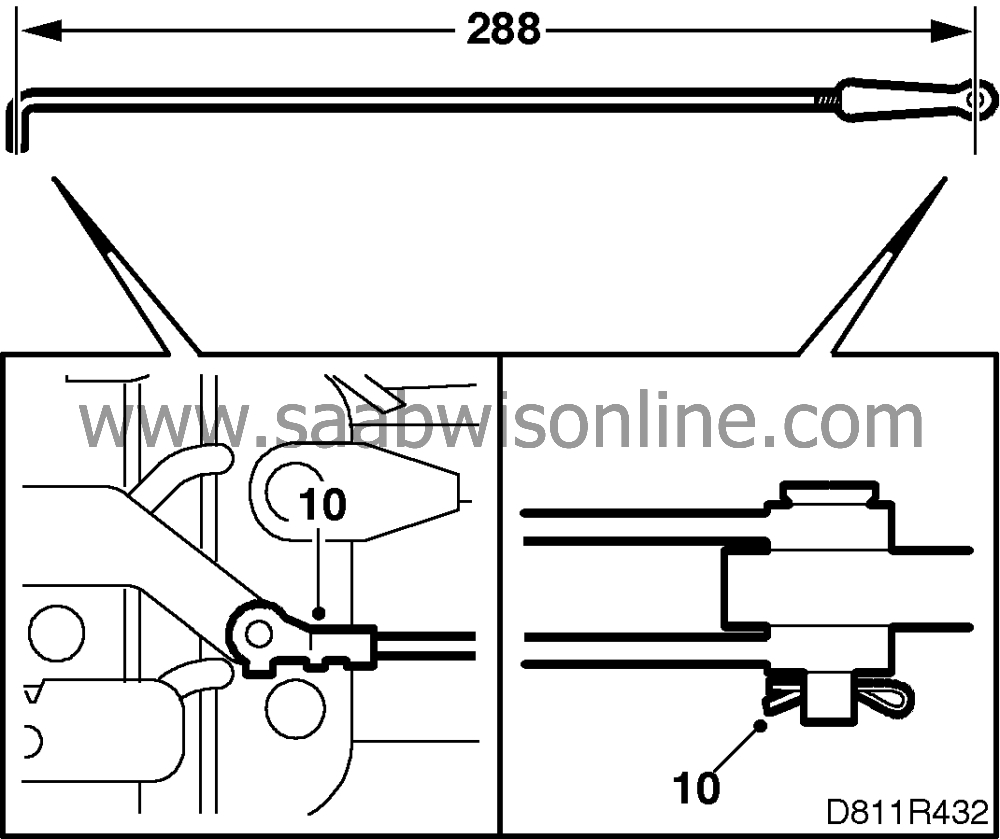
Adjust the length of the locking rods so the distance between the centre of the locking pin hole and the centre of the other end of the rod is
288
mm.
|
|
10.
|
Fit the new locking rods. Use the old lock washers as well as the new ones.
|
|
11.
|
Operate the fifth bow latch motor to open position (rotating covers on the soft top are in open position) with the diagnostic tool, command:
“TSAS”
“ACTIVATE”
“#5 BOW LATCH MOTOR”
“UP”
|
|
12.
|
Inspect the lock tab in the oval hole for the fifth bow latch. Max. 1.5 mm of the tab should be visible.
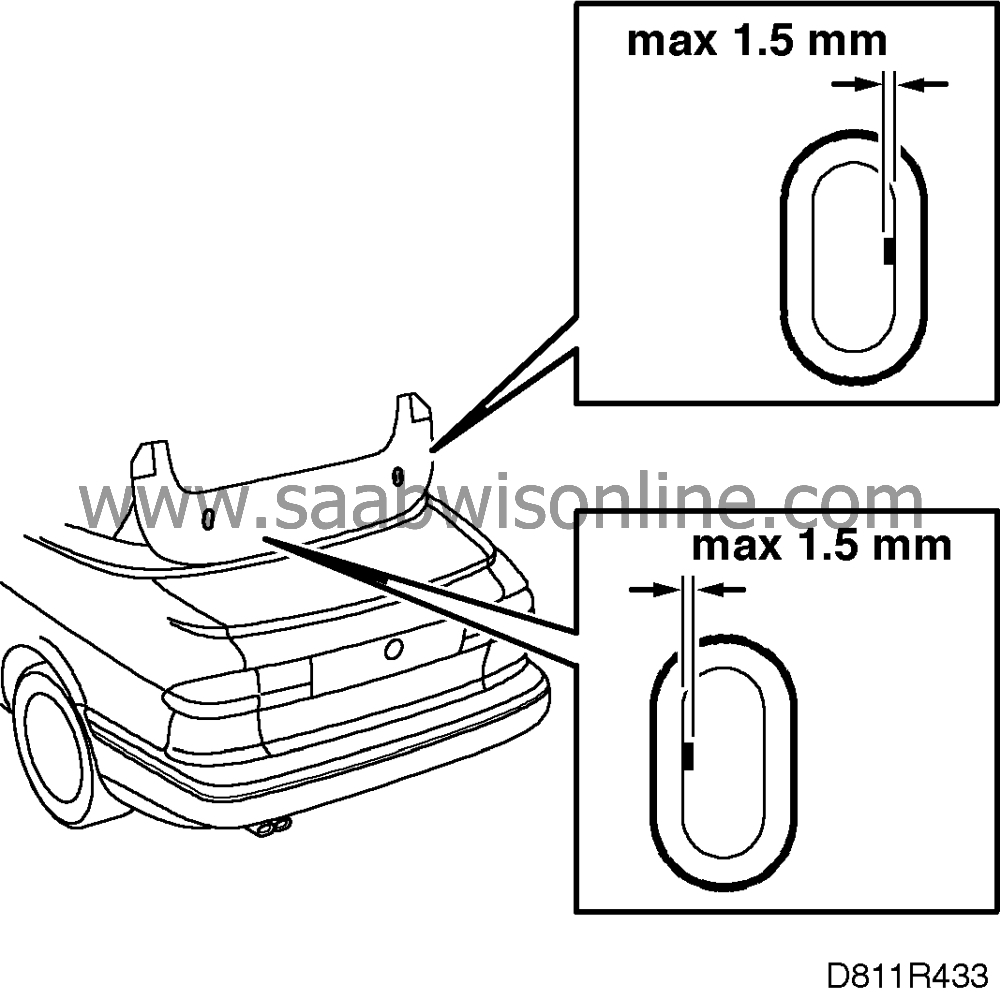
If the adjustment is incorrect and more than 1.5 mm of the lock tab is visible, continue with steps 25, 26 and 27.
|
|
13.
|
Operate the fifth bow latch motor to its closed positions with the diagnostic tool, command:
“TSAS”
“ACTIVATE”
“#5 BOW LATCH MOTOR”
“DOWN”
|
|
14.
|
Adjust the locking rods by unscrewing them so that they become longer.
|
|
15.
|
Repeat steps 23 and 24. Then terminate communications and clear any diagnostic trouble codes. Remove the diagnostic tool.
|
|
16.
|
Operate the soft top up and down 3 times. Check its function.
|
|
17.
|
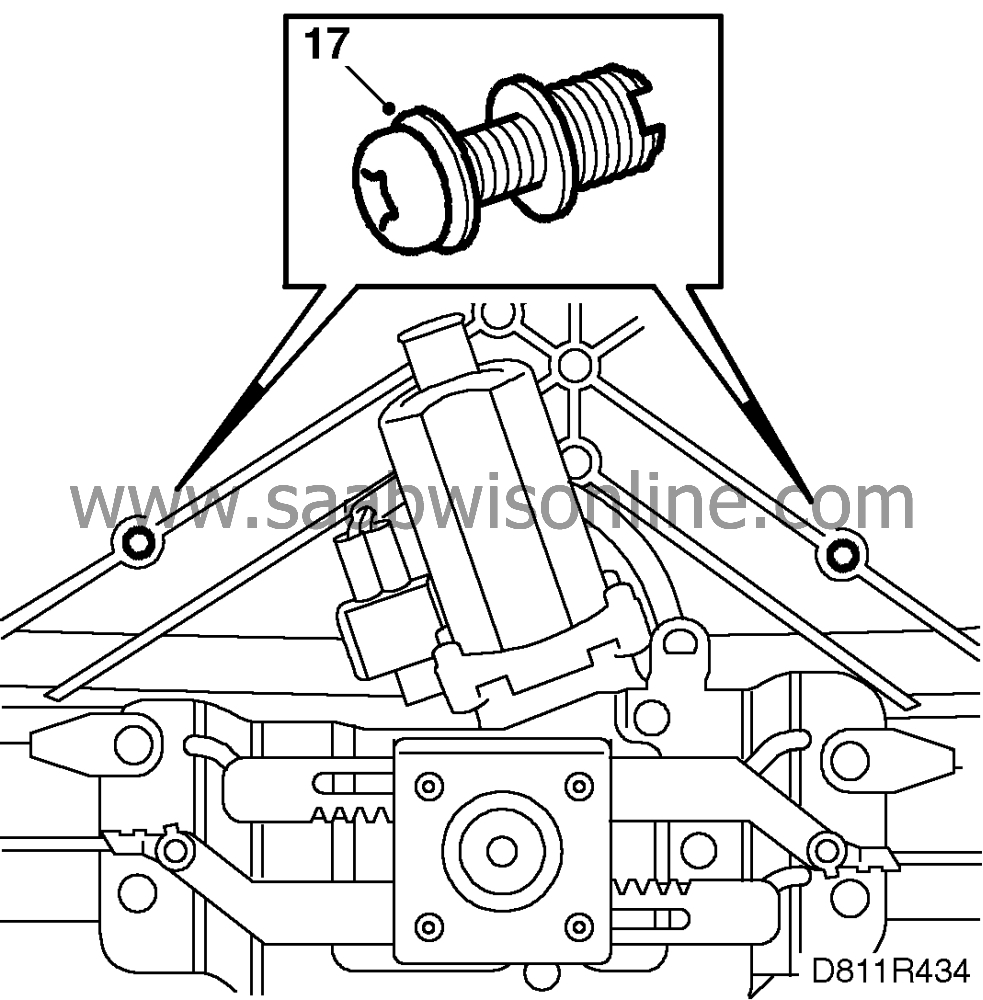
Fit the two insert threads. They must be fitted in the holes above the fifth bow latch motor. Use Torx screws and thread them into the holes. Tighten to 3-4 Nm (2.20 - 2.95 lbf ft) or until they bottom in the soft top cover.
|
Important
|
|
These insert threads are already fitted on cars from VIN V7003161.
|
|
|
|
|
18.
|
Make sure the six clips securing the cover are fitted correctly.
|
|
19.
|
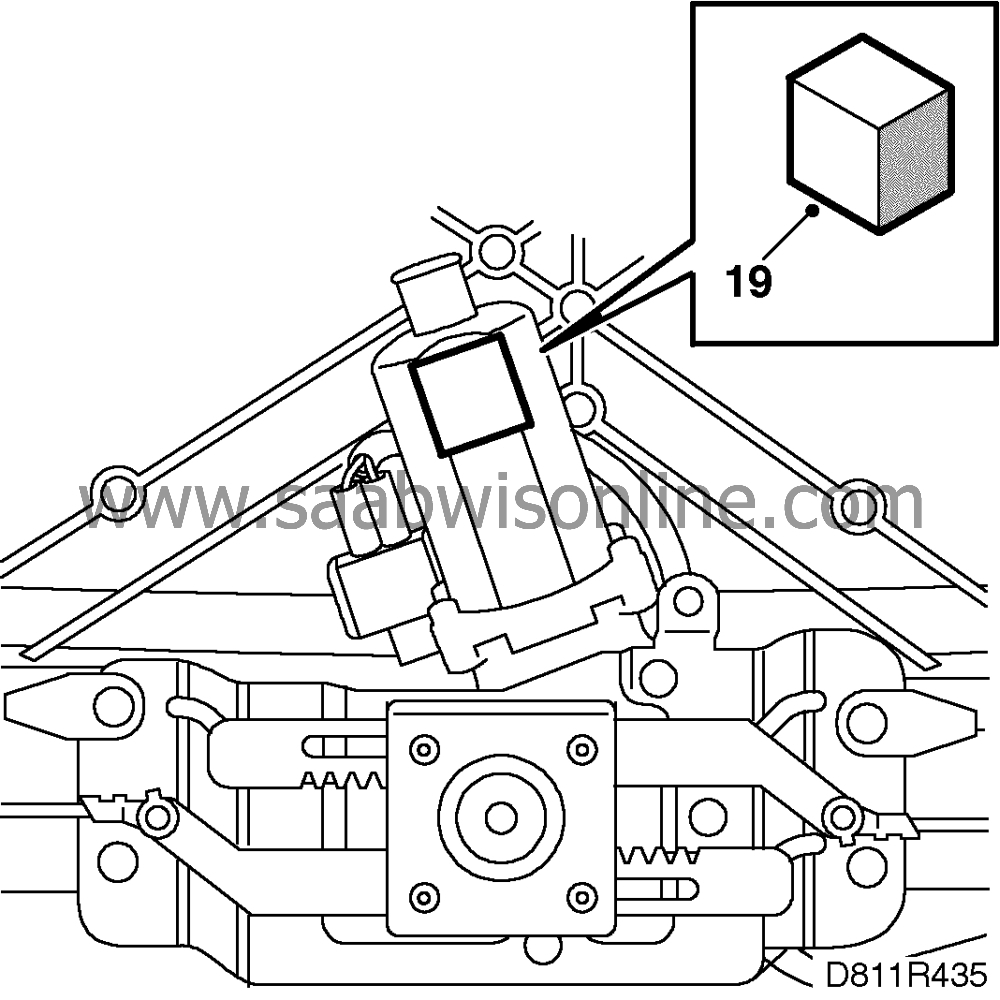
Fit the piece of foam rubber on the flat surface on the top of the motor.
|
Note
|
|
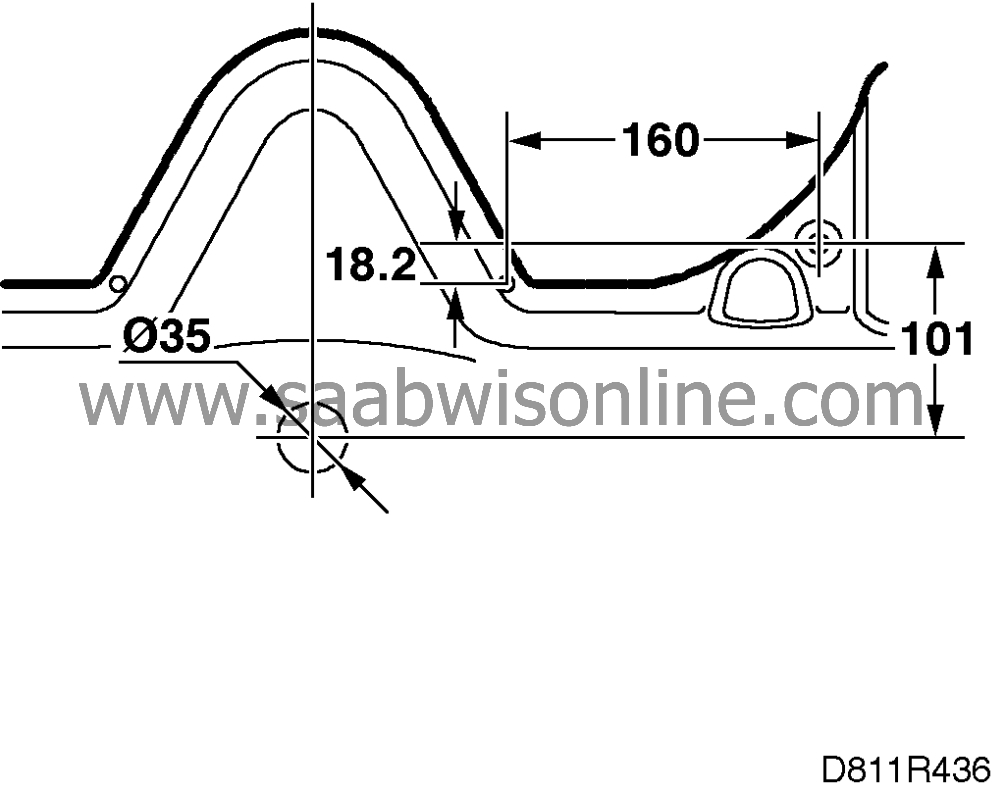
Certain cars earlier than VIN V7010305 have a cover with elevation already prepared for the new fifth bow latch motor. If this is not so: Carry out the modification described below.
|
|
|
20.
|
To mark out where on the cover the holes should be placed, apply a little paint or grease on the motor shaft.
Press the cover lightly onto the clips. With an awl, mark out where the 2 holes for the insert threads are to be drilled.
Press lightly on the cover above the motor to mark out the location of the shaft.
Remove the cover and make sure the markings correspond with those in the illustration.
Drill two 6 mm holes for the insert threads.
|
|
21.
|
Use a 35 mm hole punch and make a hole for the plastic plug.
|
|
22.
|
Remove any burrs from the hole and fit the plastic plug.
|
|
23.
|
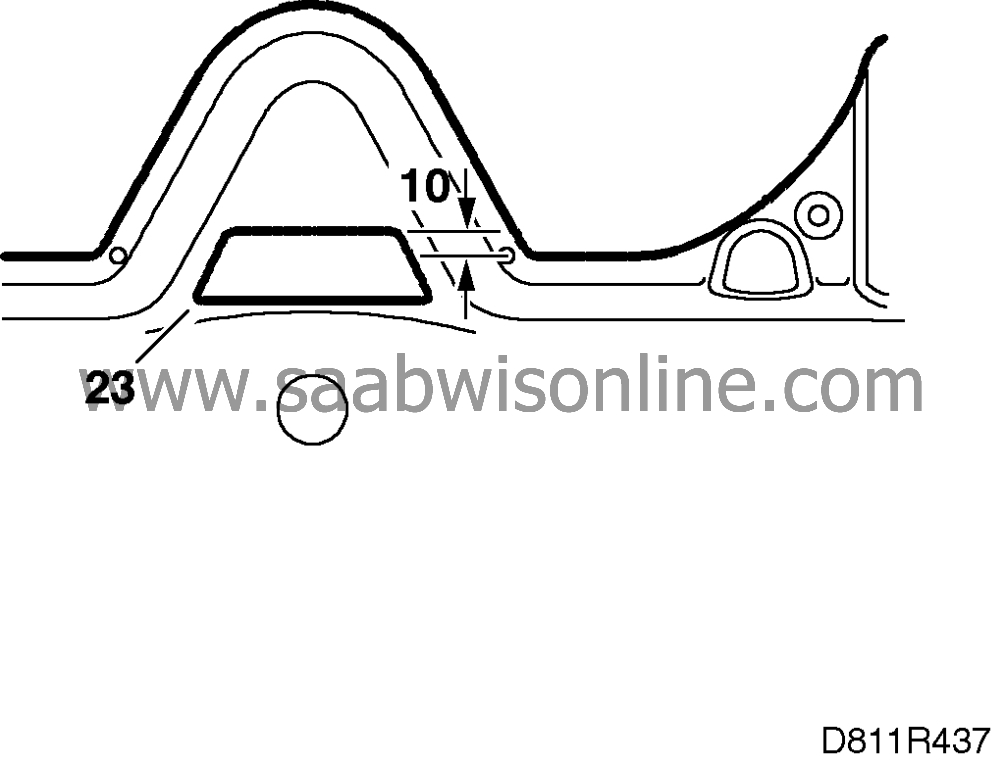
Take the protective paper off the tape and fit the tape on the cover. This is to prevent the first bow from making scrape marks.
|
|
24.
|
Fit the cover. Start with the two new screws in the insert threads and then the two remaining ones. Then press on the clips, starting from the middle and working outwards.

|


